
|
|
#91
 09-30-2023, 10:06 AM
|
|||
|
|||
|
Quote:
 I made it by tracing the outline of an LMI sand bracing jig:  I'm in the process of replacing the widest brace closest to the tail block and sanding it on the radius dish.  It probably won't make a difference but your comment about starting clamping from the waist to the ends makes sense. I've been working from the neck block down to the ail block and not focusing on the waist because that is the highest point on the rim assembly. I'll do another dry fit using this technique and if it doesn't work I'll just chisel off the back braces and order more brace stock; I don't have enough and need to stock up for the next build or two anyway.
__________________
(2006) Larrivee OM-03R, (2009) Martin D-16GT, (1998) Fender Am Std Ash Stratocaster, (2013) McKnight McUke, (1989) Kramer Striker ST600, a couple of DIY builds (2013, 2023) 
|
|
#92
09-30-2023, 07:02 PM
|
|||
|
|||
|
Quote:
https://www.flickr.com/photos/194462...7720296630125/ Why is your back hard to bend down to the neck block? How thick is it? .09"? Is your seam reinforcement strip grain oriented correctly? Quarter sawn across the back grain? Do your brace ends fit into notches in your kerfing? My backs bend to the neck block with light pressure from one hand. I've held one down with a coffee can half full of bolts while lining it up, 3 or 5 lbs? Good luck.
|
|
#93
10-08-2023, 12:41 PM
|
|||
|
|||
|
I sanded the back side of the rims with a 15' radius dish with the assembly centered on the pivot point on a 24" square platform so that "bend" in the plate wants to actually be between the #4 brace and the tail block. With the radius dish as a caul I found that the neck block side down to the #4 brace still needs some extra force beyond what the gobars can give; there's still a slight gap
As for the grooves in the sides for the braces, I actually have a little "wiggle room." I also need to see if my spruce centerline seam strip is clearing the undersides of the blocks. It's not a real problem at this point, just a headache. Worse comes to worse I just glue it all up with clamps using the radius dish as a caul. I've got about 2 dozen clamps; those cam clamps in the previous fitting session and about a dozen metal F style clamps with about a 3" throat each and lots of scrap so that they don't ding up the top.
__________________
(2006) Larrivee OM-03R, (2009) Martin D-16GT, (1998) Fender Am Std Ash Stratocaster, (2013) McKnight McUke, (1989) Kramer Striker ST600, a couple of DIY builds (2013, 2023)
|
|
#94
10-12-2023, 04:34 AM
|
|||
|
|||
|
The back was .125” thick so I broke out the palm sander and whittled it down a little. I was also having trouble with the height of the brace ends so I chiseled them as well. I also aligned the centerline with the plates and the mold using cam clamps and them took my router with a flush cut bit to trim away the overhang, then put cauls inside the mold the elevate the body to expose more of the back side rim and sanded it once more on the radius dish.
I’ve done another dry fit and everything fits with no gaps so the plan today is to sign the top and close the box using clamps on the end block and the gobar deck. I’m excited - and a little nervous! Meanwhile, I’ve created check lists and material inventories on two Excel spread sheets for this and the next build so that I can track the cost of materials and outline steps yet to come. Once the box is closed and the plates are slush with the sides I’m going to break out the scraper and level everything out in anticipation of the coming steps that I hate: routing for the binding. I’m also going to bend the binding today. It’s going to be a nice day! OT: I watched Michael Bashkin’s build video by StewMac and saw that he has a template that he uses to drill holes that align the centerline on the plates with his mold. I’m going to modify my molds to do this moving forward. This week I also bought materials for my upcoming fourth build; StewMac had a special on Honduran Mahogany back and sides for $50 so I jumped on it as well as a AAA grade Honduran Mahogany to make a neck with a stacked heel. I have to keep the ball rolling!
__________________
(2006) Larrivee OM-03R, (2009) Martin D-16GT, (1998) Fender Am Std Ash Stratocaster, (2013) McKnight McUke, (1989) Kramer Striker ST600, a couple of DIY builds (2013, 2023)
|
|
#95
10-12-2023, 09:39 PM
|
|||
|
|||
|
I finally got things figured out and glued the back on this evening.

__________________
(2006) Larrivee OM-03R, (2009) Martin D-16GT, (1998) Fender Am Std Ash Stratocaster, (2013) McKnight McUke, (1989) Kramer Striker ST600, a couple of DIY builds (2013, 2023)
|
|
#96
10-13-2023, 05:27 AM
|
|||
|
|||
|
Quote:
|
|
#97
10-13-2023, 02:58 PM
|
|||
|
|||
|
Quote:
__________________
(2006) Larrivee OM-03R, (2009) Martin D-16GT, (1998) Fender Am Std Ash Stratocaster, (2013) McKnight McUke, (1989) Kramer Striker ST600, a couple of DIY builds (2013, 2023)
|
|
#98
10-13-2023, 03:04 PM
|
|||
|
|||
|
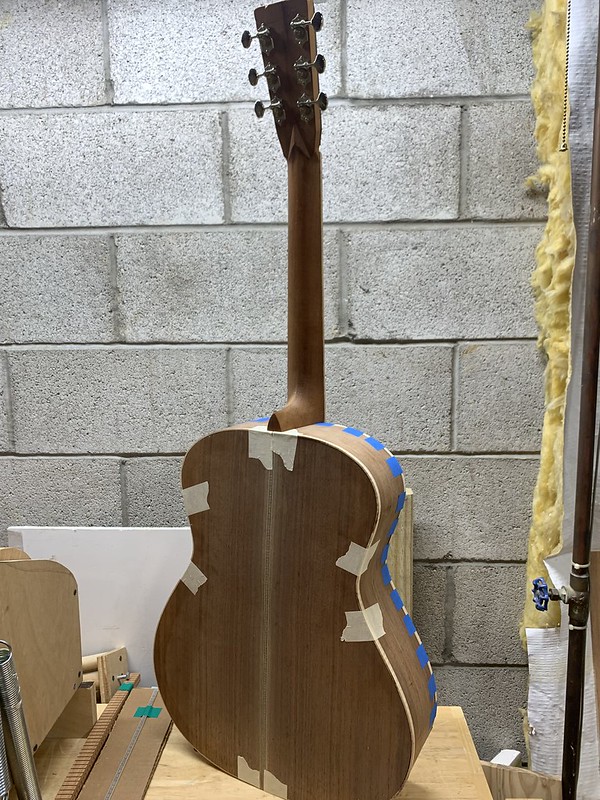
Here are pics during and after the glue up of the back.
  I recently watched Michael Bashkin's build video for Stew Mac and saw that he has a template that includes a way to align the plate with the mold using dowels. I may modify my molds and templates to adopt that idea.
__________________
(2006) Larrivee OM-03R, (2009) Martin D-16GT, (1998) Fender Am Std Ash Stratocaster, (2013) McKnight McUke, (1989) Kramer Striker ST600, a couple of DIY builds (2013, 2023)
|
|
#99
10-25-2023, 10:19 AM
|
|||
|
|||
|
I'm at my least favorite step in the build: cutting binding channels. I bent the curly maple binding several days ago and let them set in the form on my Fox bender. I also purchased prebent herringbone purfling for the top.
 Then I measured a few times and proceeded slowly while cutting the channels.  Thankfully there wasn't much tear out but I could have routed .1m further in to prevent overhang and exposure of one of the slots for the one of the back braces. I'm going to take a file and widen a portion of the channels up by the neck joint (if I screw it up the fingerboard will cover it) then use that point set the depth on my jig. The positive part of this is that I need that extra .1mm to miter the purfling at the end wedge. It wasn't a complete accident.
__________________
(2006) Larrivee OM-03R, (2009) Martin D-16GT, (1998) Fender Am Std Ash Stratocaster, (2013) McKnight McUke, (1989) Kramer Striker ST600, a couple of DIY builds (2013, 2023)
|
|
#100
10-25-2023, 11:21 AM
|
||||
|
||||
|
Neil-
Fun is! Now that my first build is wrapping up, Im not so sure about how I feel about performing woodcutting operations that can totally ruin the entire project in a fraction of a second (like cutting binding slots)  . .But as it turns out, that step went really smoothly. And oh heck, Ill never be an Ervin Symogyi, right? So does it really matter? And before you ask, I am looking forward to my next build - mistakes and all. Sounds like my wife is on board with it too. She bought me the $649 StewMac kit not knowing that the final guitar would cost (at least) $1649! (Actually, its probably closer to $2300 now. Rick
__________________
Lorem ipsum dolor sit amet
|
|
#101
10-25-2023, 07:50 PM
|
|||
|
|||
|
Quote:
|
|
#102
10-26-2023, 09:04 PM
|
|||
|
|||
|
Quote:
FYI the final bindings will have a BWB strip on the side that I need to miter with the BWB purling on the end wedge. My initial cut was using a plain piece of binding without the additional purfling so I knew it was going to be short - just not exactly. The next step was to take a file and manually deepen/lower the channel so that I could do a test fit with the right binding. Once I did that, I adjusted my jig (which is in the vice in the lower left corner in the following picture) and carefully zipping around the front and back counterclockwise. 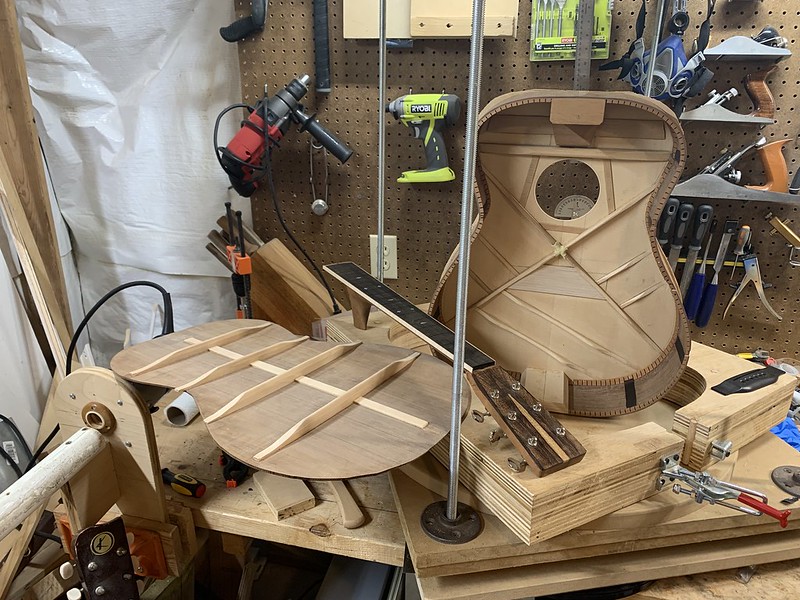 I still have to clean things up with a file but I'm okay with that. I don't completely trust power tools. The next challenge is to measure exactly how long the ends need to be so that there's no overlap or space. I'm gonna measure it 5x before doing any cutting.
__________________
(2006) Larrivee OM-03R, (2009) Martin D-16GT, (1998) Fender Am Std Ash Stratocaster, (2013) McKnight McUke, (1989) Kramer Striker ST600, a couple of DIY builds (2013, 2023)
|
|
#103
11-02-2023, 04:36 AM
|
|||
|
|||
|
The weather has turned, fall has flung and the furnace has kicked on. Ive turned on the humidifier and weather should bounce back this weekend so Ill glue it all in then.
__________________
(2006) Larrivee OM-03R, (2009) Martin D-16GT, (1998) Fender Am Std Ash Stratocaster, (2013) McKnight McUke, (1989) Kramer Striker ST600, a couple of DIY builds (2013, 2023) Last edited by Neil K Walk; 11-02-2023 at 08:52 AM. Reason: added images
|
|
#104
11-08-2023, 05:34 AM
|
|||
|
|||
|
Last night I glued the binding and purfling on. THe step backwards was using an orbital sander to level the purfling. I ended up sanding through a section, so I need to splice it out and rerout that area deeper. I have not take pictures.
The neck major step is to set the neck angle, then I can glue down the fingerboard and then it's on to fretting.
__________________
(2006) Larrivee OM-03R, (2009) Martin D-16GT, (1998) Fender Am Std Ash Stratocaster, (2013) McKnight McUke, (1989) Kramer Striker ST600, a couple of DIY builds (2013, 2023)
|
|
#105
11-08-2023, 07:01 AM
|
|||
|
|||
|
Well done, Neil. The inside of that guitar looks great! I admire everyone on here building guitars. Hope to start my first kit soon.
|


