
|
|
#17
 10-23-2012, 05:13 AM
|
|||
|
|||
|
It's black dye. I know in the pics it looks almost like a dark purple but once I get some laquer on it will be black. Thanks for the compliment. I know a lot of people are not into the dyed woods but I love the look of figured maple under a dye. It really brings out the grain IMO.
Last edited by ZekeM; 10-23-2012 at 07:15 PM. 
|
|
#18
11-07-2012, 03:10 PM
|
|||
|
|||
|
looking great!

__________________
Eric Omega Braz MJ, 2011 Omega MJ Braz Baritone Ryan Cathedral ABW/Bosnian Build thread: 2011 Kostal Mod D Brazilian/German Build thread: 2019 Kostal MDW Brazilian/German Build thread:2019 Bigfoot Mod D
|
|
#19
11-07-2012, 03:15 PM
|
|||
|
|||
|
Thanks ericsong! I got a bit more done on it but been so busy at the shop I haven't had as much time to devote as I would like. I got rolling again yesterday and I'll get some more pics up soon.
|
|
#20
11-07-2012, 11:18 PM
|
|||
|
|||
|
to each there own color wise...that said it's looking to be a great build.

__________________
https://www.facebook.com/pages/The-T...56266954411686 http://www.reverbnation.com/jayhowlett http://www.jayhowlett.com Guitars: I'm really happy to have a few nice ones.
|
|
#22
11-08-2012, 07:32 PM
|
|||
|
|||
|
Ok quick update time. Work has been crazy making it a little more difficult to find time for guitar building but with the time I have managed to find i got some work done on the neck. Heres a few pics of the neck process up to where im at now.
Sorry for the not so quality pics but i was pretty tired when i took most of them  here is two pics of the neck blank cut to approximate shape  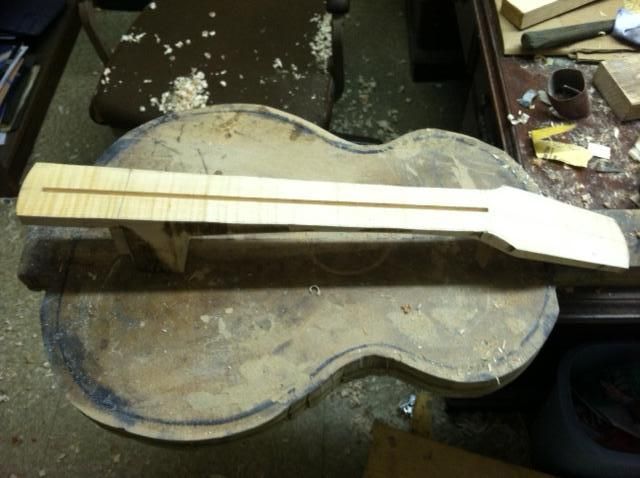 And here is the african blackwood fretboard with curly maple binding 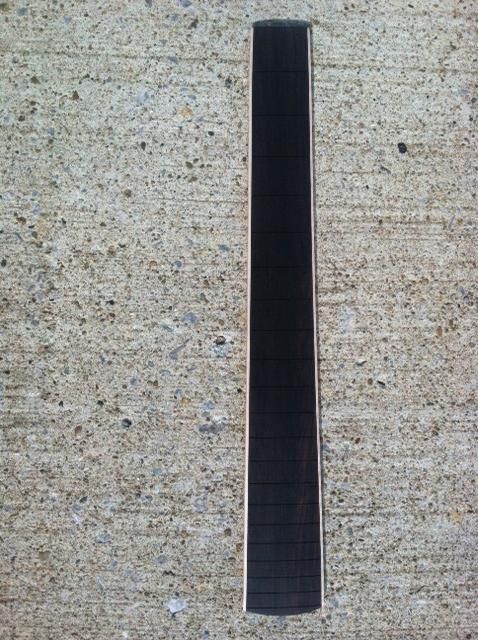 And a close up 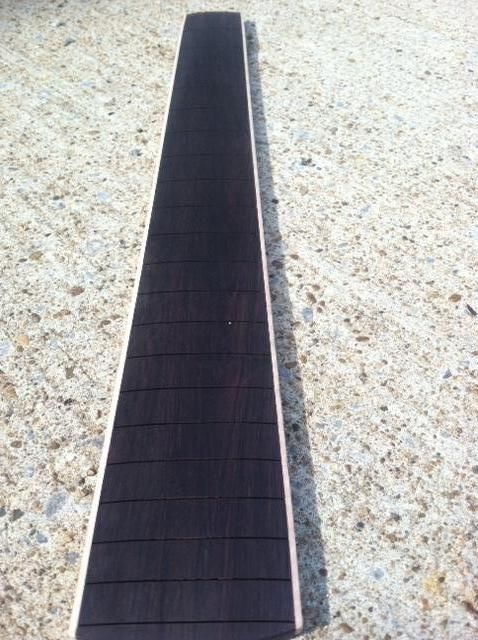 Here is the neck with the truss rod installed and roughly cut down. its ready to be glued to the fretboard 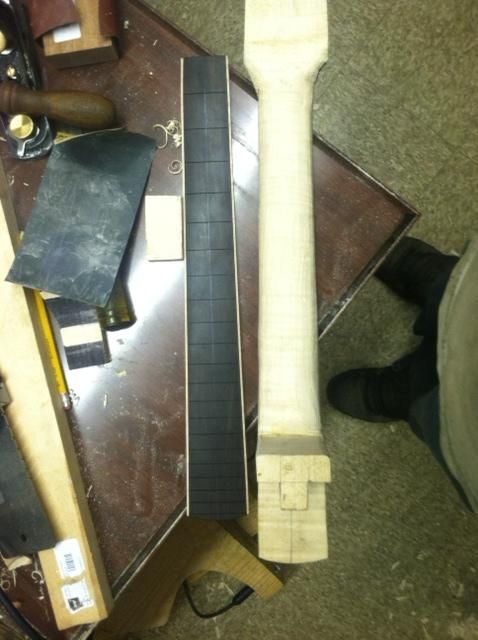 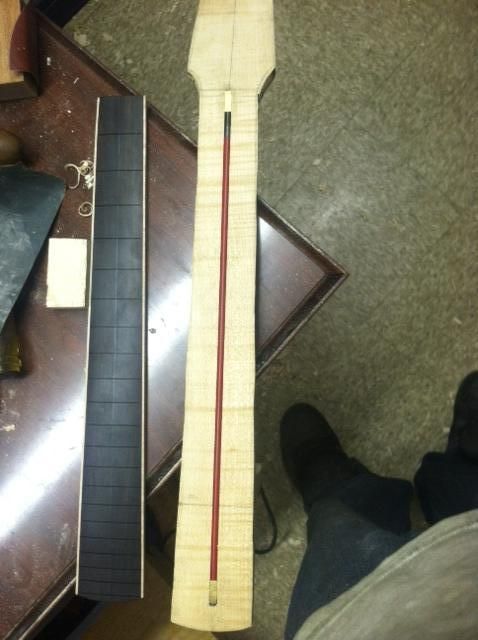 Before I headed home I got some glue smeared on and the fretboard is clamped to the neck and will be drying overnight while i catch up on some much needed sleep. Good night everyone 
|
|
#23
11-13-2012, 05:46 PM
|
|||
|
|||
|
quick update. all the neck is done except for dying and finishing. here are some pics of the neck all glued and shaped up with a little laquer on all the areas that will not be dyed.
masking the neck to prevent lacquer from getting on the areas that will be dyed black 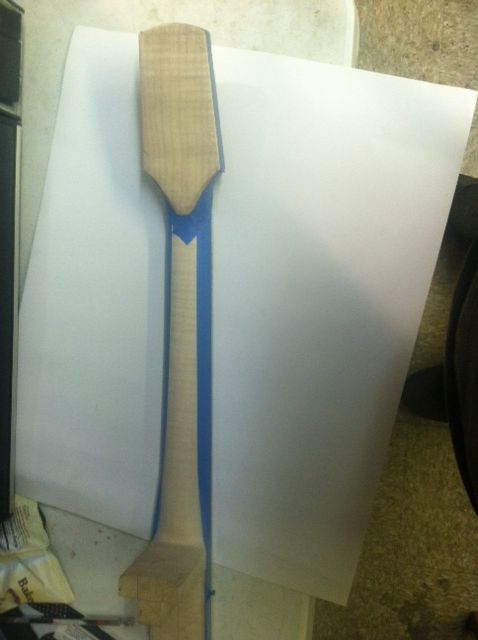 spalted maple headstock 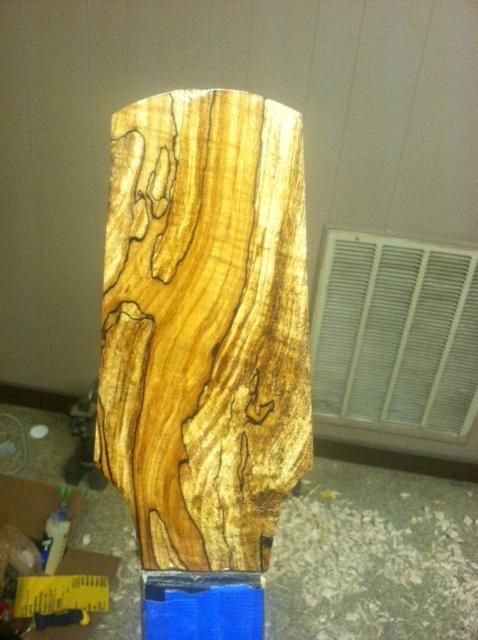 look at that figure in the curly maple binding!! 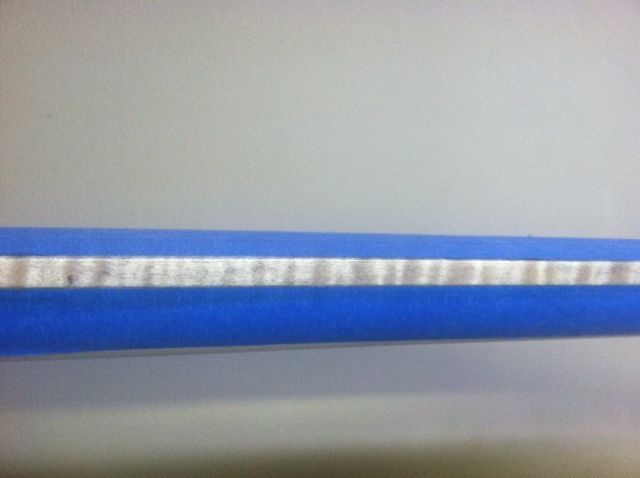 looks like the masking tape did its job just fine 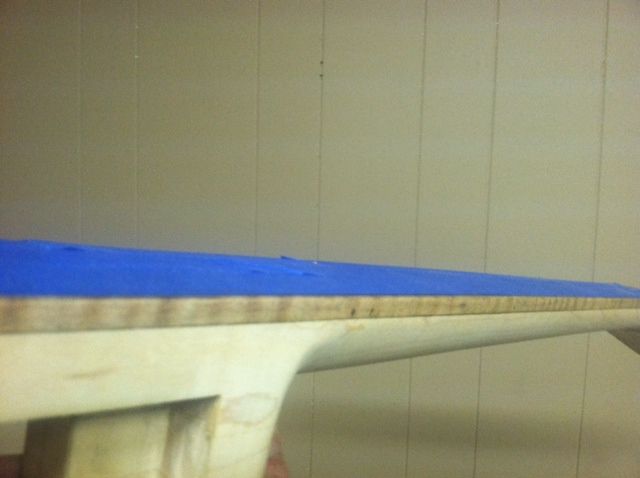 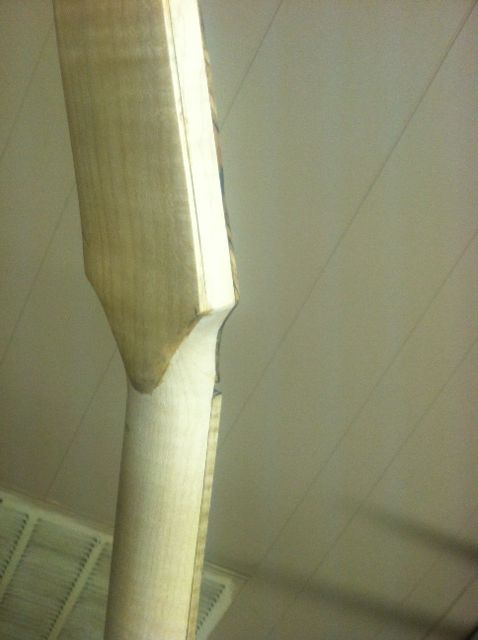 well i guess thats all you will see of the neck for a while. I dont want to show you with the dye quite yet. make it more of a surprise but man it looks good. thanks for looking
|
|
#24
12-09-2012, 07:47 PM
|
|||
|
|||
|
So its been almost a month since I have had the opportunity to work on this. Work has been so busy that I havent had a moment to spare. After meeting Harv Leach last night and getting to talk guitars with him and see some of his work first hand I became extremely inspired. So today when I woke up I decided to make time for the build today. And thats what I did. I got the armrest bevel block all cut down to the proper size. Then Installed kerfing on the front and back of the sides. I then roughed out the braces and used my new radius dishes to sand the radius on them. Then I cut some Go bars from a 2x4. Using the underside of my desk as a makeshift gobar deck I proceeded to glue the braces on the soundboard. Next i started the rough shaping of the braces but then I had to call it a night. So i quickly cut out the bridge plate and got it clamped and left to glue overnight.
Here are some pics gluing the kerfing on the top  kerfing the back 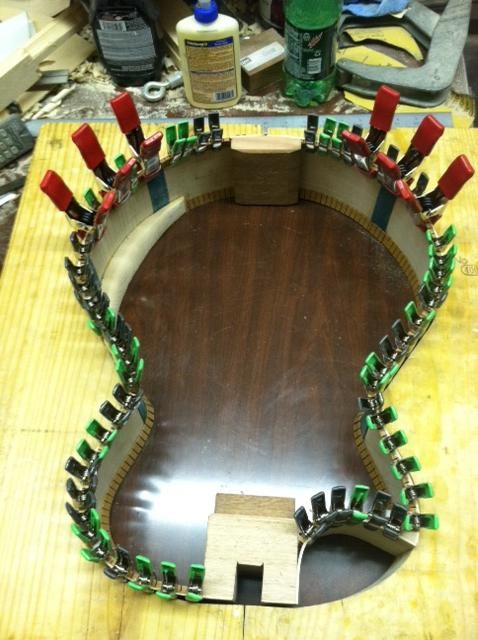 kerfing done 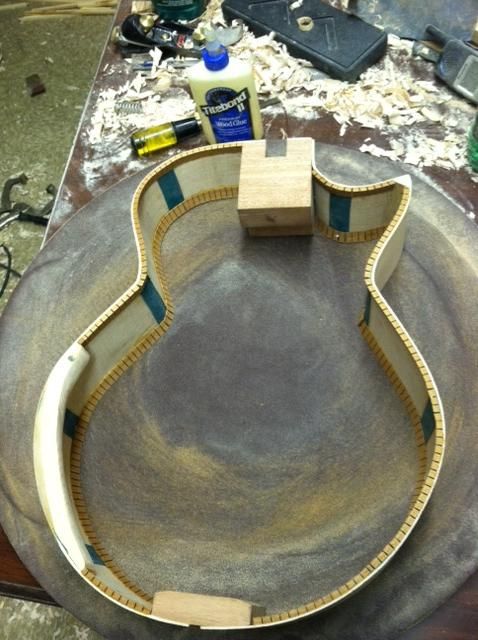 bracing the soundboard 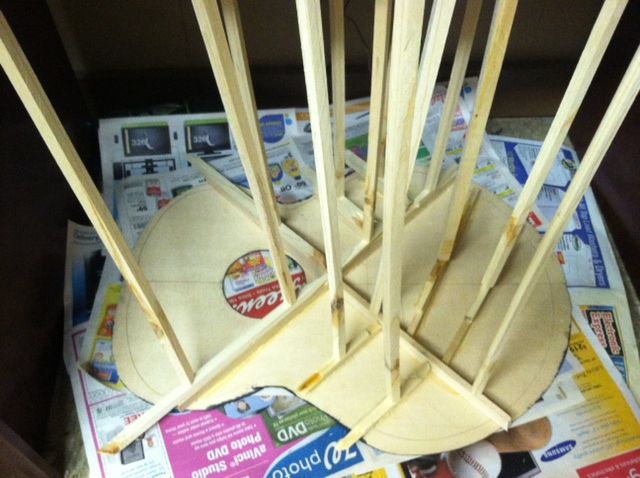 gluing the bridgeplate 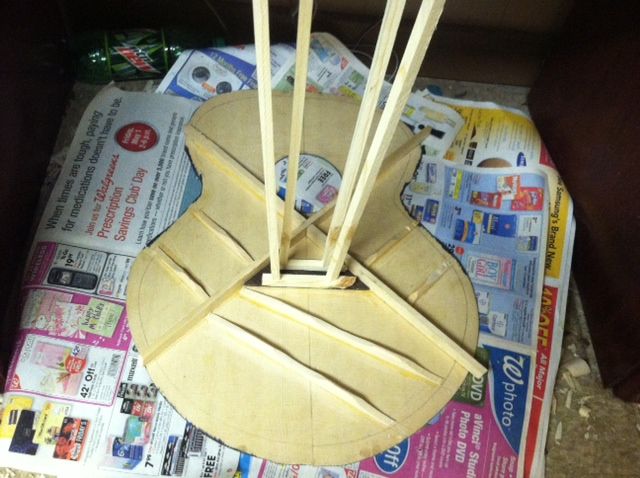 well thats all for now. hopefully I will be able to find some more time to work on this soon. thanks for looking
|
|
#25
12-11-2012, 03:46 PM
|
|||
|
|||
|
So I got the soundboard braced voiced and glued to the sides
the voicing went good....I think. It's only my second but I think I'm learning how it works. I thinned this bracing a bit more than my first. And it has a nice ring when tapped. My first had a lot of bass and this appears to have that bass but more of a musical sound IMO. Sort of a xylophone sound. I'm hoping this means it will have a little more mids and highs than my first. Though my first one sounds great it seems that it could use more in the upper frequencies. I hope this one don't fall apart under tension as thin as the braces are! Here is a pic  As you can see there is no upper face brace or anything like that. Since I am using such a large headblock and the neck will not be attached to the soundboard I did not feel the extra stiffness in the upper bout was necessary. However I was kind of in the dark as to what to put up there. Before I box it in with the back I'm hoping I can get some input as to whether y'all think this bracing seems good up there?!?!? If I have overlooked something important I'd like to know before putting the back on  Thanks for lookin
|
|
#26
12-11-2012, 04:37 PM
|
|||
|
|||
|
Looking good so far. Look forward to watching it progress.
As for the bracing, I've only ever braced one acoustic top in my life, and that wasn't a standard X bracing, so I'd be no help there. That said, your bracing to me looks good. I think that will work just fine like it is.
__________________
Mike The only thing nescessary for evil to thrive is for good men to do nothing
|
|
#28
12-11-2012, 07:38 PM
|
|||
|
|||
|
Not good! That's gonna cave right into the soundhole within the first few days... 90% sure. The purpose of that style headblock extension is to put MORE force onto the cross brace... thus sparing the much weaker soundboard from the stress. As it is, you're focusing all that torque/downward force from the neck right onto the soundhole, with only a couple skinny angled braces to sort of transfer some around the hole and to the X... and from the looks of it, the upper legs of the X are scalloped and weak as it is. Although I can't tell for sure since it's an above shot, and the heights mean everything.
What I'd do if I were you is glue in two short cross braces either side of the headblock, and then an additional strip (maybe 1/8" thick) over top of that to connect it all up, capping the connections between the cross braces and headblock. Actually come to think of it, you could use carbon fiber for the cap and it'd be even stronger That is, unless you haven't actually glued it to the rim yet. Then you could just saw off some of the headblock extension to make room for a cross brace. EDIT: Oh, and here's an alternative... flying buttress type braces. One popular style is to connect carbon fiber tubes from the upper end of the headblock to the lower end of the waist. A lot of people do them just as supplements to the upper transverse brace, but others use them to eliminate it altogether to let the upper bout area get involved in the vibration... although I'm not sure how much it actually affects the sound. Dave White is one builder I know who uses them, but with two tubes each side. You can see some photos of it here http://www.defaoiteguitars.com/page39.htm Last edited by dekutree64; 12-11-2012 at 07:52 PM.
|
|
#29
12-11-2012, 07:49 PM
|
|||
|
|||
|
Quote:
__________________
Mike The only thing nescessary for evil to thrive is for good men to do nothing
|
|
#30
12-11-2012, 07:51 PM
|
|||
|
|||
|
Yes the upper legs of the X are scalloped. I thought that there would be less pressure on the soundboard with this configuration since the fretboard would not be attached to the soundboard in any way. I will be carving out a channel in the top of the headblock in which to recieve the extension of the neck and then be fastening the neck with two bolts into the extension and two into the tongue of the neck.
I can kinda see what you are saying about there being more pressure but then again Im having trouble seeing it too haha. I think i may end up popping that one brace off the upper bout and gluing some popcicle style braces across there. maybe ill try flexing it with my hands and see if there is pressure there? Hmmmmmmmmmm what to do what to do!
|


