
|
|
#1
 05-08-2020, 06:21 AM
|
|||
|
|||
|
I wanted to share the beginnings of my first instrument - a tenor ukulele with an asymmetrical body shape. I was recently offered an apprenticeship by luthier Mark Hatcher of Hatcher Guitars, after spending a bunch of time in his shop customizing my Jazzmaster and learning more about luthiery between coats of paint.
 A little info about myself - Im a multimedia artist based in New Hampshire and have been playing guitar since middle school. I have a background in sound design, 2D design, and photography, but I came into the shop knowing pretty much the bare minimum about woodworking. Selecting the Wood & Re-Sawing The lumber I selected for the back and sides is 100 year old Eastern Black Walnut salvaged from an old mill building in Worcester, MA, which isn't far from where I grew up. The top is a beautifully figured, old growth Redwood, also about 100 years old, and was salvaged from a standing deadwood tree in Oregon. 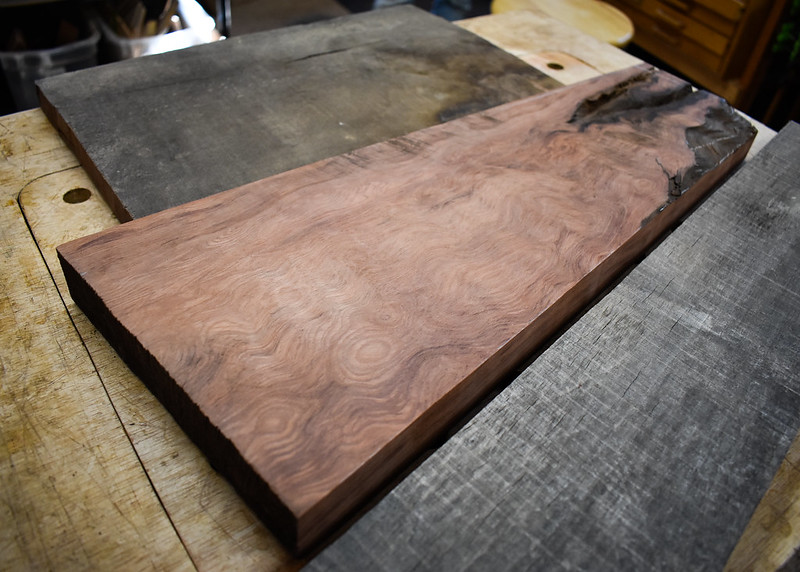  The Black Walnut really doesnt look like anything special prior to re-sawing, but has a rich brown color under that washed out patina. 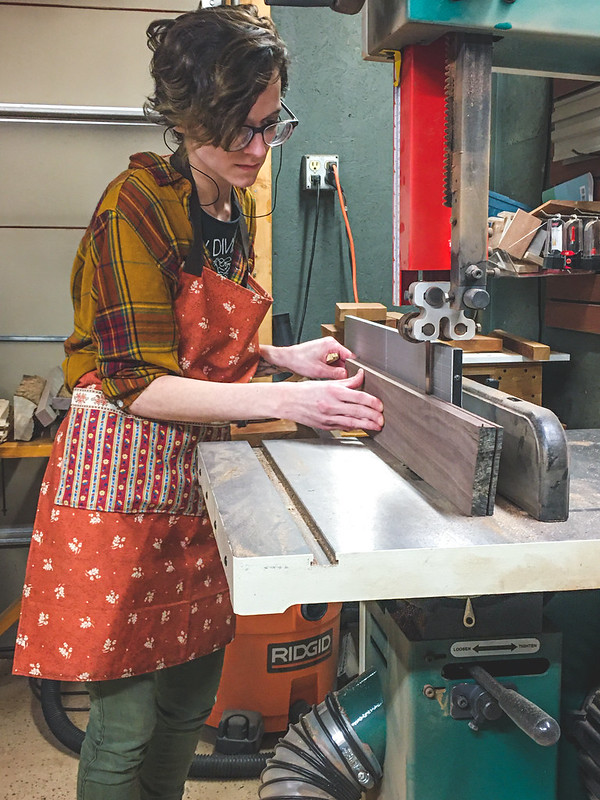 This was one of my first times using a band saw, which Ive since gotten a lot more comfortable with. 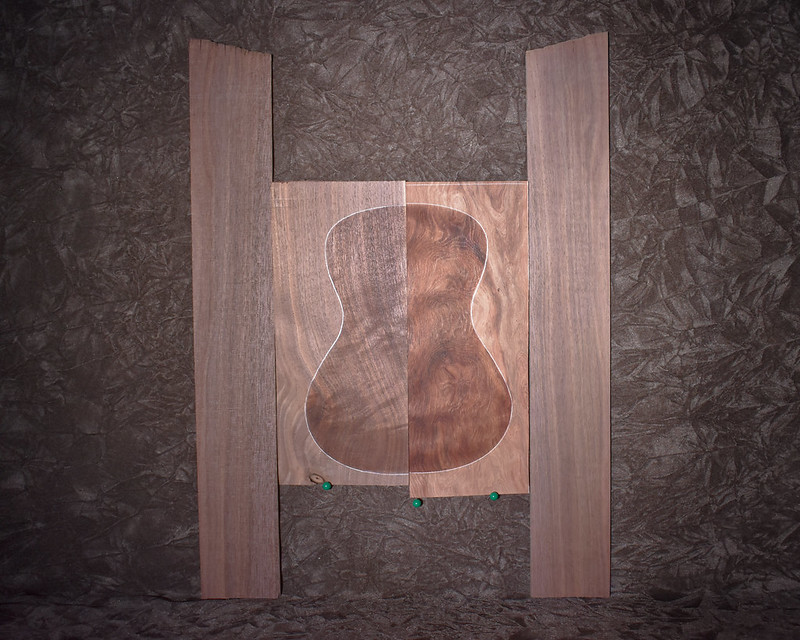 After re-sawing! Everything cleaned up beautifully with the drum sander. 
|
|
#2
05-08-2020, 10:34 AM
|
|||
|
|||
|
Looks great so far - keep us up to date with in-progress pics...
Welcome to the forum... 
__________________
"Mistaking silence for weakness and contempt for fear is the final, fatal error of a fool" - Sicilian proverb (paraphrased) Last edited by Steve DeRosa; 05-09-2020 at 07:11 AM.
|
|
#4
05-09-2020, 06:28 AM
|
|||
|
|||
|
Quote:
Quote:
|
|
#6
05-09-2020, 03:51 PM
|
|||
|
|||
|
Quote:

|
|
#7
05-09-2020, 04:09 PM
|
|||
|
|||
|
After a little edge cleanup, the back was glued together and clamped up to dry.
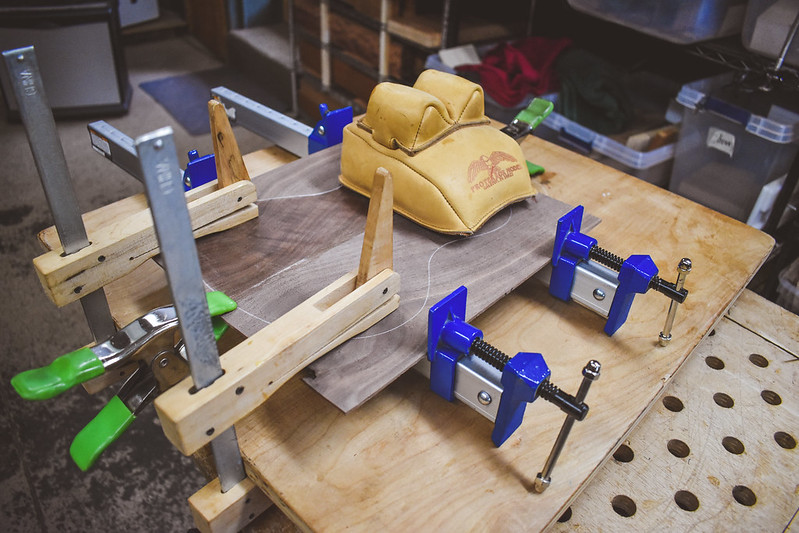 I quickly gained an understanding of just how many clamps are required for this kind of thing. After the glue dried, I rough cut the body shape with the band saw and glued in the back braces.  Im still getting the hang of setting up go-bars and am currently not a big fan, but they do photograph well.  Back braces all carved out. This part was the most satisfying so far. Really enjoyed working with the chisels and finger planes.
|
|
#8
05-23-2020, 10:15 AM
|
|||
|
|||
|
Quote:
|
|
#9
05-24-2020, 04:26 PM
|
|||
|
|||
|
Quote:
|
|
#10
05-24-2020, 05:24 PM
|
|||
|
|||
|
The process of bending the sides technically started with building a custom 'ukulele sized' bending machine for the shop. Here's the finished product and a shot of it in action.  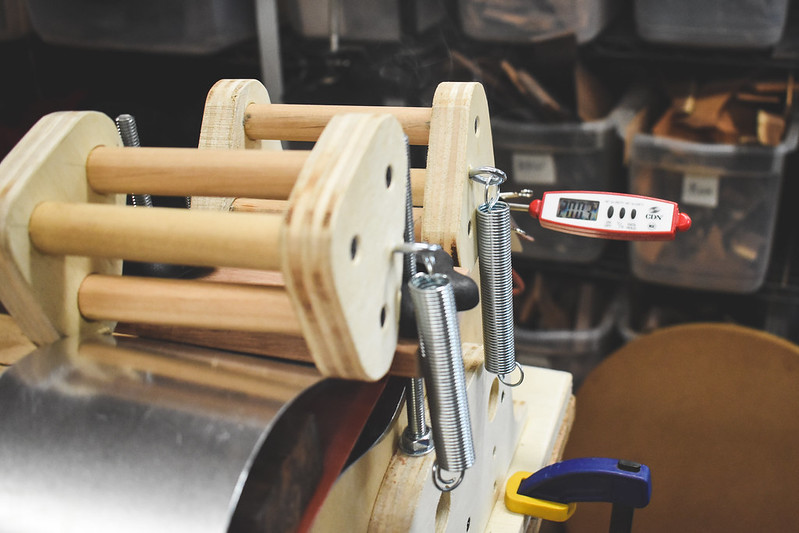 I managed to not take a single photo while gluing the sides together or making the heel and tail blocks, but the end results can be seen in the following shots of the kerfed lining being glued in.   The shop has a seemingly endless variety of specialized clamps.  Starting to take shape!
|
|
#11
05-26-2020, 10:57 AM
|
|||
|
|||
|
Wow, the ukulele is looking great and your photographs are beautiful in their own right. Thank you so much for sharing!
__________________
Yamaha FS 800/Martin 0-18/1948 Stella H928/Guild M-20/Fender American Performer Telecaster
|
|
#13
06-16-2020, 11:19 AM
|
|||
|
|||
|
Back with an update, thank you to everyone who has been following!  I decided to go with an oblong shaped rosette, which was achieved using a drill press with a pin router attachment. I used the laser cutter at my local makerspace to make the router template.  My practice attempt can be seen in the top right. I was pretty in the zone while working on the rosette so most of the process was not well documented. I did manage to get a shot of these gorgeous ambonya burl slices before they were cut to shape on the scroll saw.   All inlaid and glued together. An (almost) perfect fit, but I was reassured that any small gaps would be an easy fix. After leveling out the rosette I started the cleanup process. Ambonya burl has a lot of color variation, so I had about 3-4 piles of dust I sanded from different sections so any areas I needed to fill could be matched up.  Very satisfied with how everything cleaned up. I let everything dry overnight before starting the next round of bracing.
|
|
#14
06-16-2020, 11:50 AM
|
|||
|
|||
|
Quote:
Quote:
|
|
#15
06-16-2020, 12:14 PM
|
|||
|
|||
|
Looks great, thanks for taking the time to share. I look forward to these posts!
__________________
Riley Just playing for my own amazement Martin 000-15sm Eastman E10SS RainSong SMH Blueridge BR-142 The Loar LH-250 Recording King RPS-9 (for slide) Kentucky KM-250 Mandolin A Strat and a Tele Les Paul and Jazzmaster copies
|


