|
|
#1
 03-18-2016, 03:30 PM
|
|||
|
|||
|
Might have just thrown 20 bucks out the window but I found a Christian Beckman violin in a barn sale today. Needs a few minor parts and the finish is wasted but I see no sign of cracks or other damage. A little work it just might be worth saving. Would this be a varnish finish? Should I even attempt a refinish?
Thanks Jerry 
|
|
#2
03-18-2016, 04:36 PM
|
|||
|
|||
|
I'd remove the strings-bridge-tailpiece, label the pegs and remove them. The nut and saddle may fall out.
Then clean it with naphtha and a soft rag. Then a nice buffing. Then decide on the varnish. Sometimes just a little touchup on the top and back where it extends past the ribs is enough to make it look nice. No violin luthier will suggest a bit of stain, but how they achieve their work is their own business. If it desperately needed varnish, a little spirit varnish thinned with denatured alcohol or 190 proof grain. But then you have to deal with buffing the varnish back down. I've touched up a few tiny spots on a top and back with amber shellac or boiled linseed oil then buffed it into the varnish; a few tiny spots, it seems to work fine; it is not an "approved" fix. Of the half dozen or so violins I've refurbished, all have sounded great when I was done. Bridge shaping and sound post placement do a lot more for sound then beat-up varnish, but you do want to protect bald spots. The thinner the finish, the better the sound. But stain is not used on tops and backs; it permeates the wood and lessens vibration (so I'm told). I'd do as little as possible, reassemble it, then test it. Last edited by Sperry; 03-18-2016 at 05:08 PM.
|
|
#3
03-18-2016, 05:10 PM
|
|||
|
|||
|
I've cleaned it up as best I can. Did find a crack beneath the chin rest. There are several bare spots. Refinishing would no doubt be a can of worms. I do need a tail piece string, two fine tuners, and strings of course. Think I'll start with those and see how it sounds. My wife has some interest in violin however she's afraid to rent or buy one. Should at lest give her an opportunity. For me it's a cool project.

|
|
#4
03-18-2016, 05:43 PM
|
|||
|
|||
|
I've tried refinishing a violin back. Varnish is tough. It's not like painting window trim.
 Beating the heck out of a 100 year old fiddle I am, sanding back to almost no varnish and trying again; I may have ruined the sound; we'll see. But the last effort, I'll buff out with wool-lube and rottenstone; may finally have found the right consistently of varnish, denatured alcohol, and pigment. Beating the heck out of a 100 year old fiddle I am, sanding back to almost no varnish and trying again; I may have ruined the sound; we'll see. But the last effort, I'll buff out with wool-lube and rottenstone; may finally have found the right consistently of varnish, denatured alcohol, and pigment.The top crack, if we're not talking a Stradivarius here, you can tape off real real close and force a little Titebond into it. Super Glue would be even easier; it flows well, and you can quickly wipe up the excess; my last job, the violin was a complete mess from former repairs, so I didn't attempt a top removal, but the SuperGlue totally stabilized a fairly long crack from the top edge toward an F-hole. And guess what? The violin sounded great before the SG, sounded great after the SG, and the teacher who got the violin could not see the "repair". If the saddle is too tight, if that is where the crack under the chin rest originates, you want to pull the saddle and file it a tiny bit smaller. Usually one tuner is enough for a fiddle; they do detract from the sound somewhat. Your "Tailgut 4/4 Violin Nylon Tail Gut. New Tailpiece Adjuster Wire USA Seller" is $3 delivered . . . I recently bought a box of mixed parts for $3.25 plus $15 shipping. Had two wires NIE (new in envelope ), about 30 arched and polished nut blanks, six end pins, maybe six fine tuners, a few bridges, sound posts, and lots of odds and ends. If you are going to do a few more violins, junk like this helps out.A decent set of strings will set you back $50 . . . $37 when they are found on sale.
|
|
#7
03-19-2016, 11:54 AM
|
|||
|
|||
|
You bet, Jerry. Glad to help.
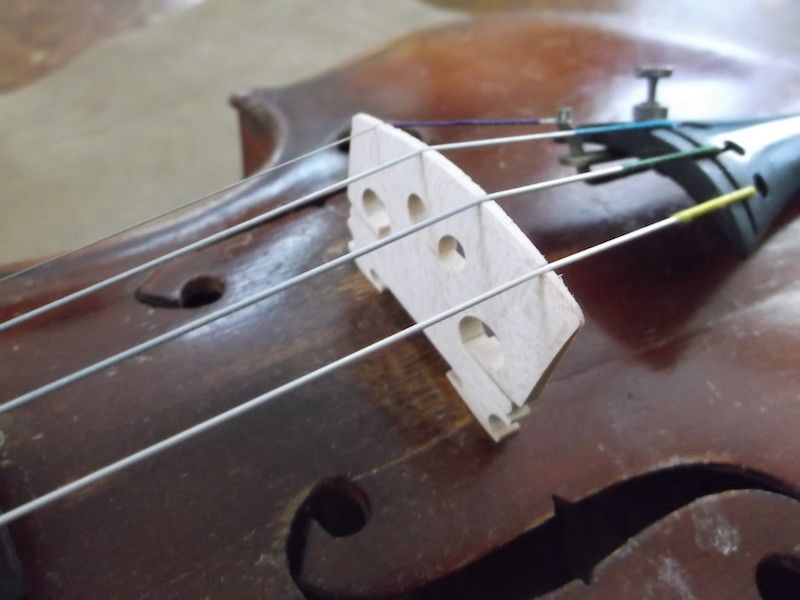
You want the strings to be about 33mm to 36mm apart at the bridge. All three bridges may not be for that fiddle. You lay a straight edge along the fingerboard and "project" the height of the fingerboard at the bridge. End graduations would be great here, but even I do not (yet) have one of those. You are looking for 6mm on the G and 4mm on the E above the projected fingerboard height. After the violin is set up you can sand the bridge a little lower, 5.5mm and 3.5mm. I've even sent a couple out with 4.5 on the G, and the player was happy. The string sits halfway in a little clean notch on the bridge. A tiny file is wanted. After the bridge is set up, notched, you take it back out and begin thinning it. A really high end shop will charge $175 plus $40 to shape a violin bridge. It took me about 90 minutes total to shape a $3 bridge for my last fiddle, and I was not even carving out excess mass among the hearts and such. The bridge sits between the two notches on the F-holes. A scale length is about 12.875", but with the notches, you do not need to measure. Most players adapt pretty quickly on different scale lengths, I'm told. At the nut, the action should be half the string diameter. Even as low as 1/8th mm on the E. Real real important for easy playing. Most of the fingering is done down here, and high nut action is harder to play. Before stringing, you can buff the fingerboard -with the grain - with 0000 steel wool, wipe it clean with lighter fluid, then rub it with boiled linseed oil. Allow to dry, then burnish/buff the crap out of it. Treat the side edges but not the back of the neck. That stays bare wood. Back to the pegs, on a well-used violin, they like their own holes. So paying attention to where they came from makes it easier for the string to hold its tension once you reassemble. Violin people talk in Metric, and I still use Imperial. That's why you see me going back and forth.
|
|
#8
03-19-2016, 05:44 PM
|
|||
|
|||
|
You've learned a lot of technics along the way. Maybe I'm over my head, the job "looks" simple enough.
You've given more info than one could hope for. I'll digest every bit but I already know there's tons to learn here. Jerry
|