The Acoustic Guitar Forum

Go Back   The Acoustic Guitar Forum > General Acoustic Guitar and Amplification Discussion > Build and Repair

Reply
 
Thread Tools
  #121  
Old 02-22-2014, 01:35 AM
SteveS's Avatar
SteveS SteveS is offline
Me
 
Join Date: Jun 2002
Location: Monument, Colorado
Posts: 9,122
Default

Quote:
One thing I'm already pulling away from all this. I don't want to build with cedar again. Too soft and not stiff enough. Spruce or redwood will definitely be the next material I work with.
Choose wood for the sound you want and learn to work with it. Also, you can learn to select you wood for the properties you want, after you learn what those are. Life is too short to work with bad wood.
BTW - redwood is difficult because it likes to split.
If you decide to build another one, I have a few tops that you might like to look at and perhaps take home - cedar, lutz, adirondack, redwood, sinker redwood, figured redwood.
__________________
“Reason is itself a matter of faith. It is an act of faith to assert that our thoughts have any relation to reality at all.”
― G.K. Chesterton
Reply With Quote
  #122  
Old 02-22-2014, 06:29 AM
LouieAtienza LouieAtienza is offline
Registered User
 
Join Date: Feb 2013
Posts: 4,617
Default

Quote:
Originally Posted by Viking View Post
New rosette work. Kinda boring to be posting the same stuff over again. But, such is the state of things when you glue before thinking.

Rosette channel routed. Cleaning the bottom with a chisel.


I went a different route and just glued the pieces straight into the channel, instead of gluing the rosette together and then gluing the completed thing into the channel. I think I much prefer this way of doing it. Although the glue ends up making a mess. Took a bit of work to get it all off the top.


Glue dried.


Halfway through scraping flush. Scrapers are the coolest wood working tool ever devised.


Sanding.


Done.


A better outcome than my first attempt.


An interesting note. This cedar is not as stiff as the cedar I jointed together from 2 inch wide quarter sawn re-sawed sections of boards from Lowes. This stuff is at .11 inches after thicknessing to a 6-7 MM 5LB deflection test VS .1-.95 inches for the other stuff. Now why a boards from Lowes would be stiffer than wood from Stew Mac is beyond me. Perhaps due to the fact that there was a fair bit of glue involved given the number of pieces I jointed together. But. Doesn't much matter given this is a first effort.

One thing I'm already pulling away from all this. I don't want to build with cedar again. Too soft and not stiff enough. Spruce or redwood will definitely be the next material I work with.
Yes it's possible that the multiple-piece top glue-up can be stiffer depending on the grain of the wood.

As to cedar I wouldn't shy away from it. Yes it does require greater care in handling but I really like the look and sound of cedar, especially for fingerstyle. One thing, however, that you found out, is that you have to be very clean when working cedar. The other thing is that when you get a set, you should de a deflection test BEFORE you join and defintely BEFORE you sand. Using the "cube rule of stiffness" it doesn't take a lot to drastically decrease stiffness. So I would do everything possible to protect the top (kraft paper) so you don't thin it further.
Reply With Quote
  #123  
Old 02-22-2014, 08:37 AM
Neil K Walk Neil K Walk is offline
Registered User
 
Join Date: Aug 2006
Location: Pittsburgh suburbs
Posts: 8,318
Default

Good work. The rosette came out nice. I love working with scrapers and hand tools as well, but learning to use them on a soft wood like cedar made it doubly hard for me.
I don't know anything about deflection testing but can attest that cedar is daunting for a first guitar build - at least it was for me. If you look at it wrong you'll leave a mark.
__________________
(2006) Larrivee OM-03R, (2009) Martin D-16GT, (1998) Fender Am Std Ash Stratocaster, (2013) McKnight McUke, (1989) Kramer Striker ST600, a couple of DIY builds (2013, 2023)
Reply With Quote
  #124  
Old 02-22-2014, 12:56 PM
Viking Viking is offline
Registered User
 
Join Date: Mar 2013
Location: Colorado Springs, CO
Posts: 234
Default

Quote:
Originally Posted by SteveS View Post
Choose wood for the sound you want and learn to work with it. Also, you can learn to select you wood for the properties you want, after you learn what those are. Life is too short to work with bad wood.
BTW - redwood is difficult because it likes to split.
If you decide to build another one, I have a few tops that you might like to look at and perhaps take home - cedar, lutz, adirondack, redwood, sinker redwood, figured redwood.
I'm definitely going to want to build another one. I'm thinking a redwood and walnut small jumbo for my next effort. Long ways off though.

Be that as it may, your offer is far too generous, unless you simply meant that they are for sale, in which case it is certainly a possibility.

And please forgive me if I don't sound excited to meet you in person. I have a number of autistic tendencies and personality traits... I'm not much of a people person.

Quote:
Originally Posted by LouieAtienza View Post
Yes it's possible that the multiple-piece top glue-up can be stiffer depending on the grain of the wood.

As to cedar I wouldn't shy away from it. Yes it does require greater care in handling but I really like the look and sound of cedar, especially for fingerstyle. One thing, however, that you found out, is that you have to be very clean when working cedar. The other thing is that when you get a set, you should de a deflection test BEFORE you join and defintely BEFORE you sand. Using the "cube rule of stiffness" it doesn't take a lot to drastically decrease stiffness. So I would do everything possible to protect the top (kraft paper) so you don't thin it further.
Yeah, I have had the thought that my sequence of performing the various tasks here needs work. The cedar did probably get thinned a small amount more than I intended after the deflection test in the upper bout/sound hole area. My thought was to make sure I have strongly braced the area, which I mostly planned to do anyway. I like some of Somogyi's thoughts on bracing the upper area. Strong transverse upper brace, inside heel block that intersects the transverse brace by extending towards the sound hole, supporting the fret board under the soundboard. Then I'll make sure the upper portions of the X brace and the sound hole braces remain a little taller than I perhaps might have cut them. Course, this being a first attempt, I have no real reference point except the literature and online resources. So we'll see what happens. I won't be completely heart broken if it fails in some way. It will have been an invaluable learning experience.

Quote:
Originally Posted by kwakatak View Post
Good work. The rosette came out nice. I love working with scrapers and hand tools as well, but learning to use them on a soft wood like cedar made it doubly hard for me.
I don't know anything about deflection testing but can attest that cedar is daunting for a first guitar build - at least it was for me. If you look at it wrong you'll leave a mark.
Yes, very, very soft stuff. I do love working with it because of the smell though. Stuff smells divine when being worked.
__________________
-- Nick
Reply With Quote
  #125  
Old 02-22-2014, 04:32 PM
Viking Viking is offline
Registered User
 
Join Date: Mar 2013
Location: Colorado Springs, CO
Posts: 234
Default

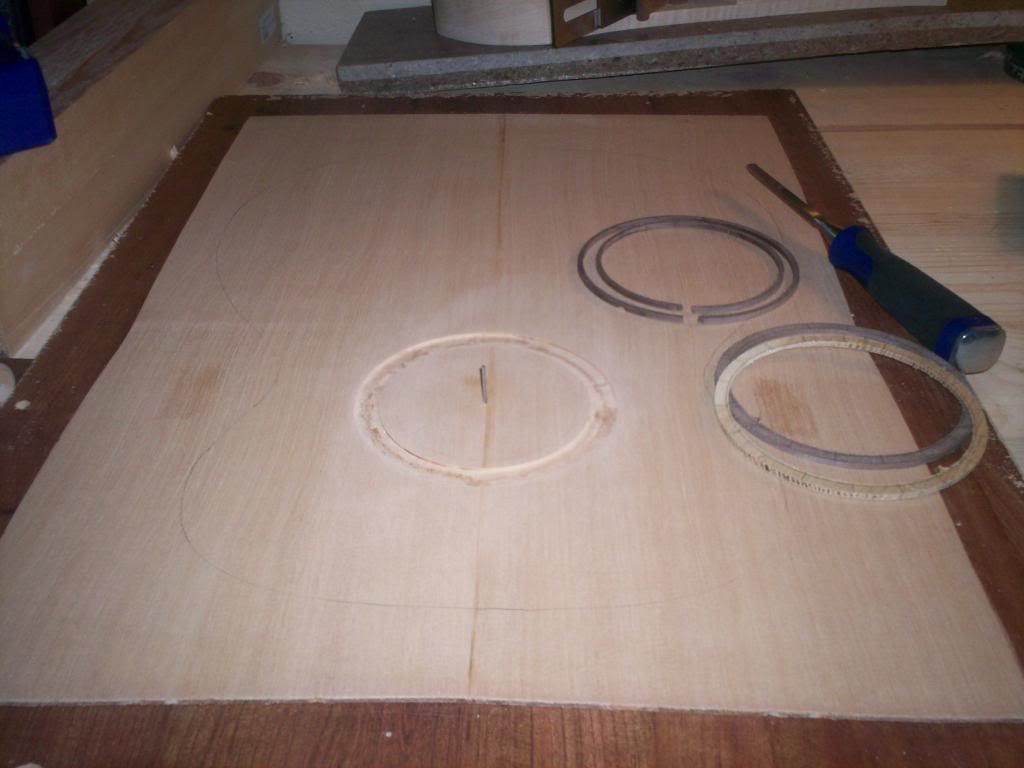
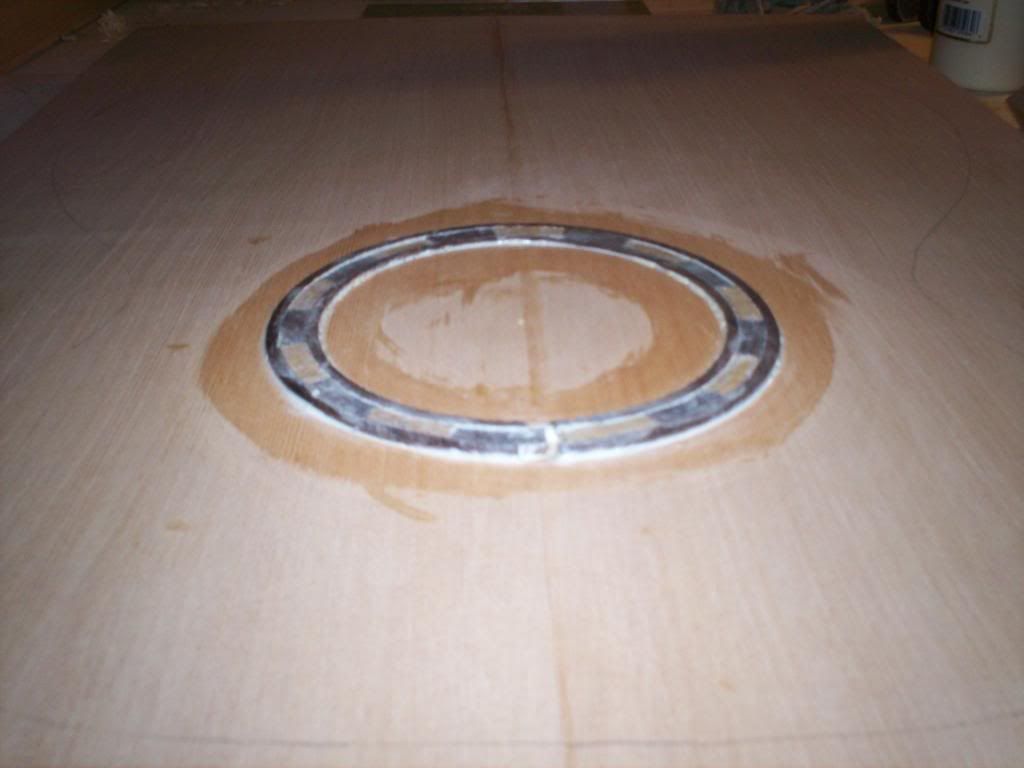
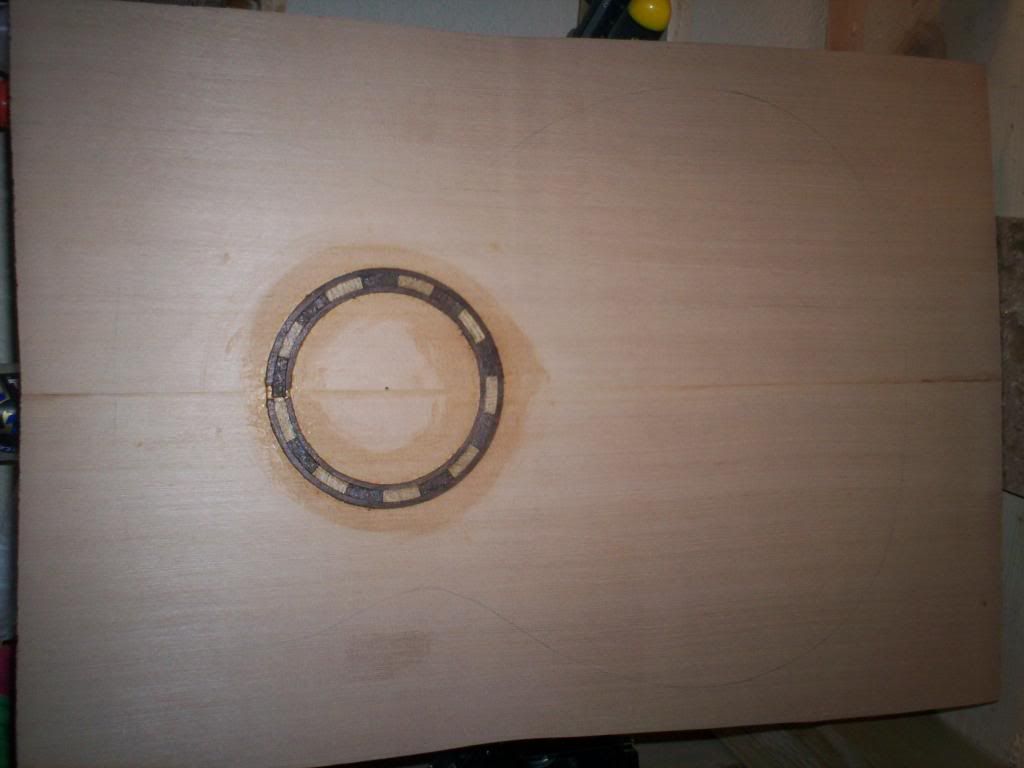
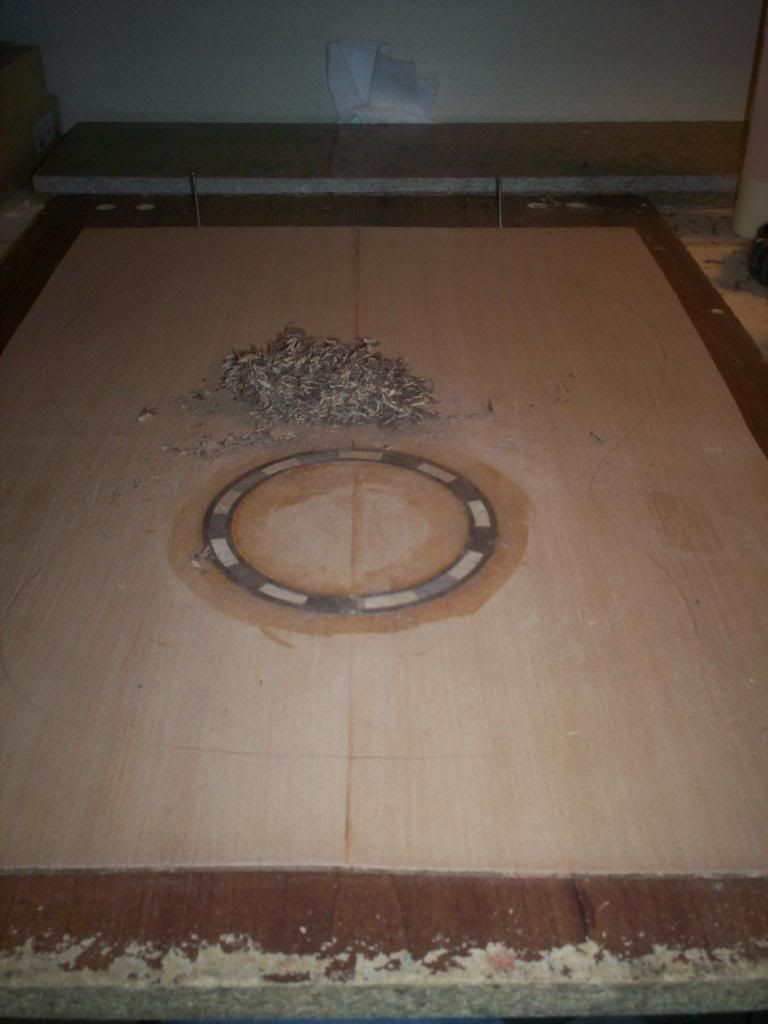
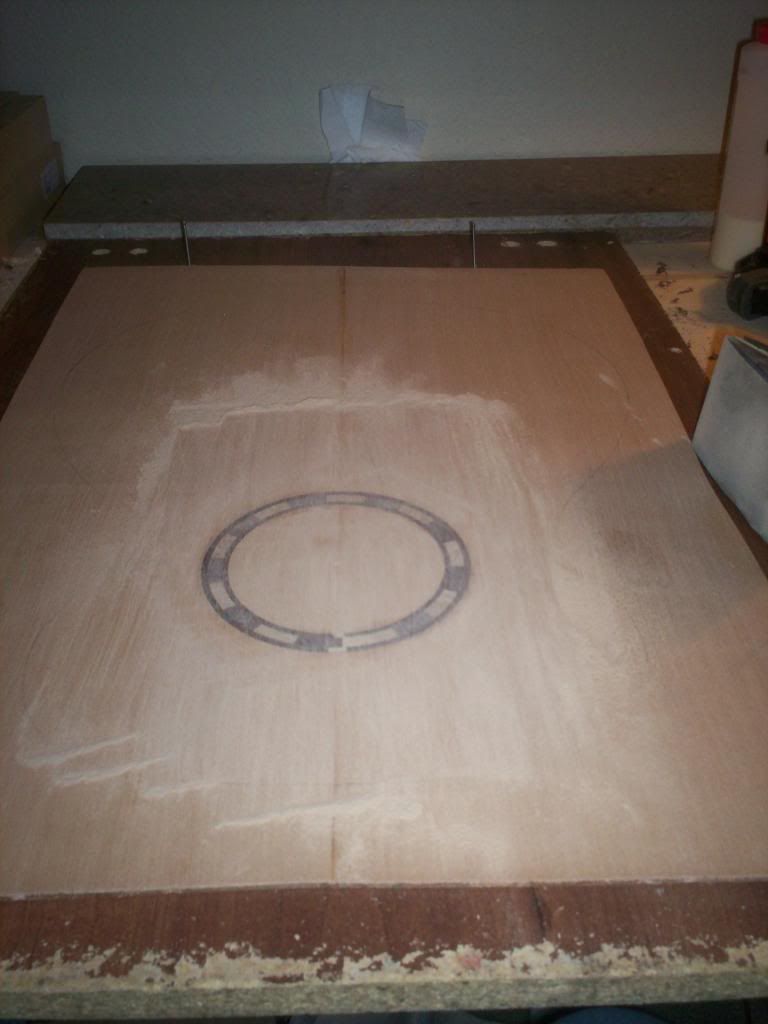
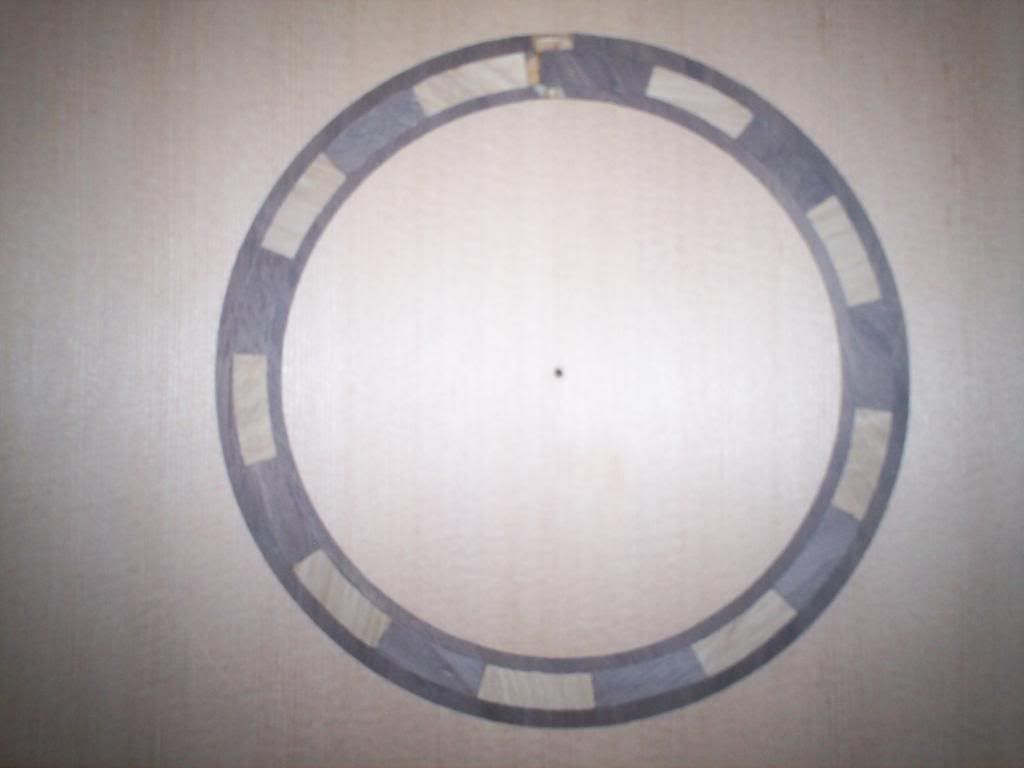
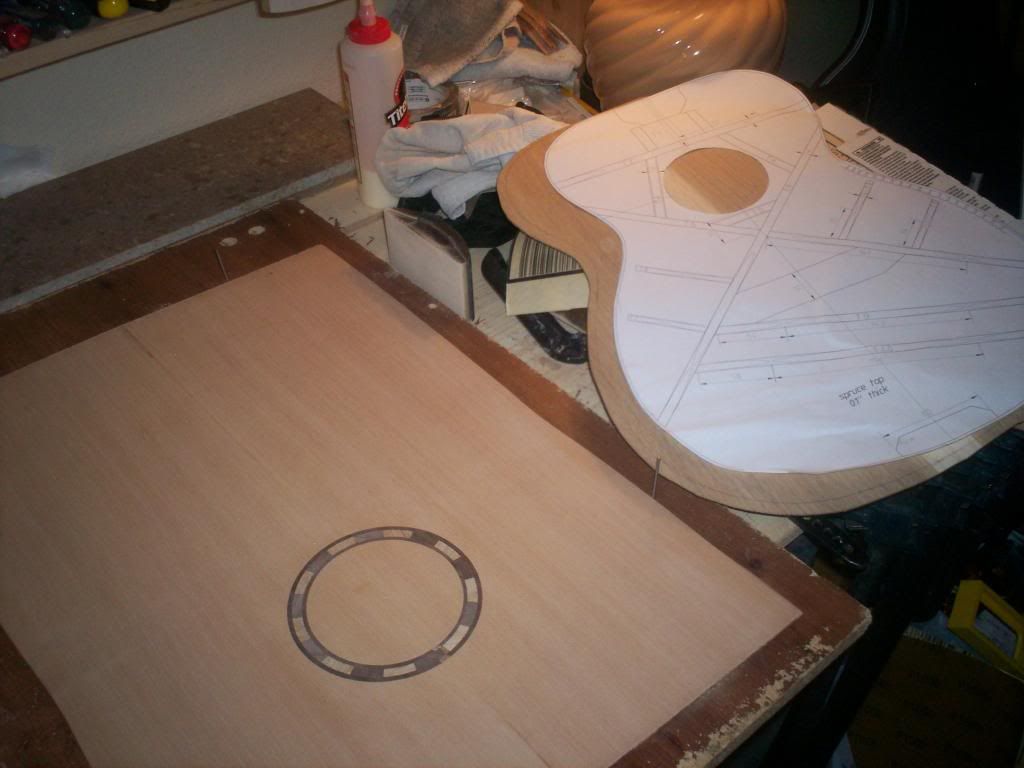
Got some more good work done today. Cut the sound hole and the rough profile of the guitar top. Then I re-sawed my white oak for the sides.


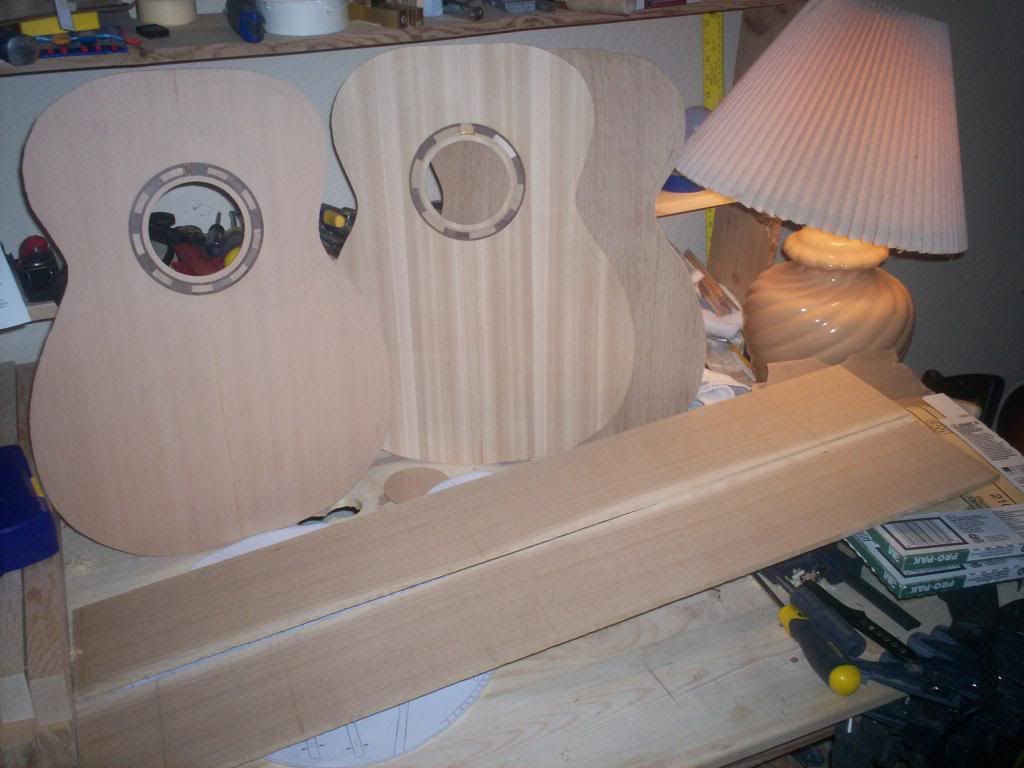
My band-saw re-sawing setup.


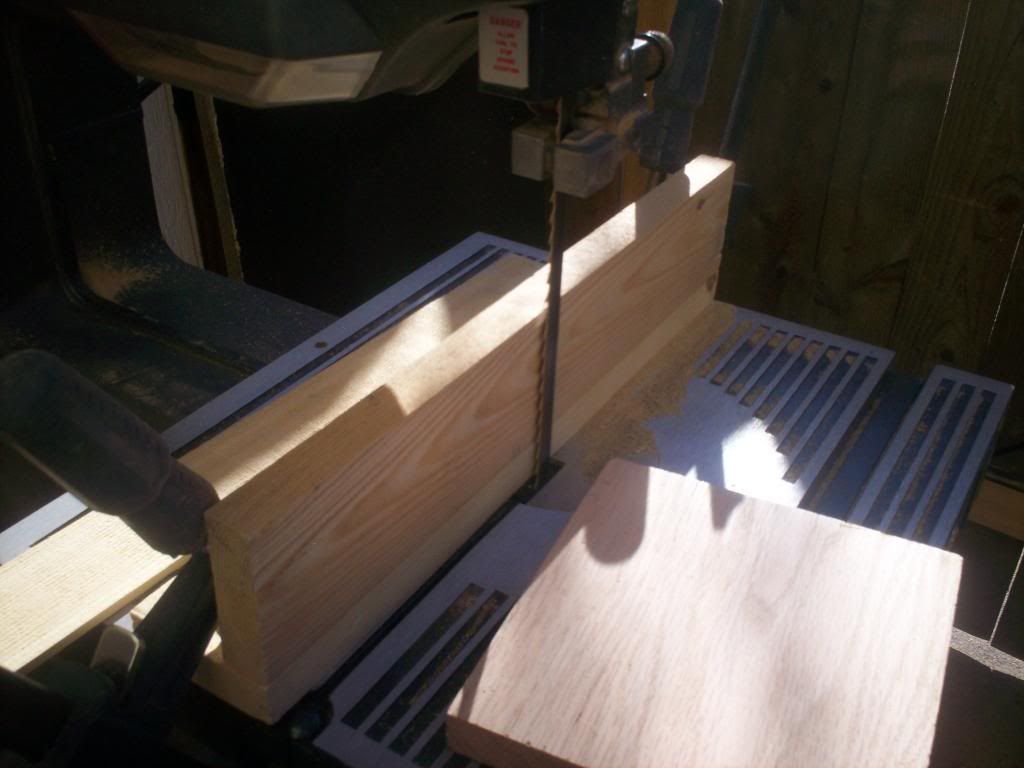
The sides, freshly re-sawn. They are 1/4" thick. I'll use my drum sander to thickness them down to size. What size do you thickness them down to? I've read .09-.08 inches.


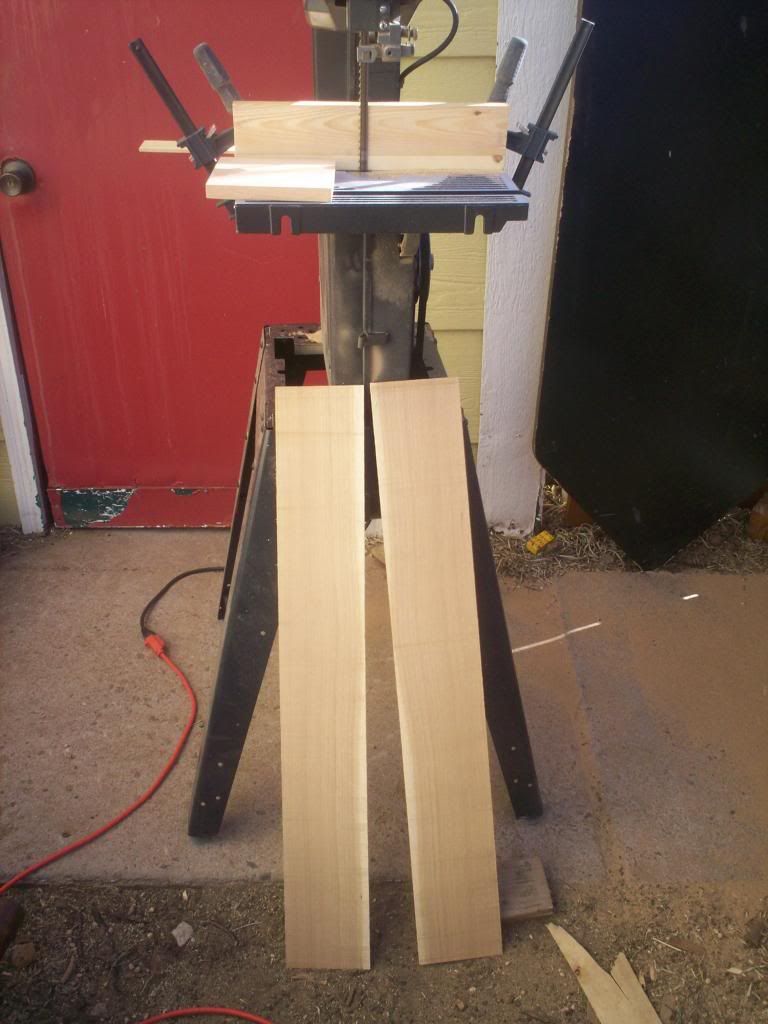
Not certain if I want to include the sapwood on the sides or not. Perhaps it would be better to just include it on the back but not the sides. What do you guys think?

Next, I'll be spending time on more infrastructure. I need to make some cam-clamps for gluing bracing to the top and back. Then I also need to put together the side bending machine. I'll be going the light bulb rout.
__________________
-- Nick
Reply With Quote
  #126  
Old 02-22-2014, 06:52 PM
LouieAtienza LouieAtienza is offline
Registered User
 
Join Date: Feb 2013
Posts: 4,617
Default

Quote:
Yeah, I have had the thought that my sequence of performing the various tasks here needs work. The cedar did probably get thinned a small amount more than I intended after the deflection test in the upper bout/sound hole area. My thought was to make sure I have strongly braced the area, which I mostly planned to do anyway. I like some of Somogyi's thoughts on bracing the upper area. Strong transverse upper brace, inside heel block that intersects the transverse brace by extending towards the sound hole, supporting the fret board under the soundboard. Then I'll make sure the upper portions of the X brace and the sound hole braces remain a little taller than I perhaps might have cut them. Course, this being a first attempt, I have no real reference point except the literature and online resources. So we'll see what happens. I won't be completely heart broken if it fails in some way. It will have been an invaluable learning experience.
Considering the small body you might get away with the thinner plate. I follow Somogyi's ideas of the transverse brace and neck block extension as well. Once you add the braces to the top you'll find that that the once floppy top stiffens up pretty well. The tops and rosettes look pretty cool...

Also, if you want to get some decent top woods, check out your local lumberyard. If they'll let you sort through stock (and of course put it back neatly) you can find some nice quartered 2X12 clear WRC, even Sitka if you have a decent lumberyard. Last I went I paid $15/lf for 2x12 clear WRC (my lumberyard does not stock 2x10 or 2x8 in clear.) I think if you're careful about protecting the top and resist sanding until the very end and only then lightly you should be fine.
Reply With Quote
  #127  
Old 02-22-2014, 08:06 PM
Viking Viking is offline
Registered User
 
Join Date: Mar 2013
Location: Colorado Springs, CO
Posts: 234
Default

Quote:
Originally Posted by LouieAtienza View Post
Once you add the braces to the top you'll find that that the once floppy top stiffens up pretty well.
I totally can't wait for that moment. Thus far, it seems that everything I've done has been very 2 dimensional. Once the braces get added, it almost feels like something magical will take place. Can't wait. Plus, yeah, not much in terms of tap tone to the cedar right now. 1 clear note prior to cutting the guitar's shape out. Not much of anything right now. I'd really like to begin to hear the music in the wood. I've read that once the braces are added to the equation, it changes everything.
__________________
-- Nick
Reply With Quote
  #128  
Old 02-23-2014, 12:32 PM
LouieAtienza LouieAtienza is offline
Registered User
 
Join Date: Feb 2013
Posts: 4,617
Default

Quote:
Originally Posted by Viking View Post
I totally can't wait for that moment. Thus far, it seems that everything I've done has been very 2 dimensional. Once the braces get added, it almost feels like something magical will take place. Can't wait. Plus, yeah, not much in terms of tap tone to the cedar right now. 1 clear note prior to cutting the guitar's shape out. Not much of anything right now. I'd really like to begin to hear the music in the wood. I've read that once the braces are added to the equation, it changes everything.
You can get a pretty good tap by using the index and thumb of one hand to hold the soundboard about a 1/4 its length from the top, and tapping about 1/4 its length from the bottom. If you don't hold it tightly you can get most any wood to ring. It is pretty cool to brace, then listen to the tap tone change (drop) as the braces are shaped down.

As to side thicknessing, I'm not sure for oak. I've bent padauk sides at .110" and had NO problems despite reports that it's hard to bend and split-prone. Then I've bent walnut sides aroun .080" and had a hard time. I bend old-fashioned with a propane-torch heat pipe. I've changed my approach over the years, and I've been sizing my side woods to .040"-.050" and laminating the sides. This seems to work great wiith flatsawn sides (like quilt maple) where I use quartered wood for the inner pieces, and really keeps them flat and they hold shape even when I take the sides off my mold.

I still make my tops on a dead flat work surface; and use a shop-made 15.5' radus dish for the backs (partly because everyone seems to use 15') which is integral to my mini-gobar deck.
Reply With Quote
  #129  
Old 02-23-2014, 07:04 PM
Viking Viking is offline
Registered User
 
Join Date: Mar 2013
Location: Colorado Springs, CO
Posts: 234
Default Cam Clamp Day

So I started in on making cam clamps. Since I've never made one before, I decided to make just 1 and see if I could produce some decent results. I'm not quite done with it, but I like the results so far. I feel fairly certain it will do it's job. I do however finally need a drill press to drill the cam fulcrum and the relief hole for the upper jaw cut. I knew it was inevitable. I'll have to get the drill press before I can complete the cam clamps, so I'll be waiting a while to get back to the guitar.

These are made from a really great piece of white oak I found at the local specialty hardwood supplier's cast off bin. 6 feet long, 1.5 inches thick and 5.5 inches wide for 5 bucks. It had some checking on the end which is why it ended up in the bin. But I'll work good for this purpose.


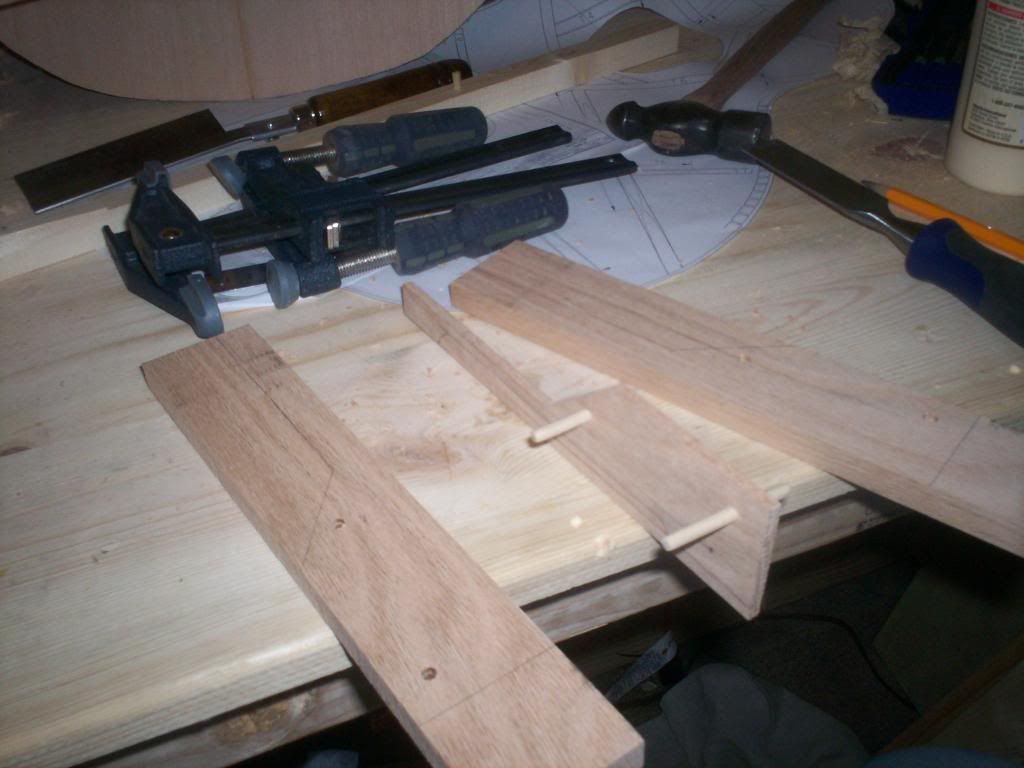
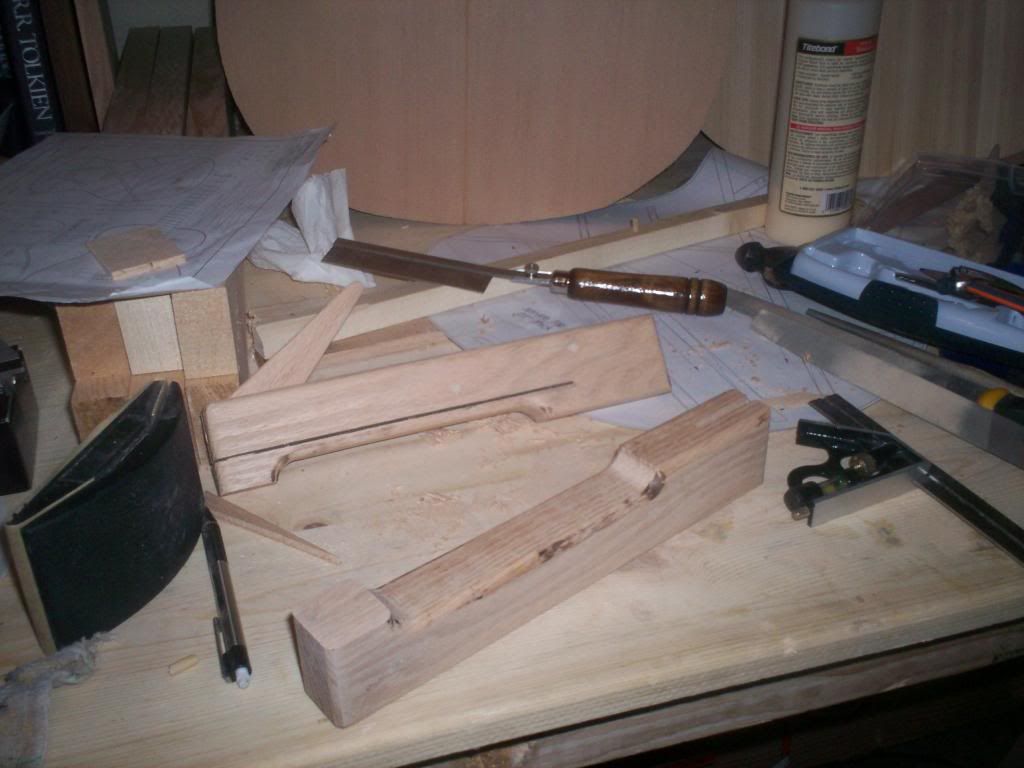
These will have 8.5 inch jaws. Sufficient to reach the middle of the x for the x brace.


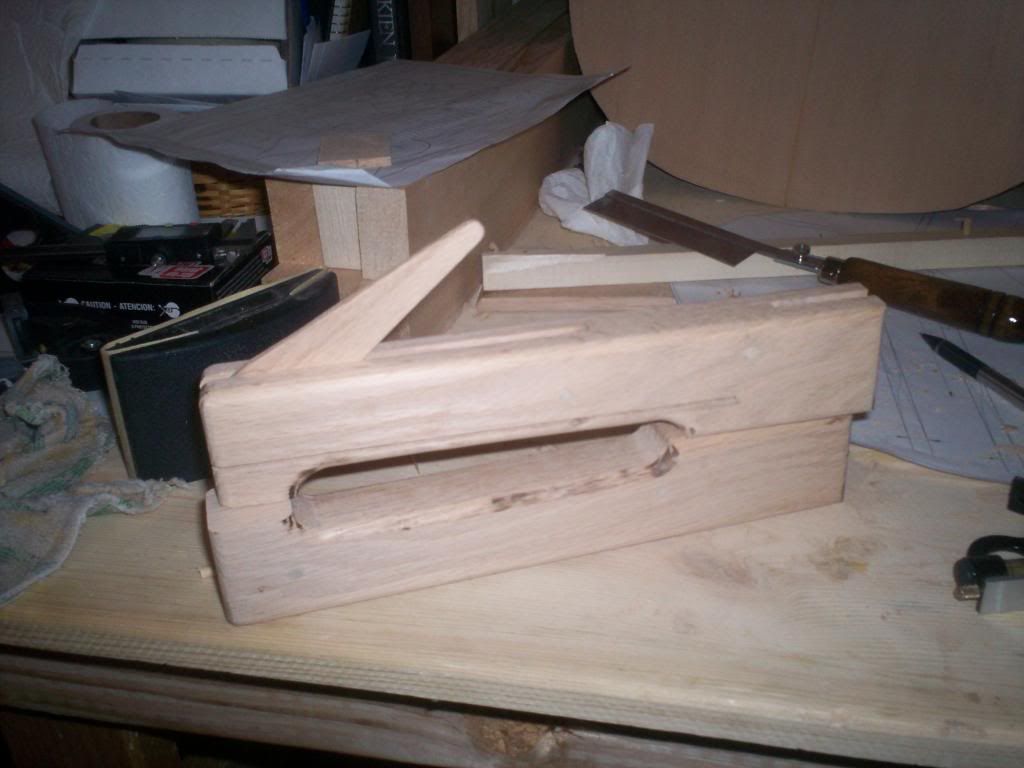
And, joy of joys, my band saw blade is finally getting dull. I've resawed a bunch of cedar with it, a bunch of white oak, cut a bunch of maple on it when I made my plane. So I suppose this has been a good stretch. Why can't tools just stay sharp indefinitely?
__________________
-- Nick
Reply With Quote
  #130  
Old 02-23-2014, 09:44 PM
Neil K Walk Neil K Walk is offline
Registered User
 
Join Date: Aug 2006
Location: Pittsburgh suburbs
Posts: 8,318
Default

...because you're working with oak!

Seriously, I tried making cam clamps too and I guess I didn't try hard enough because they came out terrible. I too used oak and the blade on my little Ryobi bandsaw was SMOKIN! Probably the biggest drawback was that I didn't use steel bars so the jaws kept slipping on the oak bar I opted to use instead.

Fortunately for me, I have a friend nearby who has a couple dozen Stewmac cam clamps and the local Rockler had them on sale too. I bought a pair with 4-1/2" throats for about HALF the price of ONE comparable Stewmac cam clamp.
__________________
(2006) Larrivee OM-03R, (2009) Martin D-16GT, (1998) Fender Am Std Ash Stratocaster, (2013) McKnight McUke, (1989) Kramer Striker ST600, a couple of DIY builds (2013, 2023)
Reply With Quote
  #131  
Old 02-24-2014, 12:25 AM
Viking Viking is offline
Registered User
 
Join Date: Mar 2013
Location: Colorado Springs, CO
Posts: 234
Default

Quote:
Originally Posted by kwakatak View Post
...because you're working with oak!
LOL. You and your obsession with the hardness of oak.

Quote:
Originally Posted by kwakatak View Post
Seriously, I tried making cam clamps too and I guess I didn't try hard enough because they came out terrible. I too used oak and the blade on my little Ryobi bandsaw was SMOKIN! Probably the biggest drawback was that I didn't use steel bars so the jaws kept slipping on the oak bar I opted to use instead.
Yeah, that's the trick with them I think. Getting the top jaw to bind against the bar it's riding on so that it catches and holds fast. I don't know that using steel is necessarily the answer though, even though that is what I'm using. This guy used wood for the bar and it worked just fine. His is the video I used the most to formulate my own plan for construction. He used 3 separate pieces of wood, glued together, to build each jaw. Most of the other plans I saw used a single piece of wood and then relied on a table saw to cut the cam slot and the slots for the bar. My table saw sucks so I wanted a plan that didn't use one. I've got a good quality band saw, even though my blade is getting dull. Now I also need a dremel so I can sharpen the thing in a timely manner.
__________________
-- Nick
Reply With Quote
  #132  
Old 02-24-2014, 02:40 AM
gpj1136 gpj1136 is offline
Registered User
 
Join Date: Nov 2012
Posts: 93
Default

A go bar deck is both easier to use for gluing braces and easier to build also. you could make the rods from left over oak. Using different lengths of rods you could also use it for gluing the top and back to the sides.

Last edited by gpj1136; 02-24-2014 at 02:46 AM.
Reply With Quote
  #133  
Old 02-24-2014, 09:11 AM
charles Tauber charles Tauber is offline
Registered User
 
Join Date: Feb 2011
Posts: 8,381
Default

Quote:
Originally Posted by Viking View Post
This guy used wood for the bar and it worked just fine.
I made a new set of clamps about a year ago or so. In order for them to work as well as the commercially made clamps, the tolerances/fit need to be just so. Perhaps most critical is the fit of the upper jaw on the bar. The fellow in the video doesn't mention it, but when both jaw faces are lined with cork or leather, to work well, when the cam is thrown, the upper jaw needs to be 90 degrees to the bar or a hair less. If not, they won't clamp thin materials well and will apply lateral forces to the work, causing glued surfaces to slide.
Reply With Quote
  #134  
Old 02-24-2014, 02:48 PM
Neil K Walk Neil K Walk is offline
Registered User
 
Join Date: Aug 2006
Location: Pittsburgh suburbs
Posts: 8,318
Default

Quote:
Originally Posted by Viking View Post
LOL. You and your obsession with the hardness of oak.


Yeah, that's the trick with them I think. Getting the top jaw to bind against the bar it's riding on so that it catches and holds fast. I don't know that using steel is necessarily the answer though, even though that is what I'm using. This guy used wood for the bar and it worked just fine. His is the video I used the most to formulate my own plan for construction. He used 3 separate pieces of wood, glued together, to build each jaw. Most of the other plans I saw used a single piece of wood and then relied on a table saw to cut the cam slot and the slots for the bar. My table saw sucks so I wanted a plan that didn't use one. I've got a good quality band saw, even though my blade is getting dull. Now I also need a dremel so I can sharpen the thing in a timely manner.
Hehe - you know I was just teasing you, right? I can't wait to hear the finished product though. I'm wondering if an oak guitar would sound similar to a maple guitar.
__________________
(2006) Larrivee OM-03R, (2009) Martin D-16GT, (1998) Fender Am Std Ash Stratocaster, (2013) McKnight McUke, (1989) Kramer Striker ST600, a couple of DIY builds (2013, 2023)
Reply With Quote
  #135  
Old 02-24-2014, 08:43 PM
Viking Viking is offline
Registered User
 
Join Date: Mar 2013
Location: Colorado Springs, CO
Posts: 234
Default

Quote:
Originally Posted by gpj1136 View Post
A go bar deck is both easier to use for gluing braces and easier to build also. you could make the rods from left over oak. Using different lengths of rods you could also use it for gluing the top and back to the sides.
I would also need a radiused work dish, which I have been planning on building without. I'd need a more robust router and the proper routing bit, plus the jig to cut the dish. Then I would build the go-bar deck. Doing what I am doing now may take a little more time, but it will take less money. I may chose to build with a go-bar deck in the future, but for now, I think this is where I'm going to stay. I can also use the cam clamps for gluing the back and top to the sides.

Quote:
Originally Posted by charles Tauber View Post
I made a new set of clamps about a year ago or so. In order for them to work as well as the commercially made clamps, the tolerances/fit need to be just so. Perhaps most critical is the fit of the upper jaw on the bar. The fellow in the video doesn't mention it, but when both jaw faces are lined with cork or leather, to work well, when the cam is thrown, the upper jaw needs to be 90 degrees to the bar or a hair less. If not, they won't clamp thin materials well and will apply lateral forces to the work, causing glued surfaces to slide.
Hmmm. Do you mean the entirety of the upper jaw, or the clamping surface itself on the upper jaw? The angle of the clamping surface, obviously, changes dramatically when the cam is thrown. So is it that small, square inch or so surface that needs to be parallel to the bar when the cam is thrown? Or the whole upper jaw? Cause right now, the whole upper jaw is almost exactly 90 degrees/perpendicular to the bar, due to a fairly straight cut on the thin inside piece. If it's the clamping surface itself, then you would want the whole upper jaw to be tilted something like 5 degrees or so away from 90 degrees, away from the lower jaw. I can still glue a shim in place if it needs it. Love to hear your feedback on that.

Quote:
Originally Posted by kwakatak View Post
Hehe - you know I was just teasing you, right? I can't wait to hear the finished product though. I'm wondering if an oak guitar would sound similar to a maple guitar.
Yeah, I know that. And yes, I can't wait to hear it either. All this work, months of effort. Dreaming about it. Agonizing over each detail, each decision. I might cry if it doesn't at least sound pretty decent. At the same time though, I think I'll probably be ecstatic if it plays in tune!

I'll have to plunk down a few bucks and get a decent microphone so I can record something.

I tend to think the species of wood doesn't have much to do with the sound. Perhaps it does in an 80/20 rule kind of way. 80% of the sound will be directly attributed to the builder... the construction, the bracing, the thickness, stiffness and mass of the top, the care taken in striking the right balance for the target guitar and how it was built, etc.. Then the final 20 might represent the coloring of the sound due to the species.

I once played an all solid wood spruce and rosewood instrument in a nice, locally owned (non GC) guitar store. I took one look at it and smiled, thinking that it's a classic combination and that the guitar should sound great. Sat down with it and started playing a finger style melody. It was mediocre in every regard. I didn't play it long and stuck it back on the wall a little disgusted. I'm sure the species of wood makes a difference once you are building at an elite level, once you can already make excellent, lightly built, highly responsive guitars regardless of the wood. THEN the species can begin to make a subtle difference because the builder has fine tuned his construction methods enough to actually release the character a particular species has to offer.

But, that's just my opinion based on a small amount of playing talent and the guitars I've played. Obviously not based on observations from having built lots of guitars.

So I hope my guitar sounds nice, though I would not say it would be representative of the sound one could expect from a well built oak b/s instrument.
__________________
-- Nick
Reply With Quote
Reply

  The Acoustic Guitar Forum > General Acoustic Guitar and Amplification Discussion > Build and Repair


All times are GMT -6. The time now is 12:42 PM.


Powered by vBulletin® Version 3.8.11
Copyright ©2000 - 2024, vBulletin Solutions Inc.
Copyright ©2000 - 2022, The Acoustic Guitar Forum
vB Ad Management by =RedTyger=