
|
|
#1
 12-30-2009, 03:48 AM
|
|||
|
|||
|
I was PM'ed by someone who thought i posted in the wrong place so i'm posting my post into a new thread here. Hopefully it is in the right place. If not i'm sure someone will be able to move it where it needs to be or delete it? thanks
I've been lurking for a few days and have enjoyed in particular the Custom shop threads. I'm an aspiring luthier, taken a few violin making courses but have decided that i'm going to go in the direction of Guitars. At present i've been buying wood and getting ready for my first build. I've looked at so many different styles of guitars and it is so hard to decide what my first one should be. I love some of Benedetto's guitars, but i don't want to do an arched one for my first one. So i'm designing one from scratch. I've seen some ideas i'd like to incorporate into my own guitar on this forum and hope that sorta thing is ok? Any how I'd like to thank all the people who have posted their creations in the forum here whether they made them themselves or had them made. I was wondering if there were any good books to get a fella going in the right direction? 
|
|
#2
12-30-2009, 07:52 AM
|
|||
|
|||
|
Welcome! (I'm new here too!)
I'm planning to build a guitar myself inspired by some of what I've read here and by this guy: http://acousticguitarbuild.blogspot.com/ I've read really good things about Cumpiano's book - Guitarmaking This is his website which also has some good information http://www.cumpiano.com/ If I had the money I'd go and take a course from a professional. Alas I do not but I'm going to try this anyways. If I end up with a total dud then I still have more than I started with plus a bunch of lessons learned. 
|
|
#3
12-30-2009, 08:26 AM
|
|||
|
|||
|
Quote:
The book is wonderful, worth a lot more than amazon is charging for it. Welcome to the forum, woodsworth! Seems like we're getting more and more aspiring builders lately. Fun times. I hope all of ours turn out as good as the other build threads around here It'll be a while before I get started though. First I need to finish cleaning up an area in the basement to construct a room down there, then move someone else into that room, and move myself into their previous room. Then I can finally build myself a workbench... to finish my half-done violin  Finally after that, I'll get my first guitar underway. At least I'll probably have the book memorized by then.
|
|
#4
12-30-2009, 11:09 AM
|
||||
|
||||
|
Quote:
Best wishes to you as you start building. I think the two threads below could be helpful. Here is my first build thread. My third build thread has a lot of good information, especially from Forum sponsor Tim McKnight.
__________________
Reason is itself a matter of faith. It is an act of faith to assert that our thoughts have any relation to reality at all. ― G.K. Chesterton
|
|
#5
12-30-2009, 11:29 AM
|
|||
|
|||
|
Ahh yes the half finished violin, I have one of these to...
Thanks so much for the replies thus far. It will be a while before i start as well. I do have a workshop, however it is set up for cabinet work. I'm in the process of making jigs and acquiring tools for guitar making, half the fun in my opinion. I will look through the links provided and thanks to steve for making a fella feel more comfortable contacting other members and makers for permission. One doesn't know if such a thing would be alright. People put their blood sweat and tears into their work as well as years of experience, so it made me wonder if the likes of a new guy having the gull to ask if such ideas could be used would be acceptable Some of the things i've seen have blown me away. I really like the chamfer i seen on one with a series of ports. One thing i find with my guitar is that it is uncomfortable due to the sharp edges. What an innovation. Not that that is one of the things i want to try but it definitely is nice. Thanks again everyone, i'll reply better to each as i've had the time to look at the links provided.
|
|
#6
12-30-2009, 12:20 PM
|
|||
|
|||
|
Quote:
And if you do want to build a chamfer (or armrest bevel), this may be of some help...This is a link to one approach posted on the Luthiers Forum "Here is a tutorial on how I do mine: http://www.luthiersforum.com/forum/v...bevel+tutorial Basically I carve the bevel, glue a veneer overlay on the bevel, and then use templates and a router to route the purflings." And the following is how Matt Mustapik approaches it.... "The main challenge is to end up with a solid beveled surface for the veneer, and yet to have good right-angle purfling ledges. Here are some pictures to go along with the description below http://mustapickguitars.com/47paskins/3/index.html http://mustapickguitars.com/47paskins/4/index.html http://mustapickguitars.com/47paskins/5/index.html http://mustapickguitars.com/47paskins/6/index.html 1) With the rim assembled and in my outside mold I took a bit of mahogany neck blank and traced the outline of the inner surface of the side in the area that was to become the bevel onto the neck blank. Then I sanded cut and sanded the neck blank into the shape of the side so that it matched the shape of the side. 2) On a belt sander, sand away the side to a nice smooth graceful line that looks right to you. 3) The edge where you sanded will be about 10 degrees off square relative to the side. This edge is going to serve as your purfling ledge...so use a sanding block to square it. 4) Put the profiled piece of mahogany back where it was, and, with a pencil, trace the profile of the sanded out side onto the mahogany lining. 5) Doing your best to maintain a steady angle for the bevel, use a belt sander (I have an edge sander) to sand to the line. If your traced pencil line of the side profile is smooth and your hand is steady with respect to the angle of the bevel your sanding in...you'll naturally get a nice smooth curve for the top as well. Just keep an eye on that as you're going along. 6) Now you have a smooth curve on the top-side of your mahogany reinforcement that will establish the shape of the top. With a pencil, draw a line offset from this 1/4" in. This is the ledge where your top purfling and top will glue onto. Cut and sand to that line. Make the cut perpendicular to the top (parallel to the side) so that it's easier to clamp to the side. 7) Sand the side-height of your reinforcement to whatever makes sense to you, (perhaps no less than 3/16" below the lowest point of the bevel). 8) Glue-clamp the side reinforcement onto the side. Glue the kerfing/lining on elsewhere as you normally do. 9) Hog off all that unnecessary wood from the part of the reinforcement that's inside the guitar that was left square for clamping purposes. 10) Trace the profile of the kerfing-lining and bevel reinforcement onto the underside of your top...very precisely. 11) Brace the top and prepare it for assembly to the rim. I did not tuck the x-brace into the bevel reinforcement...I let it thin down to nothing at that juncture. At this point, the *exact* location of the top needs to be nailed down without margin for error so the next two steps ensure that it will glue down without the least bit of uncertainty... 12) With the top in its exact place, drill a hole down through the top and into the headblock. Use a toothpick that can stick into the headblock and up through the top to lock in this location. 13) Use some light adhesive to tack down something to the underside of the top so that the bevel reinforcement can rest against it as a precise stop for purposes of locating the top while the glue is setting. 14) Before gluing the top into the rim, very slowly and carefully sand away the area of the top at the bevel so that it's line matches the presented by the line presented by the top of the reinforcement. Continue sanding to this contour until enough room is left that presents a ledge for your top-side purfling to rest on. 15) Glue your top on oh-so-precisely so that the purfling ledge you've left for the top is lined up just right. 16) After you've glued on the back, rout your binding and purfling channels in the usual way so that the channels disappear into the void left by the bevel platform. 17) Trim-sand your binding at the proper sharp angle so that it will intersect properly bevel veneer. It's hard to talk about clearly, but not so hard to visualize when you're standing there playing with the ledges and purfling and the binding and making things fit. 18) Glue the binding-purfling on in the usual way. You'll be starting at the tailblock with just a short piece of binding that quickly dies away. In the area of the bevel you'll need to continue gluing on the purfling but without the binding there to act as a clamping call. I found that I could easily just "massage" it into place as the wood glue tacked up. Once youre past the bevel, you just continue with the other side with the binding that you've prepared. 19) Thin your veneer for the bevel. I found that with koa I could thin it to .060". This was thin enough so that it flexible enough to just flop in without any prebending, but thick enough to fill the space left for bevel. 20) This is slightly tedious...you've got to shape that bevel veneer so that it just fits inside the area left between the binding, with the backside of it beveled to rest against the the side and top purfles. In order to arrive at the approximate shape for my veneer I put a piece of butcher paper over the area and used a pencil to creating a rubbing shape of the bevel. Then a cut out a piece of construction paper a bit oversize to this shape. Having shaped the construction paper, just a wee bit oversized, I then cut out a piece of practice veneer and got it just so....lots of patience, a belt sander, a spindle sander, one inch at a time. Then I traced this outline on my final piece of veneer, but it a bit oversized and repeated. I won't need to do the practice step next time, I just didn't want to learn on a pretty piece of koa. 21) Glue in the veneer with wood glue, holding it down with masking tape the way you ordinarily would for binding. 22) Wait an hour...remove the tape...sand things flush. 23) Pat yourself on the back, show your girlfriend."
__________________
Andrew White Production: Cybelle 112 Rosewood/Sitka Andrew White Production: Cybele 312C Crossover Rosewood/Red Cedar Clark: A-Wedge Koa/Snkr Rdwd 12-str Clark: A-Wedge Monkeypod/Snkr Rdwd Cornerstone: Zion All Koa Cornerstone: Tenor Ukulele Prototype #2 All Koa Fay: OM Mac Eb/Englemann Stehr: Aud. Braz/Snkr Rdwd 8-str Plaid Coyote's gone home to play
|
|
#9
12-31-2009, 05:48 AM
|
|||
|
|||
|
Thanks Oylerz, i've finally made it through the links you provided. Being that you are new to, I should be welcoming you as well, and thanks for the resource material, it's fantastic. I'll be getting the book as well, it seems to have good reviews everywhere.
dekutree64, i read that article some time ago very inspiring really. All in his kitchen!!! I'd not get away with as much but then i have a workshop, no excuses for me *smiles* steve, unfortunately all your photo's on your first build have been deleted because they were on a msn group which has been closed down. the third build is great mmmmm spalted maple 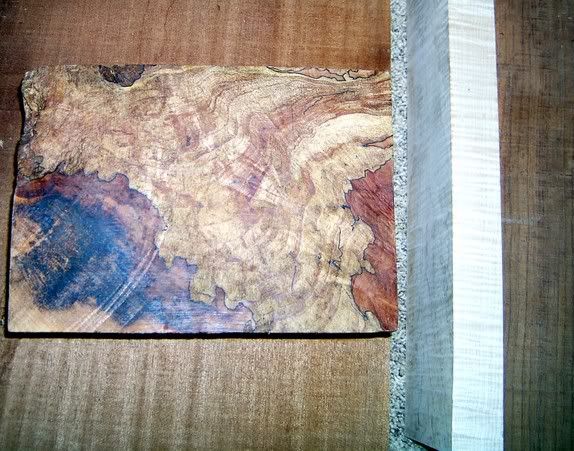 Thanks for sharing that. Can't wait to see the finished project. Did you take the original top off because of the 1/16 of an inch dip? I would of thought a set of strong strings would of brought that back. Thanks hnuuhiwa for sharing how the chamfer is made. Although it looks good i probably won't put one on mine. I like the streamline look of lines all in one direction and because the way the veneer has to sit on the chamfer, the grain looks off to me. If i could find a piece of wood with that arch in the grain i'd probably do it though. Thanks nic36 for the welcome. I hope to be as creative as i can, and as original as i can, however my first few i think i'll stick close to what others have done just so i know i'll end up with something i can play. Thanks Fliss and i can't wait either. I'll be doing two side by side one electric and one acoustic. Unfortunately i can't devote my work time hours to this so i'm not sure how long it will take. I will document as i progress though and will also ask for help when needed.
|
|
#10
12-31-2009, 06:48 AM
|
||||
|
||||
|
Hello! Welcome.
I too have been bit. Folks around here know the story but I bought out a fellow that had just about everything to build guitars and 50 board sets. So, I am under some personal pressure to succeed at this. Take a look at my thread on my first build. I just got the body done* Sort of. I have to redo some of the Rossette for the 4th time  and now I am learning the neck stuff. and now I am learning the neck stuff.My references are a few of the books mentioned. A wonderful set of John Mays Build videos. Places to know; Stew Mac (Stewart McDonald) LMI (FANTASTIC catalog!, GET the catalog) It is packed with pictures and information on wood types...) Blues Creek - John Hall. John makes "stuff" to make building go better. John also does some very good videos on how to use his stuff. I watched him use his binding cutter set up and it cleared up a few last questions before I got started. I will publicly yell at John "Put on your safety equipment!!!!" Join up over at "OLF" Official Luthiers Forum. Great guys. It's like a personal Think Tank. I asked were to get Inlay bits. I got 2 pages of sources and information It ain't a cheap hobby but I don't golf. I say its like buying a Bass boat to save money on fish. Those $500 boxes from Stew Mac are awful small.... Always wear your annoying dust mask and safety glasses Nag nag nag
|
|
#11
12-31-2009, 07:13 AM
|
|||
|
|||
|
Hi Yamaha Junkie,
I looked at your build thread. Actually i looked at all of them, paying close attention to what is in the background more then what is presented. Being that i am setting up from scratch i want to do it right or at least right for me. A blend of what i can afford with what is proven to work for others. Dust yeah i know about it. I'm sourcing out a cyclone system and some air filtration systems as well. Not going to be sanding to much exotic wood till I have that sorted out let me tell you. Hope you got a good deal on the set up. At least you got some wood with the deal. I live in the UK so i'm not sure if those stores send their catalogs over the pond, but will check, thanks. I've been lurking at the luthier forum today after hearing it mentioned here. I've seen many of those video's on YouTube, while researching. Some good stuff on there. Keep up the great work, will keep an eye out for you to see what your up to. Thanks for sharing.
|
|
#12
01-01-2010, 08:37 PM
|
||||
|
||||
|
Quote:
|


