
|
|
#1
 08-09-2018, 03:34 PM
|
|||
|
|||
|
Hello acoustic guitar gurus of the internet, my action is a little high, read, a lot high, on my Taylor 816ce.
I would like to lower it a little bit, but I don't think I want to lower it right down what I think will be perfect just yet. Maybe halfway there or something, and see how that goes. I found this resource on the internet: http://www.ramzmusic.com/misc/taylor...1089301105.pdf Which reads out what sort of string height I should be looking at. I do have a string action ruler to measure it properly. There is something I don't quite get about that though, because it gives me separate string heights for the 1st fret, for every string for acoustic guitar series. Which I don't think I'll be looking at just yet, my nut seems comfortable to me. But then for the 12th fret readouts, I will need, I think GA or maybe GC, anyway, one of the two, but it only tells me for the values for the high E and low E. And I'm assuming this might matter for string thickness as well, but I think not all those bodies use the medium strings like the 816 does, but anyway. So, is that because I will only be sanding the bottom of the nut anyway? Anyway, they say .050-.060, and I'm like at .100 for high E, and 0.120 on low E, instead of .080 - .090. So, I'd like to lower that, at first I think by .020 and see how that feels. So, I'm wondering how best to go about doing that? How much should I sand? Should I make a little mark where I want to sand to? Is there some formula to figure that out? Or, will I have to do a lot of string unstringing and restringing to trial and error it? Any other tips and tricks, or advice or recommended videos to watch would be greatly appreciated also. 
|
|
#2
08-09-2018, 04:49 PM
|
|||
|
|||
|
To lower action height by x at the 12th fret, you need to lower the height of the saddle by 2x. So to start off, to lower your action by .02, make a mark that is .04 from the bottom of the saddle. It can be a straight line or just 2 visible marks.
Sand to this line. They key is to ensure the saddle bottom is perpendicular to the sides. I find sanding while keeping the side of the saddle against something perfectly square gives me a nice flat bottom. The reason you get only the Low and high E heights for 12th fret action, but measurements for all strings at the 1st fret is that you sand the saddle. That way, you just use the outer strings as reference points to measure; the other strings will also get lowered to the same ratio the E strings do too. Basically, if your saddle has the right radius to the fretboard, then lowering it so that the High and Low E feel comfortable will also indirectly mean the A,D,G,b strings are also comfortable, and you wont need to worry about their measurements. The nut slots are lowered individually, with nut files, and so there is a certain measurement involved to getting them to an ideal height. Sanding the nut will still work, though many are opposed to this.
__________________
The past: Yamaha AC3R (2016) Rose, Eastman AC822ce-FF (2018) The present:Taylor 614-ce (2018) Clara, Washburn Dread (2012) The future:Furch Rainbow GC-CR (2020)Renata?
|
|
#3
08-09-2018, 05:27 PM
|
|||
|
|||
|
Quote:
Quote:
|
|
#5
08-09-2018, 06:46 PM
|
|||
|
|||
|
Quote:
What do you mean? How would taking the neck off allow me to make this adjustment?
|
|
#6
08-09-2018, 06:51 PM
|
|||
|
|||
|
Quote:
This. Just did this to my sons little parlor guitar. It looked like a ton of saddle to remove. I basically chickened out and eyeballed a little less than my line. It's still too high. I'll get it with the next string change.
|
|
#7
08-09-2018, 08:07 PM
|
|||
|
|||
|
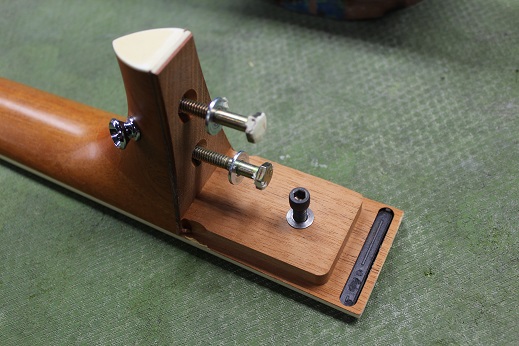
Taylor guitars should not have the saddle sanded, the bolt-on neck is installed with shims that make adjusting the neck angle a trivial adjustment, quicker than sanding the saddle. The shims are only available to Taylor certified techs, so it's not something you can do yourself.
__________________
Rodger Knox, PE 1917 Martin 0-28 1956 Gibson J-50 et al
|
|
#8
08-09-2018, 08:17 PM
|
|||
|
|||
|
Before you make any adjustment to the saddle you should ensure the neck relief is optimal first. Many people recommend a concave bow of 0.25mm or 0.010 inches. This is a good starting point but some guitars play better with a flatter relief: somewhere between 0.1mm and 0.25mm is likely to be the sweet spot.
Its essential to establish the correct relief before adjusting saddle height as the neck relief also impacts on action. Loosening the truss rod will raise the action and tightening the converse. Just to be clear adjusting the truss rod should not be used to change the action but setting relief is required before final saddle adjustment. Sanding a saddle flat and square is harder than it sounds. You can make it easier by taping the saddle to a square block with just the amount you want to sand away proud of the block. If you are looking to lower the action by 0.5mm at the 12th fret youll need to remove twice that much material from the bottom of the saddle, so 1.0mm.
|
|
#9
08-09-2018, 08:20 PM
|
|||
|
|||
|
Quote:
|
|
#11
08-09-2018, 08:37 PM
|
|||
|
|||
|
Quote:
The height of the strings above the top is the design parameter, and the purpose of the adjustable neck is to maintain this design parameter at the design value. Sanding the saddle changes the height of the strings above the top, which can alter the harmonic content (change the tone).
__________________
Rodger Knox, PE 1917 Martin 0-28 1956 Gibson J-50 et al
|
|
#13
08-09-2018, 09:58 PM
|
|||
|
|||
|
Quote:
Isnt really a costly, nor a time consuming procedure either.
__________________
The past: Yamaha AC3R (2016) Rose, Eastman AC822ce-FF (2018) The present:Taylor 614-ce (2018) Clara, Washburn Dread (2012) The future:Furch Rainbow GC-CR (2020)Renata?
|
|
#14
08-09-2018, 11:09 PM
|
|||
|
|||
|
Quote:
 Steve
__________________
Cole Clark Fat Lady Gretsch Electromatic Martin CEO7 Maton Messiah Taylor 814CE
|
|
#15
08-13-2018, 11:36 PM
|
|||
|
|||
|
One of the things mentioned in the Set Up Specification sheet is:
Sighting down the neck, the level plane formed by the 1st to 14th frets should be aligned exactly with the top surface of the bridge. This is an important first step. If this is off, the action most likely needs to be lowered by adjusting the neck. Lay a straightedge on the fretboard and see where the bottom of the straightedge intersects the surface of the bridge. If the bottom of the straightedge is below the top surface of the bridge, it needs neck adjustment and sanding the saddle isnt going to do the trick.
|


