
|
|
#31
 08-13-2012, 10:31 AM
|
|||
|
|||
|
The tapes go on right after the sides are trimmed to height, and the liners go over them. The tapes are no more than about .005" thick, and, being soaked with glue, they don't interfere with the adhesion of the liners that I've been able to discern. The liners help keep the ends of the tapes from peeling. Also, if you stopped the tapes short of the liners, that's where you'd get cracks; just where they're hard to fix.

|
|
#33
08-14-2012, 05:32 PM
|
||||
|
||||
|
Quote:
I'm looking forward to your review of your Pernambuco Sexauer and Klepper once you've had enough time with them.
__________________
Chuck 2012 Carruth 12-fret 000 in Pernambuco and Adi 2010 Poling Sierra in Cuban Mahogany and Lutz 2015 Posch 13-fret 00 in Indian Rosewood and Adi Last edited by ChuckS; 08-14-2012 at 05:41 PM.
|
|
#34
08-25-2012, 06:44 PM
|
||||
|
||||
|
When I was discussing a possible commission with Alan several months ago we were talking about all the possibilities and he added "What I don't like to change is 'my' design features: the headstock and bridge shape, rosette, and so on." I had no issues with that, as I tend to let the luthier make most all of the aesthetic choices anyway. Well it seems to me like he really puts a lot of effort into the design and construction of his rosette, why would I ever want to request him to change that?
Here are the rosette pieces he made: 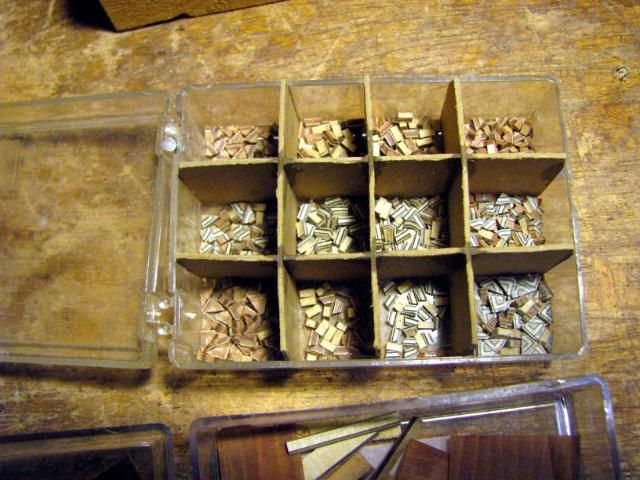 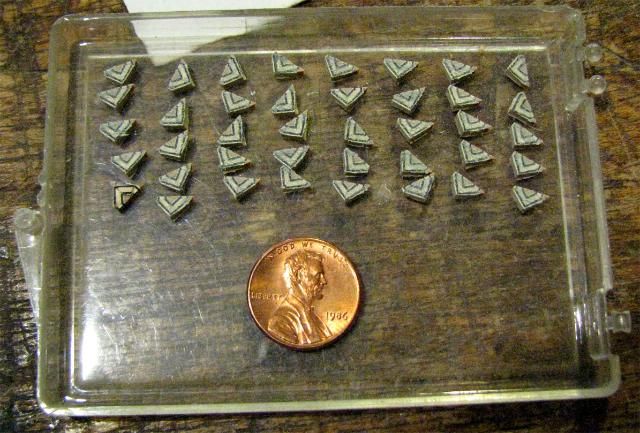 Starting with laminating veneers and cutting them into strips:  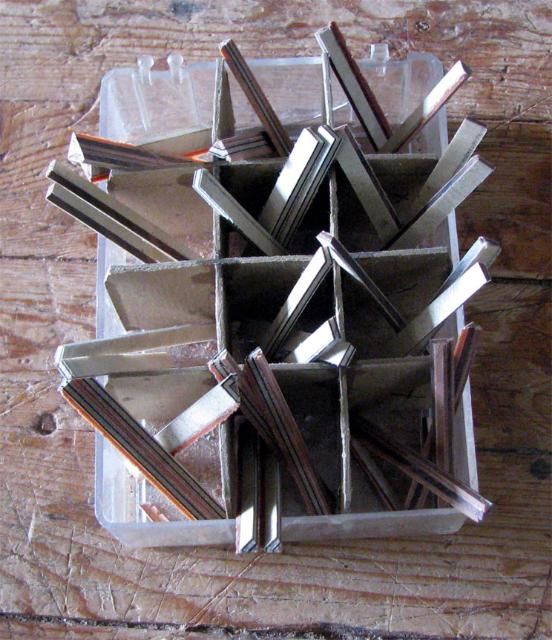 The jigs he uses for his interleaved braid: 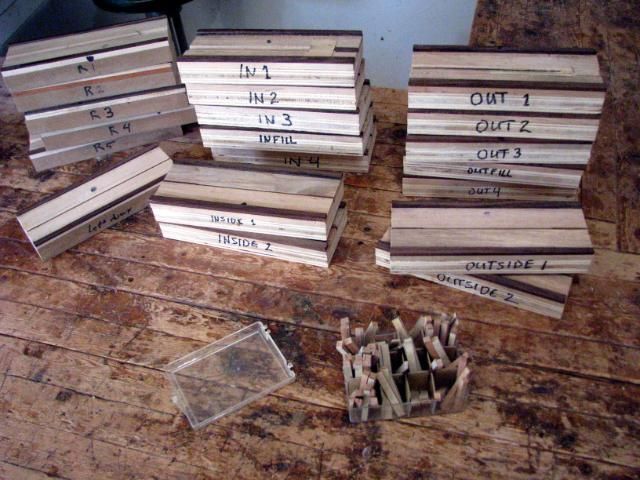 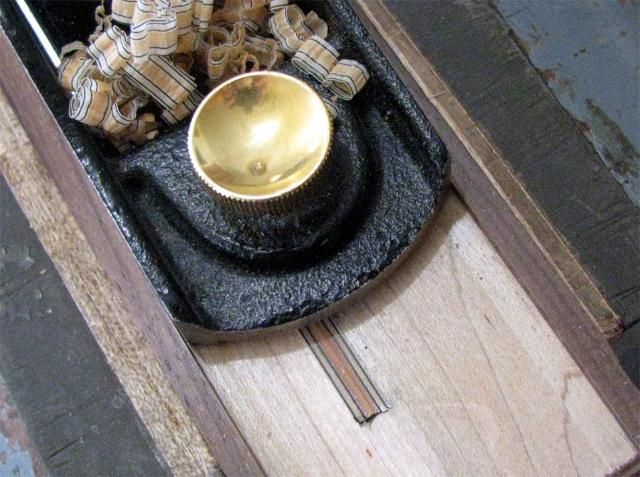 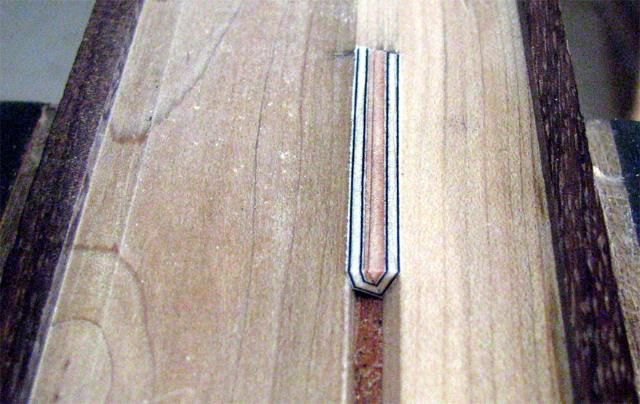
__________________
Chuck 2012 Carruth 12-fret 000 in Pernambuco and Adi 2010 Poling Sierra in Cuban Mahogany and Lutz 2015 Posch 13-fret 00 in Indian Rosewood and Adi Last edited by ChuckS; 08-25-2012 at 06:55 PM.
|
|
#35
09-04-2012, 09:12 PM
|
||||
|
||||
|
I received some more build photos and description from Alan. Instead of putting it all in my words I thought I'd simply post what I received. Here's how he finished the rosette:
Once I've got all the parts for the rosette made, the next thing is to route out the channel in the top, and get ready to put them in. Here's the channel for the interlace, with rings of veneer glued around the inside and outside edges. There are two polyethylene 'keepers' in the channel, to push the veneer rings out. One is the exact width of the interlace, and there is a narrower strip that takes the place of the cross-band background. 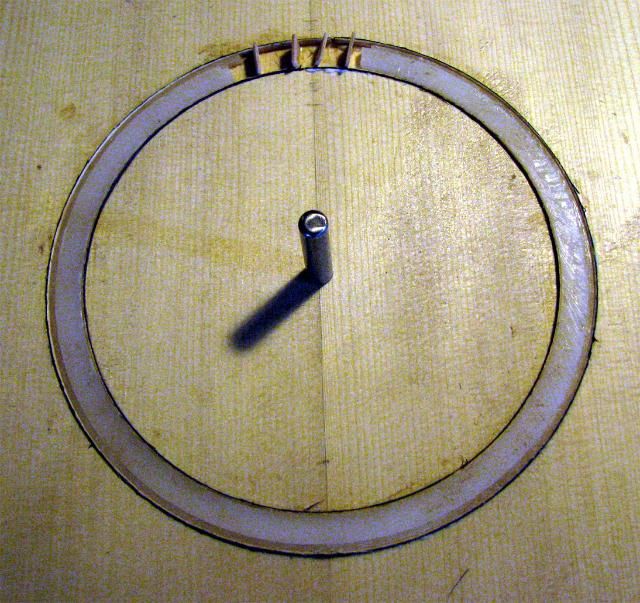 Once the inner and outer veneer rings are in place they help to hold the narrow band of top wood that goes between the interlace of the central ring and the two outer rings of the rosette. This allows the narrow channels to be cut and routed, and the inner and outer rings to be put in. Those are black-dyed and maple veneers against a central strip of bloodwood, which I hope will do a good job of picking up the red of the Pernambuco sides. The cross band cherry background is put in, with hot hide glue, and then I can start inlaying the interlace parts. Here's the first piece, super-glued in place. The rest will be put in with hot hide glue, which allows a bit of re-working to help keep things in line. Putting the first piece in with cyanoacrylate helps it stay in place, since that glue won't release with heat and moisture. 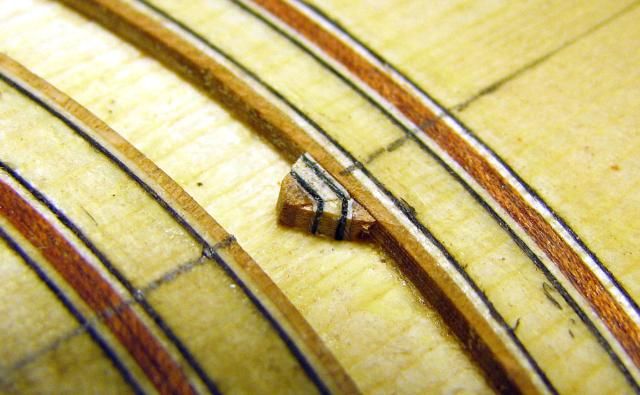 Here's a shot a little later, with two sections of the main color on either side of the first 'buckle'. 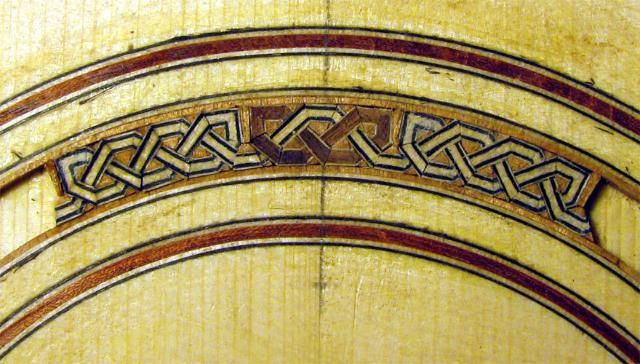 With all of the tiles glued in, the top is cleaned up carefully with a sharp hand plane. 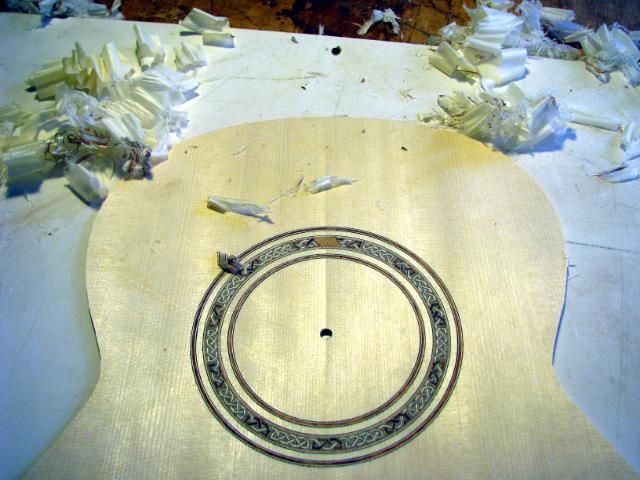 And here it is, scraped smooth. The little 'keystone' piece at the top will fall under the end of the fingerboard. 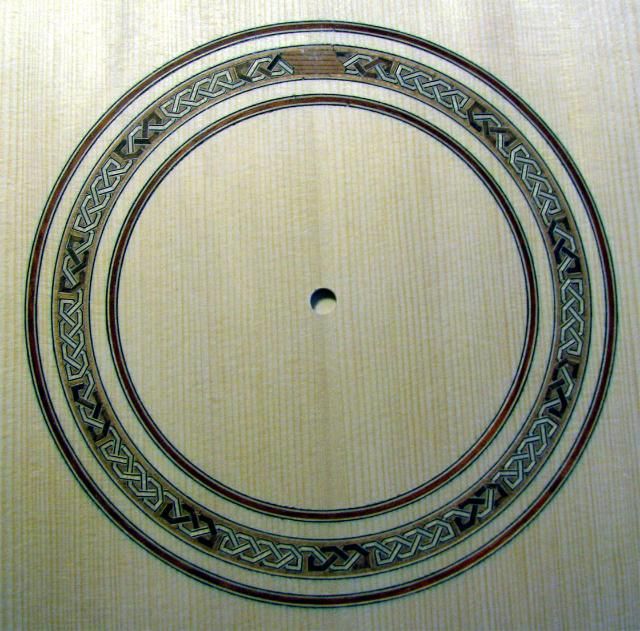
__________________
Chuck 2012 Carruth 12-fret 000 in Pernambuco and Adi 2010 Poling Sierra in Cuban Mahogany and Lutz 2015 Posch 13-fret 00 in Indian Rosewood and Adi Last edited by ChuckS; 09-05-2012 at 11:59 AM.
|
|
#37
09-04-2012, 10:18 PM
|
||||
|
||||
|
Chuck, this looks to be a spectacular instrument in progress. I'm excited to watch the process. Just wonderful. Alan is one of the luthiers on this forum that I truly admire. His knowledge, and his ability to communicate how he applies that knowledge in his instruments is extremely high. I have the utmost respect for him. He is definitely on the short list for my next custom. In the meantime, I'll follow this build with eager anticipation.
Alan, thanks for sharing and contributing to this as well. I, for one, am extremely pleased to be able to follow your work on this build. Mark
__________________
Guitars; Esteban -"Tribute to Paula Abdul L.E." Arturo Fuente- Cigar Box"Hand Made" First Act-"Diamond Bling" Main Street- "Flaming Acoustic" Silvertone-"Paul Stanley Dark Star" Daisy Rock- "Purple Daze"
|
|
#38
09-05-2012, 11:02 AM
|
|||
|
|||
|
Sorrry 'bout all the typoze.....
|
|
#39
09-05-2012, 12:05 PM
|
||||
|
||||
|
Quote:
 . I corrected what I could see, all that may remain are either my fault or my grade school teacher's fault. . I corrected what I could see, all that may remain are either my fault or my grade school teacher's fault.
__________________
Chuck 2012 Carruth 12-fret 000 in Pernambuco and Adi 2010 Poling Sierra in Cuban Mahogany and Lutz 2015 Posch 13-fret 00 in Indian Rosewood and Adi
|
|
#40
09-26-2012, 08:43 PM
|
||||
|
||||
|
I received some more build photos from Alan. For the rest of this post I'm going to insert his explanations of the process:
Here's the top with the bridge plate and soundhole doubler attached, and the sticks for the braces. The doubler is some old Sitka spruce. The bracing is Red spruce from split billets, some old and some newer, which accounts for the color difference. 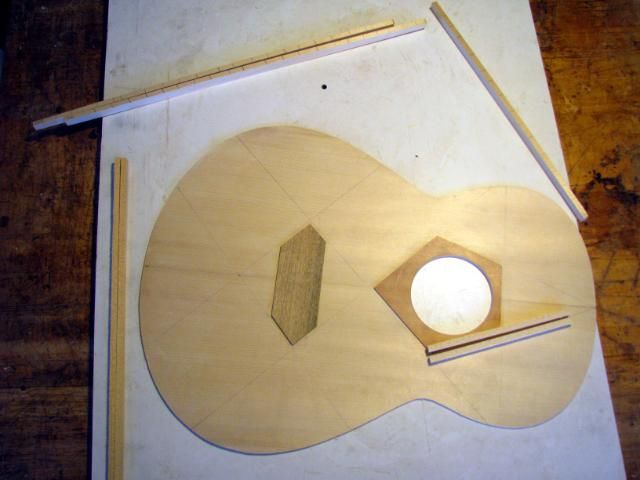 A close-up of the persimmon bridge plate to show how it's shaped. The pencil line on the top marks the 'theoretical' saddle position, and the plate extends forward of that to beyond the front edge of the bridge. Tapering it out avoids a stress riser that can cause the top to 'crease' there. Similarly, the plate extends back past the rear edge of the bridge, and is also tapered for the same reason. It's only full thickness where it has to be; where the ball ends of the strings are. 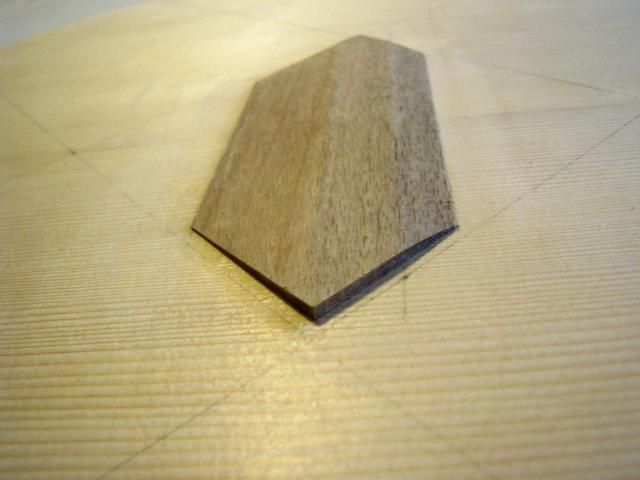 The low braces being glued to the top using hot hide glue and a go-bar deck. 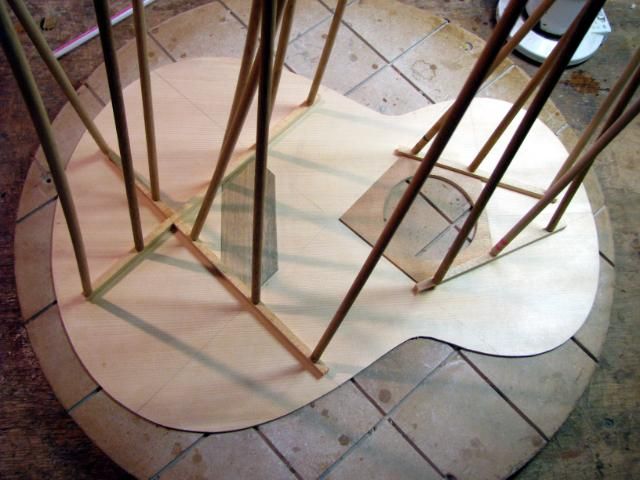 The tall braces are then notched over the low ones, which have been trimmed down at the ends of the bridge plate. The pencil marks on the brace tops are to ensure that I don't glue down the flat side instead of the curved one. 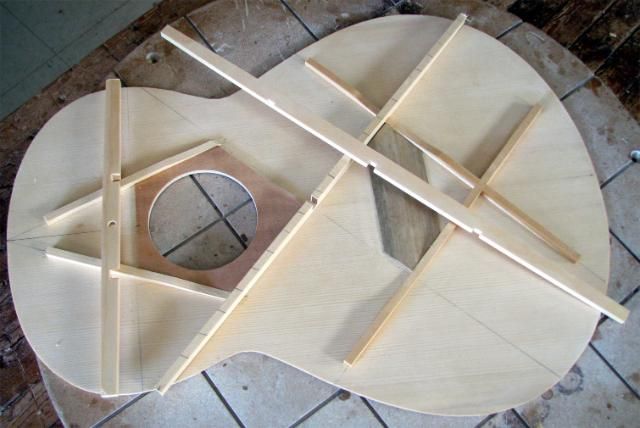 The back braces being glued. These are made of mahogany from an old table leaf: light, stable and stiff, and mellow to work.  The top and back braces are then trimmed to length and notched into the liners. I replaced a section of the low liner with taller stuff where the upper transverse brace and upper arms of the main X meet the side. The deep notches cut away a lot of liner if it's low, and that leaves less support than I like. You can see the notches for the 'A' braces in the neck block chin. 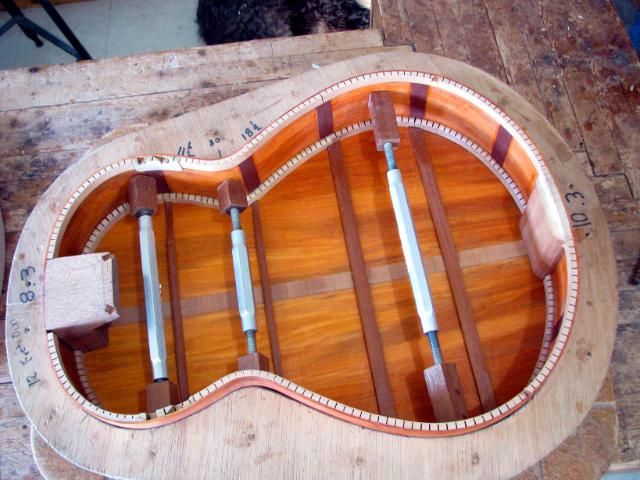 Here's a shot of the top braces all trimmed down after the 'tuning' process 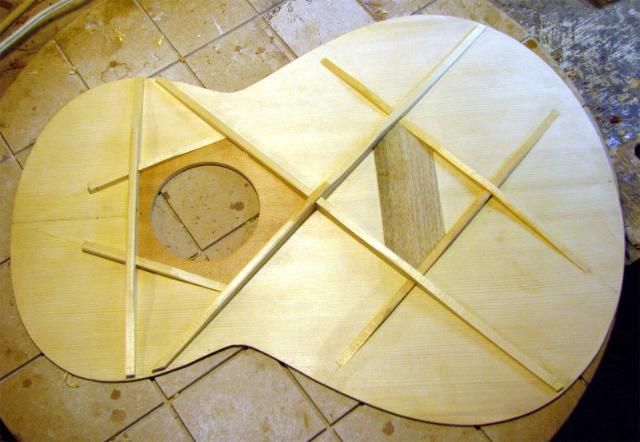 This is the Chladni pattern of the 'ring+' mode, which is the one I spend the most time working on. It's very well formed, and at a good frequency, which is a hopeful sign for the sound of the completed guitar. 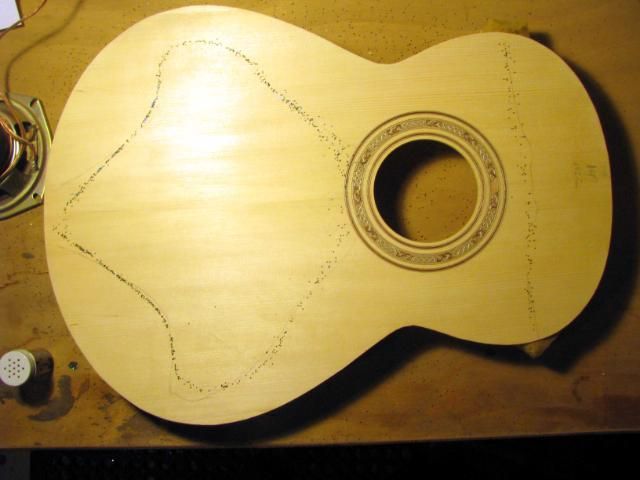 I got the back tuned this morning as well, and so am about ready to close the box up. At that point it will be 90% complete, with 90% left to go....
__________________
Chuck 2012 Carruth 12-fret 000 in Pernambuco and Adi 2010 Poling Sierra in Cuban Mahogany and Lutz 2015 Posch 13-fret 00 in Indian Rosewood and Adi
|
|
#41
09-27-2012, 08:30 AM
|
|||
|
|||
|
Quote:
Chuck (and Al), it looks great! The color of the pernambuco is really nice and the mahogany back braces against it is better. I'm hoping I get to see this one before it heads west.
__________________
Burton Boston, MA
|
|
#42
09-28-2012, 02:56 PM
|
||||
|
||||
|
The box is now closed:
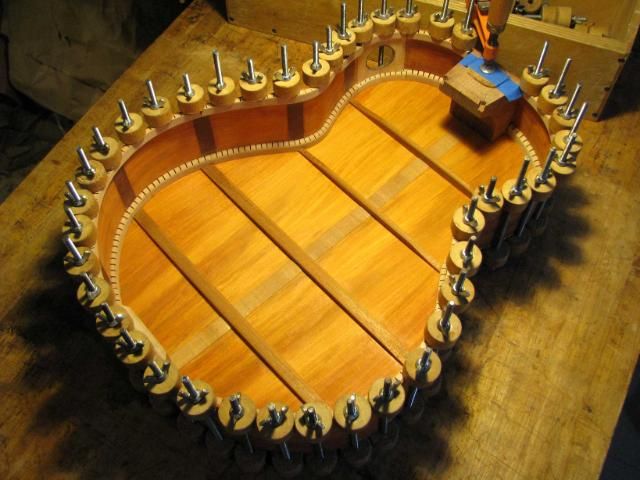 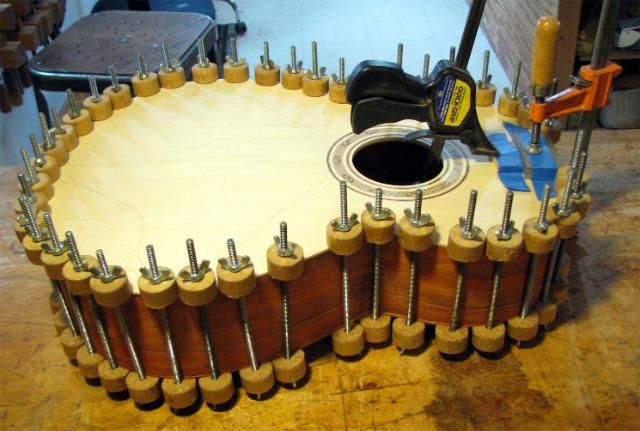 Up next is the binding, and the recurve bevel cutaway.
__________________
Chuck 2012 Carruth 12-fret 000 in Pernambuco and Adi 2010 Poling Sierra in Cuban Mahogany and Lutz 2015 Posch 13-fret 00 in Indian Rosewood and Adi
|
|
#43
09-28-2012, 05:52 PM
|
||||
|
||||
|
West, you say? I'd sure like a chance to hear this guitar!
|
|
#44
09-28-2012, 06:49 PM
|
||||
|
||||
|
The skill that goes into that inlay is unbelievable. Love those photos. Great build thread.
__________________
Circa OM-30/34 (Adi/Mad) | 000-12 (Ger/Maple) | OM-28 (Adi/Brz) | OM-18/21 (Adi/Hog) | OM-42 (Adi/Braz) Fairbanks SJ (Adi/Hog) | Schoenberg/Klepper 000-12c (Adi/Hog) | LeGeyt CLM (Swiss/Amzn) | LeGeyt CLM (Carp/Koa) Brondel A-2 (Carp/Mad)
|


