
|
|
#1
 07-09-2018, 06:50 AM
|
|||
|
|||
|
It's hard to believe that we are already half way through 2018. I haven't posted anything this year, so I thought it was a good time to share a little bit of what I'm working on. I'm currently working on a batch of three guitars for The North American Guitar. Actually it was a batch of four, but the first guitar of the four was a direct commission and it's already completed and ready for finish. And it's a replica of a guitar that I posted here on my last thread and I don't want to bore with a repeat.
All three guitars will be RL15.5 models, with Swiss moon spruce soundboards and a cutaway. For back and sides, one will be Honduran mahogany with beeswing figure, one will be figured Koa, and the last will be curly American Walnut.  IMG_5190 by ryan gerber, on Flickr IMG_5190 by ryan gerber, on Flickr[IMG]  IMG_5191 by ryan gerber, on Flickr[/IMG] IMG_5191 by ryan gerber, on Flickr[/IMG][IMG]  IMG_5189 by ryan gerber, on Flickr[/IMG] IMG_5189 by ryan gerber, on Flickr[/IMG]I've been working on these guitars for a few weeks now. Here are a few pics of the process of getting the rims together. Gluing the odd shaped neck block to the sides. [IMG]  IMG_5323 by ryan gerber, on Flickr[/IMG] IMG_5323 by ryan gerber, on Flickr[/IMG]The initial shaping of the backside of the rim. I use a motorized sanding dish to put the 15' dome on the back, but I think this saves me a little time to cut close to the final shape with the router. [IMG]  IMG_5315 by ryan gerber, on Flickr[/IMG] IMG_5315 by ryan gerber, on Flickr[/IMG]Shaping the bottom foot of the neck block. (neck block inspired by one of my favorite guitar makers, Burton Legeyt. He was one of the first builders for me to follow, and his neck block was an idea that I latched onto pretty quickly. I like the extra support in all directions). [IMG]  IMG_5325 by ryan gerber, on Flickr[/IMG] IMG_5325 by ryan gerber, on Flickr[/IMG][IMG]  IMG_5327 by ryan gerber, on Flickr[/IMG] IMG_5327 by ryan gerber, on Flickr[/IMG]Applying the seal coat of shellac. Sorry, no secret sauce here, just the hardware variety of brush on shellac. I like to wipe it away with a paper towel right after brushing it on to leave a nice thin even layer with no runs or shinny parts. [IMG]  IMG_5330 by ryan gerber, on Flickr[/IMG] IMG_5330 by ryan gerber, on Flickr[/IMG]The completed rim. [IMG]  IMG_5335 by ryan gerber, on Flickr[/IMG] IMG_5335 by ryan gerber, on Flickr[/IMG]Three rims ready for backs. The sides of my guitars are laminated with three layers of .050" material. I use Spanish cedar for the inner two layers, which allows for a very good stiffness to weight ratio. The epoxy bleeding through the sides shows how porous the different woods are. Apparently the mahogany leaks like a sieve. This certainly makes pore filling a bit easier when it comes to that point in the finish process. [IMG]  IMG_5333 by ryan gerber, on Flickr[/IMG] IMG_5333 by ryan gerber, on Flickr[/IMG]I'm a bit further along in the process but I'll stop here for now. Also, breakfast is ready!
__________________
Ryan Gerber 
|
|
#3
07-09-2018, 09:02 AM
|
|||
|
|||
|
Do you use Spanish cedar for the blocks and the linings as well? The interior of the guitar is so pretty that it's a shame you have to cover it up!
__________________
Hatcher Woodsman, Collings 0002H, Stella Grand Concert
|
|
#4
07-09-2018, 09:38 AM
|
|||
|
|||
|
Quote:
__________________
Ryan Gerber
|
|
#5
07-11-2018, 08:48 PM
|
|||
|
|||
|
The backs of all three guitars are now joined to the rims, and I've started the rosettes.
Here is the rosette for the mahogany guitar, pre installation in the top. The red ring is amboyna burl, thicker lines are mahogany and walnut, and the darker pieces with really fine lines are made from super thin sheets of paper. [IMG]  IMG_5354 by ryan gerber, on Flickr[/IMG] IMG_5354 by ryan gerber, on Flickr[/IMG] [IMG]  IMG_5355 by ryan gerber, on Flickr[/IMG] IMG_5355 by ryan gerber, on Flickr[/IMG]And the rosette for the Koa guitar. [IMG] 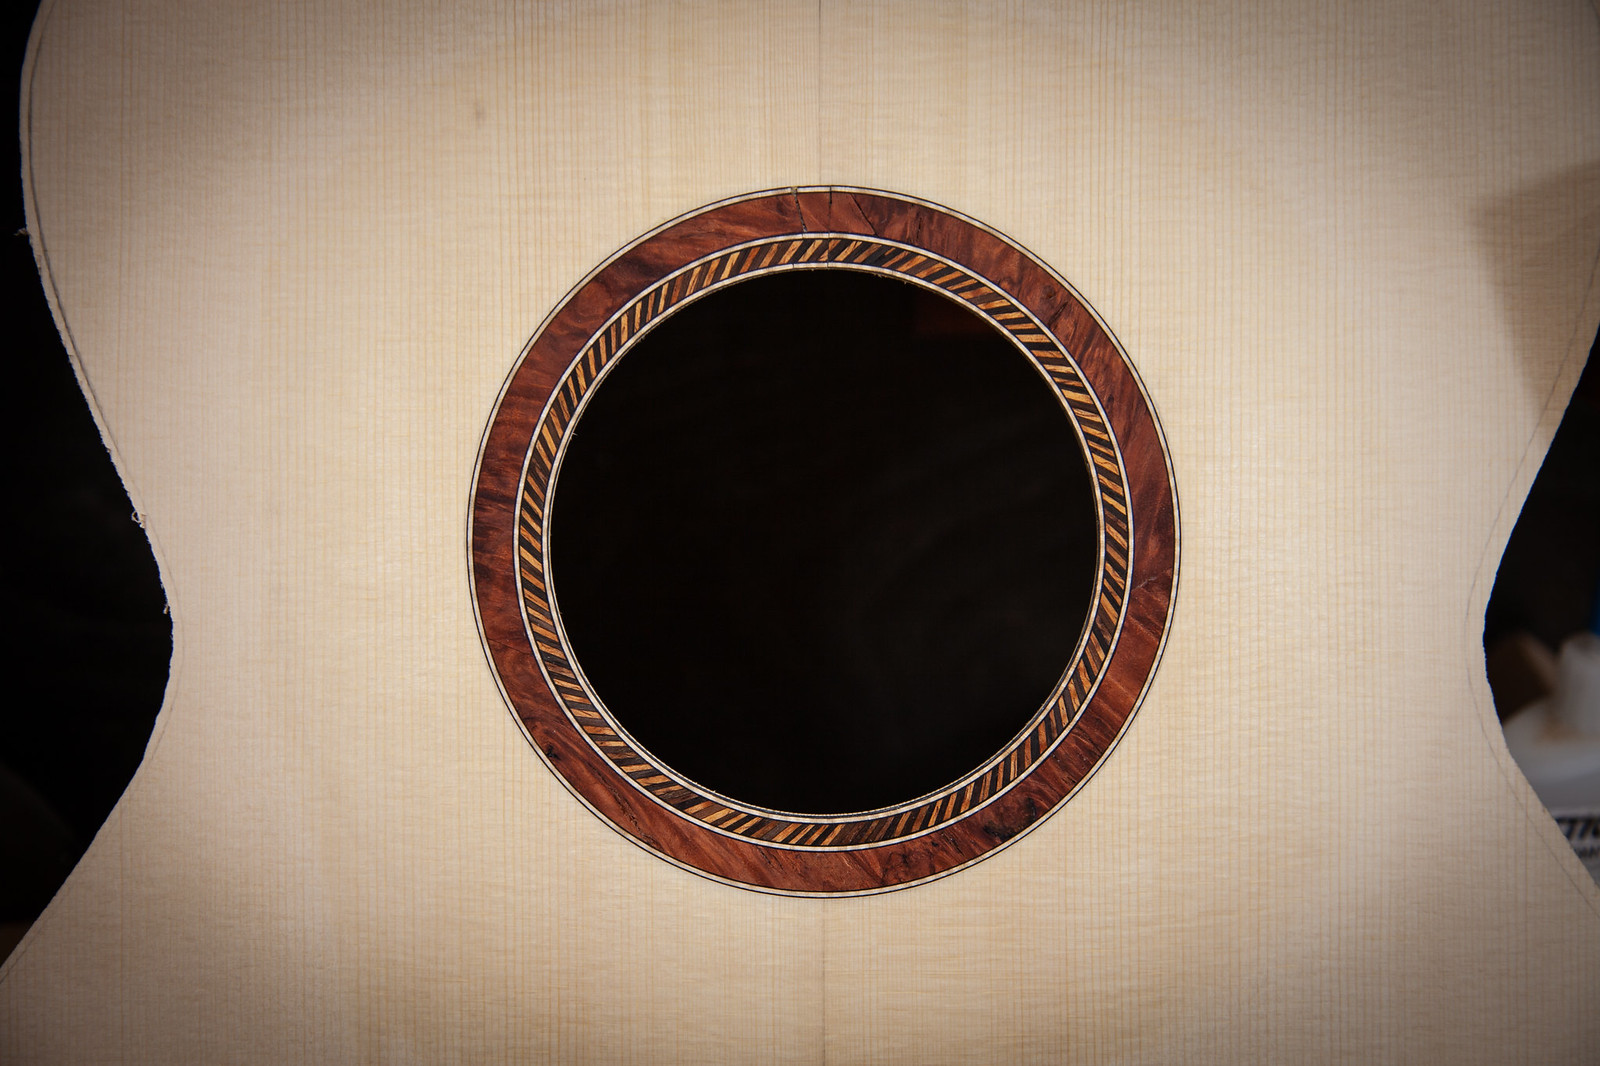 IMG_5367 by ryan gerber, on Flickr[/IMG] IMG_5367 by ryan gerber, on Flickr[/IMG][IMG] 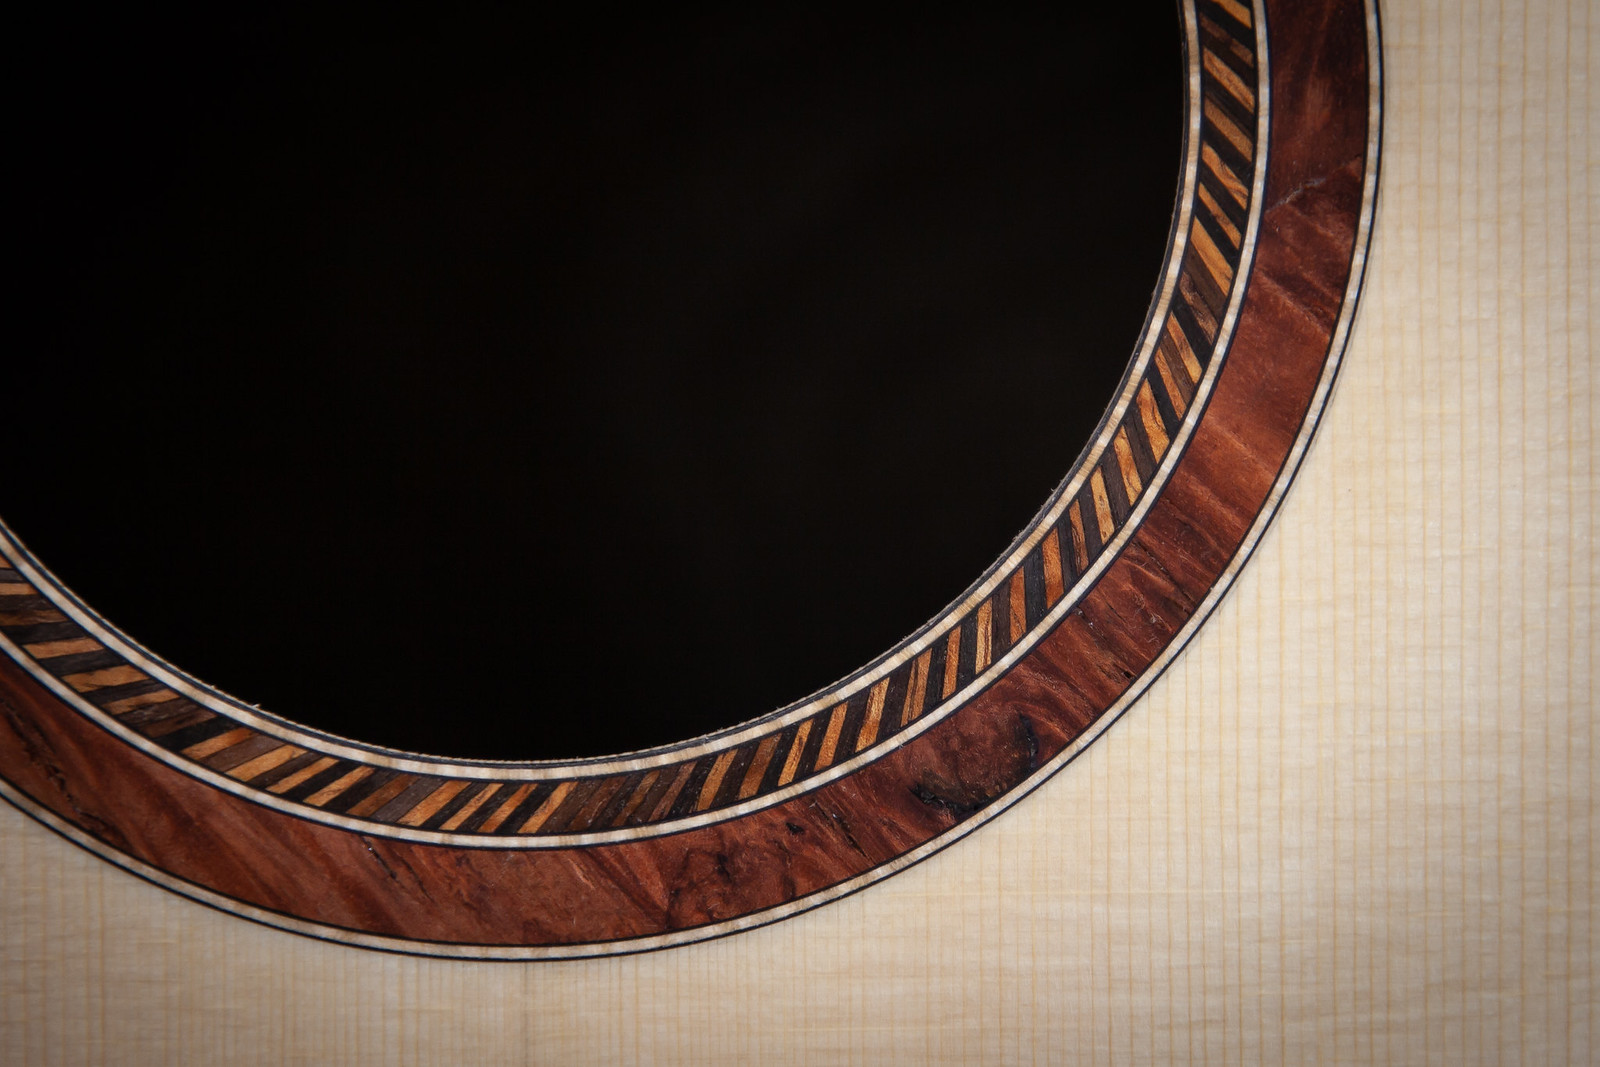 IMG_5368 by ryan gerber, on Flickr[/IMG] IMG_5368 by ryan gerber, on Flickr[/IMG]
__________________
Ryan Gerber
|
|
#7
07-12-2018, 09:14 AM
|
|||
|
|||
|
Those rosettes are exquisite!
__________________
2013 Stehr Auditorium (Carpathian/Myrtle) 2015 Stehr Auditorium (Adi/BRW) 2020 Baranik Meridian (Blue Spruce/Manchinga) 2020 Wilborn Arum (Tunnel 14/Coco) 2021 Kinnaird Graybeard (BC Cedar/Bog Oak) 2022 Kinnaird CS Student Build (Adi/Padauk) 2023 Kinnaird FS (Italian/Koa)
|
|
#8
07-13-2018, 01:00 PM
|
|||
|
|||
|
Great work. Really interesting neck block design, looks like excellent neck support. Love the rosette 's too
|
|
#9
07-14-2018, 09:20 AM
|
|||
|
|||
|
Beautiful rosettes, Ryan !!! I especially like the 1st one.
|
|
#10
07-17-2018, 07:14 PM
|
|||
|
|||
|
Thanks everyone for the compliments on the rosettes so far. I definitely find joy in making a rosette. It's a fun challenge to make something interesting out of that small little curved space.
Here is the third rosette, which will belong to the Walnut guitar. Towards the end, finishing up the inside purfling lines. [IMG] 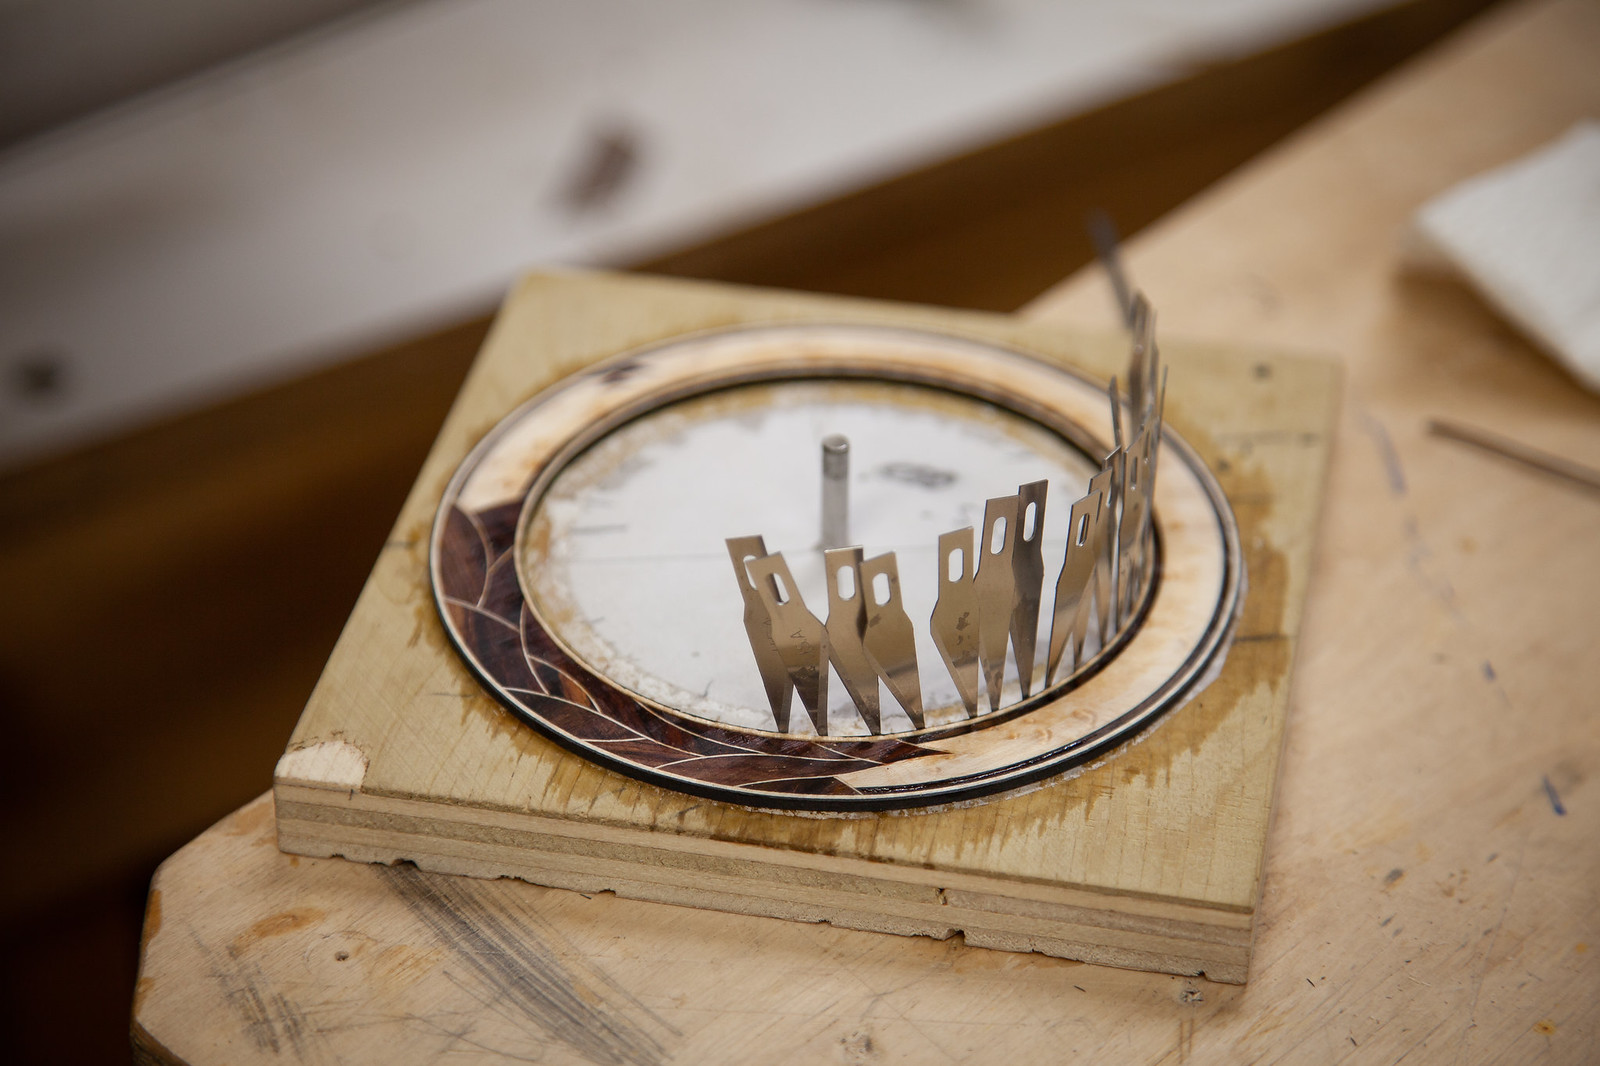 IMG_5377 by ryan gerber, on Flickr[/IMG] IMG_5377 by ryan gerber, on Flickr[/IMG]And the finished product minus the most inner ring, which will be installed after the soundboard is brought to it's final thickness. I've done this design a handful of times over the last couple of years, and I'm always trying to make small refinements. In this one, I've stuck with only one species of wood for the mosaic pieces, which I think I like better than the times that I've used an assortment of species. [IMG] 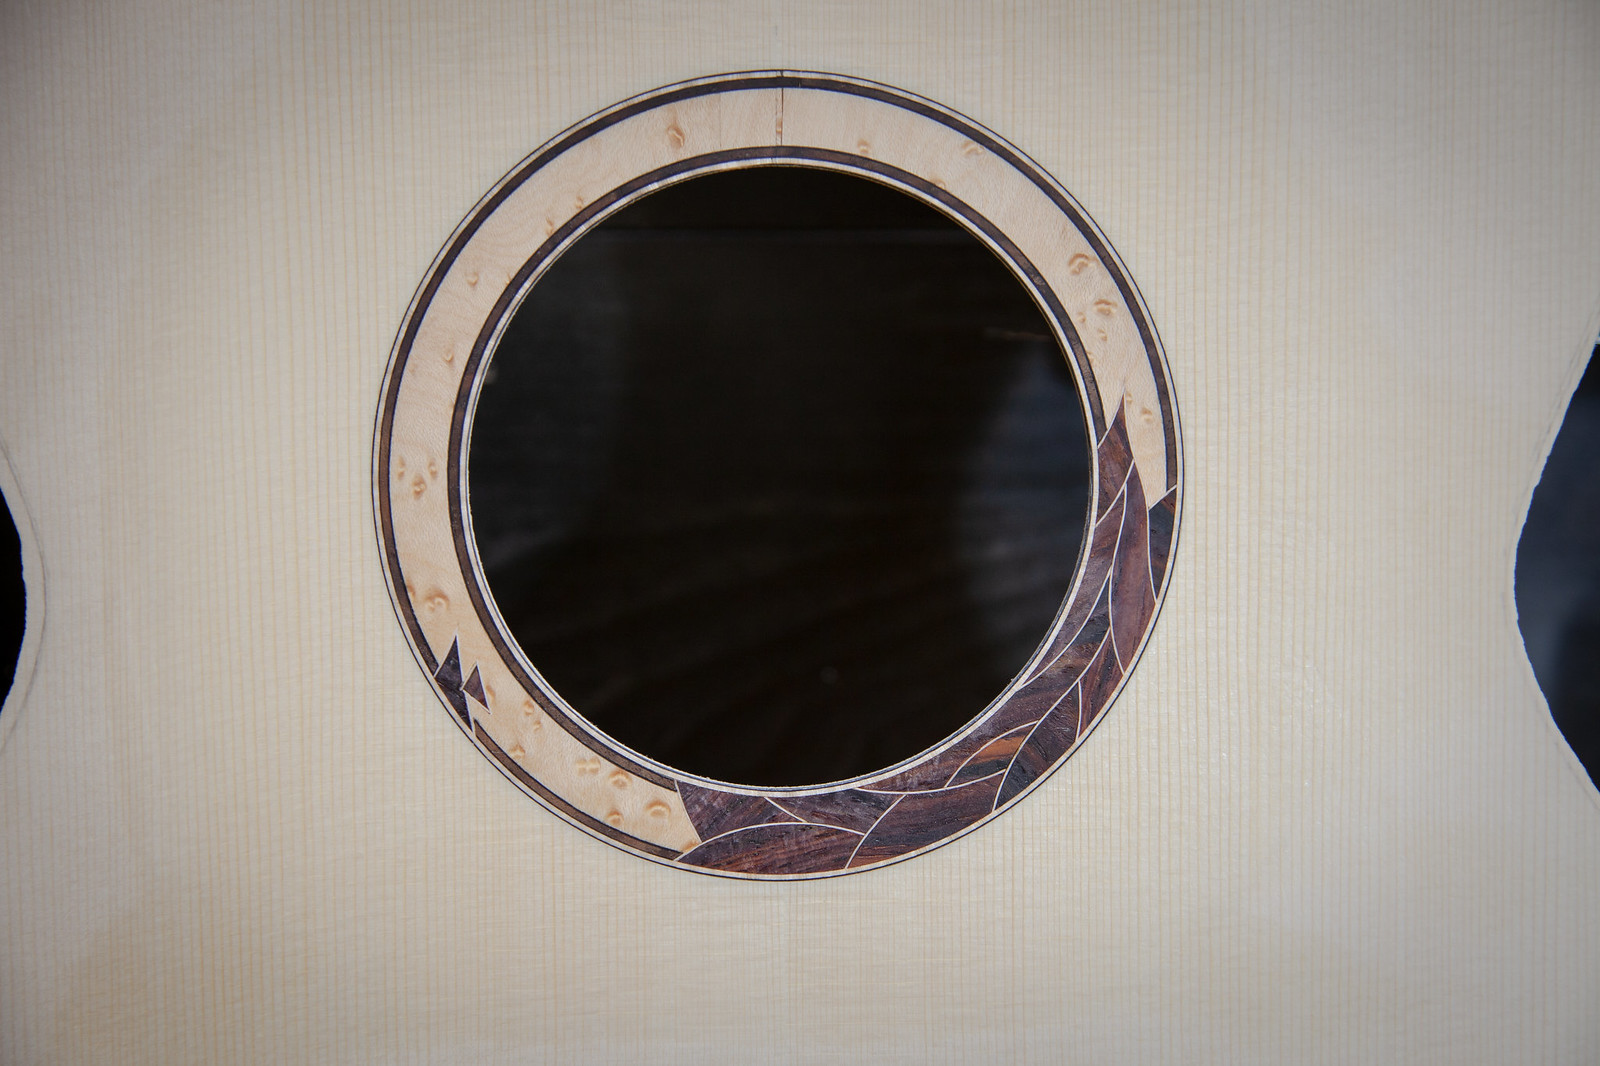 IMG_5389 by ryan gerber, on Flickr[/IMG] IMG_5389 by ryan gerber, on Flickr[/IMG]
__________________
Ryan Gerber
|
|
#12
07-18-2018, 07:31 AM
|
|||
|
|||
|
Quote:
__________________
Ryan Gerber
|
|
#13
07-18-2018, 10:22 AM
|
||||
|
||||
|
Wow, I'm going to be following this one. Lovely stuff!
__________________
Circa OM-30/34 (Adi/Mad) | 000-12 (Ger/Maple) | OM-28 (Adi/Brz) | OM-18/21 (Adi/Hog) | OM-42 (Adi/Braz) Fairbanks SJ (Adi/Hog) | Schoenberg/Klepper 000-12c (Adi/Hog) | LeGeyt CLM (Swiss/Amzn) | LeGeyt CLM (Carp/Koa) Brondel A-2 (Carp/Mad)
|
|
#14
07-18-2018, 10:43 AM
|
|||
|
|||
|
Quote:
__________________
Ryan Gerber
|
|
#15
07-23-2018, 05:00 AM
|
|||
|
|||
|
I figure since Bruce has a thread going with his new apprentice, I would share mine (: Not very many days pass by without my 6 year old daughter asking me if she can watch what I'm doing while I work. She loves to vacuum the shop, adjust my light so I can see better, use the spokeshave, and recently she's moved on the the file and rasp drawer.
I love building guitars, and I don't take for granted that I get to do it everyday. Equally, I love that I get to be at home with the kids and be an active part in what they learn and how they learn. Most days anyways (: [IMG] 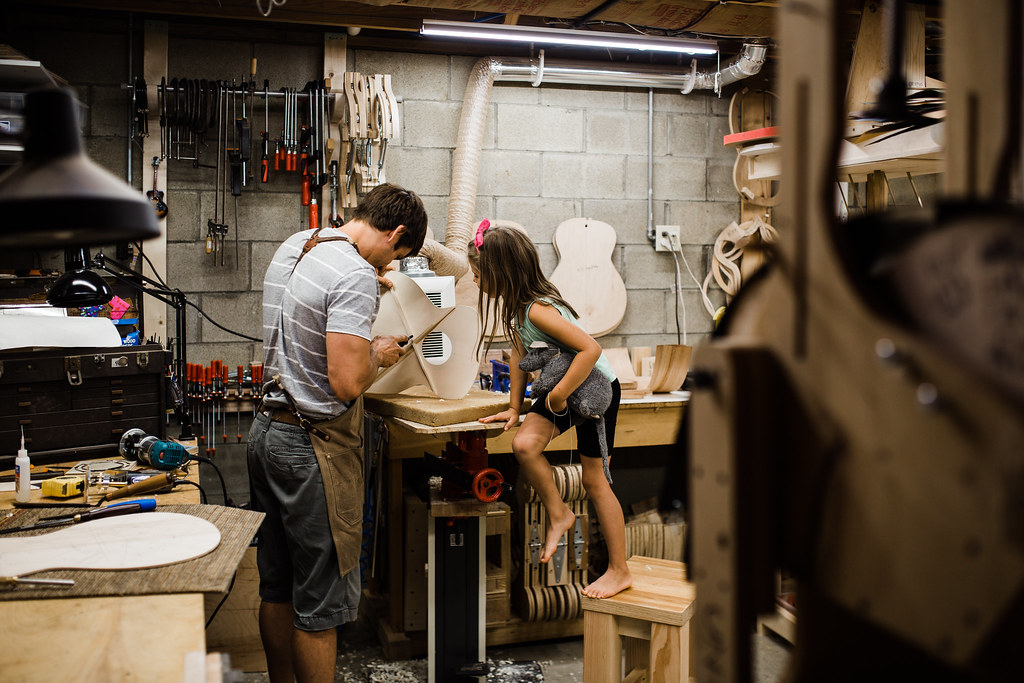 BD4A1549 by ryan gerber, on Flickr[/IMG] BD4A1549 by ryan gerber, on Flickr[/IMG][IMG] 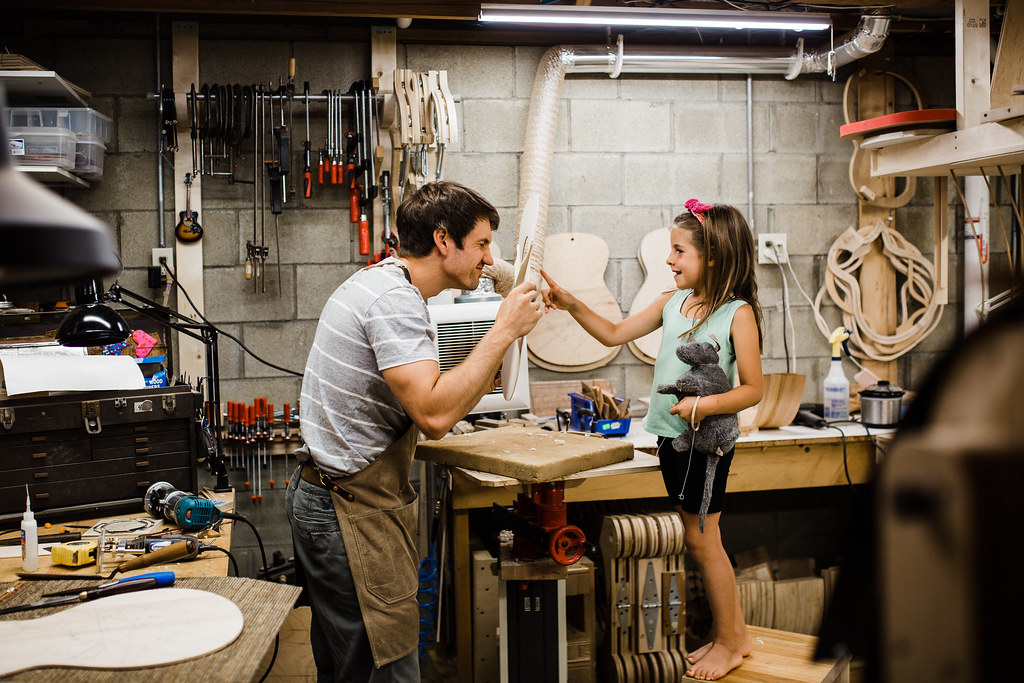 BD4A1544 by ryan gerber, on Flickr[/IMG] BD4A1544 by ryan gerber, on Flickr[/IMG]As for the progress of the guitars, I'm working towards getting all three tops braced and ready for joining to the body. I hope to finish that process today, and then start working on the bodies this week. My simple setup for testing the deflection of soundboards and backs. [IMG]  IMG_5393 by ryan gerber, on Flickr[/IMG] IMG_5393 by ryan gerber, on Flickr[/IMG]For anyone wondering about this chisel, it's an incannel patternmakers chisel and it's my absolute favorite for shaping braces. The curved geometry gives a few advantages. It naturally hollows out more of the side of the brace, which takes a few extra grams off the weight of the top, without radically changing the stiffness of the braces. It also is less prone to tearing out when you hit a section of grain runout. And I love the bent neck handle. It keeps your hand further away from the cutting surface and gives you a better angle of approach. Does anyone else out there use these chisels for brace carving? [IMG] 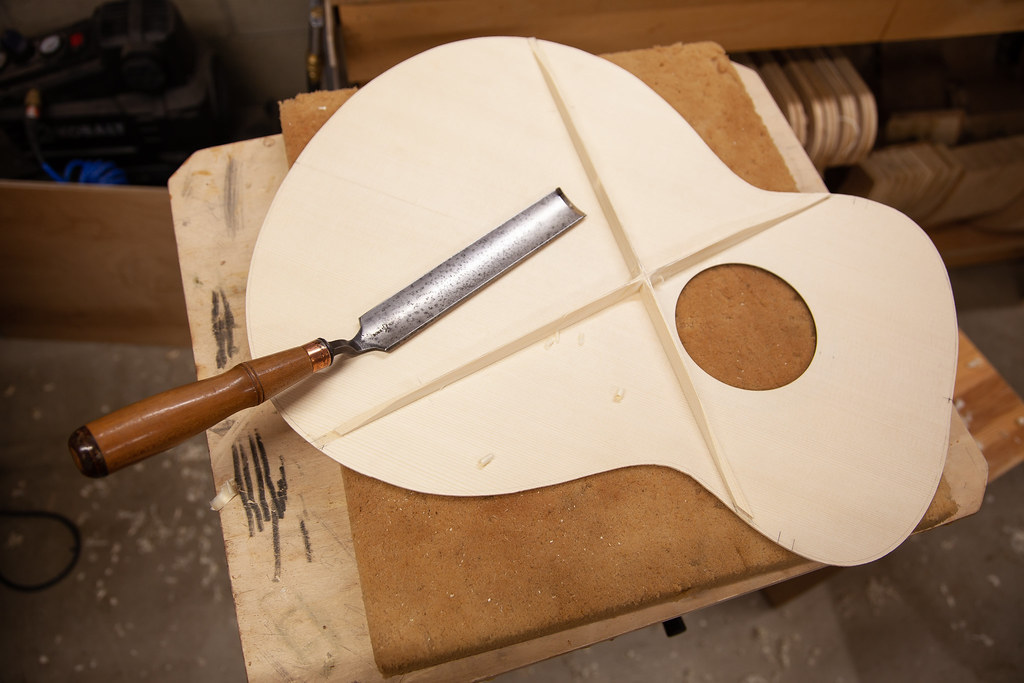 IMG_5396 by ryan gerber, on Flickr[/IMG] IMG_5396 by ryan gerber, on Flickr[/IMG]My shop tends to stay pretty cool in the summer because it's in the basement and the heat lamp helps a lot with using hide glue. [IMG] 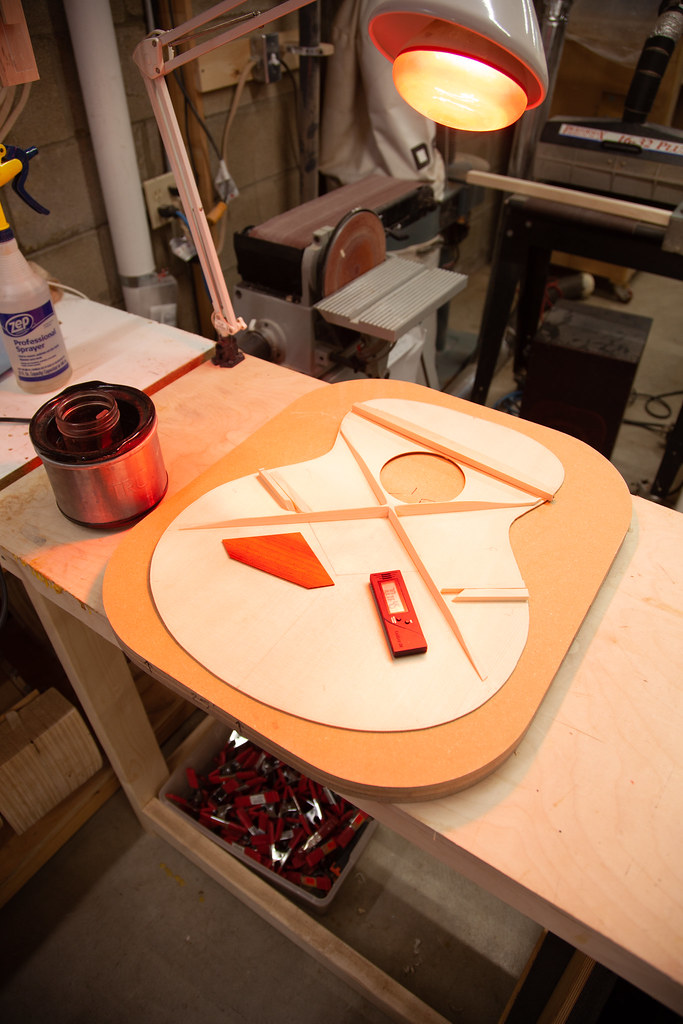 IMG_5399 by ryan gerber, on Flickr[/IMG] IMG_5399 by ryan gerber, on Flickr[/IMG][IMG] 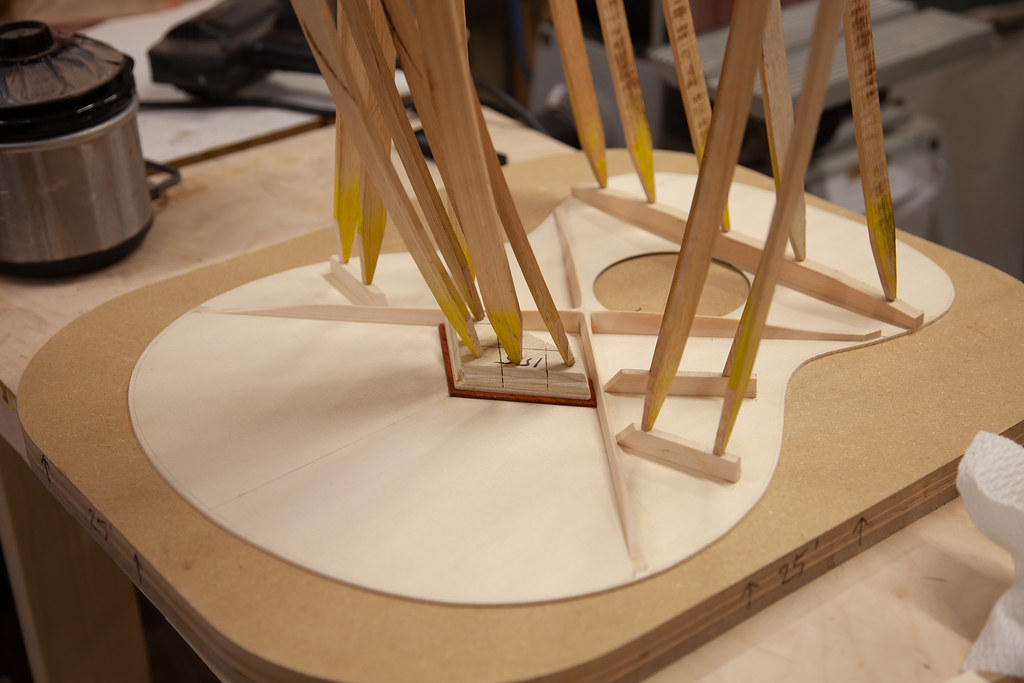 IMG_5400 by ryan gerber, on Flickr[/IMG] IMG_5400 by ryan gerber, on Flickr[/IMG]
__________________
Ryan Gerber
|


