
|
|
#16
 10-13-2013, 10:10 AM
|
||||
|
||||
|
Quote:
The woodwork on the body for this guitar is nearly done! Just finished up the binding yesterday and all that's really left is to cut the mortise and clean everything up. I start the binding process by cleaning up the sides and then installing an end wedge...  Once that has dried and been sanded, I rout the main binding channels. In the picture below I've taped a strip of the maple purfling to the top. Because the router references off of the top, when it passes over this area the cut is bumped out slightly (the thickness of the maple + tape to be exact). Bumping it out like this allows me to miter the maple purfling strips with the maple strips in the wedge.  Here's a shot of the binding jig I use...  By changing out the aluminum rollers and the depth of the router bit you can custom cut for essentially any binding/purfling combination. It takes a bit of practice and concentration, but once you've got it, it's a really flexible and fast way to make the cuts. My concentration was tested once at Sergei's when I was routing a Adi/Brazilian guitar and a woodchuck burst out from under the bench and ran through my legs in the middle of a cut (both the guitar and woodchuck were fine)! Ready for binding.... 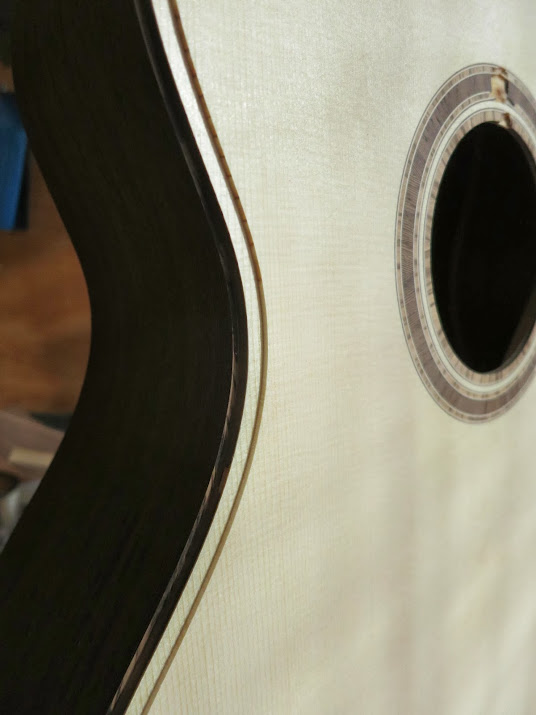 All taped up... 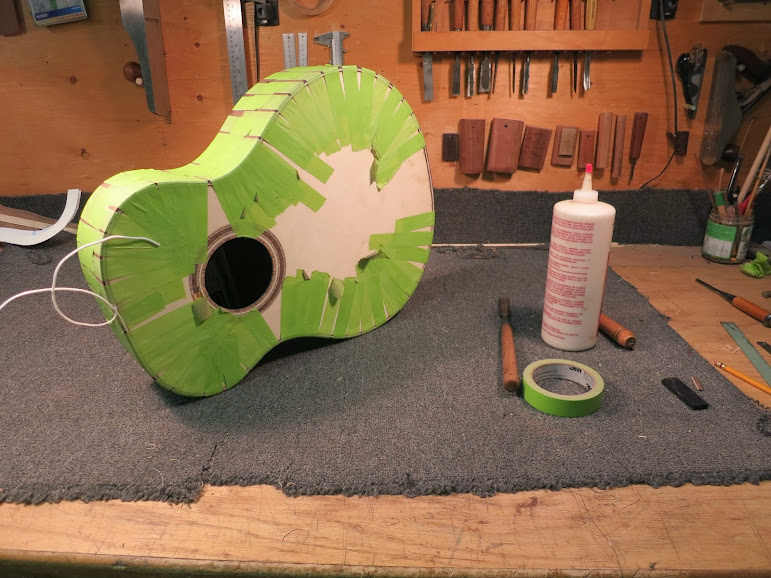 Bound!   Mike 
|
|
#17
10-17-2013, 10:25 AM
|
||||
|
||||
|
Now that the woodwork is mostly done on the body, it's time to get the neck prepped for carving!
Somewhere underneath all of that tape there is a fingerboard...  There are also some head veneers in that mass of clamps...  I'm hoping to get the fingerboard glued by the end of the day today so I can carve tomorrow. If everything goes according to plan I should be able to have all of the woodwork done in the next few days and begin french polishing this weekend! Mike
|
|
#18
10-20-2013, 09:57 AM
|
||||
|
||||
|
Once the head veneers are dry, it's time to rout the headstock shape. This kind of routing can be risky -- it can be very easy to tear out a chunk of the headstock if you try to rout around a corner. To help prevent that, you can see that my headstock template has two sides. This allows me to first I rout the top of the headstock and scoops while there is still a bunch of excess material. Once those cuts are made, simply flip the template around and rout the sides...
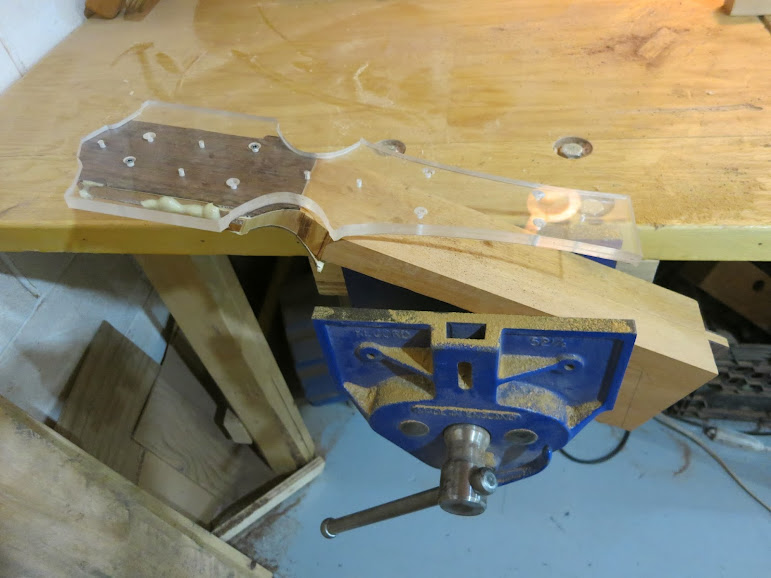 This is also about the time I finish up my fingerboard prep. Below I've just cut the end of the fingerboard to it's final shape (it matches the top of my headstock)...  And now the fingerboard is glued on and the neck is ready to be carved today!  Mike
|
|
#19
10-23-2013, 10:57 AM
|
||||
|
||||
|
Woodwork is done, pores are filled, time to french polish!
 Mike
|
|
#20
10-23-2013, 11:28 AM
|
|||
|
|||
|
Quote:
I didn't know that a finish could take 3 weeks, I can understand why luthiers favour lacquer finishes! Great progress on the guitar, I've been meaning to head to TAMCO if your guitar is there when I make the journey to Brighton I will definitely play it!
|
|
#21
01-07-2014, 06:46 PM
|
||||
|
||||
|
Greetings everyone!
It's been a little while since I've posted on here -- a few unexpected trips last fall and the typical holiday cross-country shuffle led to a longer time away from the shop than I would have liked. This guitar was basically put on hold mid-October but now that I'm back in the shop full time it should get finished up in the next few weeks. Here's how it looked this afternoon when I pulled it down of the shelf for the first time in a couple of months... 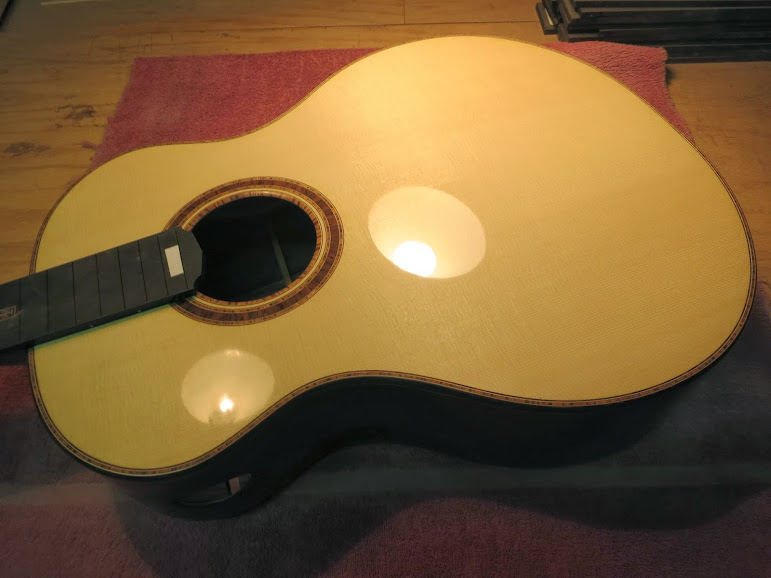  I'm quite happy with how the french polish is looking and if nothing else it's had plenty of time to dry! I'll be doing some final touches on the neck and starting in on the bridge in the next few days. I'm hoping to have the initial string-up sometime next week! Mike ps. One of my trips was spending a few weeks in Abu Dhabi visiting my brother and his family before they moved back to Boston. I was blown away by some of the designs and mosaics in the mosques and think I've found the source of inspiration for one of my next show guitars...
|
|
#22
01-09-2014, 11:16 AM
|
|||
|
|||
|
I am looking forward to following this guitar Mike. It looks great so far.
|
|
#23
01-13-2014, 10:25 AM
|
||||
|
||||
|
The neck is attached!
 Getting close... Mike
|
|
#24
01-14-2014, 06:36 PM
|
||||
|
||||
|
This is looking sooooooo great Mike! Love the woodchuck story too!

__________________
David Wren
|
|
#25
01-15-2014, 10:17 AM
|
||||
|
||||
|
Quote:
I made some good progress on this guitar yesterday. Every time I glue a bridge on with the vacuum clamp I can't help but think of Han Solo trapped in carbonite...  After the bridge went on I got the fingerboard prepared for fretting and took a fancy picture...  Today I'll finish up the fretwork, make a nut and saddle, and might even do an initial string up! Really really excited to hear how this one (and my revived bracing pattern) sounds... Mike
|
|
#27
01-17-2014, 11:41 AM
|
||||
|
||||
|
Exciting day yesterday as I got to put the strings on for the first time. Still needs a chance to stretch out and settle into being a guitar, but so far I'm really happy with how it sounds. I'll try to get a video or some audio posted soon!
 Mike
|
|
#28
01-17-2014, 11:46 AM
|
||||
|
||||
|
It looks absolutely phenomenal Mike ... love it!
__________________
David Wren
|
|
#29
01-27-2014, 09:03 PM
|
||||
|
||||
|
Finally got a chance to record a video demo for this guitar...
http://youtu.be/hhLoN0Cxpbg I did do a very slight tweak on the audio -- there was a faint background hiss that I reduced. Other than that, no reverb, compression, or audio trickery. Also, the right channel is the mic next to my ear pointed at the sound port and the left channel is the mic in front. Thought it might be interesting to see if any difference can be detected between the player/audience perspective! I'm extremely happy with how this one turned out and, as I suspected, I think this rejuvenated bracing pattern will be sticking around for a bit! Mike
|
|
#30
01-28-2014, 10:29 AM
|
|||
|
|||
|
This is beautiful.
|


