|
|
#16
 05-11-2012, 10:10 AM
|
|||
|
|||
|
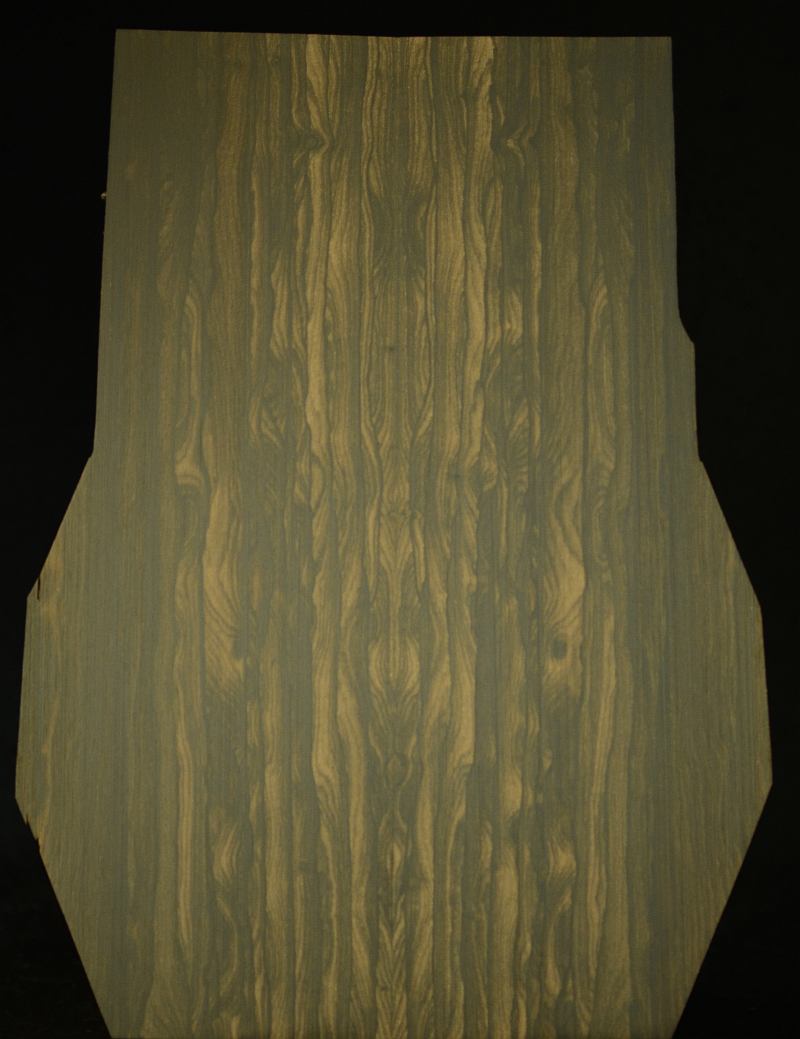
I've got an OM Zircote & Cedar guitar - it's a fantastic combination! Of all my guitars, it's the one I play the most! Terrific guitar by John Kinnaird.
Quote:

|
|
#17
05-15-2012, 02:11 PM
|
||||
|
||||
|
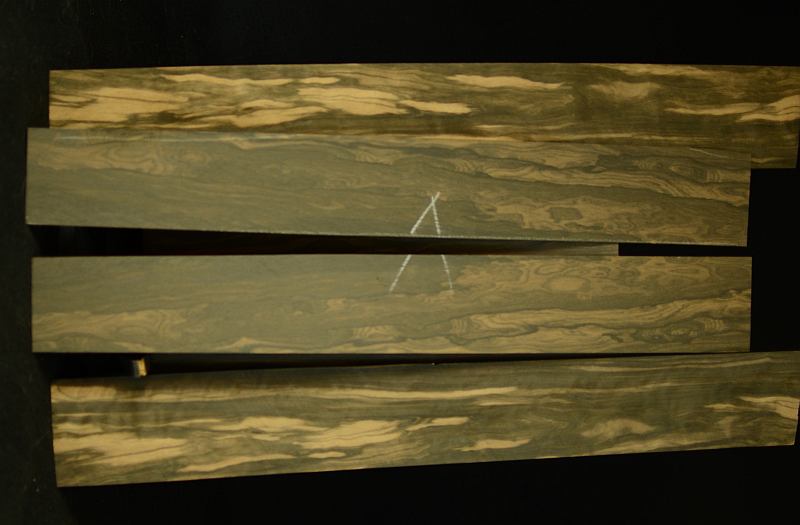
I am wrapping up a couple other guitars, but I did get back to work on this one a bit. I have to get some photos processed, as the "rim" is starting to take shape.
In the meantime here is a look at the sides and how they just lay on and in the molds. 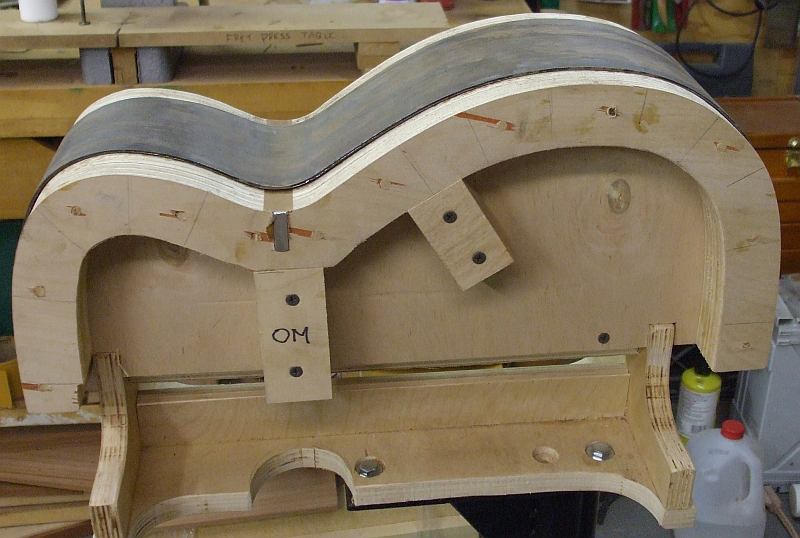 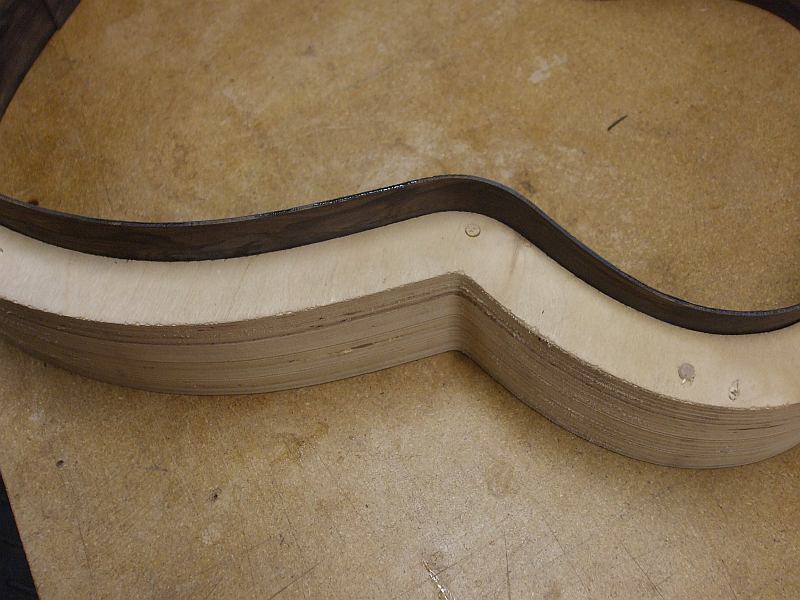 Ziricote is one of those woods that can really be helped with the double side treatment as it has been know to crack. After some diliberation, I decided to add one more very thin ply to the inside of the side sets and get the whole thing to be just that much more stable. It did add a little mass to the guitar, but in a place that I don't mind adding a little wieght in exchange for stability and stiffness. More photos to come soon, Thanks for checking it out.
|
|
#18
05-21-2012, 07:29 AM
|
||||
|
||||
|
A few more shot from the shop:
Here the rim (the assembled side set) is getting put together, in particularly the neck block is being glued in place. The neckblockhas carbon fiber reinforcement to help with long term stablitly.  Here is a look at the carbon fiber reinforced tail block. It is tough made up of spanish cedar, red spruce and the aforementioned carbon fiber. 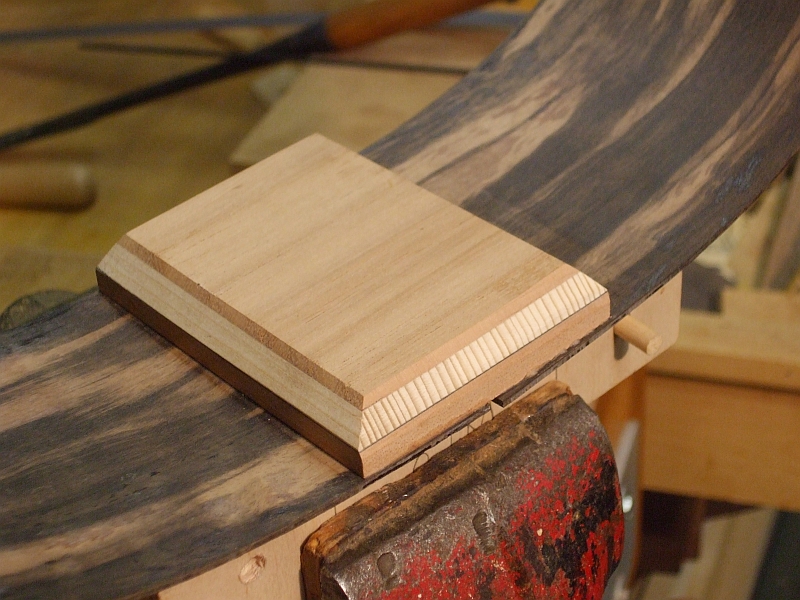 Here is some shots of the kerfed lining being installed. I am using the A4 cypress linings that I get from Kevin Ryan. (Great stuff) 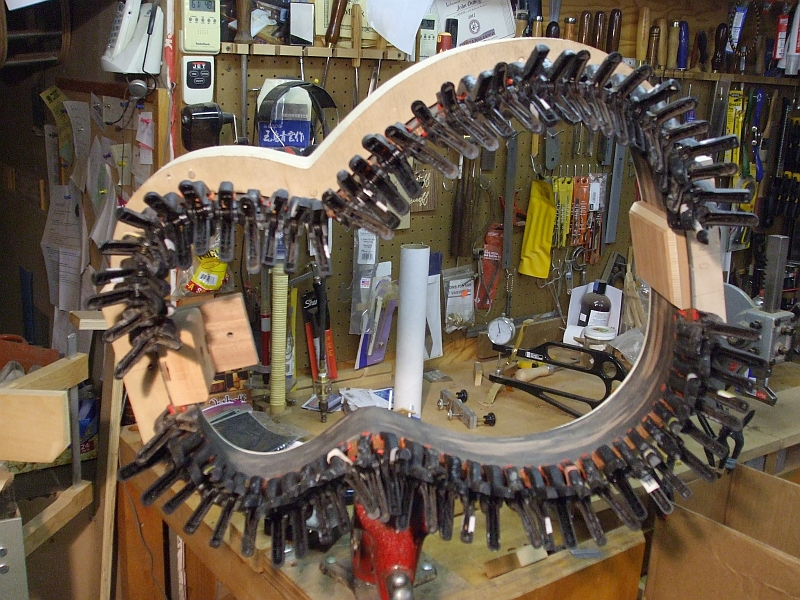 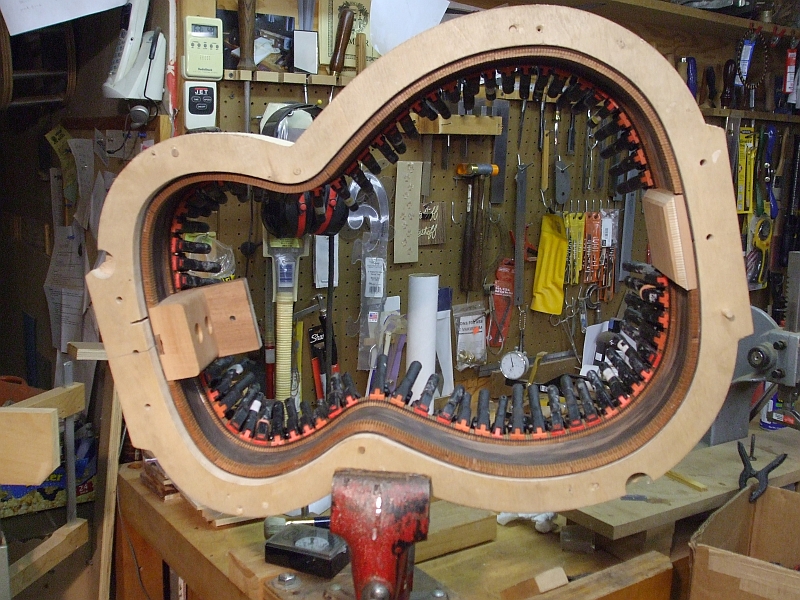 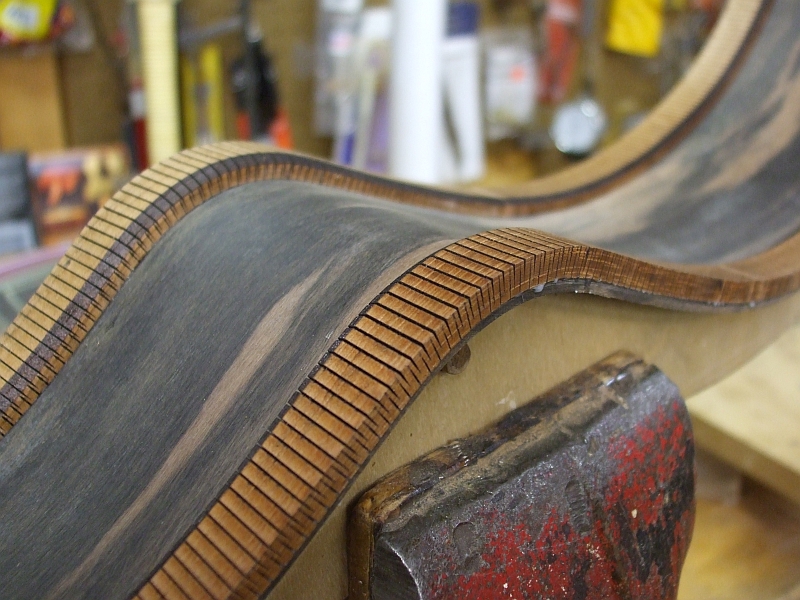 I hope to get on to the back and top plates later today ... stay tuned 
|
|
#19
05-23-2012, 06:42 AM
|
||||
|
||||
|
I got the back processed and ready for bracing.
Here are a couple shot from the go-bar deck, First getting the reinforcement strip in place: 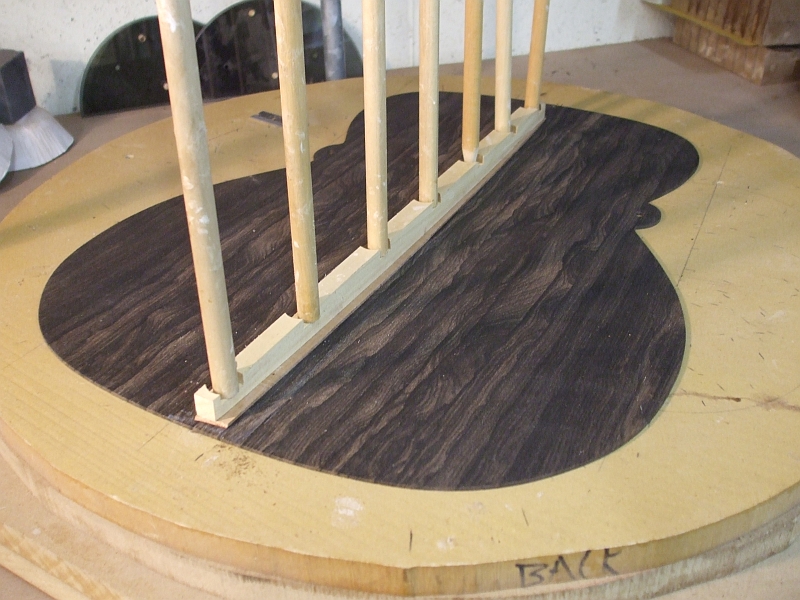 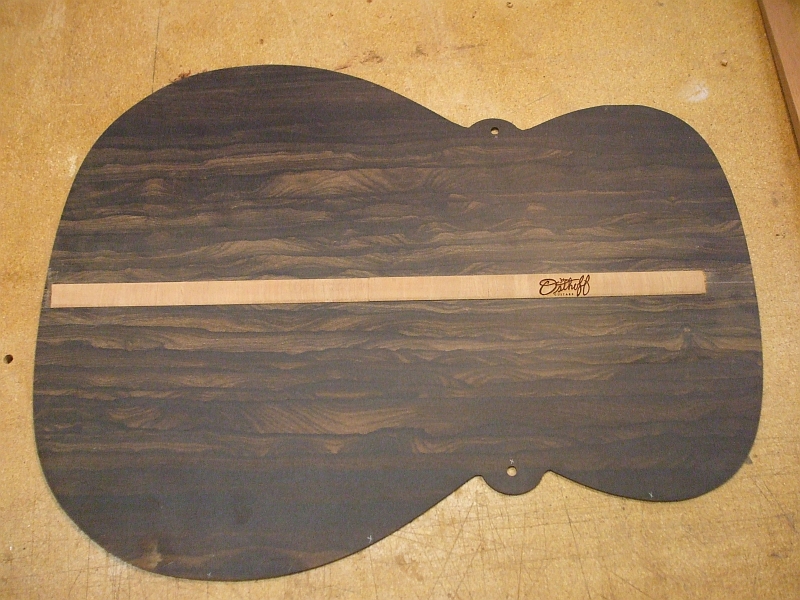 Next is getting the backbraces roughed out and put in place. I glue on 2 at a time, giving me plenty of room to work. 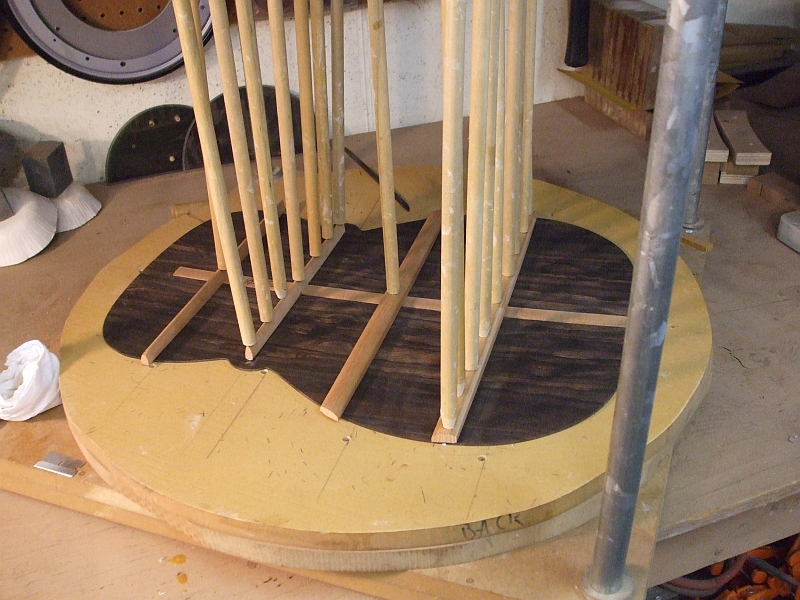 Next up is the rosette, I hope to have some process pictures of that taken today (in other words, that is part of today's agenda)
|
|
#21
05-24-2012, 08:28 PM
|
||||
|
||||
|
So I got going on the soundboard and the rosette.
Here is a reminder of the walnut piece we had to find some rosette pieces from. 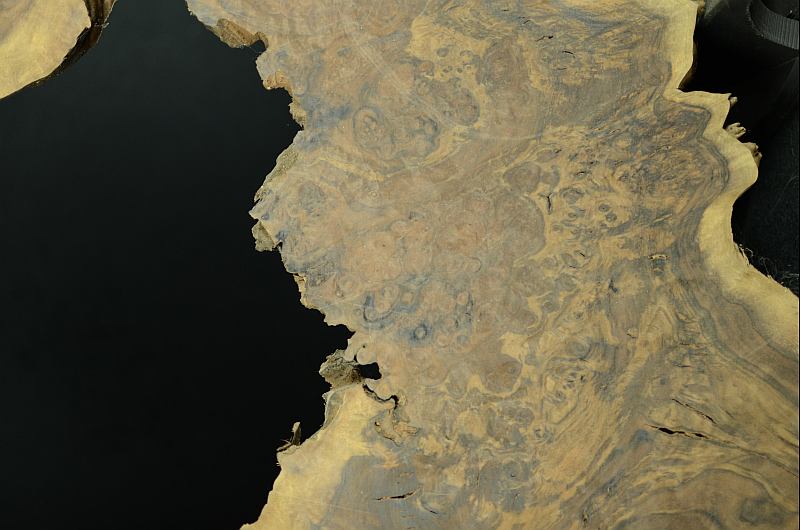 Here I am resawing the claro walnut that we are using for the rosette. On the bench in the background you can see the rim and the top with the rosette channel cleared out. 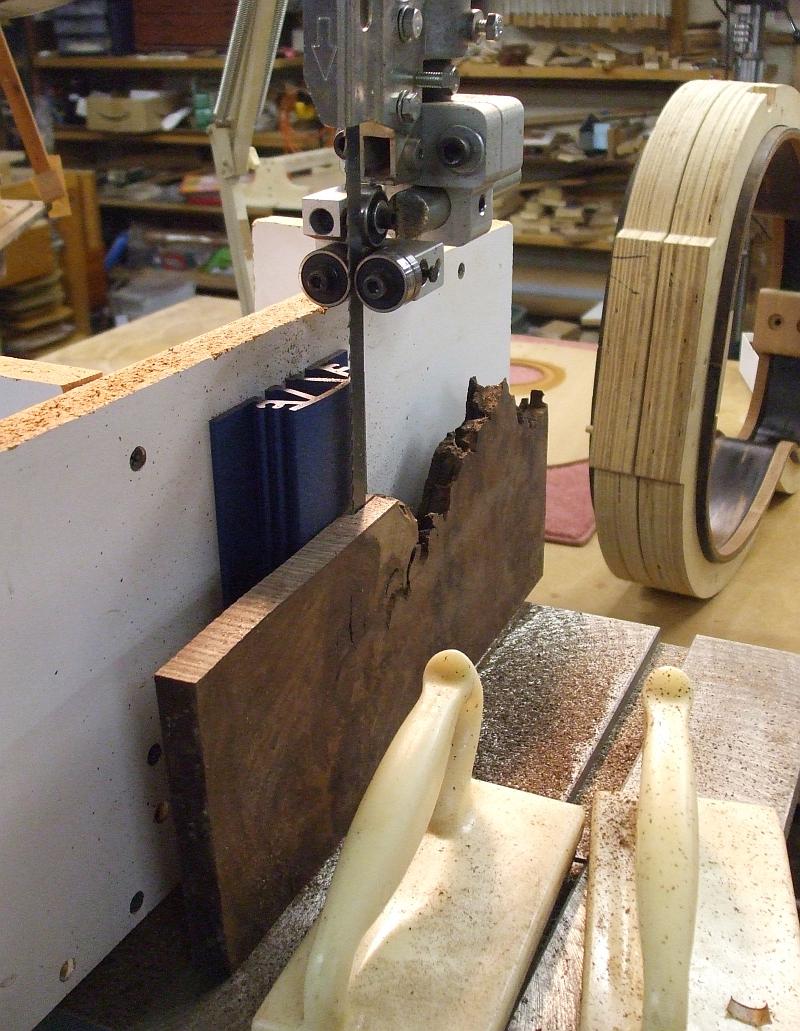 A couple of the pieces laid out ... getting ready to find a parts for the rosette. 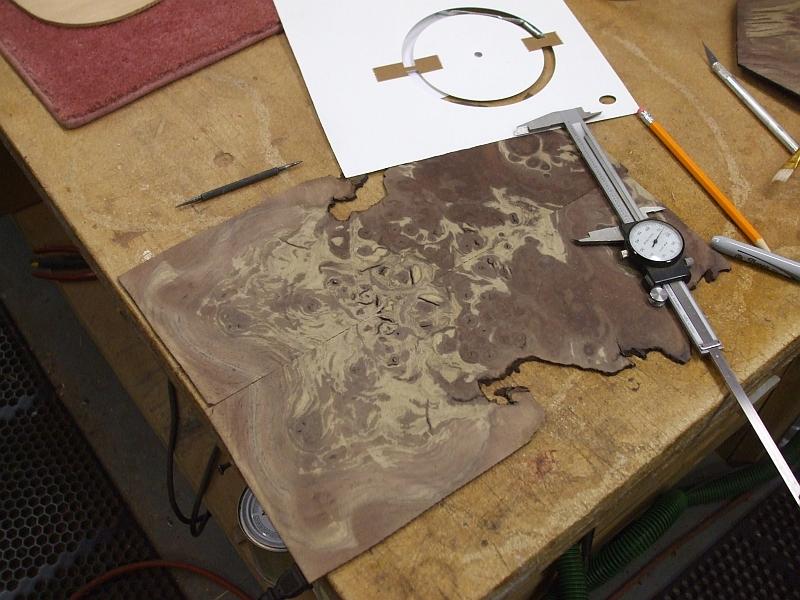 Here the paper template used in the "hunt." 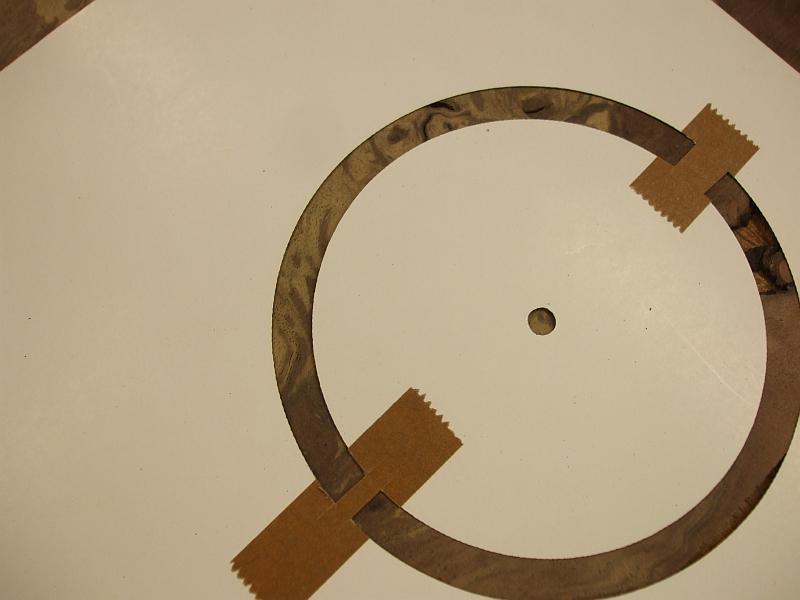 I am missing a few steps here, kind of got on a roll and didn't snap any photos, but here is a look at the result: 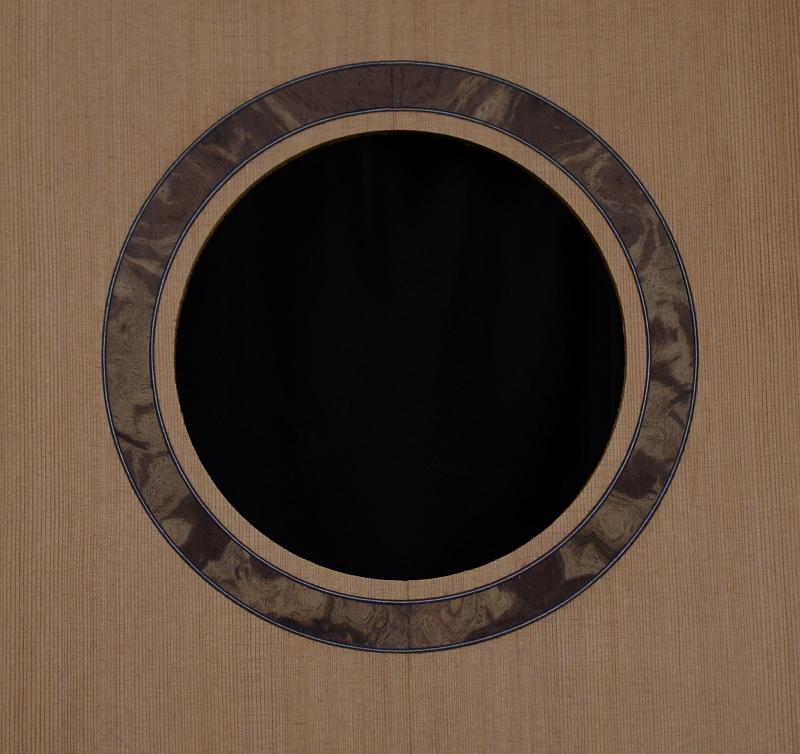 It will darken up a quite a bit with finish ... here is a look with some naptha over the rough sanded top. (to get a color idea) 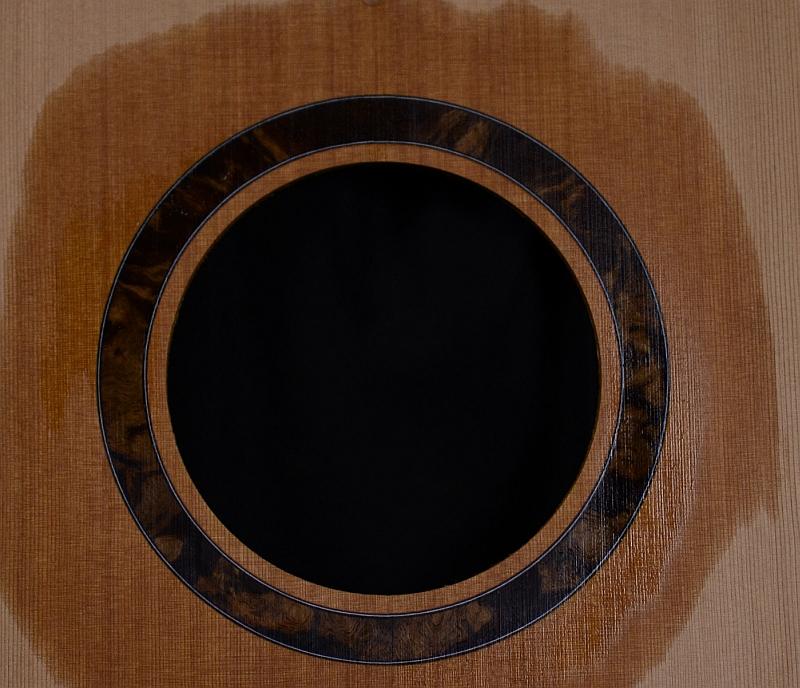
|
|
#22
05-24-2012, 08:36 PM
|
||||
|
||||
|
Great job, John!!!
|
|
#23
05-24-2012, 09:14 PM
|
|||
|
|||
|
John, very pretty wood! looking great!
__________________
Eric Omega Braz MJ, 2011 Omega MJ Braz Baritone Ryan Cathedral ABW/Bosnian Build thread: 2011 Kostal Mod D Brazilian/German Build thread: 2019 Kostal MDW Brazilian/German Build thread:2019 Bigfoot Mod D
|
|
#24
05-31-2012, 06:03 AM
|
||||
|
||||
|
I got a couple others on the bench (another OM and an SJ) but this one is still coming along too.
Here I am roughing out the back braces: 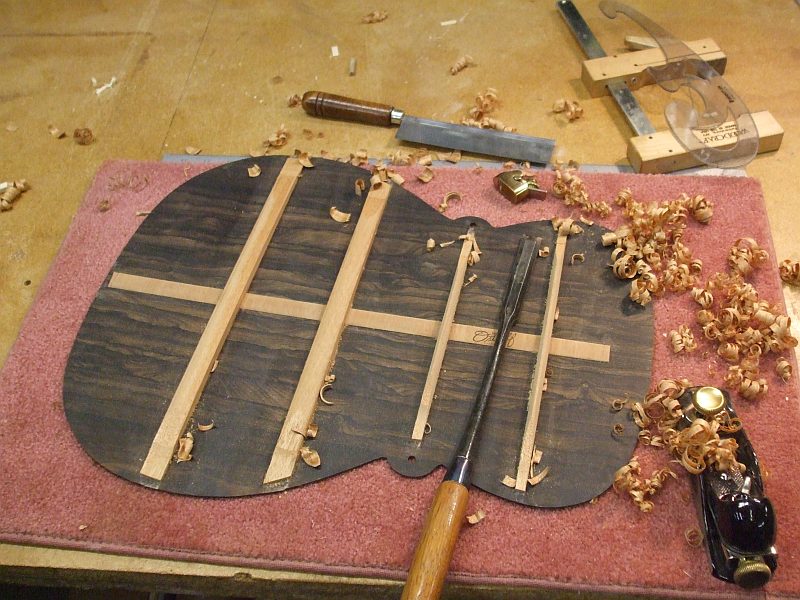 Here is a look at some of the braces for the top being put in place on the go-bar deck: 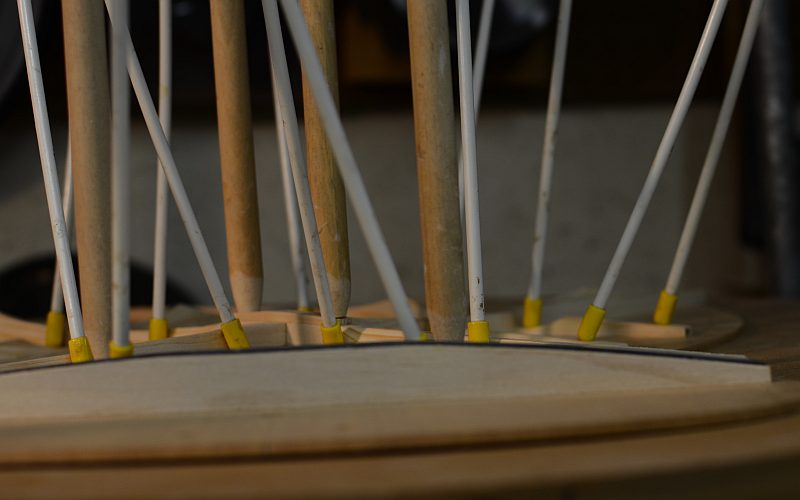 Once the braces have been glued on, I go about "tuning" the top, with the aid of spectrum analysis and Chalidni patterns. Here you can see the what is sometimes referred to the ring+ mode. I work my bracing to try to get this ring ro "close" and in this case I was successful. 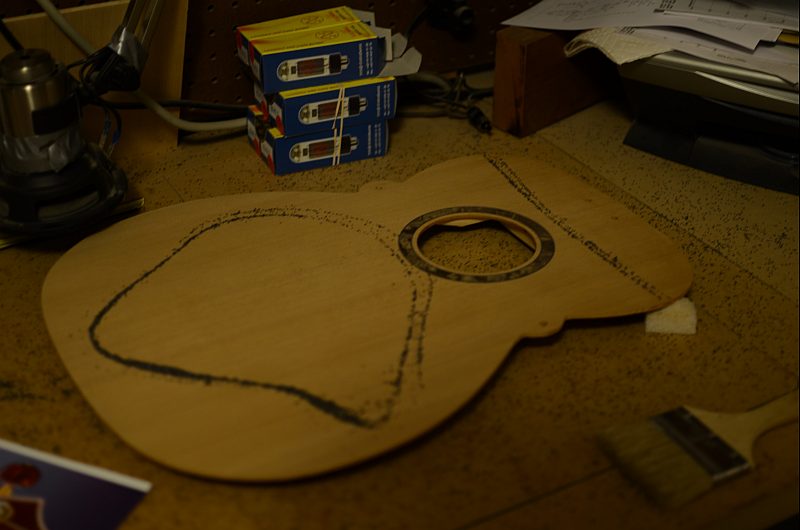 After the bracing/tuning/testing is done (a long process) I glue the top on to the rim. 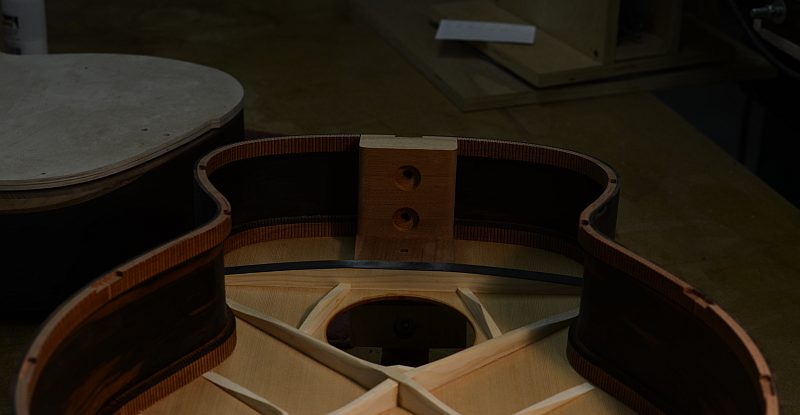 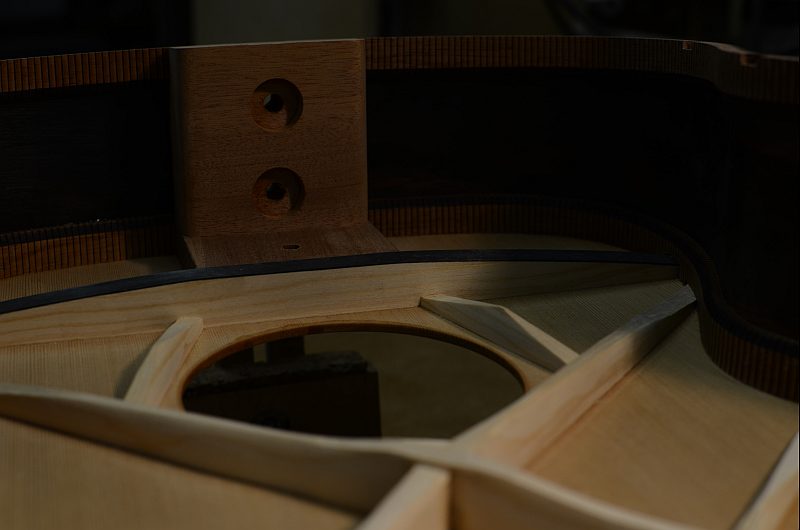 I glued the back on late yesterday afternoon, but realized after I took all the clamps off, I did not take a picture of that process ... anyway, binding is next ...
|
|
#25
06-01-2012, 06:26 AM
|
||||
|
||||
|
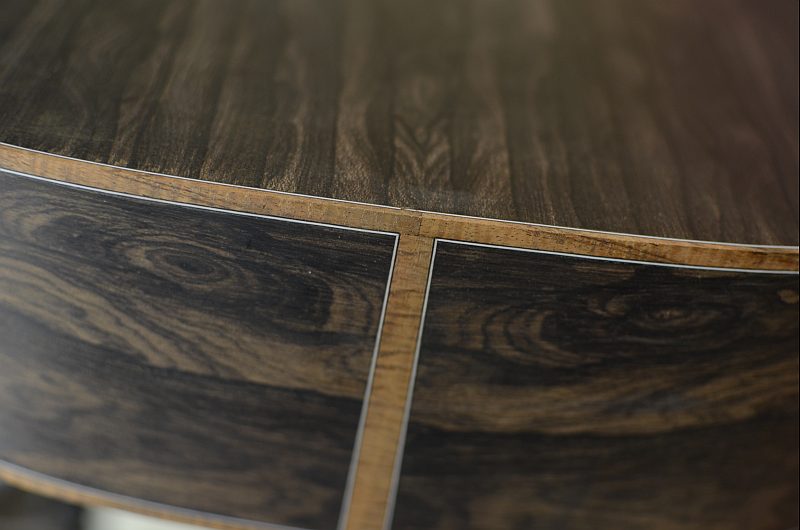
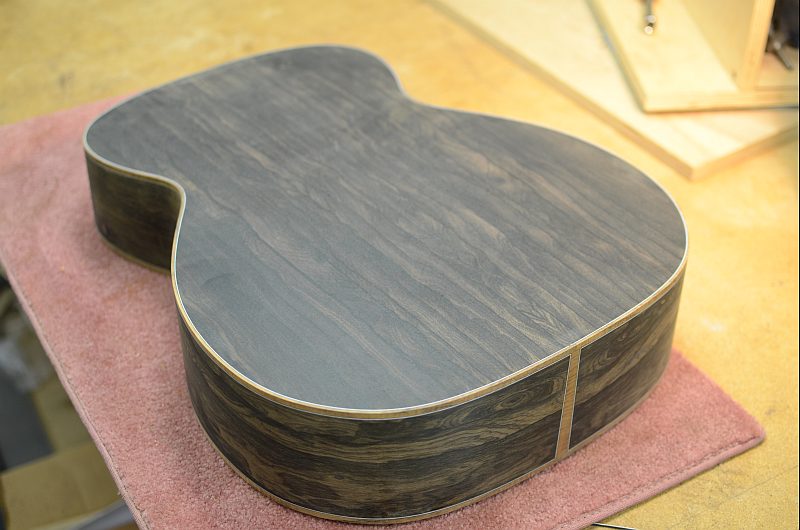
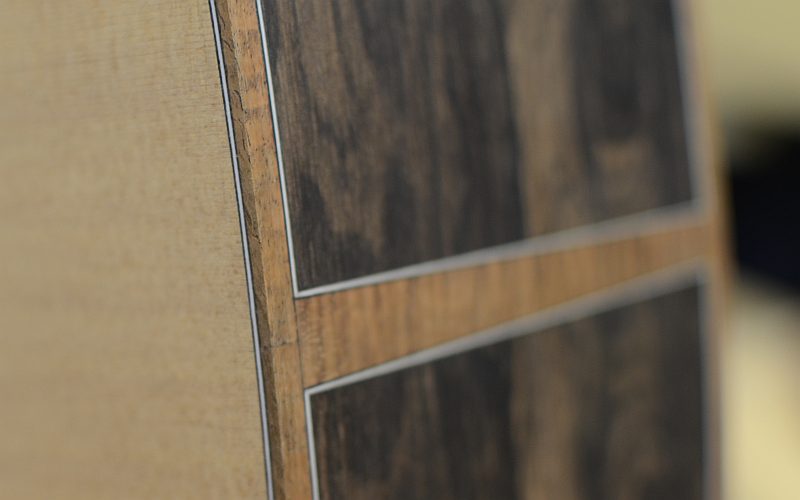
So the body is just about completed ... the endgraft is installed, the binding channels cut and the binding and purfling in place. The body still needs some clean-up, but I usually wait until pre-finish until that gets done. In the meantime here are some process shots ...
First the endgraft. I cut this out by hand ... I now include side purflings as a "standard" feature so I start by adding them to the outside of the wedge. 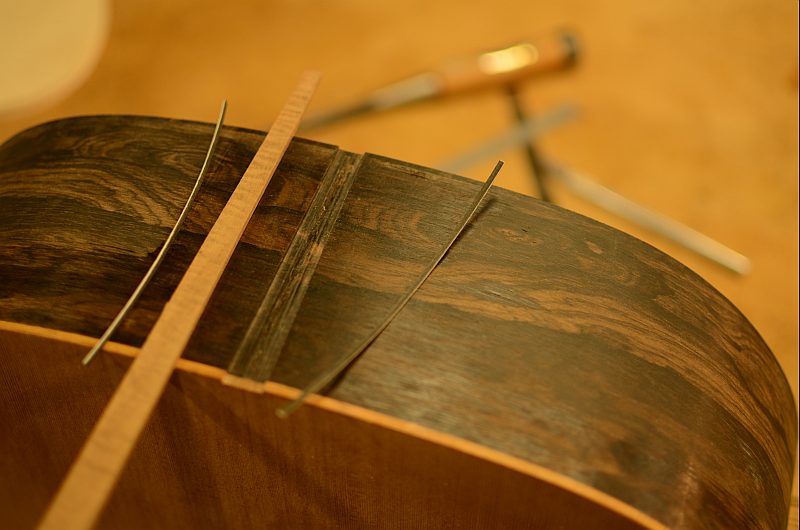 In this shot the wedge is tested for fit ... looks good. 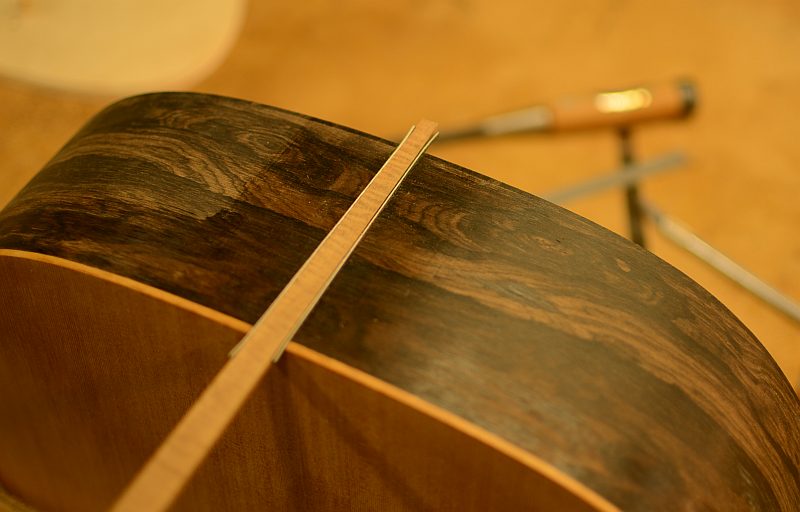 Next up is the routing of the channels for the binding and purflings. Here is my set-up ... 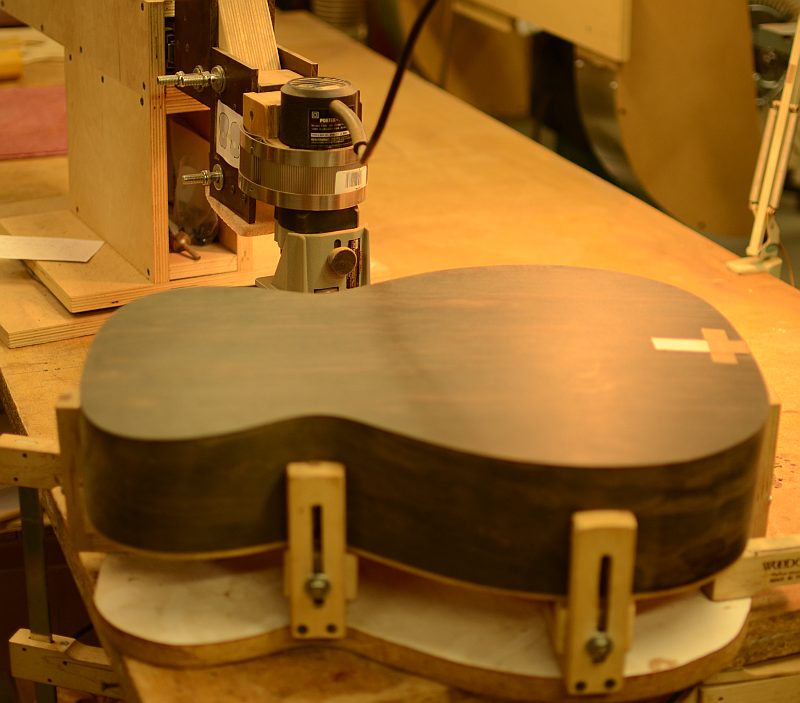 A few shots of the binding channel toward the back of the guitar being cut. 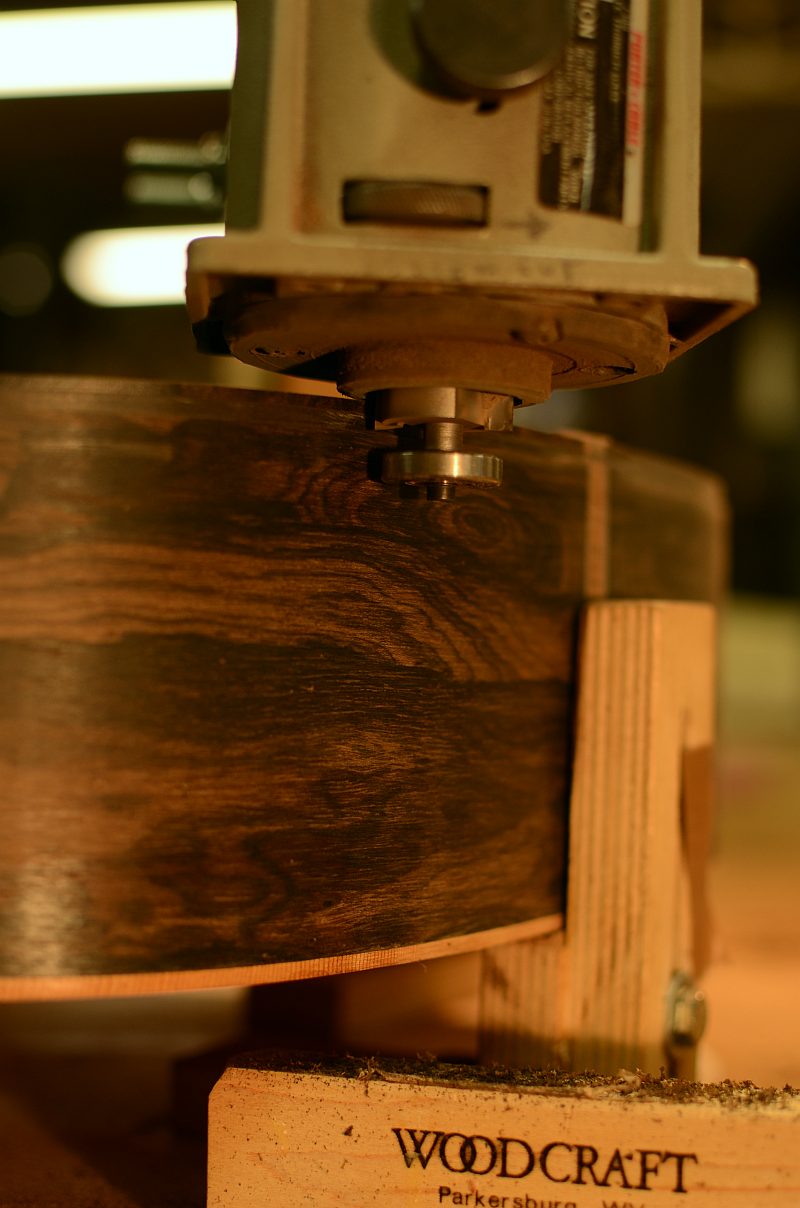 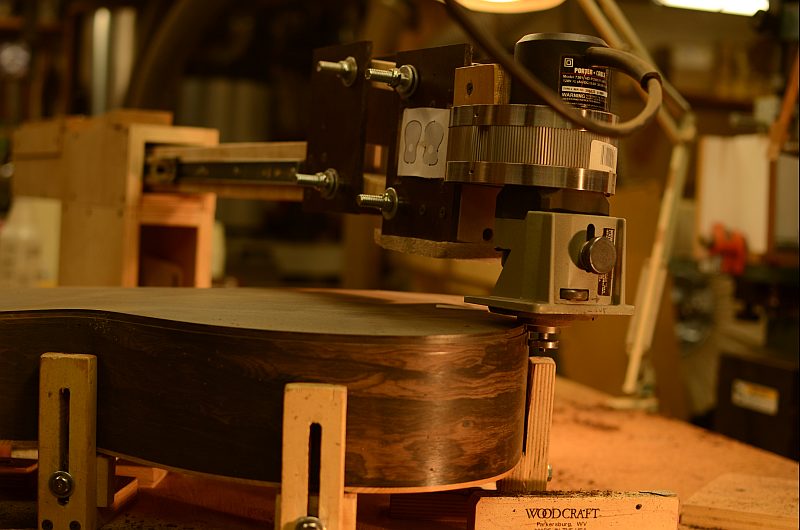 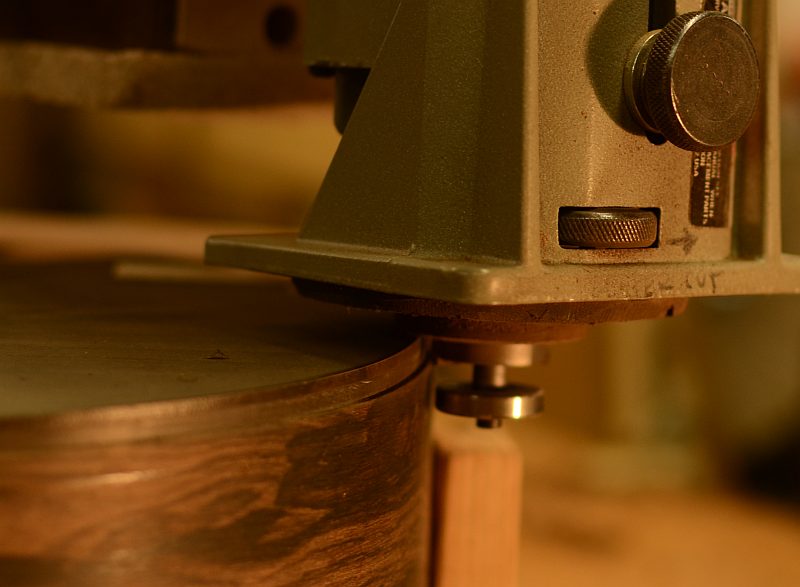 For the heck ot if, here is shot of the rosette that I took yesterday ... 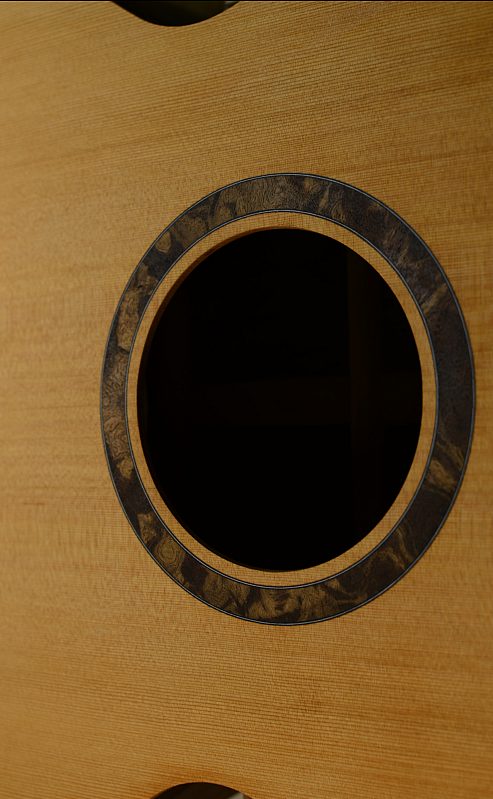 I plan to get started on the neck today, but I have some appointment in the afternoon ... hopefully we can make progess next week. In the meantime I will try to take some shots of the bound body later today.
|
|
#26
06-01-2012, 09:33 AM
|
||||
|
||||
|
John,
You know I'm a fan of your work, and once again you're meeting all expectations. Great work! My only suggestion is that you might...might... benefit from a longer chisel. Just sayin' Steve
|
|
#27
06-02-2012, 02:49 AM
|
|||
|
|||
|
Quote:
and that rosette is a really lovely piece of work.
|
|
#28
06-05-2012, 11:16 AM
|
||||
|
||||
|
The body is all bound up. I have been working on the neck, but those pictures are still "on" the camera ... I will try to get those "up" later on ... in the mean time here are some shots of the body with the koa bindings added on.
|
|
#30
06-05-2012, 08:41 PM
|
||||
|
||||
|
I have been working on the neck this week. I do have a couple things taking me out of the shop a bit this week, but hopefully I will finish up the fretboard before I leave the shop for the weekend. Here are some of the shots.
First up is a small pile of mahongany (and one maple) neck blanks. I know some builders buy necks premade, or at least roughed out, but I like to build mine up from scratch. About 95% of my necks are made from laminated stock, and I usually reserve the wider block (like these) for the one piecers. For this build, I had a nice blank already made up (since I get 2 from each one) This one has 3 strips of Rosewood running down the center. After the neckblock extension was made and fitted into place, a hole is drilled and reamed to accept the aluminum "tapped-plug" 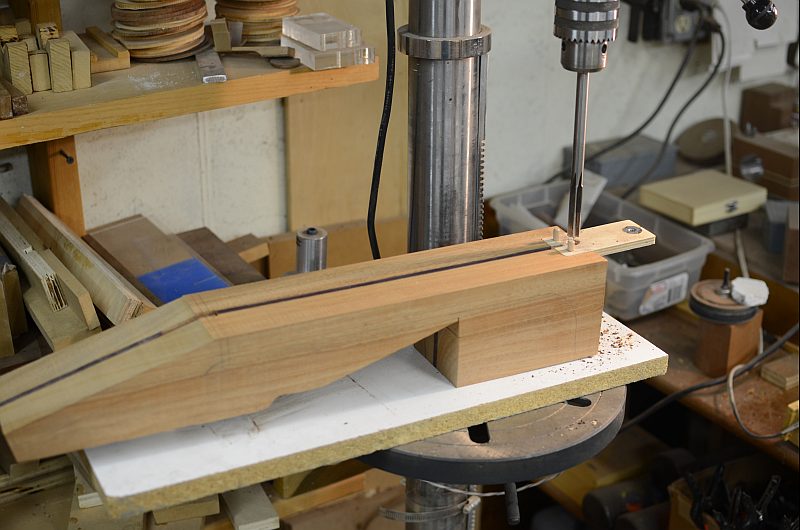 Next, making the "tapped-plug." Here the aluminum is being tapped with thread to accept the bolts that hold on the neck. 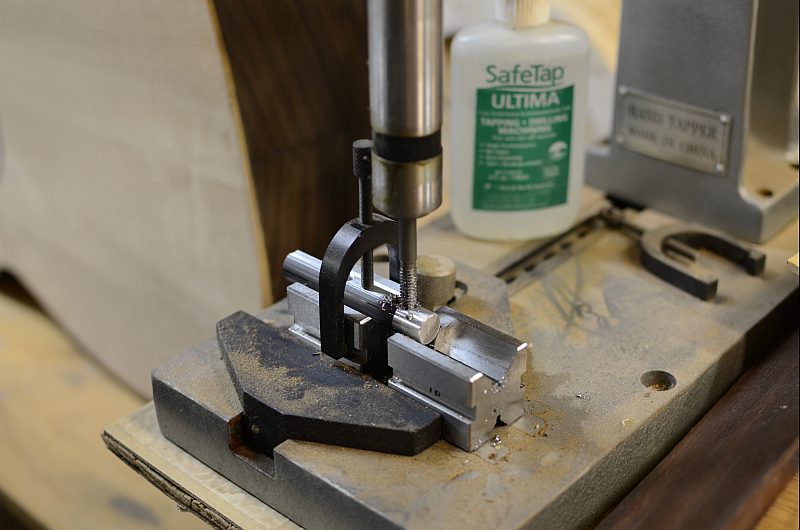 Here is a look at the finished tapped-plug in front of the fuel that keeps the shop running. (I kinda like that cup too.) This alum part will be installed in the reamed hole at the front of the neck. 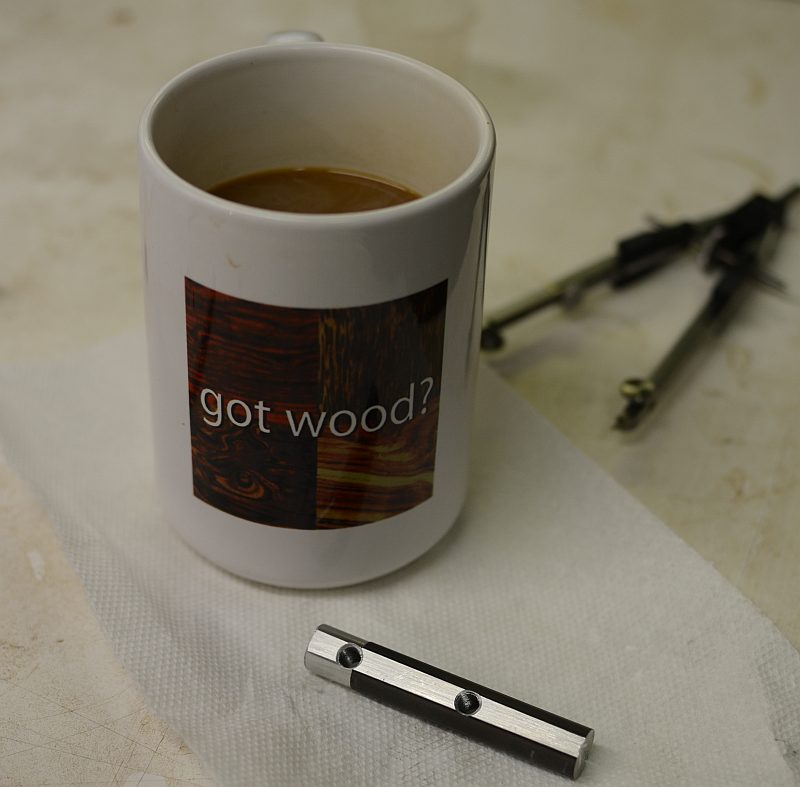 Next-up making the titianium trussrod and installing the carbon reinforcements.
|