
|
|
#1
 11-11-2013, 10:08 PM
|
|||
|
|||
|
Hello AGF,
About a year ago, I posted this thread seeking advice from the AGF: Ridiculously Horrible Lacquer Cracks/Finish - DIY Refinish?!? I was having real bad lacquer checking issues with two of my ukuleles, made by the same builder. (Disclaimer: I still respect the builder very much so I'd prefer not to include his identity. This could very much be just a result of extreme weather changes from my multiple relocations over the years.) 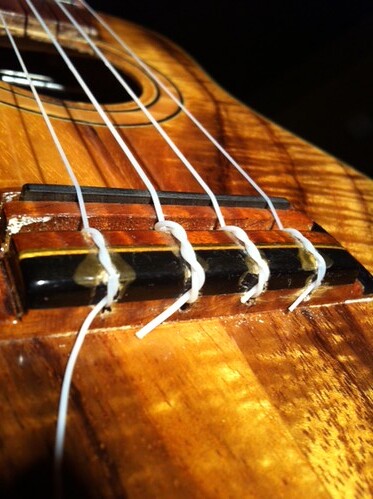  I've obtained so much helpful information from the AGF that I'd like to pay it forward by taking the time to document and photograph my steps to refinish this ukulele. Through this entire process, any comments, suggestions or thoughts on how I could improve is very welcomed - please share it for others in the future. Thanks for reading and I hope you enjoy this journey as much as I will! ... Joe 
|
|
#2
11-11-2013, 10:27 PM
|
|||
|
|||
|
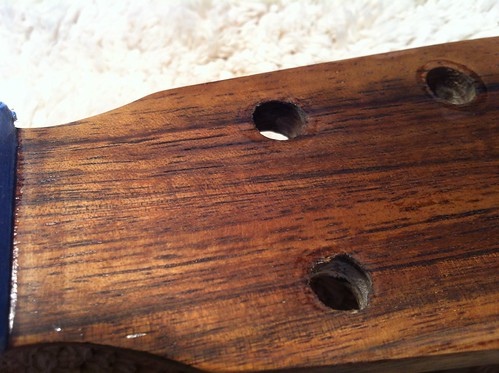
The first step in the process was to remove the existing lacquer. After suggestions from some here on AGF and some online research, I decided to try some lacquer thinner that I found at my local hardware store.
[TO BE UPDATED: Photo of lacquer thinner can] I started on a very small area on the back of the uke and dabbed it on with a small artist paint brush. Thankfully, the thinner softened the lacquer nicely. To expedite the process, I used shop paper towels and a little pressure to wipe the dissolved lacquer off the uke. Apologies, because my hands were in gloves and covered with thinner, I couldn't photograph this part. However, here are some shots of the uke with the lacquer removed (no sanding done yet). 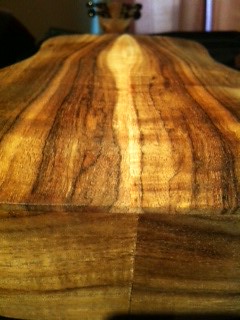  You may notice the wood grain is a bit different from the uke in my OP. Hhowever, this uke was made by the same builder (and relocated with me to the same climates) and had the same severity of lacquer checks as the other uke. You can see the bridge constructions are fairly identical. Just for curiosity sake, I slapped on a brand new set of strings to see how it sounded with bare wood...AMAZING! The tone of this uke was unlike it ever was before! Because I want to preserve this sound, I've opted to use a very thin finish and also not restore it back to high gloss. My aesthetic preference is satin or matte over high gloss anyways. The next step is to sand it down to clean out the spots of lacquer left over. ... Joe
|
|
#3
11-11-2013, 11:01 PM
|
|||
|
|||
|
Before I started sanding away, I had to address a pretty bad crack in the top that was caused by an extreme change in humidity at a very high temperature. I was outside here on Guam at about 11:30AM in the morning, it was about 90-93 degrees and sunny with clear skies. As it often does, it started to rain pretty hard suddenly for about 30 seconds then stopped. This little bit of rain was enough to cause the roofing and road to just steam, like adding water to a hot frying pan. At this high of heat, the sudden rain caused the solid koa top of my uke to belly real bad and eventually crack right along the side of the bridge. This happened in a matter of 60-90 seconds and before I could do anything about it, it was too late.
Here is a photo of the top crack. 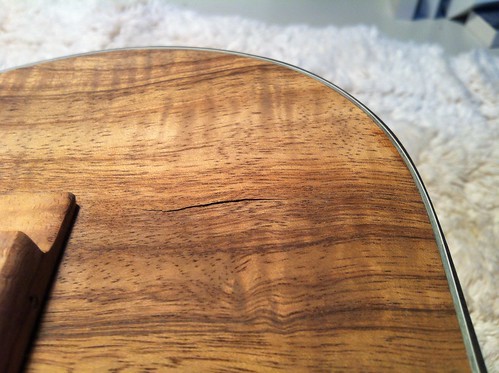 Again, with the help and advice of some here on the AGF (see: Repair: Fixing Lower Bout & Waist Cracks (Ukulele)), I massaged Titebond wood glue into the crack and reseated it together. After letting the glue cure overnight, I did some light sanding with 400-grit and you can barely see evidence of the crack. 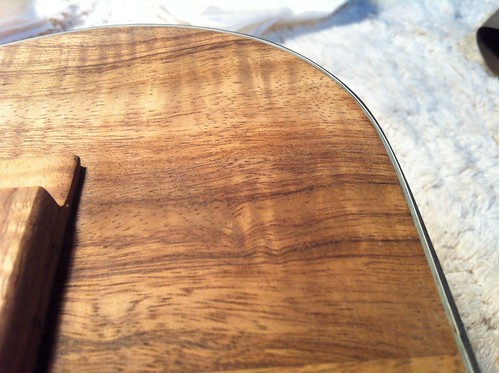 Here are some photos of the uke before sanding, you can still see some patches of the lacquer with paper towel lint within it. 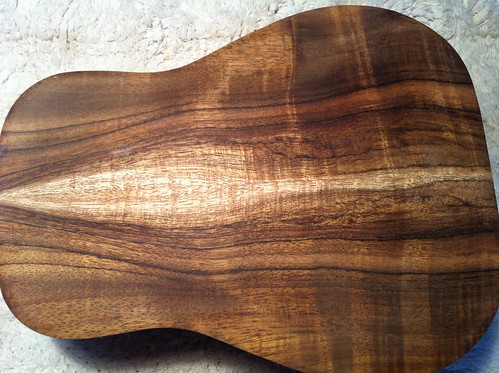 You can also see that the pores need to be filled. Either they were never filled originally, or the lacquer thinner did an amazing job of cleaning it out. 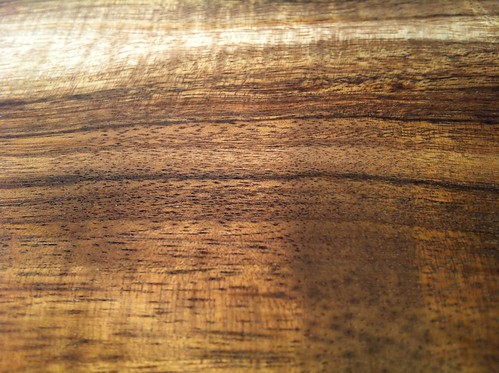 In this shot of the back, you can see the subtle flamed part of this curly koa.  Here's a shot of the front, the "curly" in the koa looks real nice. 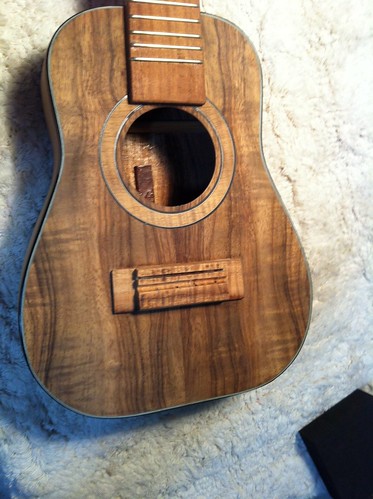 So I first hit it lightly with 120-grit on a sanding block by hand, then 240-grit. 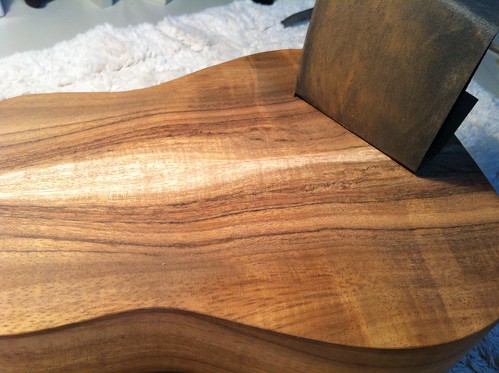 Once it felt pretty clean of the lacquer spots, I used 320-grit on a random orbital sander to level and smooth it out. Sorry, the lighting in my shop where I did the power sanding isn't too good. 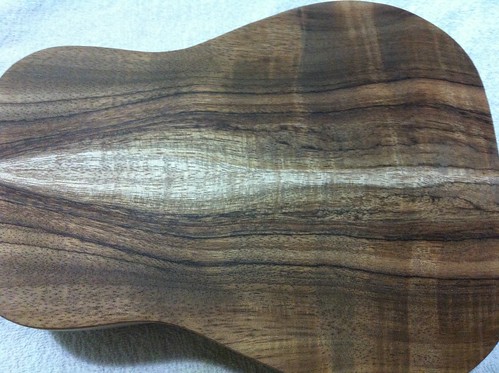 Once it looked and felt pretty good, I vacuumed the dust off and wiped it with some naphtha. Here's a glimpse of what this wood will look like with some finish. 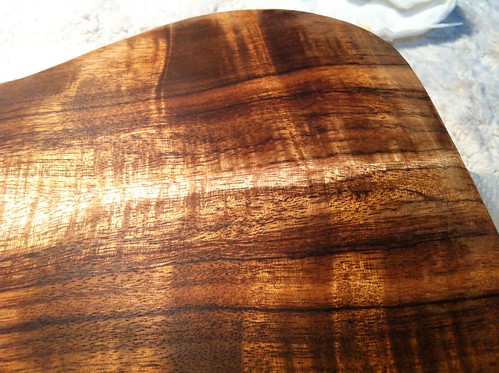 I did this same process for the top, sides, neck and headstock. The next step in the process is to apply the first coat of Z-poxy to fill the pores. Cheers! ... Joe
|
|
#4
11-11-2013, 11:12 PM
|
|||
|
|||
|
Cool project. Best of luck....but it looks great so far. My older KoaWorks uke is covered with lacquer cracks but I've come to like them. Sort of a badge of honor the for the 6,000 hours of playing time since 2005.
__________________
My YouTube Page: http://www.youtube.com/user/ukejon 2014 Pono N30 DC EIR/Spruce crossover 2009 Pono koa parlor (NAMM prototype) 2018 Maton EBG808TEC 2014 Hatcher Greta 13 fret cutaway in EIR/cedar 2017 Hatcher Josie fan fret mahogany 1973 Sigma GCR7 (OM model) rosewood and spruce 2014 Rainsong OM1000N2 ....and about 5 really nice tenor ukuleles at any given moment
|
|
#5
11-11-2013, 11:43 PM
|
|||
|
|||
|
Thanks Jon! The super concert black curly koa uke pictured in my OP was the first uke I had fitted with a pickup that allowed me to plug in and play my first gig back in 1999. It was a Fishman Matrix undersaddle transducer (the Matrix Infinity came later). Back then, Fishman only provided the smaller ukulele sized piezo to their dealers, even then, only some dealers on Oahu had them. I was lucky to find it which allowed me to perform across about 10 states and numerous cities within them. So these ukes have traveled from the original build in Hawaii, to the dry desert of AZ and now back to the humid island of Guam. Definitely climate extremes!
 Cheers! ... Joe
|
|
#6
11-12-2013, 12:42 AM
|
|||
|
|||
|
As a recommendation of some here on AGF and also Robbie O'Brien from O'Brien Guitars (Disclaimer: I'm not affiliated with O'Brien guitars at all, just reached out to Robbie for advice as I saw one of his YouTube videos and he was so kind to provide some advice. A very nice man.), I'm using Z-poxy Finishing Resin to fill the pores. It should be good to note that this is not the Z-poxy 5-minute epoxy. It's mixed in a 1:1 ratio and I used these three YouTube videos to guide me in the process:
Epoxy Pore Filling Part 1: Application of First Coat & Sealing a Rosette Epoxy Pore Filling Part 2: Prep & Application of Second Coat Epoxy Pore Filling Part 3: Prep & Application of Third Coat and Prep for Finishing I should also note that I've masked off the freboard and nut using blue painters tape as I don't want any finish to get on this area. 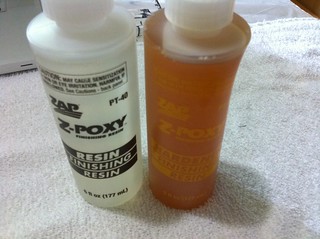 Unlike Todd Stock in the video, I didn't use a squeegee because I didn't have one. I read online somewhere that Luthier Tim Mcknight applied it with an old credit card, so this is what I used. However, before using the credit card, I ran the short edge across some 240-grit paper on a flat surface to straighten out and smooth the edge. Other than that, I pretty much followed Todd Stock's process and tried to press an even coat with the grain, then scrape off as much as I could while it was still wet. I did this to the back and sides and here's a shot of the first coat after letting it cure overnight, you can see the small patch where I already started sanding it down. 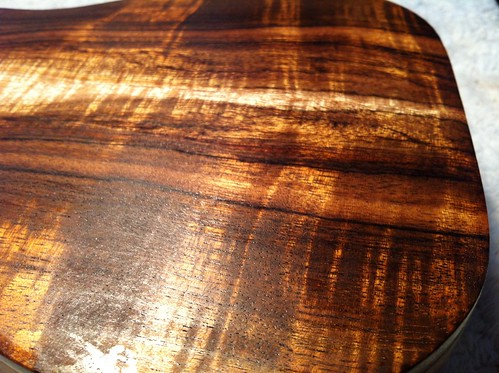 In this photo of the dried first coat, you can see the shine of the z-poxy in the individual pores, it's filling very nicely. 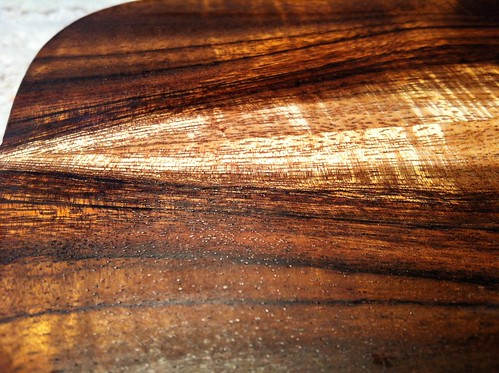 Following Todd's advice, I started by using 400-grit and a sanding block by hand. I prefer to attach the grit paper to the sanding block using double-sided tape instead of just wrapping it around the sides. Just to take it slow and get a feel for the process, I did a rough sand of the back and sides. 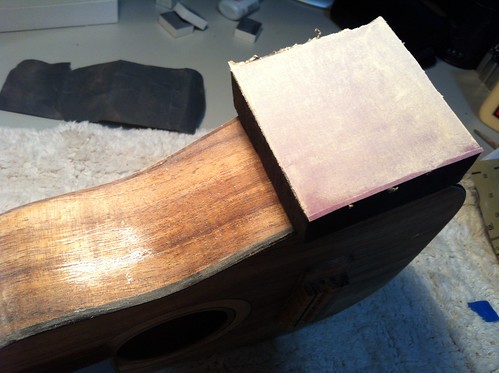 It wasn't long before I decided that I could safely use my random orbital sander. Because my local hardware store or Home Depot did not have 400-grit discs for my orbital sander, I decided to make one using an old 120 disc and some CA glue. I just used a hobby knife to cut out the disc and the vacuum holes.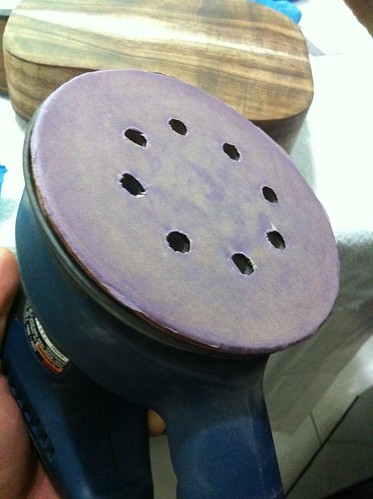 I cleaned the sand dust using a vacuum and soft brush, then wiped it with naphtha. 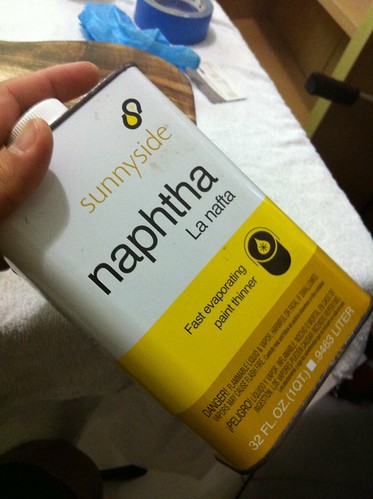 Here's what it looks like after the sanding and cleaning, the shiny high gloss should be removed and the only thing remaining should be the z-poxy in the pores. You can see the z-poxy reflecting in the pores in these photos. 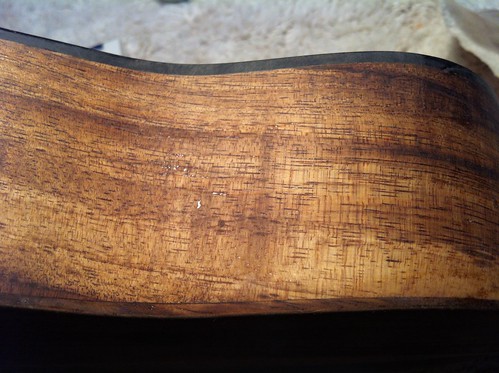 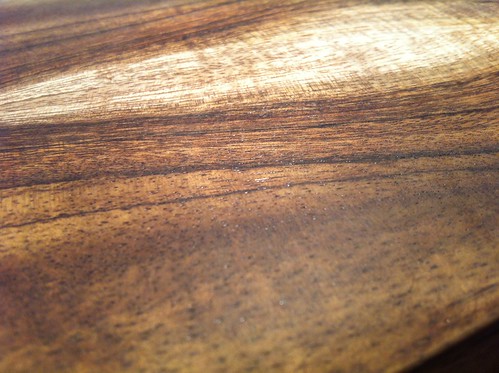 The next step in the process is to apply the second coat and then repeat the sanding to level it once again. ... Joe Last edited by joeguam; 11-12-2013 at 01:09 AM.
|
|
#7
11-12-2013, 01:08 AM
|
|||
|
|||
|
Here's a shot of the 2nd coat applied using the same method as the first. You can see that the pores are not as deep as the first coat.
   I accidentally mixed a little too much z-poxy, so I decided to get started on filling the headstock too, why waste it! 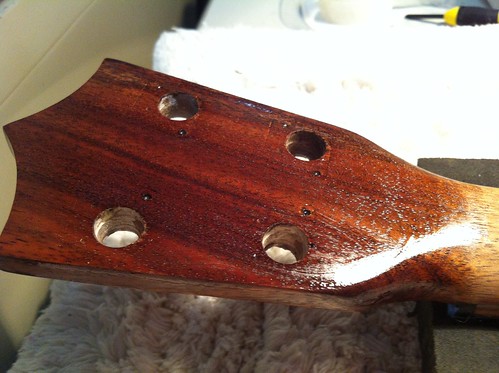 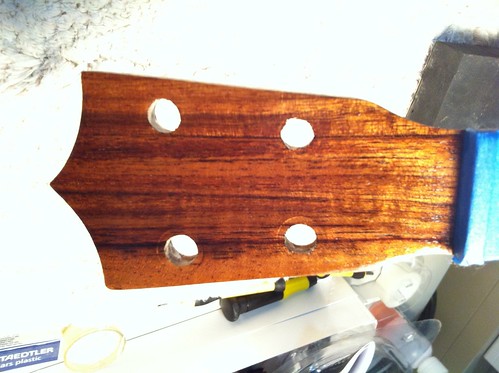 The next step is to sand the 2nd coat level just like the first round and apply a very thin 3rd and final coat. Cheers! ... Joe
|
|
#8
11-12-2013, 01:24 AM
|
|||
|
|||
|
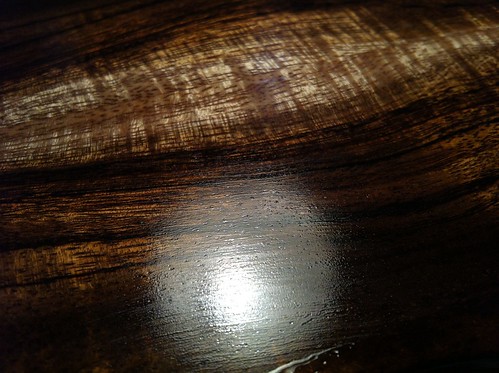
I let the 2nd coat cure overnight and sanded it level, the pores are noticeably more filled. You can see in these next photos that the surface is really a lot smoother as the z-poxy now reflects from the top of the pores as opposed to deep within it.
   So after I vacuumed and wiped the surface clean with naphtha from the sand dust, I applied the 3rd coat using as little of z-poxy as possible. I realized the limitations of using a credit card instead of a squeegee at this point - that there was no difference in how much z-poxy I could scrap off. Todd Stock in his videos claims that he can take off more z-poxy from the 3rd coat by applying more pressure with his squeegee. Oh well, I guess I'll just have more to sand. 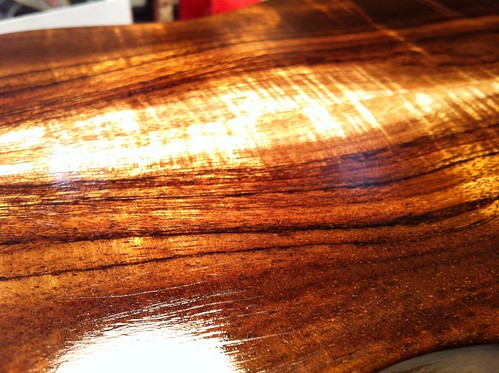 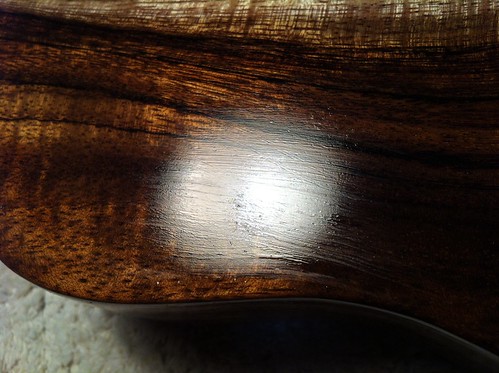 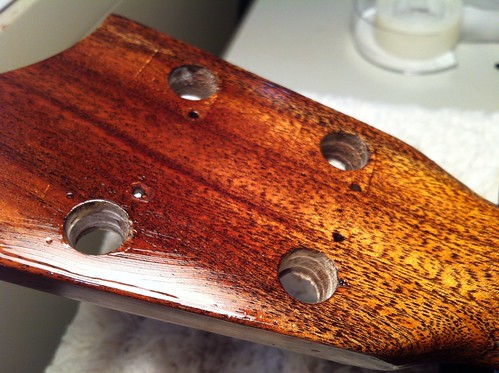 I let the 3rd coat dry overnight as well and you can see the "bubbles" Todd Stock spoke about. 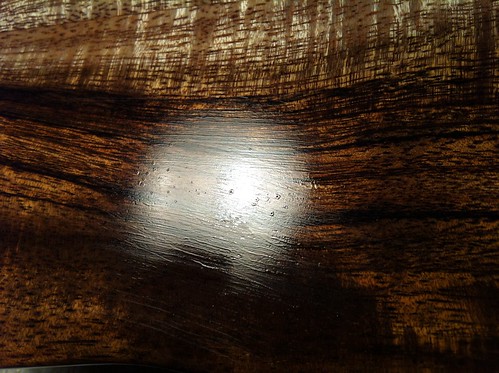 The next step is to lightly sand the 3rd coat with 400-grit paper and 0000 steel wool. I won't be using the orbital sander for this next round as I'll need a bit more control over this sanding. I don't want to get down to the bare wood and want to leave a good foundation of z-poxy for the finish. Cheers! ... Joe
|
|
#9
11-12-2013, 02:03 AM
|
|||
|
|||
|
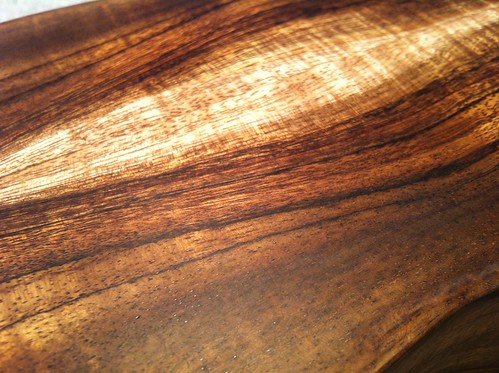
To sand the final coat down, I used a fresh 400-grit paper on a sanding block lightly grazing against the strokes I used to apply the z-poxy. Todd Stock recommends not to use the sanding block and uses his hand, however, I prefer the sanding block as it applies even pressure, I just throttled the pressure back. Here's a photo of what the surface looks like when I stopped sanding with 400-grit.
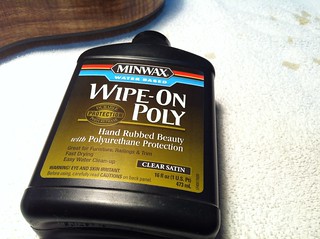
 As you can see, there's still quite a bit of z-poxy on the surface, I just used the 400-grit to level the waves left by my application strokes - again, another disadvantage of using the credit card instead of the squeegee. I then used 0000 steel wool to buff the remaining glossy z-poxy out in a circular motion. They don't sell the gray scotchbrite 0000 pads here in Guam, so I just used regular 0000 steel wool from Home Depot. Here's a close up shot of the surface after the 0000 steel wool buffing, as you can see, there high gloss from the z-poxy is all gone, and the pores are filled very nicely with a really smooth surface ready for finishing. 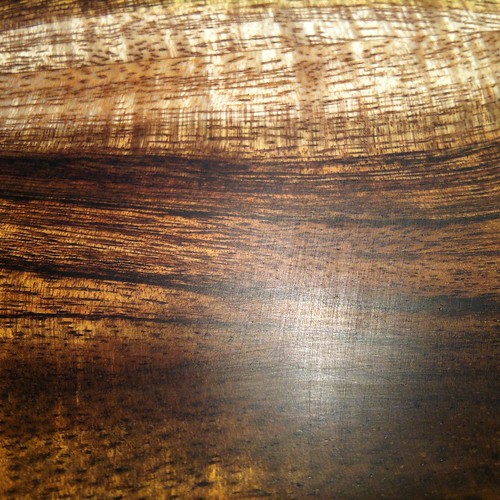 These next final shots are of the back and sides all buffed out and ready for finishing. 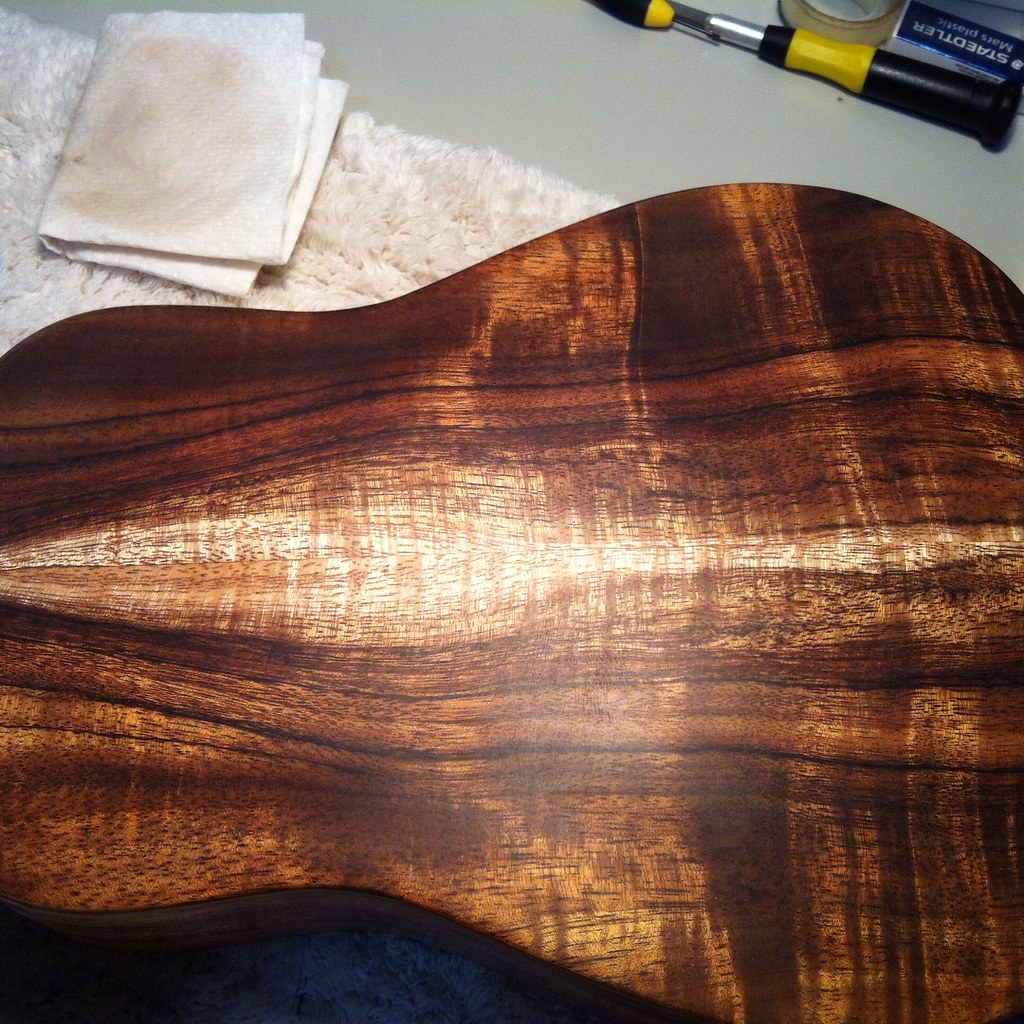 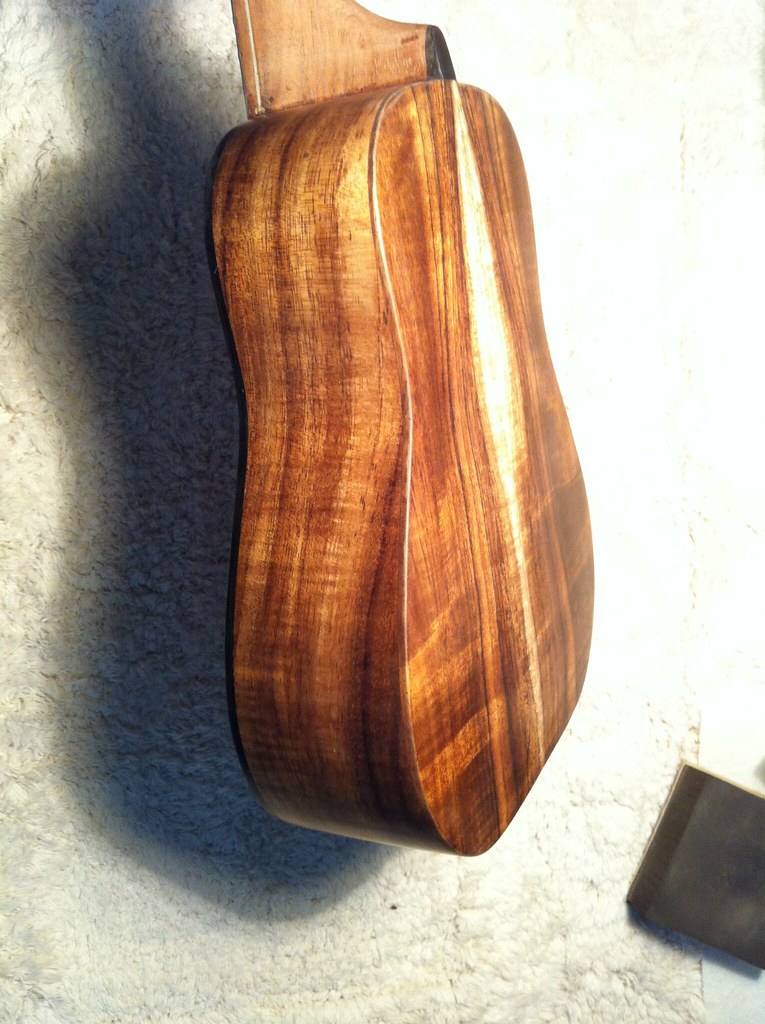 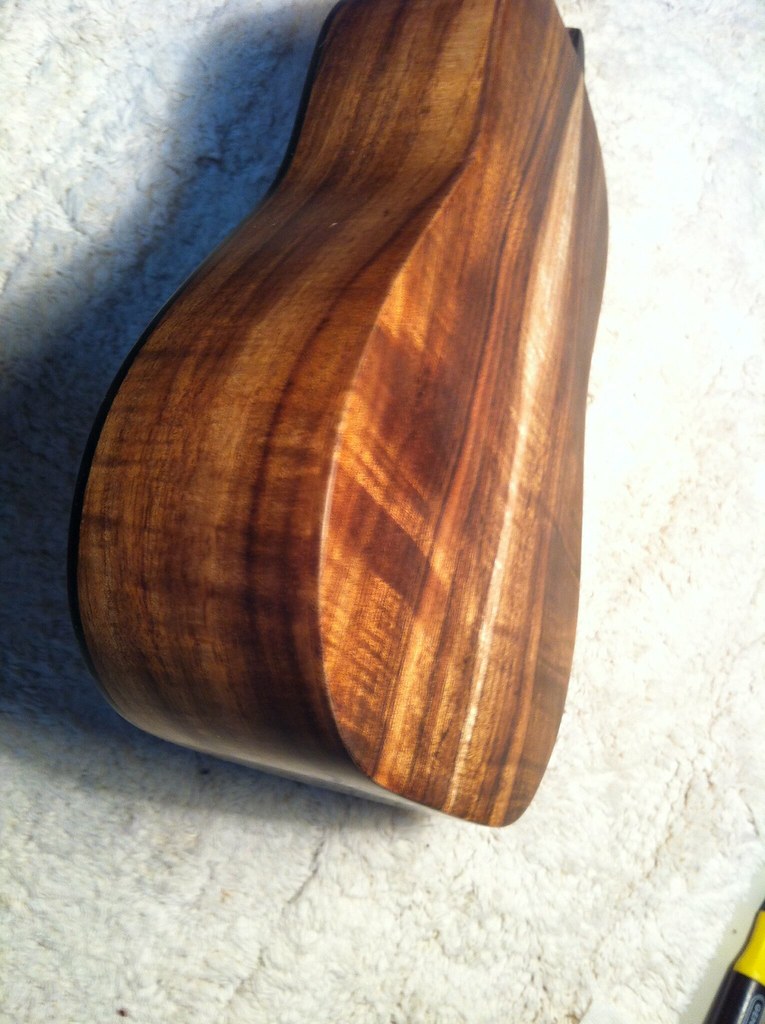 The feel and look of the wood at this point is SO AMAZING! I would love to just leave it just the way it is now, its perfect! However, this is not durable by any means. You could definitely tell that one bump or nick and it will be detrimental. The next step is to apply the first coat of Minwax Wipe-On Poly! Almost there! Oh yeah, if I haven't mentioned, I'm doing this uke in the following stages: - Back & Sides - Top & Headstock - Back of Neck Cheers everyone! Please share any thoughts or suggestions. ... Joe
|
|
#10
11-12-2013, 08:18 AM
|
|||
|
|||
|
that is a very thorough and well documented process, your work looks great, honestly appreciate seeing it and reading the steps you have taken and the research you did prior to starting, look forward to seeing the finish, so far looks fantastic.
|
|
#11
11-12-2013, 09:43 AM
|
|||
|
|||
|
Joe,
Did you put a cleat underneath the crack that you fixed in the top? Might be a good idea and not at all difficult to do.
__________________
Bill Gennaro "Accept your lot, whatever it may be, in ultimate humbleness. Accept in humbleness what you are, not as grounds for regret but as a living challenge."
|
|
#12
11-12-2013, 03:57 PM
|
|||
|
|||
|
Quote:
... Joe
|
|
#13
11-12-2013, 05:37 PM
|
|||
|
|||
|
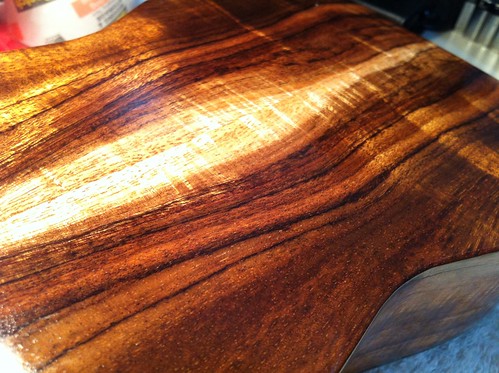
For the finishing process, I'm using Minwax Wipe-On Polyurethane clear satin.
 I've used water-based polyurethane in many of my other woodworking builds, but never this diluted wipe-on solution, and never on an instrument. I used an old t-shirt and tried to follow all the steps I've researched online, however, the first coat didn't go so well. Here's a shot of how it dried up, you can see how uneven it was and the streaks it left behind. 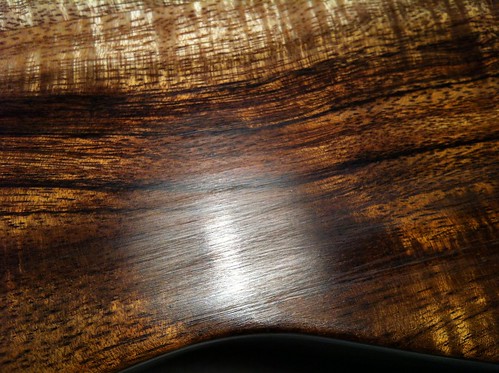 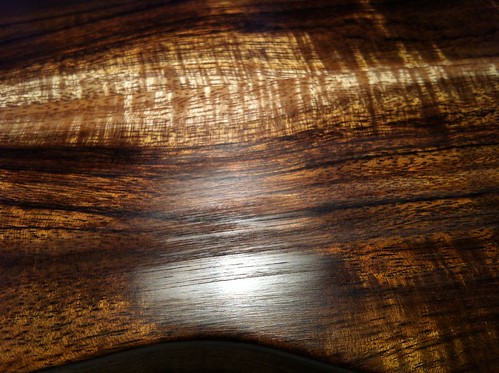 The sides were a little better, but still not to my liking. 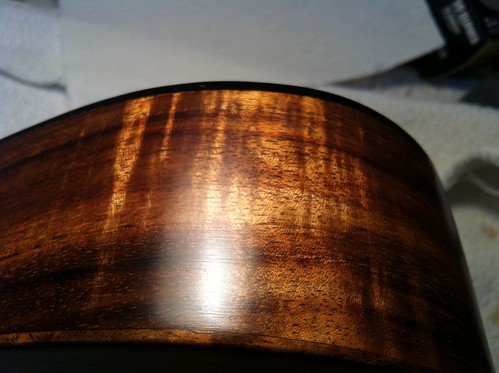 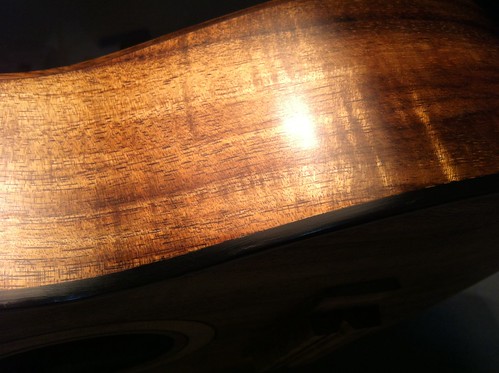 This stuff dries very quickly, a lot quicker than I had ever expected. Here's a shot of an area where I tried to go back and smooth out the streaks, you can see it was already tacky and actually pulled the paper towel into it. 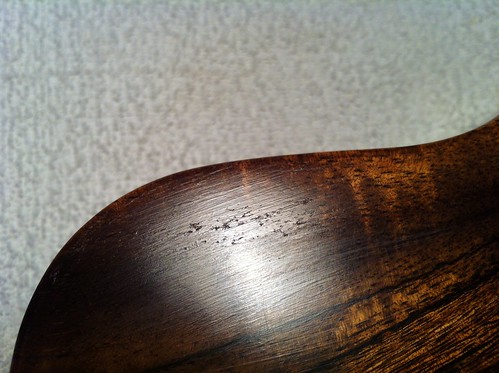 There were also some spots that had a little too much that beaded up, can you tell I'm a rookie with this stuff?! 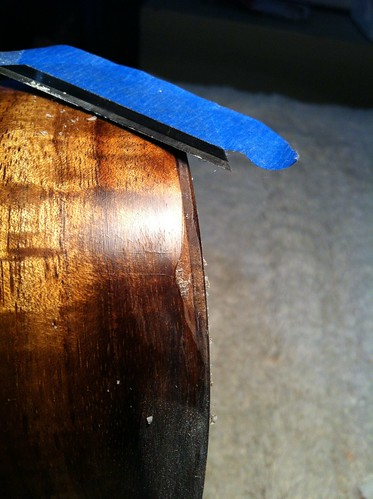 Good thing this stuff is all fixable. Going back to Frank Ford's tip on using a razor blade with a burred edge, I leveled the affected area. Then, I used 600-grit to knock it down a bit, and finally finished it smooth with 0000 steel wool. made sure not to go below the z-poxy foundation and it's back to finish-ready again. 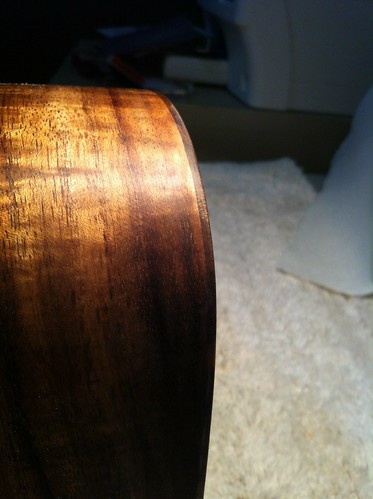 So I prepared the surface to try another round of poly by lightly buffing with 0000 steel wool. I cleaned the area with a vacuum, soft brush and then wiped it lightly with naphtha. The next step is to try my hand at applying the poly. Cheers everyone, I welcome any suggestions if you have any. ... Joe
|
|
#14
11-12-2013, 06:00 PM
|
|||
|
|||
|
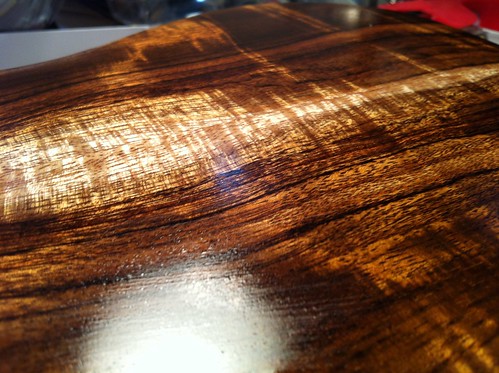
As mentioned earlier in this thread, I found this video from Robbie O'Brien:
Luthier Tips du Jour - Tru oil He's been so kind in helping me learn this process by answering any questions I had. I was pretty bummed out from the first coat of poly because everything was going so well with the z-poxy, then I hit a bump in the road. So I asked Robbie a few questions and watched his video very closely once again. This time around, I followed the steps almost exactly and got a very good coat! 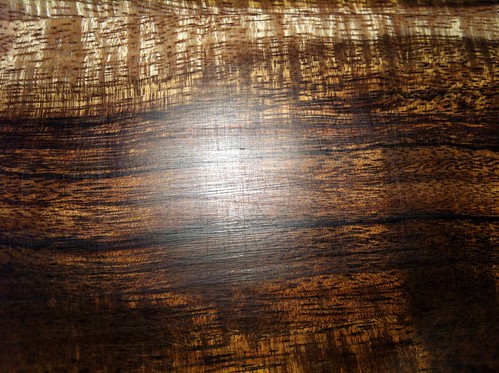 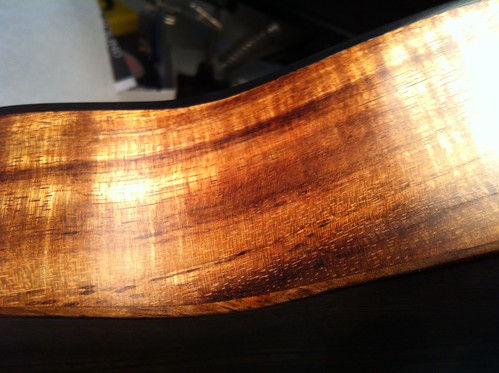 My problem was that I was expecting this stuff to apply and dry just like oil (e.g. TruOil, linseed oil, etc.) and it is almost exactly the opposite. Robbie reiterated to me that this has to be applied in very thin layers - meaning one wiping stroke and leave it alone - and not a thick/saturated surface. You can see in the pictures above that a good thin coat was applied because you can still see the fine scratches from the steel wool. Robbie also recommended to build 3 thin coats up first before attempting to level. It also helps to note that the method to charge/recharge the applicator made a big difference with in success. For the first coat (which I wasn't too successful), I used a dip method into a small container - this was too saturated! Here's a shot of the paper towel where I charged it with poly using the cover-and-tip-over method that Robbie used in this video. This adds just the right amount of poly to a small area that works really well with each stroke. Really thankful for Robbie's help! 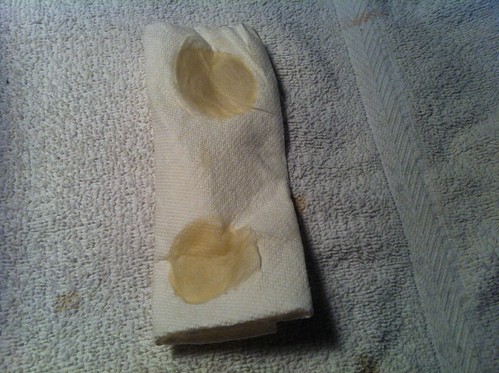 I want to also send a special thanks to fazool here on AGF. I reached out to him for some help as well because he just used this wipe-on poly recently in this restoration thread and he was so kind to provide some really good info: Bridge removed and top stripped The next step is to apply 2 more thin coats of poly, waiting 3 hours in between to dry. Once I have 3 coats on, I will then buff it smooth with 0000 steel wool and assess if I want to stop or add more. Cheers everyone! ... Joe
|
|
#15
11-12-2013, 08:06 PM
|
|||
|
|||
|
Great timing, I am starting to think about when I have to finish my guitar. Might go satin myself as it should be more appropriate with the humble woods I am using. That Koa looks great, hope the poly works out well. I'll be following along.
|
 |
|
| Tags |
| checks, lacquer, minwax wipe-on poly, refinish, refinishing |
|
|


