
|
|
#61
 06-11-2017, 09:11 AM
|
|||
|
|||
|
Here is the start of my attempt to 'fix' that nice gaping hole in the side. Still a long way to go to actually tidy it up and put it all together, but this is what i've done so far, and what i'm committed to even if it goes wrong....
I was going to put in a simple rectangular Rocklite end graft that matches the bindings, i'm undecided about if I should run the purfling that sits under the bindings continuously horizontally (as per normal/previously planned) or if I should send the purfling down the curve? If I do run it down the curve, i'm not sure if I should then run a second purfling line under the binding or not. The problem is its hard to visualise because its all on a curve, and I have to decide on this first, because i'll then have to re-cut the binding and (top side) purfling ledges after installing this overly large end graft. 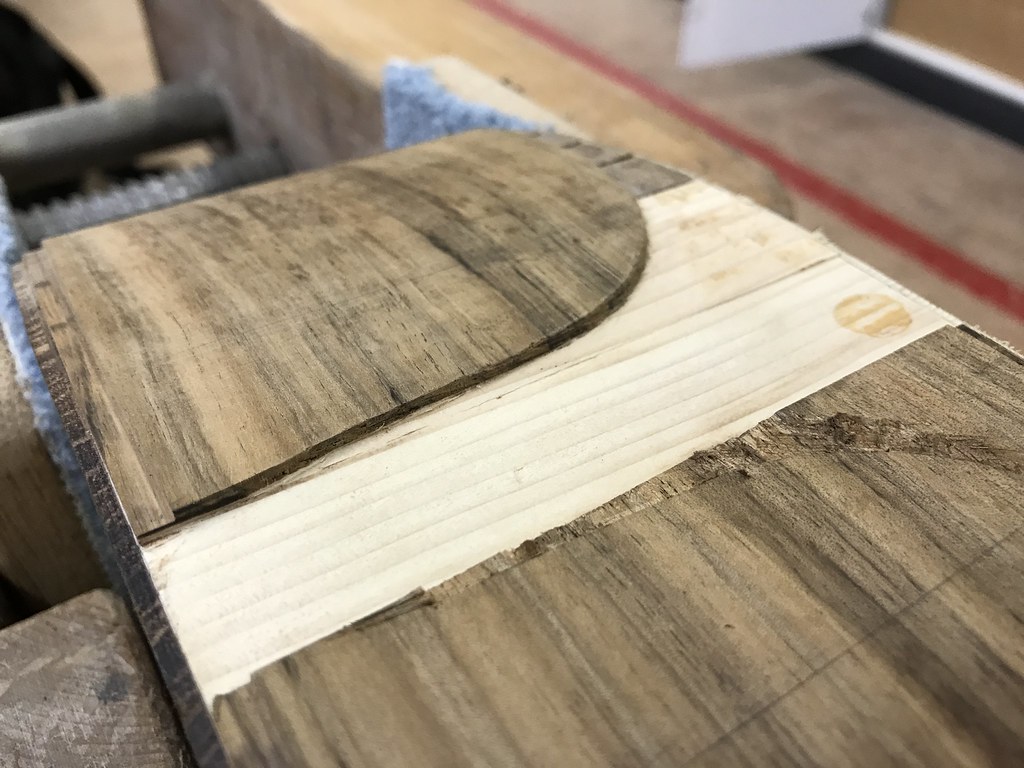 Untitled by David Emm, on Flickr Untitled by David Emm, on Flickr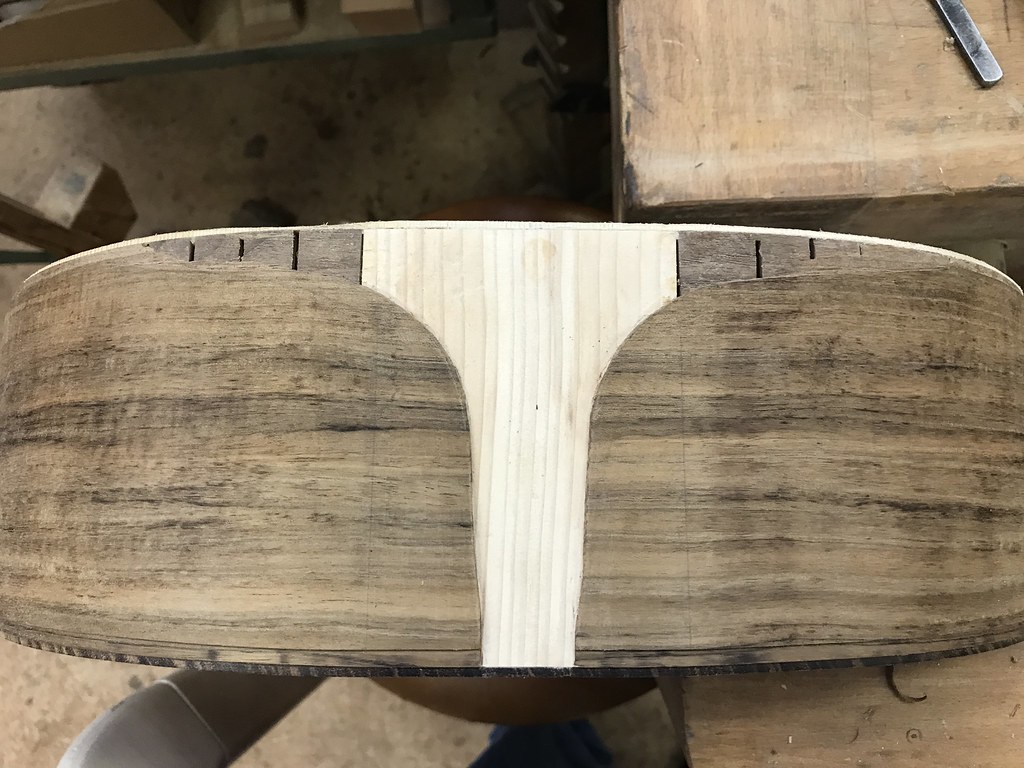 Untitled by David Emm, on Flickr Untitled by David Emm, on Flickr

|
|
#62
06-13-2017, 01:15 PM
|
|||
|
|||
|
Is that a test piece, or the real deal?
I think it might look good out of the same Tasmanian Blackwood having just the different grain orientation providing the contrast.
|
|
#64
06-13-2017, 07:43 PM
|
|||
|
|||
|
It's the end block revealed.
|
|
#65
06-14-2017, 06:36 AM
|
|||
|
|||
|
Quote:
Last edited by Quickstep192; 06-14-2017 at 08:01 AM.
|
|
#66
06-14-2017, 09:29 AM
|
|||
|
|||
|
Quote:
Quote:
This is turning into a ****** ***** **** ***** complete disaster, it just looks awful. If I wanted to install something like this from the start, I would go about it differently, but because of where that stupid tear out hole was I didn't have any other option other than to install it like this and make it this big. By far the best it looked was when I inserted a piece of newspaper into the rear end graft. I looked at how it would look with more tasmanian, i only have a super flamey piece that is for the headstock. I laid it in place and it just looked weird, when the grain was the same direction it just looked like a mistake, when the grain was perpendicular it looked terrible. Unfortunately the biggest pieces of rocklite that are available without having to custom order seem to be the headstock pieces. Luckily I had one that was initially intended to perhaps be a backstrap on the headstock, but i was leaning away from that option anyway. These headstock pieces are not wide enough to fill the whole end graft area. Thus I now have to add a smaller block to fill the gap at the bottom. I then plan to rout out a vertical strip straight down the centre to put what would have been similar to the original end graft idea in place, this would make the moustache looking bits a bit like wings, but hopefully i can get the straight end graft in there with a minimally viewable join. The 2 rocklite pieces were actually 'almost' a decent fit when I dry fit them, I was always going to have to do something about the centre area/join as it was hard to get the angles on both to align as they aren't exactly identical. but it was never this bad in the dry fit. The purfling in the picture is just there as a spacer to get the gap for where the purfling attached to the binding will eventually go. I now have to wait for a correct sized bearing to arrive in the post so I can rout the deeper purfling channel, and i'll have to sand these rocklite pieces to the same thickness as the sides before I do any more routing, which will be next week now. Side note. I'm constantly having issues with things moving after they've been glued. even after it should have 'tacked up' and be pretty much joined, ie 20-30 minutes after the things have been glued and clamped, i'm then coming back to things an hour after gluing and finding things have moved. My back bracing was a prime example, every single one moved, and moved SIGNIFICANTLY. I've tried 6 theories lately and none have changed this. a) use less glue so the part doesn't float on the glue b) apply part instantly and clamp c) wait for glue to tack slightly then apply part and clamp d) rub the part back and forth under pressure to eliminate air gaps in the glue before sliding exactly into position and clamping. e) clamp under high pressure, f) clamp with much less pressure. I've tried all of these, combinations of these. It doesn't seem to matter it always moves. My next theory is to leave small gaps in the Titebond where i'll apply CA glue, then the part can't move while the Titebond dries. Probably just about the worst idea ever though.  Untitled by David Emm, on Flickr Untitled by David Emm, on Flickr
|
|
#67
06-14-2017, 10:25 AM
|
|||
|
|||
|
Quote:
There is technique involved, as there is with most tools. It isn't as simple as just clamping the **** of something. In some cases, people use pins or other alignment techniques to keep parts where intended during clamping and glue drying. For example, I use two small nails (brads) through two fret slots to keep the fingerboard aligned while clamping/glueing. It is a common technique. Some use the same technique for bridge gluing. I use two bolts through the two outside bridge pin holes. And so on. Even a layer of masking tape can go a long way towards preventing parts from moving, used as an edge against which to butt parts, or as a temporary means of holding parts while applying clamps. Observe what others have done and apply it as you see fit. Last edited by charles Tauber; 06-14-2017 at 11:28 AM.
|
|
#68
06-14-2017, 01:48 PM
|
|||
|
|||
|
That's the beauty of hide or fish glue, they tack fast and stay in place when you start to apply clamp pressure. Titebond will tack eventually too and at least make it a bit easier but it can be a real PIA. I like to use brad tpye nails as pins too especially for large flat things like the fretboard or headplate.
|
|
#69
06-14-2017, 03:16 PM
|
|||
|
|||
|
I've sprinkled a tiny bit of sand onto the glue to keep parts from slipping around when I'm clamping.
Also, FYI - LMII instrument glue tacks very quickly. I like it.
|
|
#70
06-16-2017, 12:05 PM
|
|||
|
|||
|
Quote:
I use pins on the fretboards, but I cant pin everything, a lot of things are too small to pin. I like the masking tape boundary idea, several layers thick should create a barrier less easy for the part to cross even if it is moving slowly. Quote:
I do now have some LMII glue, I used it to glue the purfling strip to the underside of my binding before bending later. I did spot it tacked noticeably quicker than Titebond. Its 'supposed' to be more heat resistant than Titebond too, we'll see when I come to bend it how true that claim is.
|
|
#71
06-16-2017, 02:07 PM
|
|||
|
|||
|
Hmm, sand, interesting idea. Does that not affect the quality of the join? or only so little its not a big deal?
I've not had a glue joint fail when using the sand, and yes, it is a tiny bit, just one or two grains in a 2 square inch area. Under hard clamping pressure, the sand gets crushed into the grain of the wood. That said, I've only ever done it on furniture, not musical instruments.
|
|
#72
06-26-2017, 02:33 PM
|
|||
|
|||
|
Got the back binding on, decided I should put the 'simpler' side on first and if it went well to do the top side too.
As per the rest of this build, it didn't exactly go to plan. As such i've only put that one side on. I may put the other side on tomorrow, its a tricker job with 3 lines of top purfling that i'm not sure how i'm going to get good mitres on. I'm not sure if I should glue them all together and then bend them, bend them one at a time and then glue them together and install, or install them individually. As for my actual install I went for the "tape mummification" method. It seems to do its job ok but its slow. I also glued on with Titebond. i'm wondering if I should have used CA glue. Dry fit the binding with gaps in the tape, then wick CA glue in, once thats dry remove the tape and CA glue those gaps too. The titebond tacked up pretty quickly because obviously the binding is pretty thin so the amount of glue in there isn't a lot and by the time i've taped from one end to the other, i had to add more glue. The non-cutaway side seems to have come out 95% good. the tail end, the lower bout, the waist and the upper bout all came out fine, but the corner right by the neck block/the cutaway, didnt seem to fit square, theres a noticeable twist in the binding. i hope it will come out ok in the end, but I may have to do some filling/modifications in that area. The cutaway side is noticeable worse, especially the actual cutaway. The top purfling line seemed to fit perfect, but even though in my 'dry fit' i was happy with the fit, when I took the tape off after the gluing i found a nice large gap. Did the glue swell? or the moisture in the glue swell/twist/kink the binding leaving the gap? I can't decide if I should route this off and re-make and re-do the binding, or just fill the gap with CA glue/Glu-boost/something similar and rocklite sawdust. Taping the binding in place 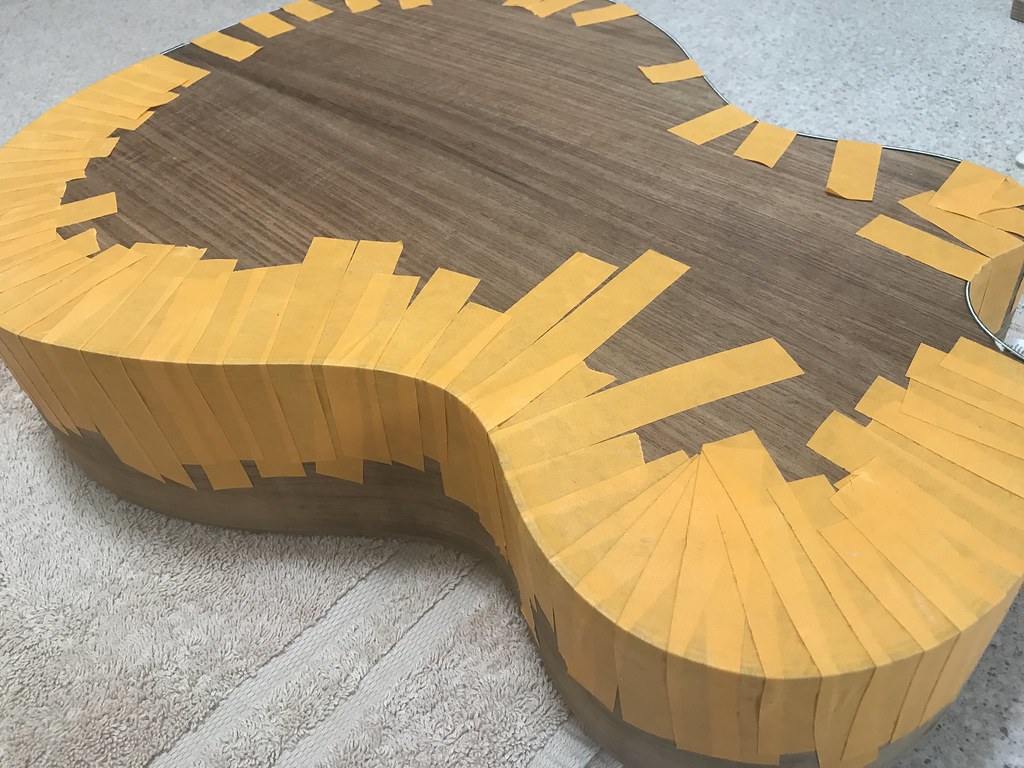 Untitled by David Emm, on Flickr Untitled by David Emm, on Flickrwhat the binding looks like from the back 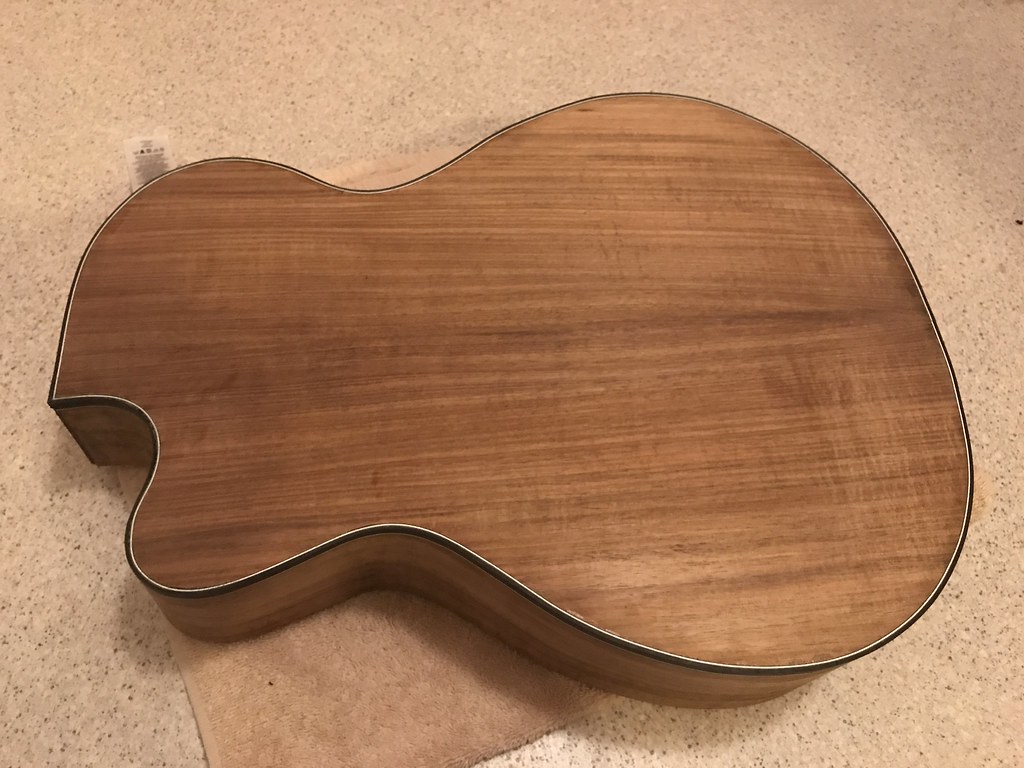 Untitled by David Emm, on Flickr Untitled by David Emm, on FlickrCutaway binding gaps 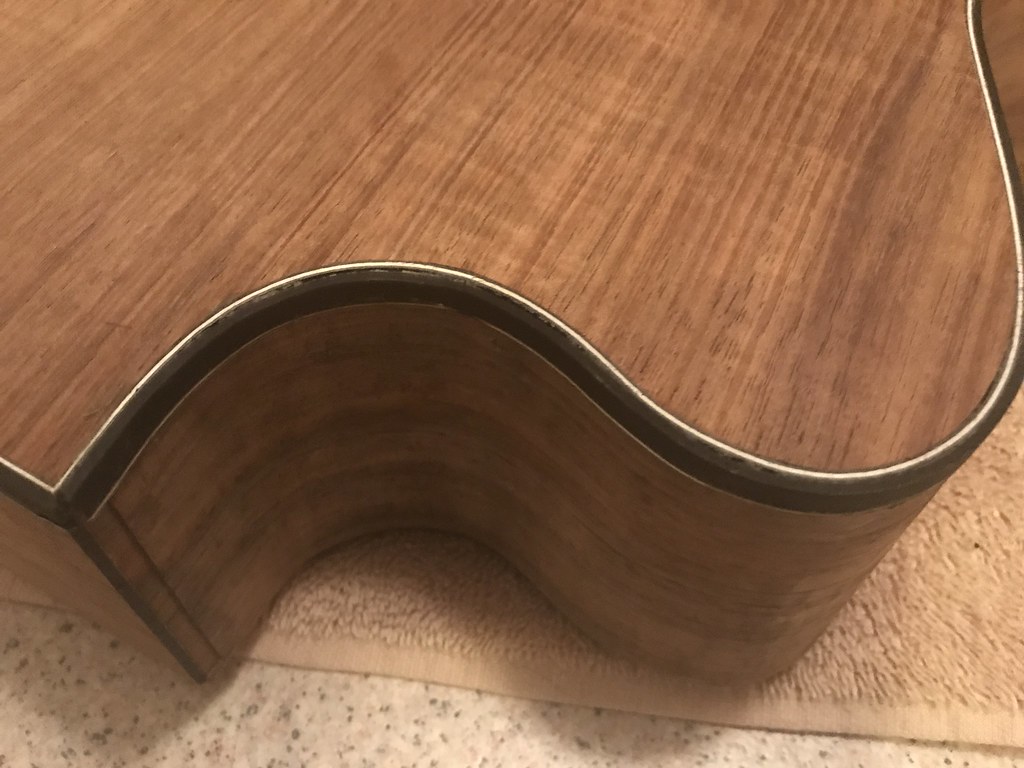 Untitled by David Emm, on Flickr Untitled by David Emm, on Flickranother view of the gap between the binding and the purfling 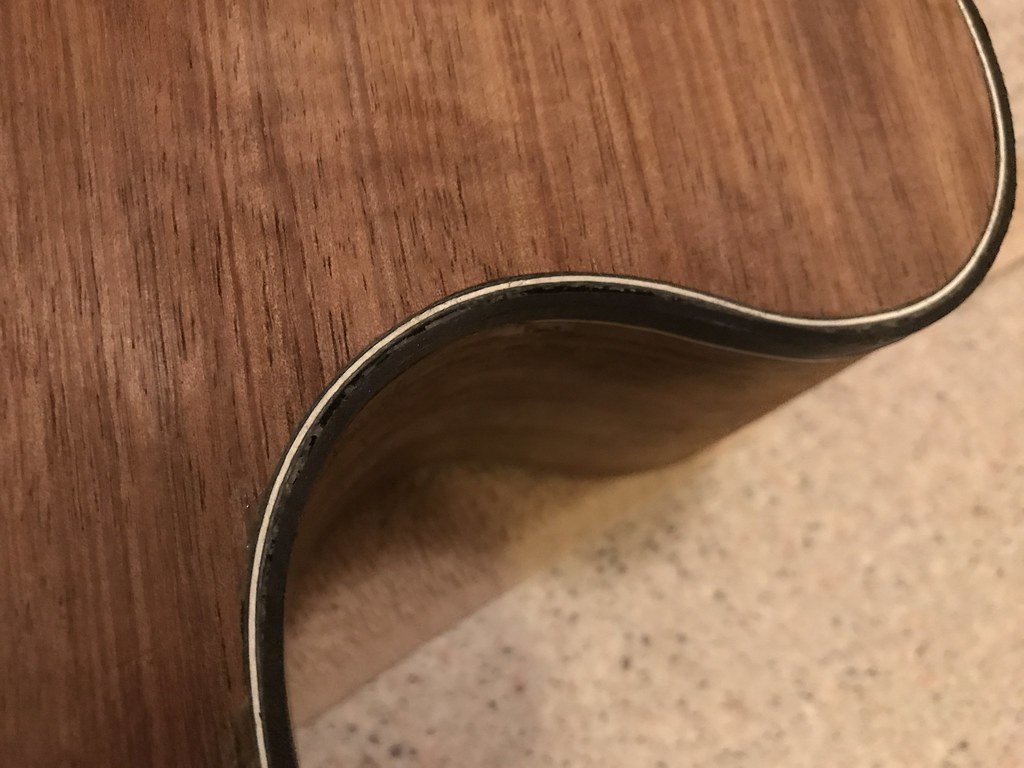 Untitled by David Emm, on Flickr Untitled by David Emm, on Flickr
|
|
#73
06-27-2017, 11:36 AM
|
|||
|
|||
|
For todays efforts I managed to install one half of the top binding and purfling, unfortunately I ran out of time to install the cutaway side before I have to leave for a week away.
I'm sure it will keep until I get back. Heres the top binding and purfling. I havent scraped it back or anything, its just freshly installed. 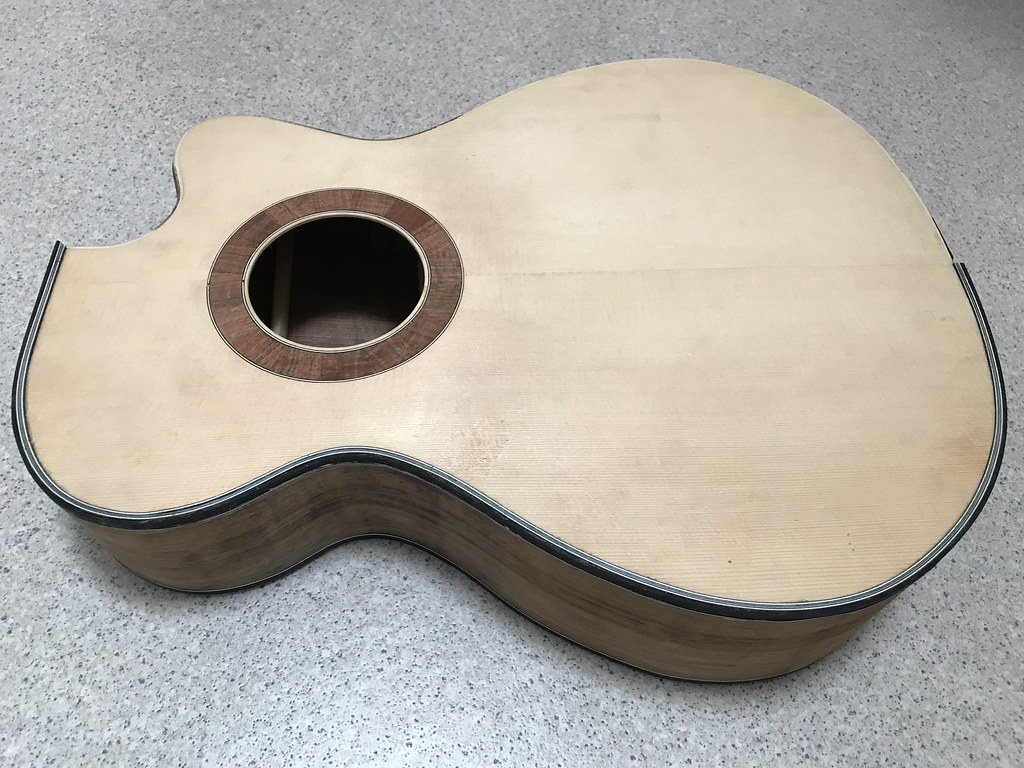 Untitled by David Emm, on Flickr Untitled by David Emm, on FlickrThis shows what the end graft will looks like, I still haven't put the centre strip in yet, and obviously havent put the right hand side binding in either but you can at least get a proper idea of how its going to look.  Untitled by David Emm, on Flickr Untitled by David Emm, on Flickr
|
|
#74
07-11-2017, 03:13 AM
|
|||
|
|||
|
Its been a while since the last update, i've been away, and the workshop is on a summer break so the opening times are very limited.
The body is now fully binding'd front and back. The extra purfling lines on the top were very awkward to do and to make sure everything still stayed in the right place while gluing. One half I bent them all separately, glued them together at one end and then actually glued it on and into place with the main binding, the other half I glued together at one end, and bent the 3 strips together. I'm not sure theres an advantage in either of those methods, they both seemed to 'do the job' but nothing more. If I ever go for multi strips again, I'd probably bend them all together just for the sake of less time and a bit less hassle. I also finally finished the back end graft, i still think it looks a bit odd, but it looks less of a mess now. In the process of putting the centre strip filler in that, which I deliberately fitted very tight, I seem to have slightly damaged a small section of the bwb purfling underneath it, its been pushed down slightly and slightly twisted, probably due to the pressure of the centre strip. Not sure this is repairable. From some angles it looks fine, from other angles it looks like i've missed a section entirely. Whilst waiting for the glue to dry on the final bit of the end graft I needed something to do, so I hogged out some wood with the drill press from what will become the slots in the slotted headstock,. Because its not finished, it does look rather odd right now. I then realised i'm supposed to drill the tuner holes first. I think if I drill the holes before I finish the slots I might get away with minimal hole blow outs, but thats just hope. next things to work on will be the neck/body joint, the headstock and the fretboard. I was originally planning to bind the fretboard as i'm not a fan of the exposed fret end/tangs, but I don't have any matching rocklite binding left. Haven't decided if I should order more or not yet, especially as that would mean international shipping/import for just 2 strips of binding... 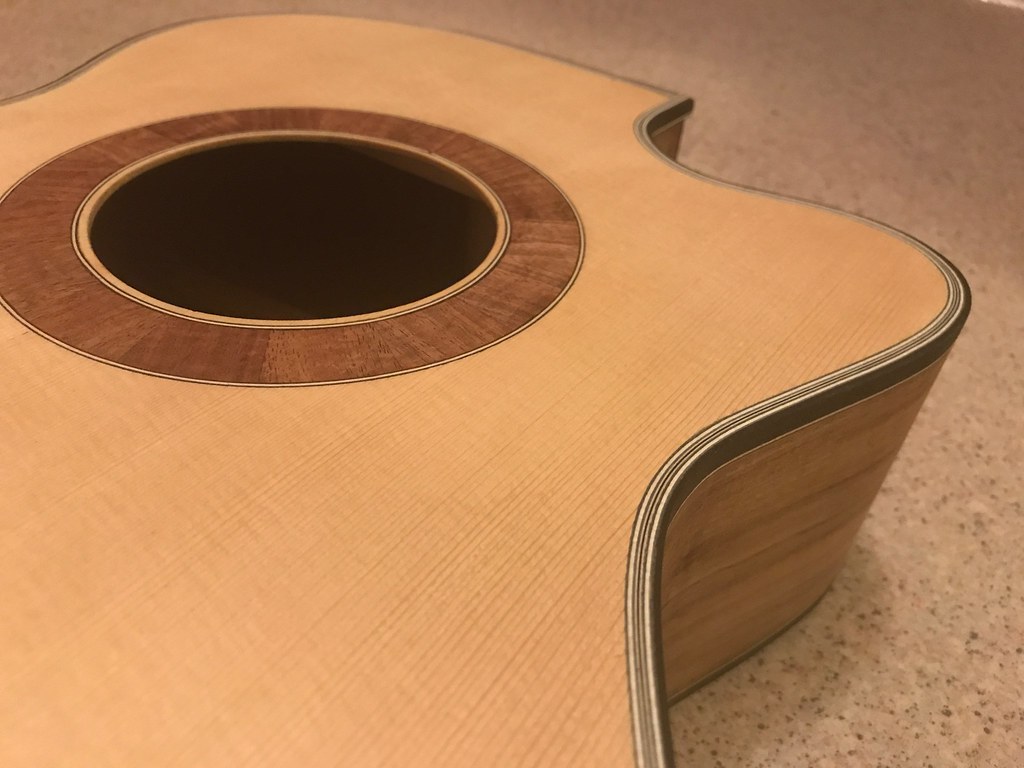 Untitled by David Emm, on Flickr Untitled by David Emm, on Flickr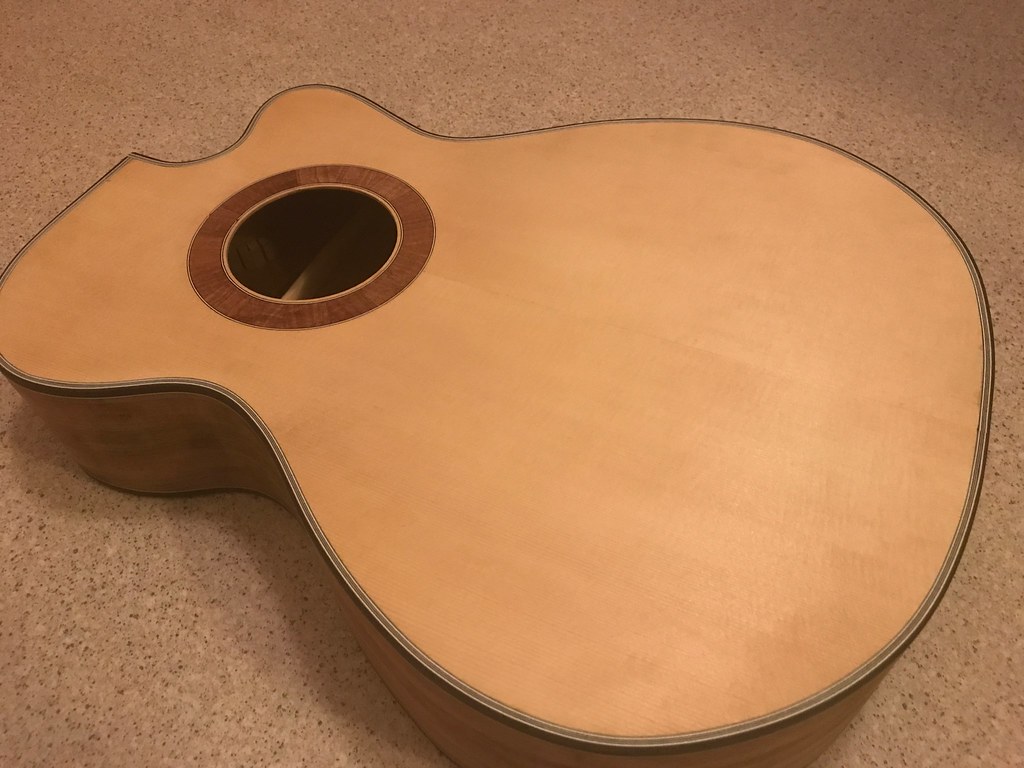 Untitled by David Emm, on Flickr Untitled by David Emm, on Flickr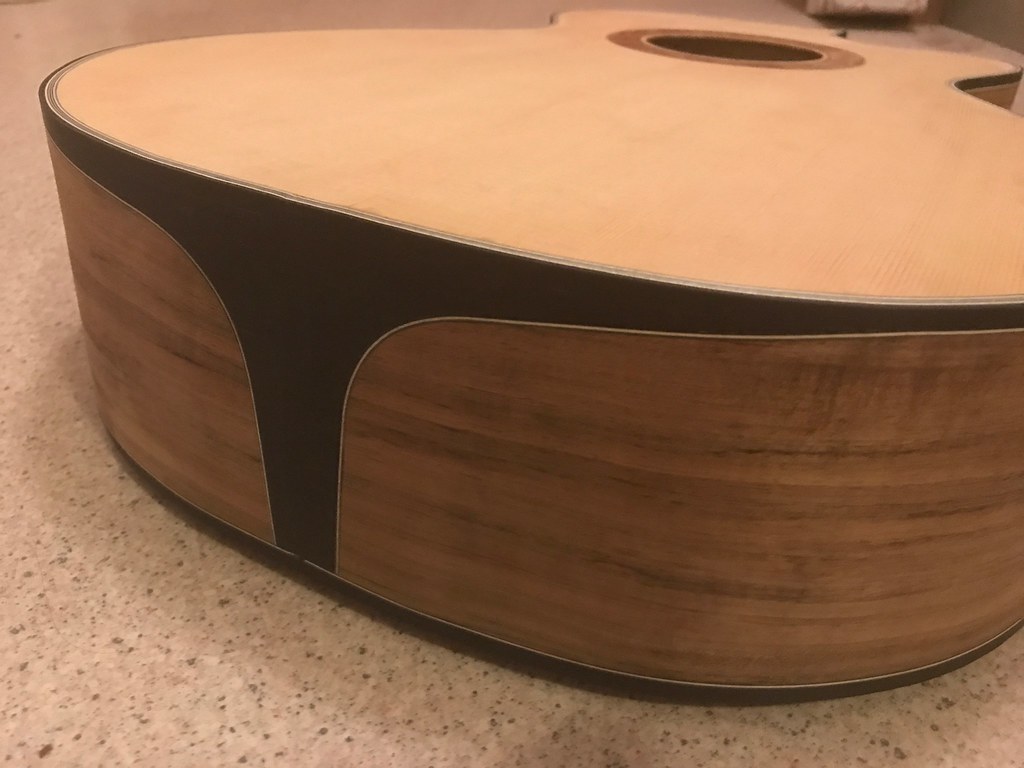 Untitled by David Emm, on Flickr Untitled by David Emm, on Flickr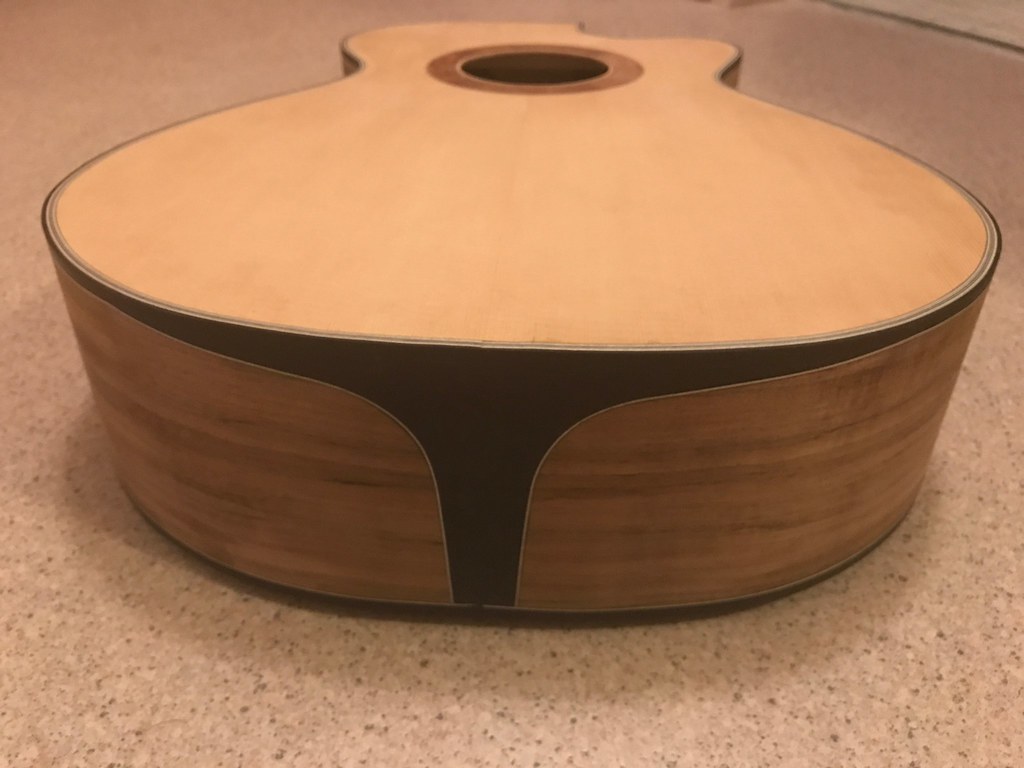 Untitled by David Emm, on Flickr Untitled by David Emm, on Flickr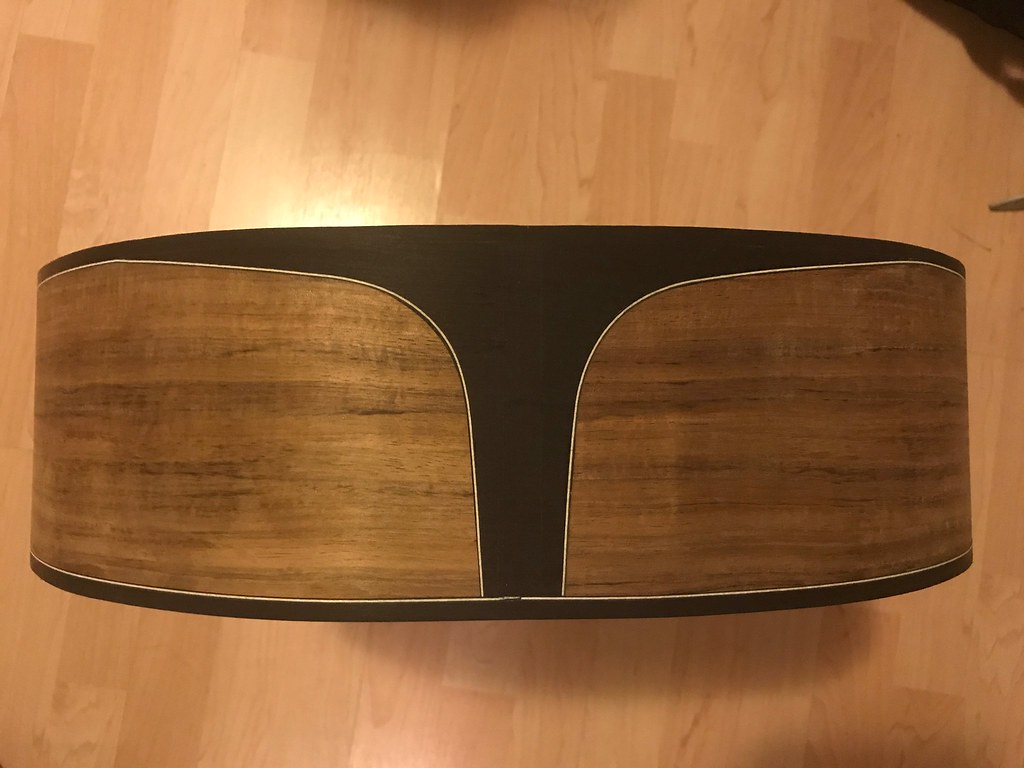 Untitled by David Emm, on Flickr Untitled by David Emm, on Flickr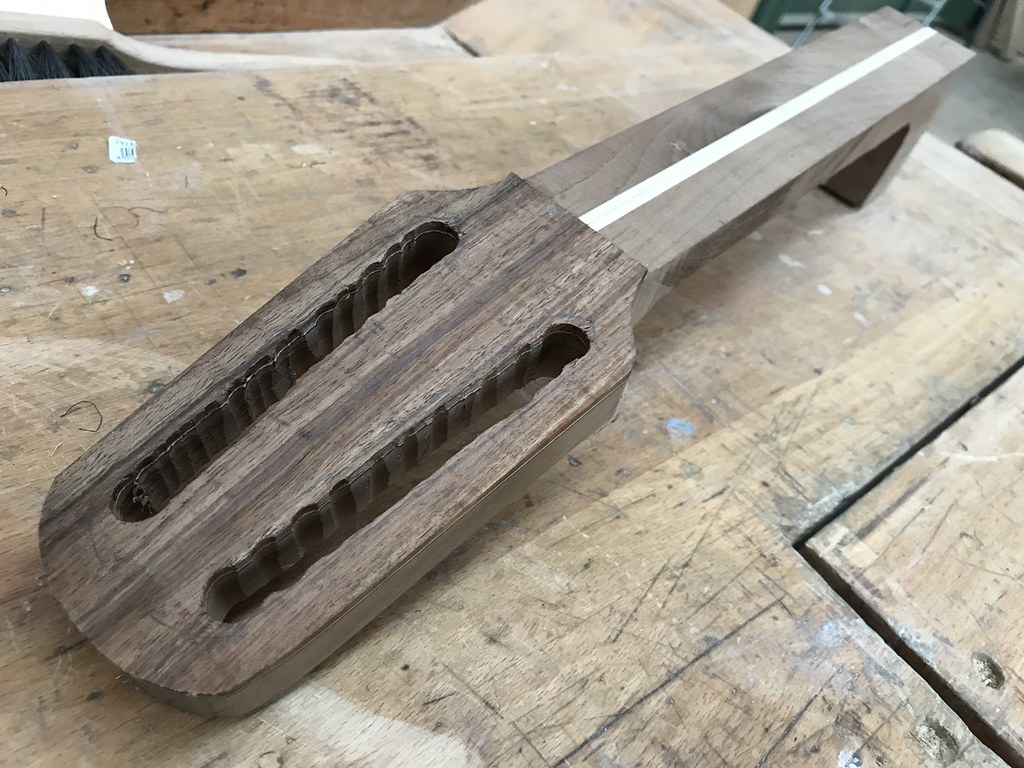 Untitled by David Emm, on Flickr Untitled by David Emm, on Flickr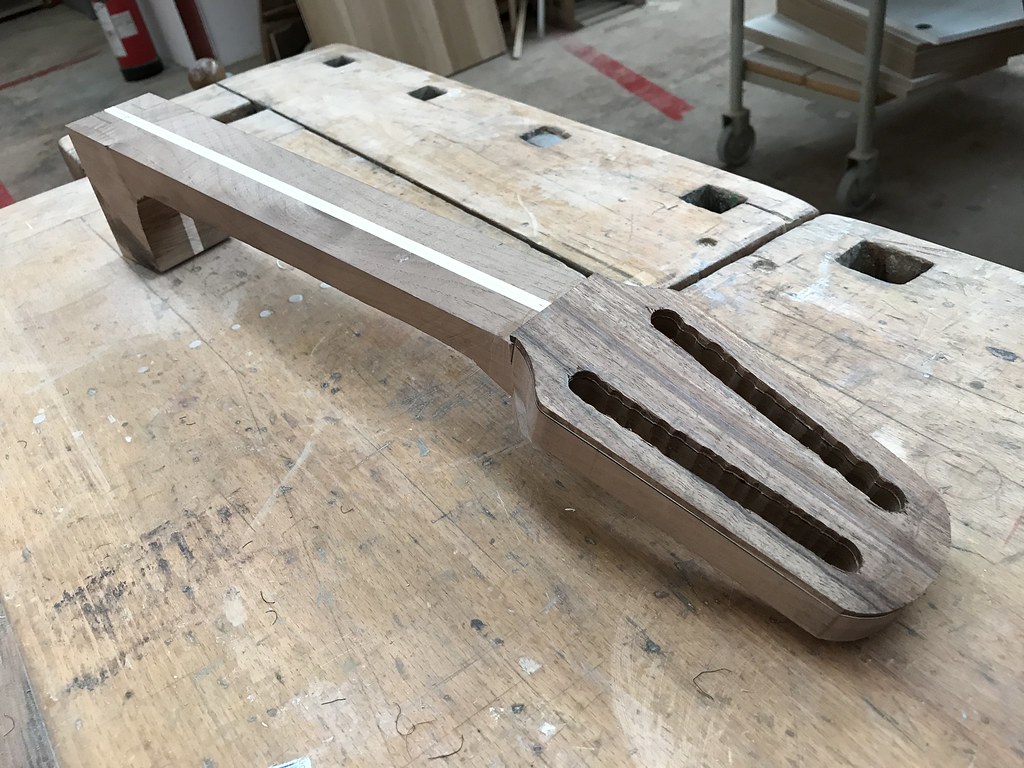 Untitled by David Emm, on Flickr Untitled by David Emm, on Flickr
|
|
#75
07-11-2017, 06:33 AM
|
|||
|
|||
|
Could you cut out and repair the purfling? Otherwise I think the back strip turned out fairly well and looks right. Something I would see and say why didn't I think of that.
__________________
Fred
|


