
|
|
#16
 10-15-2013, 04:58 PM
|
|||
|
|||
|
Thanks for the great day 2 update! Looking forward to day 3....


|
|
#18
10-16-2013, 12:33 AM
|
||||
|
||||
|
Pretty cool. Thx for the pix.
__________________
1930 Martin OM-28 2017 LeGeyt Parlor 2021 LeGeyt CLM Red/Tree 2021 Kostal MDW German/Pernambuco
|
|
#19
10-16-2013, 04:01 AM
|
|||
|
|||
|
Day 3
----- Today we focused solely on the back and sides of our eventual guitars. Quite a hard day's work actually. Very intense, with very few breaks. At the end of it I was quite mentally exhausted more than physically. We started straight away on the shaping of the backs of our guitars. So the sides we put together yesterday was placed back in the jig, and we had to use a plane to shape the curve of the back. This was where an experienced luthier wins hands down. We had pictures and drawings, but trying to get the same slope equal on both sides of the side shell was extremely difficult and time consuming. 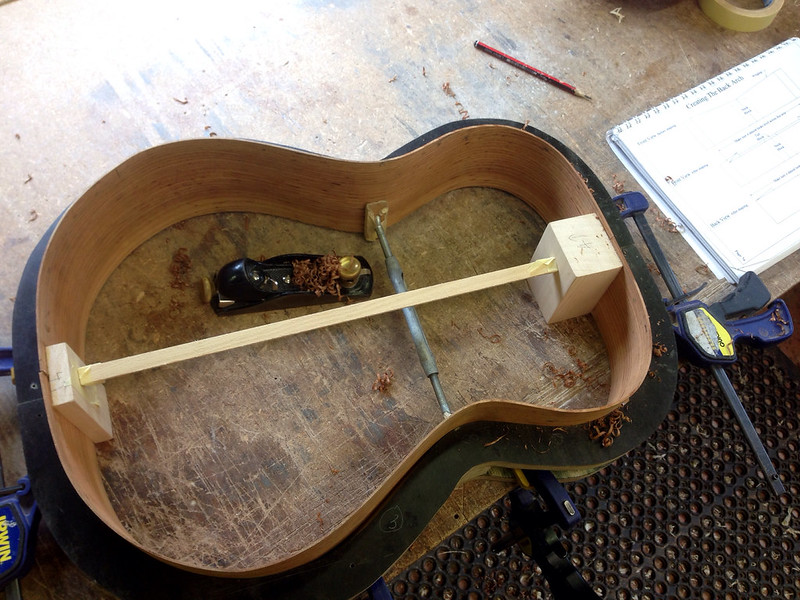 We could measure and plane, but at the end of the day, it came down to sight and judgement. It was amazing that every time Chris came around to check, he would say almost without studying the curve in detail "Oh, you have to shave 1mm off here", or "Make that slope a little steeper". When I measured it, sure enough, he was spot on. No substitute for experience, is there? This step also took longer than usual for me, because, if you remember yesterdays post, the neck block had shifted slightly when I clamped it after gluing, so I had to spend time correcting for the shift on both the bottom and the top surfaces of the block in order that the side shell sat level in the jig. The top was especially tricky as I had to correct an approx. 6 degree shift to the left whilst still maintaining the 4 degree upward slope for the back to glue to. After the planing, there was more fine tuning with this nifty gadget - essentially a large sanding block with a built in level.  I won't be afraid to admit that during this process, I was ably assisted by Bill, who is a former student of Chris' who is now a luthier in his own right. A very good one too. If I get the chance later, I will post a picture of the magnificent guitar he built that was in the workshop for final touches. Straight after the shaping was done, the insides were given a quick sanding down. 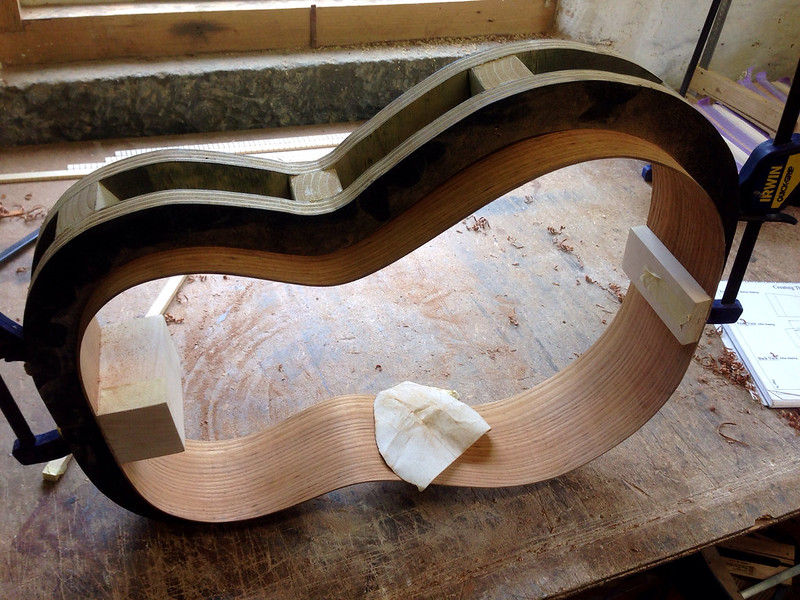 Then, shortly before lunch, it was straight onto gluing in the kerfing. I thought this part would be as arduous as cutting the kerfing, but it actually proved to be loads of fun to do. Here is my side shells doing their best sea anemone impression. 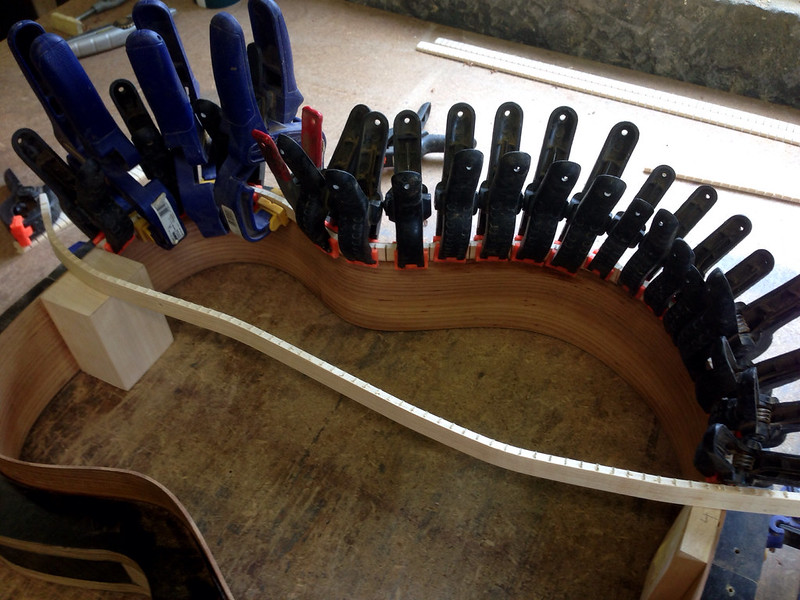 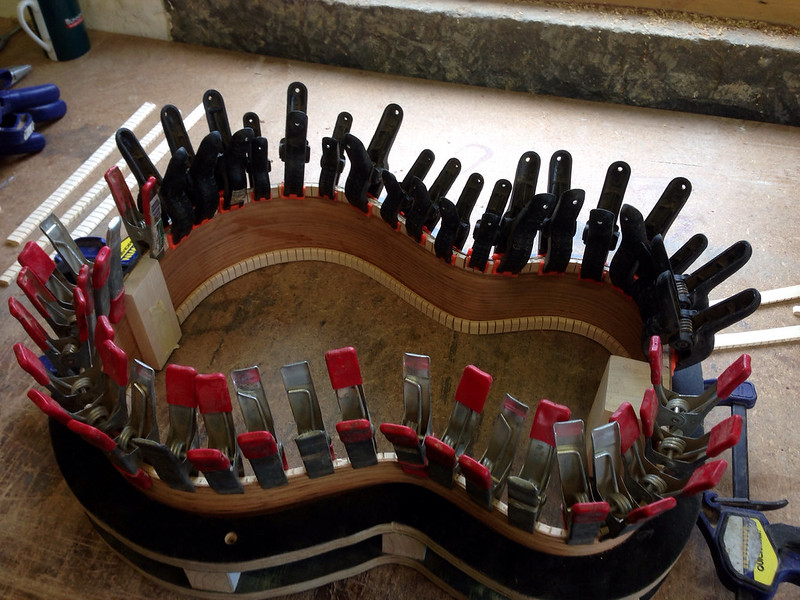 While the kerfing was drying, we moved back to the back (Ha!) and this time, had to use a chisel to finish off the curves at the ends. I must admit my chisel skills were very rusty, so I took it a lot easier and with less confidence. This meant there were more untidy chisel marks all over the curves, which meant I had to spend more time with the sandpaper to clean it up. Fortunately the chisel didn't slip, which would have left a large gouge on my back, and possibly even gone right through it! Whew. 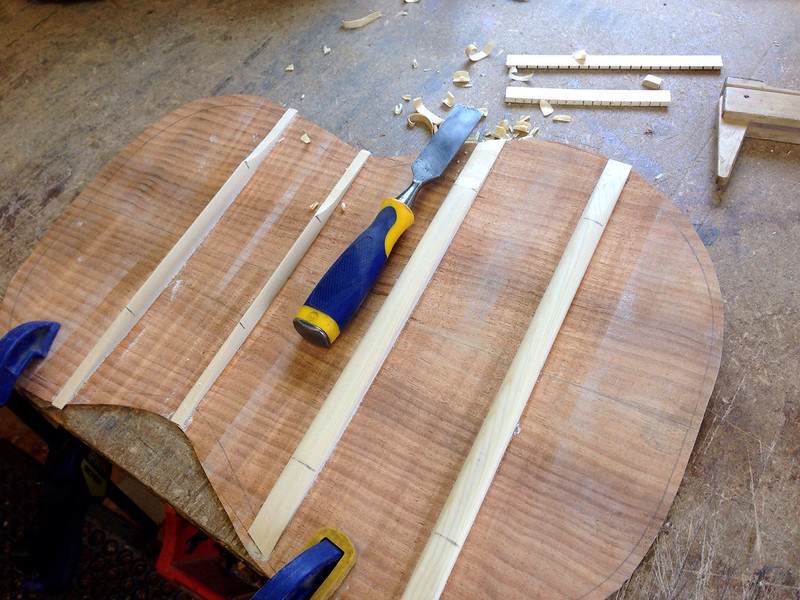 Lesson rapidly being learned here - if you take shurtcuts or do a messy job early on, it always means more time spent later on the tidy up. We then had a quick and easy 'break' task of shaping and cutting the centreline reinforment block and gluing them in. A nice easy break from the intense tasks so far today. 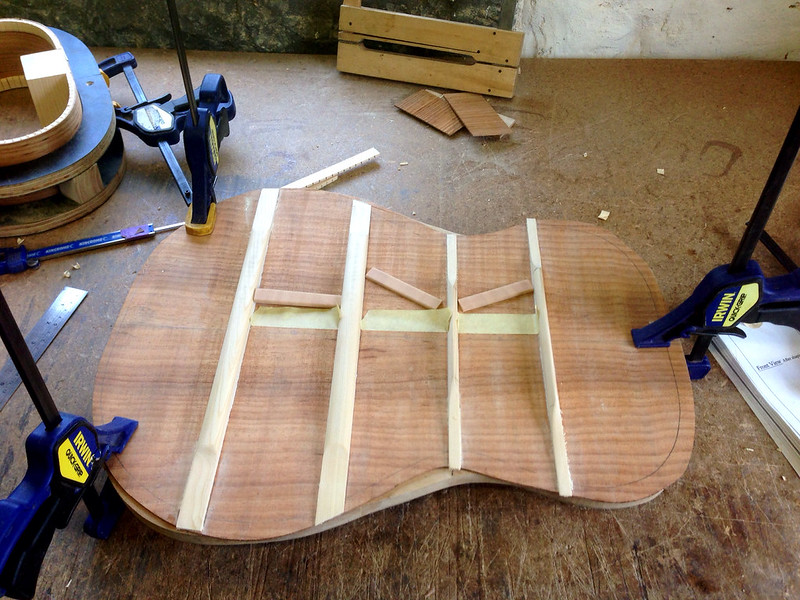
__________________
······························ ·▄▄▀▀▀▄▄··▄▄·················· ▐·······▀▀··▀▌··········ΦΦΦ··· ▌····║··(░)▒▒▒▒▒▒▒▒▒▒▒▒█████·· ▐·······▄▄··▄▌··········ΦΦΦ··· ·▀▀▄▄▄▀▀··▀▀·················· ······························ » My name is Devan » Guitar and Personal Blog. » Guitar and Gear Review Site. Last edited by CyberFerret; 10-16-2013 at 04:21 AM.
|
|
#20
10-16-2013, 04:02 AM
|
|||
|
|||
|
(Day 3 cont'd)
After the tiring chiselling and sanding, we had what I consider a treat. We were asked what we wanted for the little piece that runs along the bottom joint. I forget the technical term for this bit now! Oops! 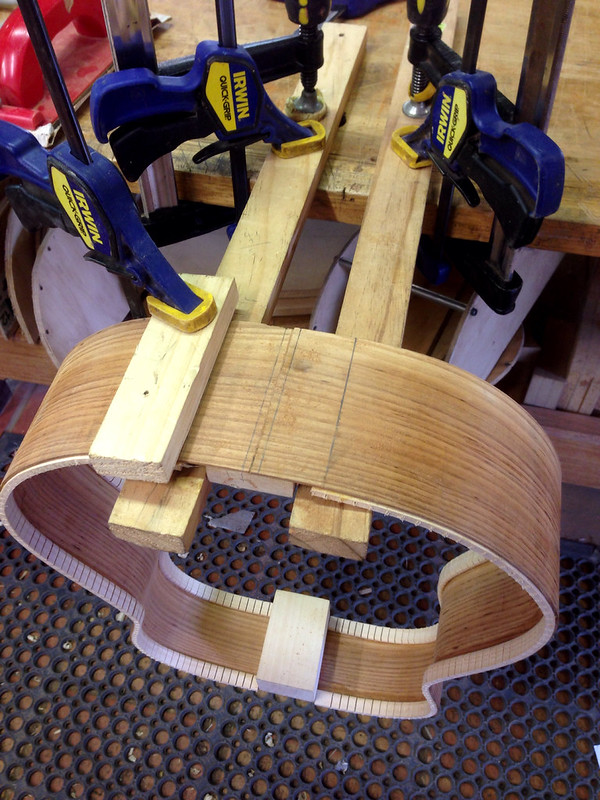 Both Sam the other student and I chose a Tiger Myrtle strip for the bottom, and we both decided to go with the purfling on either side too. It meant a lot of extra work, but we though it looked especially good against the Myrtle.  There was a lot of hand shaping and sanding to get the three pieces to fit. But I did it. It gave me a special glow of pride to see this bit, as I thought it made my guitar look a bit more 'professional'. 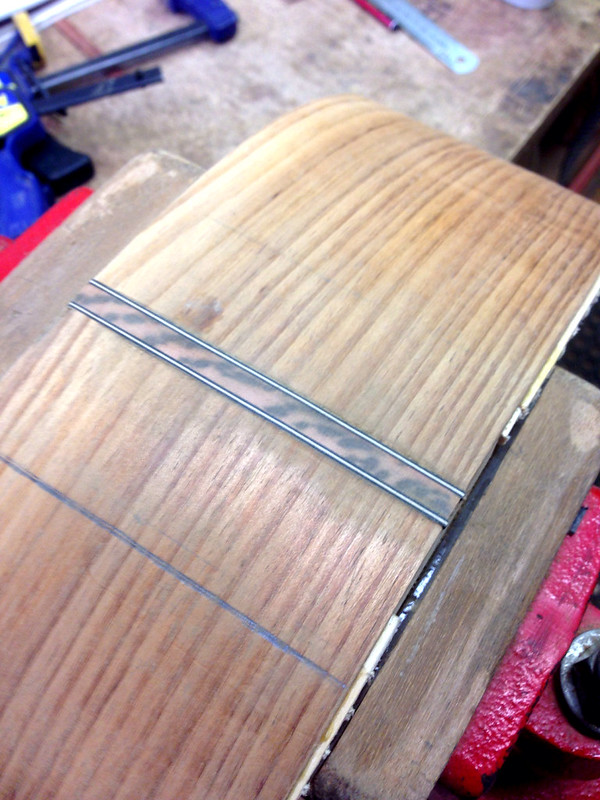 We thought about packing up and going home early after a mentally challenging day, but in the end decided to stay back a little later and do the final sanding of the bottom kerfing so that we could fit the back onto the side shell first thing tomorrow. The sanding is tricky, as you have to maintain a 4 degree upward slope on the bottom of the kerfing for the back shell to glue onto (to allow for the curvature of the back). 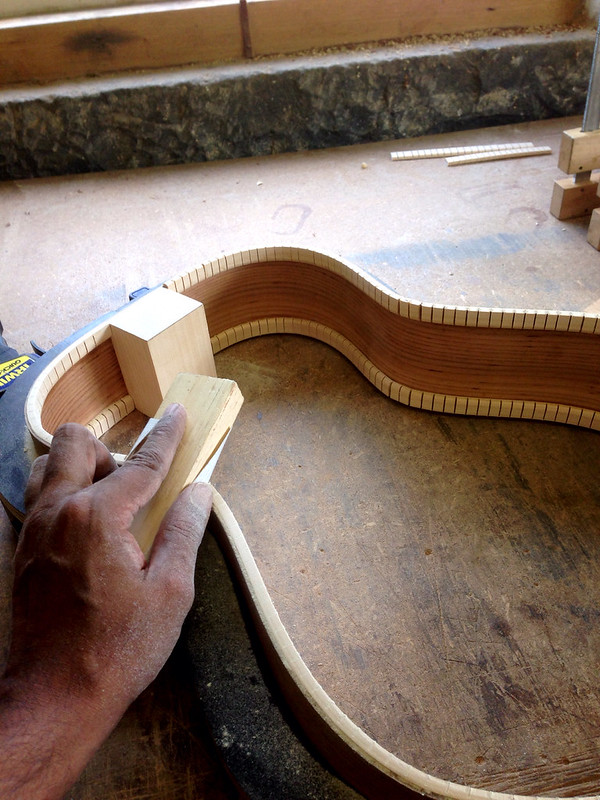 Note: Today was also especially good in the workshop, as there were two other students on a different course timetable that were working on their guitars. Having them, and Chris's assistant Bill in the workshop really elevated the mood and atmosphere. Nothing better than a bunch of people who are passionate and love what they are doing all working in the same room, talking guitars and music. Occasionally also helping and encouraging each other. Really added to my enjoyment. I arrived back at my accommodation feeling very tired, but very satisfied. Also a little excited, as tomorrow, all going well, we attache the back, then start to work on the soundboard. See you then!
__________________
······························ ·▄▄▀▀▀▄▄··▄▄·················· ▐·······▀▀··▀▌··········ΦΦΦ··· ▌····║··(░)▒▒▒▒▒▒▒▒▒▒▒▒█████·· ▐·······▄▄··▄▌··········ΦΦΦ··· ·▀▀▄▄▄▀▀··▀▀·················· ······························ » My name is Devan » Guitar and Personal Blog. » Guitar and Gear Review Site.
|
|
#21
10-16-2013, 06:54 AM
|
||||
|
||||
|
Devan, this is fascinating. The volume of details you have to keep in your mind is incredible. I am exhausted reading this. Can't imagine how you feel.
We really appreciate you posting this.
__________________
Life is like a box of chocolates ....
|
|
#22
10-16-2013, 07:00 AM
|
|||
|
|||
|
Nice! Keep up the good work as it is coming along very nicely!!
|
|
#23
10-17-2013, 02:59 AM
|
|||
|
|||
|
Day 4
----- The word for today was: INTENSE ! As expected, it was time to join the back to the sides. This was an operation that was not unlike mating the wings to the fuselage of and aircraft. Everthing had to be precisely alinged and fitted. This meant *multiple* test fittings and dismantling of the test rig to make lots of little adjustments. First thing we had to do was to measure that the body was symetrical. Even in the jig, the sides are subject to twisting etc., so additional spars had to be cut to size and fitted in a cross bracing pattern to push out certain points of the sides to fit the back. 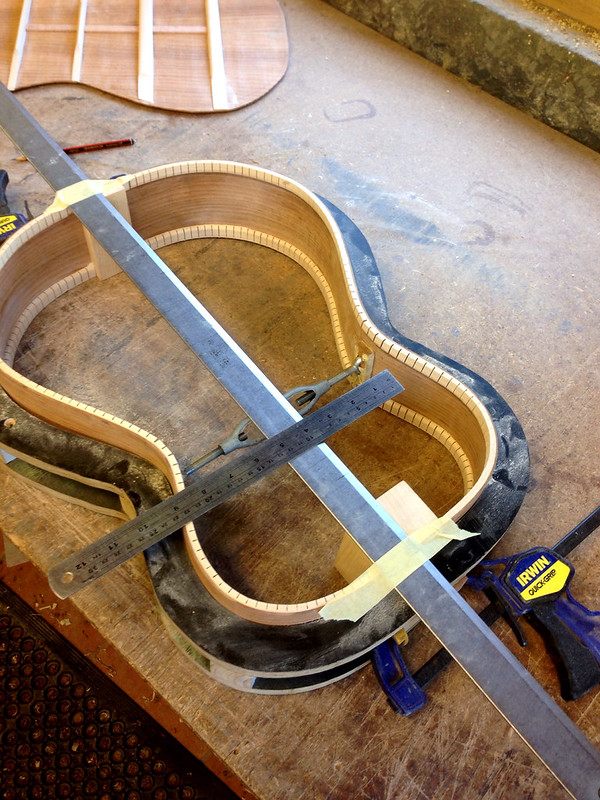  (These are Chris' arms above, as he explained where to place the bracing to skew the sides into shape). Then it was time to cut the slots in the sides for the braces to fit. This had to be carefully measured, rechecked, and checked again. We had to be careful to cut the slots undersized, then chisel out the centre piece and finish off with a file. It was imperative that the slots for the bracing were in the EXACT right place to ensure everything slotted together properly later. 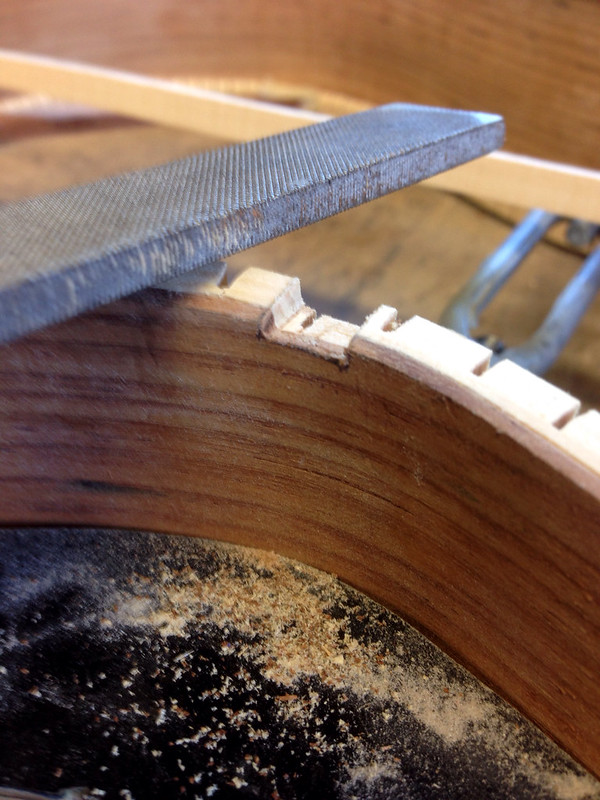 Lots of tape and temporary wooden blocks were used to ensure that the back was placed back in the same position each time for each test. As I mentioned - intense. This took a LOT of concentration and cross checking to accomplish. It took us pretty much the whole morning and early afternoon to acomplish this one task. I think the picture below was 'dry run' number 537... or thereabouts! img]http://farm6.staticflickr.com/5493/10324642264_ce370b5b66_c.jpg[/img] Finally, the glue was applied, and the back clamped into place. Success. Everthing looked good and seemed to align. I was unaware of the tension I was holding within until we finished that last clamp on the back. Then it was like a huge weight was lifted from my shoulders. This was probably the most critical part of the build so far, and was the culmination of so many other prior steps, all of which could have introduced errors. I actually had to have a sit down at the end, as my lower back and legs were aching. But I felt elated. 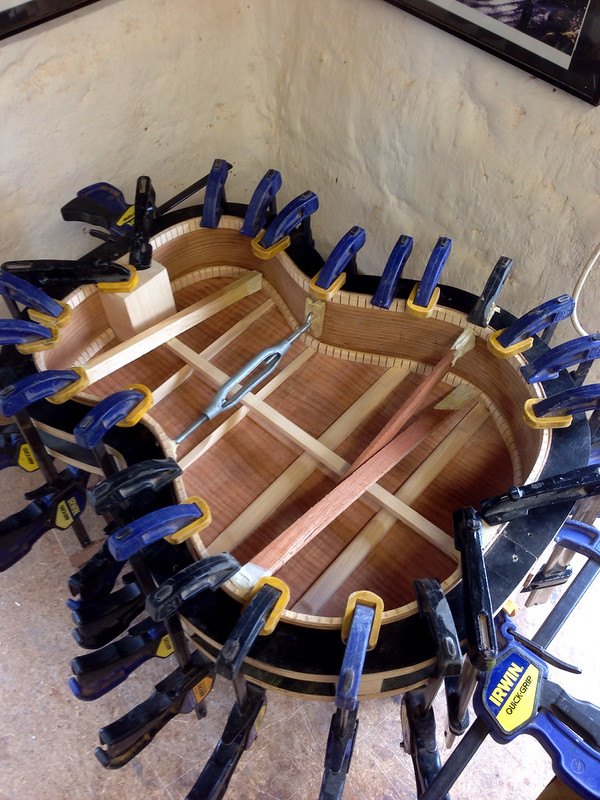 We were given an 'easy' task to do in order to wind down and take the pressure off. the cutting of the side braces. Very simple, but I took my time to ensure the side blocks were chamfered and sized to the right lengths. This would have normally been a quick task, but I spent an hour on this purely because I wanted some mental space from the morning's events. I also completed the blocks running along the back at this time. 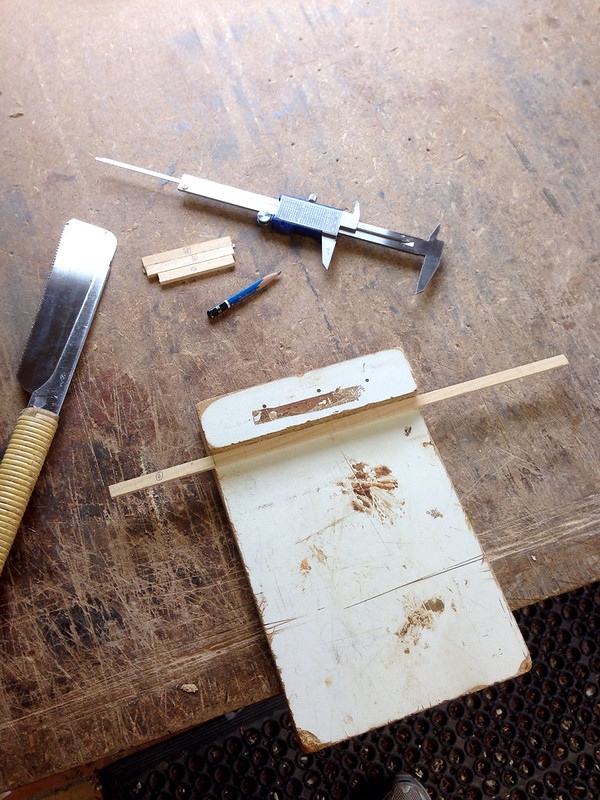 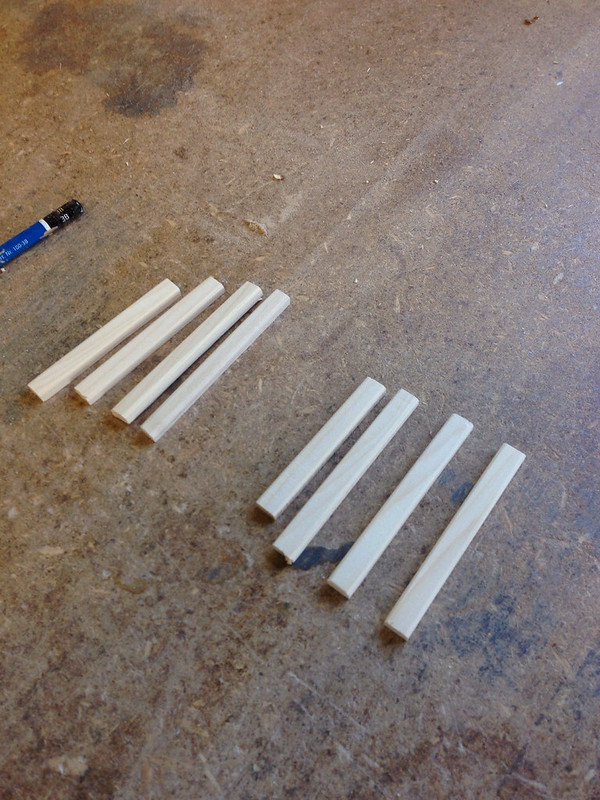 As soon as I finished my purposely extended task, it was time to remove the clamps on the back and give it one more inspection. Everything looked good. Chris then demonstrated how to use the router to remove the 'overhang' around the back piece and trim it flush with the body. I love using the router - such a fun and useful tool ! 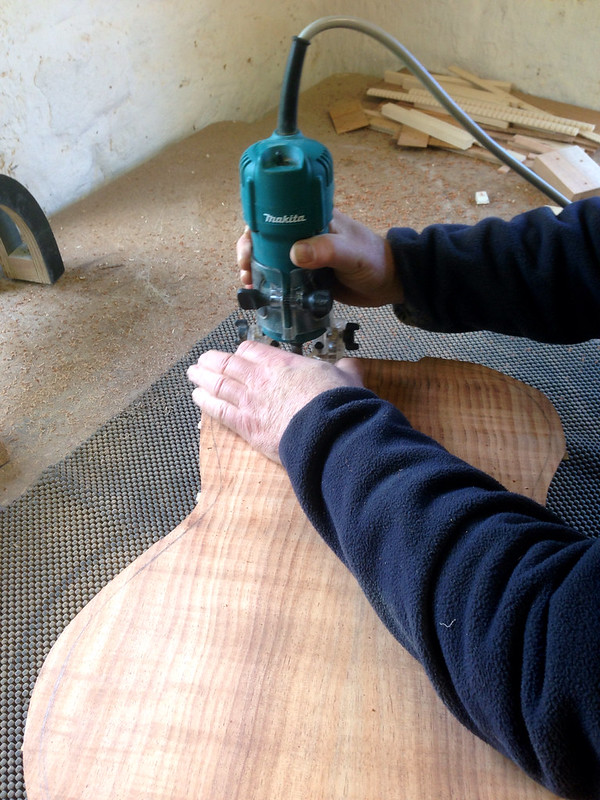 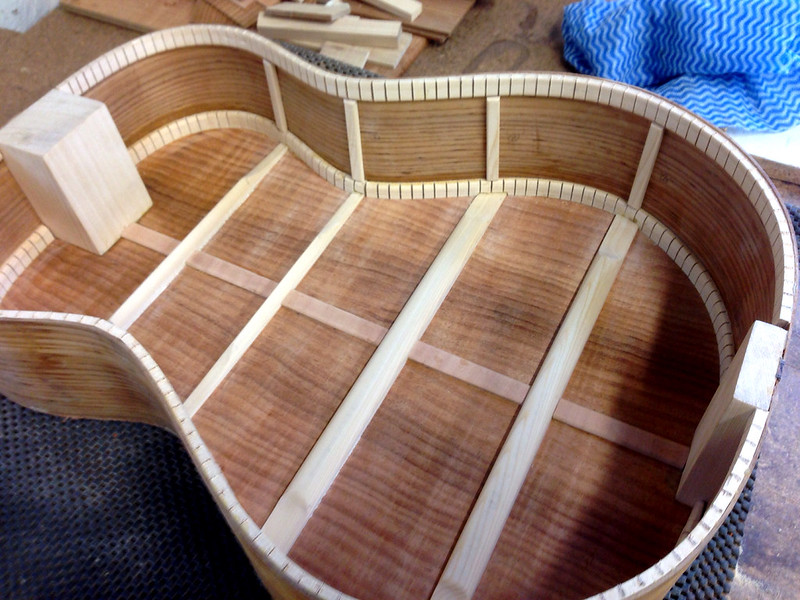
__________________
······························ ·▄▄▀▀▀▄▄··▄▄·················· ▐·······▀▀··▀▌··········ΦΦΦ··· ▌····║··(░)▒▒▒▒▒▒▒▒▒▒▒▒█████·· ▐·······▄▄··▄▌··········ΦΦΦ··· ·▀▀▄▄▄▀▀··▀▀·················· ······························ » My name is Devan » Guitar and Personal Blog. » Guitar and Gear Review Site.
|
|
#24
10-17-2013, 03:03 AM
|
|||
|
|||
|
Day 4 (cont'd)
[Intermission - We were interrupted by a hailstorm outside at this point] 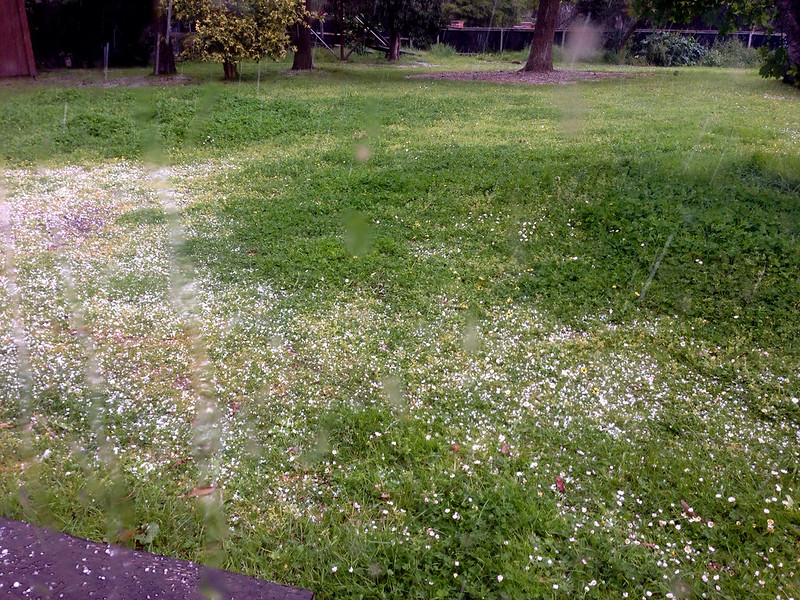 Then we were given a reward by Chris and Bill. The opportunity to choose the woods for our tops! Yay! This was probably the most critical decision we could make that would affect the end tone of our guitar. To this end, the master luthiers took us through a tour of the current guitar builds in the workshop to explain and show us the different woods in a completed or semi completed context and explain the tonal implications of our choices. Then we visited the woodshed again. I decided to go for a lighter wood to offset the darker Blackwood back and sides. Choices of lighter Australian tonewoods were basically different types of pine. I took a look at a few samples, but me heart was capture by the Huon Pine pieces I saw. Inspection by wood experts ascertained that this particular piece came from a tree that was approximately a thousand years old !! 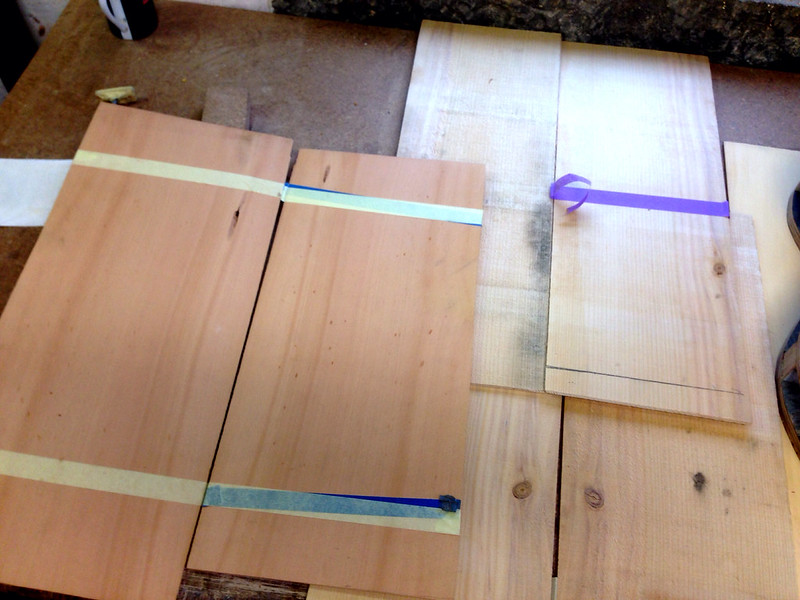 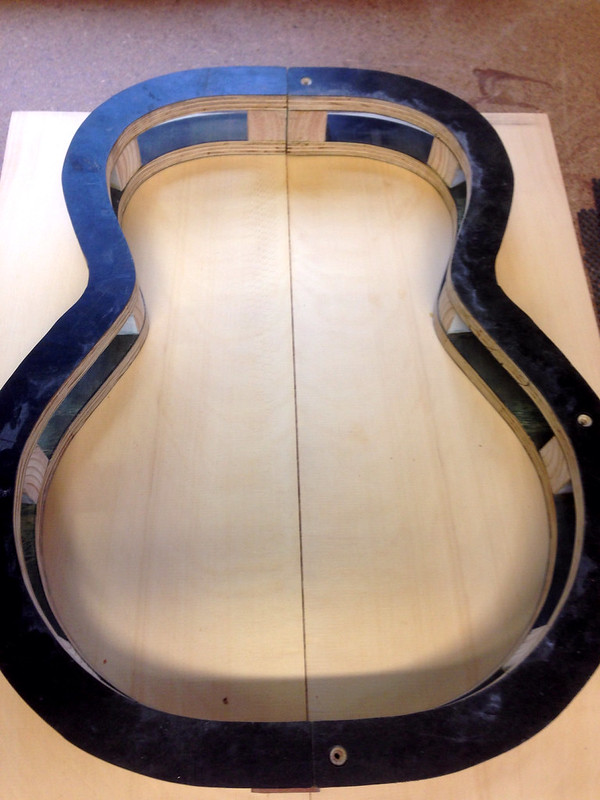 This unleashed a new surge in energy, and I wasted no time in drawing out the shape of the top, and preparing the edge for gluing. After the arduousness of the back preparation, this was a breeze. Being a softer wood meant that only after about 10 minutes work with the straight edge sander, the top pieces were pretty much ready to glue. 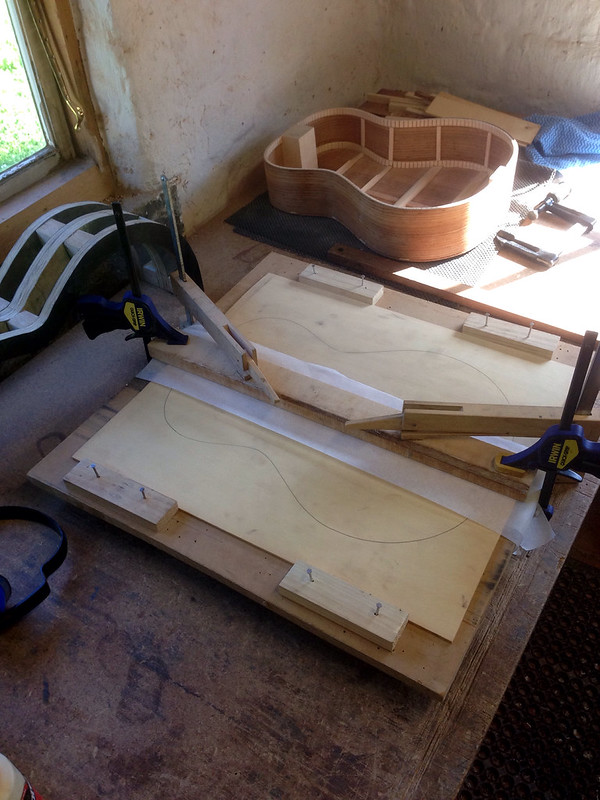 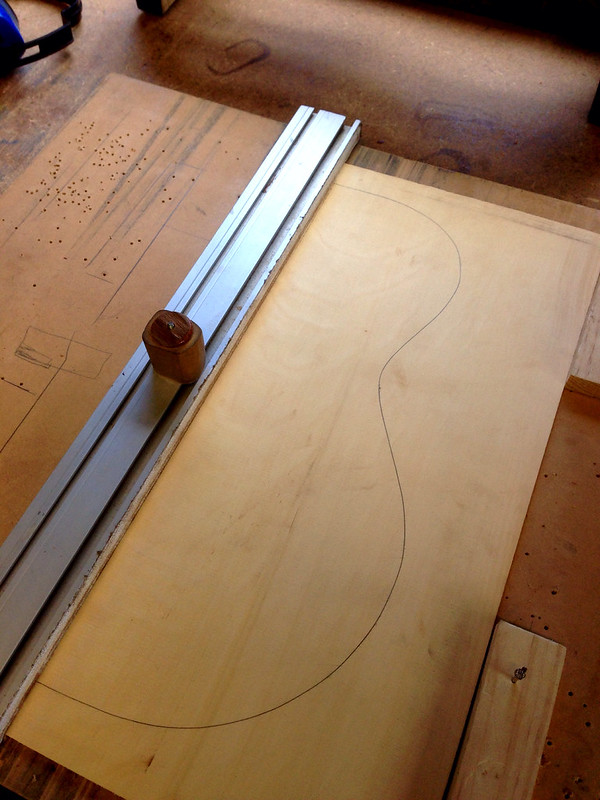 While the top was drying, yet another treat - we could choose the Necks as well !! Must be Christmas. Chris explained that he had a couple of special pieces of Tasmanian Oak for us to look at and as soon as Sam (the other student) and I saw the first piece, we decided we just HAD to have it. Such beautiful flame. The photo really couldn't capture it.  We wasted no time in measuring and cutting the angle for the headstock, then spent some time preparing the two halves to ensure the eventual join would be absolutely flat and flush. We literally had to be forcible kicked out of the workshop as it was well past 'down tools' time and everyone else wanted to go home.  I arrived home tired, yet super excited about tomorrow. Catch you then!
__________________
······························ ·▄▄▀▀▀▄▄··▄▄·················· ▐·······▀▀··▀▌··········ΦΦΦ··· ▌····║··(░)▒▒▒▒▒▒▒▒▒▒▒▒█████·· ▐·······▄▄··▄▌··········ΦΦΦ··· ·▀▀▄▄▄▀▀··▀▀·················· ······························ » My name is Devan » Guitar and Personal Blog. » Guitar and Gear Review Site.
|
|
#25
10-17-2013, 03:10 AM
|
||||
|
||||
|
Looking great, thanks for posting!
__________________
1930 Martin OM-28 2017 LeGeyt Parlor 2021 LeGeyt CLM Red/Tree 2021 Kostal MDW German/Pernambuco
|
|
#26
10-17-2013, 06:24 AM
|
|||
|
|||
|
Go Devan go!
|
|
#27
10-17-2013, 06:44 AM
|
|||
|
|||
|
Go Devan go! Can almost feel your excitement
|
|
#28
10-17-2013, 09:38 AM
|
|||
|
|||
|
I'm really enjoying following this thread. Thanks so much for your detailed accounts and photos. Looks to be a very intense but rewarding experience. Thanks again...
__________________
2013 Stehr Auditorium (Carpathian/Myrtle) 2015 Stehr Auditorium (Adi/BRW) 2020 Baranik Meridian (Blue Spruce/Manchinga) 2020 Wilborn Arum (Tunnel 14/Coco) 2021 Kinnaird Graybeard (BC Cedar/Bog Oak) 2022 Kinnaird CS Student Build (Adi/Padauk) 2023 Kinnaird FS (Italian/Koa)
|
|
#29
10-18-2013, 03:09 AM
|
|||
|
|||
|
Day 5
----- *NOTE* I must apologise for not replying directly to comment and PMs I've received yet. I am staying at accommodation with no Internet access, so I am relying on my phone to transmit the posts, which means I have to compose them offline, then take a brief window of opportunity to upload everything and sign off again to keep the bandwidth costs down. I promise to reply to all when I get back home in just over a week! *NOTE 2* In response to many enquiries, I am happy to reveal that the name of the workshop I am attending is Thomas Lloyd Guitars Australia. Their website is www.thomaslloydguitars.com.au. Chris Wynne is the master luthier in charge. A very nice guy. Please feel free to contact him with any questions about the school. Word of today was: HARD MATHS ! We started off with the same momentum as yesterday. I raced straight over to the top I glued yesterday and removed it from the clamps. All looked great. I gave it a few quick runs throught the belt sander to remove the glue marks and it turned out terrific. 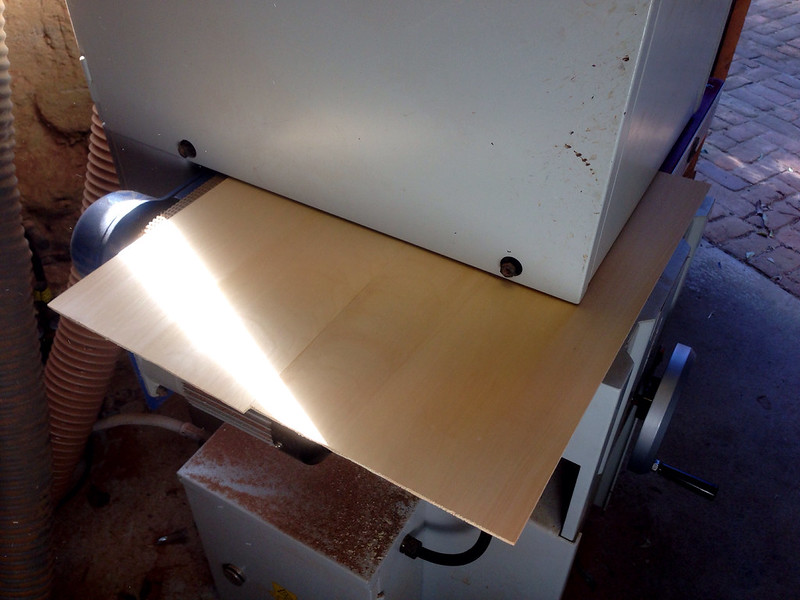 Next job: Ensuring the neck/headstock join was perfectly flat, then gluing the two together and clamping. Lots of tricks to this, to prevent the two pieces from slipping out under pressure due to the angle. All went well. 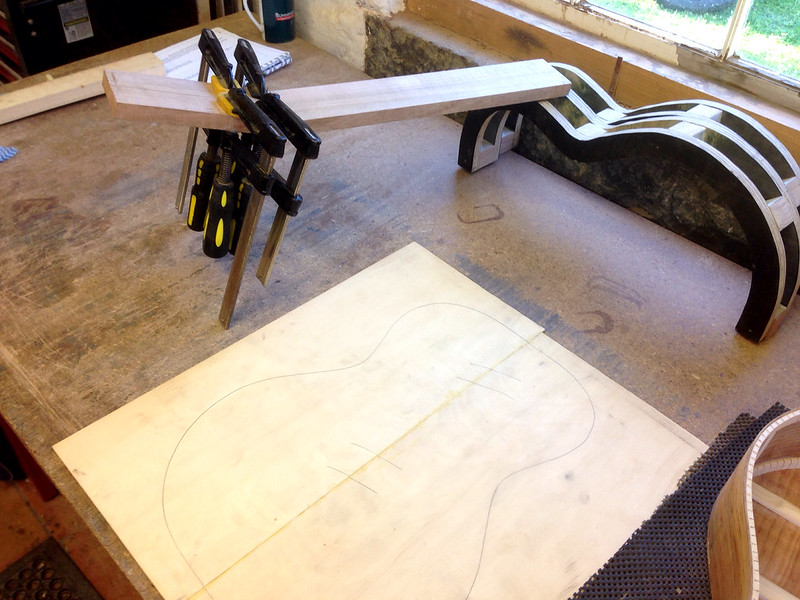 Then, it was time to glue the neck heel block. This also proved to be tricky - a bit like building a 4 layer sandwich. With all the glue, the blocks tended to slip and slide around when clamping pressure was applied. All in all, I think I got it done OK.  While waiting for that to dry - I re-drew the body shape onto the top of the guitar. There is a very similar 'waterfall' pattern on the front as there is on the back.  Next, a bit of excitement - choosing and designing the rosette. Now bear in mind that nothing is pre made here. It is all scratchbuilt. After thinking about all the option, I decided to go with a tricky pattern of alternating wood arcs for the rosette. I had a poke around the woodshed and found these sheets of Myrtle and some lovely Lacewood. 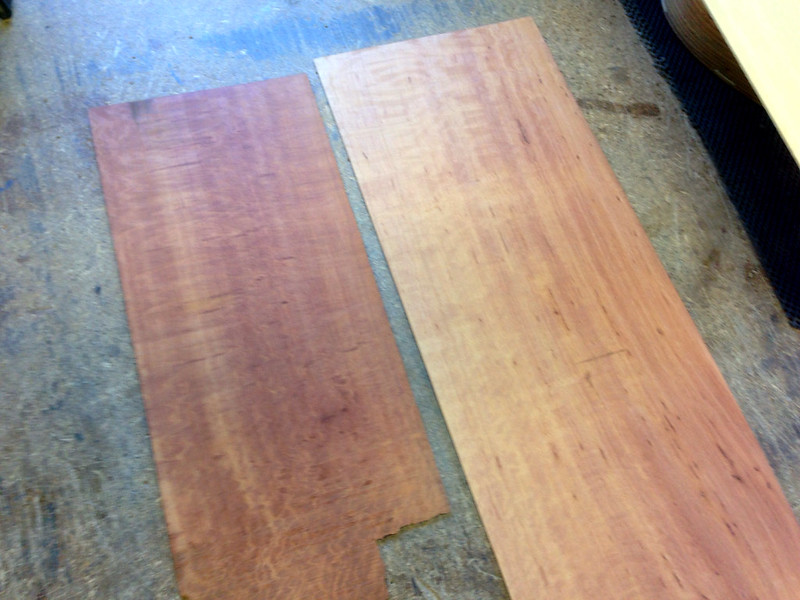 The Myrtle in particular was quote thick, so I had to spend a LOT of time on the belt sander thinning it down to about 2mm thick. [Intermision] While thinning the rosette wood, a local musician visited to try out the guitar that Chris' assistant luthier (and former student) built. This is a magnificent 000 sized acoustic. Just check out that wood grain under 60 layers of French Polish ! 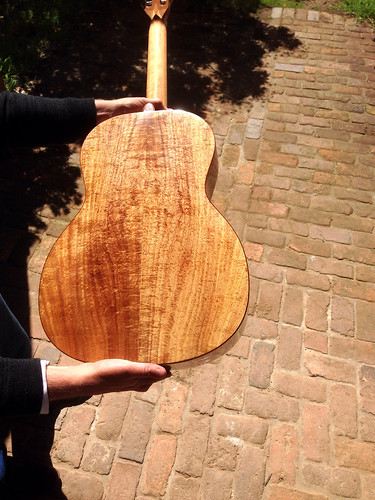 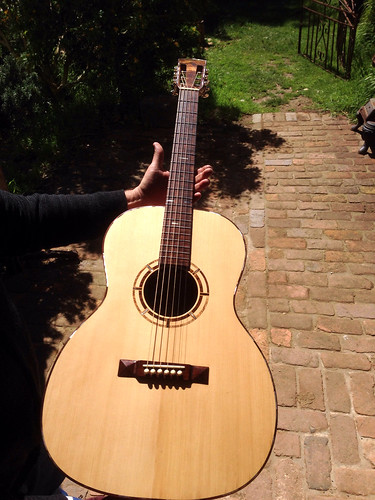  Ok, NOW came the hard maths I alluded to earlier. Chris handed me a block of wood and showed me the dimensions and quantity of braces that I needed to cut from the block with minimum wastage. He also handed me a sample top with the bracing pattern outlined.  I spent about 90 minutes calculating the optimum cut patterns to utilise the block I had, ensuring that wastage was minimal. It was like a 3 dimensional puzzle - also remembering that I could not get too distracted with the calculations and keep my wits about me as I sliced them on the band saw. I think I did OK. 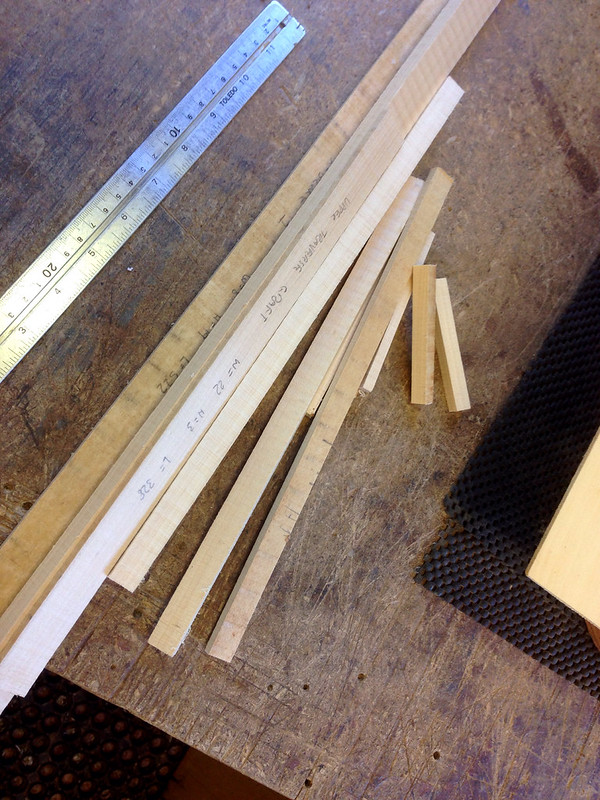
__________________
······························ ·▄▄▀▀▀▄▄··▄▄·················· ▐·······▀▀··▀▌··········ΦΦΦ··· ▌····║··(░)▒▒▒▒▒▒▒▒▒▒▒▒█████·· ▐·······▄▄··▄▌··········ΦΦΦ··· ·▀▀▄▄▄▀▀··▀▀·················· ······························ » My name is Devan » Guitar and Personal Blog. » Guitar and Gear Review Site.
|
|
#30
10-18-2013, 03:11 AM
|
|||
|
|||
|
(Day 5 cont'd)
Then, a break from mental maths when I was asked to glue the front laminate onto the headstock. I choose the same Myrtle that I was going to use on the Rosette. I glued it on, waited for it to dry, then sanded it down on the Linisher. It has quite a cool 'flame' pattern to it that should come up under the finish. 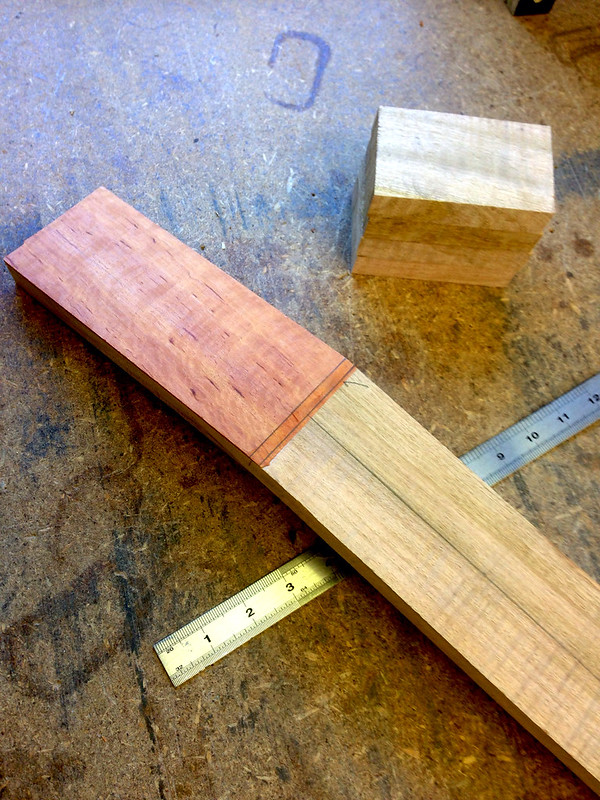 Next, was gluing the heel block onto the neck itself. Easy done. I am getting the hang of this gluing business! A little more maths, but quite basic this time, as I had to calculate the scale length and nut width and draw them up on the front of the neck blank in preparation. 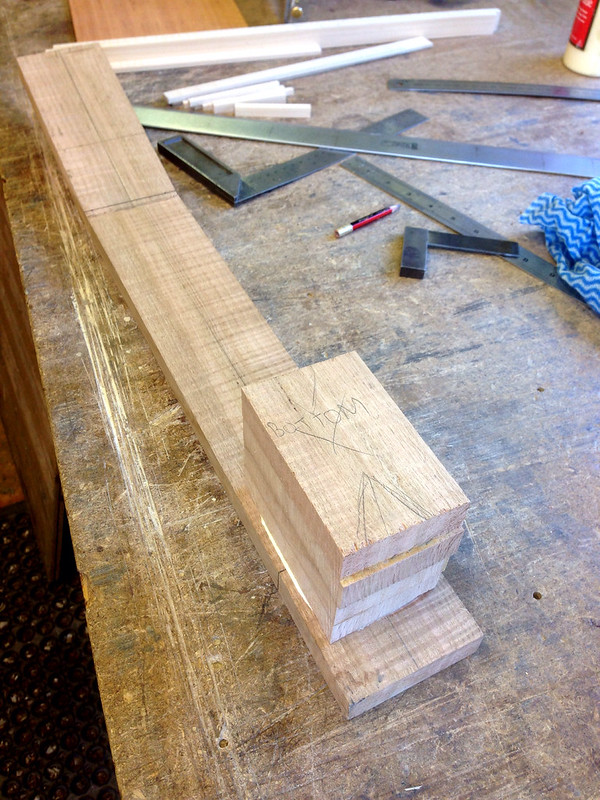 Now, it was the fun bit again, as I taped both the rosette wood planks together and stuck them onto the cutting bench to cut them out with the router. 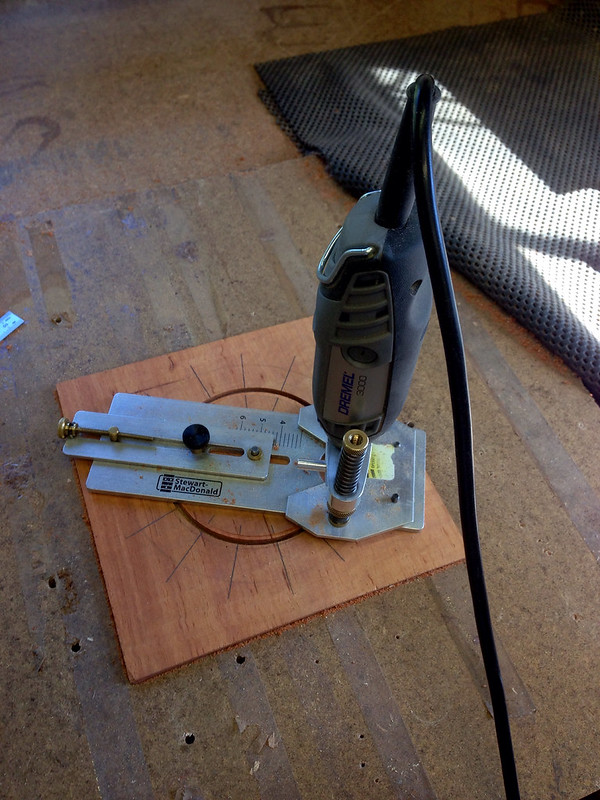 After the careful cutting, it came down to marking out the segmentation. This is where the second lot of hard maths came up. I had to work out the best way to mark out 12 segments on the circle. All my long forgotten high school maths had to be recalled. I ended up using protractors and dividers and calipers to create bisecting circles etc. to calculate the segments. These will be 12 alternating wooden pieces which I will have to cut tomorrow. 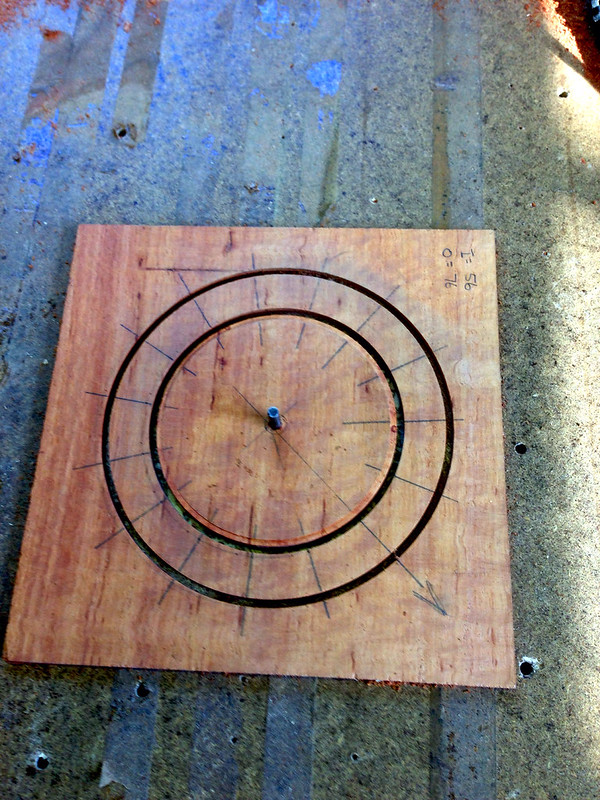 Once again, I had to be kicked out of the workshop as it was after 5pm on a Friday afternoon here and everyone else wanted to go home for a beer! I was having too much fun with the maths though. Perhaps late Friday was not the best time to be doing hard maths, but while working on my guitar - time has lost all meaning. Honestly, most days it feels like I have only been working for a couple of hours, when instead a whole day has gone by. Loving it. We will be working throughout the weekend too... see you then!
__________________
······························ ·▄▄▀▀▀▄▄··▄▄·················· ▐·······▀▀··▀▌··········ΦΦΦ··· ▌····║··(░)▒▒▒▒▒▒▒▒▒▒▒▒█████·· ▐·······▄▄··▄▌··········ΦΦΦ··· ·▀▀▄▄▄▀▀··▀▀·················· ······························ » My name is Devan » Guitar and Personal Blog. » Guitar and Gear Review Site.
|


