|
|
#31
 06-30-2013, 07:56 PM
|
|||
|
|||
|
Here's the drum being glued up.
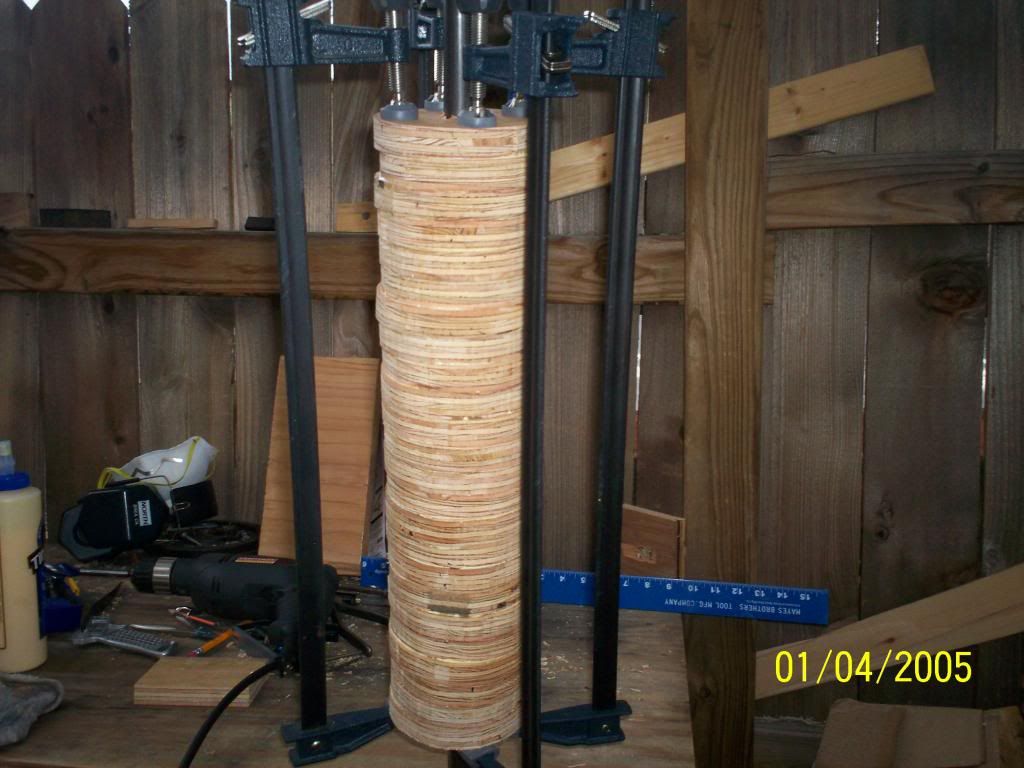 I've got quite a bit of work to do on it to true it up. It's not that even. Kinda rushed through the process of cutting the disks. I also installed the dimmer switch in the electronics of the saw and fired it up. Great RPM control. All the way from about 5-10 RPMs on the low end, all the way up to full speed. And it is quite a bit quieter on the lower end.
__________________
-- Nick 
|
|
#32
06-30-2013, 08:37 PM
|
|||
|
|||
|
Quote:
What is more important than drum speed is surface speed in feet per minute. That is, how many feet of sanding surface pass a given point in a given time. That varies with drum diameter and rotational speed (RPM). For the same rotational speed, a larger drum will have a higher surface speed than a smaller drum. Quote:
You'll need a means of securing the drum to its shaft so that the drum doesn't spin on the shaft. The drum will need to be concentric on the shaft for a) accuracy/repeatability and b) for dynamic balance of the rotating mass (drum). You'll need a means of attaching the sandpaper to the drum. I'm guessing from the photo that your finished drum will be about 5" or so in diameter and 20" or so long. The combination of drum diameter and shaft diameter needs to be sufficiently stiff to prevent flexing mid-span under load. Ideally, you'll want about 400 CFM of air flow for dust collection. You'll also want some sort of dust shroud to keep the dust "in". Alternatively, use it outside. Grit Laskin wrote an article about his home-made drum sander in an early issue of Fine Woodworking. The article provides fairly complete working drawings. You might want to read what he did. Or not. Another author gave full plans for a home-made wide-belt sander in a different issue of the magazine. I literally jumped for joy the day I disassembled my home-made sander in favour of a commercially made one with a variable speed feed and drum speed, quick-change sandpaper, accurate depth gauge... Back in the day, sanders started at over $20k: now one can be had for as little as $600.
|
|
#33
06-30-2013, 10:06 PM
|
||||||
|
||||||
|
Quote:
Quote:
Quote:
Quote:
 ) and keep them from getting out of hand, it should be stable. But we'll see. ) and keep them from getting out of hand, it should be stable. But we'll see.Quote:
Quote:
__________________
-- Nick
|
|
#34
07-01-2013, 05:47 AM
|
|||
|
|||
|
Nick,
A little trick I found when making my rollers was after a ton of sanding, I chalked the roller to see the low and high spots, put wood putty in the low spots, let dry and re sanded, sped up the process a lot. I use the hook and loop on mine, the Velcro is thick and does help. Only other minor issue I found on mine was I had to shim one of the pillow blocks up to match the exact height of the table. Charles, now that you've gone high tech how much time do you save thickness sanding a top or back set? I like my homemade thickness sander, but it sure does take time. Stu btw Nick, how do you plan on adjusting your table height? Also do you any auctions near where you live? I was at one sat. and they had 4 electric motors from 1/3 h to 1 horse and they went for $10.00 each.
__________________
I'm not a luthier...luthier's know what they are doing. 
Last edited by stuw; 07-01-2013 at 05:59 AM.
|
|
#35
07-01-2013, 08:17 AM
|
|||
|
|||
|
Auto body filler might be a good idea to fill out spots. I just set up the sander and put a coarse grit sandpaper on the base raising it more as it took off the high spots. Didn't have quite that much to straighten out but that is just a little more time.
Still would not bother doing the combined impeller thing. I did make up a couple for some heat treating furnaces and learned a bit about it. Find an old furnace, call up a heating-AC company and get the blower from one they replaced. Then you can use your dust collection for other tools also. The dimmer voltage control might not be a good idea, the motor generates a back EMF (fancy name for a voltage) which counteracts the voltage being supplied. The slower the speed the less EMF it produces compared to the voltage coming in. The bigger the difference between them the more current gets drawn. This is what gives you your power but it also heats up the windings. Better to use the right size shiv. Last edited by printer2; 07-01-2013 at 08:25 AM.
|
|
#36
07-01-2013, 09:39 AM
|
|||
|
|||
|
Quote:
|
|
#38
07-01-2013, 10:09 AM
|
|||
|
|||
|
Quote:
Quote:
I also understand the desire to do it all from the ground up, making all one's own tools, jigs, machinery, etc. Also been there, done lots of that. Designing and making tools is a different activity than making guitars. Just depends upon where one's interests lie, how one partitions one's time between making tools and making guitars. Last edited by charles Tauber; 07-01-2013 at 10:17 AM.
|
|
#39
07-01-2013, 12:42 PM
|
|||
|
|||
|
Quote:
Tom
__________________
A person who has never made a mistake has never made anything
|
|
#40
07-01-2013, 01:34 PM
|
|||
|
|||
|
Quote:
At the ends of the drum, I cross-drilled the shaft, inserted a pin through the hole longer than the diameter of the shaft and put screws into the ends of the drum adjacent to the pin, preventing relative rotational motion of shaft and drum. Lots of ways that it could be done, including keys. Last edited by charles Tauber; 07-01-2013 at 01:42 PM.
|
|
#42
07-01-2013, 04:15 PM
|
|||
|
|||
|
Quote:
Tom
__________________
A person who has never made a mistake has never made anything
|
|
#45
07-01-2013, 08:14 PM
|
|||
|
|||
|
So I'm covered in saw dust, or rather sander dust. Good grief. My wife may never forgive me.
 I spent a good 1-2 hours tonight truing up the drum. I simply used a piece of flat wood, on top of the adjustable table, to which I had stapled some sand paper. I've still got a number of low spots, but I feel confident they'll come out in the next day or two. Turns out the dimmer switch is probably just not necessary. I pretty much had it wide open the entire time. I think the drum is turning at roughly the right speed. I don't think the motor is able to turn the whole thing at it's full RPM capacity. Though, I didn't smell any cooking electronics during the whole affair, and I actually pushed the motor pretty hard. Several 5-10 minute sessions without giving the motor a break. And, the drum ran straight, no wobbling. at least, none once some of the bigger irregularities were sanded off. They did initially make for some decent wobble. Once they were gone, it runs steady. I feel certain it will result in some pretty consistent thicknesses once I'm actually sanding wood on it. The drum was solid on the shaft as well. If the shaft was turning, so was the drum.
__________________
-- Nick
|