|
|
#137
 07-29-2014, 05:09 PM
|
|||
|
|||
|
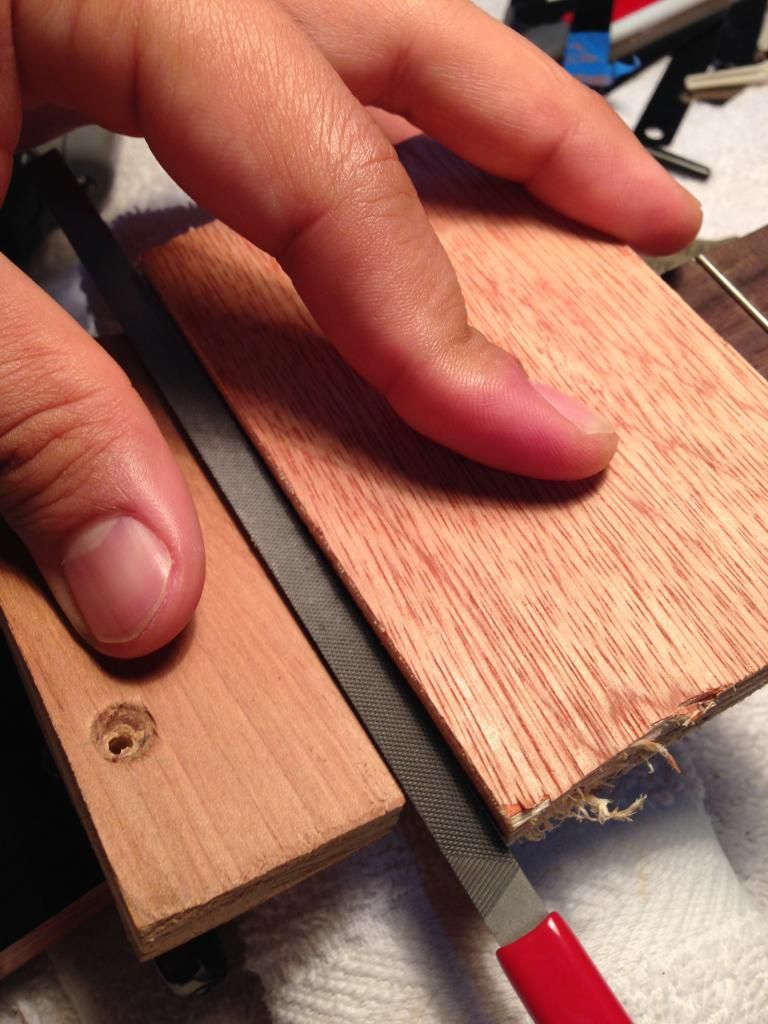
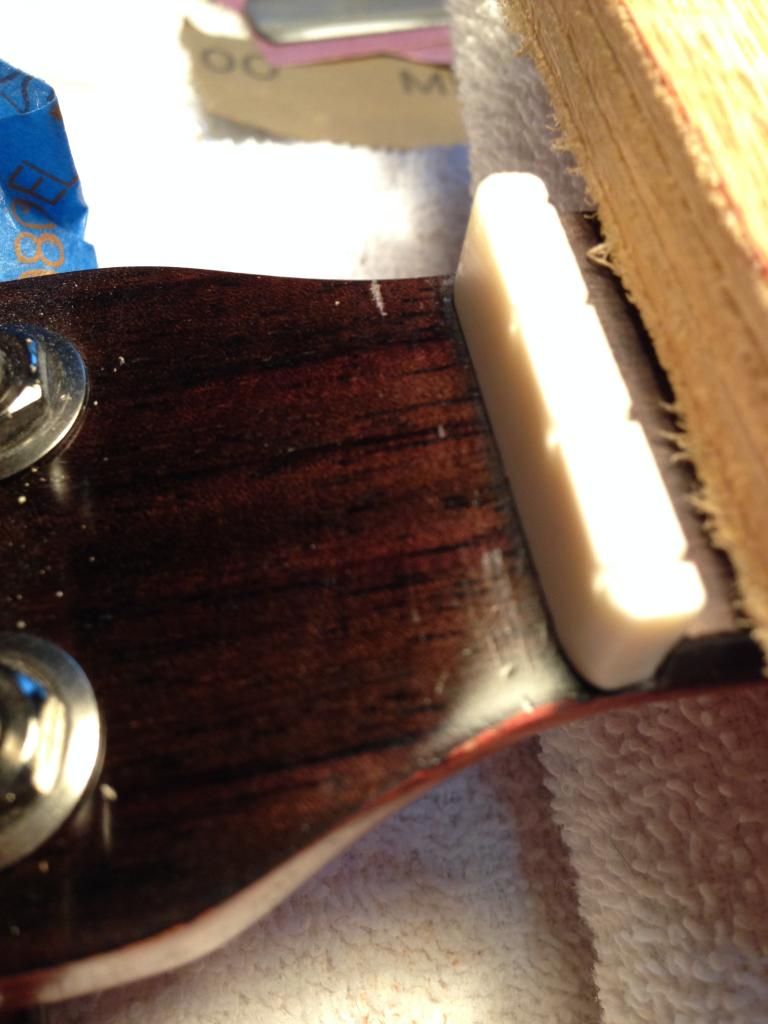
I just realized that I was so focused on finishing the uke that I forgot to take pictures of filing the nut slots to depth. Oh well, here's the next step which is to file the nut down so that the strings are buried only halfway into the nut.
Quote:

|
|
#138
07-29-2014, 05:18 PM
|
|||
|
|||
|
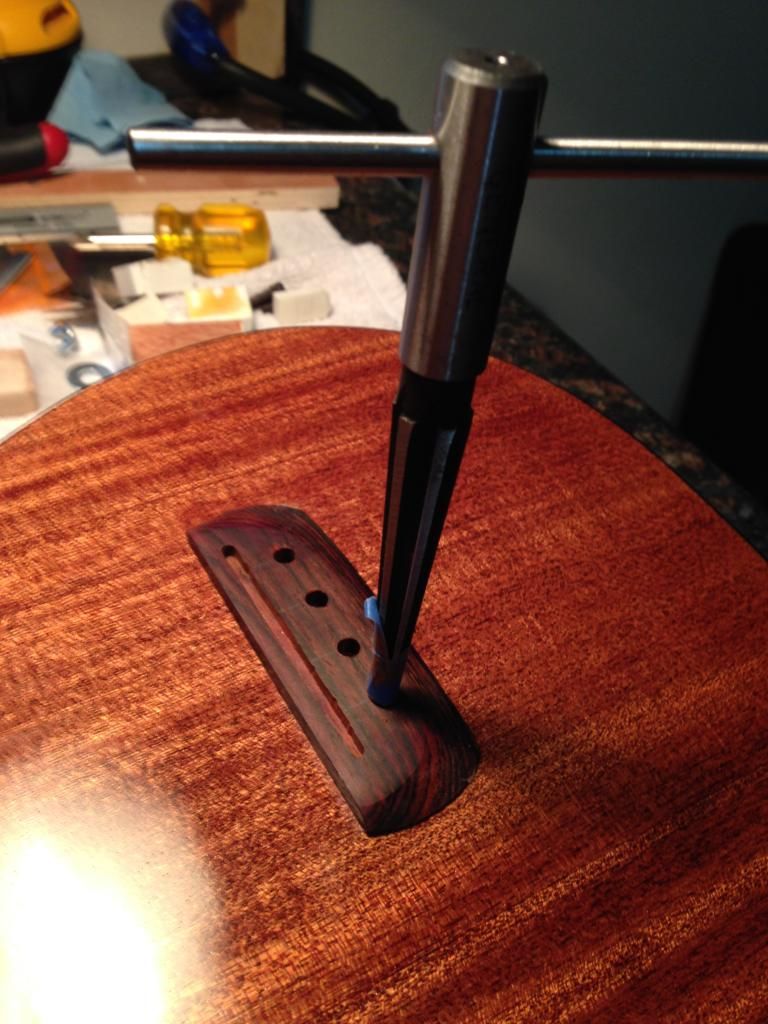
Next step is to slot and ramp the bridge pin holes. I have to thank Robbie O'brien again for this tip, I do this with a jigsaw blade. The width of the hole is not critical like the nut slot as the string rests on the saddle in front of it, so it just needs to be able to seat itself when the bridge pin is inserted.
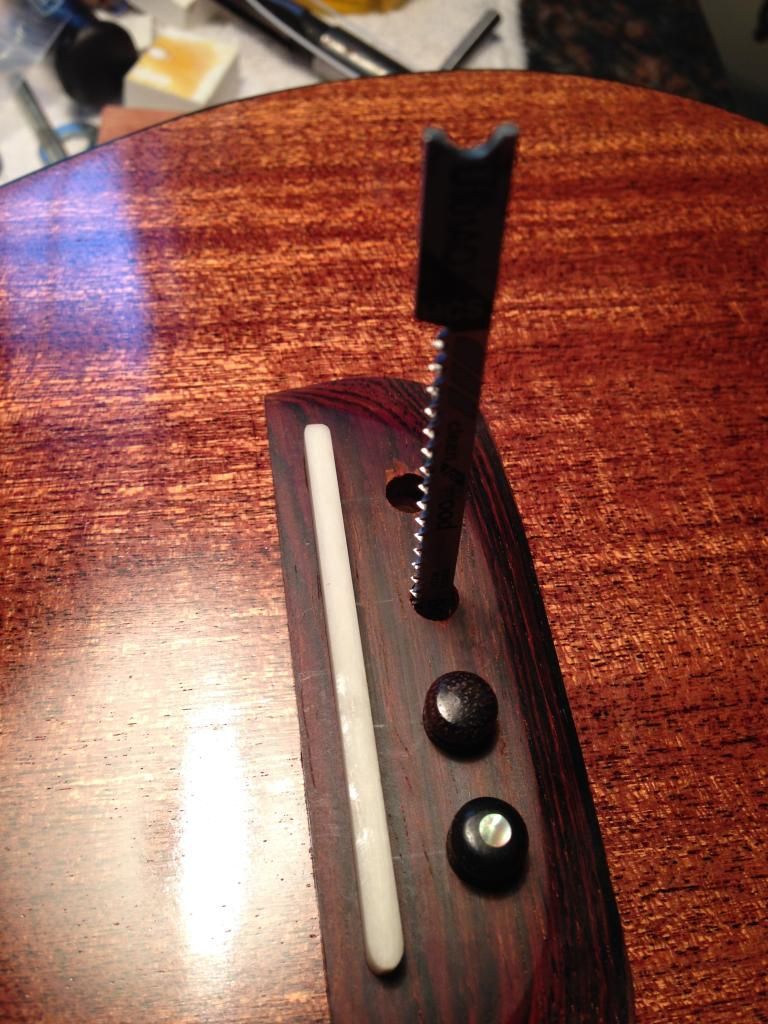   The slight ramping is not for break angle adjustment (the saddle height should be correct for break angle), its to relieve the string from pressure at the top of the bridge pin hole. This will extend the life of the string and prevent it from cutting into the soft material.
|
|
#139
07-29-2014, 05:36 PM
|
|||
|
|||
|
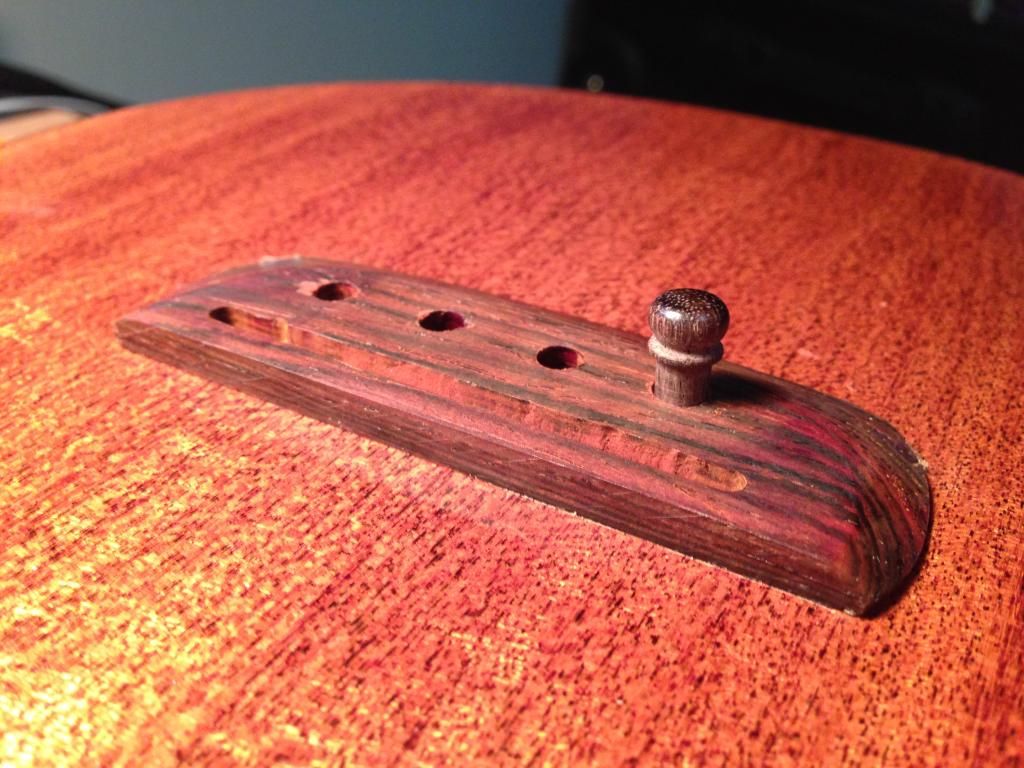
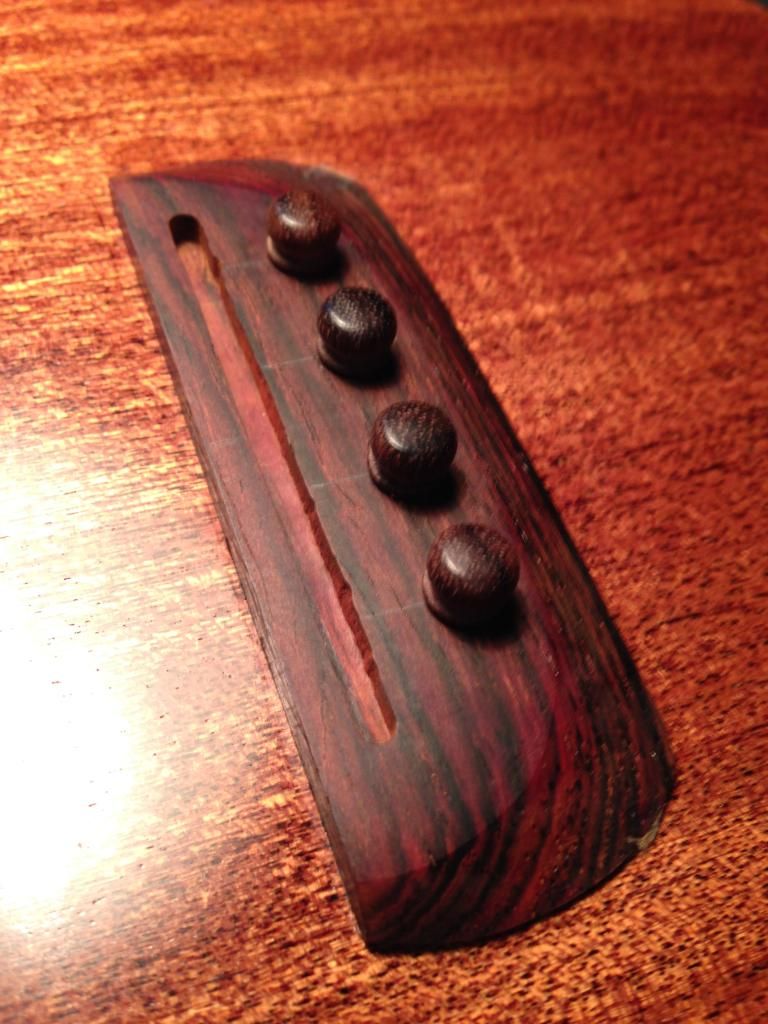
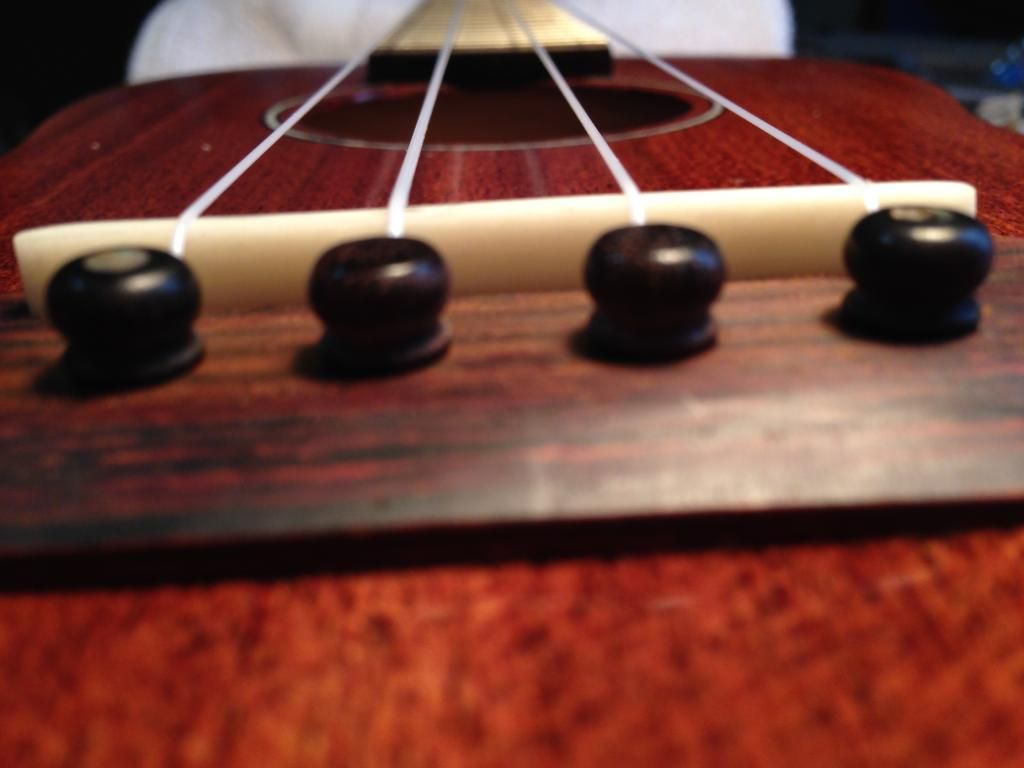
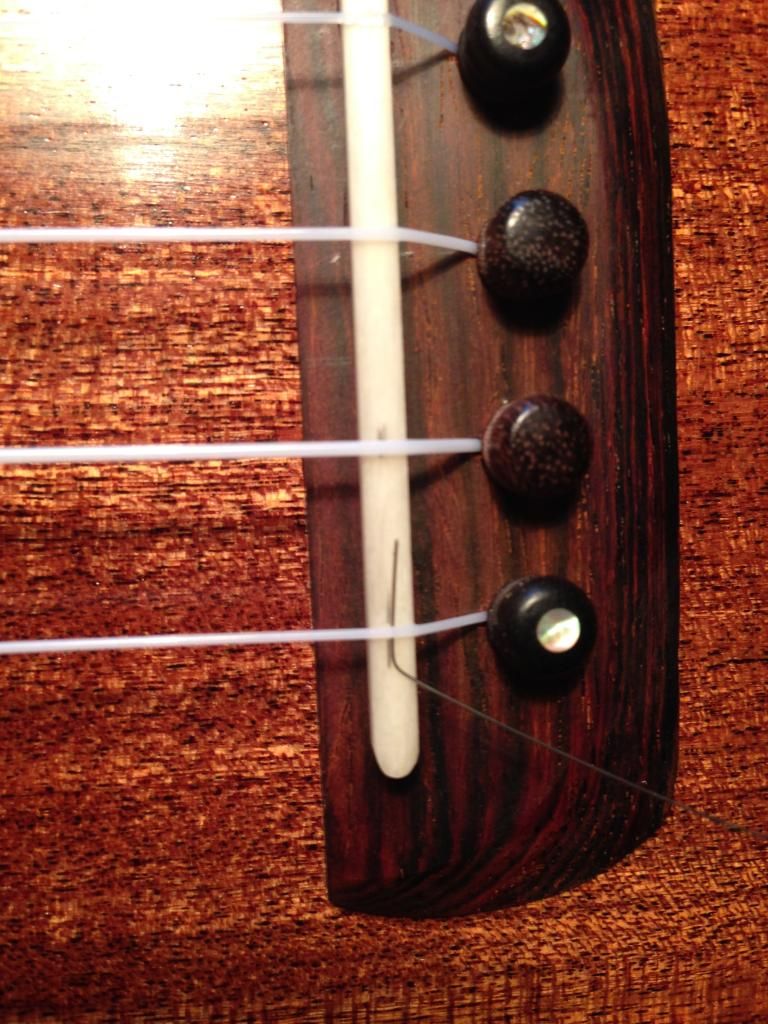
Here's how I finished the compensation of the saddle. You can see the pencil mark right alongside the dogleg, I'll use this to file the compensation.
I filed the top of the saddle FROM THE FRONTSIDE to the back at an angle until the pencil mark disappears. Then, I file the backside until the peak is in the correct spot, making sure not to make it too sharp of a peak. 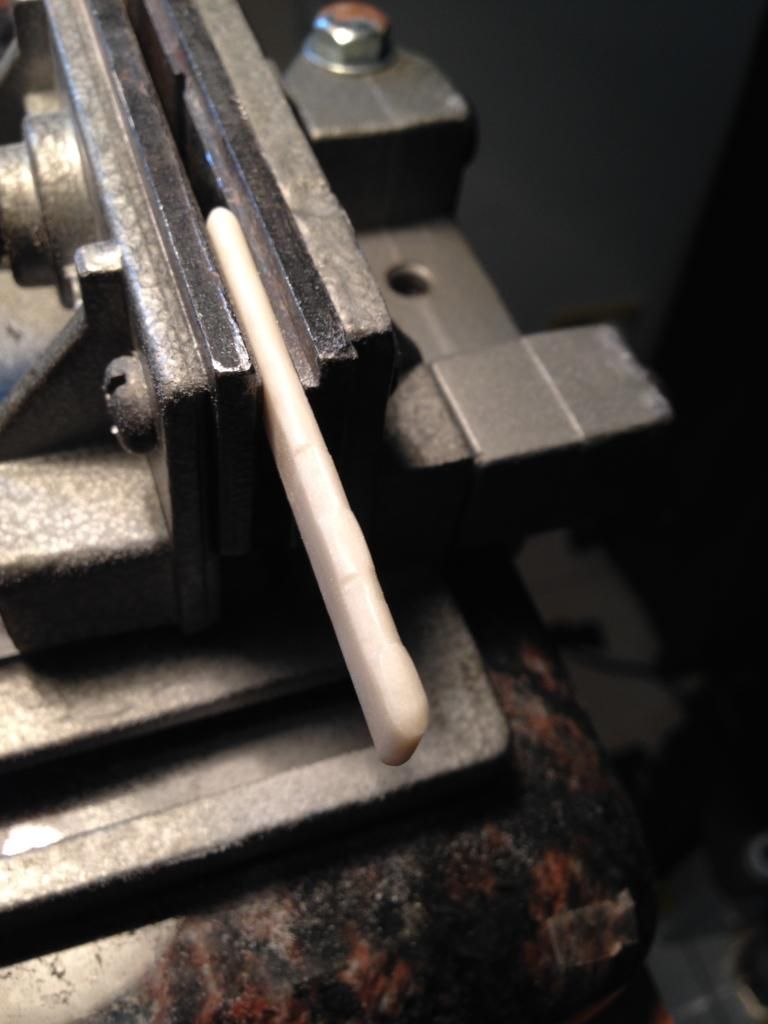 I'll have to admit, this is only my 2nd hand-shaping of a saddle, so I'm still learning this step. When all is done, I figured I'd label the strings underneath so I'll never forget the orientation of the saddle in the future. 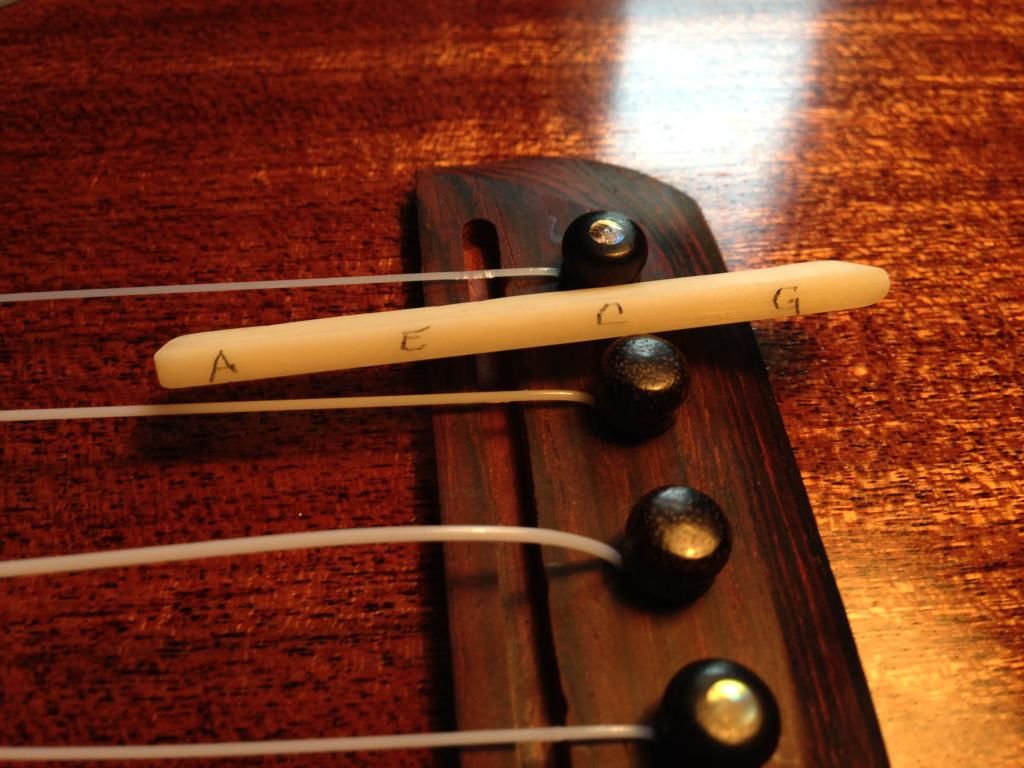 And....this is the final step!
|
|
#141
07-29-2014, 06:01 PM
|
|||
|
|||
|
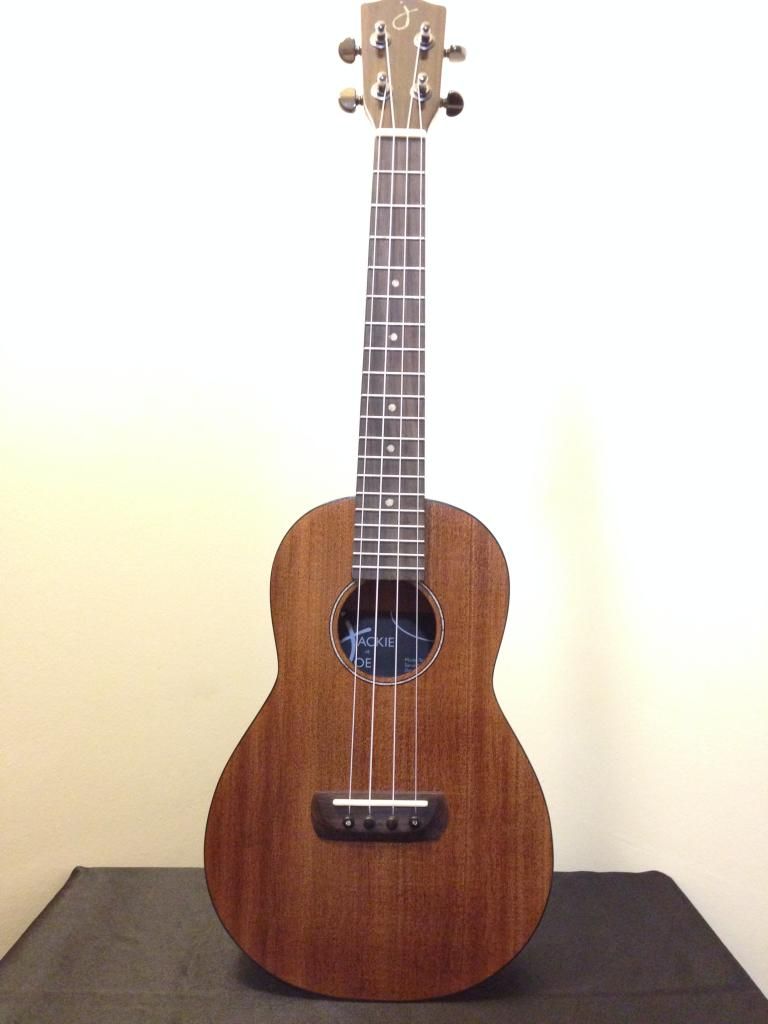
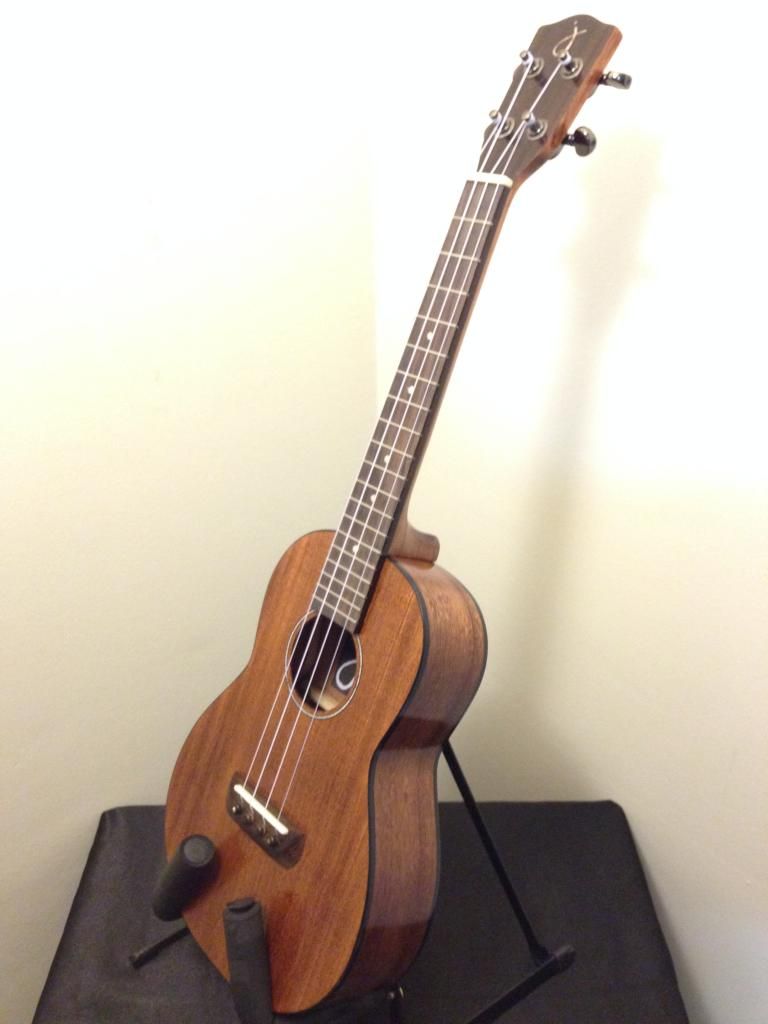
It wasn't long before I couldn't wait to hear the warm sound this solid mahogany plugged in. My pickup of choice, the K&K aloha twin (pure mini).
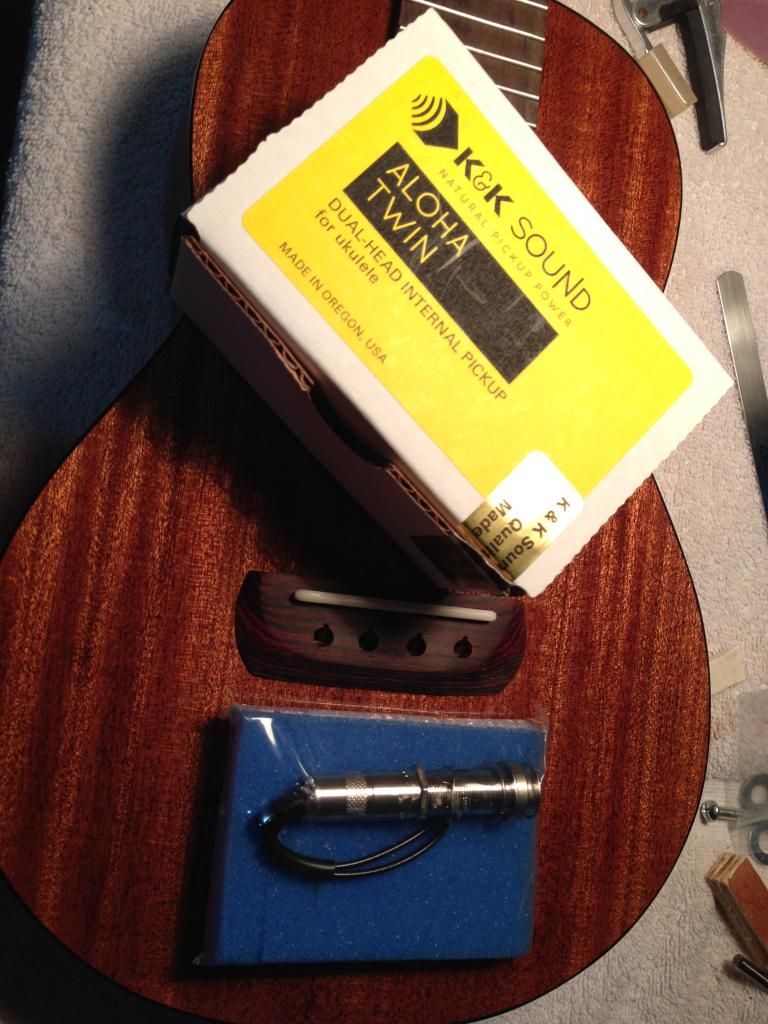 First is to mark the center point of the endblock. I used a digital caliper, measured the depth of the endblock, then used the depth stick of the caliper set to half of the depth of the endblock to put a tiny print in the tape. I mark the print with a pencil for better visibility, then punch a crater with an awl (I use my reamer). 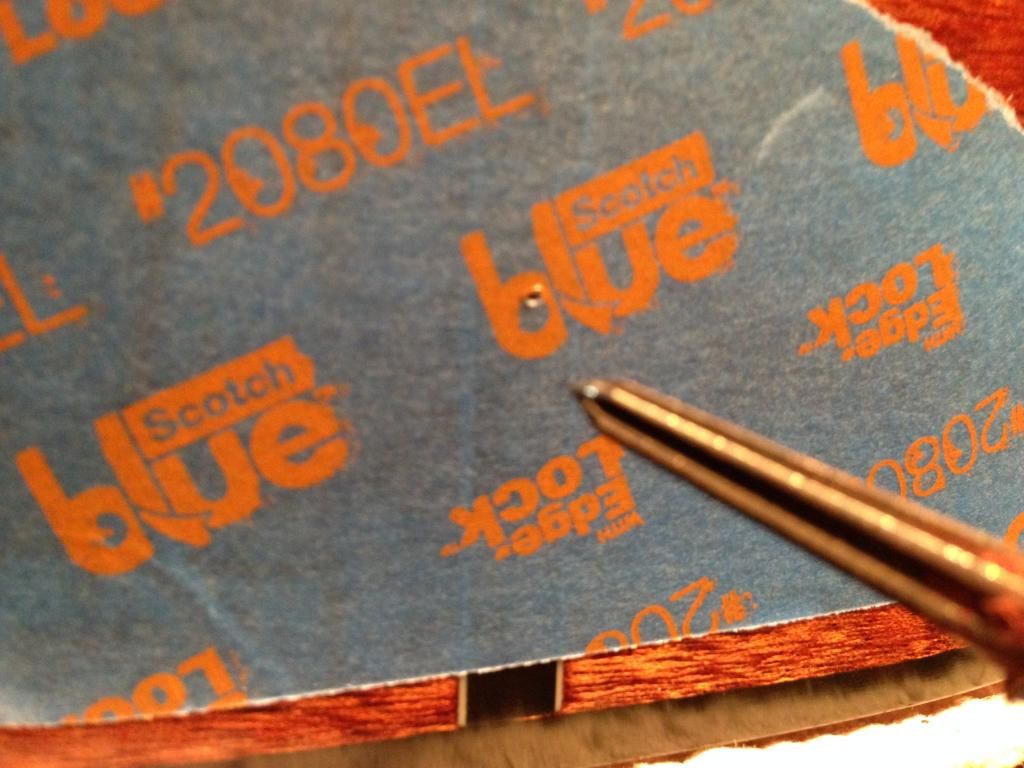 Then, I drill a small pilot hole with a 5/32" bit.  Once the pilot hole is drilled, then I use a step bit to enlarge the hole to 1/2" slowly to ensure not to lift the finish. 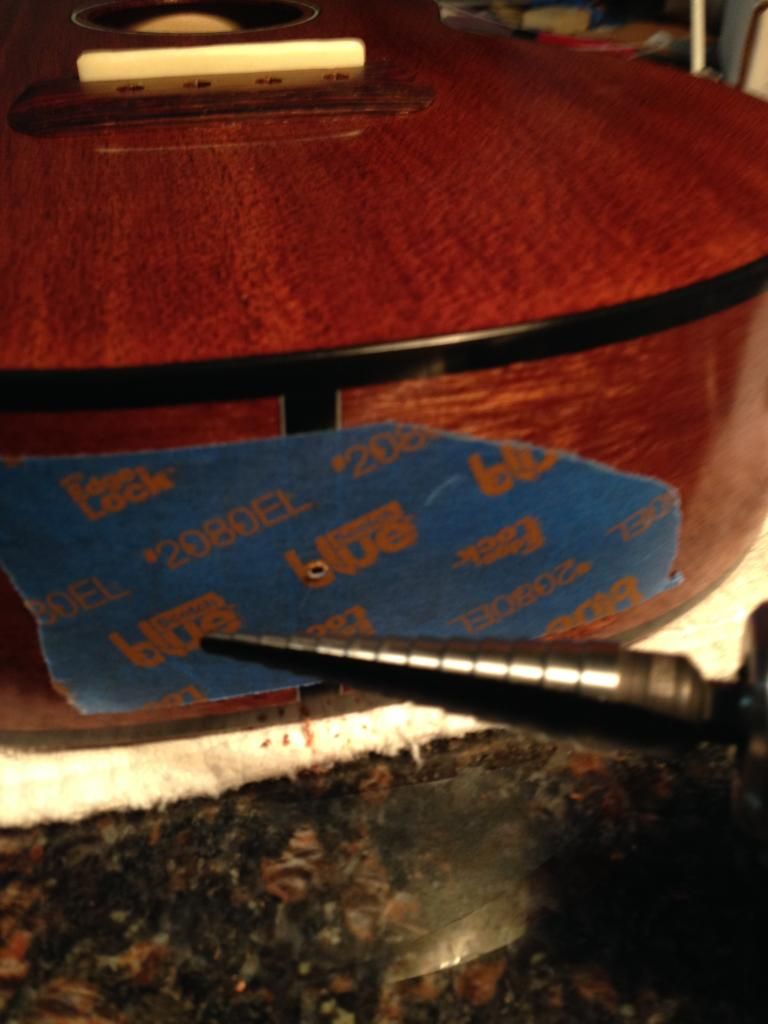 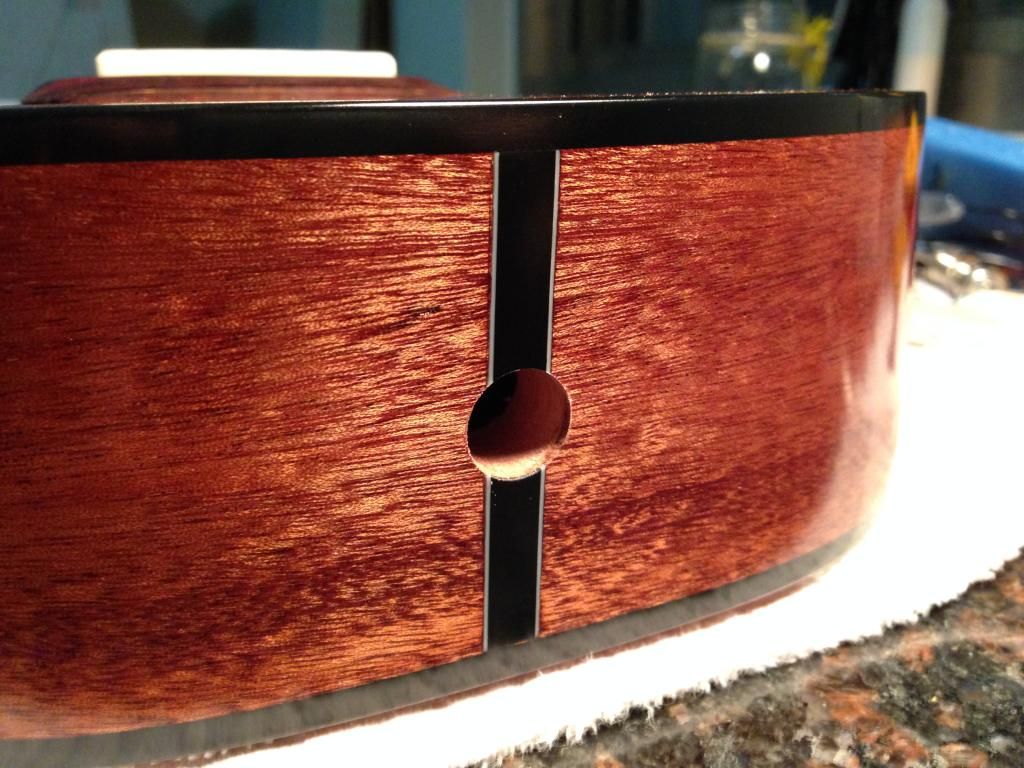 Follow the K&K instructions and use a cardboard jig to install the transducers between the G/C and E/A strings. 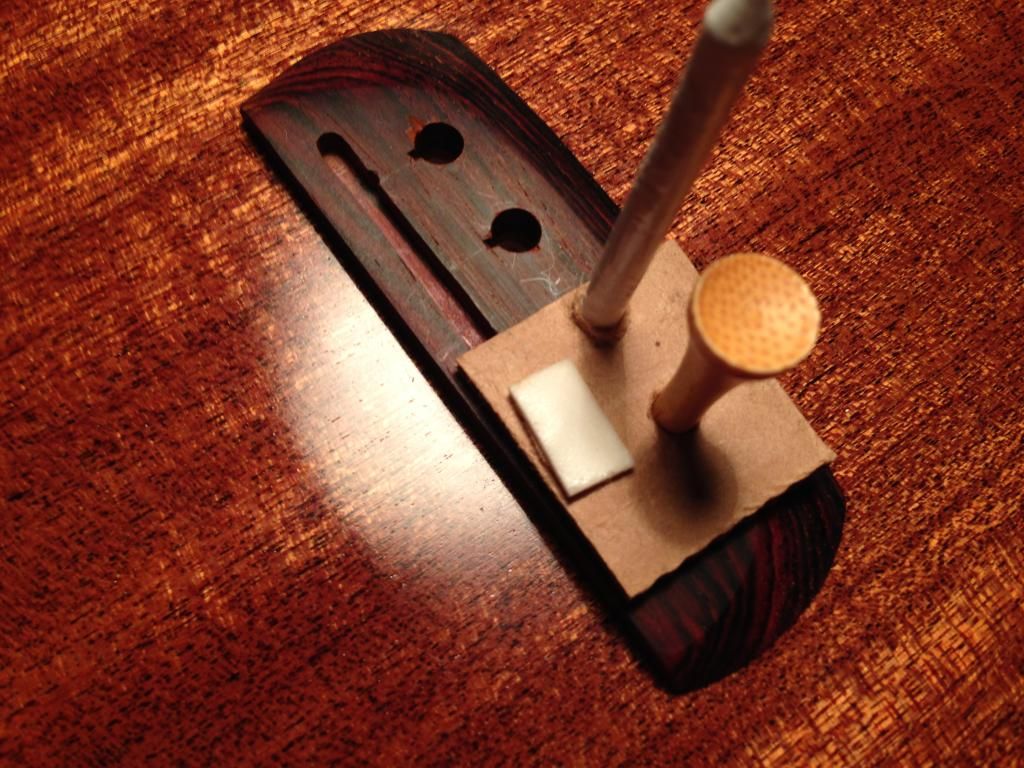 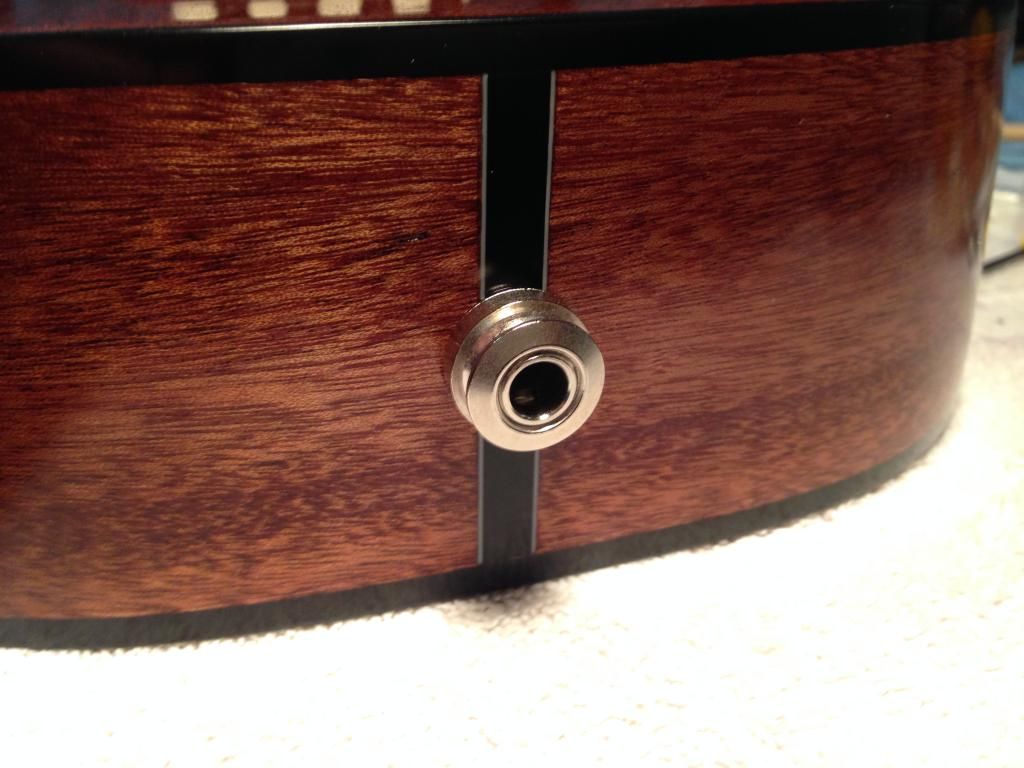 All done, and love the sound plugged in too! I'll be using this uke at my next gig.
|
|
#142
07-29-2014, 06:03 PM
|
|||
|
|||
|
And that's a wrap folks!
As promised, I'll compile all the lessons learned and also provide some final thoughts for anyone who's thinking about taking on this challenge. I'll also provide a sound clip both unplugged and plugged in. Thanks for following my journey, it's truly been amazing!
|
|
#143
07-29-2014, 06:12 PM
|
|||
|
|||
|
One word... Badass!
Couple more words... You inspire me to try my hand at making my own, thank you
__________________
Martin HD28E Retro Seagull Maritime Mahogany Alvarez Rd8c Dean EABC5 Gretsch 9121 Lag TN100 Nylon Recording King RO-10 Recording King RP-06 https://soundcloud.com/search?q=Smokerblacker
|
|
#144
07-29-2014, 07:10 PM
|
|||
|
|||
|
Quote:
- If you want a tenor uke, save your money and buy one from a professional builder. - If you want to experience the art of building an uke and learn the science behind it's design/structure, then go for it! Build this kit!
|
 |
|
| Tags |
| first build, stewmac tenor kit |
| Thread Tools | |
|
|