
|
|
#31
 01-08-2019, 03:33 PM
|
|||
|
|||
|
Yesterday I got the bindings on the back. While the glue was curing, I sharpened my scrapers and this morning scraped the bindings level and gave the guitar a good sanding. I still need to round over the bindings, but that is the last thing I'll do prior to finishing.
I won't bore you with pictures of binding the back, so I am skipping to the good stuff  I couldn't hold my camera and scrape at the same time, so you get a picture of some shavings. This is actually the best part of binding. I love scraping away the excess wood and glue to reveal the purfling and joints--a bit of a reward for all that effort binding:  Below are shots of the body after I had finished leveling and sanding. First up the tail area on the top. I joined the purfling such that the design is mirrored on each side of the body:  Both runs of purfling around the top pulled in tight at the waist. Always pleased when I scrape that area and find the joint nice and tight:  The back has just a single fine black/white/black purfling, which also turned out nice:    The black ebony and fine purfling lines look great running along the rims:  And lastly, the tail graft. Not much ornamentation, but no distractions to take away from the beautiful mahogany:  This will be my last progress update for a while. I have two other guitars I need to bind, and I want to do those prior to working on the neck. Thanks for your interest. Ken
__________________
www.casperguitar.com 
|
|
#32
03-04-2019, 07:57 PM
|
|||
|
|||
|
Been so long since I updated this thread, I had to go to my CP to find it! Anyone still interested in an update? I have been getting my other two builds caught up and actually now have them ready for lacquer. I hope to have this one buttoned up by the end of the week.
Basically what is left is the neck. The neck will be 13 frets to the body with a 1 13/16" nut and 2.25" string spacing at the saddle. We are using my usual five piece lamination with the 2 and 4 thin black laminations fanning out over the heel. I rough cut the pieces for the laminations on my bandsaw. Here are the laminations ready for glue up:  Gluing up:  Clamped and drying:  I run the blank over my jointer to level the face that will be mated to the fingerboard and cut the blank to rough shape prior to milling on my CNC:  We are using a remnant from the back as a lamination for the back of the headstock:  My guitar models are named after the lakes that surround the state of Michigan. This model is my smallest and is named after Lake St Clair, which sits in both US and Canada in southeast Michigan. I inlay a representation of the lake the model is named after in the back of the headstock. Here I am cutting the inlay from abalone on my CNC:  I cut the pocket in the mahogany laminate and inserted the inlay to check the fit: 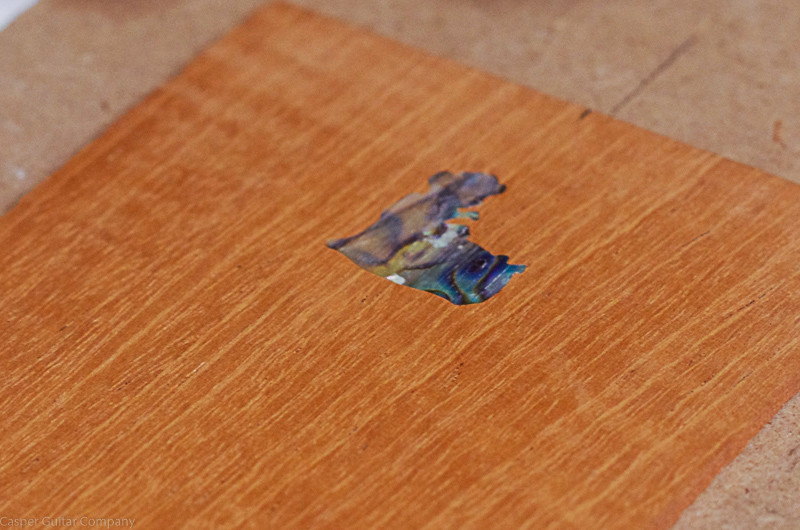 The profile of the back laminate is cut by the CNC:  I bound the back of the laminate with which will pair nicely with the body of the guitar:  Good to be making progress on this little guitar again. Should be more photos following throughout the week. Cheers, Ken
__________________
www.casperguitar.com
|
|
#33
03-04-2019, 09:34 PM
|
||||
|
||||
|
Looking great Ken. How much clearance do you allow your inlay? The fit looks perfect. Dark into light is no walk in the park.
|
|
#34
03-04-2019, 10:53 PM
|
||||
|
||||
|
Very pretty indeed
Thanks for sharing this beauty with us! Have FUN Paul
__________________
4 John Kinnaird SS 12c CUSTOMS: Big Maple/WRC Dread(ish) Jumbo Spanish Cedar/WRC Jumbo OLD Brazilian RW/WRC Big Tunnel 14 RW/Bubinga Dread(ish) R.T 2 12c sinker RW/Claro 96 422ce bought new! 96 LKSM 12 552ce 12x12 J. Stepick Bari Weissy WRC/Walnut More
|
|
#35
03-05-2019, 07:13 AM
|
|||
|
|||
|
A beautiful guitar coming along here and your work is extremely clean and precise. Thanks for sharing all of the details of your work.
|
|
#36
03-05-2019, 07:25 AM
|
|||
|
|||
|
What a beautiful build, great wood choices, and excellent craftsmanship, Ken! Can't wait to see more photos.
Which CNC do you have? What software did you use to model the neck? I've only built one guitar and want to use my CNC to profile the neck on the next one but I haven't started the modeling yet. I use Fusion 360. David
__________________
David My Woodworking YouTube channel - David Falkner Woodworking -------------------------------------------- Martin, Gallagher, Guild, Takamine, Falkner
|
|
#37
03-05-2019, 08:56 AM
|
|||
|
|||
|
Your work is so gorgeous! This is going to be a wonderful little guitar. I'm glad you're letting us follow along!
beth
|
|
#38
03-05-2019, 09:25 AM
|
|||
|
|||
|
This is coming along fabulously. Nice touch with the inlay being the shape of the lake. Beautiful work.
Best, Jayne
|
|
#39
03-05-2019, 10:08 PM
|
|||
|
|||
|
<<How much clearance do you allow your inlay?
Hey Tim, Thanks! For that inlay, I offset the pocket by two thousandths. If I have inlays with a lot of curves or circles, I might go a bit more. You are right, though, inlaying in light woods can be a challenge. Thanks Paul, Geoff, David, Beth, and Jayne! A lot of time and care went in to getting the guitar to this point. Appreciate you noticing the details. David, I have a K2 machine and use Rhino with MadCAM. An acoustic neck on a CNC presents a few challenges. When you are ready, reach out to me via email, and maybe I can give you a few helpful tips. I milled the neck for this one today. I have a few pictures, but didn't get time to upload them tonight. I am helping a local guy build a purpleheart Huron, and he dropped by this evening to work on the neck. I'll get some photos up tomorrow. Ken
__________________
www.casperguitar.com
|
|
#40
03-06-2019, 09:11 PM
|
|||
|
|||
|
A little more work done on the neck today. I'll post the photos from yesterday along with a few from today.
Here are the photos of milling the neck. The hand carvers will cringe, but for a one man shop, having the CNC mill the neck is like having an extra guy in the shop. It can whittle away while I work on something else. The first thing I do is mill the slot for the truss rod:   I then mount the neck to a spoil board and start with some roughing passes:  After the neck is roughed out, I follow up with some finishing passes that leave the neck close to final shape. I'll finish shaping and sanding by hand after the fingerboard has been glued on:   I don't flip the neck over to mill the face of the headstock nor do I profile the headstock with the CNC. I mark on the blank where I want the face and the nut located. The extra mahogany is cut off using my bandsaw, and I clean it up on my stationary belt sander:   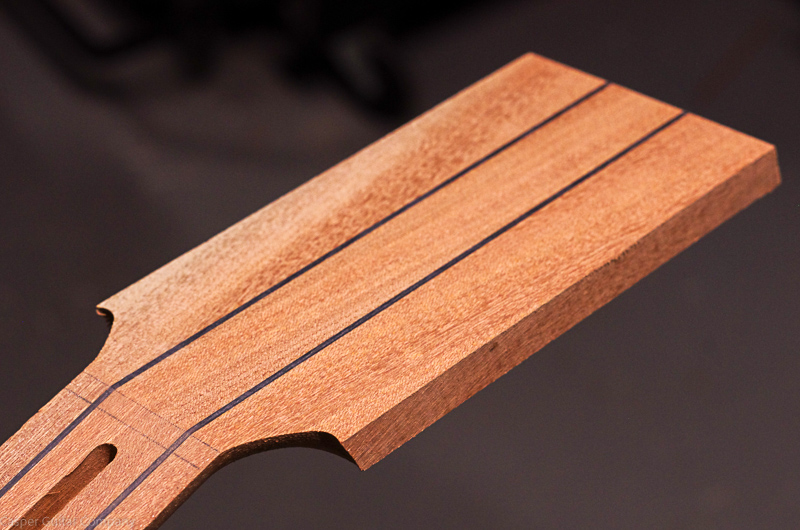 The headstock profile is cut with my router using a template:   I use a jig to cut the neck tenon and matching mortise in the body:    As the top of the upper bout is rounded, the neck will need some fitting to seat tightly against the rims. Here is the neck and body just out of the jig. Notice the big gap near the soundboard:  I use a chisel and sandpaper to shape the shoulders of the heel until the neck sits tightly against the body. This part takes some time as I want to ensure that not only is the joint tight, but I want the line down the center of the neck to be down the middle of the top, so the bridge can be centered in the lower bout. I also want a certain plane down the fingerboard relative to where the saddle will be, so I can have a nice action on the finished guitar. Getting these three dialed in now is key. It is time consuming, but much easier without a fingerboard on the neck:  I also got the back laminate glued on the headstock today. That was about it for shop time. I needed to get back to my computer to work on my design for a pyramid bridge that we will be using on this guitar. Thanks for checking in! Ken
__________________
www.casperguitar.com
|
|
#41
03-06-2019, 09:22 PM
|
||||
|
||||
|
"...the hand carvers will cringe..."
No, we'll kick the dog and go to bed green with envy! Ok, we won't kick the dog. (Don't even have one--woof!) Maybe we'll shoot the possum. Whatever, we envy that 2-man efficiency packed into one fella. And by the way, the mahogany guitar is looking sweet! Steve
|
|
#42
03-06-2019, 10:34 PM
|
|||
|
|||
|
Quote:
Ken
__________________
www.casperguitar.com
|
|
#43
03-11-2019, 08:35 PM
|
|||
|
|||
|
I recently completed the bridge and fingerboard for this guitar. My customer wants a pyramid bridge from Brazilian RW. I did the initial shaping on my CNC and finished up by hand. We want the bridge black, so I'll dye it later:
  I also use the CNC to radius the fingerboard and cut fret slots and inlay pockets. The inlays are at the edge of the fingerboard and will also be used as side position markers:   This evening I glued on the fingerboard. I need to make the face plate laminate for the headstock. Once that is on, I'll do some final sanding and shaping, and the guitar will largely be built. I'll post a picture or two once it is ready for lacquer. Thanks for checking in. Ken
__________________
www.casperguitar.com
|
|
#44
03-11-2019, 08:58 PM
|
|||
|
|||
|
I mean this with the utmost appreciation, respect, and cordiality: dont be a knucklehead and bury the grain on that bridge. Give the customer a couple days at least to acclimate to the idea of preserving the lovely subtlety of the stripe behind the slot. Do it for America, puppies, and the children.
|
|
#45
03-12-2019, 09:33 AM
|
|||
|
|||
|
Man, I have to agree--that bridge looks so awesome as is!
Sweet looking little hog--nice work!
__________________
2013 Stehr Auditorium (Carpathian/Myrtle) 2015 Stehr Auditorium (Adi/BRW) 2020 Baranik Meridian (Blue Spruce/Manchinga) 2020 Wilborn Arum (Tunnel 14/Coco) 2021 Kinnaird Graybeard (BC Cedar/Bog Oak) 2022 Kinnaird CS Student Build (Adi/Padauk) 2023 Kinnaird FS (Italian/Koa)
|


