
|
|
#1
 02-26-2019, 03:46 PM
|
|||
|
|||
|
Hi again all
i've started my latest guitar and as usual i'll try and keep you up to date with whats going on with another build thread. It's something I've been tempted to do and have been threatening to for a least a year if not 18 months. As this is a bit atypical for a guitar, especially a nylon string guitar, so let me try and explain the reasons behind its design and aesthetics. So, many of you may have read my previous nylon crossover build thread where I also used Tasmanian Blackwood for the sides. The first attempt to bend the sides did not go perfectly to plan and left me with a set of sides with significant crease marks in the cutaway area, it felt like a shame to scrap those sides so I have kept them. During my escapades in this guitar building lark I have acquired a very nice flamed maple back but with no matching sides. A previous build also left me with a slightly over thinned spruce top. I had decided I was going to combine all these parts into a guitar so as not to waste the materials. The idea of it being a nylon crossover is that i so enjoy playing the last one i made that i decided somewhere along the line i needed a nylon string guitar for myself in my life and here was a chance to have one. The aesthetics of the idea for that guitar have intrigued me since i thought of it but as my build standards have improved, the damaged sides and the extra thin spruce top didn't make the cut for the final build, in fact that spruce top was cut up for a soundhole reinforcement patch on my Redwood/Leopardwood OM. I decided to go ahead and build such a guitar, but with a new top, new sides, and other new bits, only the flamed maple back and the original concept idea remained. The actual guitar will have a Swiss moon Spruce top, flamed Maple back, Tasmanian Blackwood outer sides, Maple inner side laminates for the double sides(fits the guitar theme and its aesthetic), a 3 piece Tasmanian Blackwood/Maple/Tasmanian Blackwood neck, Maple fretboard, Flamed Maple headstock overlay, Maple and Tasmanian Blackwood rosette, Rocklite bindings and i'm still undecided about using a Rocklite bridge or using Tasmanian Blackwood as i have some nice pieces left over from cutting out the neck blank. There will be a kind of Tasmanian sandwich look about it where the front and back are light coloured and the side view will have that golden brown glow from the Tasmanian Blackwood sides and neck. The project has been slowly getting underway the few weeks or so meaning i have some pictures to show for it. I glued the kerfed liners in yesterday and tonight, the build is definitely starting to flow along so hopefully more pictures and updates will come soon. Beautiful piece of AAA Swiss Moon Spruce  Untitled by David Emm, on Flickr Untitled by David Emm, on Flickrthe spruce top joined and cut out sitting on the killer flame maple back 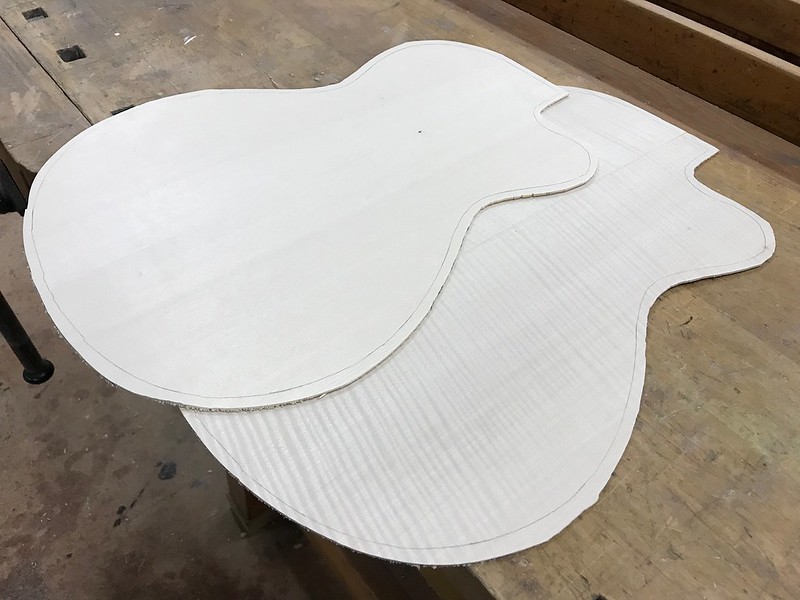 Untitled by David Emm, on Flickr Untitled by David Emm, on FlickrThe maple fretboard sitting on the Tasmanian Blackwood neck 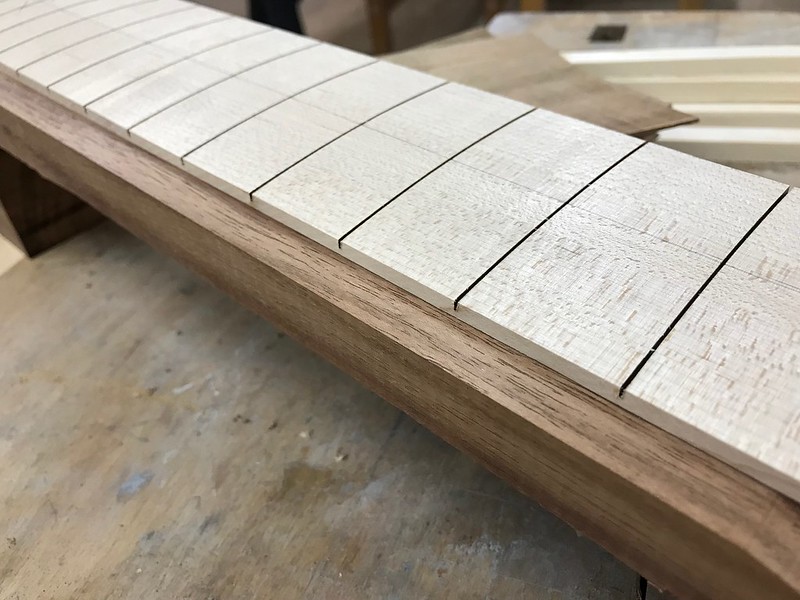 Untitled by David Emm, on Flickr Untitled by David Emm, on Flickrthe sides were bent 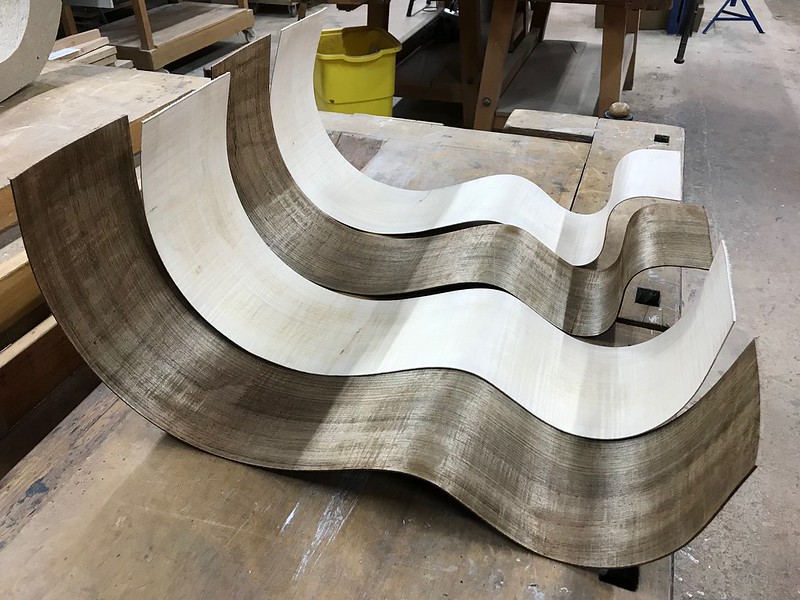 Untitled by David Emm, on Flickr Untitled by David Emm, on FlickrI like the look of the contrasty double sides 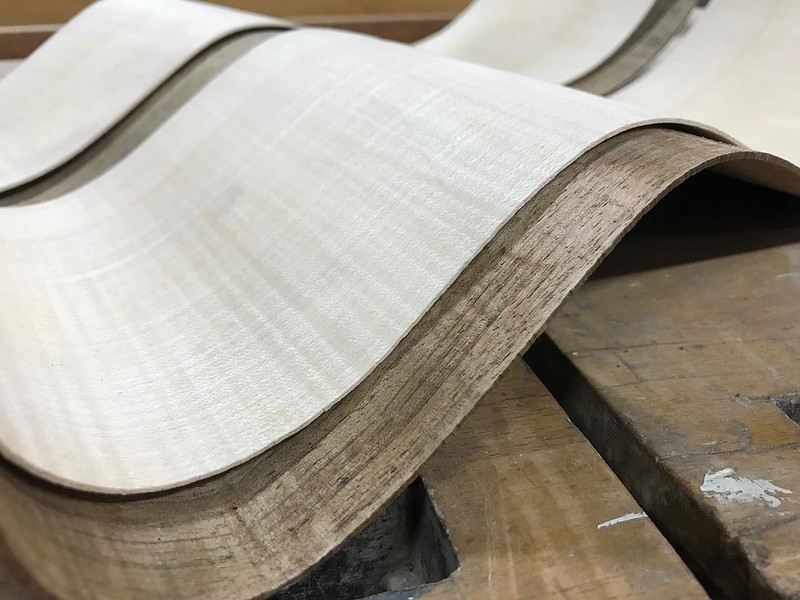 Untitled by David Emm, on Flickr Untitled by David Emm, on Flickrand then they were laminated, i used PU glue so as not to cause rippling in the sides due to the water content in Titebond 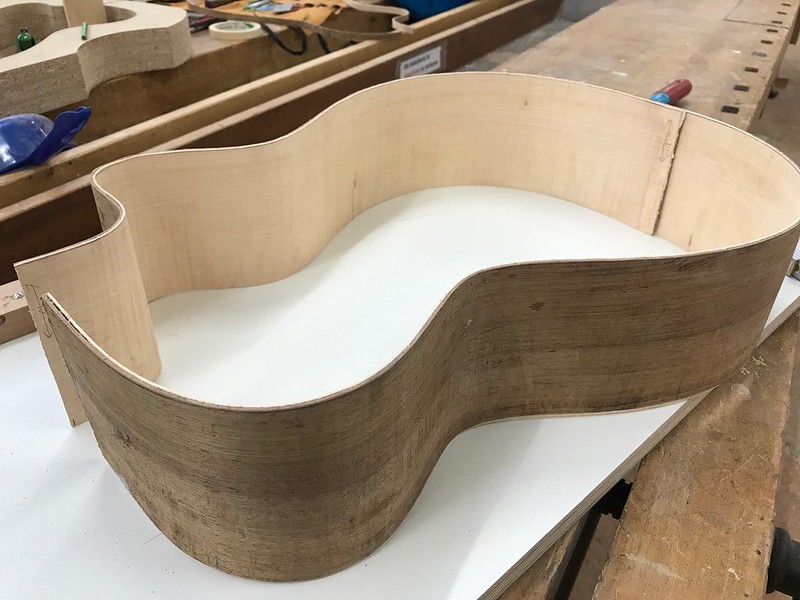 Untitled by David Emm, on Flickr Untitled by David Emm, on FlickrThe sides were put in the mould and the heel and end blacks were glued in 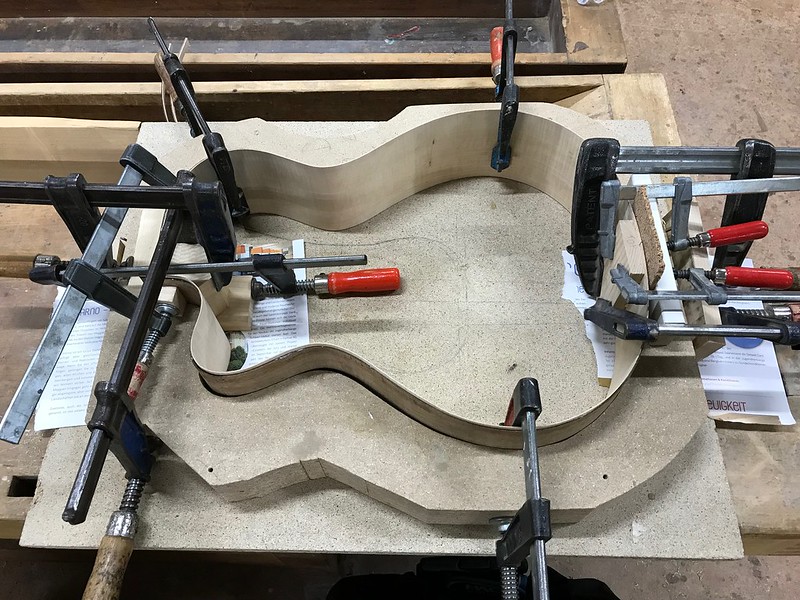 Untitled by David Emm, on Flickr Untitled by David Emm, on Flickrnext the linings were glued in 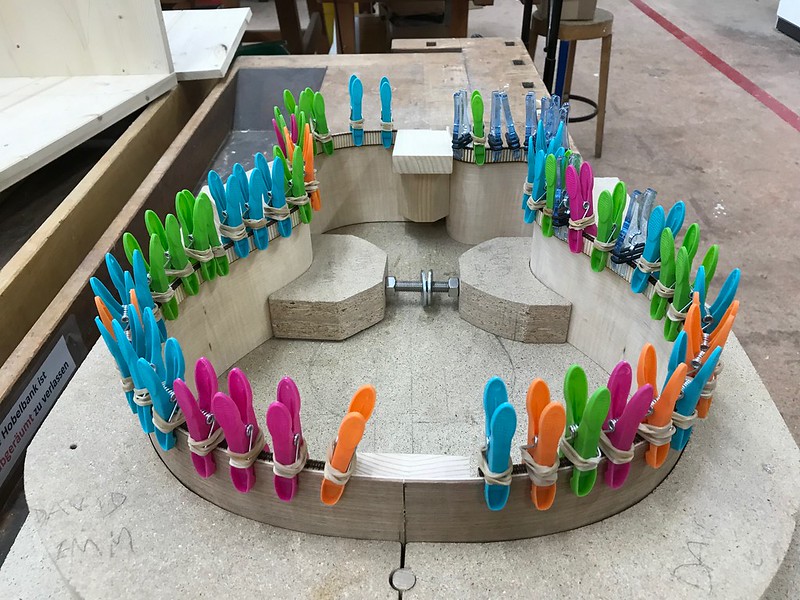 Untitled by David Emm, on Flickr Untitled by David Emm, on Flickrlinings part 2 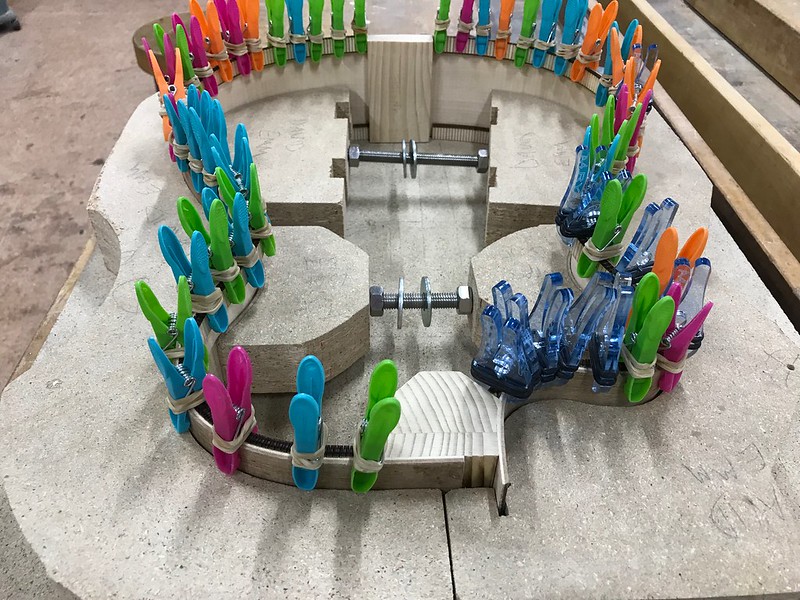 Untitled by David Emm, on Flickr Untitled by David Emm, on Flickr
__________________
David 
|
|
#3
06-08-2019, 03:35 AM
|
|||
|
|||
|
Hi All.
I'm Back! I've been in a new job for most of the year so far which although theoretically scheduled to allow me some free time here and there to build some guitars its worked out the opposite where i've had zero time to do anything let alone guitar building. But, I'm finally starting to get have some minutes to slowly get back into this project and in the last few days I completed my rosette and have pretty much finished the soundboard bracing. The Rosette was a bit of a mission. Due to a few mistakes and mishaps along the way such as the whole rosette exploding when I took it out after a perfect test fit and then none of the joints fitting back together cleanly, gluing in the purfling with the mitre at the wrong end, redoing the Tasmanian Blackwood section yet again but making it nearly 5mm too narrow, and worst of all gluing in a replacement Tasmanian blackwood section that I hadnt noticed didn't seem to get pressed down at one end so when I scraped it all flat I actually scraped through the rosette to see the glue (see picture below). I thought I enjoyed making the rosettes for my previous guitars but i guess when you have to redo it 6 times it's much less fun. It's not perfectly perfect, but it's pretty good now and i wasn't going to do it again as for my own mental stability, pretty good will have to be good enough here. As anyone who has read my previous build threads may have spotted, I have a tendency to go with the flow and change tack on a whim. In this case it was the bracing pattern. I had originally planned to go with the same standard Torres 7 brace fan pattern with closing V braces as the last nylon crossover I built, but as I do, right as I was about to glue the braces on I had an idea and decided to switch and try something more in the Friedrich bracing direction. My thoughts were that because this is a bigger than 'standard classical sized' soundboard and it felt soft across the grain I wanted more lateral stability. It turned out to be not exactly Friedrich bracing because I haven't included the closing V braces and the outside braces don't run through the main lateral brace, but it is kind of in that direction. I will put the soundboard onto the rim and see what I think after that. Along with some probable minor voicing tweaks, if I decide the lower edge is too soft I may yet glue in some closing V braces. Currently it sounds pretty decent to me when I tap it and as much as i'm consuming plenty of information about bracing and voicing, as i'm not that experienced yet so i'm still using the "if I tap it and it rings nicely, thats got to be a good thing, right?!" methodology. I'm sure any real classical or nylon crossover builders will shred my thought patterns and my bracing pattern into 873 uneven pieces. Here are the pictures of where i'm up to. Rosette disaster no. 5  Untitled by David Emm, on Flickr Untitled by David Emm, on FlickrFinal rosette.  Untitled by David Emm, on Flickr Untitled by David Emm, on FlickrSoundboard bracing  Untitled by David Emm, on Flickr Untitled by David Emm, on Flickr
__________________
David
|
|
#5
06-10-2019, 06:47 AM
|
|||
|
|||
|
Just curious...
How were the slots in your fretboard cut? It looks like maybe with a laser?
|
|
#6
06-10-2019, 08:17 AM
|
|||
|
|||
|
Quote:
Quote:
__________________
David
|
|
#7
07-17-2019, 01:57 PM
|
|||
|
|||
|
Another update,
It's been slow going due to lack of time in the workshop but I have managed to hit one of those good milestones. I closed the box. Since the last update i first glued the top on, then did some voicing fine tuning, I actually took the brace ends back about 8-10mm away from the main transverse brace, this made a major difference to the pitch of the top, moving those brace ends away from the brace even just 2-3mm dropped the pitch much more than expected, fortunately the pitch is now in the area i kinda hoped it would be originally so i'm happy, I also reduced the cross brace height between the fans and did a bit of tweaking on the two outside fan braces. I then braced up the back which unfortunately I don't seem to have any pictures of and then I glued that on to close the box. I'm a little (but not enough to change it) nervous about the back as it may be a bit softer than I planned, but it seems ok. I haven't worked with a maple back yet so its a bit of a guess there. Here are the obligatory pictures and at the end you can finally see the sandwich colour scheme come to life!! Gluing the top on  Untitled by David Emm, on Flickr Untitled by David Emm, on Flickrtop glued on but before some final voicing took place  Untitled by David Emm, on Flickr Untitled by David Emm, on Flickrclosed the box  Untitled by David Emm, on Flickr Untitled by David Emm, on Flickrback glued on 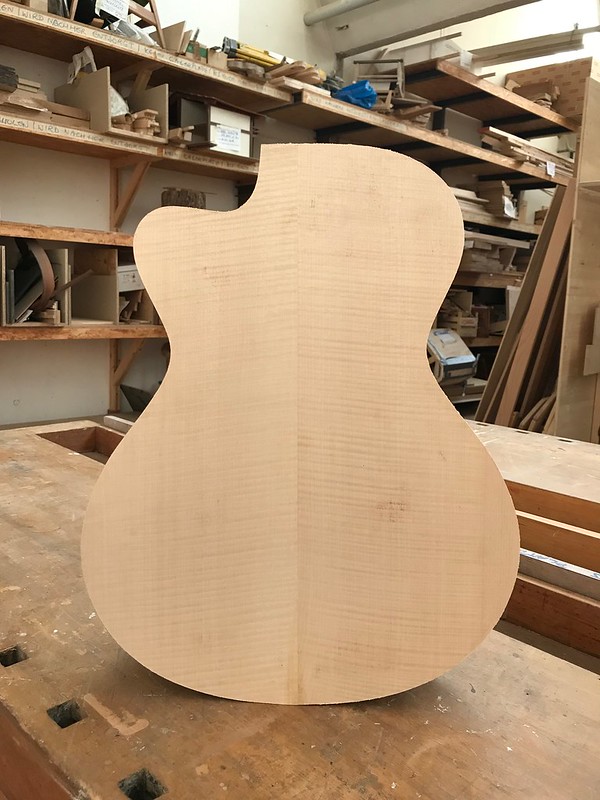 Untitled by David Emm, on Flickr Untitled by David Emm, on Flickrthe view of the contrast between the sides and the back 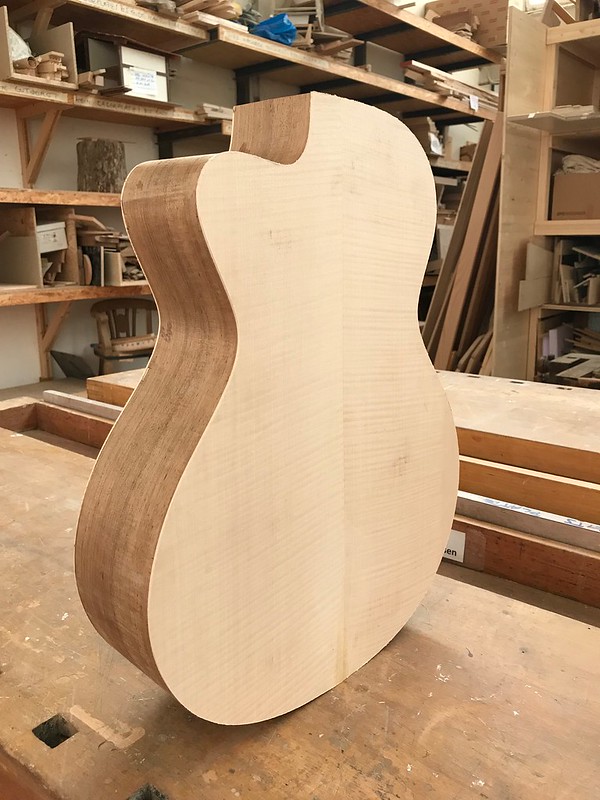 Untitled by David Emm, on Flickr Untitled by David Emm, on Flickr
__________________
David
|
|
#8
07-17-2019, 09:10 PM
|
|||
|
|||
|
Very nice !
|
|
#9
08-06-2019, 03:18 PM
|
|||
|
|||
|
I've managed to get the box bound. It looks much smarter with black trim, almost like its dressed up. I'm very happy with my choice of black Rocklite over the alternative option of maple binding, i'm sure that would have looked fantastic but i think with the contrasting sides and back, the black enhances that rather than blends in.
I'm looking forward to seeing the maple back under finish even more now, that binding really makes it jump out. Next up - the end graft. I started that today but i ran out of time in the workshop before i really got anywhere. If that goes to schedule on Thursday, i might even start working on the neck, or at least bind the fretboard and maybe start on the 12th fret inlay.  Untitled by David Emm, on Flickr Untitled by David Emm, on Flickr Untitled by David Emm, on Flickr Untitled by David Emm, on Flickr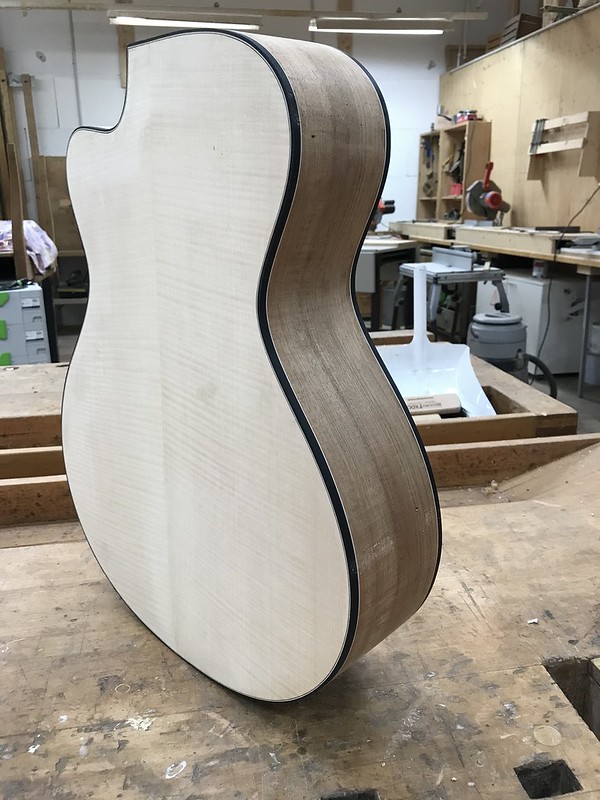 Untitled by David Emm, on Flickr Untitled by David Emm, on Flickr Untitled by David Emm, on FlickrUntitled by David Emm, on Flickr Untitled by David Emm, on FlickrUntitled by David Emm, on Flickr
__________________
David
|
|
#10
08-08-2019, 01:34 PM
|
|||
|
|||
|
I got the end graft in this evening and the result is one that i'm very happy with! Love it when whats in my head comes out in the actual build
 The idea is that it's almost an inversion of the rosette theme. It's also very likely to have a pickup endpin drilled through the middle of it so I tried to make it so that wouldn't ruin it too much. Terrible lighting in my apartment but it still looks decent  Untitled by David Emm, on Flickr Untitled by David Emm, on Flickr
__________________
David
|
|
#11
08-08-2019, 02:27 PM
|
|||
|
|||
|
Very nice work, looks great
|
|
#12
08-09-2019, 07:24 AM
|
|||
|
|||
|
Youve got some serious talent kiddo...
|
|
#13
08-09-2019, 04:17 PM
|
|||
|
|||
|
Quote:
Quote:
__________________
David
|
|
#14
10-03-2019, 03:04 PM
|
|||
|
|||
|
Hello all
Unfortunately I don't have many photos of what I've been up to as i've been using flickr as a host and i ended up losing a bunch when they changed their accounts, but I do have some photos of where the build is now at. Since I have last posted, there has actually been some very good progress. I made the neck joint, installed the neck, made a fretboard extension, drilled and installed some threaded inserts for the 4 bolt bolt on / bolt off system, cut the maple fretboard and bound it in Rocklite, made and inlayed my signature 12th fret inlay but with a small twist, added the maple headstock cap to the neck, drilled the string post holes routed out the slots for the slotted headstock, shaped the headstock itself, and carved the neck which brings us up to today. I still need to tweak the shape of the heel and do something about a heel cap. I'm a bit undecided about what i'm going to do the cap as i'd like to go with maple but i'm not sure its the right look. Next up is the bridge, its going to be rocklite with a flame maple tie block. Hopefully this blends the 12th fret inlay into the design even more. I really wanted a flame maple 12th fret inlay but its not so easy to make that stand out against a plain maple fretboard and i looked at a tasmanian blackwood inlay but it wasn't the right look so I inlayed the whole 12th fret in rocklite and then inserted the flame maple inlay, i'm very happy with how that came out. Rosette with the bound fretboard and the 12th fret inlay 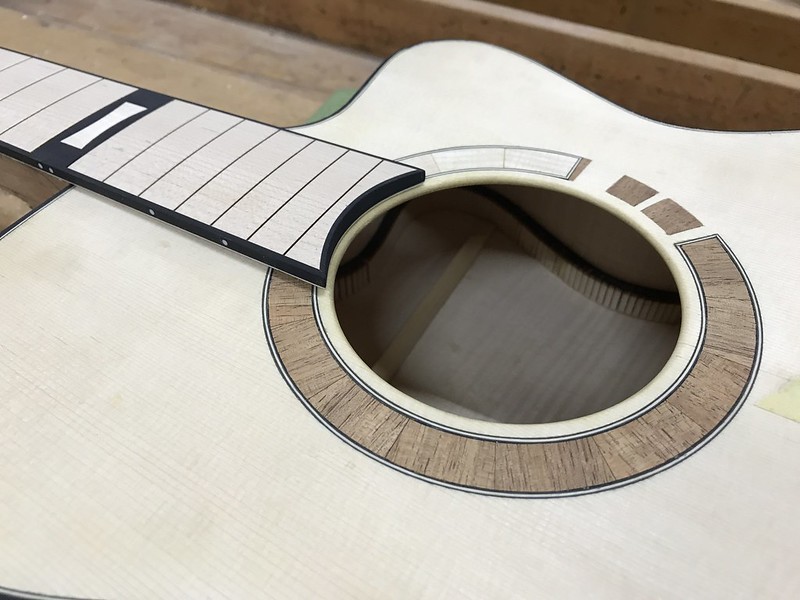 Untitled by David Emm, on Flickr Untitled by David Emm, on FlickrMaple capped headstock  Untitled by David Emm, on Flickr Untitled by David Emm, on Flickrcarved neck  Untitled by David Emm, on Flickr Untitled by David Emm, on Flickrcarved neck in place on the guitar  Untitled by David Emm, on Flickr Untitled by David Emm, on Flickrcarved neck in place on the guitar  Untitled by David Emm, on Flickr Untitled by David Emm, on Flickrshowing most of the front of the guitar 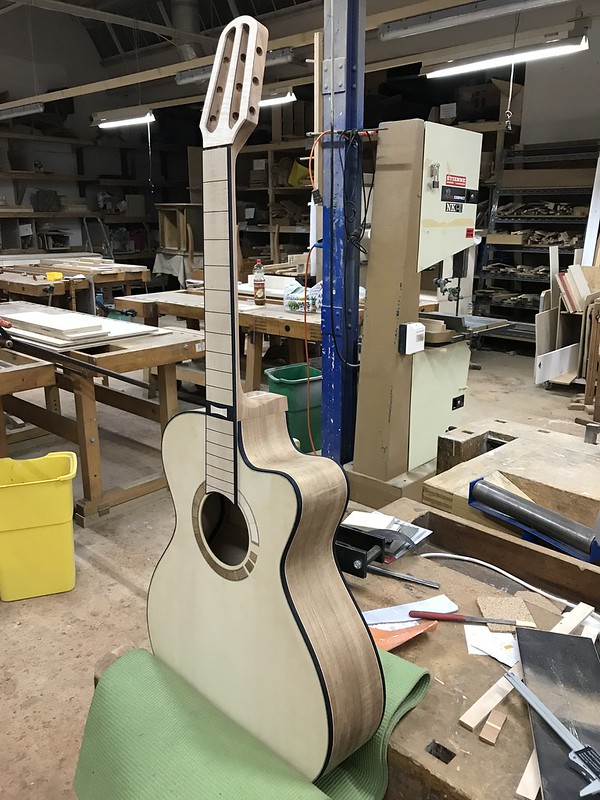 Untitled by David Emm, on Flickr Untitled by David Emm, on Flickr
__________________
David
|
|
#15
10-03-2019, 03:10 PM
|
|||
|
|||
|
Thats very nice looking both in construction and in artistic design.
What are you planning to use for a finish? I recall from another post that you werent keen on Crystalac, so Im wondering if you sorted the Crystalac, or found something you like better.
|


