
|
|
#211
 05-04-2020, 08:08 PM
|
||||
|
||||
|
Quote:
Quote:
Quote:
Mary does a great job on the pictures. Id like to expound on the sanding and buffing schedule that pictures cant really capture. I dry sand the entire body and neck with 600 grit sand paper. Next I wet sand with 1000 grit to remove the 600 grit scratches. Next course is to wet sand with 1500 grit to remove the 1000 grit sanding scratches. Last we wet sand with 2000 grit to remove the 1500 grit sanding scratches. Therefore the entire body and neck have 2000 grit sanding scratches on them. The reason we wet sand is because the sandpaper is so fine that the microscopic distance between each sanding grain is so small, the finish quickly clogs or loads up the microscopic voids in the sandpaper surface. By using a mixture of soap and water while sanding, allows the fine finish particles to float away and not clog up the sand paper. Since the surface of the finish is left with 2000 grit scratches, the next step is to buff those scratches out with a cotton flannel powered buffing wheel. We apply dry buffing compound to the flannel surface of the buffing wheels. The compound is made from a type of clay mixed with super fine aggregate abrasives. We hold the buffing compound bar to the spinning wheel and it transfers and impregnates the surface of the wheel. The spinning wheel is held (lightly) against the finish and the (medium) compound removes the 2000 grit scratches and a slight gloss now appears on the surface of the finish. Next we rake the spinning wheels to remove the medium compound grit from the cotton flannel wheel and then we apply fine compound to the wheel. The fine compound removes the medium compound scratches and the gloss increases a bit more. Finally, we switch to another wheel that is dedicated to using only the very fine grade of buffing compound. This is the final step of the process and brings up the mirror like gloss. Sorry to get long winded but I dont think the process is clearly understood by a few pictures and bears further explanation. It takes several hours from the start of the sanding to the final course of buffing. Thanks again for following along... |
|
#213
05-06-2020, 03:18 AM
|
||||
|
||||
|
Quote:
Quote:
Quote:
Quote:
__________________
Life is like a box of chocolates .... |
|
#214
05-06-2020, 03:20 AM
|
||||
|
||||
|
Here is a very exacting process as the bridge is glued to the top.
      I do believe I see some bear claw in that top! 
__________________
Life is like a box of chocolates .... |
|
#215
05-06-2020, 03:27 AM
|
|||
|
|||
|
Hi Fan,
I'd say that the exacting part was removing the lacquer precisely AND having placed those indexing pins to start with! After that it's fairly easy, which is why you do the hard stuff beforehand! I really can't wait to hear how big that shallow body sounds. I have no doubt it will be the most comfortable guitar you own! I believe a trend should be started. Best, Howard Emerson
__________________
My New Website! |
|
#216
05-06-2020, 05:11 AM
|
|||
|
|||
|
Absolutely beautiful guitar! Tim, what glue are you using for the bridge?
|
|
#217
05-06-2020, 03:32 PM
|
||||
|
||||
|
Quote:
|
|
#218
05-06-2020, 03:57 PM
|
|||
|
|||
|
Won't be long now, Dennis--looking so awesome!
__________________
2013 Stehr Auditorium (Carpathian/Myrtle) 2015 Stehr Auditorium (Adi/BRW) 2020 Baranik Meridian (Blue Spruce/Manchinga) 2020 Wilborn Arum (Tunnel 14/Coco) 2021 Kinnaird Graybeard (BC Cedar/Bog Oak) 2022 Kinnaird CS Student Build (Adi/Padauk) 2023 Kinnaird FS (Italian/Koa) |
|
#219
05-06-2020, 07:13 PM
|
||||
|
||||
|
I have been following along almost daily. I, like so many others here, eagerly await completion of this gem. It truly is one of the most beautiful guitars I have seen.
__________________
Goditi la vita! Collings ~ Taylor ~ Martin |
|
#220
05-07-2020, 01:27 PM
|
||||
|
||||
|
Quote:
 Quote:
Quote:
__________________
Life is like a box of chocolates .... |
|
#221
05-07-2020, 01:30 PM
|
||||
|
||||
|
Tim and Mary have outdone themselves. An incredible amount of work accomplished today. And a record (for me anyway) 50 pics and videos.
First off, leveling of the fretboard. Chalk is applied before sanding.     After a pass of a sanding beam, the remaining chalk shows the remaining low spots.    This area is called fall away. It's blended into the fretboard with a shorter sanding beam.   
__________________
Life is like a box of chocolates .... |
|
#222
05-07-2020, 01:31 PM
|
||||
|
||||
|
Then the fretboard angle is measured to the bridge. Perfect!
  Center of the fretboard is marked to position the inlays.     Once the inlay positions are confirmed, each is traced before cutting of the pocket with a router.    
__________________
Life is like a box of chocolates .... |
|
#223
05-07-2020, 01:32 PM
|
||||
|
||||
|
Again, a light sanding before the inlays are glued in.
   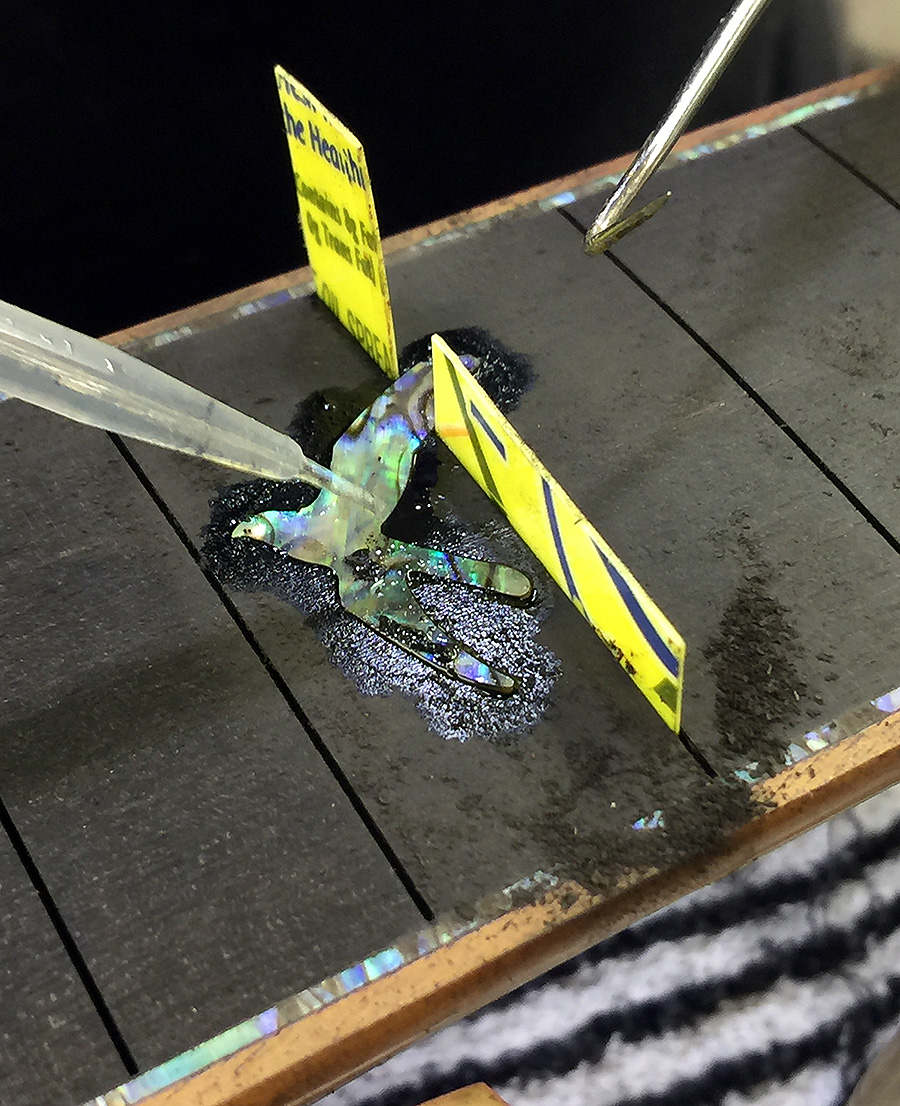 Then the inlays are leveled. Video 1 Video 2   Each of the fret slots are cleaned of debris.    The claw hook fret slot cleaner thingy (tech term) is used to remove all sanding dust and shavings from the fretboard. 
__________________
Life is like a box of chocolates .... |
|
#224
05-07-2020, 01:33 PM
|
||||
|
||||
|
Several different grit sandpaper are used to final sand the fretboard and bridge.
  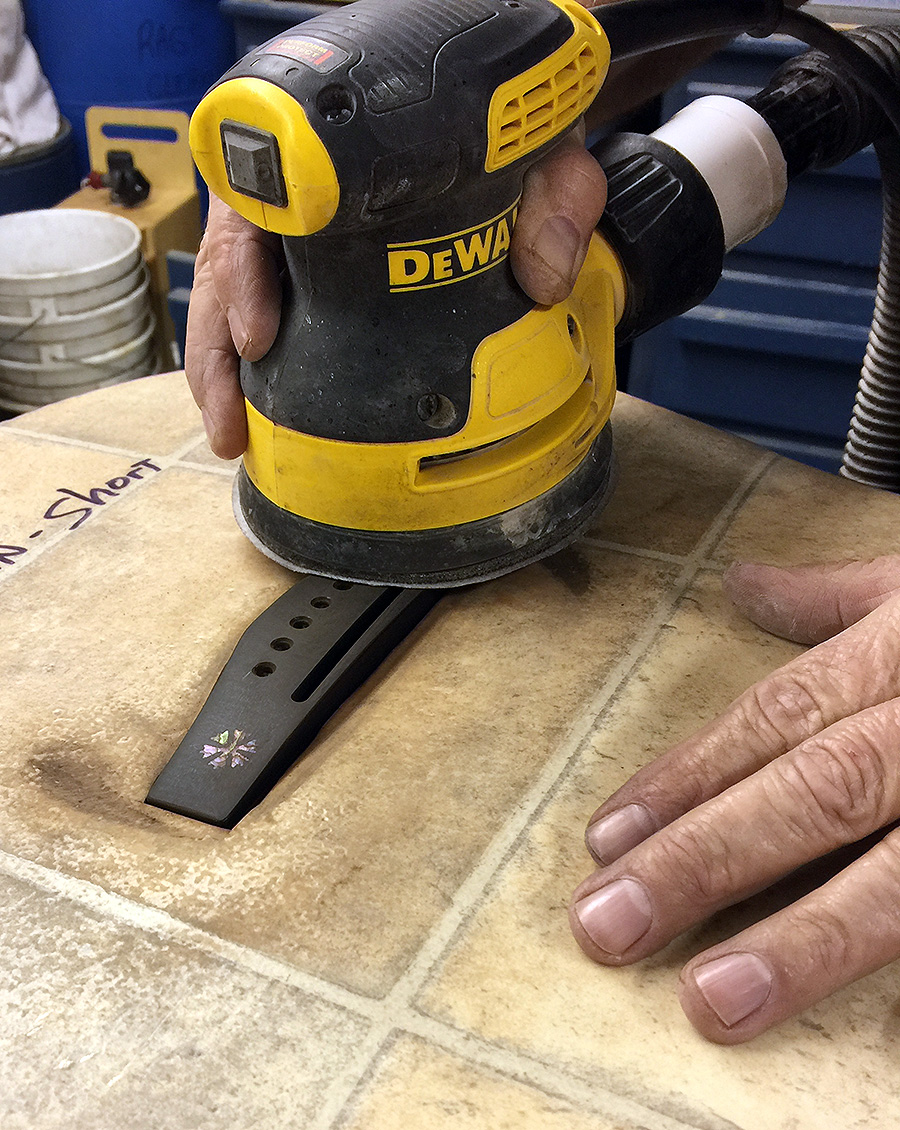 Then it is time to cut the fret wire.    Each fret is filed flat on both end to fit the space between the end of the slot and the binding. Video 
__________________
Life is like a box of chocolates .... |
|
#225
05-07-2020, 01:34 PM
|
||||
|
||||
|
I asked Tim to place a hemispherical shape at each end of the frets. I've had it done on a couple other guitars as it is more comfortable running your hand up and down the neck when you play. It is a option Tim offers.
The following pics depict the steps required to accomplish a hemispherical shape at each fret end. Painstaking and exact! 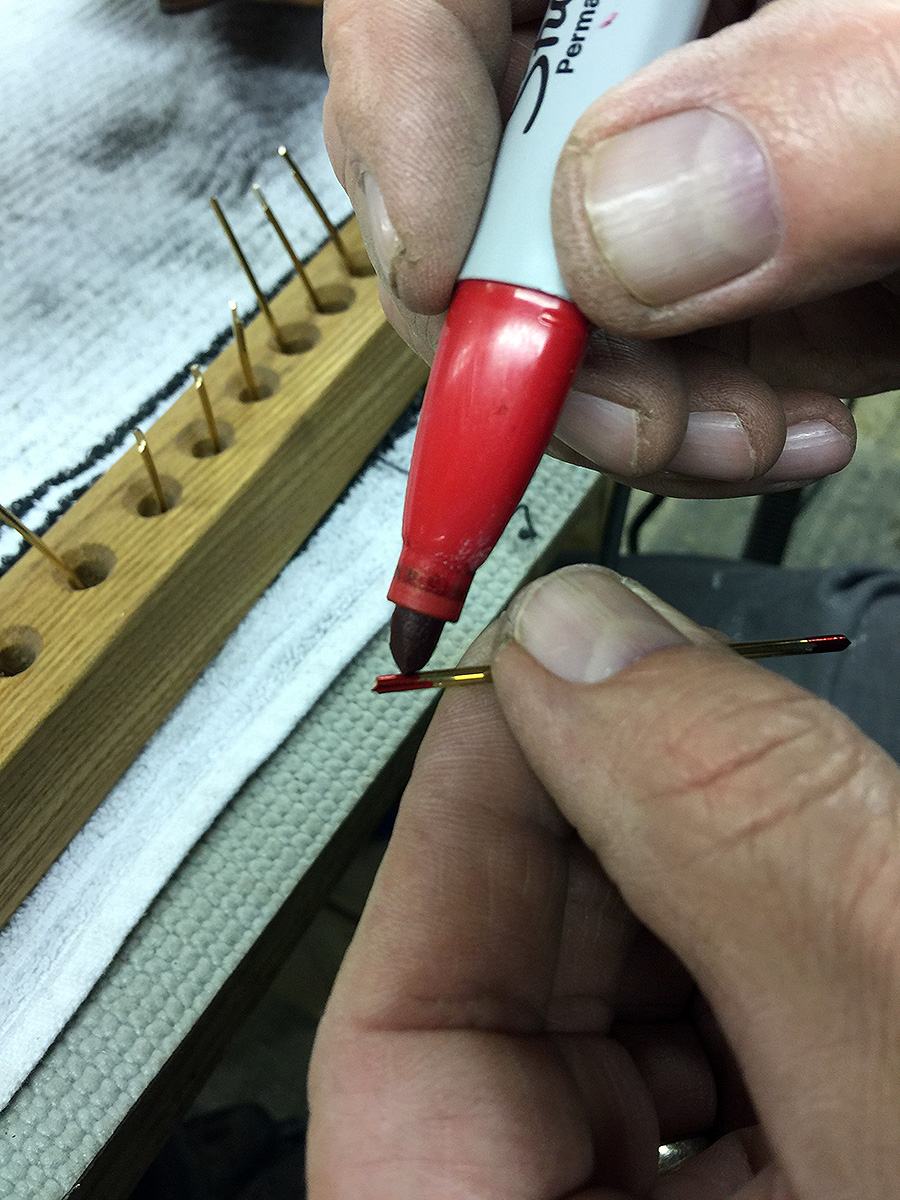         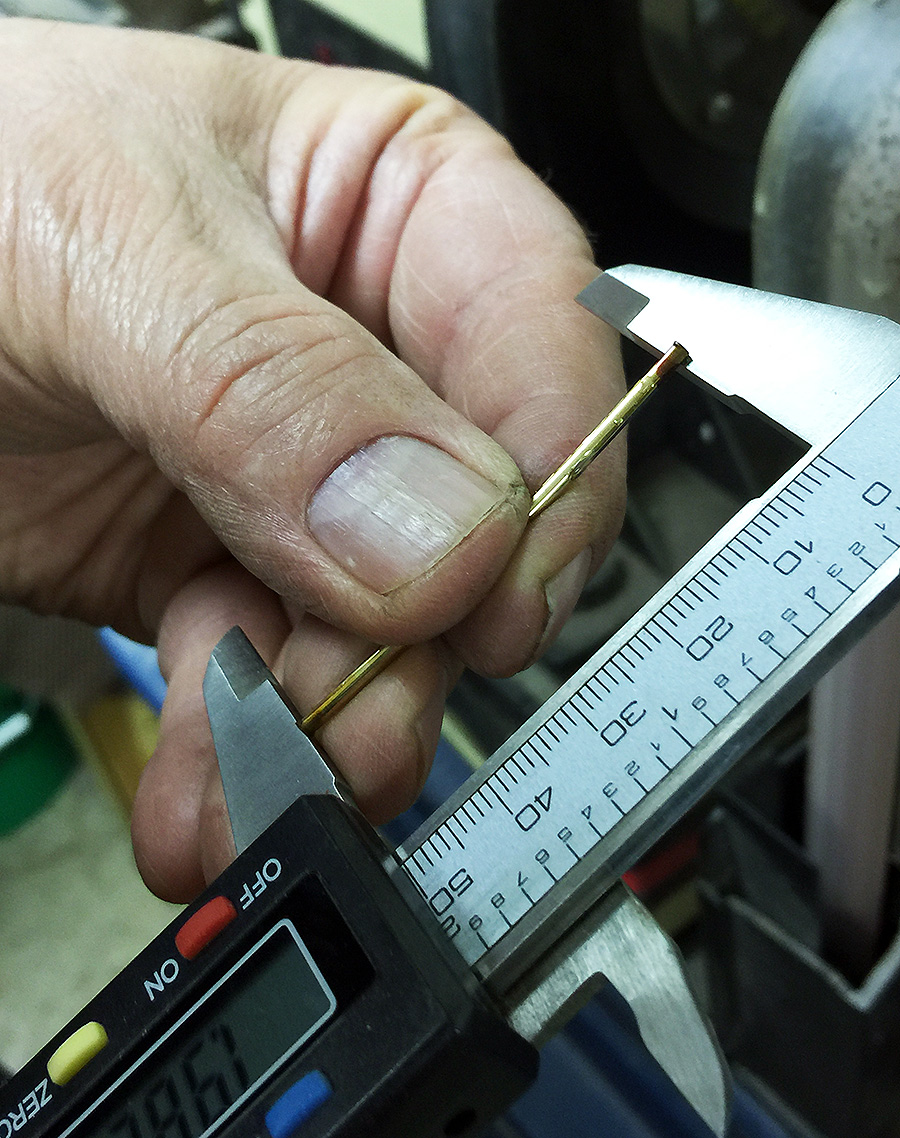
__________________
Life is like a box of chocolates .... |


