
|
|
#31
 06-05-2012, 09:07 PM
|
||||
|
||||
|
Interested neck attachment John. Looking forward to seeing more pics and learning. Do you bolt the FB extension as well?

|
|
#32
06-06-2012, 06:17 AM
|
||||
|
||||
|
Quote:
Yes there is one bolt that comes up through the carbon reinforced neck block and "pulls down" the on fretboard extension (also carbon reinforced which we will see in some future pictures.) Here are some shots of the the trussrod being made. The trussrod is "buried" into a slot that is has a concave arched bottom. A spline that matches the arc is then glued on top of the trussrod. First the titianium is bent at one end. 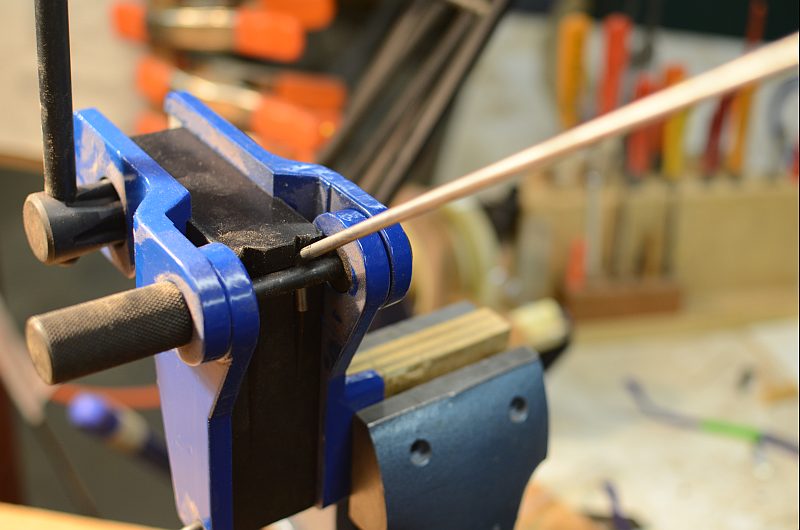 Then the other end is cut to length and is readied for the threading. 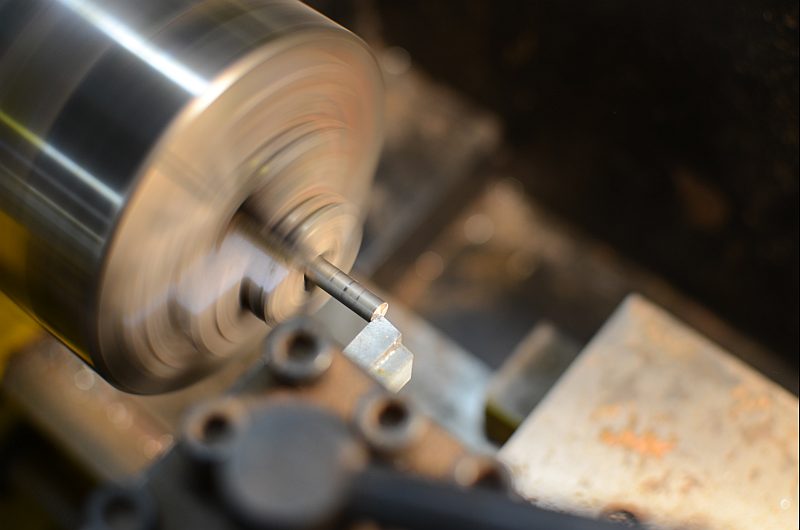 The threads being cut (The titanium is tough)  Here is a look at the "buisness side" of the trussrod. It will get a dab of grease on the threads when it is installed. 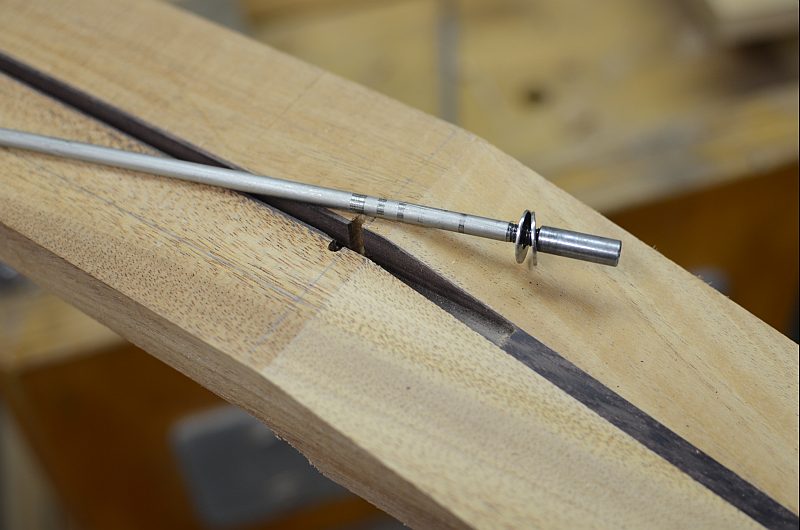 The trussrod in its new home 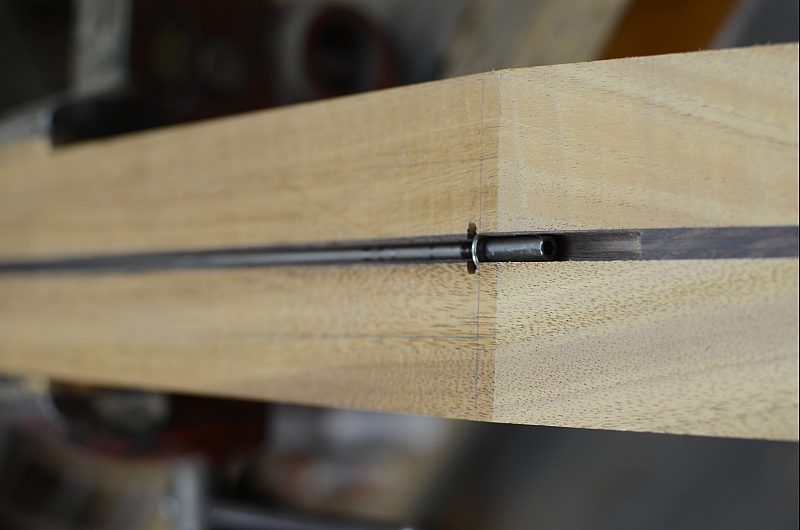 The spline is glued into place 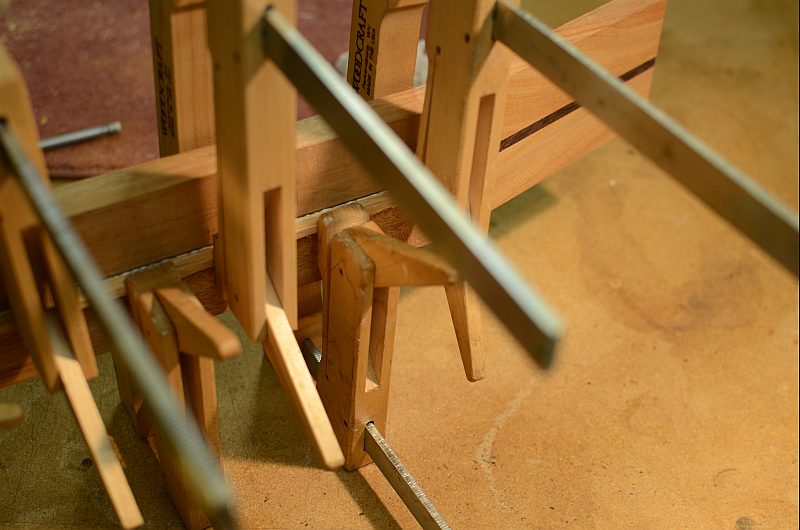 After the spline has time for the glue to dry, it is cut flush to the top surface of the neck block 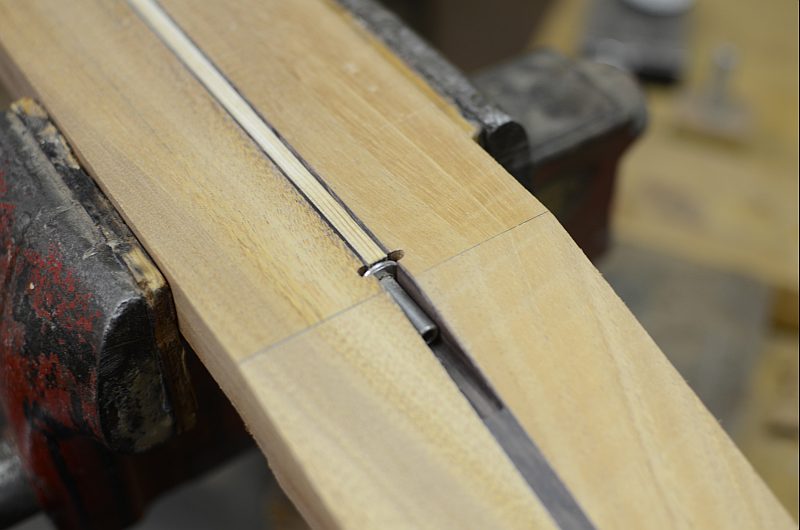 Here's a shot showing the neck getting the clearance holes for the bolts being drilled. This actually happened prior to the trussrod being installed, but you can see the hole (just below the larger one) where the 90 degree bend of the trussrod is installed. 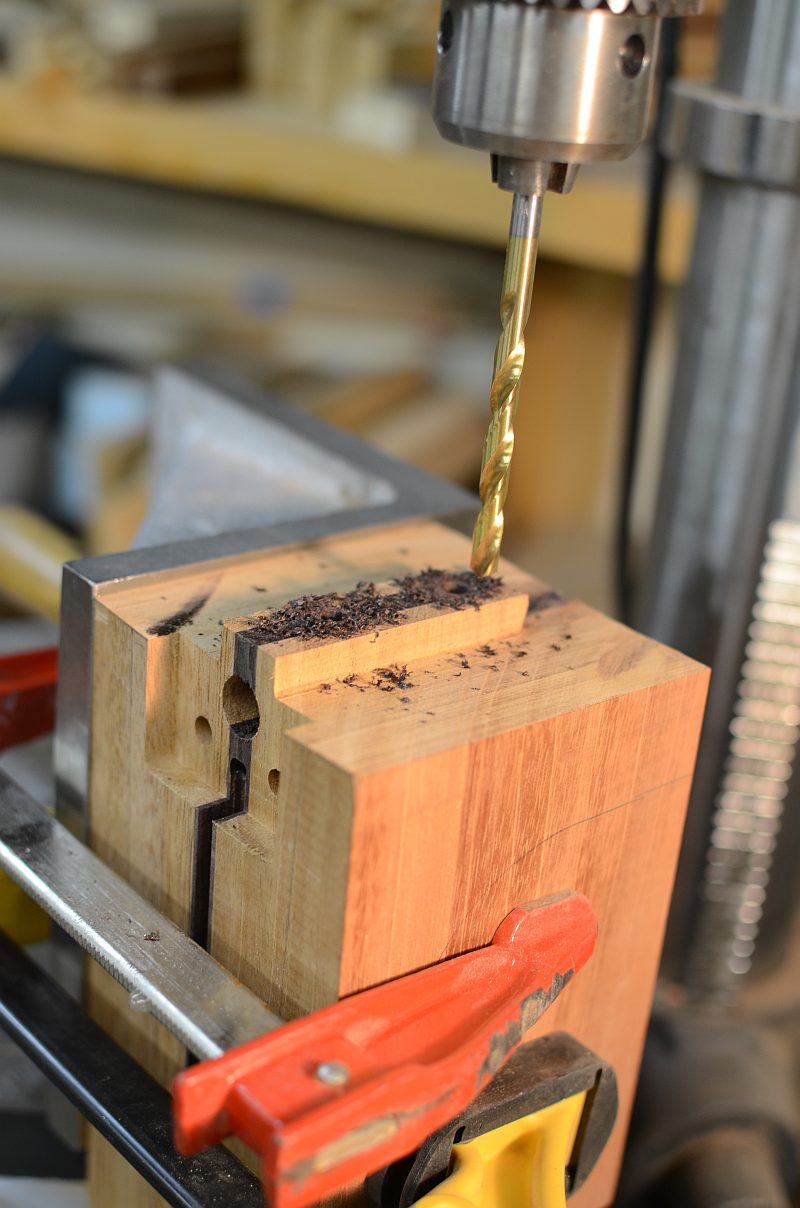 Now it is time to get going on the headstock, here the ebony front (a little washed out in this photo ... it is much more black) and the ziricote rear veneers are glued on. 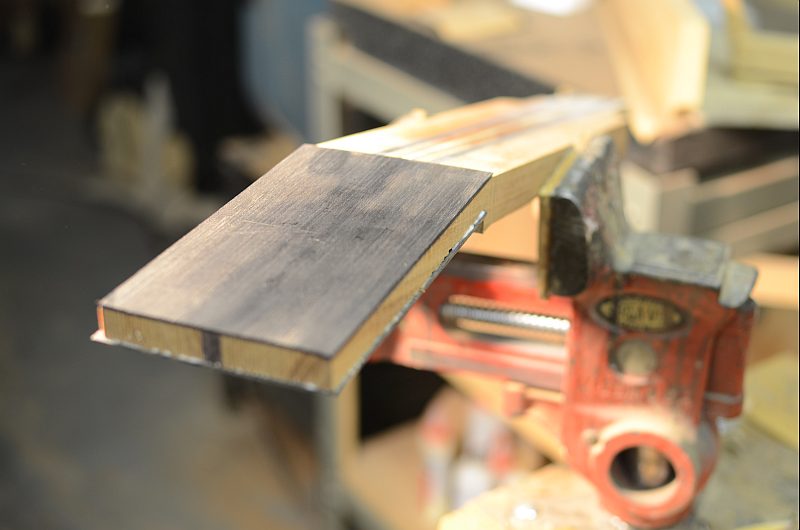 More on the headstock later ...
|
|
#34
06-06-2012, 06:58 AM
|
||||
|
||||
|
I am thoroughly enjoying this thread, John! This is going to be a wonderful guitar, and watching it's growth and development gives me an even greater appreciation of the skill, artistry, dedication and sheer magic of a builder like you.
cotten
|
|
#35
06-06-2012, 07:00 AM
|
||||
|
||||
|
I always like following your builds John, great work and an inspiration, will this be at the Montreal Guitar show?
|
|
#36
06-06-2012, 09:17 AM
|
||||
|
||||
|
Quote:
Quote:
|
|
#38
06-06-2012, 12:54 PM
|
|||
|
|||
|
I'm very interested to see this guitar. I've been impressed by a Petros and a Lowden in this combination of woods. I've also played and very much liked the mahogany and spruce Osthoff OM that Trevor has in the shop at the moment, so I'm really interested in how this turns out.
__________________
Richard Baranik, Bourgeois, Brook, Collings, Fischer, Fylde, Kinnaird, Lowden, Martin, Oddy, Taylor For sale: Bourgeois JOM custom - Adirondack/koa Brook OM custom (maybe!) - Bubinga/Sitka Lowden F 25th anniversary model - European/Brazilian David Oddy J - Englemann/Brazilian David Oddy mandocello - European spruce/flame maple David Oddy A4 mandolin
|
|
#39
06-07-2012, 07:01 AM
|
||||
|
||||
|
Continuing with the neck build ...
In yesterday's post I showed the headstock with the veneers already glued on, but first I put in the carbon reinforcement strips, here are a couple shot of the strips being dry fitted in place. 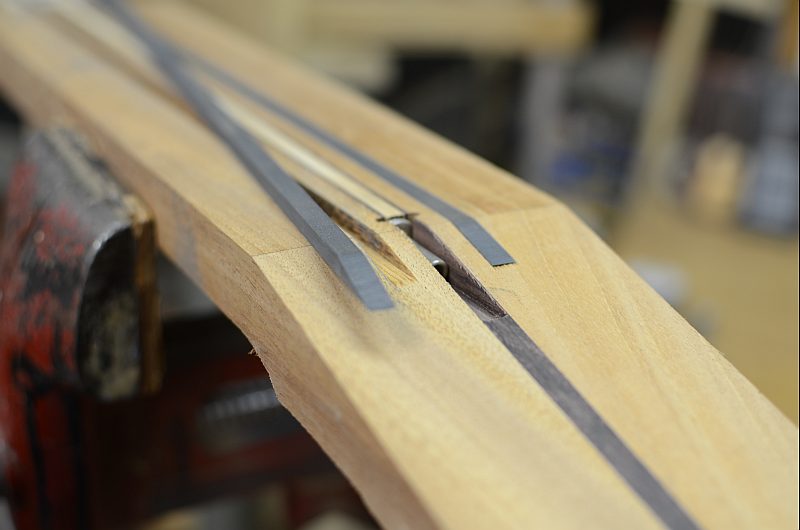 (Tim, this should clear up any questions about the neck attachment) 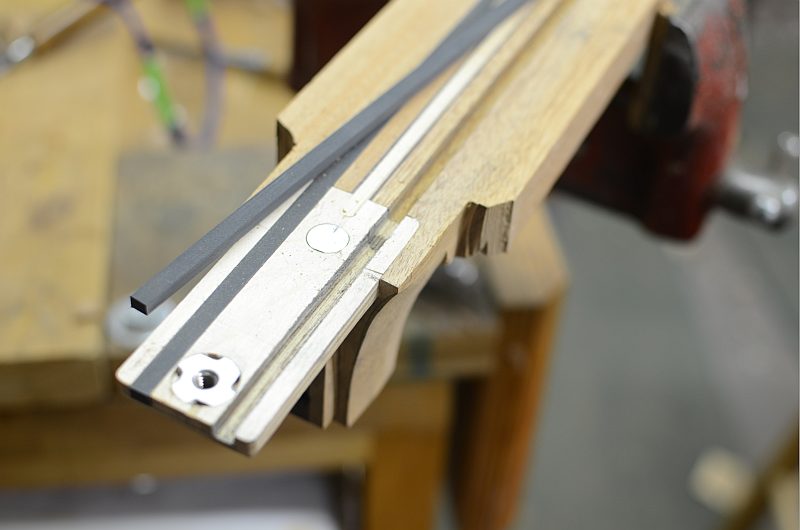 After the headstock is roughed out, I touch it up on the spindle sander 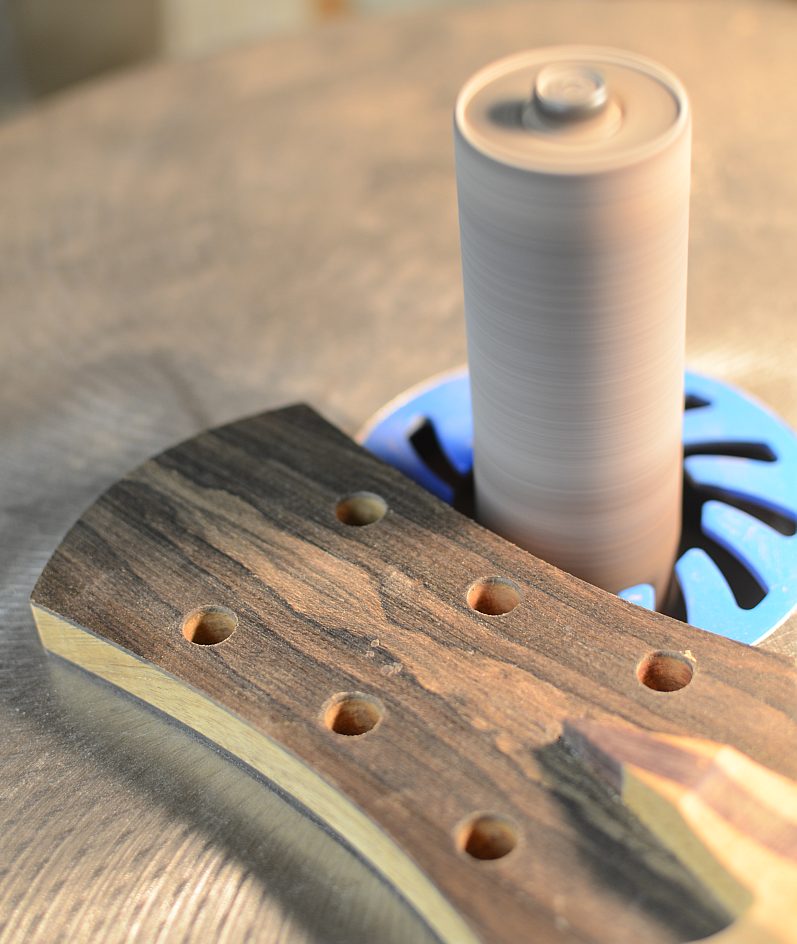 The ziricote on the rear of the headstock to match the back/sides. The volute will be carved with a really sharp (and long) chisel. 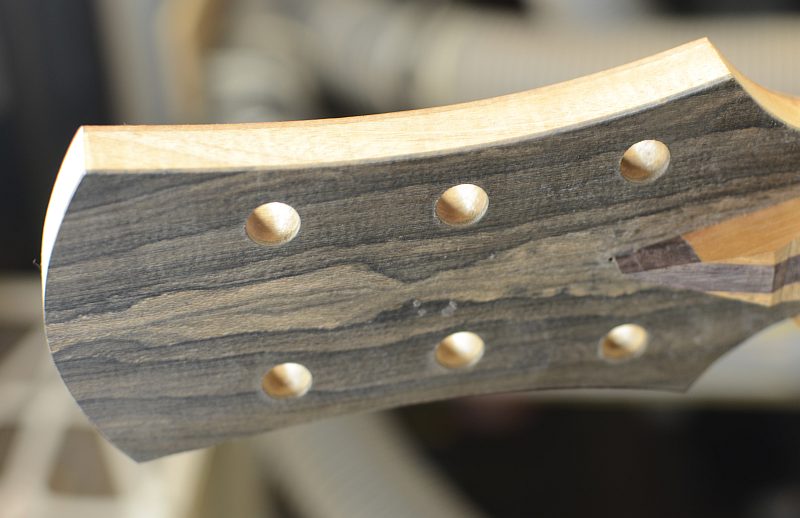 The logo is made from Koa and this headstock will get bindings to match. The stealth truss rod cover opening has been routed out. 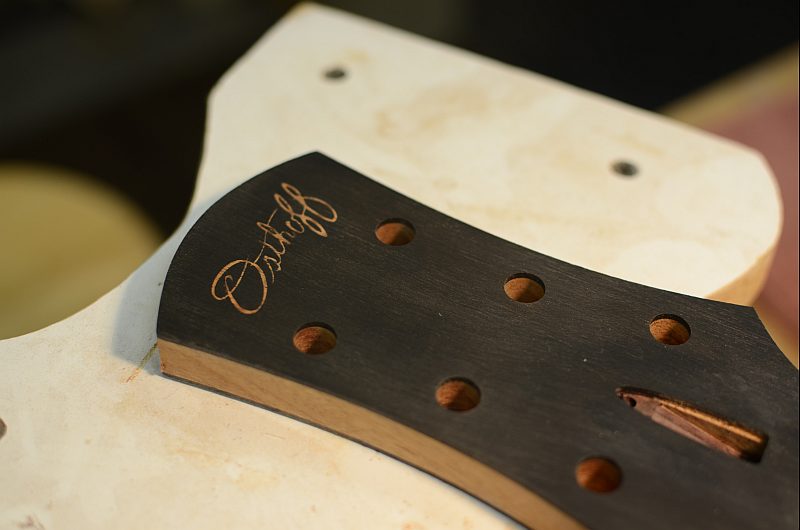 Routing out for the headstock bindings 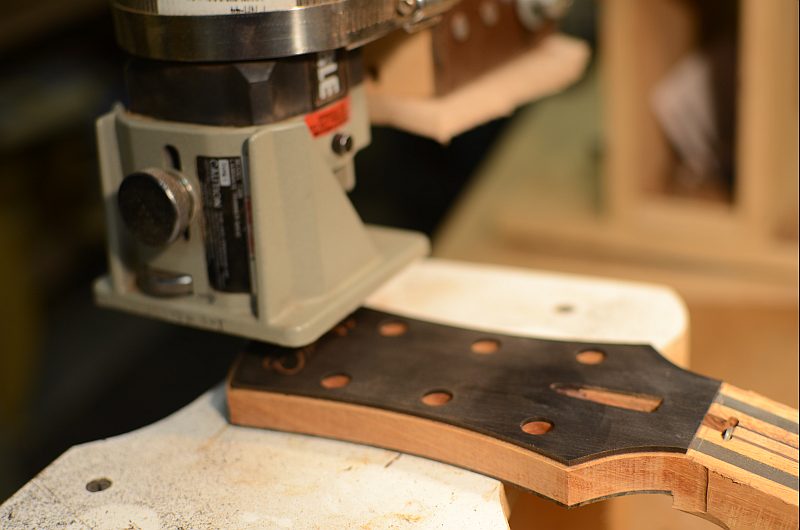 And the results of the router 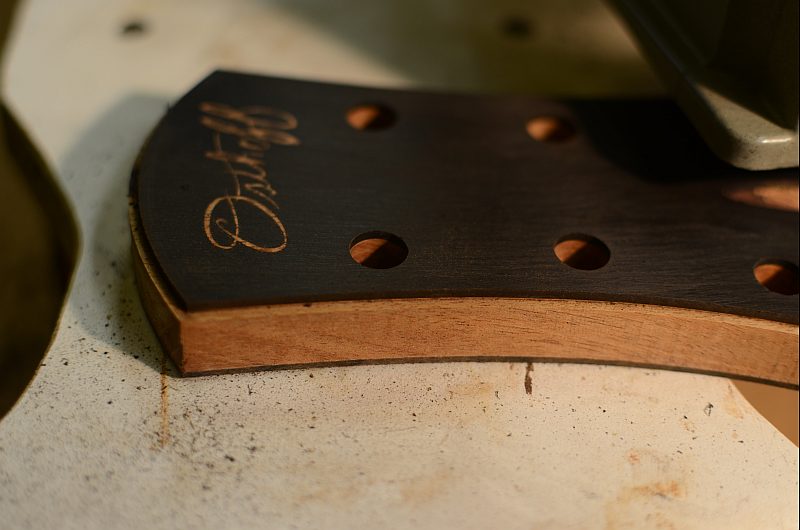 Dry fitting the binding 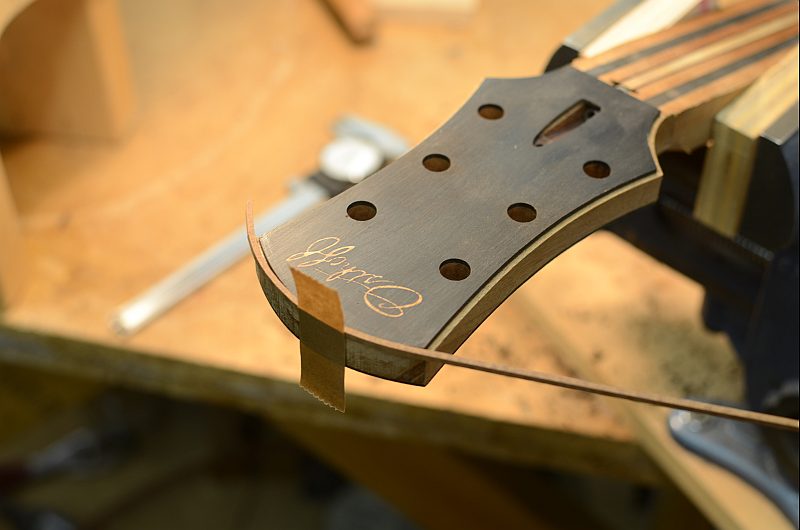 The headstock bound with koa and the stealth truss rod cover (opened.) 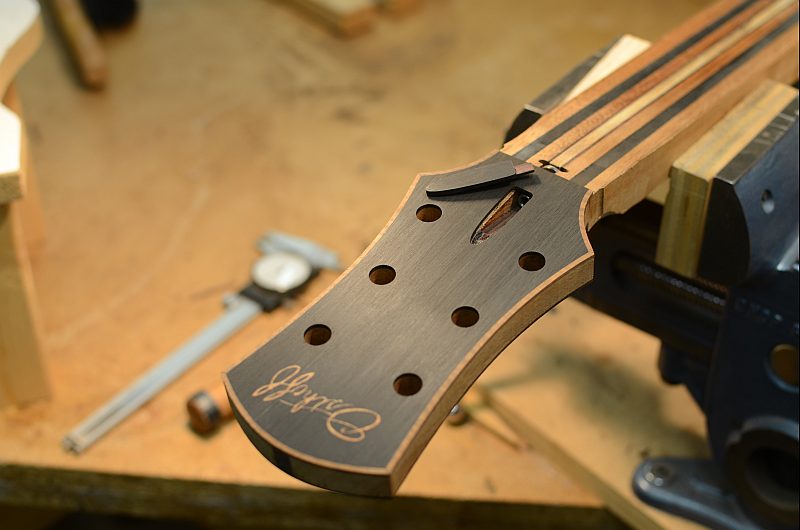 And with the stealth truss rod cover in its home 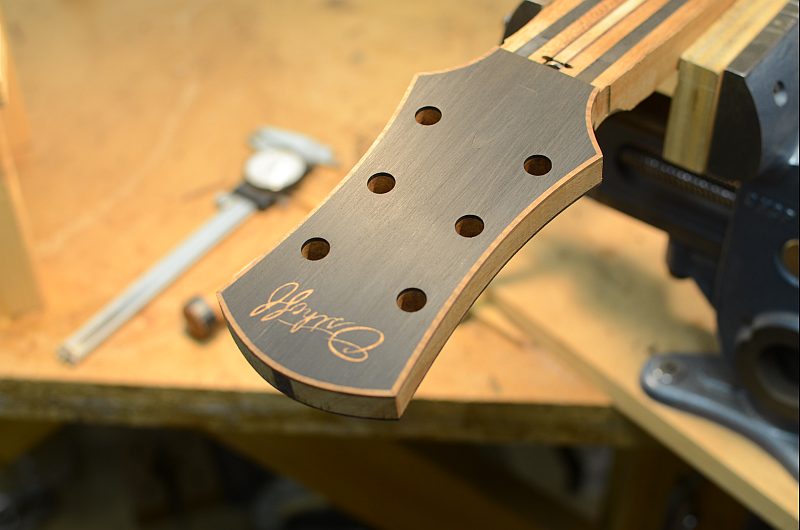 I am working on the fretboard today ... I hope to make some good progress on it, although I have some stuff taking me out of the shop later today until early next week. Hopefully I will be carving the neck next monday. Thanks to those of you that have looked, lurked and posted so far.
|
|
#40
06-07-2012, 07:13 AM
|
||||
|
||||
|
Quote:

|
|
#41
06-11-2012, 07:18 AM
|
||||
|
||||
|
I will get going on the rest of the neck later today, but here are few shots of the fretboard work from last week:
In this shot, I have "processed" a few ebony blanks into approximate size (leaving them rectangular) mostly getting the thickness close. Next step is to slot the blanks. I use my tablesaw with a fine blade and a couple of stablizers on each side of the blade. http://osthoffguitars.com/images/cus...b/023blade.jpg I have a tablesaw fence dedicated to the fretslotting. It has a small dowel pin that indexes my slotting templates. I doublestick tape the fretboard to the template. The fretboard is under the stainless steel template in this pic. 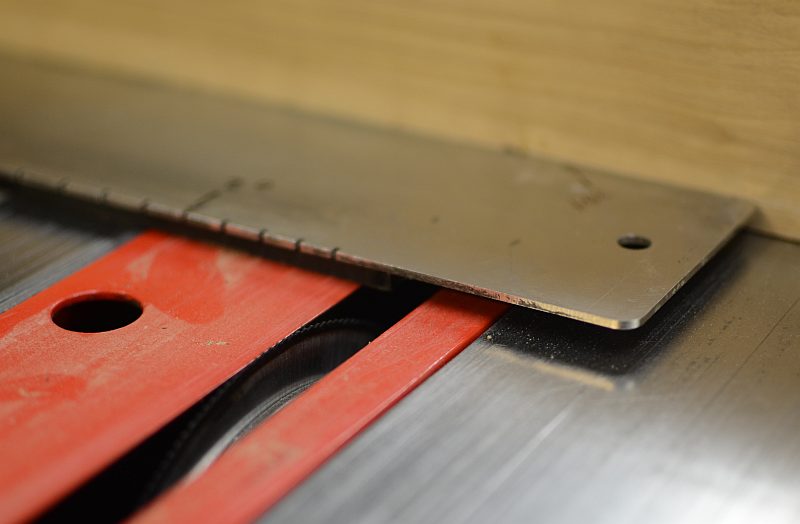 Here the template is flipped over showing the fret slots 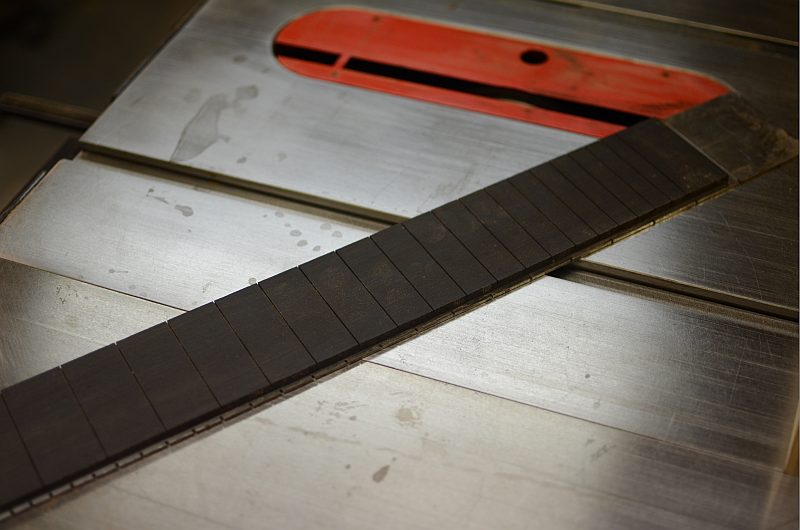 Here the taper is being cut on the table saw. 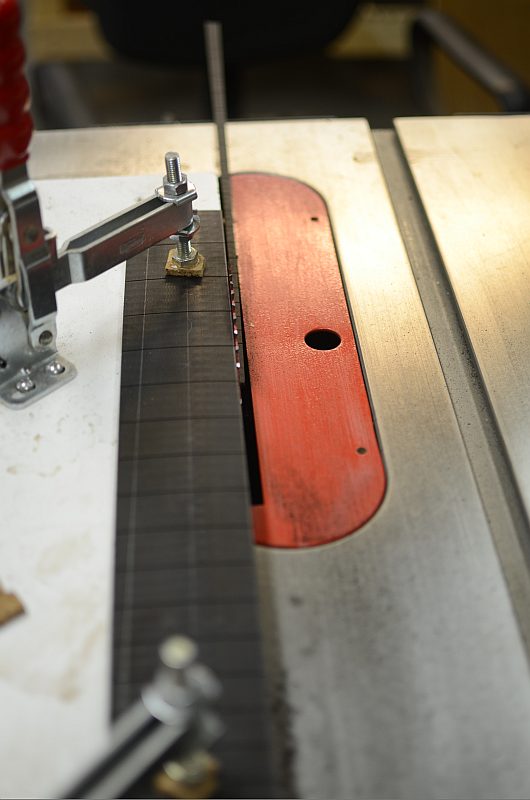 After some rough work on the radius of the fretboard and cutting the outline around the soundhole, just some quick checks on the guitar to see if things are going along ok. 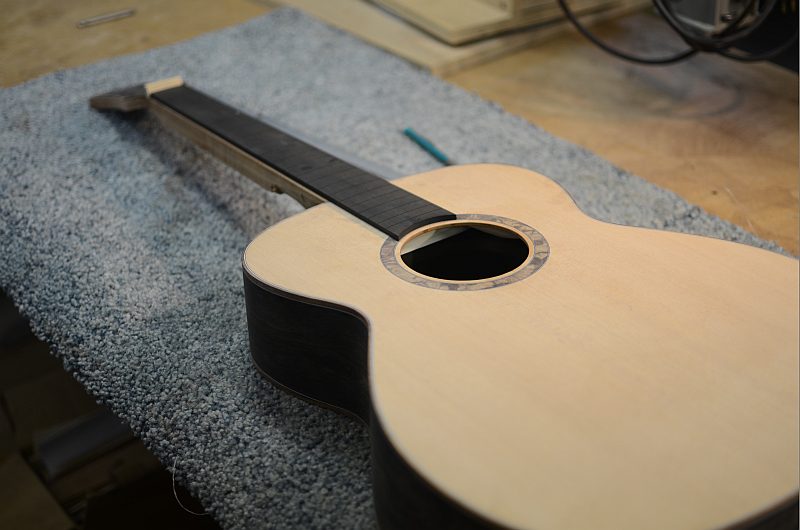 Next up, the fretboard binding, fretmarkers and frets.
|
|
#42
06-12-2012, 05:51 AM
|
||||
|
||||
|
Continuing on the fretboard ...
It looks like I did not get any pictures of the me drilling for the fretboard inlay marker dots, these are koa with walnut centers, but here is the result 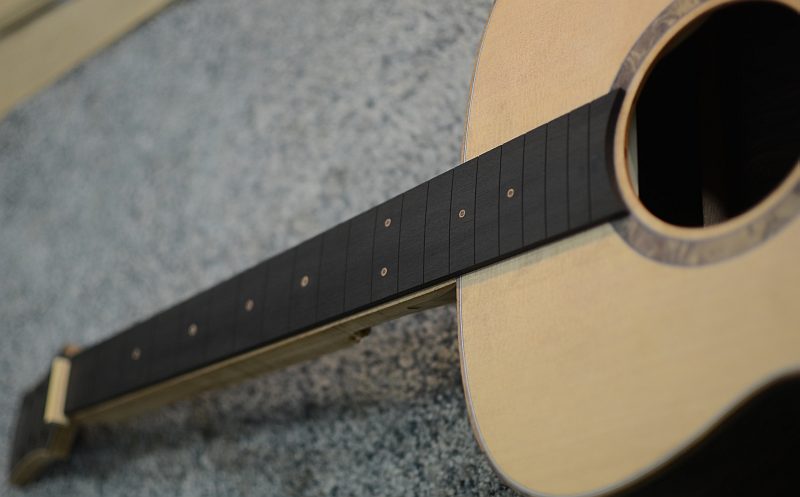 I make sure the fret slot "follows" the curvature of the fretboard and I simply do this with a handsaw 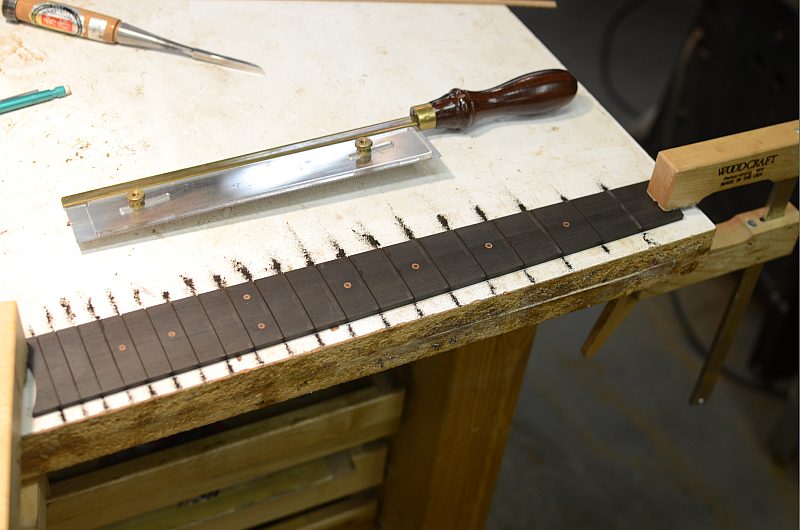 The fretboard is check for "flatness" and corrected with abrasive radius planes. 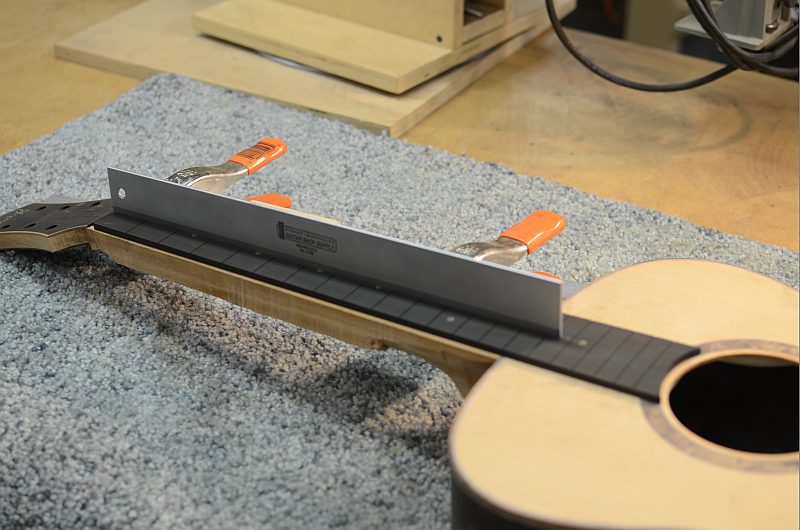 Here the binding is getting started, first the curve around the soundhole is dry fitted with a piece of koa. 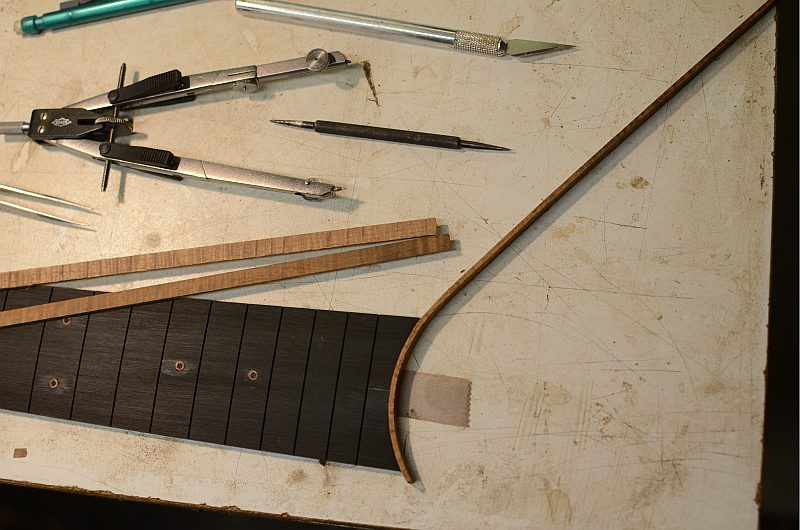 Once the binding is installed the side marker dots are positioned then drilled. 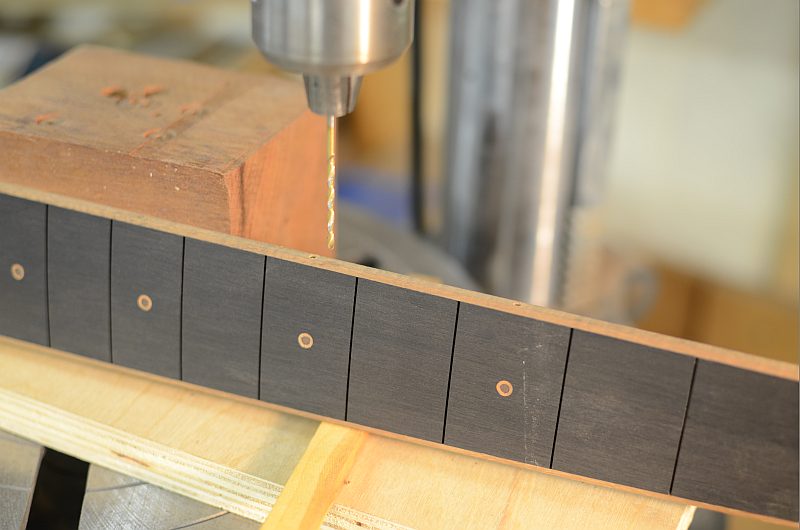 The side dots are the "reverse" of the fret board markers, this time walnut with koa centers. 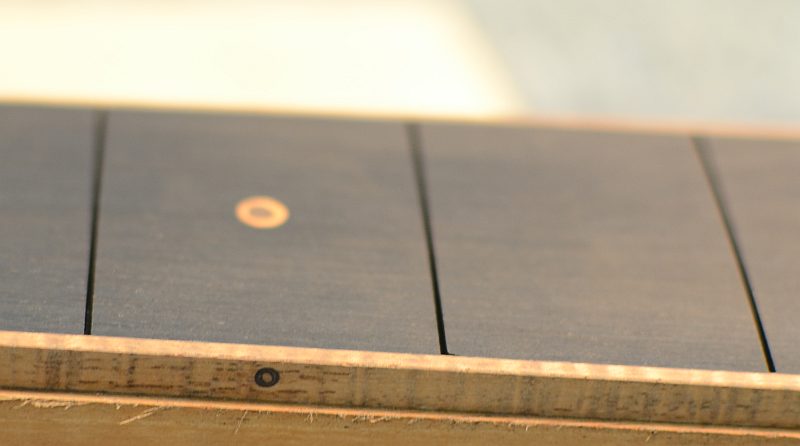 Getting setup to "press" in the frets. In this process, I cut each fret to length, the undercut each fret "go over" the binding. 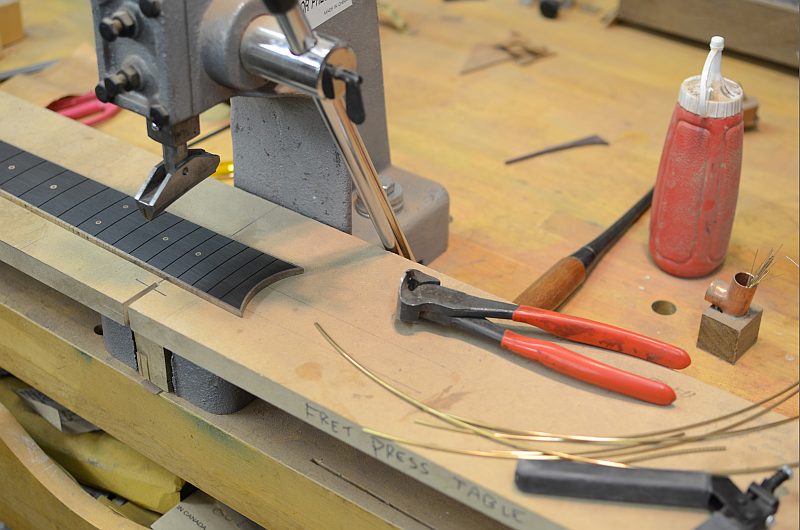 A few more shots of the fret press:  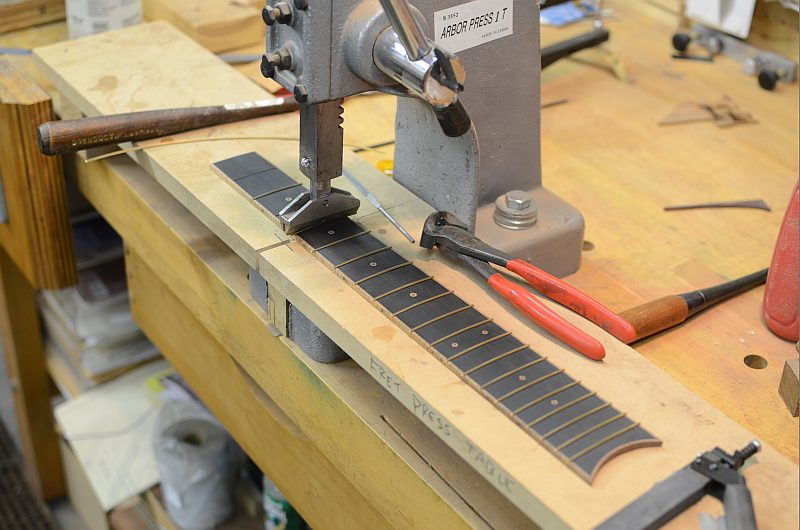 I check each fret using sight and sound. The sound part is done by tapping each fret with the board lying on my granite surface plate. It any fret is loose it will make a muffled sound when tapping. In this case all frets are nicely seated..  The fretboard is glued on then the neck is carved, I have a few photos on the camera of that process coming later.
|
|
#43
06-13-2012, 09:24 PM
|
||||
|
||||
|
The fretboard was glued to the neck and then carved ... here are some shots of the process:
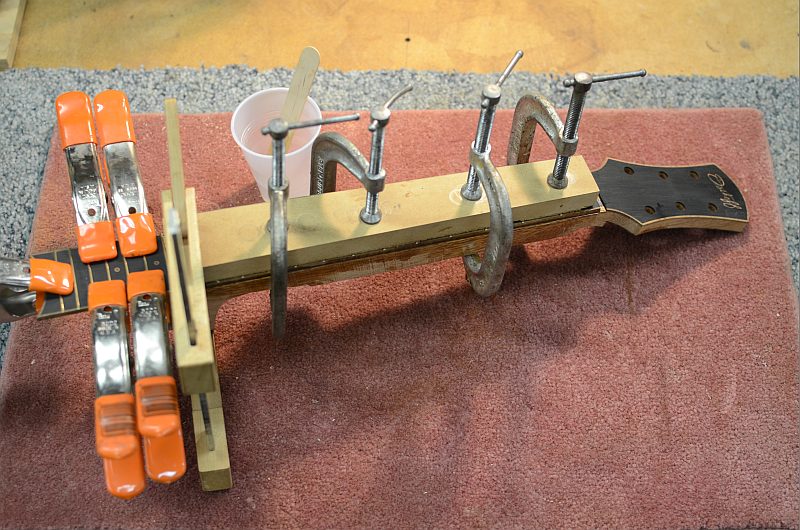 This is probably one of my favorite things in building the guitar ... carving the neck. Here the neck is still a little "chunky." 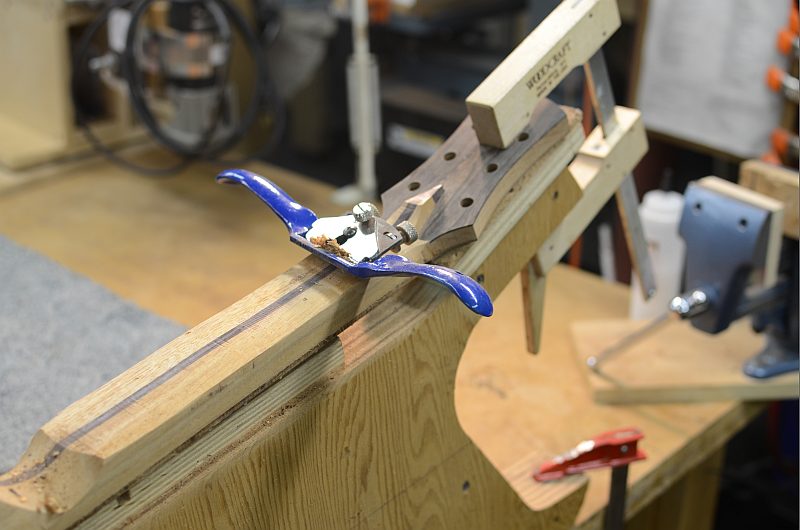 Carving the volute. 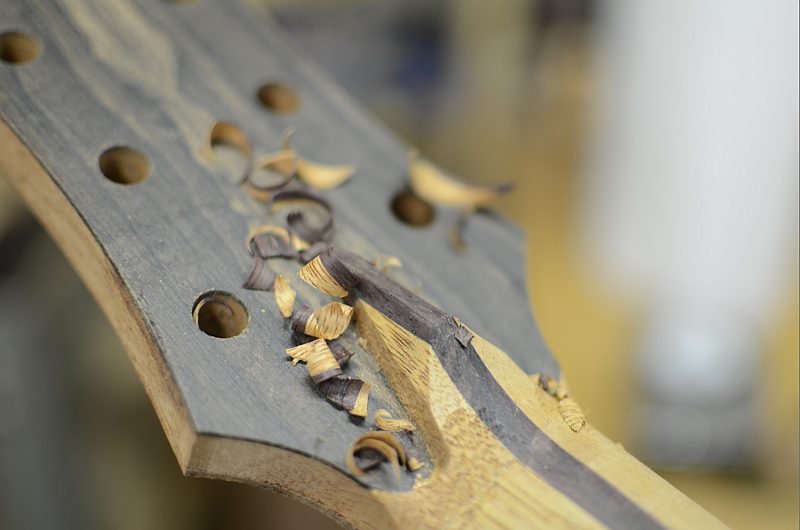 Starting to take shape 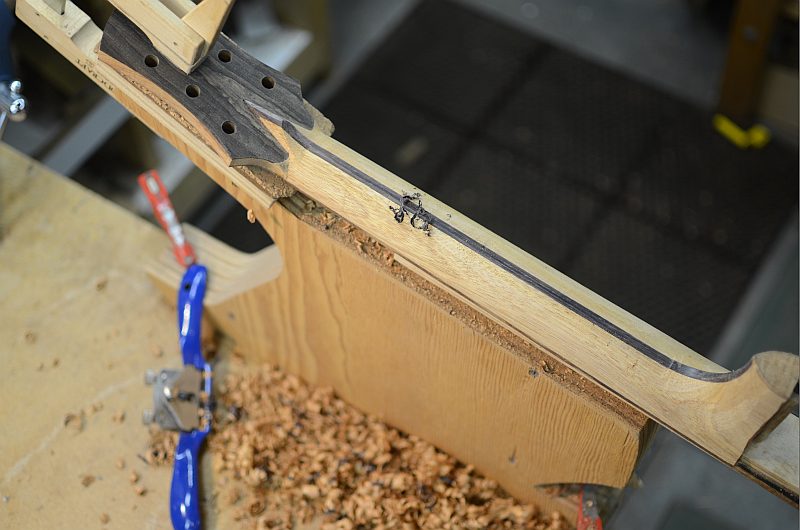 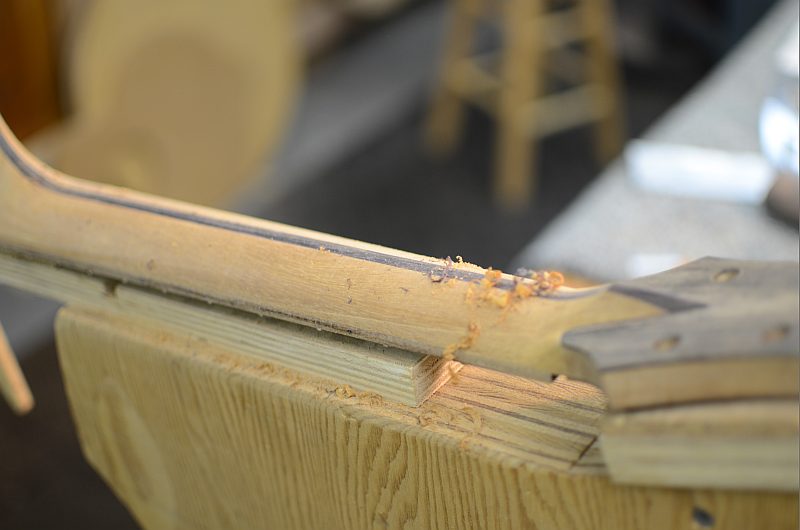 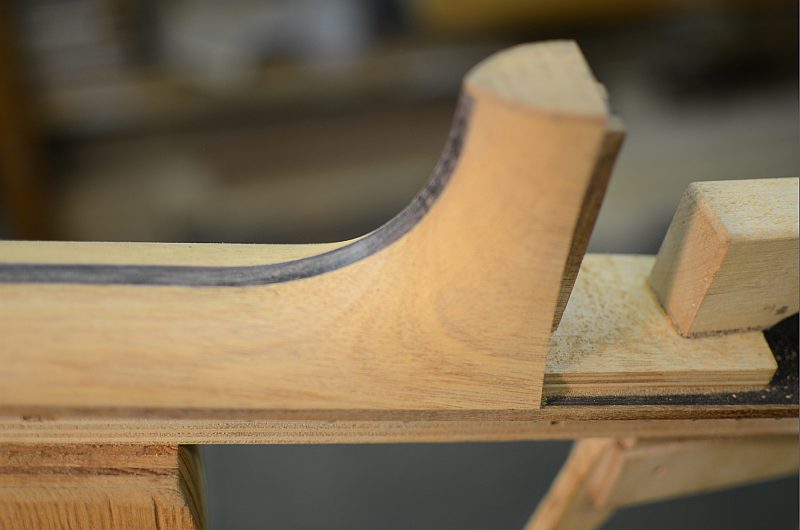 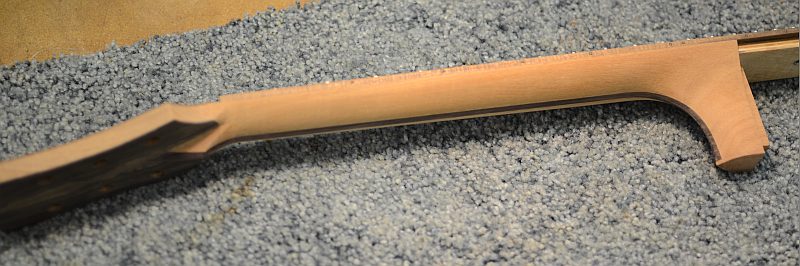 And let's see if is still fits ... 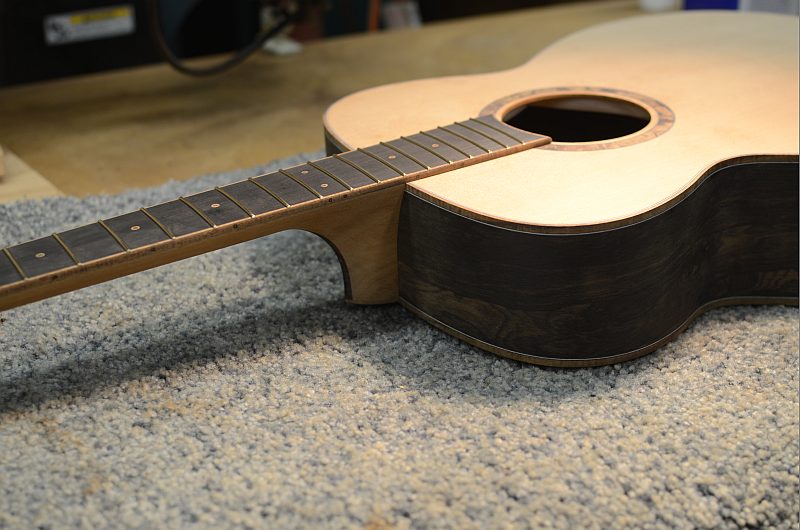 A side shot 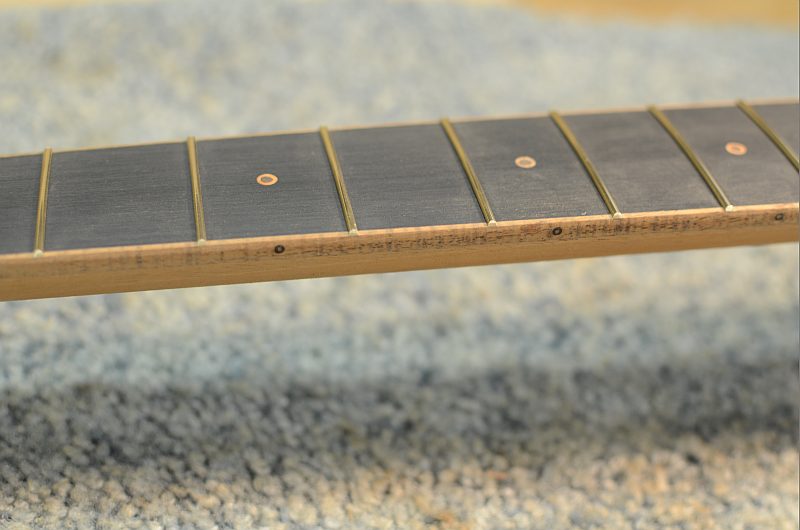 And a look through the soundhole  Next up finishing up a bridge and getting ready for finish. I actually have a bridge almost completed as I usually make 2 at a time.
|
|
#44
06-15-2012, 05:58 AM
|
||||
|
||||
|
Continuing with the build ...
I make a lot of stuff in two's in the shop. When I make a fretboard I will make two of them. (In case I screw one up ... I have a backup) In this case for the bridge, I had one almost completed, so I just had to do a few odds and ends on it to get it ready for this guitar. In this shot, I am countersinking the pin holes  A quick peek at the bridge on the guitar. 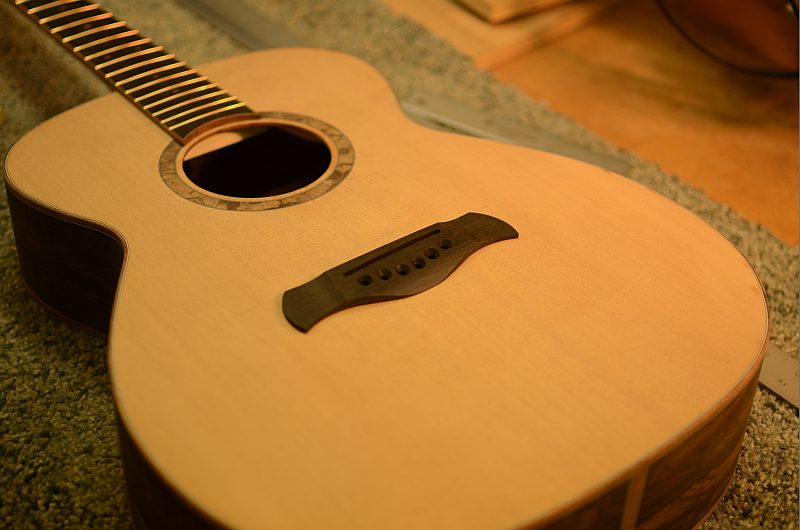 Here the bridge acts a drilling guide 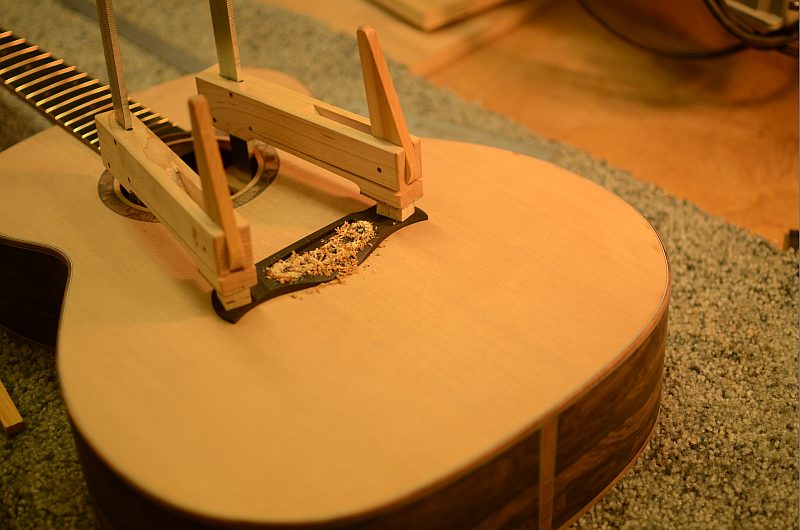 The smile ... 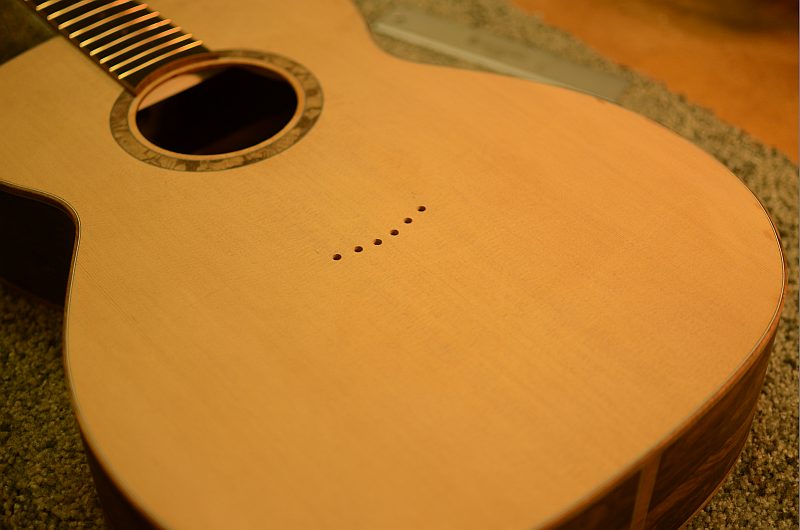 Get the holes on the headplate ready 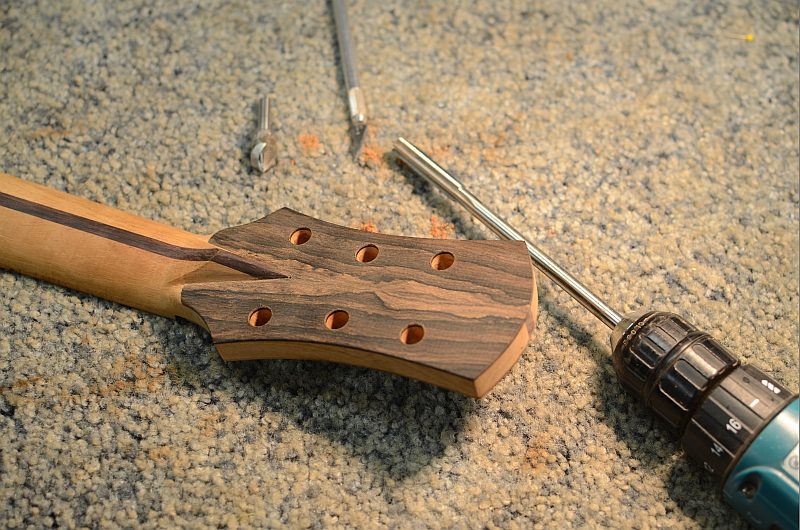 Masking 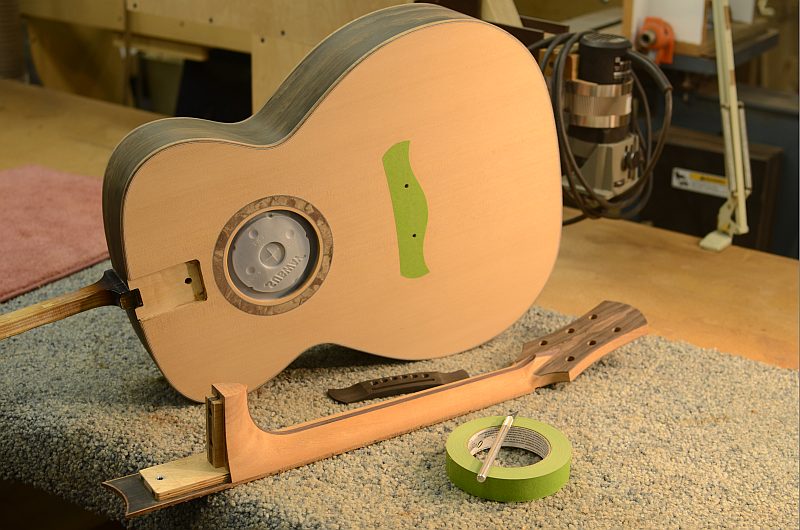 More masking ... in this case it has to be after lunch and ordering a big gulp drink  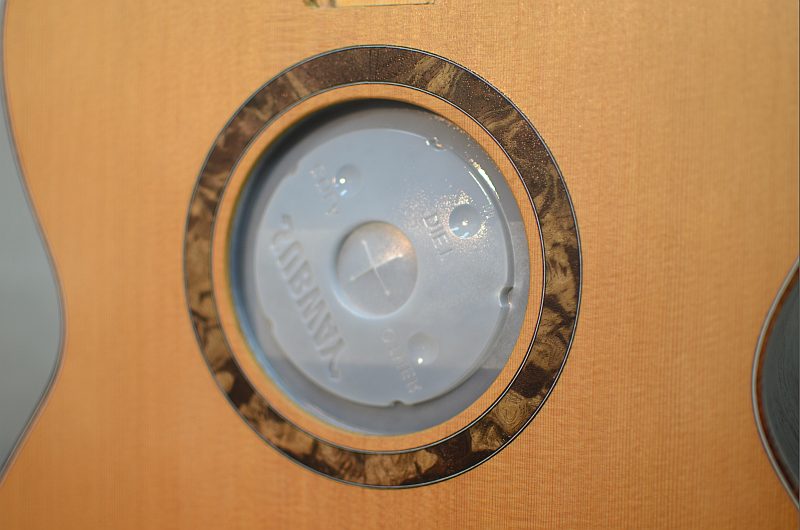
|
|
#45
06-15-2012, 06:01 AM
|
||||
|
||||
|
Continuing from the masking and getting ready for finish
Washcoat of sealer 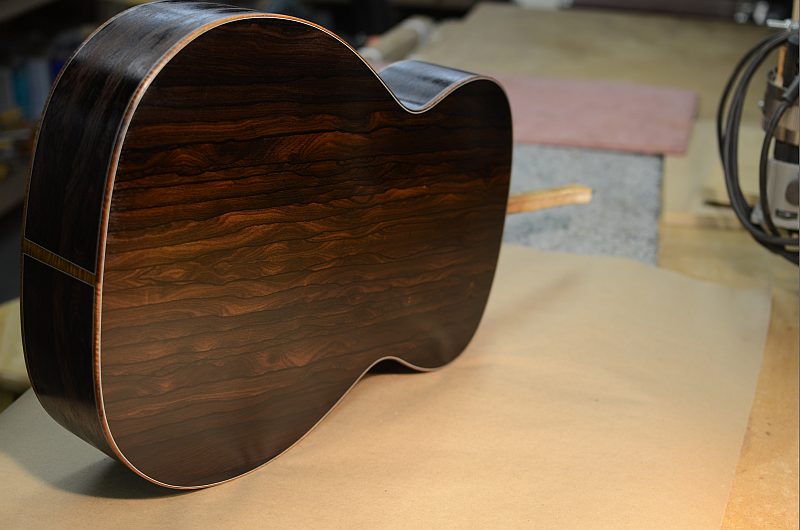 Pores the need to be filled 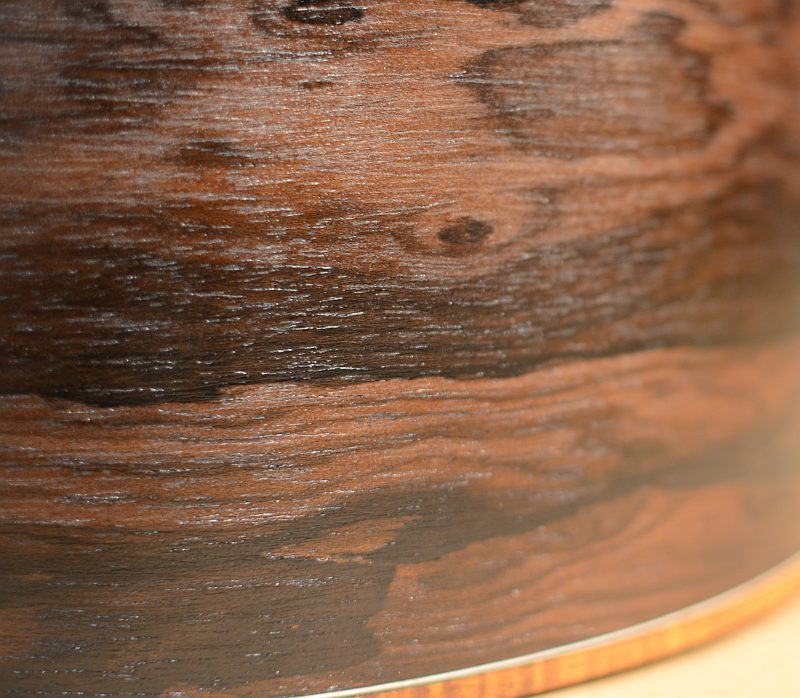 In this shot, the side on the left of the endgraft has been pore filled. You can see the difference. 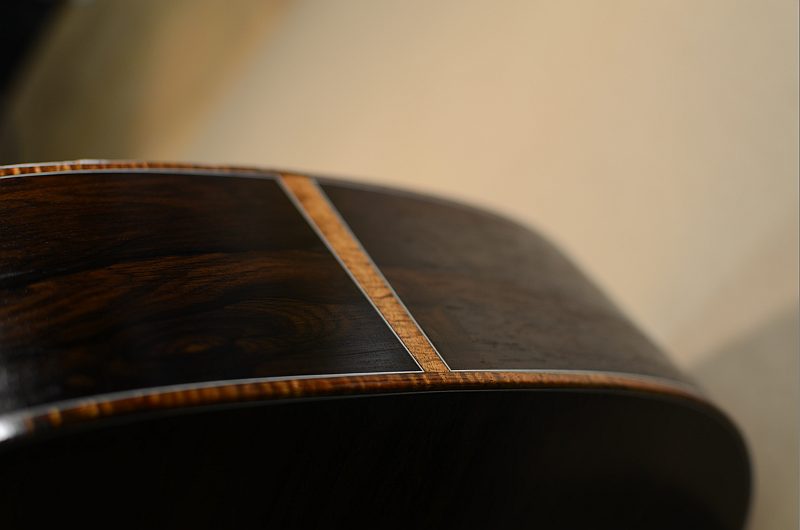 Porefilled and hanging around. 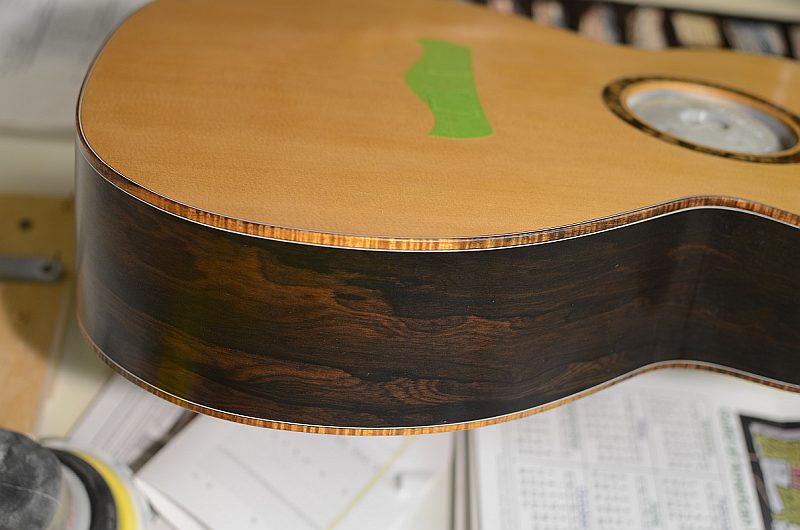 Tedious process ... a lot of applying finish and sanding it off ... top coats soon (I hope)
|


