
|
|
#16
 05-21-2020, 12:31 AM
|
|||
|
|||
|
As others mentioned, technique is involved and you simply need to develop this skill some more.
1) The blade does need to be super sharp. You also want the mouth to be set close to the blade to prevent tearout. And you also want to take a very small amount off - ideally, less than 0.001" shavings. 2) As Bruce stated, create a slight gap in the center by just planing the interior of the joint and avoiding the outsides. When you have this small gap, then plane the entire piece until you get a full shaving along the entire joint. 3). If you are struggling with this part, then create the gap in the center and use a flat surface with sandpaper attached (adhesive backed sandpaper is incredibly useful and you will use it for loads of lutherie related activities). A jointer is a good surface and you can use the fence. I've had impossible to joint back sets that just wouldn't let me get a clean joint due to grain direction (African Blackwood with burl sections near the joint) and used this method to get a good joint. However, encountering a piece of wood like this is quite rare and a jointer should suffice for the vast majority of situations. 4). In terms of technique, it is helpful to apply pressure on the front end of the plane when initiating the cut and apply pressure on the back end once the cut gets going. The planing motion should be steady and smooth. 
|
|
#17
05-21-2020, 10:45 AM
|
|||
|
|||
|
Quote:
|
|
#18
05-21-2020, 10:49 AM
|
|||
|
|||
|
This is what I have been using for about 25 years now. The MDF board laying behind it gets screwed in place to handle wide tops and backs. No clamps of any sort are necessary I simply hold the work down with my left hand and plane away with the right.

|
|
#19
05-21-2020, 11:13 AM
|
|||
|
|||
|
Quote:
The first shows Lee Valley's shooting plane in Lee Valley's track on a home-made shooting board. 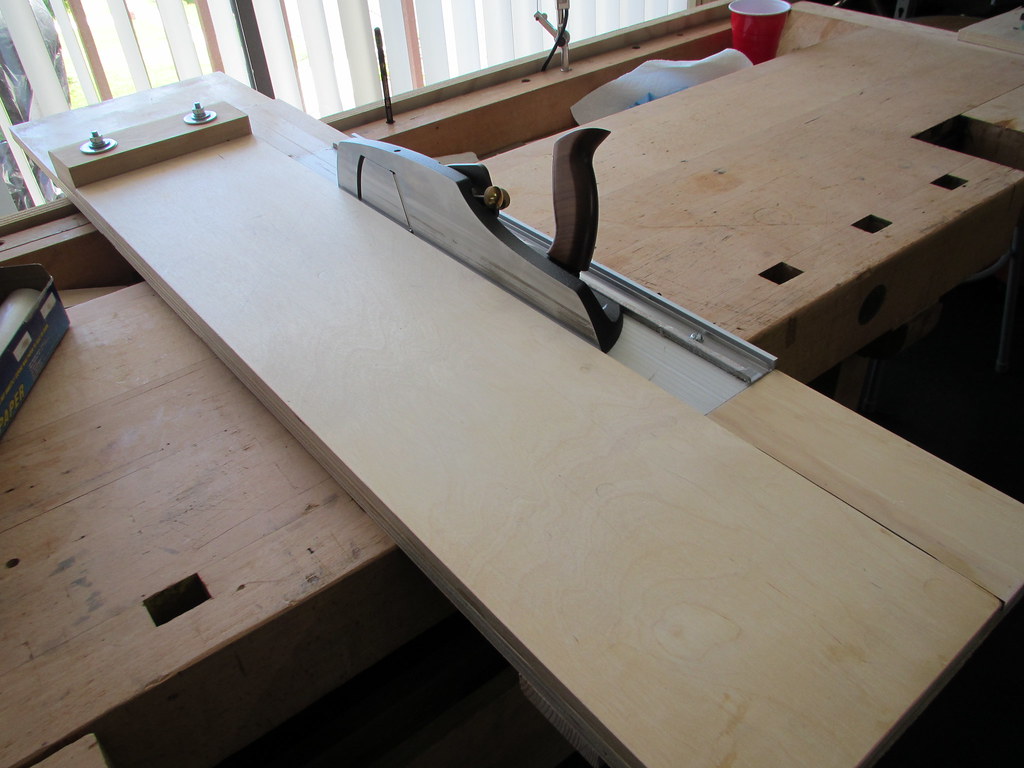 This one shows the captured plane in the track. 
|
|
#20
05-21-2020, 02:14 PM
|
|||
|
|||
|
Thanks for showing the photos and for the explanation.
I am going to build one like that using stipes of plastic (Teflon / PTFE ) to let the plane glide more easy. I tried to show that in the pic below  The small stripe above the basic gliding stripe is to prevent the plane from cutting into the wooden working base. The cutting blade of my plane begins just above this small stripe , about 5mm from the edge. Might be seen here better: 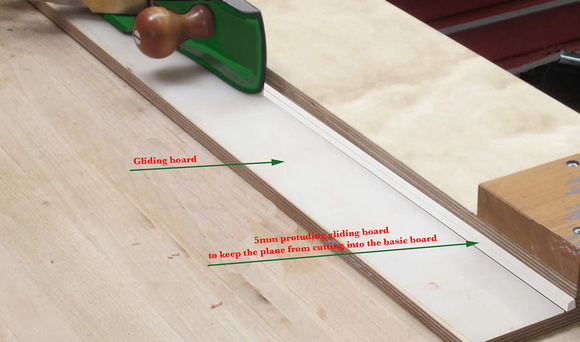
__________________
Thanks!  Martin D28 (1973) 12-string cutaway ...finished ;-) Hoyer 12-string (1965) Yamaha FG-340 (1970) Yamaha FG-512 (ca. 1980) D.Maurer 8-string baritone (2013-2014) and 4 electric axes Last edited by viento; 05-21-2020 at 04:34 PM.
|
|
#21
05-21-2020, 02:39 PM
|
|||
|
|||
|
Quote:
|
|
#22
05-21-2020, 06:14 PM
|
|||
|
|||
|
Quote:
 : : Their second, more recent, offering is similar to Lee Valley's, both based on a Stanley 51.  Unlike Lee Valley, Lie-Nielson does not offer an integrated system for shooting. Lee Valley's shooting board is pretty clever and works very well with their plane and shooting sander. 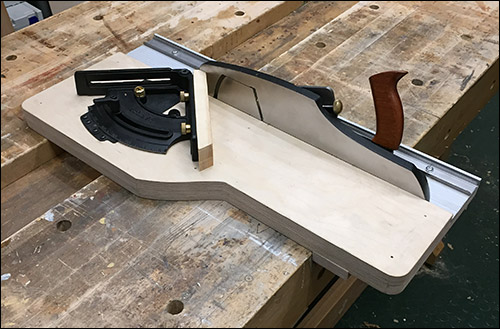 Their shooting sander: 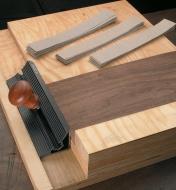 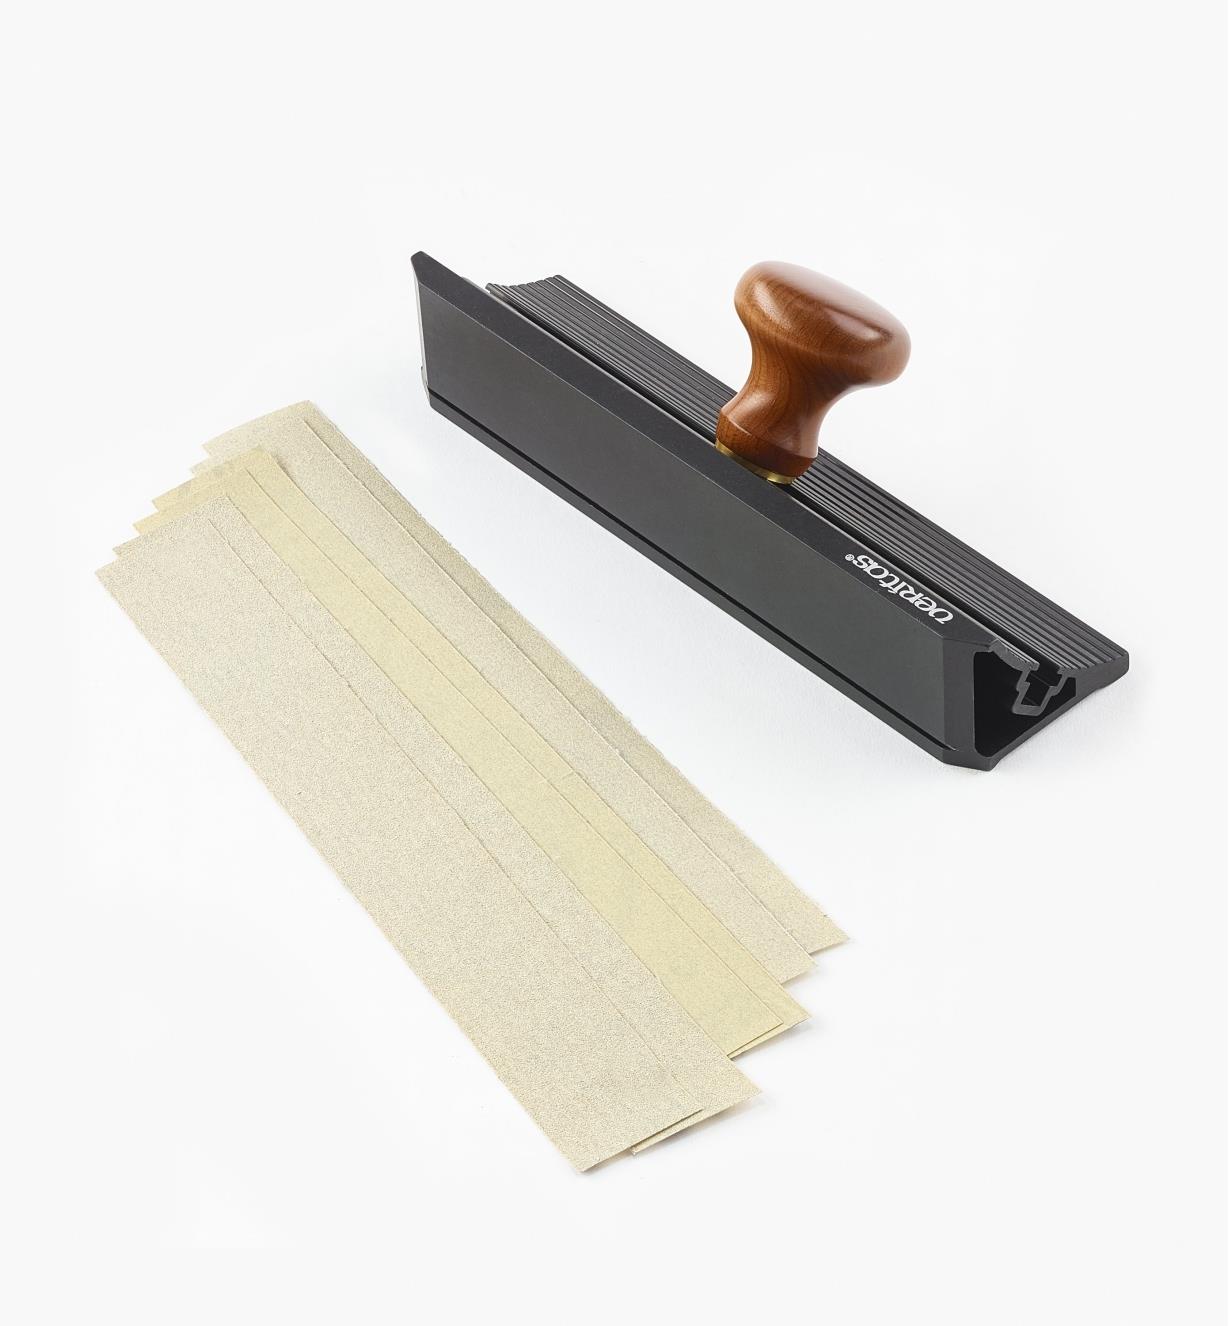
|
|
#23
05-21-2020, 08:44 PM
|
|||
|
|||
|
My shooting board cost if I bought the wood $4, but I did actually make it out of scraps from other jobs,
Two pieces of mdf glued together and a screwed piece of wood on the end to stop my work from moving, people way over complicate a simple guide and simple process Steve 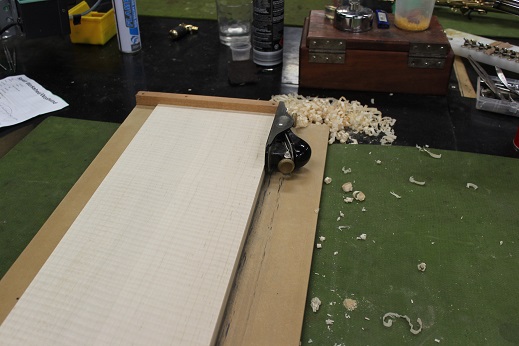
__________________
Cole Clark Fat Lady Gretsch Electromatic Martin CEO7 Maton Messiah Taylor 814CE
|
|
#24
05-22-2020, 01:26 PM
|
|||
|
|||
|
Quote:
|
|
#25
05-22-2020, 02:56 PM
|
|||
|
|||
|
Quote:
I was initially skeptical regarding Lee Valley's various shooting board "jazz". However, sometimes it's possible to invent a better mouse trap. In my opinion, they have. If one has the money to spend on it, I highly recommend that. I don't often highly recommend anything.
|
|
#26
05-22-2020, 04:54 PM
|
|||
|
|||
|
Quote:
The only downside of the Lee Valley system is the UHMW tape slowly separates from the steel channel. But, this is the best shooting board I've used for tops and backs, and rosette logs.
|
|
#27
05-22-2020, 06:13 PM
|
|||
|
|||
|
I didn't ant to spend the money on a chute board plane so I made a handle for a #5. Handle works fine, but you could make any shape you like. I picked a plane out of the stash that had a nice square angle between the sole and the bottom side
https://www.flickr.com/photos/ruby16...7635379996680/
|
|
#28
05-23-2020, 01:35 AM
|
|||
|
|||
|
That´s an interesting addition to a plane!
__________________
Thanks! Martin D28 (1973) 12-string cutaway ...finished ;-) Hoyer 12-string (1965) Yamaha FG-340 (1970) Yamaha FG-512 (ca. 1980) D.Maurer 8-string baritone (2013-2014) and 4 electric axes
|


