
|
|
#1
 06-23-2016, 12:42 PM
|
|||
|
|||
|
So after you guys all convinced me in the previous thread that it is more then possible that my first acoustic guitar build will be all good, I have actually started.
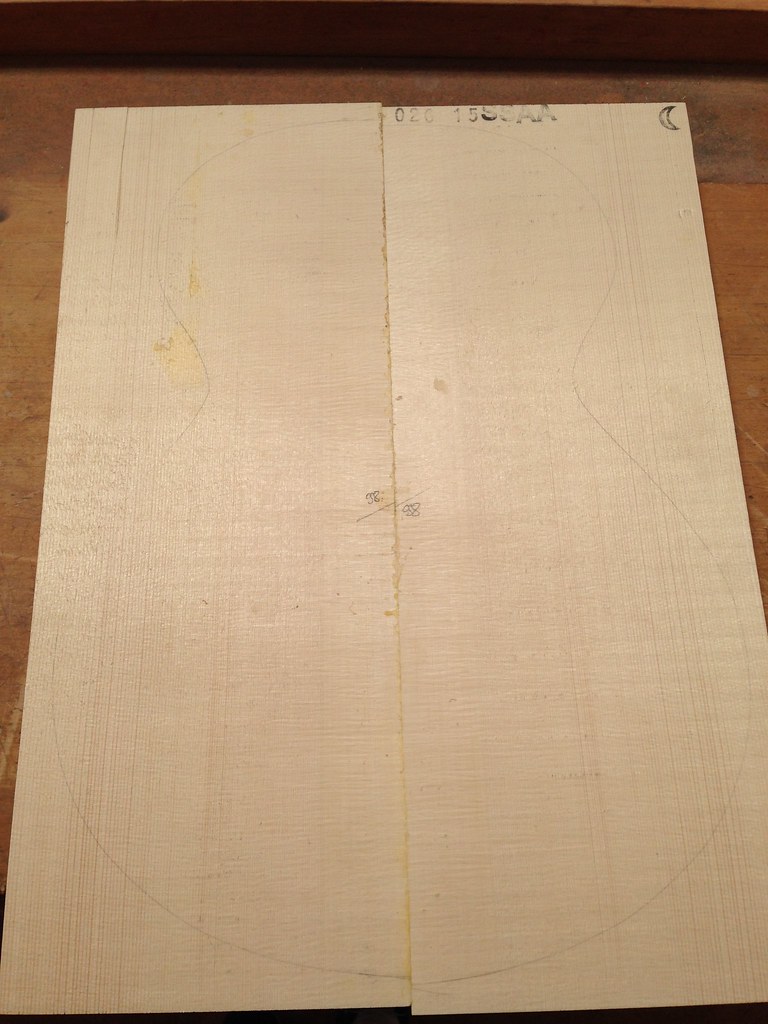
Here are some pictures of where i've got to in the process so far Here is the Swiss Moon Spruce soundboard (advantage of living in Switzerland, is easy-ish access to this!) 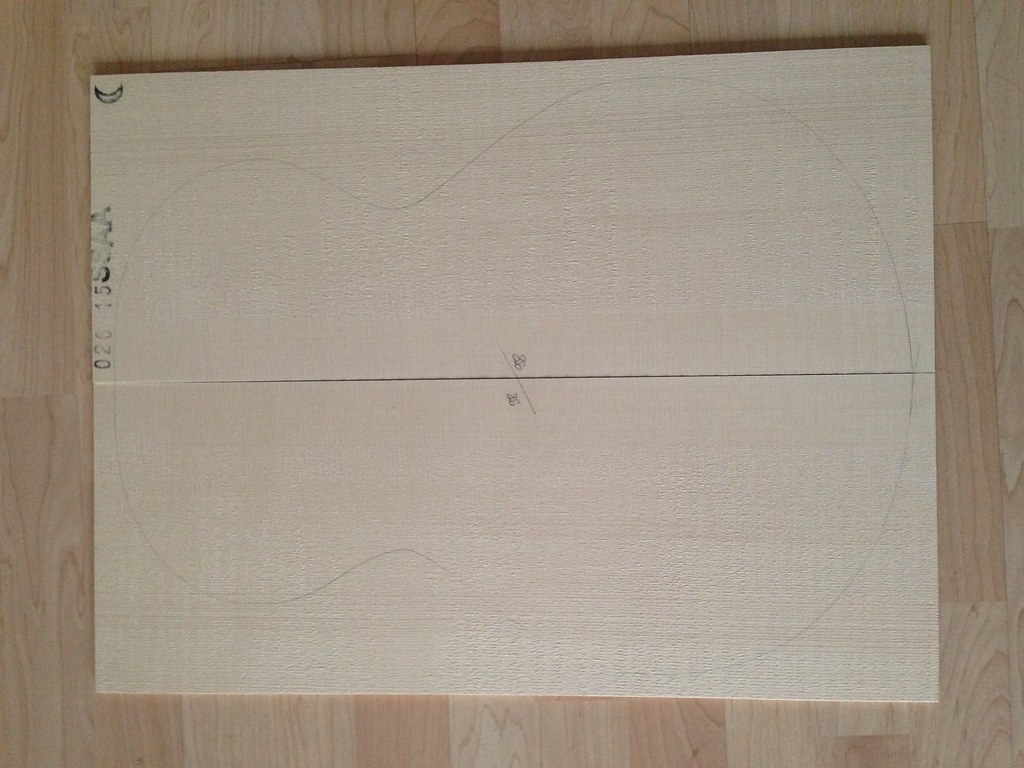 Untitled by David Emm, on Flickr Untitled by David Emm, on FlickrSwiss walnut back and sides 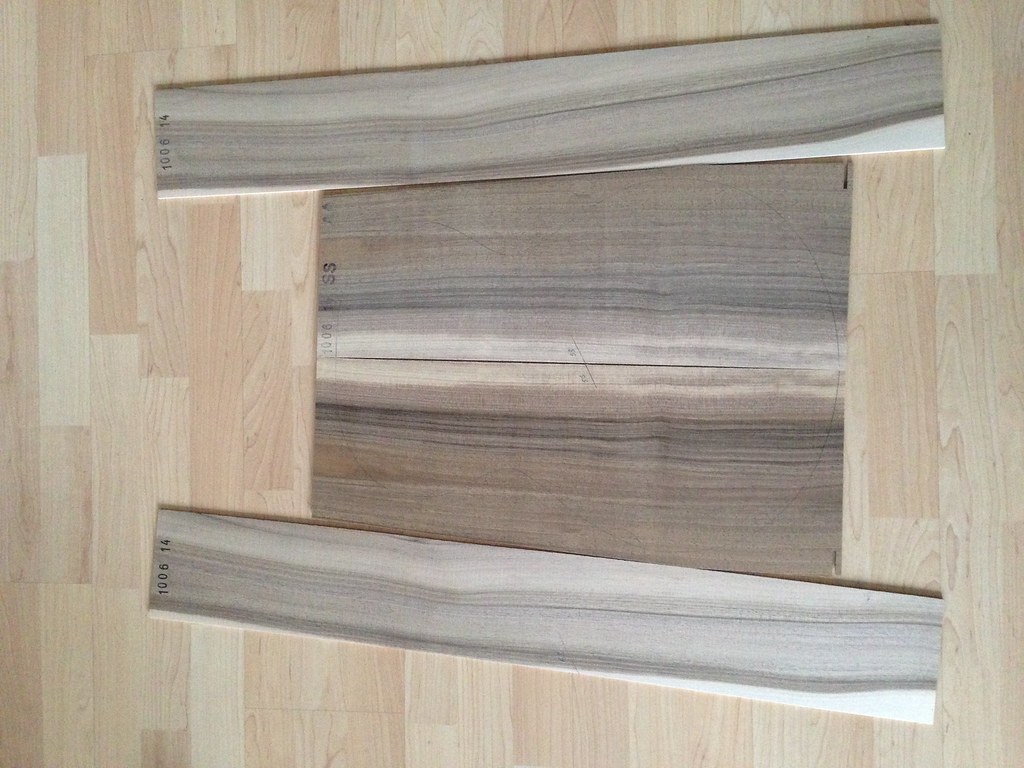 Untitled by David Emm, on Flickr Untitled by David Emm, on FlickrHalf templates created on thin plastic from which i can build a mould. (actually still to be sanded to a clean edge after this picture) 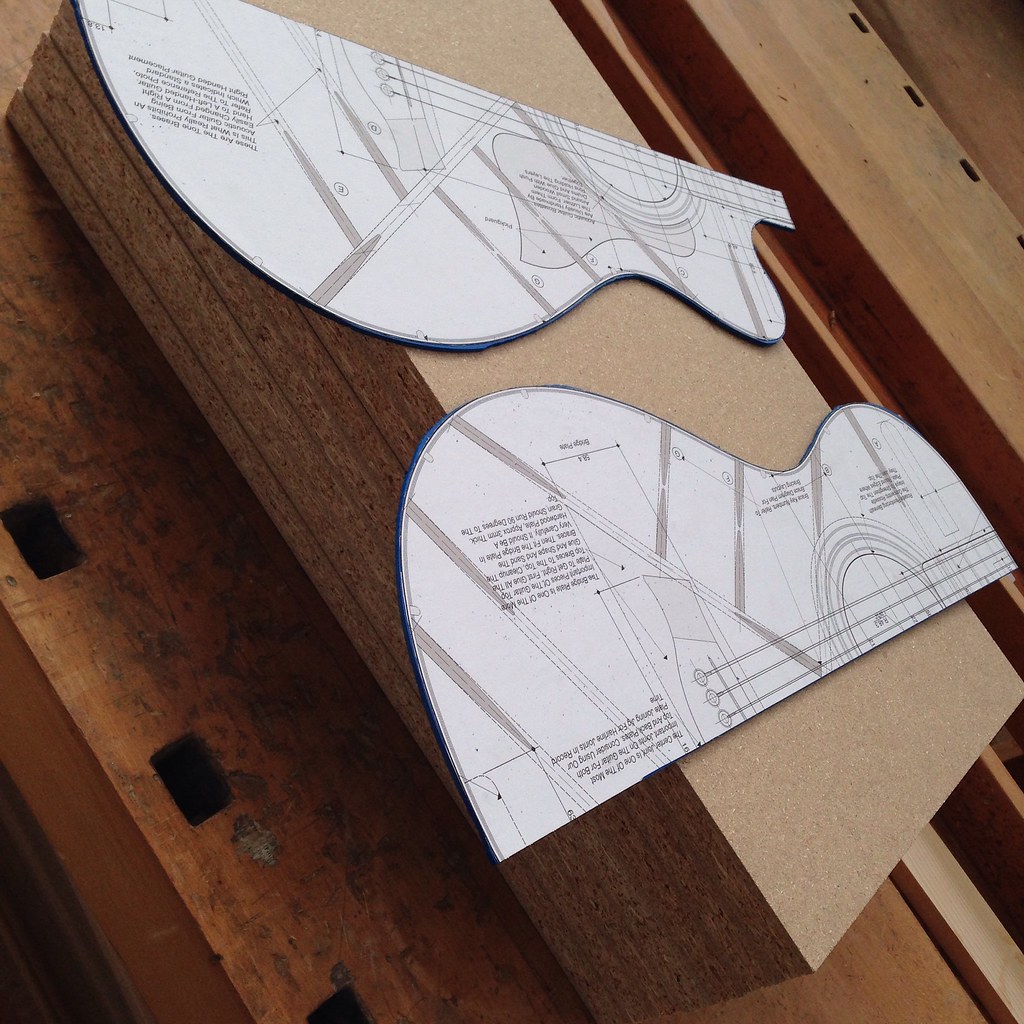 Untitled by David Emm, on Flickr Untitled by David Emm, on FlickrShowing the woods underneath the mould outline before gluing 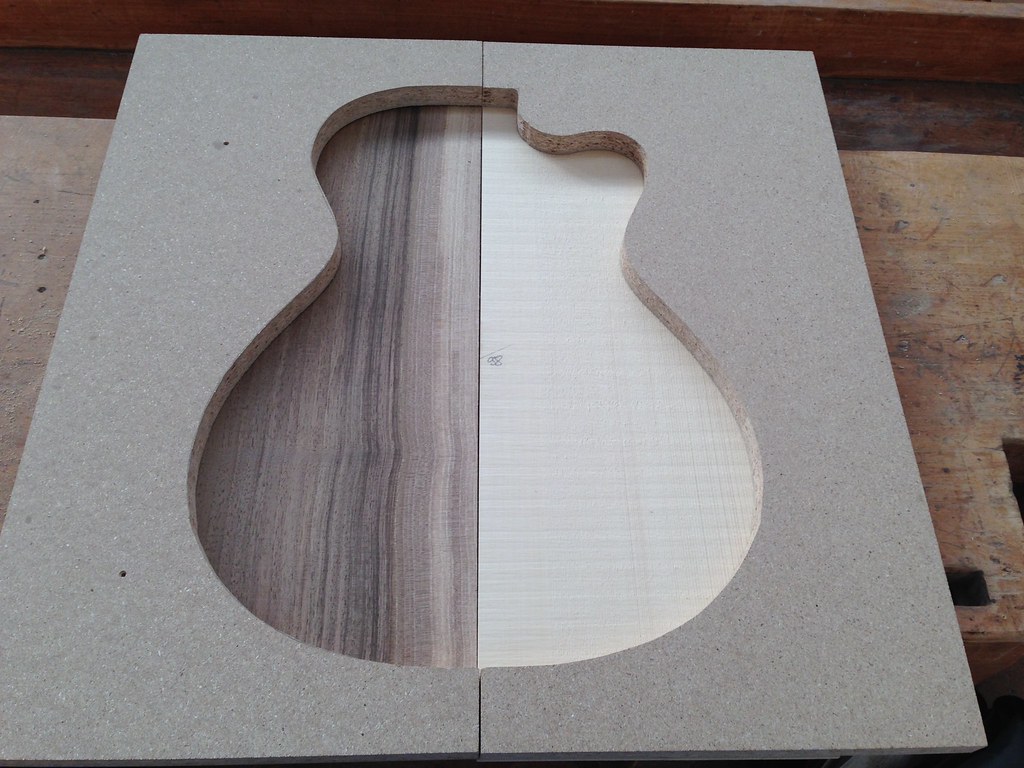 Untitled by David Emm, on Flickr Untitled by David Emm, on FlickrMoulds after gluing, i haven't added the toggle clamps on each end as I forgot to buy screws. 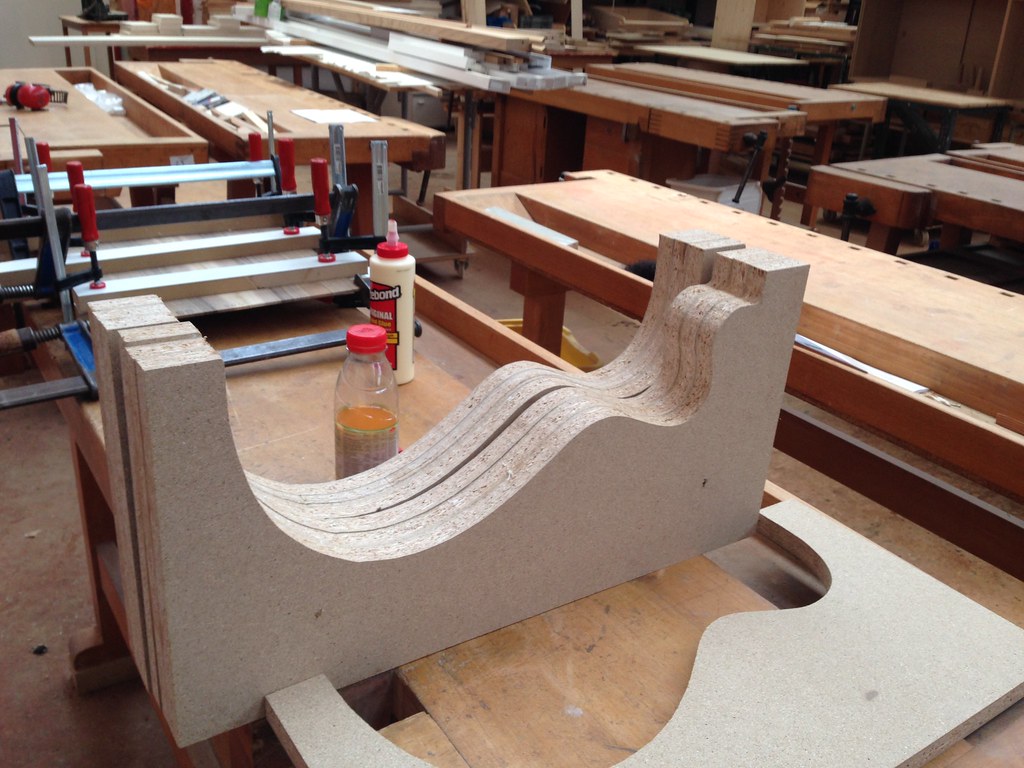 Untitled by David Emm, on Flickr Untitled by David Emm, on Flickrwalnut back glueup process 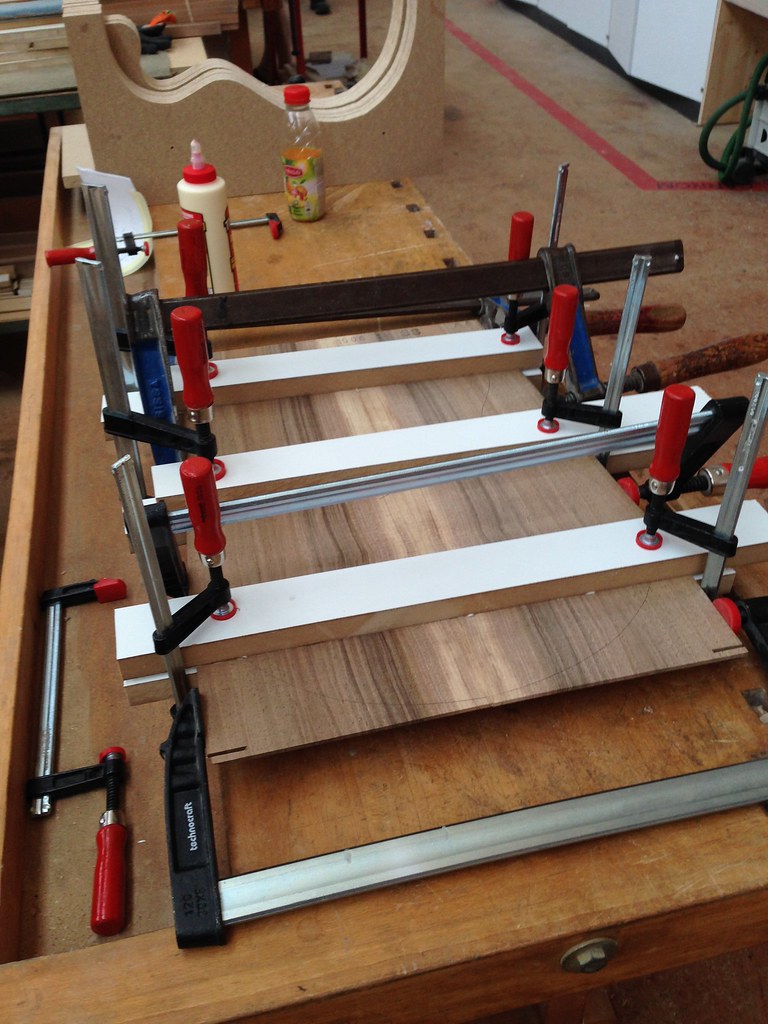 Untitled by David Emm, on Flickr Untitled by David Emm, on FlickrUnfortunately I don't have access to my own workshop, what I do have, is after a membership fee, access to a public woodwork workshop. Even more annoyingly despite planning to glue both the back and the soundboard the same way, the carpenter who was at the workshop who once I asked him for some small bit of advice decided he needed to help me with everything and obviously that meant he knew the "right" way to do everything and I didn't and actually despite me saying so couldn't really stop him, put the soundboard in this giant clamp device. Not a terrible idea per se, except he tried to clamp it with such ridiculously excessive force, he actually buckled and put some massive splits in the soundboard which he decided by trying to glue the splits together again absolved him of any blame (you can see by the extra clamp and board in the bottom corner which was holding the "repair" together. 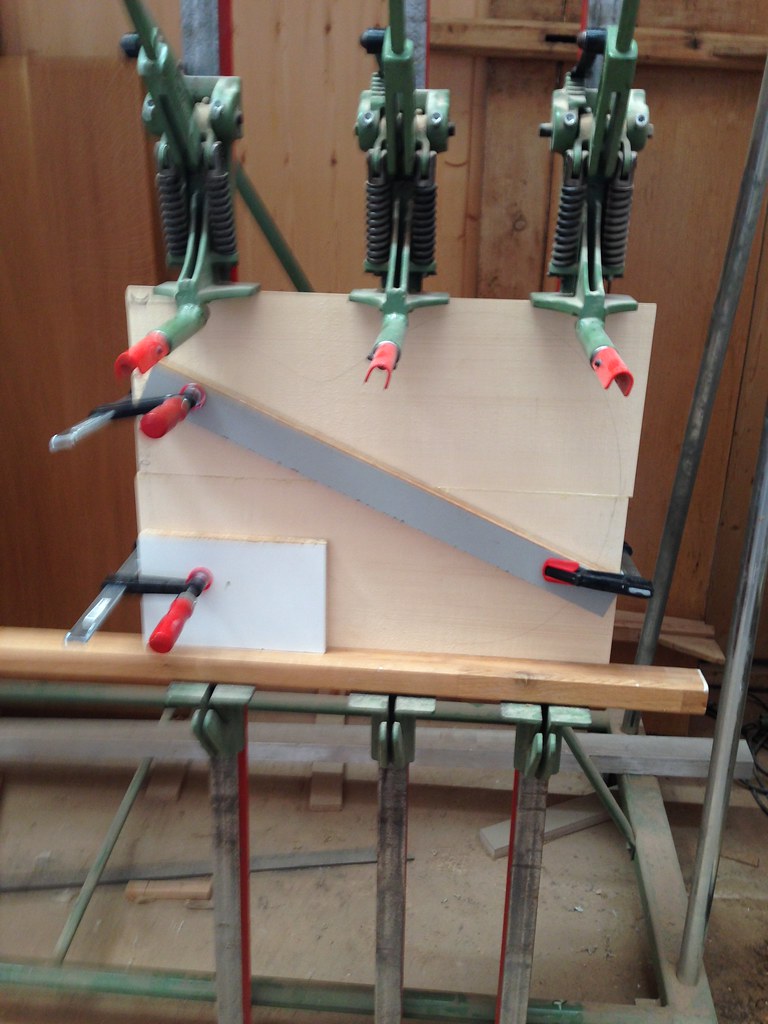 Untitled by David Emm, on Flickr Untitled by David Emm, on FlickrSo the next question is, do i just forget this soundboard and get another one? something thats annoying because the wood dealer is not close so postage isnt cheap and I can't really afford to buy all my parts twice. or just check the wood again tomorrow/next week and see how the cracks look and maybe just go along and pretend it never happened? If i get time tomorrow i'll try and get back to the workshop and take some pictures of the cracks/splits, otherwise it will be monday. How far up the proverbial creek am I and do I still have the paddle? Not quite the ideal start to the project. 
|
|
#2
06-23-2016, 01:12 PM
|
|||
|
|||
|
I'd have to see the split and repair to comment.
Were it me, I'd turn the sides end for end. That way the grain follows the general shape of the guitar. Wide, straighter grain at the but, more curved as the depth converges and the curves are tighter.
|
|
#3
06-23-2016, 04:16 PM
|
|||
|
|||
|
Great! Probably OK on the split; if you feel the need you can glue a couple tiny cleats in afterwards...
As to clamping, you shouldn't use too much force. A tiny bit of glue squeeze-out is where I stop. I also let the glue beads stiff up a little, then use a scraper to remove them, rather than a wet rag while the glue's still wet.
|
|
#4
06-24-2016, 01:48 AM
|
|||
|
|||
|
Quote:
Quote:
If I can get there this afternoon i'll grab some pictures of the cracks/repair and see how its holding up after 24 hours.
|
|
#5
06-24-2016, 02:34 AM
|
|||
|
|||
|
I've cracked and fixed several soundboards before. Practically invisible if you get it aligned just right. But worst case, you can use it for a harp ukulele
 With a perfect joint, gluing the halves of a soundboard together hardly takes any clamping pressure at all, since the joint area is so small. I just use a few strips of masking tape stretched across like this so it pulls some tension on them when laid flat. 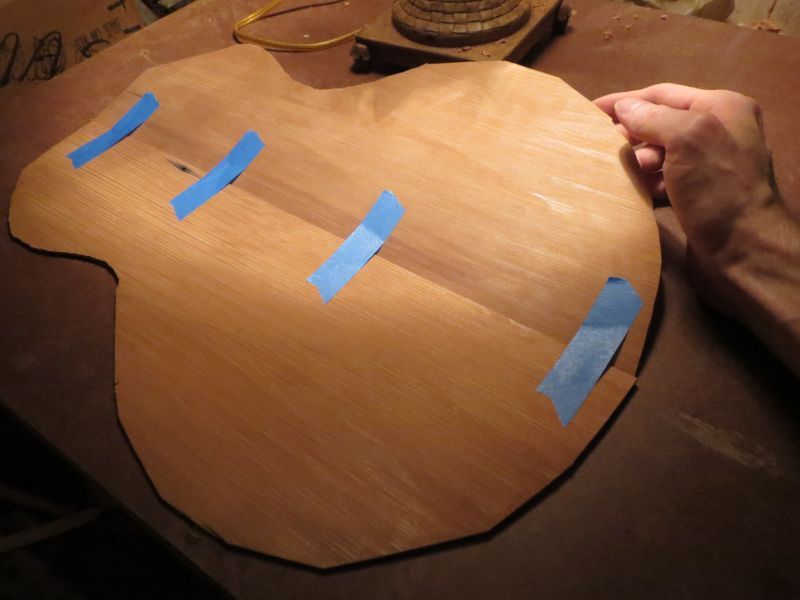 You can also add a long strip up the middle to keep the show face clean, so you don't have to scrape off the glue after it dries. Then flip it over, lift it up like a tent, squeeze glue into the joint, and drop it down. Press on both sides of the joint with your thumbs all up and down the seam to make sure both halves are aligned. Stick a few more strips of tape on it to hold the joint closed, and set it aside until dry. Last edited by dekutree64; 06-24-2016 at 02:39 AM.
|
|
#6
06-24-2016, 12:03 PM
|
|||
|
|||
|
I'm not sure if these photos of the crack/repair to the soundboard show what needs to be shown, i only had 2 minutes to run into the workshop take the photos and run out again.
 Untitled by David Emm, on Flickr Untitled by David Emm, on Flickr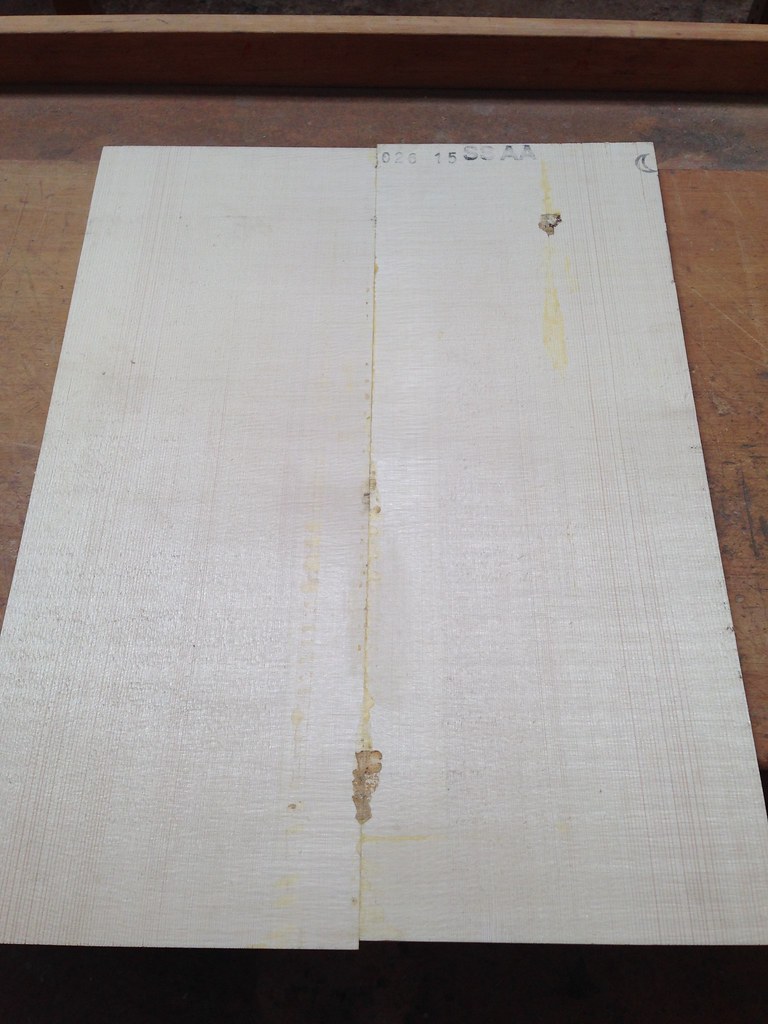 Untitled by David Emm, on Flickr Untitled by David Emm, on Flickr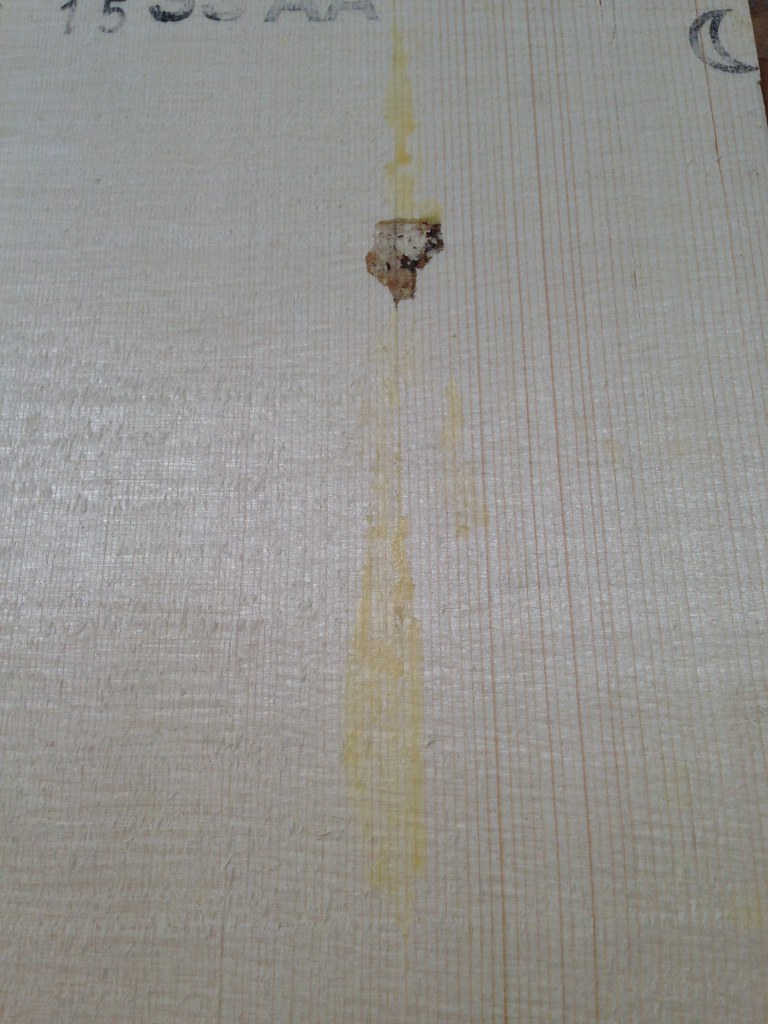 Untitled by David Emm, on Flickr Untitled by David Emm, on Flickr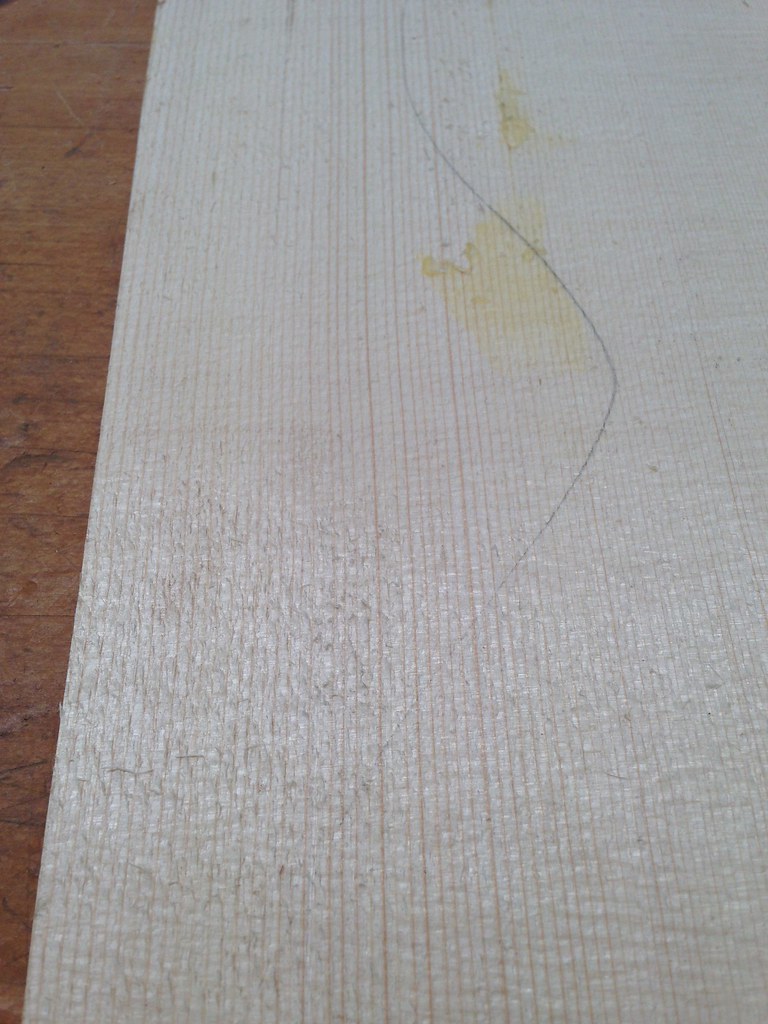 Untitled by David Emm, on Flickr Untitled by David Emm, on Flickr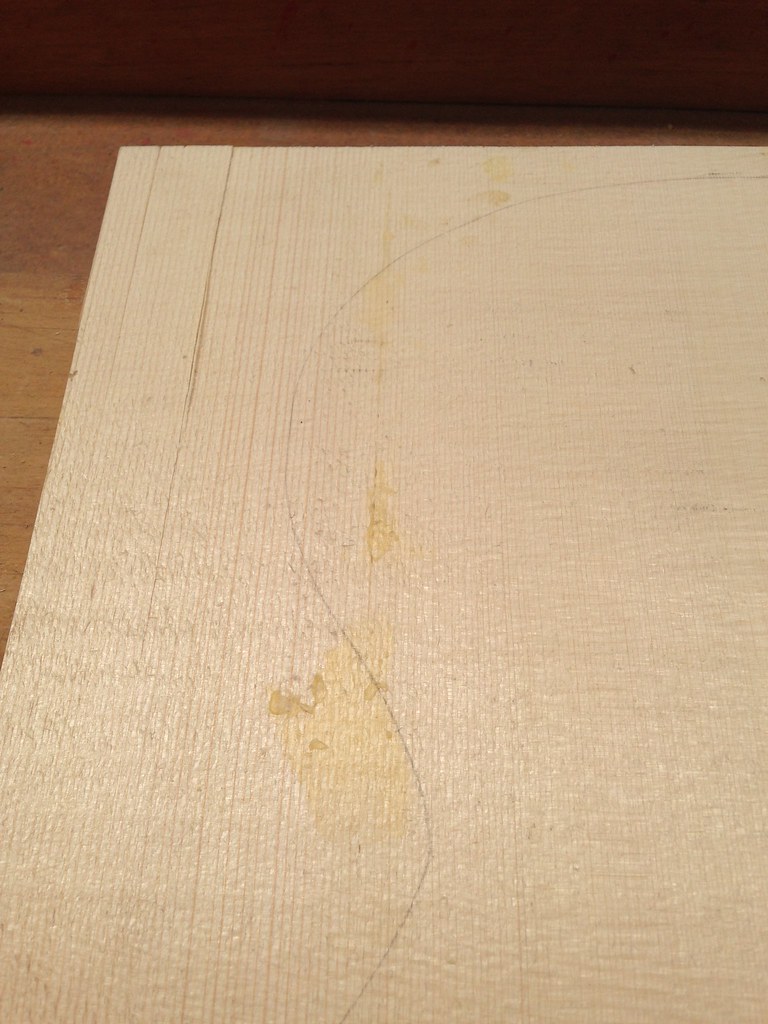 Untitled by David Emm, on Flickr Untitled by David Emm, on Flickr
|
|
#7
06-24-2016, 12:08 PM
|
|||
|
|||
|
I think it will be fine. Some of that will be bindings and linings, leaving relatively little of the top span in that area. It will also have a large brace running across the area.
Just out of curiosity, was there a particular reason for shifting the two halves of the top when glueing?
|
|
#8
06-24-2016, 12:31 PM
|
||||
|
||||
|
There appear to be several other cracks as well. I'd like to think I'd do a very serious inspection before going further, were it my potential top.
The alignment question occurred to me as well. Not a deal breaker in any case, nor is the repaired crack, though it will likely be visible under finish. Less likely if done with HHG.
|
|
#9
06-25-2016, 12:35 PM
|
|||
|
|||
|
Thanks Bruce
Yea i'm also a bit concerned about the structural integrity of the whole board after the cracking, there are other cracks but i thought most others seemed to be closer to the edges and outside that line (although that line was the test line already scribed on to the wood by the supplier, its not my line) I was going to check it out properly anyway before I went any further in the process, but i'll have to give it a much more detailed check-over when I go back to the workshop next week. I really hope it ends up ok when i look at it and clean the glue up, and if its damaged, i hope theres a way i can use this somehow, otherwise thats probably the quickest waste of $80 i'll make all year.
|
|
#10
06-25-2016, 01:42 PM
|
||||
|
||||
|
Don't throw it in the shredder, there are always smaller guitars . . . not to mention Ukuleles.
Once you have cut away the obvious cracked bits, tapping for resonance is a sure way to know if you have integrity, though of course you must know what that sounds like.
|
|
#11
06-25-2016, 08:58 PM
|
|||
|
|||
|
Right. Your top wlll most likely be fine. Any glued cracks will be along grain lines and will most likely be more or less invisible.
Certainly check for any other cracks and glue them up sooner than later Then - just go ahead and move along with your build. My only caution is this: Unless your workshop is very well climate controlled and dehumidified to around 40% relative humidity - you should not brace up your top or back until cold weather arrives and the shop is heating. That may be October or November in your neck of the woods. This will prevent the top/back from caving in or splitting during dry winter weather. Go ahead and bend the sides and glue the head and tail blocks and associated bits. Make your neck and fretboard. Inlay the rosette and any backstrip you are planning... Then wait for late fall/winter to go any further. Thanks
|
|
#12
06-26-2016, 07:29 AM
|
|||
|
|||
|
If the humidity is too high you can always make a quickie environmental chamber, a cardboard box and a light bulb in it. Will need a humidity meter to check what the internal humidity ends up at. Can always regulate the temperature with a light dimmer. Don't keep the bulb too close to the wood as you don't want to create a hot spot.
Otherwise, carry on.
__________________
Fred
|
|
#13
06-29-2016, 03:59 PM
|
|||
|
|||
|
Actually the humidity doesn't really concern me, especially as here in Europe, Winter is normally plenty wet, not much dryness here.
So anyway, today I went into the workshop to check the further repairs I made to the soundboard on monday after I checked it after last weeks repair attempts and found more were needed, and hopefully start installing the rosette. But its dead. toast. kaputt. i've already repaired 3 large cracks and a 4th opened up right in the middle of the face today when there wasn't even any pressure being applied at the time, the other cracks were mostly towards the edge. The other half of the board is completely fine but this left side has no integrity left, I could glue it up AGAIN, but I don't think its worth it, and I don't really trust it now to be put under even low tension or survive a small knock either. I will probably end up recycling it as a soundhole reinforcer as i didn't have enough spruce remaining to make one anyway. This is very annoying as I now have to wait for another soundboard to arrive after I'll order it tomorrow, puts my schedule back quite a way and it was a nice waste of money. On the other hand I started the neck today, I really wanted to do a cherry/maple/cherry neck but had a very hard time finding cherry boards that were thick enough, so in the end I went with walnut so i'll have a walnut/maple/walnut neck now. Now hoping my bending iron will finally arrive so I have something to be getting on with!!! This was part of my soundboard crack repair setup, what you cant see is the tape underneath holding the cracks together after I glued it. 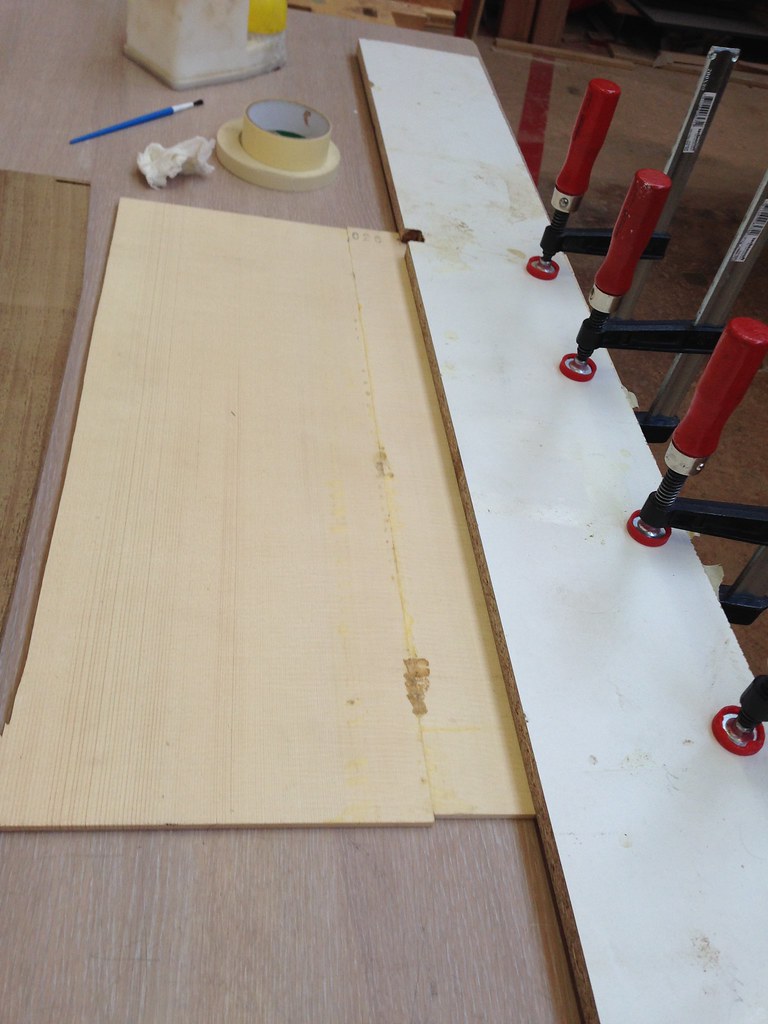 Untitled by David Emm, on Flickr Untitled by David Emm, on FlickrThe crack that broke the camels back, drove me mad and made me decide i need a new soundboard after all. 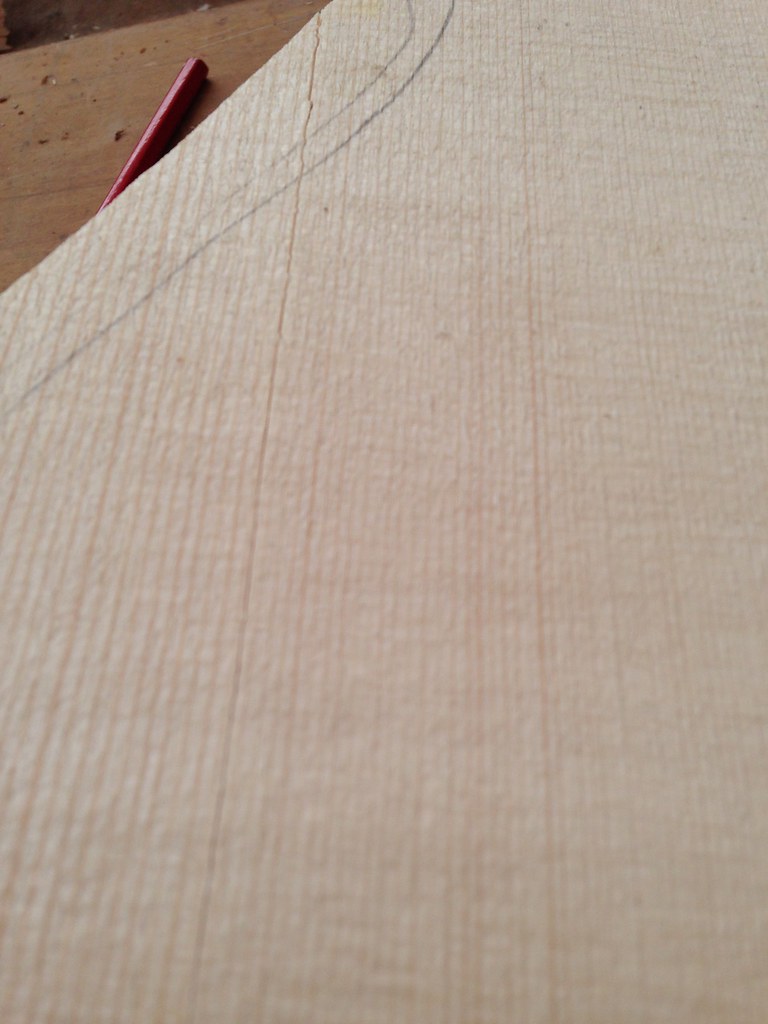 Untitled by David Emm, on Flickr Untitled by David Emm, on FlickrThese are the neck pieces just before I glued it up 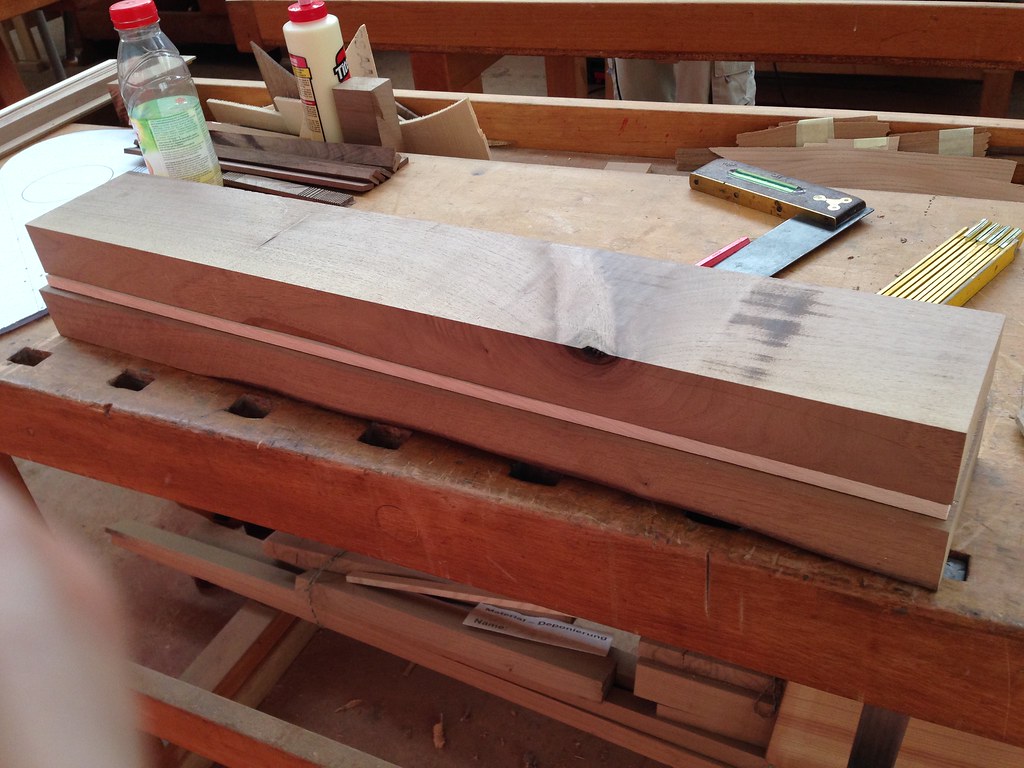 Untitled by David Emm, on Flickr Untitled by David Emm, on Flickr
|
|
#14
07-02-2016, 07:37 PM
|
|||
|
|||
|
Don't use the piece with the huge thru knot. That's not suitable for neck wood. If it doesn't crack - it will twist like mad with that grain orientation.
Use only clear straight grain wood for necks - laminated or not. On the soundboard... Now you understand one of the reasons I like to recommend low grade tops for your 1st guitar. There are so many ways to ruin a top.... And you haven't even got to any of the parts that require a router. Now... For an $80 top - get back there and repair that thing. If it was a $10 top and you had 7 more of them - sure, scrap it... it's a beginner mistake... But for $80 - fix it... If you do decide to scrap it... Get back with your supplier and ask for cheap student wood that has good medullary ray silking and little runout long grain.... Wide grain, color streaks, and such are acceptable. More variation in grain is just fine. And acoustically - they are great. The best part is that you can buy 5 or 10 of those top sets for the price of your $80 top.... Then - mistakes can be routed back off and you just start over with a new top. Thanks
|
|
#15
07-03-2016, 05:42 AM
|
|||
|
|||
|
As far as the neck wood goes, its good to know the only remotely useful pieces of wood i found (unless i bought an actual tree log) after visiting the only 2 local wood suppliers that aren't DIY superstores, are junk. I did glue it together already and I'll be able to get 2 neck blanks from the piece, i guess i'll just bin the one cut from the knot side, or if you're right, both.
The only wood supplier for soundboards here in Switzerland doesn't sell cheap wood, the one I bought was already their 'low' quality board, 58chf ($62) plus 20 for shipping. Typical Swiss pricing. When thats the case, and i don't have an alternative, thats all i can do. I'm pretty sure this current soundboard will crack again if put under any pressure, so i get the feeling i'll be repairing it forever, sometimes you just have to take the hit. There is a chance that I won't replace this soundboard because it looks like the project is already becoming a nightmare and maybe not worth carrying on with. If thats the case I just hope I can get some money back on the tools i've ordered that haven't arrived yet.
|


