|
|
#16
 01-14-2015, 01:04 PM
|
|||
|
|||
|
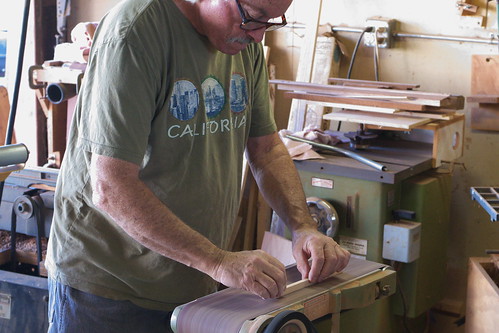
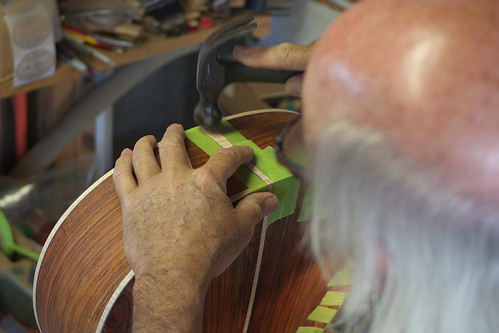
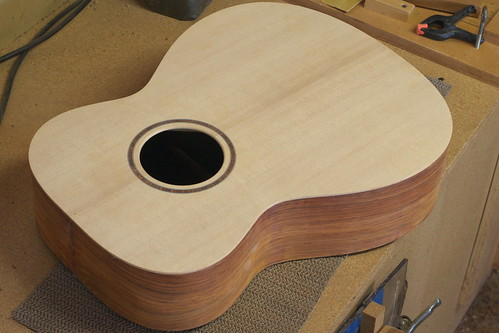
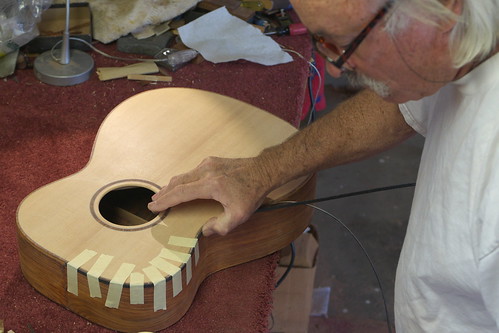
Thanks for the comments. Much appreciated. I've added Sam making the cocobolo rosette surrounded with black-white-black purfling and routing out the sound hole. The rosette seemed like more work than I was expecting and the sound hole was less work than I expected.
Alignment/swing pin. Routing rosette's channel.   Gluing inner and outer purfling. Forming cocobolo strip inner radius. 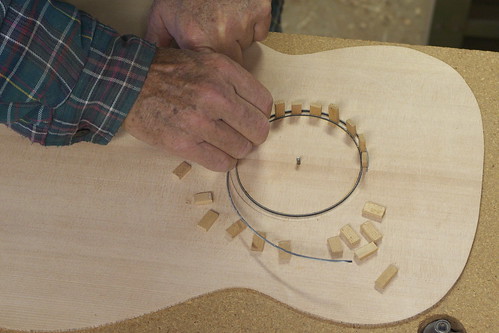 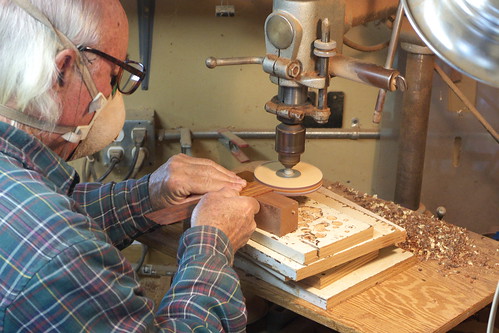 Jig for forming cocobolo strip outer radius. Gluing strips of cocobolo. 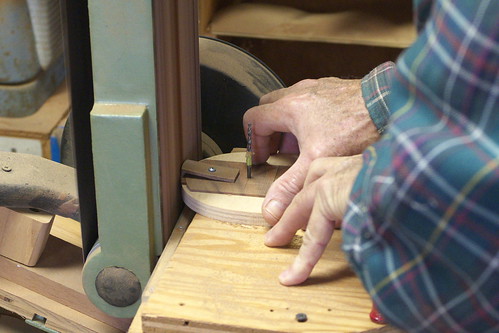 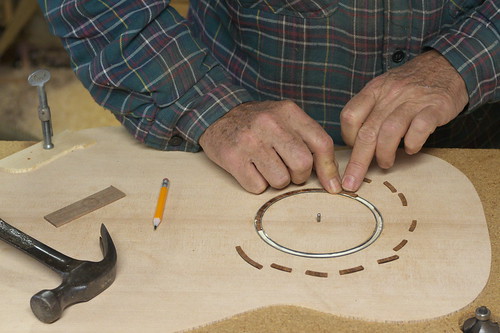 Sound hole jig. Initial hole rout.   Finish router with edge forming bit. Completed sound hole! 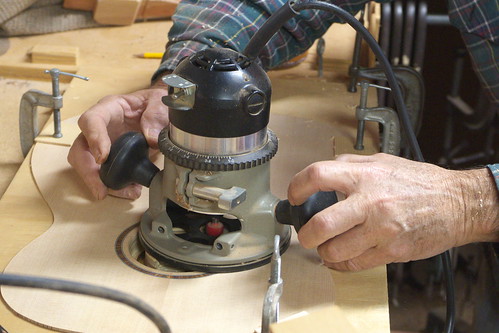 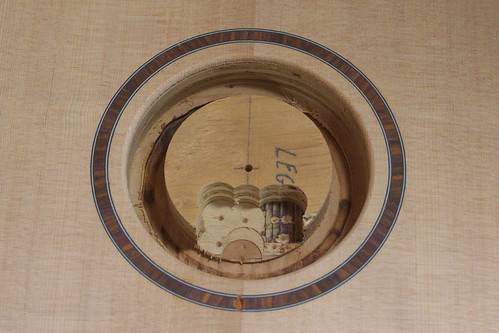

|
|
#17
01-18-2015, 12:43 AM
|
|||
|
|||
|
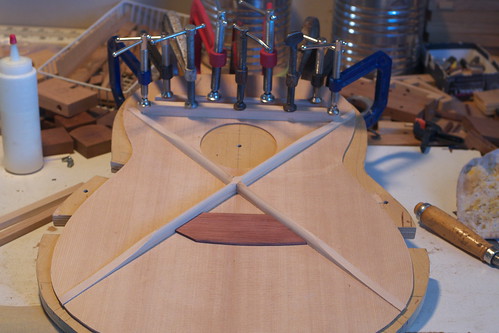
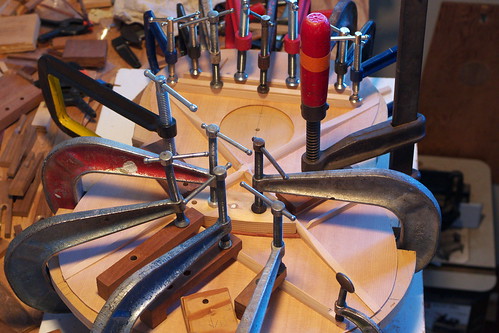
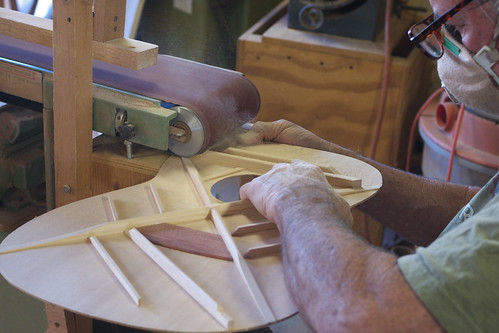
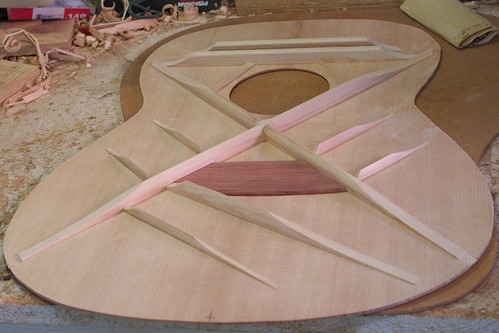
Behold...the mystical bracing for the top begins. Starting with the X-brace. Without question the top and associated bracing is the main contributor to the sound of a guitar. While this guitar's bracing is conventional it didn't take me long to realize there are many subtleties in it's construction that are not readily apparent. Sam Radding evaluates the materials for a desired goal. He chooses the spruce bracing's grain pattern, the thickness, and the height all in relation to the size and stiffness of the top. He incorporates an arch to his bracing with strategic placement for all components to work together. I didn't see a wand but there is definitely some magic going on here.
Cutting X brace notch. - Positioning brace alignment stops.  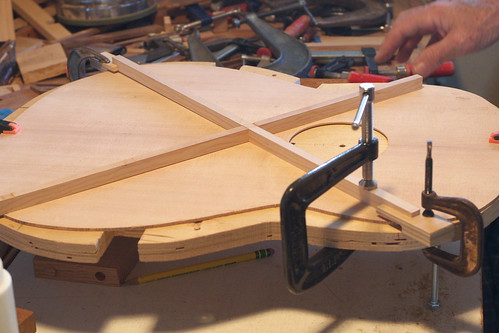 Sanding a slight arch in the braces. - Preliminary routed shaping of braces. 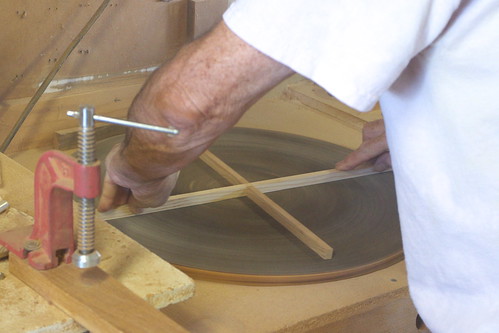  Gluing the brace. - Clamping from the inside out. 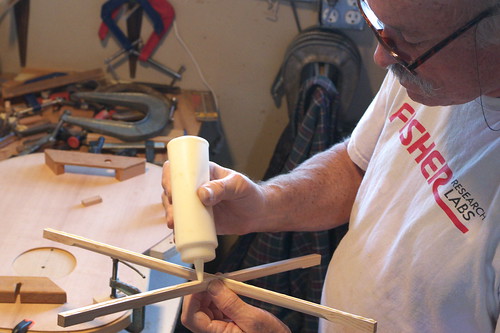 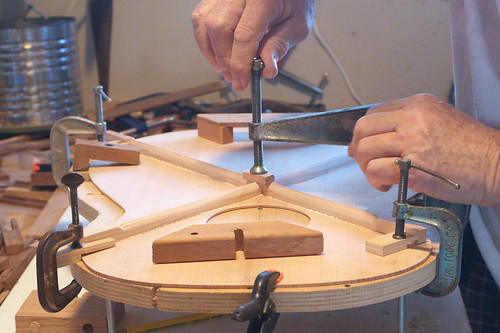 If he only had more clamps! - X brace clamps removed.  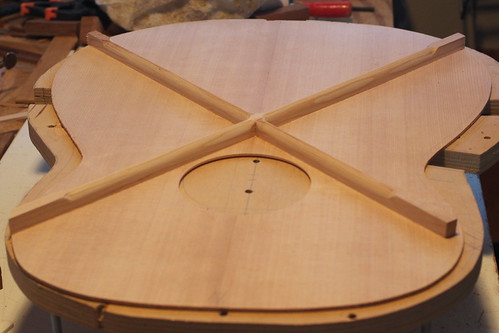 Hand chisel to shape the ends. - Initial shaped x brace. 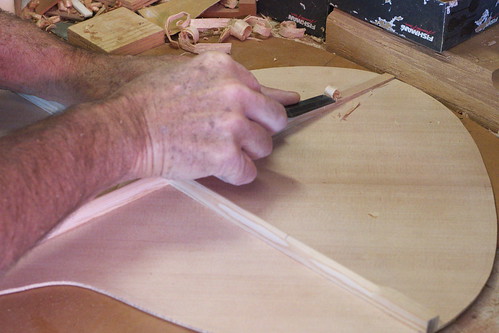 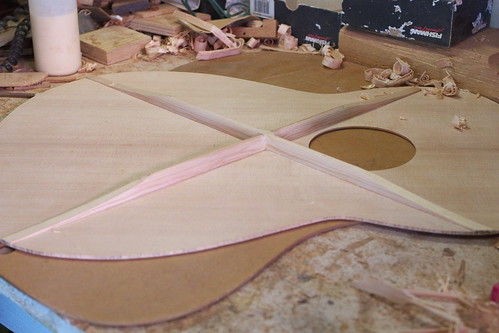
|
|
#19
01-28-2015, 08:53 PM
|
|||
|
|||
|
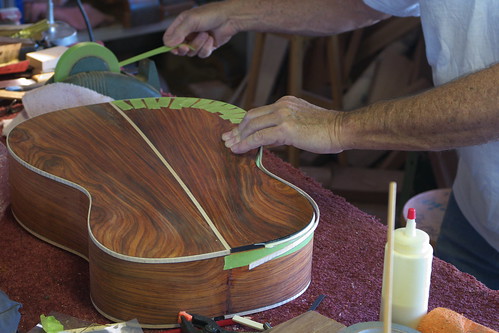
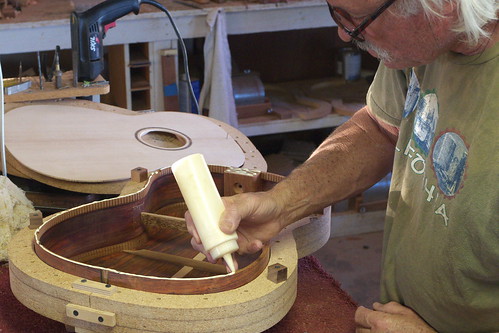
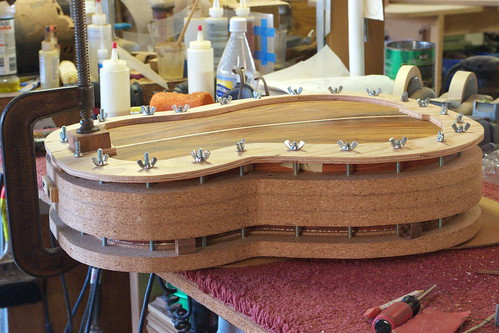
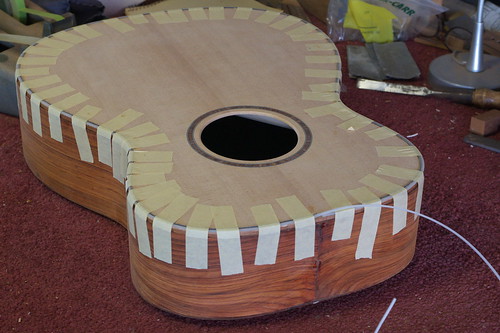
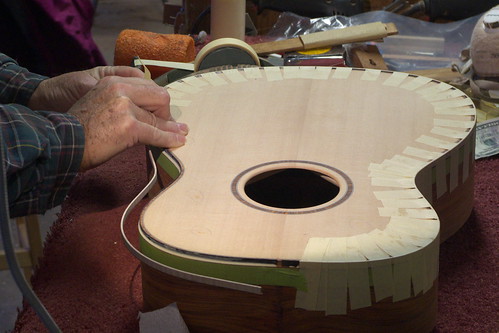
Attaching the top to the back and sides as well as starting on the trim and binding. This guitar will be edged with a black/white/black purfling, a coco strip, a black purfling, and a maple binding. I think I'm really going to like this!
|
|
#20
02-03-2015, 01:15 AM
|
|||
|
|||
|
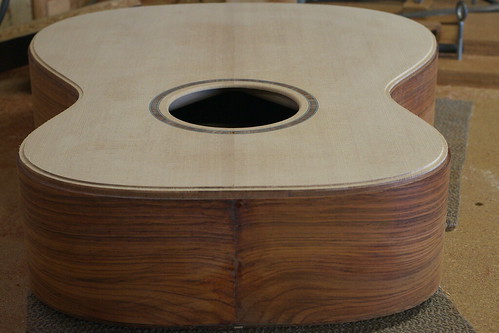
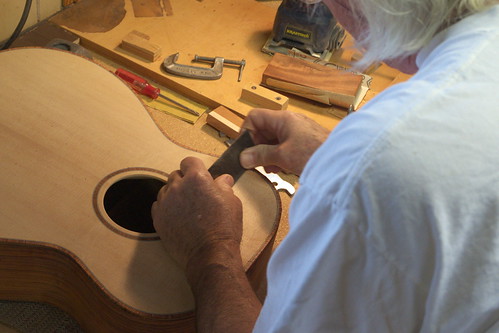
Finishing up on the top's edging and binding. While Sam works on my custom guitar he continues to build and sell his Go Travel guitars and parlors. This day's progress was slowed with visits from a couple other customers checking out the guitars and Sam's shop. It was a fun day talking and playing guitars. I think this is a big part of the enjoyment Sam gets from building guitars.
|
|
#21
02-06-2015, 08:09 PM
|
|||
|
|||
|
Coda, thanks a bunch for posting a video of Sam using his fixture for sawing kerfed linings. I liked that so much I got in touch with him and asked for information about it.
Sam is a great guy. He generously sent me photos, dimensions, and a plan drawing. I learned from a little Googling that a lot of our modern tradition of openness and sharing among American guitar makers can be traced back to Sam, who stressed that in the workshop where he taught Bob Taylor and others how to build in the 1960's. I made a few changes and tweaks when I built my fixture, but the design is still Sam's. 
__________________
"Still a man hears what he wants to hear, and disregards the rest." --Paul Simon
|
|
#22
02-06-2015, 10:58 PM
|
|||
|
|||
|
Howard,
That's awesome! It makes my day that my post was of value to you and resulted in your fine looking fixture. Sam does seem eager to share his knowledge with others. The opportunity to watch him build my guitar has been an incredible experience and given me a much deeper understanding of the instrument. I'm looking forward to the next steps in the process.
|
|
#23
02-07-2015, 07:15 AM
|
|||
|
|||
|
I went to the Go Guitar website to have a look and am seeing small travel type guitars and one parlor. Was your guitar a custom which isn't showing on the website or am I missing something?
|
|
#24
02-07-2015, 07:27 AM
|
|||
|
|||
|
Loving the cocobolo strip and purfling in general...so classy

|
|
#25
02-07-2015, 02:34 PM
|
|||
|
|||
|
Quote:
).When I first consulted with Sam, we discussed what I was looking for in comparison to the guitars I owned and others I'd played and this is the custom design we came up with.
|
|
#27
02-12-2015, 03:20 PM
|
|||
|
|||
|
Cool pics, looks like it's going to be a very nice guitar.
Sam built me a custom GO Type II Parlor about six years ago and I visited him many times during the build process for neck shaping etc. Wish I would have taken some pictures back then. Good to see Sam is still at it.
__________________
Steve SoundCloud / SoundClick / Facebook Music Page 'More guitars than I need but not as many as I want.'
|
|
#28
02-12-2015, 03:33 PM
|
|||
|
|||
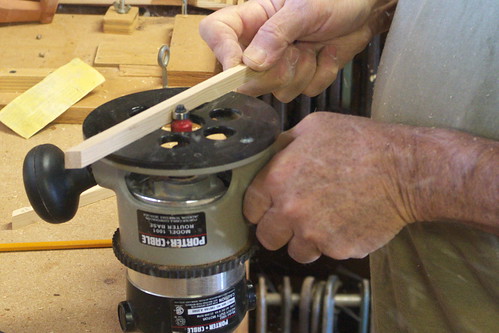
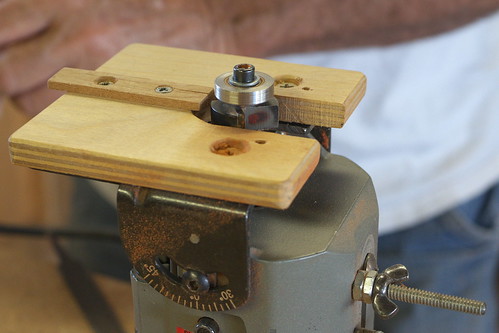
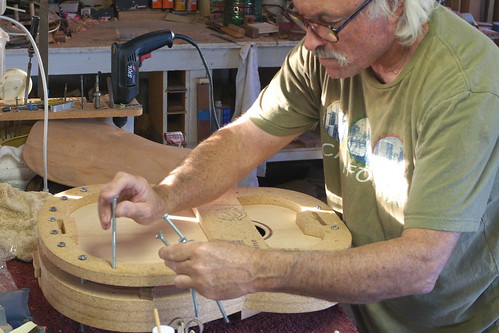
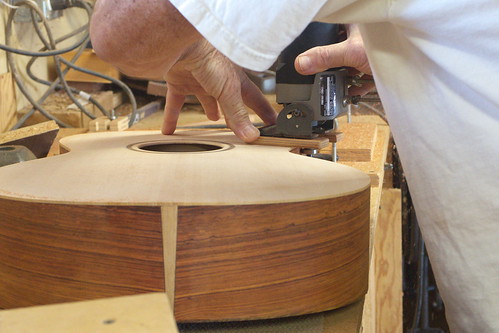
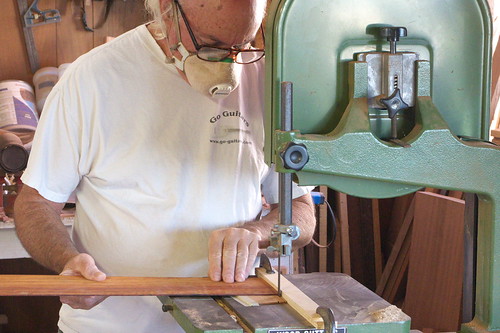
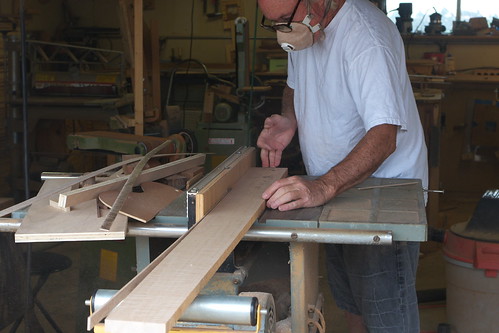
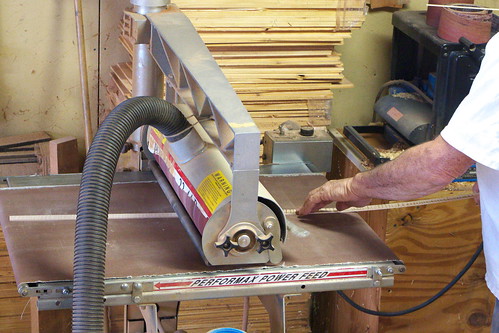
 Did you see how the router works for cutting the binding rebate? It looks like it is pivoted on that long length of wood, presumably with a counterweight (or rather a compression spring) at the other end ? I am assuming that it also slides up and down on the galvanized pipe to keep it vertical, and that Sam moves the guitar body under the router rather than keeping the body stationary and moving the router? EDIT :Just noticed the earlier pic where it shows Sam routing out the soundboard rebate with a hand-held router . . . Last edited by murrmac123; 02-12-2015 at 04:08 PM.
|
|
#30
02-13-2015, 02:00 PM
|
|||
|
|||
|
Quote:
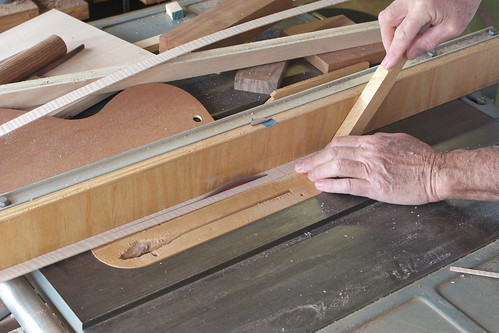
The piece of purfling taped on the end of the tail graft is a standoff for the router to extend the back center strip to allow for butting the end wedge and center strip to the binding. He refined this routed area by hand with an exacto knife. 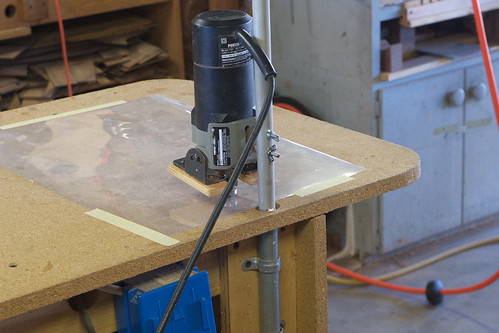 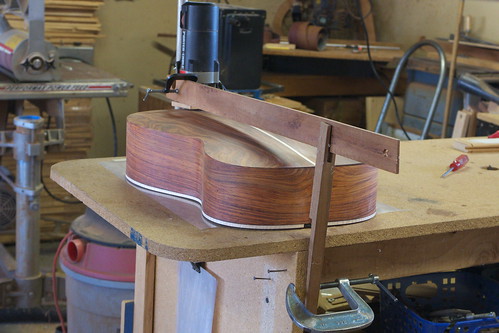  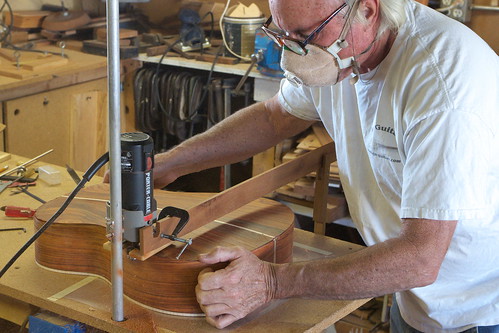  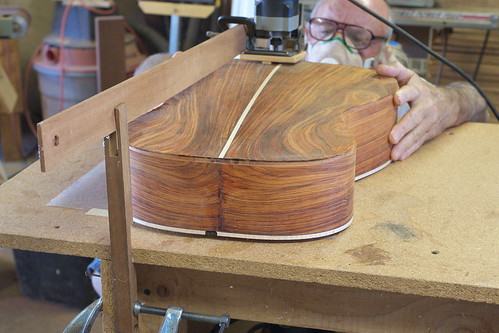
|