
|
|
#16
 10-12-2019, 02:40 PM
|
||||
|
||||
|
Quote:
amazing grain And what phone are you using? It sure beats my iPad. I don't even have a smart phone... can you say "Dino-saur?" Nice stuff Paul
__________________
4 John Kinnaird SS 12c CUSTOMS: Big Maple/WRC Dread(ish) Jumbo Spanish Cedar/WRC Jumbo OLD Brazilian RW/WRC Big Tunnel 14 RW/Bubinga Dread(ish) R.T 2 12c sinker RW/Claro 96 422ce bought new! 96 LKSM 12 552ce 12x12 J. Stepick Bari Weissy WRC/Walnut More Last edited by Guitars44me; 10-12-2019 at 02:58 PM. 
|
|
#17
10-12-2019, 05:10 PM
|
||||
|
||||
|
Quote:
|
|
#18
10-13-2019, 09:46 AM
|
||||
|
||||
|
Here are the final shots for this guitar!
  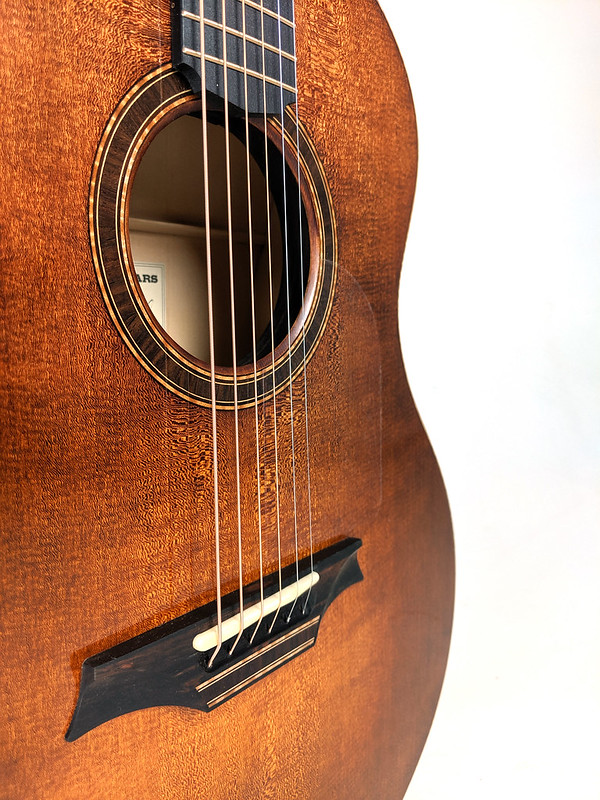     I'm REALLY happy with how this one turned out. It definitely has the biggest bass of any guitar I've made but doesn't seem to sacrifice anything in the mids and highs. I've been enjoying bringing it to the shows and especially having other builders sit down to give it a try. Pretty much without fail everyone has a little jump and "whoa!" when they strum the first open E chord and feel/hear the bass. It's been my experience that there's no real merit to the stereotypical "maple sound" and this one is no exception. I'm sure a lot of that has to do with how I like to build especially since this one is fully laminated, back as well. I haven't laminated all that many backs but more and more I'm realizing that there's some incredible power in being able to really fine tune the weight of the back regardless of the species of wood and I think this is also emphasized when building with the thick structured sides. Like the first guitar in this thread this was built for my shows this year and will be up for grabs in a couple of weeks! Most likely I'll ship them out to dealers but I'll keep them around for a few weeks after so feel free to PM me with any questions or if you're interested in either! Last edited by IndianHillMike; 10-13-2019 at 09:52 AM.
|
|
#19
10-13-2019, 10:39 AM
|
||||
|
||||
|
I just love that top, the way the medullary rays jumped out with the finish is amazing. I have a redwood topped guitar we did a potassium dichromate treatment on that ended up with a very similar effect, I just love it.
Great job. I am also a big fan of Maple guitars, although those I have are not laminated. The stereotype of Maple guitars is definitely not warranted IMO. Big bass abounds!
__________________
PS. I love guitars!
|
|
#20
10-13-2019, 12:49 PM
|
|||
|
|||
|
That guitar is just drop-dead gorgeous. Beautiful, beautiful finish - front and back.
__________________
Hatcher Woodsman, Collings 0002H, Stella Grand Concert
|
|
#22
10-14-2019, 10:41 AM
|
||||
|
||||
|
Quote:
Quote:
Quote:
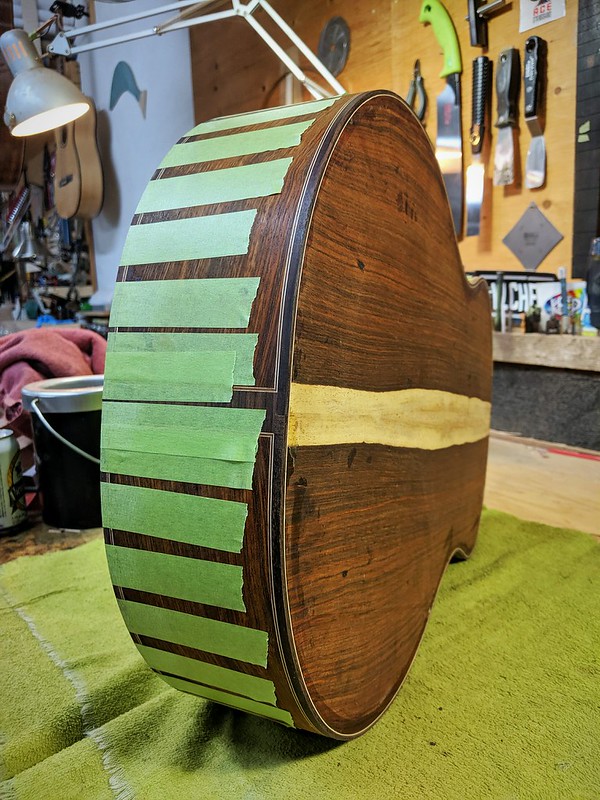
Here's one more from this year that I'll post about -- this one wasn't built for shows but instead for a charity auction (Time Out Women's Shelter in Arizona) that I just recently finished up. Starting out with a killer set of cocobolo and a lutz spruce top...  Joining up the back with Sergei de Jonge's incredibly simple wedge method. I was also building a black limba guitar at the same time so you'll see some shots of that one peppered throughout as well...  Based on some of my shopmate Jeremy Clark's ideas I've been experimenting with hexagonal bracing patterns. This is the first stage of braces glued down...  I forgot to get a shot of the cocobolo back fully braced, but the black limba back was done in the same way. The upper bout has a laminated center strip to help maintain the arch while the lower bout has the hex pattern (with a couple of small dots for center joint insurance and because I thought it looked cool!). The 60 degree hex pattern is a great way to distribute support while encouraging the back to move how I want it to (think of a speaker cone)...  It's unreal how resinous cocobolo can be! It's all on the surface and the bent side on the right had about 45 seconds of light sanding to entirely remove the burnt resin. In the second photo you can see how the unsanded black limba had essentially zero resin...  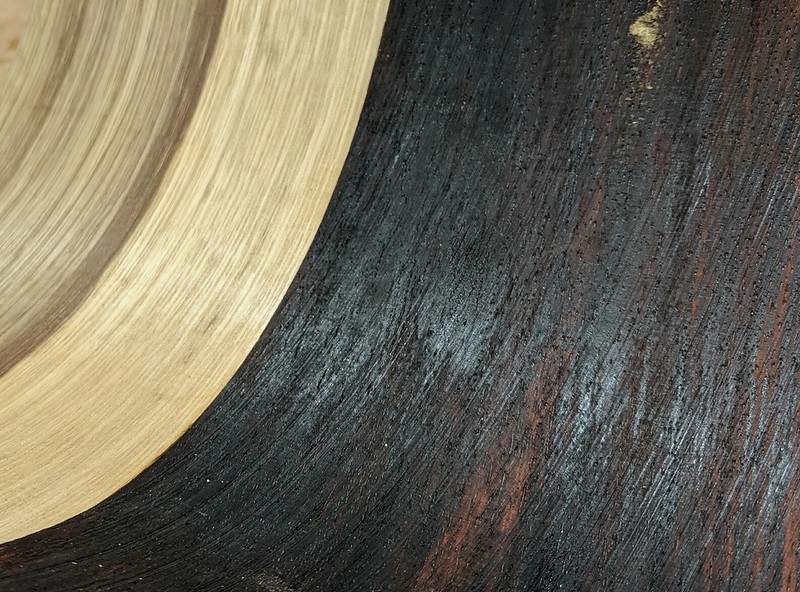 To laminate my sides (these are again the structured sides) I fold my mold in half, put in the various layers, place a caul on top, and press everything down with slightly arched cross braces. The braces are arched so that they first contact in the middle and as the bolts are tightened press from the middle out. This helps insure no cavities or pockets of glue trapped in the middle. I also like using my mold like this to insure a perfect fit -- plus it saves having to build/store an entirely separate laminating jig! 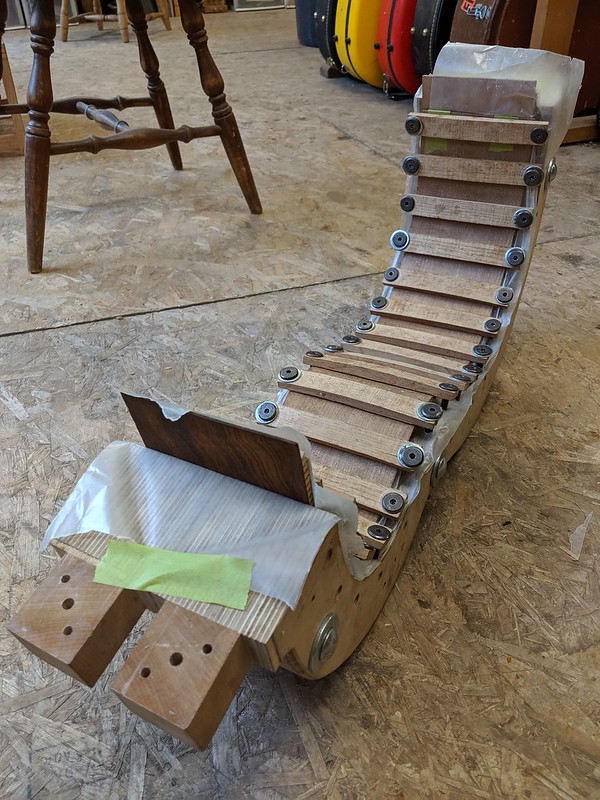 Bracing the top with some wooden go-sticks. These are great because once they're bent you can get good pressure but they're just short enough that if they slip they can just fall off and not punch a hole through your top!  Ready to go! 
|
|
#23
10-15-2019, 11:37 AM
|
||||
|
||||
|
Boxed up and getting bound...
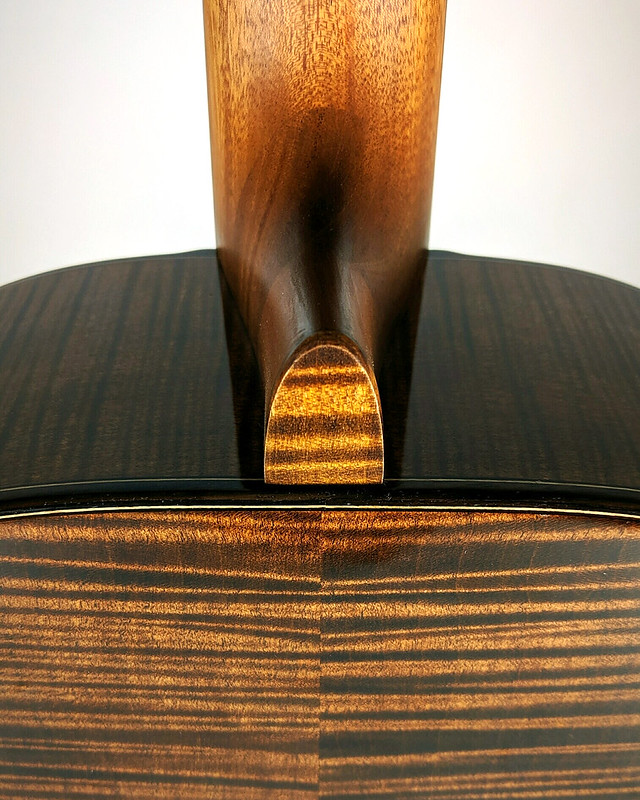
 For the past few years I've switched to entirely bolt on necks and love everything about it -- ease of working/adjusting, repairability down the line, and especially having the mahogany (or whatever neck material I'm using) continue past the body joint. I really like the idea of having more consistency along the full length of the fingerboard and not have a drastic flex point right at the body joint. The picture below also highlights something I think about a lot during my building and emphasize whenever I'm teaching or helping newer builders -- when/where precision counts. I could spend a day making a pair hyper-accurate male/female 45.00mm templates to route out this pocket and the corresponding neck extension. Or, I could take 5 minutes to put this together, cut the male part just a wee bit big, run my plane over it a couple of times and get a perfect fit. Personally, I'll choose the second option!  Something new that I tried on this one is a carbon fiber 'U' reinforcement in the neck. All most all of my shopmates have been doing this for a few years and I figured it was finally time to get on board. I'm not a fan of doing big layups with epoxy but the long term stability this provides makes a lot of sense. The process wasn't as bad as I had thought and I think I'll stick with it...  I was just about out of bridge blanks during this build so decided to prep a batch for upcoming guitars and here I'm routing the saddle slot. In addition to tilting the slot back for intonation, I also tilt it back vertically -- the idea is to split the break angle in half so that the string tension pushes directly down the height of the saddle. For a typical saddle slot, the strings torque on the saddle pushing it against the front of the slot whereas in this case the string tension is now directed towards the bottom of the saddle.  Another hand rubbed burst for this one!  Final neck prep... 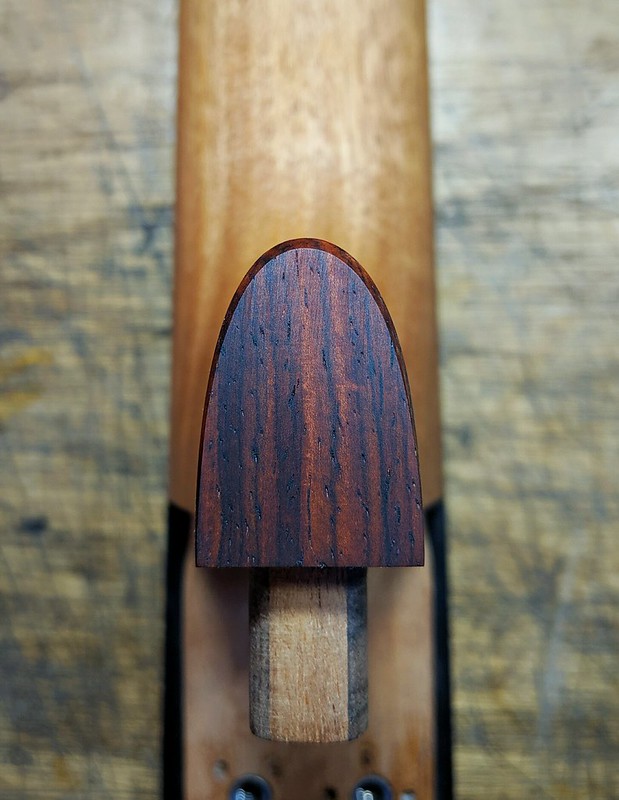 Pre-shiny burst... 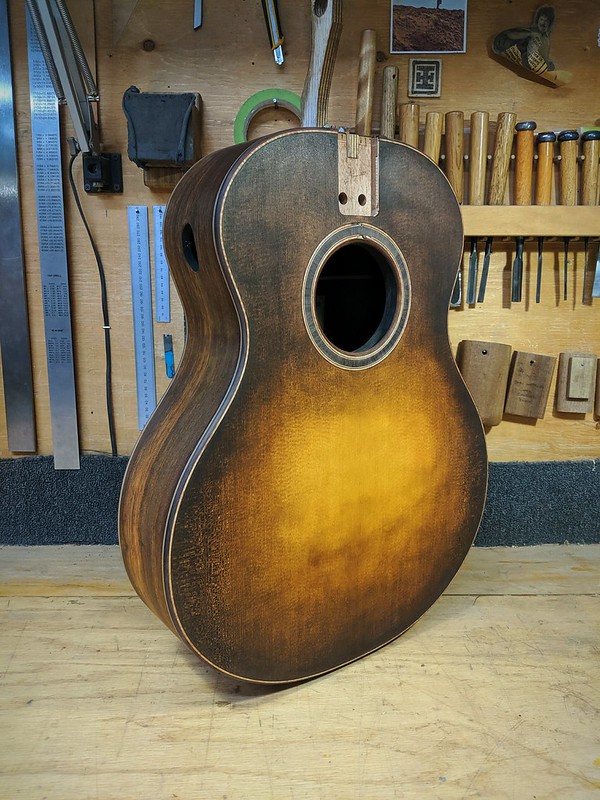 All shined up in the shop...   And in it's new home out west! 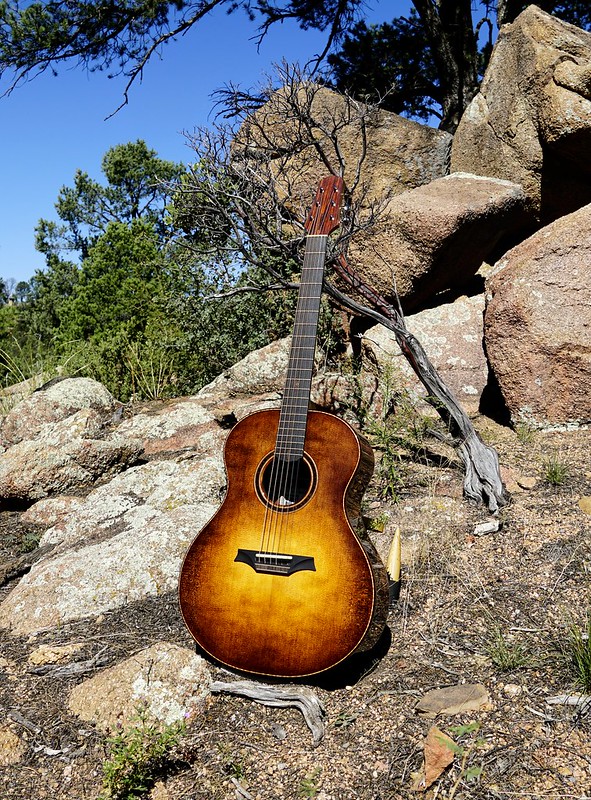  I was very very pleased with both how this one looked and sounded. I think the burst fit incredibly well with the cocobolo and tonally it was beautifully rich and even across the board with tons of volume. Also happy to say it raised $10K for the Time Out Shelter in Payson, Arizona!
|
|
#24
10-15-2019, 05:25 PM
|
||||
|
||||
|
Quote:
Here is the thread: https://www.acousticguitarforum.com/...ght=black+lion You can skip to page 3 to see the trial sample of the treatment and then final pics are on page 10....Hope you like it, I love it!
__________________
PS. I love guitars!
|
|
#25
10-15-2019, 08:58 PM
|
|||
|
|||
|
Good lord that burst is pretty
|
|
#26
10-16-2019, 11:02 AM
|
||||
|
||||
|
Quote:
Quote:
|
|
#28
10-20-2019, 08:35 AM
|
||||
|
||||
|
Quote:

|
|
#29
10-20-2019, 11:05 PM
|
|||
|
|||
|
So much good stuff in this thread. Thank you for sharing all of your creative and interesting ideas as well as why you use them! The magnetic truss today cover is stellar. Your thinking about the neck joint is really interesting! I might be a convert. 10+ dovetails in and I still dislike them as much as the first one
 ..... .....Really inspiring so thanks again. Sam
|
|
#30
10-21-2019, 10:50 AM
|
||||
|
||||
|
Quote:
I used dovetails on probably my first 30 or so guitars. I definitely don't regret learning how to build with them but am quite happy to have made the switch first to a standard mortise and tenon and now a fully bolt-on.
|


