
|
|
#76
 08-27-2016, 01:14 PM
|
||||
|
||||
|
Quote:
Quote:
Quote:
As my plans have no soundhole braces, i think i'll have to spend a bunch of hours scouring the custom shop build threads to find the "average" size and positioning from the soundhole to determine where I install these braces Quote:
The X-Brace design... Well i'm just following the plans i bought which are supposedly a Taylor-esque design. I don't know how close this is to actual Taylor bracing, but I'm just building to the plan (and thats what the plan said) where i can, plus modifications suggested by the awesome helpfulness of you guys here!! Thanks, the main reason I went for linings like that was that the linings were made from the offcut walnut from my neck, these edges were not always the best wood. My original attempts at the linings were traditional, they weren't triangular, but they had all the kerfs on the same side. These snapped WAY too easily, cutting the kerf slots too deep or too shallow, both resulted in snapping when bending round corners, even on the less stressful lower bout area, so I decided to cut opposite sides to try and release some of the pressure on each of the thin bits holding the linings together. It worked pretty well, I cut far too many so I have more for a future guitar if needed, if i did them again, i would do exactly the same, but also make some shorter ones with closer cuts to get round the cutaway easier. The only real downside is controlling the glue squeezeout into the slots is tricky and its quite hard to clean the glue out of those slots, so I just left it there (if someone asks i'll claim that glue is there for structural integrity) Thanks again all Dave 
|
|
#77
08-27-2016, 04:22 PM
|
|||
|
|||
|
I think following a plan on your first few guitars is a good idea. Just stick to the plan and then you will know how to make changes in the future. Remember you can always reach inside a guitar and remove brace material in the future but obviously you cannot put it back on
 FWIW I have noticed that most plans are over built. Take it with a grain of salt. Not saying your guitar looks over built but most plans seem to be heavy on the construction.
|
|
#78
08-27-2016, 04:46 PM
|
|||
|
|||
|
Quote:
Well you can, but it may not be pretty. 
__________________
Fred
|
|
#79
08-29-2016, 01:53 PM
|
|||
|
|||
|
So today I removed a bit more material from the braces towards the ends of the x-braces and towards the ends of the long harmonic tone bars near the end block. I also scraped down the bridge plate from about 3mm to about 2.4-2.5ish and that has made a noticeable difference to the deflection, it still deflects about the same amount but requires less effort to do so.
I don't have a frame of reference, but these alterations have made the current tap tone quite pleasing to the ear, i don't know if this is good or bad for the actual guitar sound, but I like it. Also the tap resonance has significant sustain. this can only be good! The final thing i did today was glued on some soundhole braces! I just had to make a guestimate of what was/is required for these as there arent any in my plans so after reading through a bunch of the custom shop forum build threads this morning, I took an average from what I saw. The braces I installed are 5.5mm wide and currently 7mm high, although these can be carved down as the rest of the braces were. The picture below shows what installed. Hopefully this is on the right track 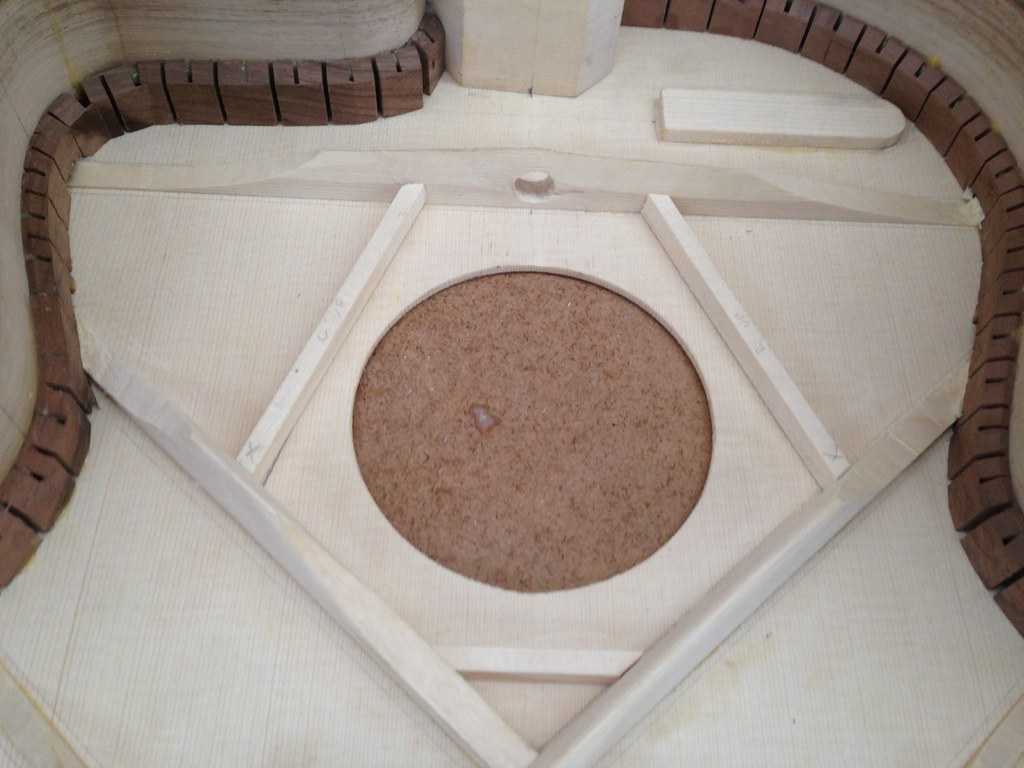 Untitled by David Emm, on Flickr Untitled by David Emm, on Flickr
|
|
#80
08-30-2016, 02:06 PM
|
|||
|
|||
|
Annoyingly didn't get much done today, everything I did took a lot longer than I hoped to get it done.
Mainly because I have discovered the front of my neckblock is not square to the centreline of the guitar. This meant routing the slot for the neck tenon was more awkward then it should have been. Luckily with some strange clamping and a built up floating jig for the router I managed to get it as close to straight down the centreline as was possible. The downside is now that I have to cut an extra angle into the neck tenon to keep the neck straight while at the same time cutting the actual neck angle into the neck. This drove me so crazy I decided to give up with that for today and glue the back on, unfortunately the workshop closed up before I had the chance to do that, I was still chiselling out the slots for the brace ends. And this is where the walnut linings caused me yet more problems, it just chipped out so easily that the slots that I've managed to do so far for the brace ends are about 357% bigger then they need to be. Hopefully I'll get the back glued on tomorrow instead I only managed to get the 1 useful picture today. 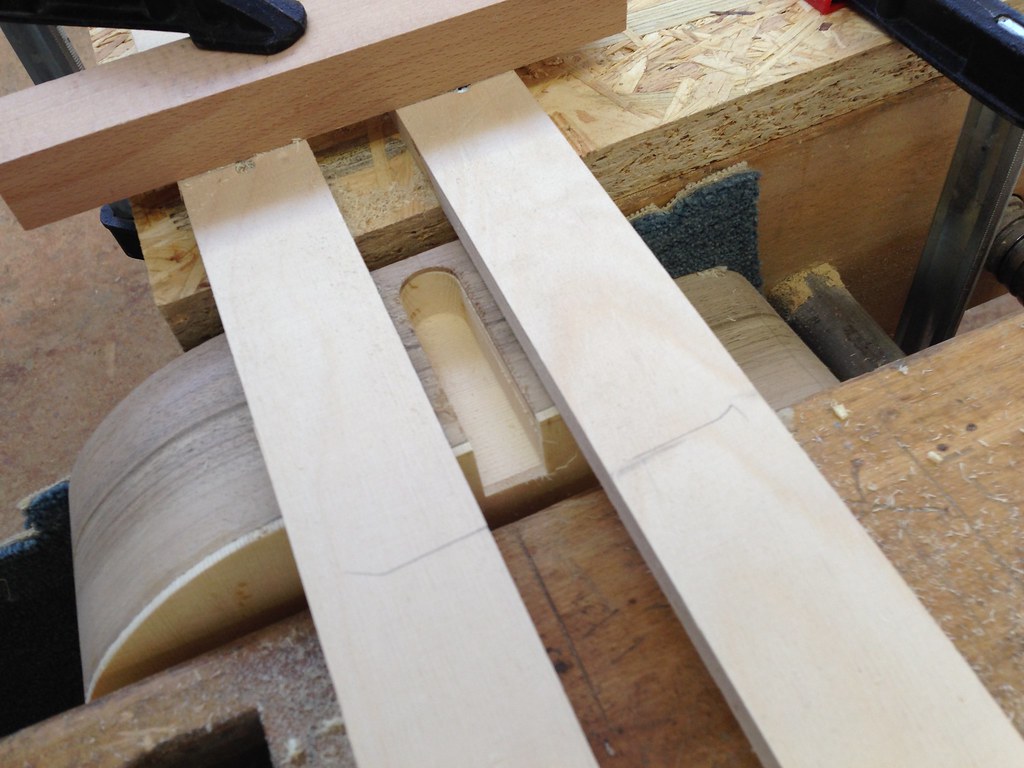 Untitled by David Emm, on Flickr Untitled by David Emm, on Flickr
|
|
#81
08-31-2016, 03:47 PM
|
|||
|
|||
|
Today wasn't a day to attempt to mess around with the neck so i decided to glue the back on. I probably didn't really do enough to tune the top perfectly, but i have the impression that its not going to be terrible (of course I could be sadly and horribly mistaken) and as i'm not sure what i'm doing not really sure what anything else i do tuning wise is achieving.
I glued the back on with as minimal an amount of pressure as I felt I could give, as I really didn't want to re-buckle the sides, I'm pretty sure that would to be a MUCH harder task to fix once the back is on. I'll be back in the workshop tomorrow, planning to trim the back flush to the sides and then install binding at least on either the front or back edge and if i have the time, both! and then if I still have time, do some more work on that unbelievably annoying and awkward neck tenon joint. Heres my back gluing/clamping method 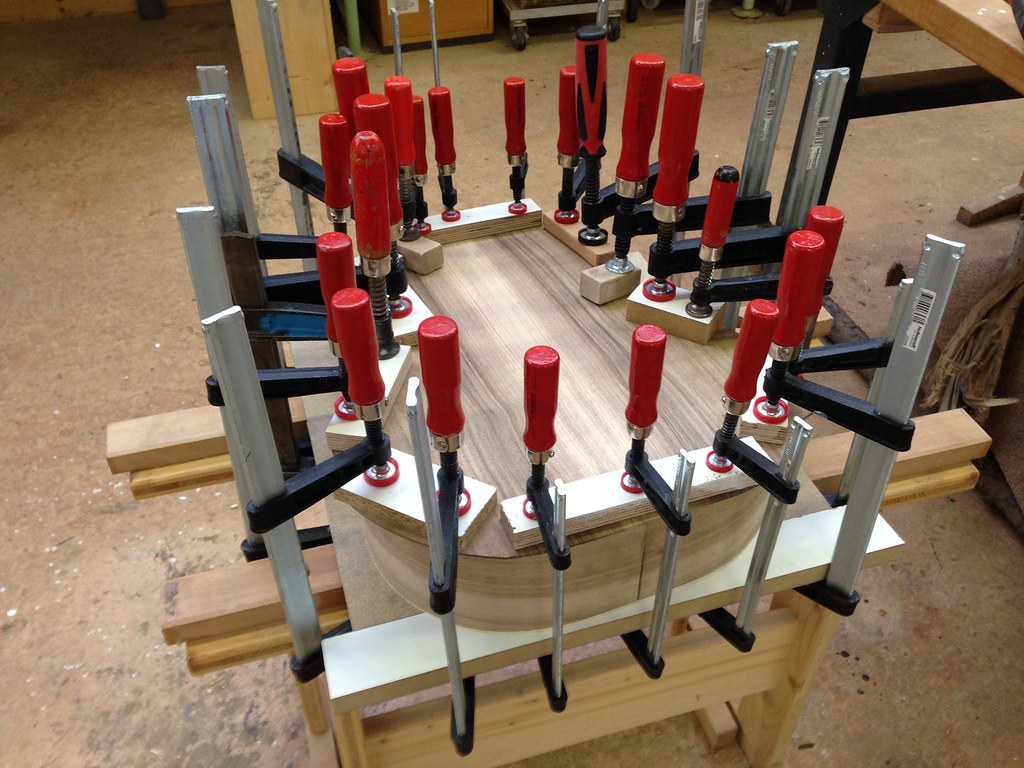 Untitled by David Emm, on Flickr Untitled by David Emm, on Flickr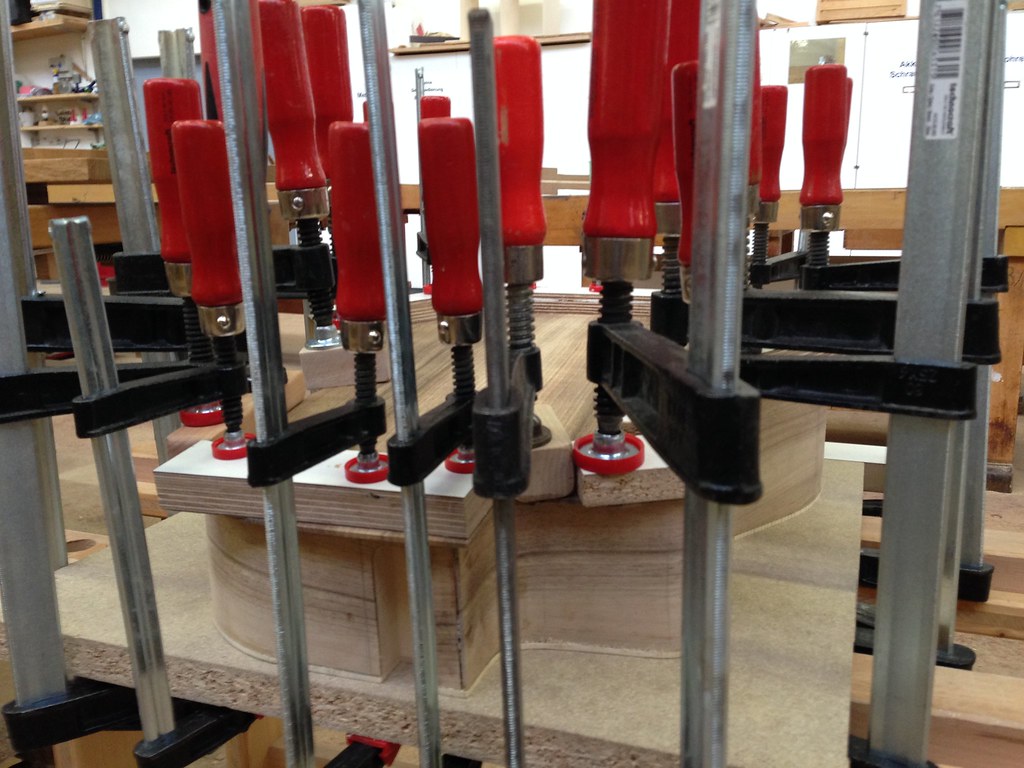 Untitled by David Emm, on Flickr Untitled by David Emm, on Flickr
|
|
#82
08-31-2016, 06:50 PM
|
|||
|
|||
|
I can see that headblock angle in the soundhole bracing picture. As you say, the neck can be carefully cut to match. You'll probably also need to add a wedge shim inside, to provide a perpendicular surface for the bolt heads to bear against.
Don't expect to get binding done in a day. It's one of the more difficult and time consuming tasks. Cutting the channels, bending the strips accurately, gluing the strips, heating and squeezing out gaps, and scraping them level all take time. And it may be better to do more tap tuning first. As soon as you get those clamps off, you'll get your first taste of the real box tap. And the bindings will cover up the edges of the plates, so now is a good time to do some perimeter thinning if it sounds like it needs it, while you can see how thin it is. Once the binding channels are routed, the tap tone goes bad because of all the little air holes the linings make. But it will come back after the bindings are on. And you can still do perimeter thinning at that point. You're just doing it purely by ear, so it's a bit more risky. Oh, and back lining pockets... it doesn't matter if they're wider than the brace ends. Only that the depth is right. The purpose of them is to hold the brace ends down in low humidity. The stress from the back shrinking gets concentrated at the brace ends, which can peel them up in some cases.
|
|
#83
08-31-2016, 08:16 PM
|
|||
|
|||
|
Quote:
Quote:
https://www.youtube.com/watch?v=neYyq9OHNLE Note that prior to routing/installing the binding, I do some thumb-deflection-testing and thin top and back accordingly, mostly around the perimeter of the lower bout. On the soft-wood top, I do most of it with an electric sander, on the hard-wood back, mostly with a scraper. Once that is done, the sides are sanded to their n-1 finished state. If one does a lot of plate thinning and side flattening after installing the binding, one risks making the bindings non-uniform in height and width.
|
|
#84
09-01-2016, 12:05 AM
|
|||
|
|||
|
Thnak you for those videos, Charles, it takes me back to my childhood when I was attending woodwork classes. The teachers were as fine a craftsmen as you certainly appear to be and I learned some valuable skills from them. If I had the time and the wherewithal, I would certainly like to attempt to build a guitar, sadly time and space are at a premium, so all I can do is appreciate your fine work.
__________________
Maton CE60D Ibanez Blazer Washburn Taurus T25NMK
|
|
#85
09-01-2016, 12:13 AM
|
|||
|
|||
|
Everything was looking so good...and then I saw you were building a cutaway and my heart sank!
|
|
#87
09-01-2016, 08:56 AM
|
|||
|
|||
|
Quote:
|
|
#88
09-01-2016, 09:04 AM
|
|||
|
|||
|
Quote:
Quote:
|
|
#89
09-01-2016, 12:35 PM
|
|||
|
|||
|
Quote:
Quote:
Being that I go on holiday for 10 days tomorrow night some of the things I had to sort out for that before I go took longer then expected today so didn't get ANY binding done, i'll start that when I get back. In fact I got literally nothing done today except taking the clamps off after gluing the back on yesterday. Reason being the workshop helper guy that pretty much destroyed my soundboard at the beginning of the project was there today and in less then 30 minutes made a good effort to tell me everything I was doing and had done up to this point was wrong, (yet he's never made anything resembling a guitar before) how I was going to rout the back flush to the sides was wrong, how I was making the neck joint was wrong, apparently the back to side join will be terrible and according to him adding a binding won't even help, he wasn't happy with how the sides join at the back even though this has no relevance as there will be a end wedge/graft, yes i could have made it fit better, but the fact it didn't fit perfectly doesn't make any difference to me and worst of all he wouldn't just let me do my own thing and let me build it my way. To save my guitar from being smashed over his head I decided from now on if he is in the workshop i'm not. That means mondays and thursdays are now no-go's (downside of a public access workshop). I did take a few pictures of the closed box though before I left. This means progress!!! 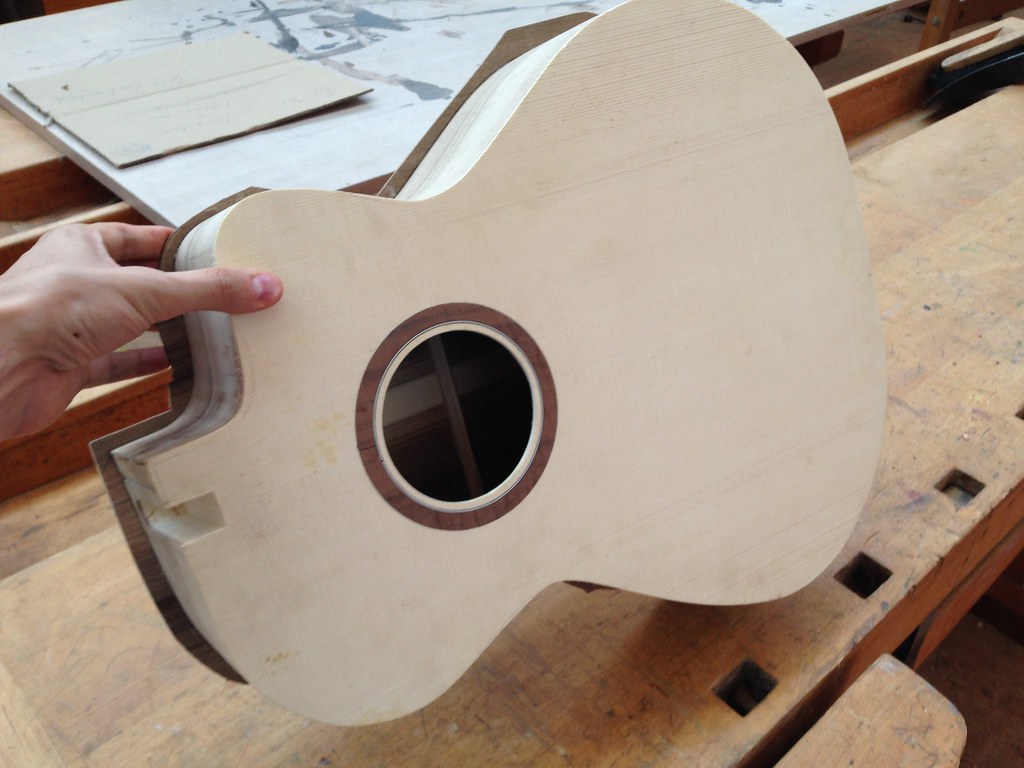 Untitled by David Emm, on Flickr Untitled by David Emm, on Flickr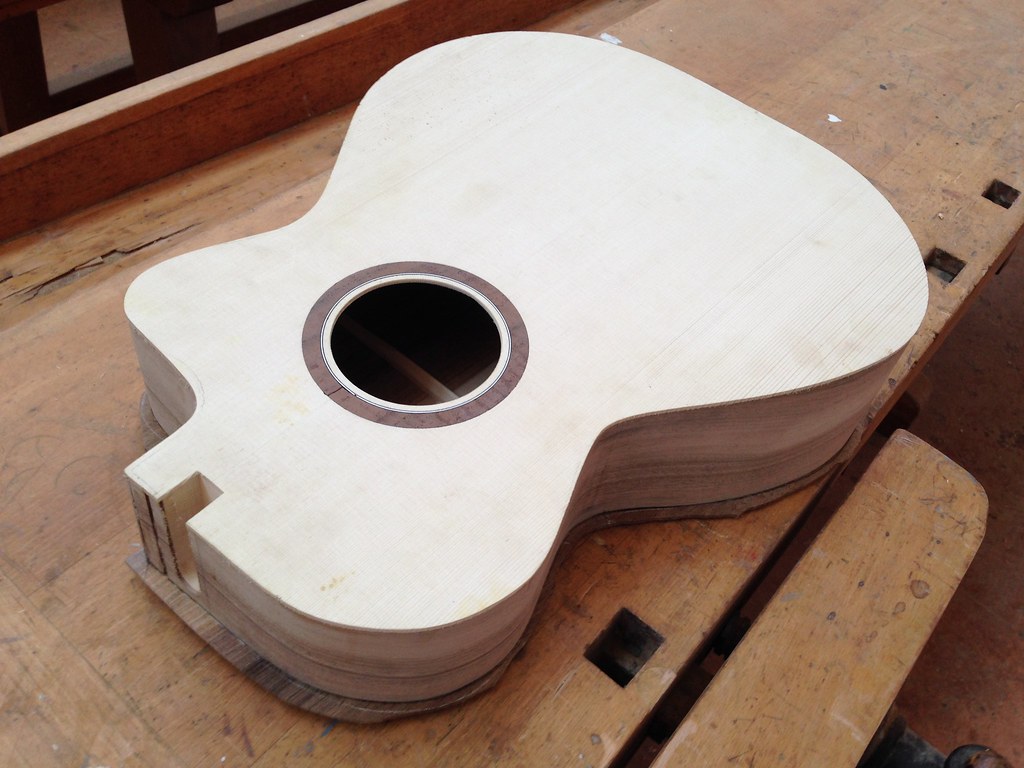 Untitled by David Emm, on Flickr Untitled by David Emm, on Flickr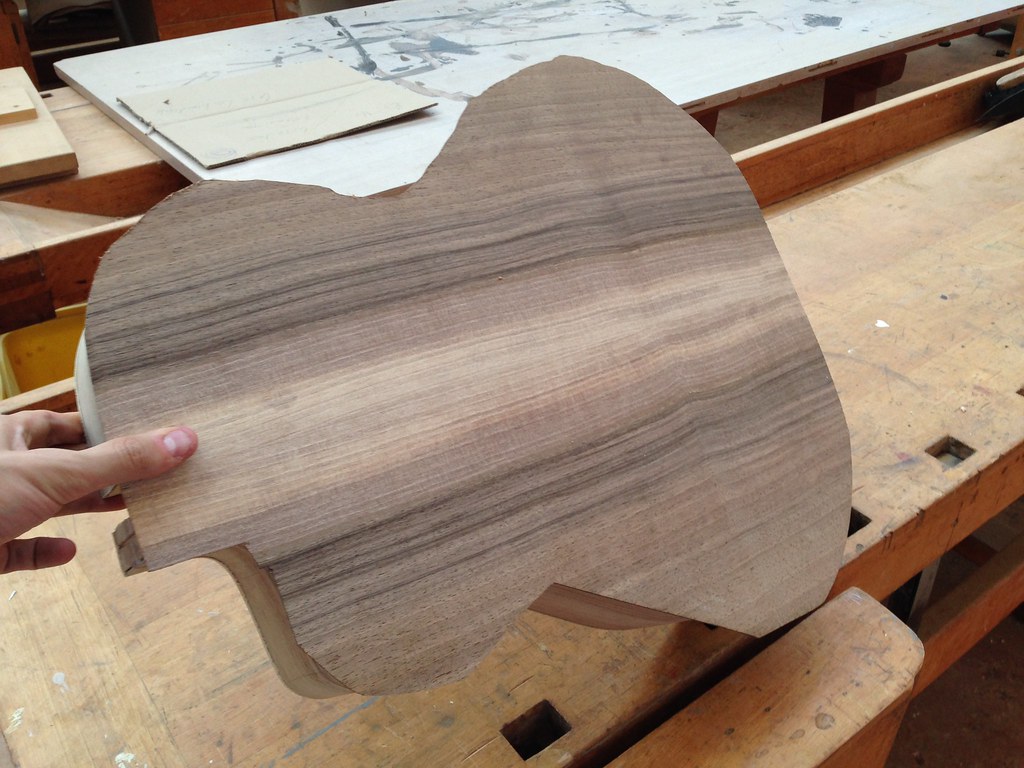 Untitled by David Emm, on Flickr Untitled by David Emm, on Flickr
|
|
#90
09-01-2016, 12:38 PM
|
|||
|
|||
|
Quote:
Actually I was watching this (and a lot of your other videos) after you posted your other video a few days ago, made a lot of sense. I'll watch it again when I actually get to do my binding
|


