
|
|
#1
 03-27-2014, 11:34 AM
|
||||
|
||||
|
Just getting started on my next build for Trevor at The Acoustic Music Company. This one is going to be a Grand Concert 12-fret cutaway (flush to the heel) with curly maple back/sides and sitka spruce top.
Here's the wood... 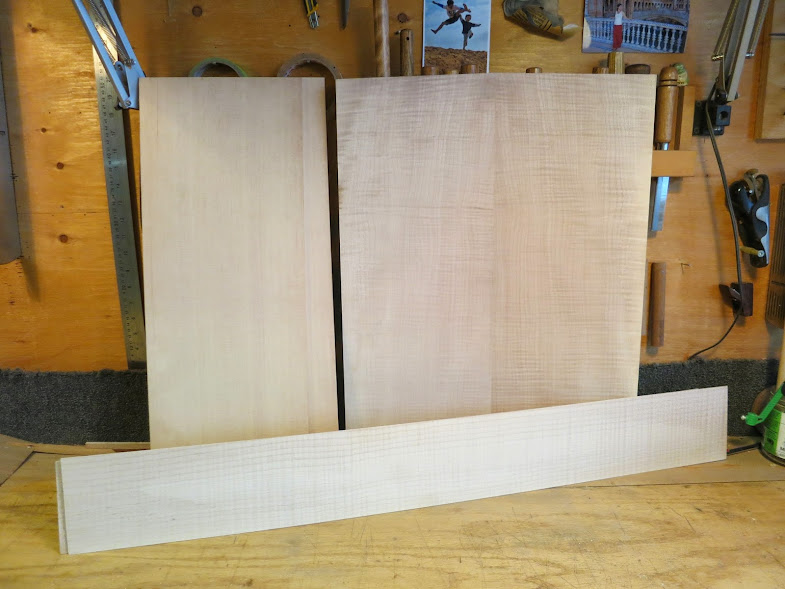 Joining the top...  I can't really think of a simpler jig to join tops/backs -- one clamp yet incredibly effective! Once the top is joined and cut to shape, it's time to make the rosette. I start by choosing sections of spalted maple...  Once I've decided on a section I want to use, I mark the center of the circle and simply draw/cut lines radiating from that point. By doing this there's no worry that the various sections won't line up and form the ring I'm intending. Three sections glued up...  Next I cut out the spalted maple ring slightly larger than the final size... 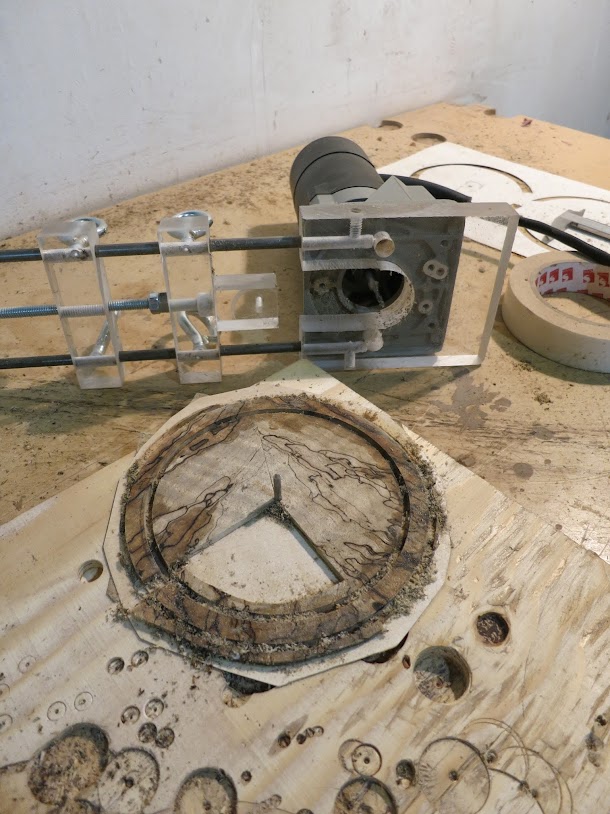 I glue the oversized ring into a slot in my top... 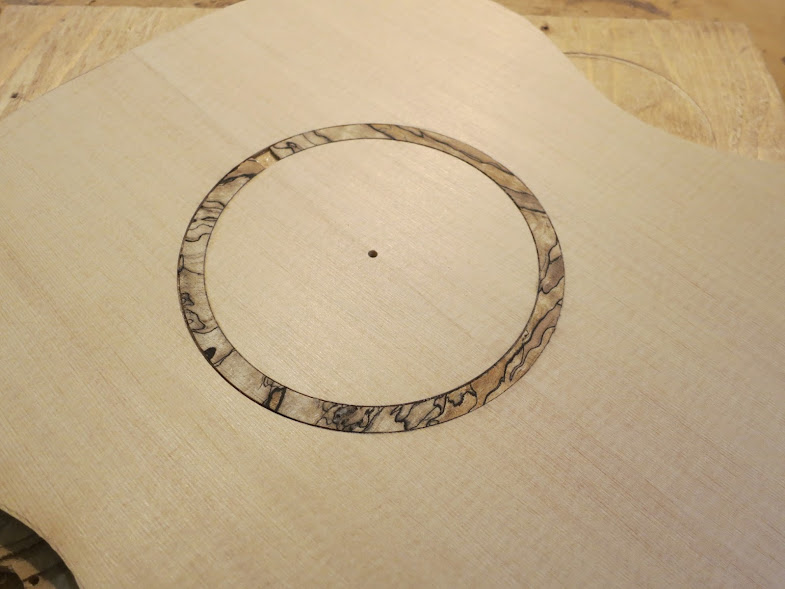 Once this is dry, I rout out either side of the ring to fit my purfling strips, glue them in and voila!  This should be a fun and challenging guitar to build -- flush to the heel cutaways can be really tricky! Mike 
|
|
#2
03-27-2014, 12:29 PM
|
|||
|
|||
|
Good pics. Fun to see how you go about it. What tonal characteristics do you expect to get from this body and wood combination. And what subtle build techniques will you use to lean the tone one way or another.
|
|
#3
03-27-2014, 12:39 PM
|
|||
|
|||
|
Like that rosette
|
|
#4
03-28-2014, 10:30 AM
|
||||
|
||||
|
Quote:
I've started in on the bending and laminating process for the sides. Here's the cutaway being bent...  And positioning the back...  Today I'll continue on with preparing the cutaway -- this next little bit is one of the most challenging parts of the build. More pictures on the way! Mike
|
|
#6
03-30-2014, 10:37 AM
|
||||
|
||||
|
Made some more progress on the cutaway these past few days. For those that might be uncertain what I mean when I say flush to the heel, here's an example of one I made a few years back...
 The obvious difference between this and most cutaways is that I maintain the same heel shape with a perfectly smooth transition to the side. Some of the main challenges in this style of cutaway are getting the wood to bend in more ways than one (follow the curve of the sides and of the heel at the same time) and keeping everything perfectly lined up and on center. In order to achieve this, I made a bending/lamination mold for the cutaway section... 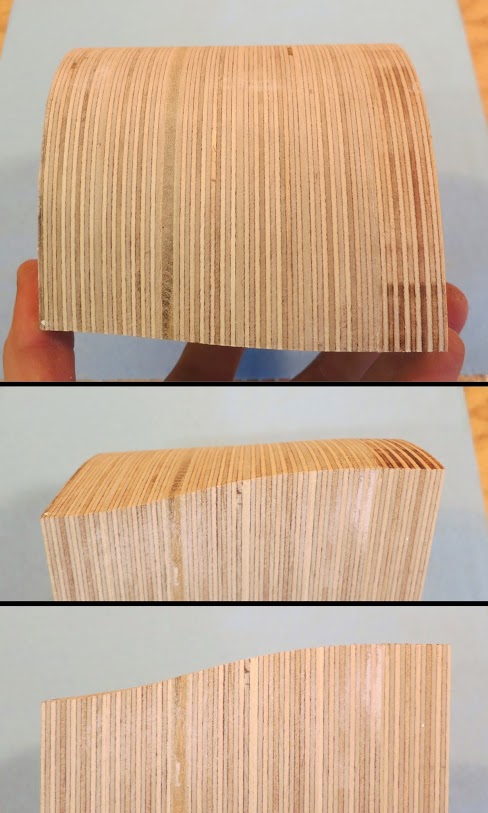 As you can see, it starts flat and perpendicular to the top/back. As it approaches the fingerboard it starts to angle but still remain flat. Once it reaches the end-block, it starts to transition from flat into the final heel shape. Since it is such an amorphous shape, this all has to be carved by hand. Now comes the challenge of laminating! For the flat sections, I use the same brace and bolt system that I use to laminate my sides. However, for the curvy heel section, I need to make a caul that is an exact fit (plus the thickness of the sides) in order to get perfectly fit lamination. So, plaster of paris to the rescue!  And here's a shot of the cutaway being laminated with the plaster mold and brace/bolt system... 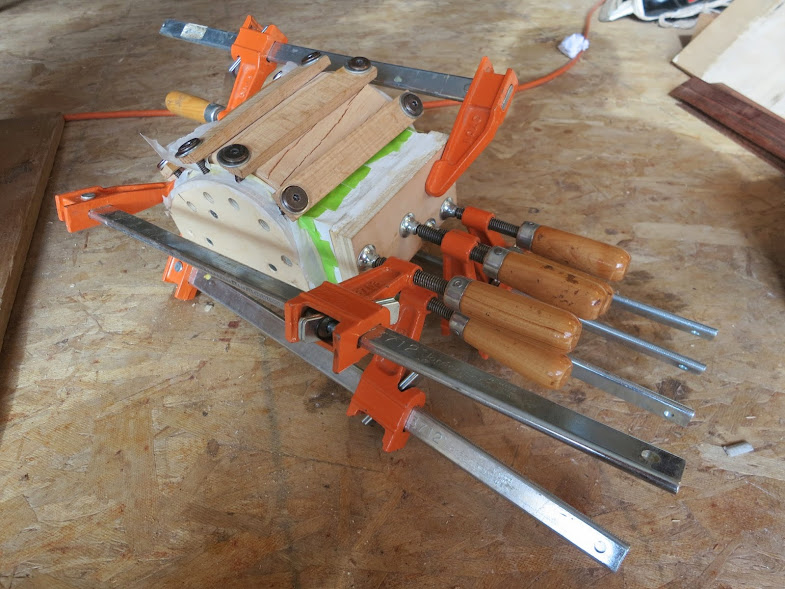 That's it for now. Next up is carving the block! Mike
|
|
#7
03-30-2014, 03:02 PM
|
|||
|
|||
|
I love your work Mike! It will be a wonderfull guitar, and the rosette is pretty cool!
__________________
Benjamin Paldacci Guitars: "I strive to build my instruments with the finest Tone, Ergonomics & Aesthetics" https://www.benjaminpaldacciguitars.com/
|
|
#9
04-01-2014, 08:53 AM
|
||||
|
||||
|
Quote:
Quote:
While I've been working away on the cutaway section, I enjoyed the much easier task of laminating the rest of the sides...  One day I'd like to make some sort of 3-D replicating jig, but for now the best way I have to fit the block is using chalk... 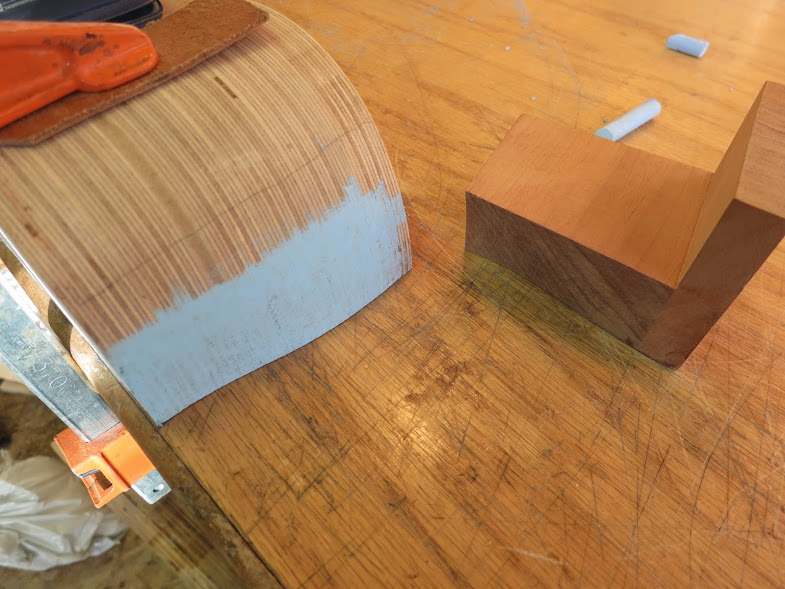 Push the block into position, wiggle it ever so slightly, pull it back and sand away the chalk marks. Takes a while but gets a great fit!  Very satisfying to finally get this section glued up! 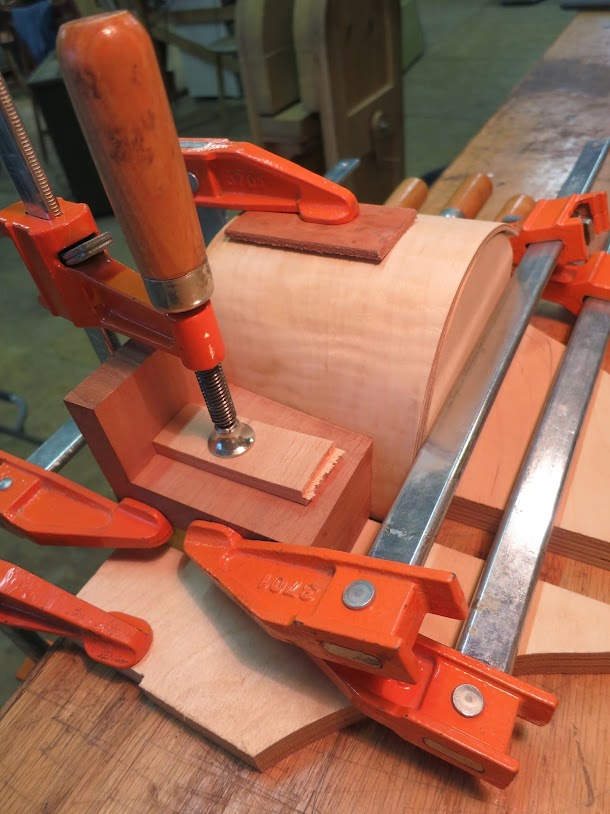 Next I'll put all the parts of the sides together and get on with bracing the back. Mike
|
|
#10
04-01-2014, 05:33 PM
|
||||
|
||||
|
Looking great Mike!
__________________
David Wren
|
|
#11
04-07-2014, 09:35 AM
|
||||
|
||||
|
Towards the end of last week I was able to get the sides joined up. Quite a rewarding feeling after spending so much time preparing the cutaway section!
 Nothing too tricky coming up so the next little while should zip along. Here I'm gluing on some laminated maple strips to give some long grain stiffness to the back... 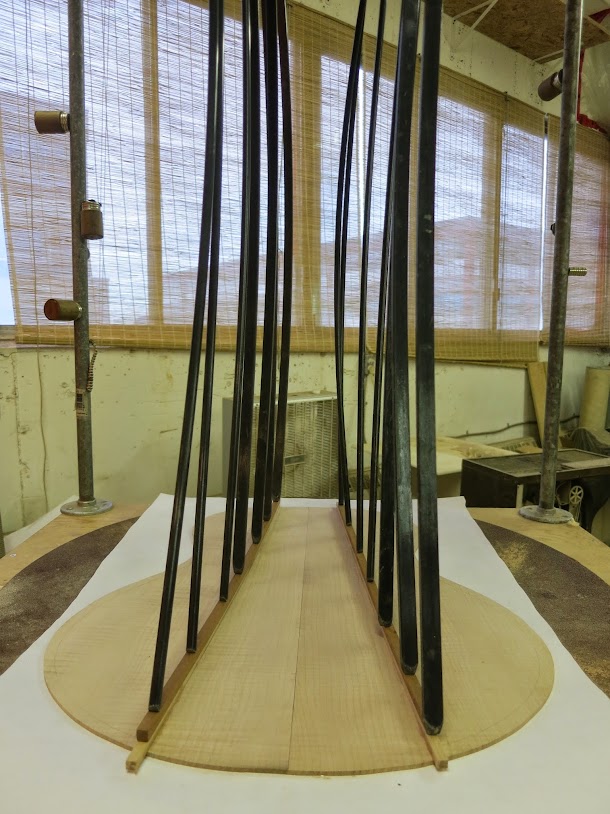 Each brace is two 2.5 mm strips of maple laminated into a 15' arch. Bracing a back with a typical ladder bracing adds almost no long grain stiffness, so for me adding these braces is key to getting a more even distribution and helping maintain the arch. My center strip is also laminated but with a thin cross-grain layer of spruce and a thin maple strip on top. If all goes well the back will be glued on by the end of the day and it's on to bracing the top! Mike
|
|
#12
04-09-2014, 07:11 AM
|
||||
|
||||
|
Now that the back is on, you can finally start to see the shape of the cutaway...
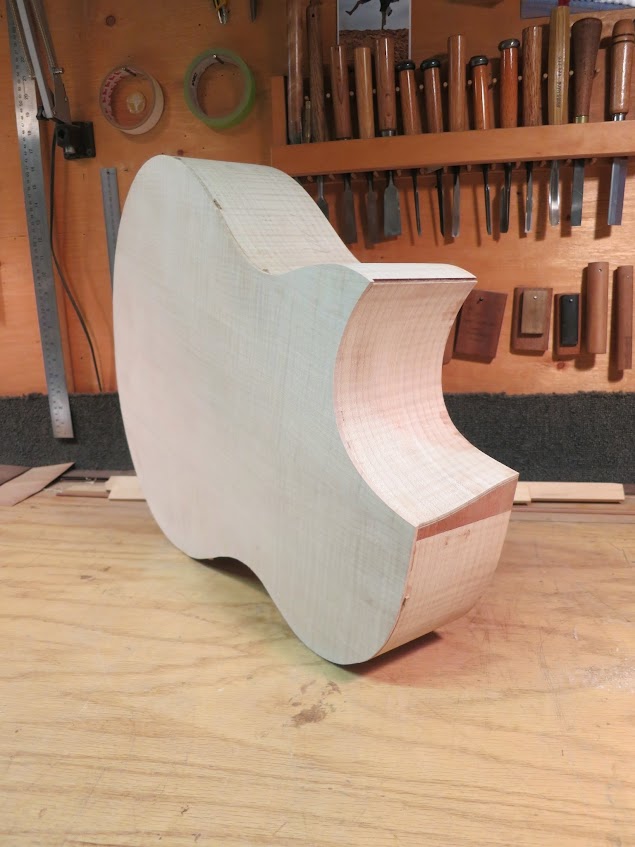 Today I'll finish up bracing the top and hopefully have it tuned and glued on tomorrow! Mike
|
|
#13
04-09-2014, 08:19 AM
|
|||
|
|||
|
Your cutaway-neck-joint is great!
|
|
#14
04-09-2014, 02:38 PM
|
||||
|
||||
|
This is looking sooo great Mike!
__________________
David Wren
|


