
|
|
#1
 11-04-2014, 09:55 AM
|
||||
|
||||
|
I have a new project in the works that I'm pretty excited about -- building a guitar that will be part of the C.M. Russell western art auction next spring! This is an annual event held in Great Falls, Montana and is part of the city's long running western art week. Charles M. Russell was a well known western artist that lived from 1864-1926 and the auction is run by the museum dedicated to him and his work.
So, here's where it starts! The wood for this one will be beautiful set of claro walnut for the back and sides with a sitka spruce top...  I almost always bend my sides over a hot pipe, but I recently made a bending mold for my grand concert shape (to save me from the woes of hand-bending curly maple!) and figured if I have it, might as well use it...  For any of you who have followed my other builds, you'll know I'm a fan of laminated sides and this one is no different. I want the sides to be super stiff and act as a rigid base for the top to vibrate on. Here a side is clamped in my lamination mold (which is my regular molded taken apart and folded in half)... 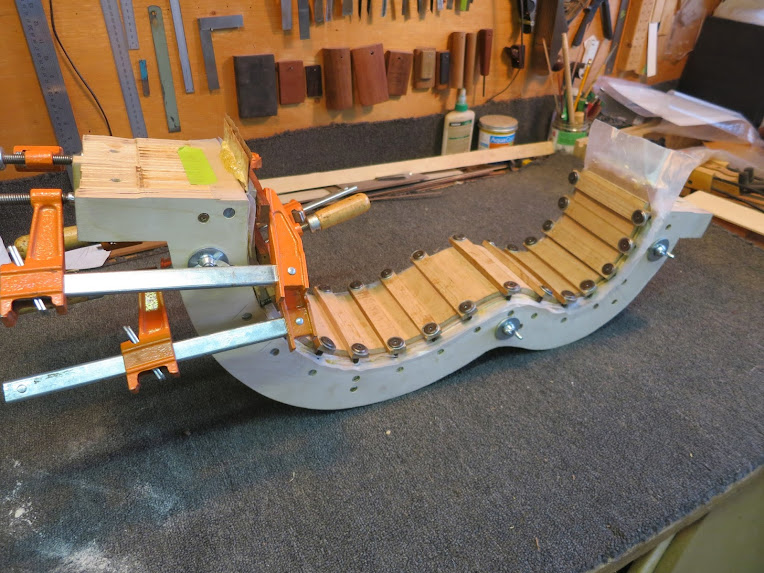 The most exciting part of this guitar for me will be the top -- I'll be trying a wood burning and f-holes! More pictures soon... Mike 
|
|
#3
11-04-2014, 04:28 PM
|
||||
|
||||
|
Sounds interesting! I'll be following this one. The wood looks great already.
__________________
Home Texas : Time to Ride : Real Nice Day : Make Things Right : For Dreams : YouTube : Spotify
|
|
#4
11-06-2014, 12:10 PM
|
||||
|
||||
|
With the sides fully laminated, time to glue in the blocks and join them together...
 For the past few years I've been putting in some laminated braces angled along the length of the back. These braces are typically made of the same material as the back (walnut in this case) and are two pieces pre-laminated into a 15' arch before gluing to the back. The goal is to make a really stiff back that will maintain it's arch over time; essentially a latticed braced back. In this picture you can see my template between the braces that ensures a consistent angle from guitar to guitar...  Now for the exciting part! The wood burning on the top...  The image is C.M. Russell's logo and initials. After sizing and printing out the logo, I took some carbon transfer paper and traced it onto the top. Then, it was just a matter of learning how to burn wood! 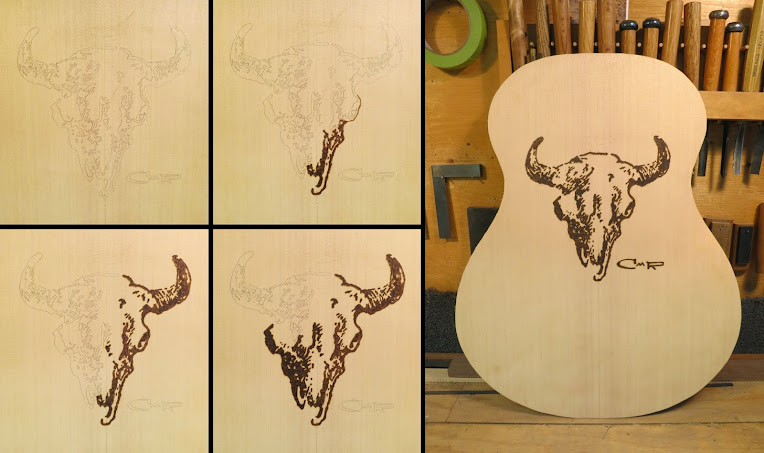 It was a bit tiring on my hand, but I'm really happy with how it turned out! Next up is designing the f-holes and bracing the top. Mike
|
|
#6
11-06-2014, 03:38 PM
|
|||
|
|||
|
So rad!! Loving this one and will be following for sure!
__________________
Brad
|
|
#7
11-07-2014, 12:35 PM
|
||||
|
||||
|
Quote:
Quote:
One of the new things will be f-holes. I had a fun couple of days coming up with a design and I think I've settled on one...  It's a bit hard to tell scale from that picture but I should have the top braced (and f-holes cut out) in the next few days! Mike
|
|
#8
11-12-2014, 12:21 PM
|
||||
|
||||
|
Another challenge with this guitar is coming up with a new(ish) bracing pattern for the top to account for the f-holes. This is a mid-bracing picture but you can get the gist of what I'm going for...
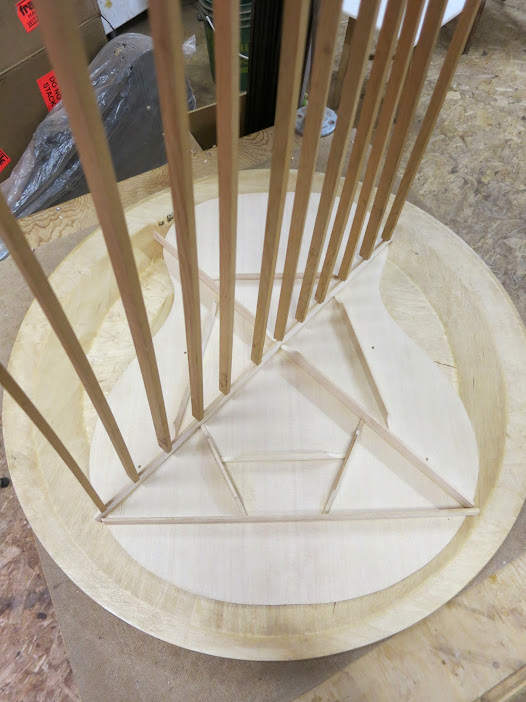 Once the top was braced it was time for the fun part -- cutting out the f-holes...  Using an arsenal of saws, knives, rasps, and bits of sandpaper I was able to get the job done reasonably quickly...  Here's a shot of the fully braced (but un-tuned) top...  And here is how the f-holes turned out! 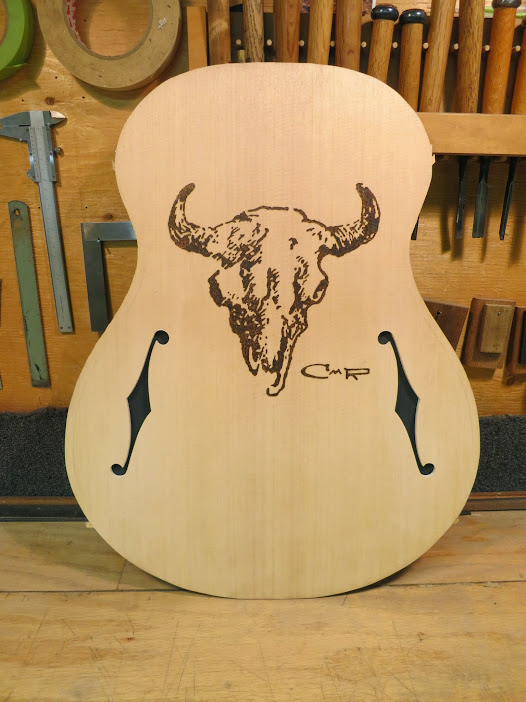 Today I'll work on carving down the braces and tuning the top. I'm quite interested to see how this pattern will respond as I'm carving. Mike
|
|
#9
11-17-2014, 10:56 AM
|
||||
|
||||
|
I made some more progress on this one the end of last week. Here's a shot of the fully braced and tuned top...
 In a side by side comparison you can see there's quite a difference before and after tuning. Since this pattern was an unknown, I glued on the braces a bit taller than normal to make sure I had some material to work with... 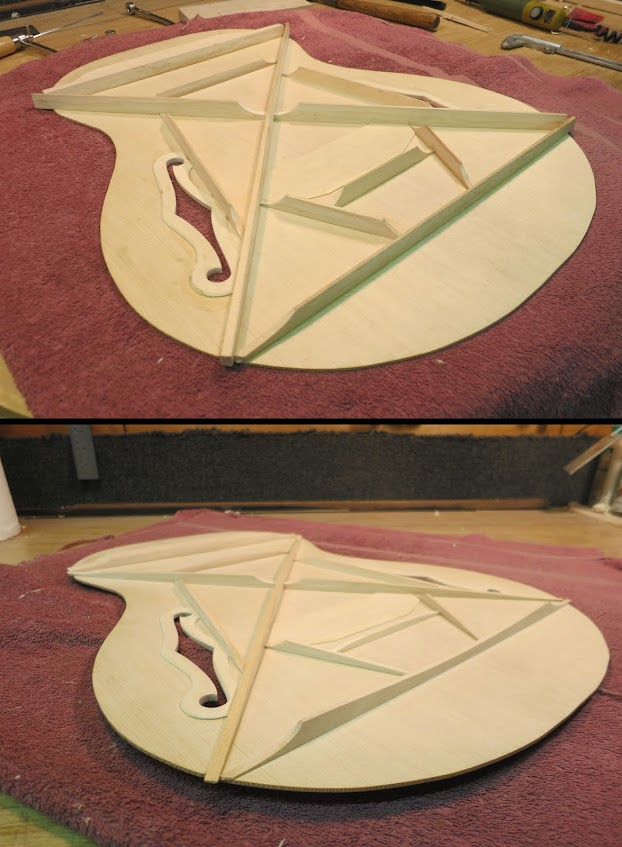 One of the basic goals in tuning the top is to try to get a closed ring and a half pattern. This one worked out great!  And ready to be joined... 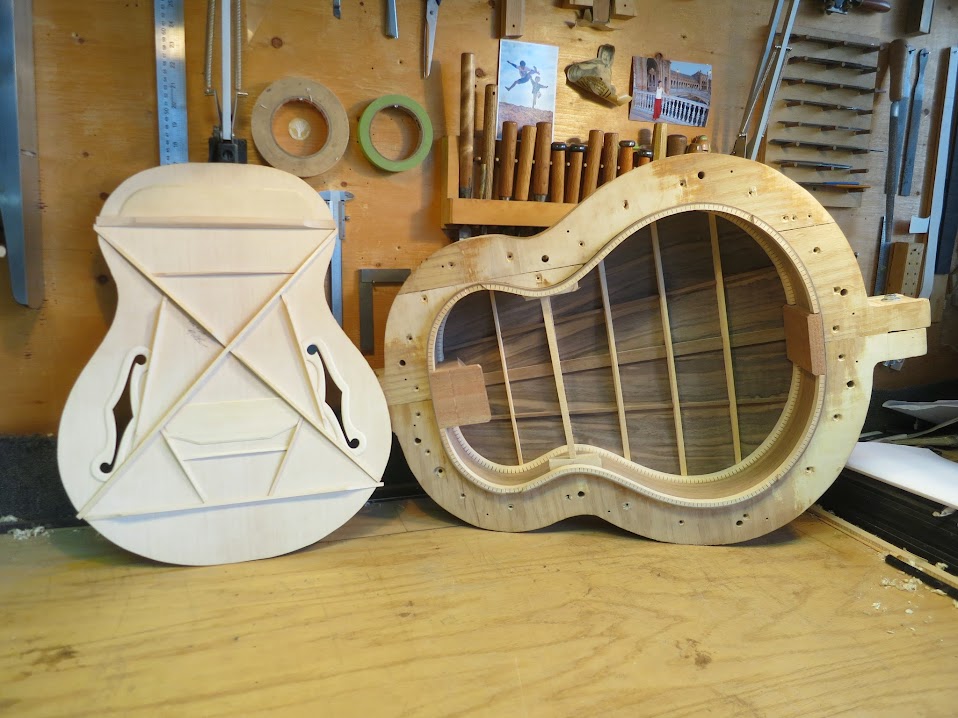 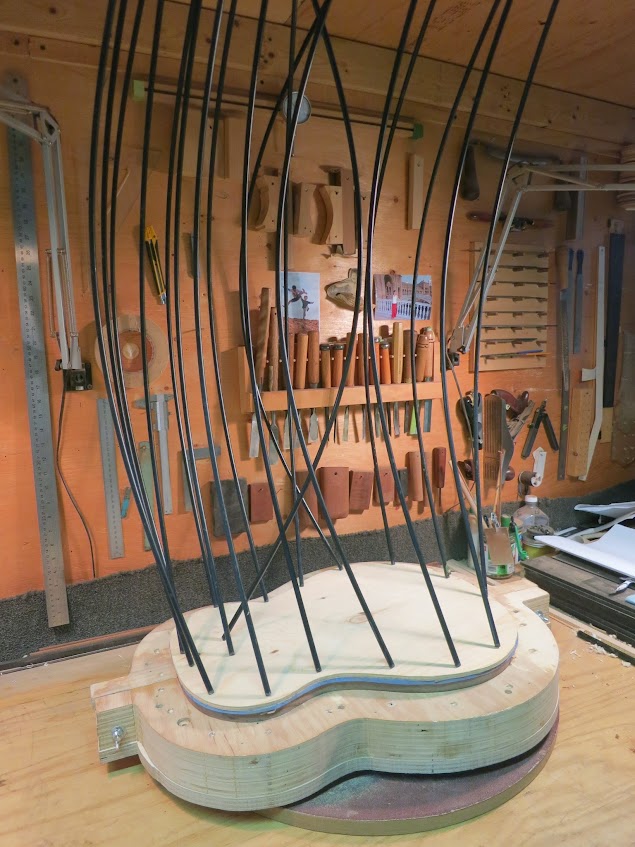 Next up is binding and starting on the neck! Mike
|
|
#10
11-25-2014, 10:58 AM
|
||||
|
||||
|
I had fun the past few days trying to figure out how to do the binding and end graft on this guitar. With only f-holes in the top, I needed another way to access the interior of the guitar and figured the end-graft was the best spot to do it! Here's a bit of the process...
Since this is just a one-off idea, I find it easier/faster to just use with knives and chisels to cut out the shape instead of making a template and routing (though I do clear out the bulk of material freehand routing)...  And putting in the frame...  The main part of the end-graft is another wood burning. Since this is a western themed guitar, I thought it appropriate to put my brand on it... 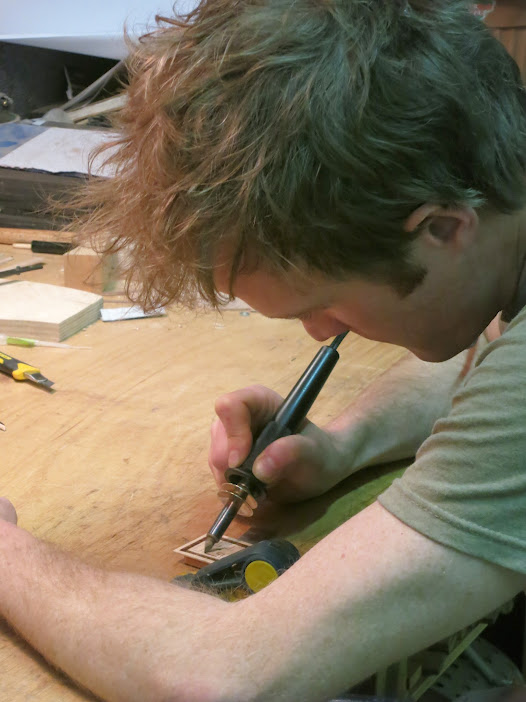  Now for the sneaky part with hidden magnets...  Once the end-graft was done, the rest of the binding was relatively standard...  Continuing with the western theme and another first for me, making some rope purfling! 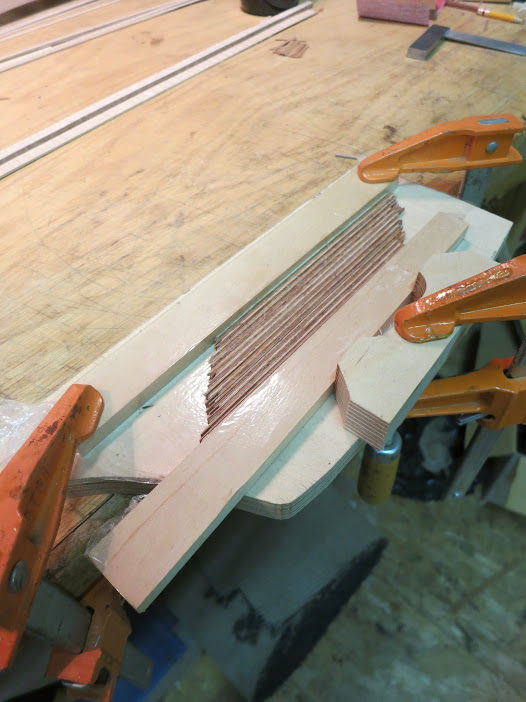  Once I clean up the guitar a bit it's on to the neck! Mike
|
|
#11
11-27-2014, 05:44 AM
|
|||
|
|||
|
Mike, this build looks fantastic! Familiar but with a very original twist. The build quality obviously looks outstanding.
|
|
#13
11-27-2014, 10:29 AM
|
||||
|
||||
|
Quote:
Quote:
 Mike
|
|
#14
11-27-2014, 11:49 AM
|
|||
|
|||
|
Making a comment just so I can follow this build.
WOW!
__________________
Bill http://www.billpillmore.com Favorite Guitars Woolson LG Woolson OM (Special Bracing/Double Top) Bashkin SJ-12 Baranik Retreux Parlor H&D 00-SP Cedar John Kinnaird Hi-Strung Guitar
|
|
#15
11-27-2014, 11:51 AM
|
|||
|
|||
|
Quote:
|


