
|
|
#16
 04-18-2010, 04:44 AM
|
||||
|
||||
|
Very cool. Great looking wood. WEAR A Dust Respirator! Cocobolo is toxic wood.
Cocobolo dust in the shop got Mary McKnight very sick. Beautiful wood but use with care. BTW ALways wear a dust mask. Lungs full of Mahogany ain't so good for you either! 
|
|
#17
04-24-2010, 02:23 PM
|
|||
|
|||
|
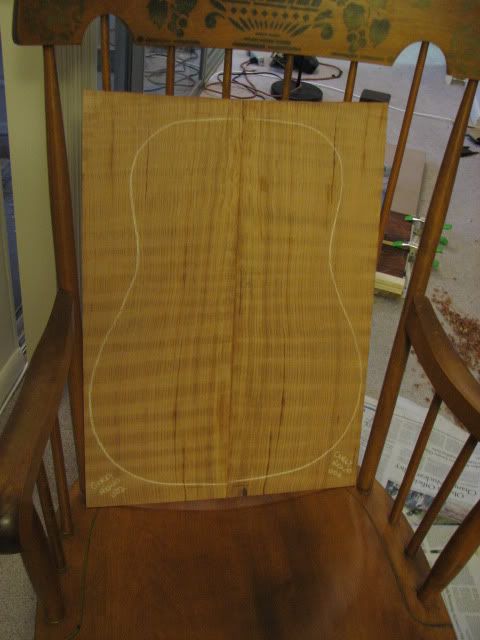
Thanks for the words of advice, I don't think I'll be ready to die at least until after I finish this build!
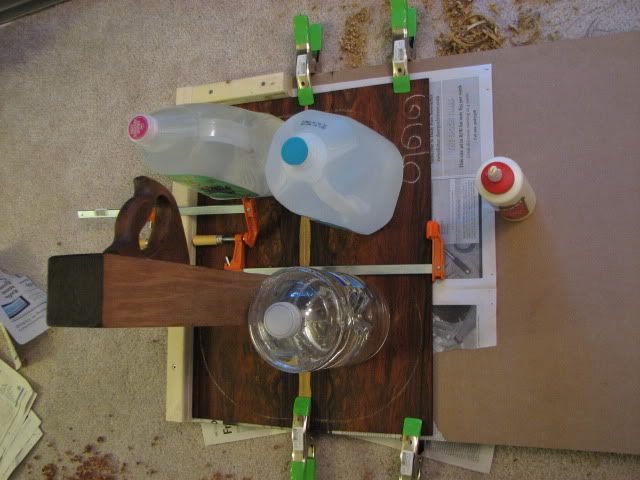
Just put together my shooting board to join the top and back plates (never noticed until now, but why do we call it that instead of "front and back" or "top and bottom"? Just another oddity to love). I'm a little concerned about the length, but if it doesn't work I'll switch the stops. Per Steve Summerford's blog, I also chose to use a big enough sheet of MDF to double as a workboard for gluing the plates and anything else that may come up. I ended up getting this old wooden jointer plane off of ebay for cheap (I won't list the price, but lets just say it was a single digit). I have a feeling I'll need to true the sole and make a few other adjustments, but that's a small price to pay for using a unique tool. Unfortunately that's one of the sale photos with the shop in the background.....too bad that didn't come with the auction...  
__________________
My First Build!!! Curly Redwood/"Cloudy" Cocobolo Rosewood -- http://acousticbuilder.blogspot.com 1960s Gibson Hummingbird Regal Black Lightning Resonator etc. Last edited by Savashchi; 04-24-2010 at 02:23 PM. Reason: Typo
|
|
#18
04-26-2010, 09:42 AM
|
|||
|
|||
|
Nice to see the hand tools. I enjoy working with them as well. For the wooden plane you'll most likely need to flatten the sole. A really flat surface (e.g. a nice thick piece of MDF) and sandpaper will work, if you know someone with a jointer then even better. However, more importantly the blade will need to be set to give a square edge when using the shooting board. Two things come into play here, the squareness of the sides to the sole and the lateral adjustment of the blade. It is best to get the sides of the plane square with the sole so you only have to tweak the lateral adjustment of the blade. Test it on a thicker piece of scrap to verify squareness before shooting the thin top and back plates.
Also, I noticed that your shooting board has two fences (top and left in the picture). Most of the shooting boards I've seen only have a single fence (the top one on your picture. I'm not a luthier so that may be intentional, if so then disregard my comment.
|
|
#19
04-26-2010, 11:36 PM
|
|||
|
|||
|
I'm glad you are moving out of the planning stages into the actual build. I'm watching this beautiful wood become a beautiful guitar!!!
A little tip when you get to the fingerboard- a little somethin nobody ever mentioned. Not sure how you plan on radiusing it but a little something to remember that I just came across in my first build is if you radius a rectangle evenly and then taper it the wide part of the fretboard @ first fret is going to be much thinner than down at the 14th fret so... keep that in mind so down the road when you get there you'll avoid doing things twice 
|
|
#20
05-01-2010, 12:06 PM
|
|||
|
|||
|
Quote:
Quote:
The Update: The plane came in the mail this week, and of course I was excited to get to work. Far too excited as it turned out, when I quickly began working on the Redwood top. The sole was fairly true but I soon realized that the side was not, and getting a good joint was impossible.   Considering Ruston's advice above, I decided to use the back side of my MDF shooting board/workboard/sanding board to true the sole and side:  I felt like I had Popeye arms by the time I was done, it took a long time by hand. Although blurry, this photo taken part way through truing the side gives an idea of how much the side was out of whack:  After adjusting the plane I got the top ready to glue, now I'm working on the back. I'm not having as much luck with the hardwood, I'm going to sharpen the blade and see if that helps att all. If not I may have to get a regular jointing plane, the lack of adjustability with this old wooden jointer makes using it difficult.  Next up, sharpen the jointer blade and get the back ready to glue. Then glue the top and back,cut out the plywood template and finish its construction, and begin planing the top and back down to the correct thickness
__________________
My First Build!!! Curly Redwood/"Cloudy" Cocobolo Rosewood -- http://acousticbuilder.blogspot.com 1960s Gibson Hummingbird Regal Black Lightning Resonator etc.
|
|
#21
05-08-2010, 05:37 PM
|
|||
|
|||
|
Finished joining the plates, not the best seam ever but I think it will work. Here's the top after joining, and the back being glued (as I type in fact). As you can see this is not the most professional set-up, but it works fairly well
__________________
My First Build!!! Curly Redwood/"Cloudy" Cocobolo Rosewood -- http://acousticbuilder.blogspot.com 1960s Gibson Hummingbird Regal Black Lightning Resonator etc.
|
|
#23
05-23-2010, 10:06 AM
|
|||
|
|||
|
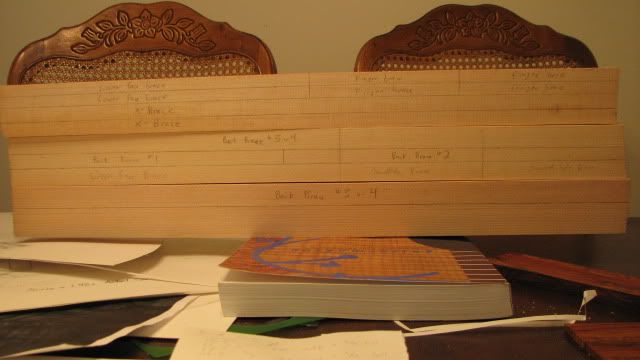
After a major snafu getting the brace blanks etc. delivered to my house, today I've drafted out the bracing and gotten the Sitka Spruce brace blanks marked for sawing. I basically ordered an extra blank and a half of bracing since this is my first time, and want to have enough in case of errors. Here is the bracing drawn out on the blanks:
 Then I thought I could use a backsaw to cut the braces out, only to discover that's not going to work very well. After using a straight-edge and a knife to score the line for the saw to ride in, then using a framing nail to again score the trench I began carefully sawing. After working on it for quite a while I had only sawn less than 1/4" depth, so I'm going to have to find something else. At this pace I would be spending the next three weeks sawing these. 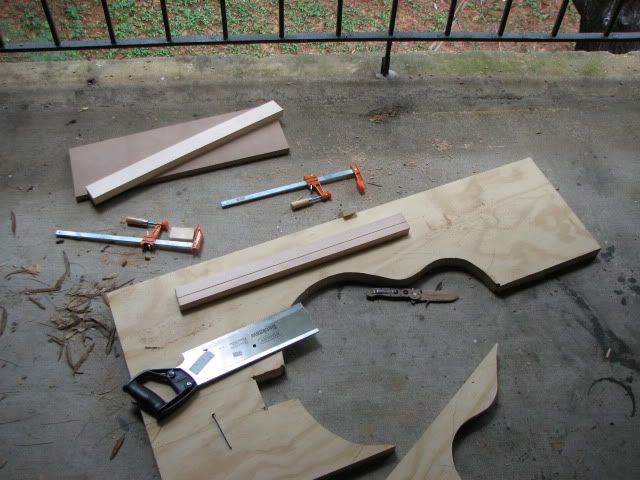 I found a cheap Ryobi table saw used on craigslist that I'm hoping to get, it will come in handy later on too. The stand will also double as a stand to clamp my template to. In the meantime I'm going to cut out the plates and finish constructing my template. I'll post another update later today
__________________
My First Build!!! Curly Redwood/"Cloudy" Cocobolo Rosewood -- http://acousticbuilder.blogspot.com 1960s Gibson Hummingbird Regal Black Lightning Resonator etc.
|
|
#24
05-25-2010, 11:14 AM
|
|||
|
|||
|
I really think your best bet is to get a cheap tablesaw or bandsaw like you say. I use a 10" chopsaw which has a built in tablesaw to rough cut the braces then I tidy them up to get them flat. I don't have a bandsaw as of yet, however I am on the prowl for one as I am fed up of using a coping saw for everything!
|
|
#25
06-01-2010, 08:52 AM
|
|||
|
|||
|
Backsaws are typically filed for crosscut so trying to rip with one is inefficient (I also learned this from experience
) If you want to use a hand saw you'll need a panel saw (not a backsaw) filed for ripping. The benchtop table saw you are looking at would be even better.Good luck on your build. Your positive attitude is inspiring and I enjoy your posts.
|
|
#27
10-07-2010, 04:17 PM
|
|||
|
|||
|
Let me add two cents worth. First the sound hole goes to the end of the fretboard. It's not something you can move around much. The bridge also has to go into a certain place. There is a tool you can get a stewmac that will help with bridge placement. If the bridge isn't in the right place the intonation won't be right. If the soundhole isn't in the right place you may see parts of your rosette showing that you don't want to be seen.
I really want to hear this combination of woods. I'll bet that will be killer tone.
__________________

|


