
|
|
#16
 11-11-2019, 05:22 PM
|
|||
|
|||
|
Quote:
Ken
__________________
www.casperguitar.com 
|
|
#17
11-14-2019, 01:26 PM
|
|||
|
|||
|
The red spruce guitar needed some work to catch up. I got linings on the rims, braced and carved the top and backs, and this morning, closed the box. I am not posting pictures as the process was basically identical to what I posted on the Engelmann build. After routing off the overhanging spruce, I level sanded the rims, so both bodies are now ready for binding. Here are a few pictures of the two bodies:
   Enjoy the day! Ken
__________________
www.casperguitar.com Last edited by Kenneth Casper; 04-16-2020 at 04:26 PM.
|
|
#18
11-14-2019, 03:25 PM
|
|||
|
|||
|
These are looking great!
Love the looks of that adi top too!
__________________
2013 Stehr Auditorium (Carpathian/Myrtle) 2015 Stehr Auditorium (Adi/BRW) 2020 Baranik Meridian (Blue Spruce/Manchinga) 2020 Wilborn Arum (Tunnel 14/Coco) 2021 Kinnaird Graybeard (BC Cedar/Bog Oak) 2022 Kinnaird CS Student Build (Adi/Padauk) 2023 Kinnaird FS (Italian/Koa)
|
|
#19
11-15-2019, 03:45 PM
|
|||
|
|||
|
Quote:
My wife and I are off to warmer climes for several days, so the shop will be idle. I'm at a good stopping point, though. I'll pick up with binding when I get back Ken
__________________
www.casperguitar.com Last edited by Kenneth Casper; 04-16-2020 at 04:26 PM.
|
|
#20
12-10-2019, 09:01 PM
|
|||
|
|||
|
About time I post an update to these two builds. Nice to be back in the shop again after some time away. I am sure Jack is glad to see progress being made again.
I previously made up some wenge bindings for these two guitars. Wenge has a lot of figure when flat sawn. The quartersawn face has grain lines that run tightly parallel to one another. I want the quartersawn face to be the wider edge of the binding. Flatsawn face:  Quartersawn face:    A fist full of wenge binding: 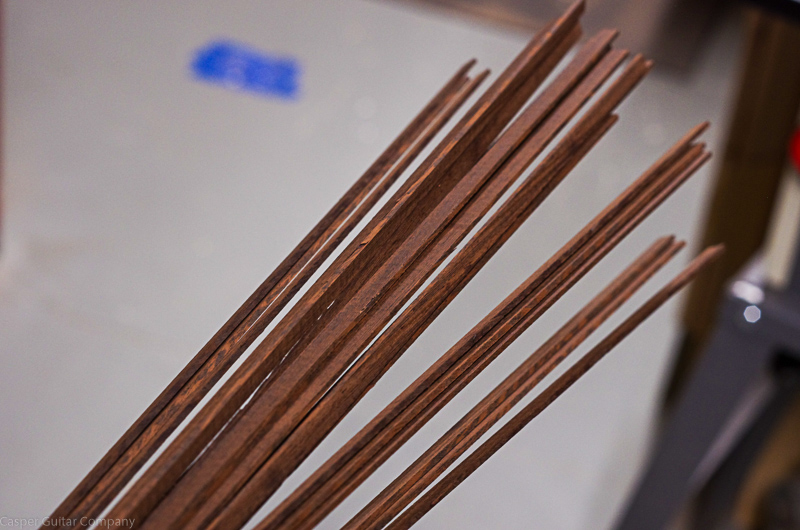 Because we are using osage orange purflings, these need to be bent along with the binding strips. I tightly tape the binding and purfling together so the purfling strips don't roll when bending. I then run the taped up binding and purfling through my bender: 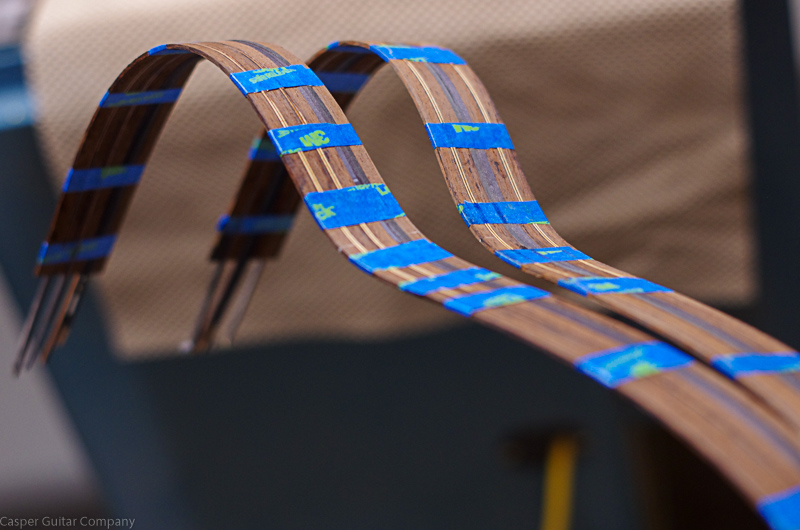 I cut the binding and purfling channels using my laminate trimmer, which is mounted to a jig that keeps the trimmer straight. I put the Engelmann body in a carrier that allows me to level the body so the rims are 90 degrees to the table surface:  The laminate trimmer does a good job at cutting the channels, but I still use a small sanding block to clean up the channels and run a scraper around the inside corners:   I test fit the binding and purfling prior to gluing in:  I like to move quickly when gluing in the binding and purfling, so I cut miters and butt joints and pre-cut pieces of binding tape. With everything laid out, I am ready to go:  I start at the tail graft and work my way around one side of the soundboard, gluing and taping as I go. When one side is done, I repeat the process with the other side. Once the top binding and purfling are taped in, I wrap the entire body with twill tape to pull all the joints in tight:   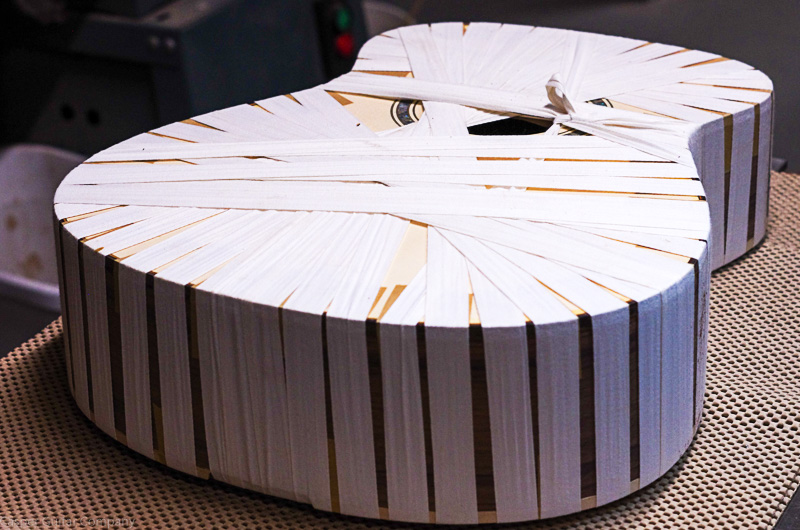 I got the back bindings on the Engelmann body this afternoon as well as the top bindings on the red spruce body. Tomorrow I should finish up binding and will start leveling. I'll post more pix when get both bodies done. Thanks for following along. Ken
__________________
www.casperguitar.com Last edited by Kenneth Casper; 04-16-2020 at 04:27 PM.
|
|
#21
12-12-2019, 02:26 PM
|
|||
|
|||
|
I finished binding and got both guitars leveled and sanded. I work very meticulously to get nice tight joints, but I am never really certain how well I did until I level and sand. It is sort of like an unveiling. No issues with these as the joints and seams are tight with nice straight lines. The osage orange really pops under some mineral spirits.
Others have mentioned, and I believe I have before as well. Being a luthier gives me a chance to work with some really nice woods. I admit I do get a bit of a rush after the bodies are bound, purfled, and sanded, and I swab them with mineral spirits to pop the color and grain. Enjoy the pix and thanks for dropping by! The third guitar is a cherry Huron. I slipped it in to get pictures of all three bodies I have been working on. Ken       
__________________
www.casperguitar.com
|
|
#23
12-12-2019, 03:01 PM
|
|||
|
|||
|
Kenneth - gorgeous instruments. The bound bodies look absolutely fantastic!
|
|
#24
12-12-2019, 03:11 PM
|
|||
|
|||
|
Quote:
The osage orange was a great choice to set things off.
__________________
2013 Stehr Auditorium (Carpathian/Myrtle) 2015 Stehr Auditorium (Adi/BRW) 2020 Baranik Meridian (Blue Spruce/Manchinga) 2020 Wilborn Arum (Tunnel 14/Coco) 2021 Kinnaird Graybeard (BC Cedar/Bog Oak) 2022 Kinnaird CS Student Build (Adi/Padauk) 2023 Kinnaird FS (Italian/Koa)
|
|
#25
12-12-2019, 04:53 PM
|
|||
|
|||
|
Thanks for jumping in and sharing the nice comments!
Quote:
Quote:
Quote:
__________________
www.casperguitar.com
|
|
#26
12-12-2019, 09:54 PM
|
||||
|
||||
|
Wow, Ken, those look fabulous. That wee strip of Osage looks electric under the mineral spirits. What a nice touch!
Steve
|
|
#28
12-13-2019, 09:14 AM
|
|||
|
|||
|
Your work is so beautiful, Ken! These are turning into gorgeous guitars!
I played my Casper Huron yesterday- what a beautiful instrument.... I still just love to look at her. And the playability is excellent and the tone is continuing to open up. I'm looking forward to continuing to check in on what you're up to in that Michigan workshop! Thanks for sharing with us! beth
|
|
#29
12-13-2019, 09:33 PM
|
|||
|
|||
|
Quote:
Quote:
Quote:
 Happy to have you all following along! Ken
__________________
www.casperguitar.com
|
|
#30
12-14-2019, 05:35 PM
|
|||
|
|||
|
With the bodies done, I started working on the necks. I had previously glued up the neck blanks of mahogany and wenge laminates. I typically build my necks using five laminations with the two narrower laminations fanning out over the heel. This was my approach with these two necks as well.
I do not plan to start a debate on hand carved vs CNC milled necks. I'll just say my CNC is a great help in my one man shop and allows me to get very repeatable neck profiles. First thing I do is mill a slot for the truss rod then flip the blank over to mill the heel, profile, and back of headstock:   I cut the face of the headstock on my bandsaw then clean it up on the belt sander:  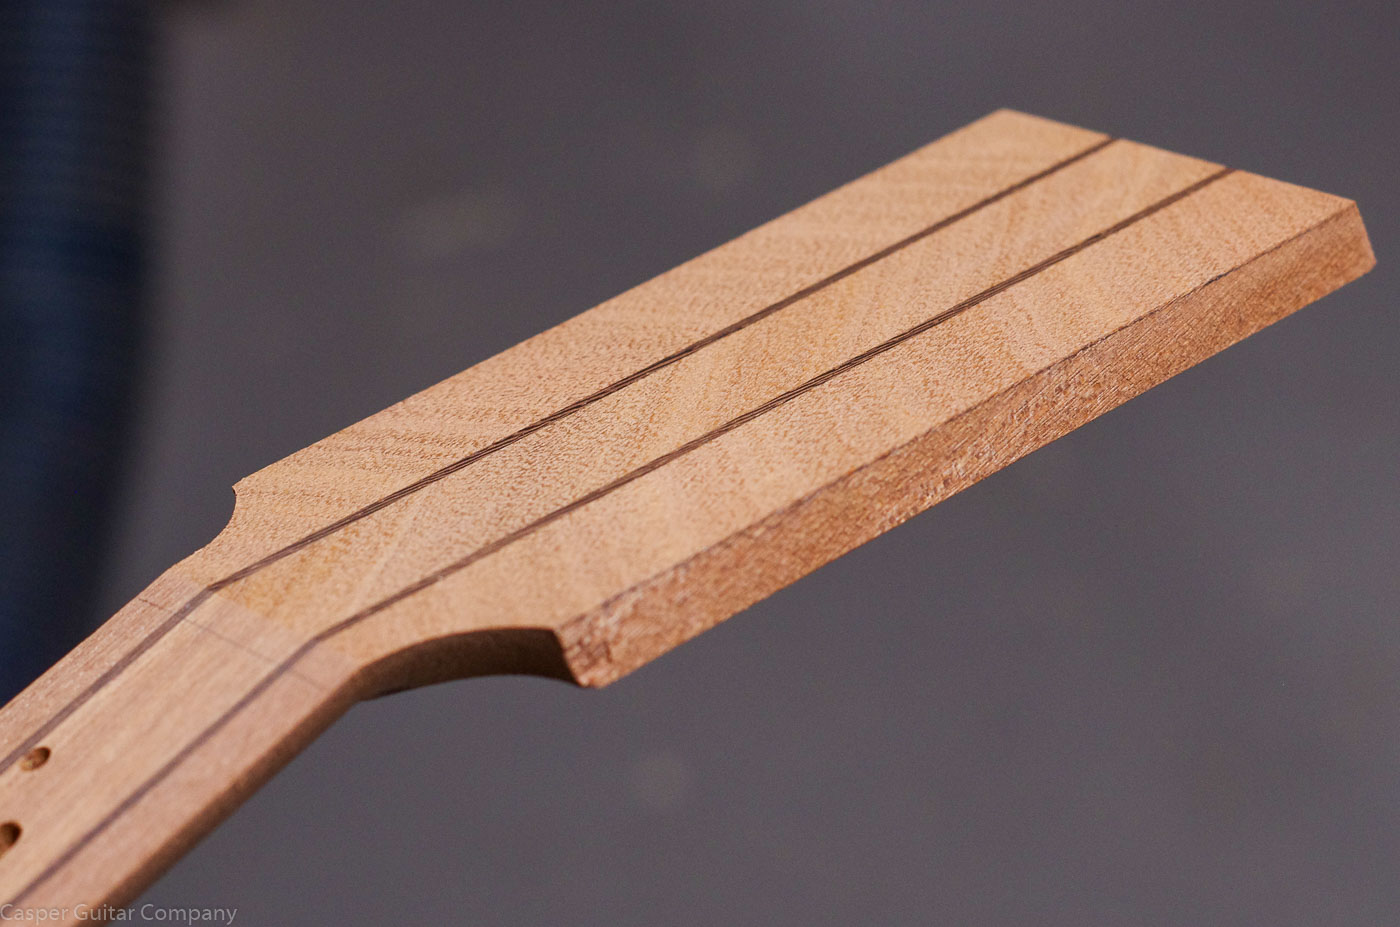 I use a bolt on mortise and tenon neck. The mortise and tenon are cut using a jig that takes into account the needed angle for the neck joint:   I installed a pair of barrel nuts in each tenon and drilled matching holes in the neck block for the bolts to pass through to the barrel nuts in the tenon. Prior to routing the heel tenon, I wicked super glue into a few key areas of the neck heel to minimize tearout. You can see this in the image below. This will all be cleaned up when I final shape and sand the neck after the fingerboard is on:   The neck needs to be hand fitted with a chisel and sandpaper to ensure a nice tight fit: 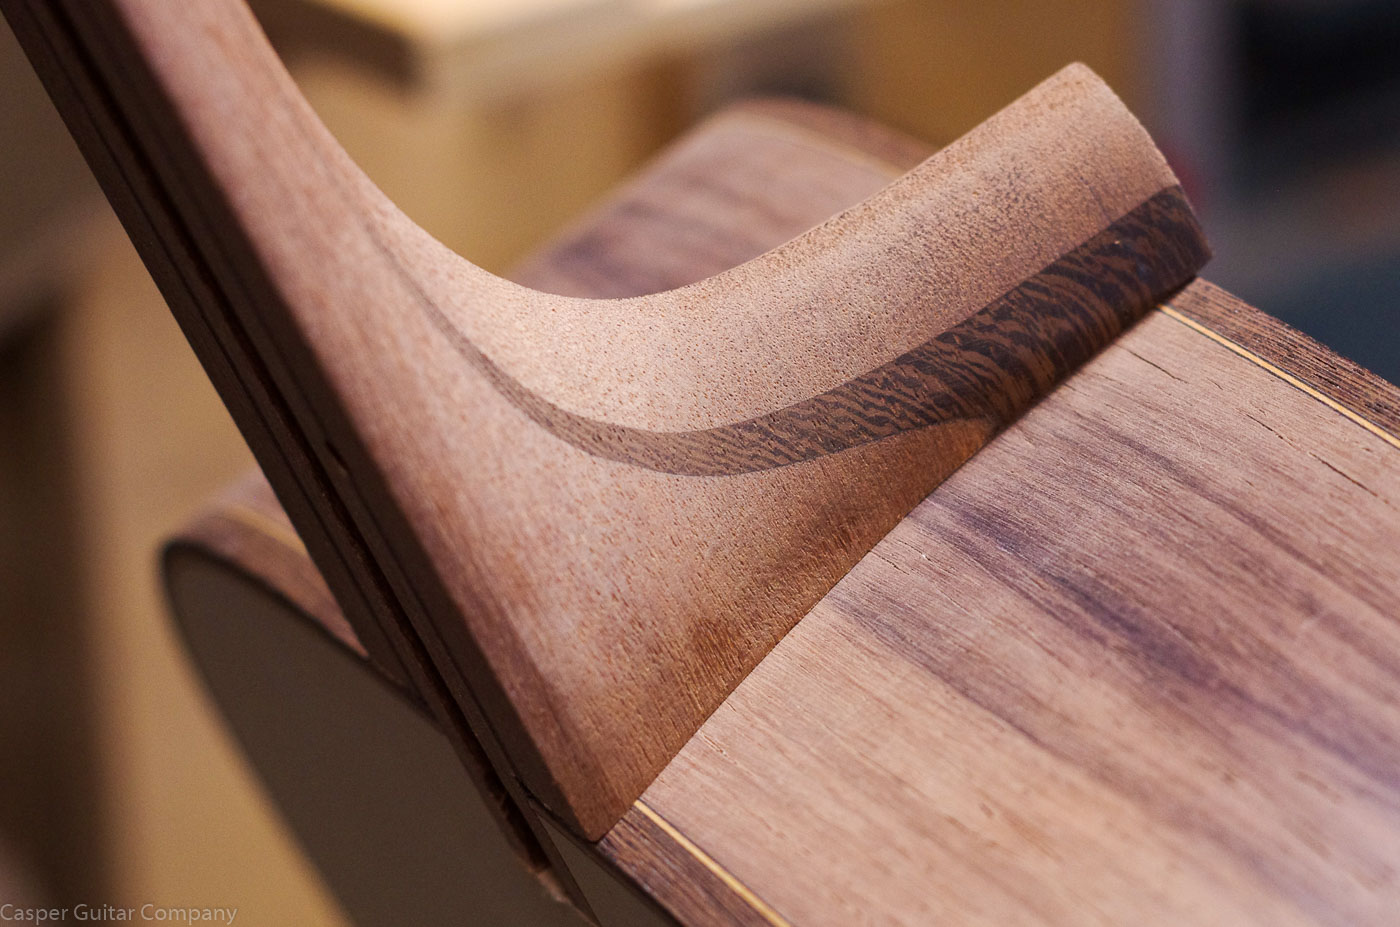  Looking like guitars now! Enjoy the weekend! Ken
__________________
www.casperguitar.com
|


