The Acoustic Guitar Forum

Go Back   The Acoustic Guitar Forum > General Acoustic Guitar and Amplification Discussion > Custom Shop

Reply
 
Thread Tools
  #46  
Old 04-30-2015, 02:06 PM
gregg gregg is offline
Registered User
 
Join Date: Jul 2006
Location: Dahlonega, Georgia
Posts: 1,141
Default

Quote:
Originally Posted by colins View Post
That looks amazing Greg!

Col
Thanks a lot Colins....I cut the back plate shape out today and just laid it on the rim for effect, sure is some pretty wood, think it is gong to be a beaut! I also am on a mission to lighten up my guitars which takes some thought considering the parts & pieces I use in my construction. Back plate center strip and bracing should be completed this weekend, not too long now and I will have a guitar body.

Take Care!
__________________
Greg Gwaltney
Reply With Quote
  #47  
Old 05-02-2015, 01:18 PM
gregg gregg is offline
Registered User
 
Join Date: Jul 2006
Location: Dahlonega, Georgia
Posts: 1,141
Default

Here is the back center strip being glued on...it has cross-grain spruce capped with a piece of Aussie Blackwood. Spent most of the day hand splitting Lutz Spruce billets to make my top and back braces, they will go on the back tomorrow.


__________________
Greg Gwaltney
Reply With Quote
  #48  
Old 05-13-2015, 11:49 AM
gregg gregg is offline
Registered User
 
Join Date: Jul 2006
Location: Dahlonega, Georgia
Posts: 1,141
Default

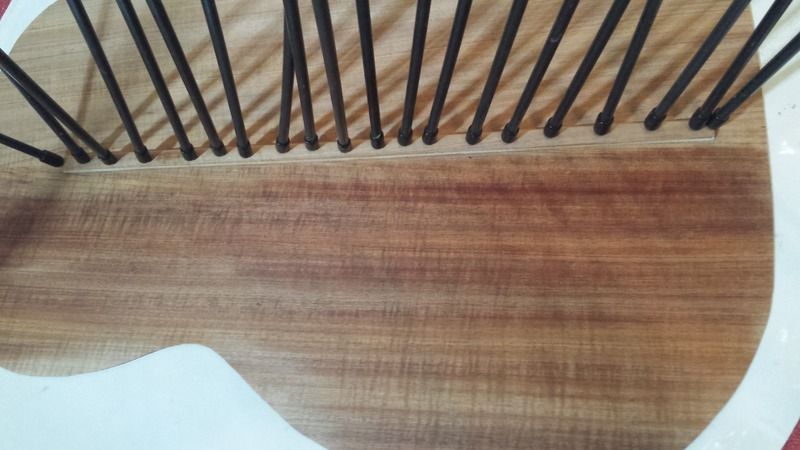
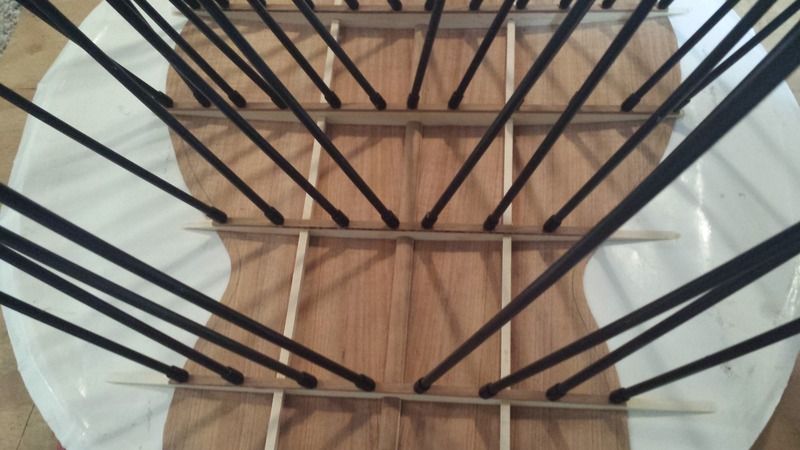
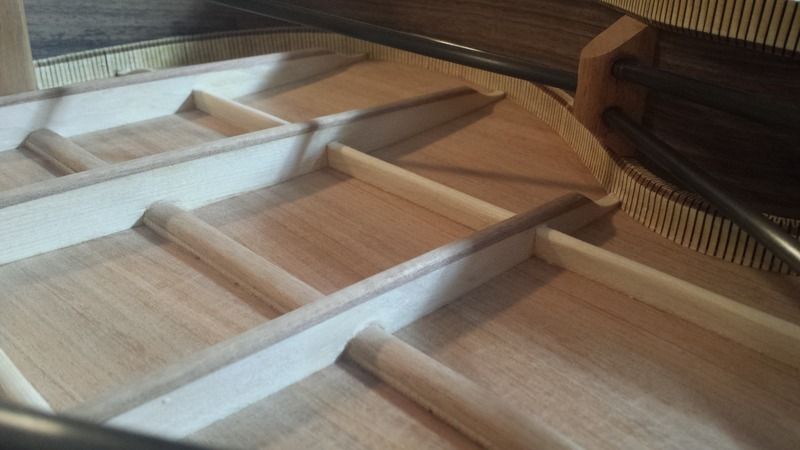
Here I am just dry fitting the back braces, still some work to do. I've used various lattice type braced backs for years, this is a bit different than the ones I've used previously as I felt this guitar would benefit from the structure used here....really like it so far. I will most likely cap the cross braces with Aussie Blackwood strips.

__________________
Greg Gwaltney
Reply With Quote
  #49  
Old 05-14-2015, 11:25 AM
gregg gregg is offline
Registered User
 
Join Date: Jul 2006
Location: Dahlonega, Georgia
Posts: 1,141
Default

This is one of the jigs I use for brace making. Don't mind the scrap piece of brace wood in the pic, it won't work in this jig, but might be used elsewhere.

__________________
Greg Gwaltney
Reply With Quote
  #50  
Old 05-18-2015, 06:18 PM
gregg gregg is offline
Registered User
 
Join Date: Jul 2006
Location: Dahlonega, Georgia
Posts: 1,141
Default

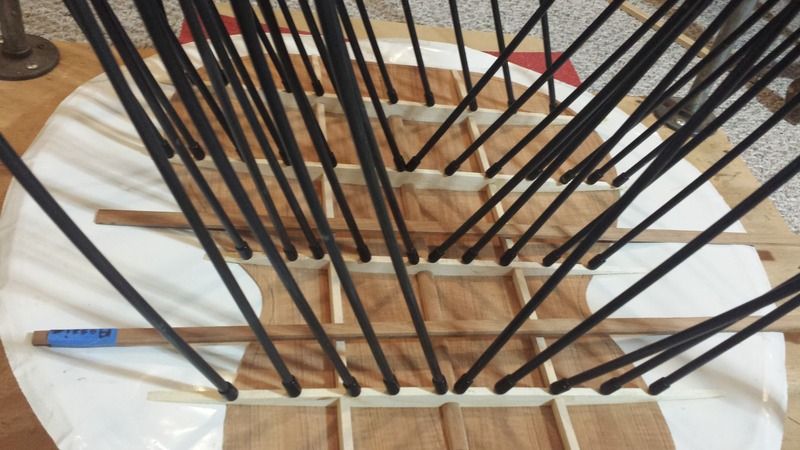
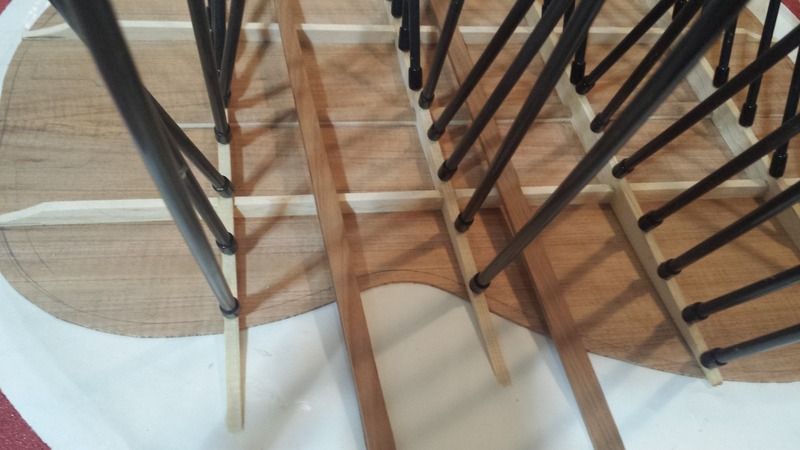
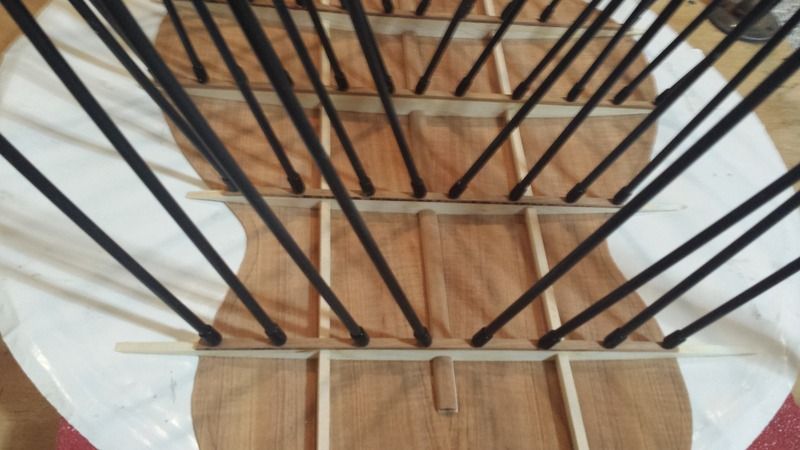
Here are a few shots of the back braces being glued on....the other wood laying across the spruce bracing is the Aussie Blackwood brace caps to be installed tomorrow. Hoping to have the back plate glued on the rims by the weekend. Started working on the rosette and top plate as well, pics of those coming soon.


__________________
Greg Gwaltney
Reply With Quote
  #51  
Old 05-19-2015, 09:28 AM
Rob C Rob C is offline
Registered User
 
Join Date: Mar 2014
Posts: 42
Default

That is an interesting back brace configuration. I will be watching this with interest.
Reply With Quote
  #52  
Old 05-19-2015, 09:30 AM
CoolerKing's Avatar
CoolerKing CoolerKing is offline
FKA matthewpartrick :)
 
Join Date: May 2013
Location: North Havana
Posts: 5,344
Default

Cool bracing, and I'm looking forward to seeing the brace caps in place.
Reply With Quote
  #53  
Old 05-19-2015, 12:33 PM
gregg gregg is offline
Registered User
 
Join Date: Jul 2006
Location: Dahlonega, Georgia
Posts: 1,141
Default

Quote:
Originally Posted by Rob C View Post
That is an interesting back brace configuration. I will be watching this with interest.
I removed the go-bars and did a little tapping/flexing on the back today, very happy with the result. Some of my favorite sounding guitars I've built had some sort of lattice-like back bracing, they are a pain to use with extra work crafting/installing them, glue clean-up, etc.....but, thinking this is where I want to stay for now.
__________________
Greg Gwaltney
Reply With Quote
  #54  
Old 05-19-2015, 12:42 PM
gregg gregg is offline
Registered User
 
Join Date: Jul 2006
Location: Dahlonega, Georgia
Posts: 1,141
Default

Quote:
Originally Posted by matthewpartrick View Post
Cool bracing, and I'm looking forward to seeing the brace caps in place.
Hey Matthewpartrick....thanks, brace caps are under the go-bars as I write this, I'll throw up some pics later tonight. I have a little brace shaper/sander that I will use to round-over the caps as well, of course I will have to do that after the glue dries. Thanks for the comments, certainly more fun for me that way

I see you are from the keys, I grew up in South Florida and spent many a day down there fishing/diving/etc.....beautiful place.
__________________
Greg Gwaltney
Reply With Quote
  #55  
Old 05-19-2015, 04:12 PM
gregg gregg is offline
Registered User
 
Join Date: Jul 2006
Location: Dahlonega, Georgia
Posts: 1,141
Default

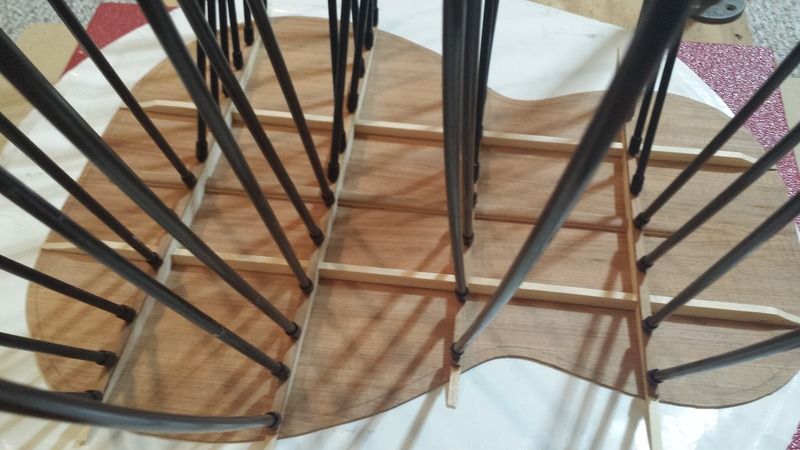
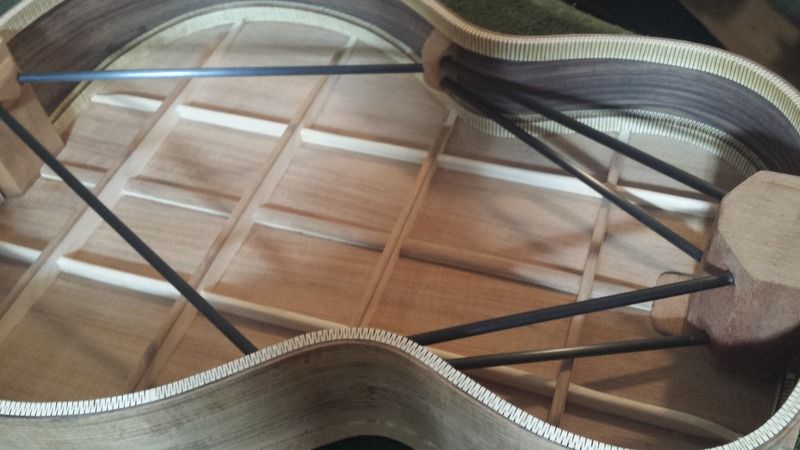
Here are the Aussie Blackwood brace caps being glued on, tomorrow I will shape the braces a bit as needed. I'm looking forward to seeing/hearing this back plate after it is glued to the rims.


__________________
Greg Gwaltney
Reply With Quote
  #56  
Old 05-20-2015, 08:37 PM
gregg gregg is offline
Registered User
 
Join Date: Jul 2006
Location: Dahlonega, Georgia
Posts: 1,141
Default

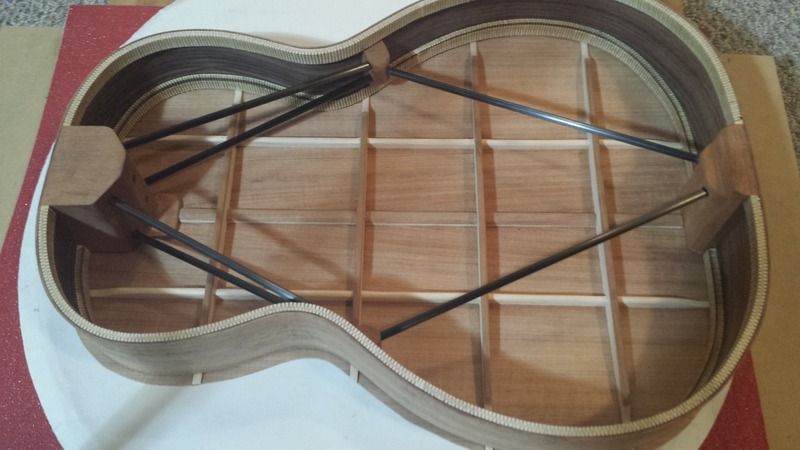
The back plate with capped cross braces is just about ready to be glued on to the rims, the rim is just sitting on the back plate here, I will inlet the back braces to the rim tomorrow. FYI...my camera will not download pics to my computer so I am using my cruddy phone pics for now.


__________________
Greg Gwaltney
Reply With Quote
  #57  
Old 05-30-2015, 03:56 PM
gregg gregg is offline
Registered User
 
Join Date: Jul 2006
Location: Dahlonega, Georgia
Posts: 1,141
Default

The back is now attached. I also have the rosette in the top with some bracing and bridge plate being glued down today. Making some decent progress, hoping to have the top glued on this week. I will do a bit of trimming/shaping of the neck and tail blocks as well before final assembly.


__________________
Greg Gwaltney
Reply With Quote
  #58  
Old 05-30-2015, 07:19 PM
SJ VanSandt SJ VanSandt is offline
Registered User
 
Join Date: Feb 2013
Location: Fort Worth, Texas
Posts: 2,124
Default

Man, that looks solid as a rock (but lighter, I'm sure)! Are you going to put the traditional strips along the sides to prevent cracks from spreading, or are they unnecessary with the double sides?
__________________
Hatcher Woodsman, Collings 0002H, Stella Grand Concert
Reply With Quote
  #59  
Old 05-30-2015, 08:46 PM
gregg gregg is offline
Registered User
 
Join Date: Jul 2006
Location: Dahlonega, Georgia
Posts: 1,141
Default

Quote:
Originally Posted by SJ VanSandt View Post
Man, that looks solid as a rock (but lighter, I'm sure)! Are you going to put the traditional strips along the sides to prevent cracks from spreading, or are they unnecessary with the double sides?
Yeah, you would not believe how stiff/rigid these rims are, the difference between a typical rim and this one is pretty amazing....actually it is very light, I weighed the components I use for the inner struts and it is just a few ounces, well worth it IMO. Good question about the side strips, I've done both with double sides, always used them on single sides. Guess there could be strong arguments for or against their use, but double-sides are a different animal for sure and much more stable and crack resistant.

Greg
__________________
Greg Gwaltney
Reply With Quote
  #60  
Old 06-27-2015, 01:02 PM
gregg gregg is offline
Registered User
 
Join Date: Jul 2006
Location: Dahlonega, Georgia
Posts: 1,141
Default

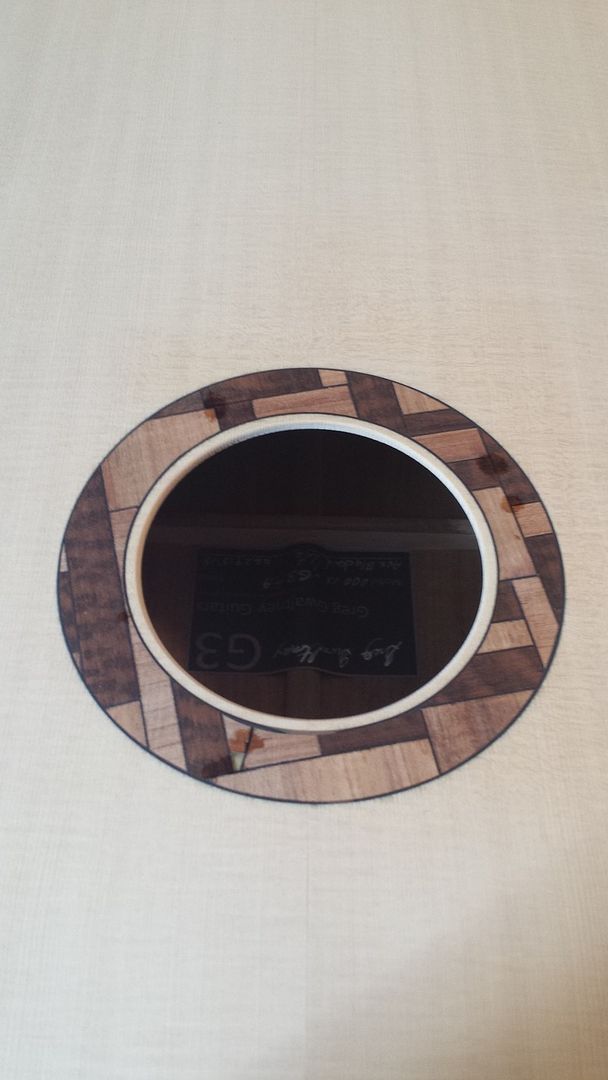
It's been a while since I posted any pics here, but I have done a lot to the guitar......Here is a pic of the rosette, you can see I am doing a little gap filling here. The top is braced and glued to the rim now, this is a different top/back/radius design for me so I had some fun tapping this closed box vs another closed box of previous design....wow, this thing is powerful, huge sound produced, my son noticed it immediately and said this guitar has his name on it....lol....told him we will build another one together soon. I will explain the new design a little later in this thread, but so far I am pretty excited about it, looks cool too. By the way, the rosette has snakewood, Aussie blackwood, and ebony in it. I am going to use snakewood and ebony for the binding/purfling and will incorporate all of these woods in the tail wedge, fretboard markers, bridge, as well as headplates.
__________________
Greg Gwaltney
Reply With Quote
Reply

  The Acoustic Guitar Forum > General Acoustic Guitar and Amplification Discussion > Custom Shop


All times are GMT -6. The time now is 02:35 PM.


Powered by vBulletin® Version 3.8.11
Copyright ©2000 - 2024, vBulletin Solutions Inc.
Copyright ©2000 - 2022, The Acoustic Guitar Forum
vB Ad Management by =RedTyger=