
|
|
#16
 12-31-2015, 10:47 AM
|
|||
|
|||
|
Happy New Year! Ken sent lots of photos last night as he finished the top bracing, shaved the top braces to where it had the balance and deflection he wanted, and closed up the guitar. So we have a box! The wedge looks good and Ken says he cradled it in his lap and it did what it's supposed to do- the added depth wasn't noticeable- pretty cool.
We were going to go with Amboyna Burl top purfling to match the rosette, but Ken is really liking this Indonesian Rosewood and has some left from the rims that he thinks would look really cool as top purfling. So I think we may go with that. Top bracing was glued on with hot hide glue  Soundboard is voiced and bracing sanded:   Rims are notched and ready for the top:  Gluing the top on:  Straight on view of the wedge:  View of the wedge showing just a touch of the back:  Deeper view of the back and wedge:  The back of this Huron Model (Ken's take on a Grand OM)  Front view of the Huron Body:  It's very exciting to see this guitar take shape! Thanks for following along on this wonderful journey- beth 
|
|
#17
12-31-2015, 12:57 PM
|
||||
|
||||
|
This is looking really cool. The woods are great. You know things are going well when the pictures of the top bracing are so pretty!!!! Sometimes it looks so nice it is a shame that they won't be seen!
__________________
PS. I love guitars!
|
|
#18
01-01-2016, 11:51 AM
|
|||
|
|||
|
Thanks for the kind words TomB'sox! Like so many of these talented luthiers, Ken's work is so precise and beautiful. I'm glad I will at least have pictures of the inside of this instrument
 I'm sure you're enjoying your new Kinnaird! It really is so gorgeous and I greatly enjoyed following your build thread.
|
|
#19
01-01-2016, 02:26 PM
|
||||
|
||||
|
Quote:
No problem, easy to be nice when something looks as great as this guitar does. Thank you for the kind words regarding my Kinnaird. I am enjoying it a lot, about 4 hours so far today...trying to learn some new stuff....comes slow, but once you have it...sooooo worth it. I am glad you enjoyed the thread(s), it was a lot of fun and had a lot of great back and forth....the build was stressful at some points, but it came out PERFECTLY and sounds fantastic. I will be following along on this thread as well!!! Best to you and Happy new Year.
__________________
PS. I love guitars!
|
|
#20
01-11-2016, 09:06 PM
|
|||
|
|||
|
I've made a bit of progress over the past couple of weeks, so thought I would provide an update on Beth's Huron build. After I closed the box, I leveled the rims and used my laminate trimmer to route the channels for the bindings and purflings, following up with routing the pocket for the tail graft. The body is now ready for some cocobolo bindings. This is all pretty straightforward stuff for the builders out there, but I'll post some pix anyway so you can see more of this crazy Indonesian RW
 Using a sanding bar with coarse sandpaper to level the rims. I wish there were an easier way to do this, but elbow grease is the best approach I've found: 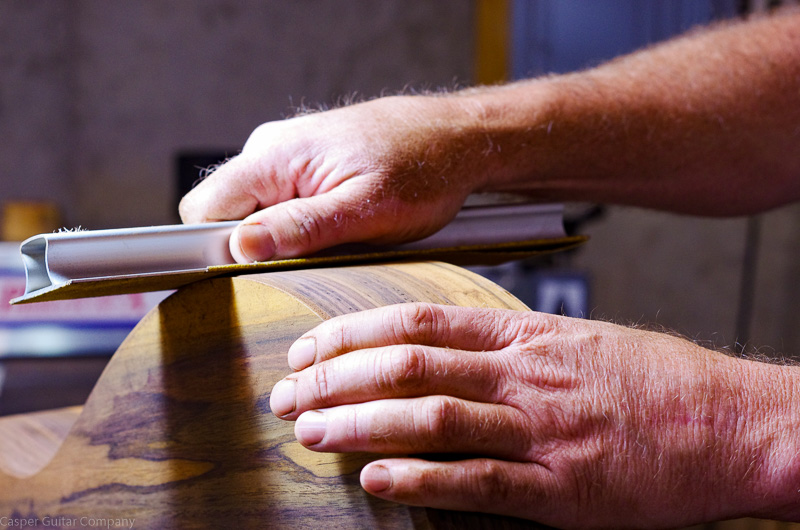 Routing the channels for the bindings and purflings. Given the wedge shape of the body, the jig for the laminate trimmer was greatly needed: 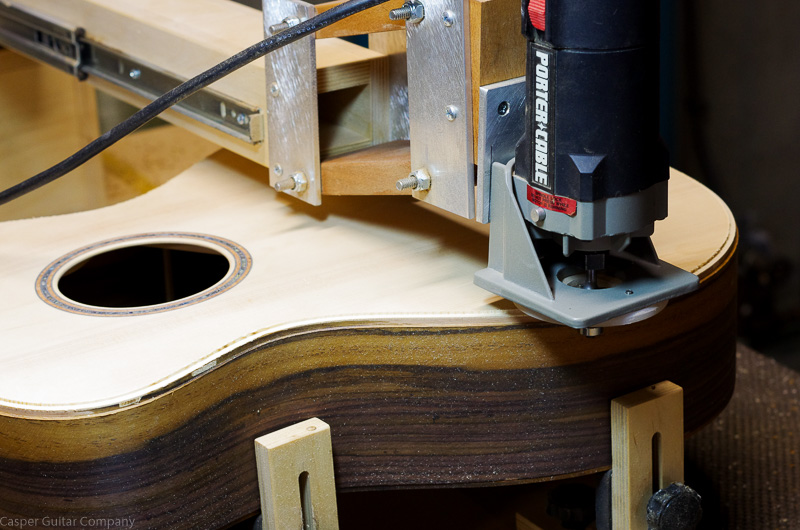 Always a bit scary to take a laminate trimmer to a recently closed box, so I am always relieved when all the channels are routed: 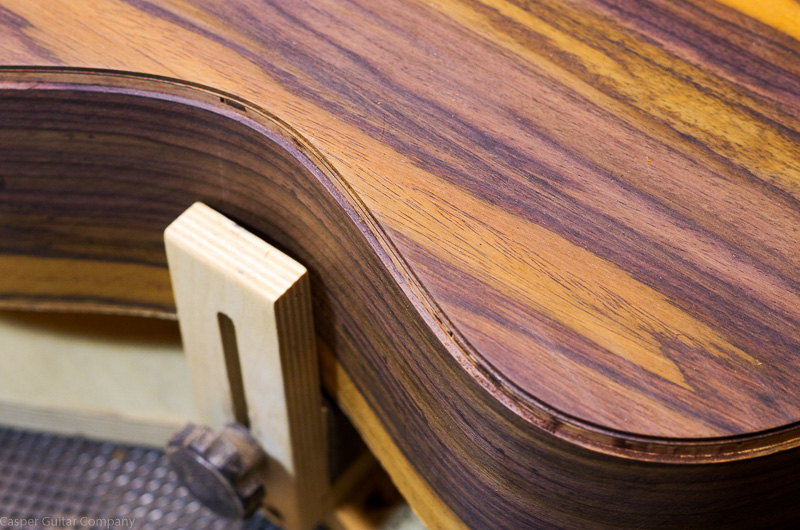 To ensure the bindings and purflings seat well in the channel, I run my scraper around the inside corner to clean it up: 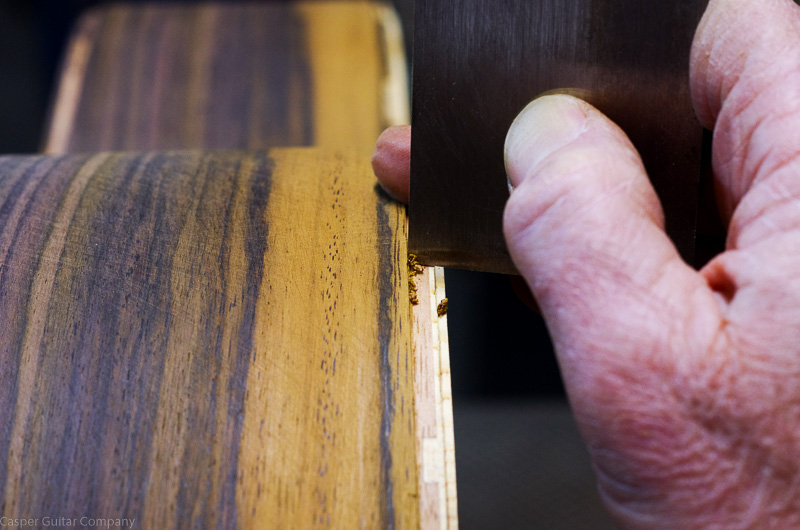 Lastly, I attach my jig to the tail so I can route the pocket for the tail graft: 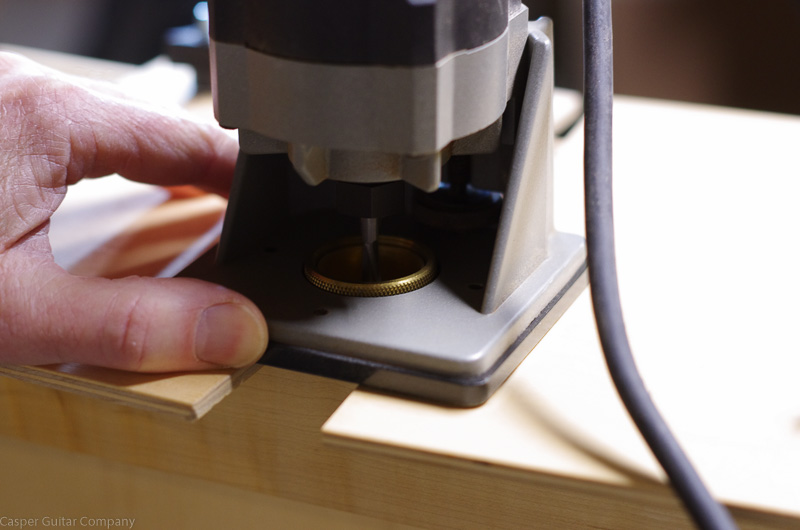 All done with the laminate trimmer, and the body is ready to be bound. I'll get to that over the next couple of weeks:  Thanks for looking. Ken
__________________
www.casperguitar.com
|
|
#21
01-12-2016, 02:16 AM
|
|||
|
|||
|
Ken, it has been a while. Thanks for the props on my thread.
That is an amazing set of Indonesian rosewood!!! I'd like to know if you have another set and are willing to part with it (send me a PM). I have really enjoyed your build thread thus far. Nice and clean. Looking forward to the neck and fretboard. Cheers
__________________
Rod True, aspiring luthier My current project A guitar I built for my Father in Law The Celtic Beauty - The Epic Journey True SJ - #9
|
|
#22
01-12-2016, 12:33 PM
|
|||
|
|||
|
Rod, thanks! Sorry, but I don't have another set. I picked up this single set a few years ago from another luthier as the yellows and oranges were so much more pronounced than in other sets I had seen. I set the wood aside knowing that someday, someone would want to build with it, and I was pretty excited when Beth decided to use it on her grand-sized Huron. There are so many great woods out there, I just wish I had the time to build with more of them!
Ken
__________________
www.casperguitar.com
|
|
#23
01-15-2016, 10:50 AM
|
|||
|
|||
|
So I got some new pictures from Ken! He started working on the binding. I was initially drawn to Ken's guitars by the craftsmanship that was so clear in his bindings and tight miters. I'm loving seeing the details of this process. Ken gave some description of what he's doing:
Cocobolo bindings and top purflings cut and sized. They are taped together prior to binding  Ken says: "Cooking in the binder"  Bookmatched bindings bent and ready to be installed  Tailgraft is in and mitering the purflings  The level of detail that goes into each one of these luthiers' instruments is so amazing. Playable art is such a good thing!
|
|
#24
01-16-2016, 02:00 PM
|
|||
|
|||
|
Ken got the bindings on this morning and just sent pictures. Wow! It's thrilling to watch this guitar take shape. So here's the new pics with Ken's commentary:
Bindings and purflings are glued on and the body wrapped in twill tape and left to sit overnight to dry  Morning after and Ken removed the tape  Ready to level the bindings and purflings  Ken uses a scraper to take the bindings and purflings down to the level of the rims  Using the scraper to level the bindings along the perimeter of the back  The bindings and purflings along the top also get leveled with a scraper  The bindings and purflings are now leveled and the body given a good sanding. Ken says he still has a bit more sanding to do (hard for me to believe) but he'll wait with that until right before the finish is applied  Ken says "I swabbed it in mineral spirits to see what it would look like under finish." I say "Lordy- that's gorgeous!"  A look at the tail graft and miters in the purling. Here it's easy to see the cocobolo is brighter red right now. Ken said it will darken over time.  Nice tight seams at the waist  A look down the rims  Close up of the top binding  So that's how Ken spent his morning. And he walked the dog. That's an impressive day and it's only noon here on the west coast! I'm really loving how this is looking. Ken says it's even more remarkable in person!
|
|
#25
01-16-2016, 05:40 PM
|
|||
|
|||
|
I am happy you like what you see Beth! I had planned to bind my other build before I leveled the bindings and purflings on yours, but when I came in from walking the dog this morning, I really wanted to see what this guitar was going to look like with the bindings dialed in. So I left the other body alone on the bench and took my scraper to yours
 I started scraping just below the waist, and the picture above of the waist was basically what I saw as the cocobolo was scraped down and the fine pins of purfling started to pop. As much work as binding is, I love getting that first glimpse of the body with the bindings and purflings. I often don't round over the bindings until just before I finish the guitar. So for now, the body is basically done. I'll cut the mortise for the neck tenon after the neck is done. I'm really pleased with how it has turned out. Ken
__________________
www.casperguitar.com
|
|
#26
01-22-2016, 08:10 PM
|
|||
|
|||
|
Kind of a slow time on this build right now. Waiting on a part for one of Ken's machines... Next up is the neck and I had some ideas about the shape of the neck- I play best with a thinner neck and Ken said he could mimic the shape of one of my guitars where I love the neck shape if I made him a template.
I took the guitar to my teacher who is also a great tech (works on all of Los Lobos instruments) and he measured the thickness of the guitar neck of my guitar at the 1st, 5th, and 9th fret, as that's what Ken had requested. And my husband bought a contour gauge and we used it to measure the shape of the neck of this guitar at the same frets. Any excuse for a new tool! We have no pictures of this because we needed his hands and my hands to do this measuring job. Not sure how Ken gets by with just two hands Meanwhile, Ken was hunting wood back in Michigan... He was quite excited, as he came across a guy selling 5/4 quarter sawn perfectly clear Honduran mahogany that was previously purchased about 40 years ago for a guy to build a boat. Only about 50 board fee remain, and Ken drove over to his place to pick it up. Ken wrote: I have a good stash of mahagony, but much of what I have is 8/4, meaning 2" thick. This is great if I am doing a two or three piece neck, but it results in a lot of waste if I build a five piece neck with the pins fanning out over the heel. I was looking for a good supply of 1" mahogany when I stumbled across this little stash." I really like Ken's five piece laminate necks. I asked for one of those for this instrument, so it seems Ken may have found some of the wood for my guitar neck. This guitar will be mahogany with twin lams of cocobolo that fan out over the heel. I've seen other instruments he's done with that design and it's quite striking. Here's a picture of one off of Ken's website. This one is rosewood.  Ken's also going to satin finish the neck. I asked Ken about it after having read Cigarfan's thread on his gorgeous Hatcher Greta 13 fret, which has a satin finish on the neck. Ken has done that before and the guy who has that guitar loves the feel of that satin neck, so that's what we'll do. Ken plans to glue the neck laminations up well in advance of milling it, so that should happen soon. Thanks for your interest in this build! beth Last edited by mountainguitar; 01-22-2016 at 08:18 PM.
|
|
#27
01-23-2016, 06:59 PM
|
|||
|
|||
|
Beth, I received your neck templates in the mail today. They should work just fine. I'll get the neck modeled and when I get my CNC back up and running, I'll mill the neck. Things will be a bit quiet until then.
Ken
__________________
www.casperguitar.com
|
|
#28
01-23-2016, 08:52 PM
|
|||
|
|||
|
I just wanted to say that this is turning out to be one beautiful guitar. I have enjoyed watching this one come together, and I am really excited to see how it turns out in the end. Everything about this guitar is just gorgeous.
Shane
__________________
96 Taylor 710 97 baby Taylor 08 Taylor Fall Ltd Koa GS
|
|
#29
01-23-2016, 09:42 PM
|
|||
|
|||
|
Thanks Shane! It is a cool guitar to be working on. I'm with ya, though, I'm anxious to see how it turns out too!
Ken Quote:
__________________
www.casperguitar.com
|
|
#30
02-29-2016, 07:01 PM
|
|||
|
|||
|
Ken's been traveling a lot lately and hasn't been able to be in the shop much at all. This week he's in all day meetings in Vegas, but before he got on the plane, he worked on the neck for my guitar. And sent me pictures! This is one of Ken's five piece laminate necks. I told Ken I'd update the thread with his pictures and explanation. So here's the latest from Ken's workshop:
Mahogany ready to become guitar necks:  Cutting a couple of slices of cocobolo for the neck laminations:  Neck just about ready to be glued up:  Laminations ready for glue up:  Gluing up the neck laminations:  Truing up the fingerboard edge on the jointer:  Cutting the slot for the truss rod:  Checking the fit of the truss rod:  Roughing out the neck on the CNC:  Milling the back the back of the headstock:  Finishing passes on the heel:  Neck fresh off the CNC machine:  Ken's gone out of the country for work next week, and then I think he'll be able to get back to the shop. He said to expect much more to be happening in the next month. We're getting close- looks like this one will be an April baby!
|
 |
|
| Tags |
| casper guitar, custom acoustic, grand concert, manzer wedge |
|
|


