
|
|
#31
 05-30-2009, 10:45 AM
|
||||
|
||||
|
Quote:
 Thanks for the nice words on my photo's 
|
|
#32
05-30-2009, 02:11 PM
|
||||
|
||||
|
THE TRAPEZE IS HERE! Not bad I ebayed it on Memorial day. Canada to SW Pa in 5 days! I was expecting no less than 10. I was gonna mess with the case tonight. No way. ( I cut the sides this morning.)
Today I am making a 5 course Chinese meal for my wife and her 2 buddies. Been prepping for 2 days. Then they hit the movies (Happy Birthday) Then Croquet with a pile of kids.....then the trapeze. But, I'll get there
|
|
#33
05-30-2009, 07:18 PM
|
||||
|
||||
|
Huh! I don't like the trapeze! Not on this Parlor anyway. Back to a Pyramid lol
Heart bridge goes in the someday pile
|
|
#34
05-31-2009, 09:35 PM
|
||||
|
||||
|
I pounded in the frets!
Pictures tomorrow! All goes right I put on the bridge next.
|
|
#35
05-31-2009, 10:40 PM
|
|||
|
|||
|
YJ,
Will going back to a pyramid bridge (with pins, I assume) change your neck angle? Frank
|
|
#36
06-01-2009, 03:11 AM
|
||||
|
||||
|
Quote:
|
|
#37
06-02-2009, 05:34 AM
|
||||
|
||||
|
Last night I sanded and polished the fret board down to 0000 Steel wool
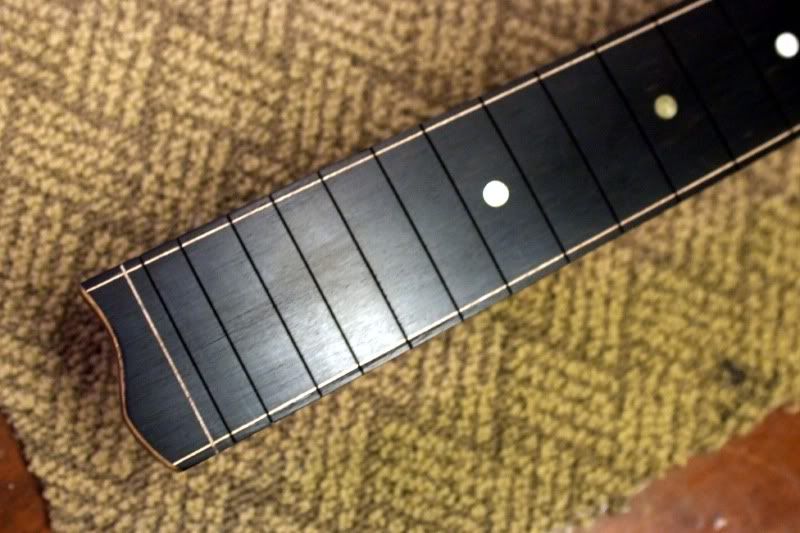 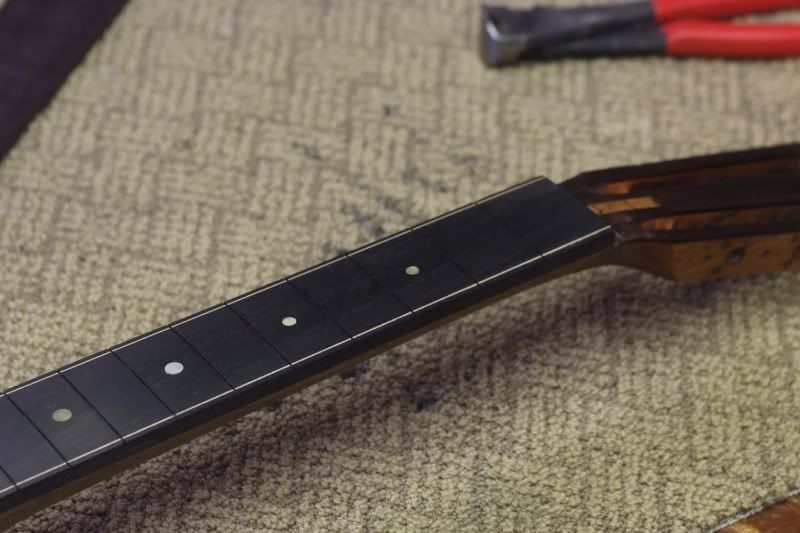 After cleaning the trenches with a dental pick 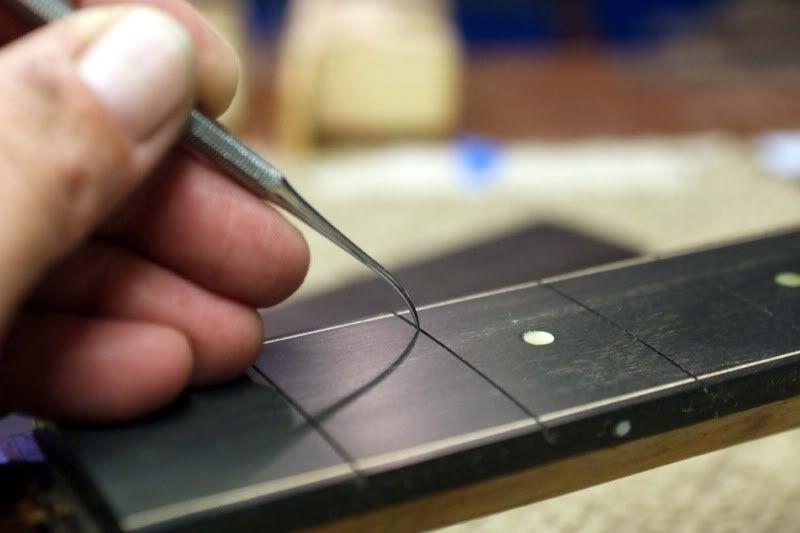 then I folded some 800 grit and slid it back and forth. I found a few high spots from misses with the fret saw, I corrected them with a narrow nut file. Fret prep; First cut the frets to rough size from a 2' length of fret wire. There are tons of different fret wire. High, low, fast pitch (tall/narrow), low curve (short/fat) I chose one Stew mac says is used for vintage restorations. After clipping down I used this fancy fret bender.  You pre bend a slight curve kinda matching the radius of the board. That aids in proper seating and keeping them from popping out. BTW a FANTASTIC book is "Guitar Player Repair Guide" by Dan Erlewine. He is the tech guy for Stew Mac, he has built and repaired some famous guitars. Quite a wealth of experience reads out as easy as it can in this book. The fretting section is about 60 pages. I read and reread, now that I have done it I will likely comprehend the read better. So, I'll read it a few more times...... Pounding in the frets was nerve racking. By the time I had done 10 I had a "method". As suggested by a few, I do need to score a bag of buckshot for pounding in the frets. clipped the over hanging frets 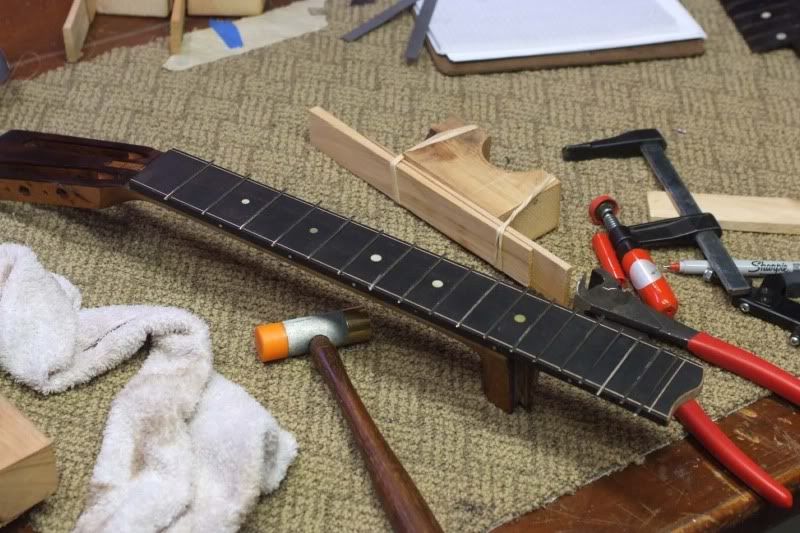 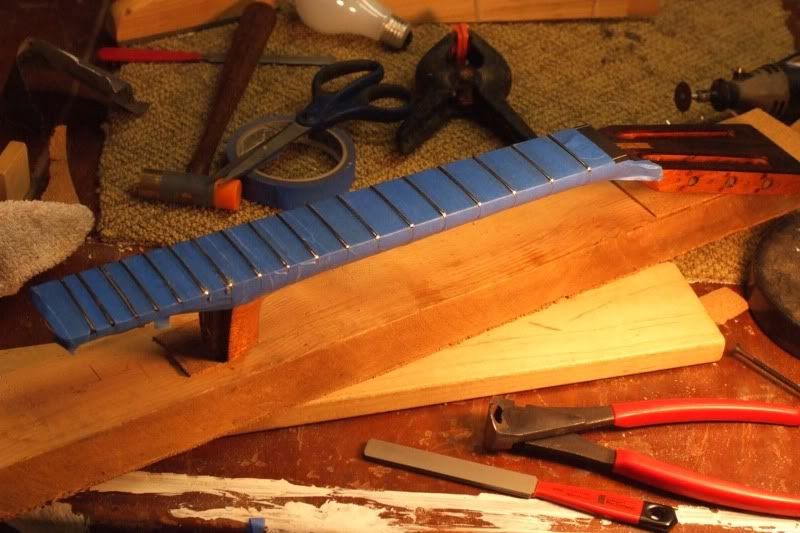 Crowned the ends with a fret file/ its hollowed on the side Ran a fret leveler file up and down the fret board. A few frets were high and really flattened out. Then I took a long thin file and reshaped the flattened frets Then 320, 600,800,1000 and then 1500 sandpaper to polish the frets 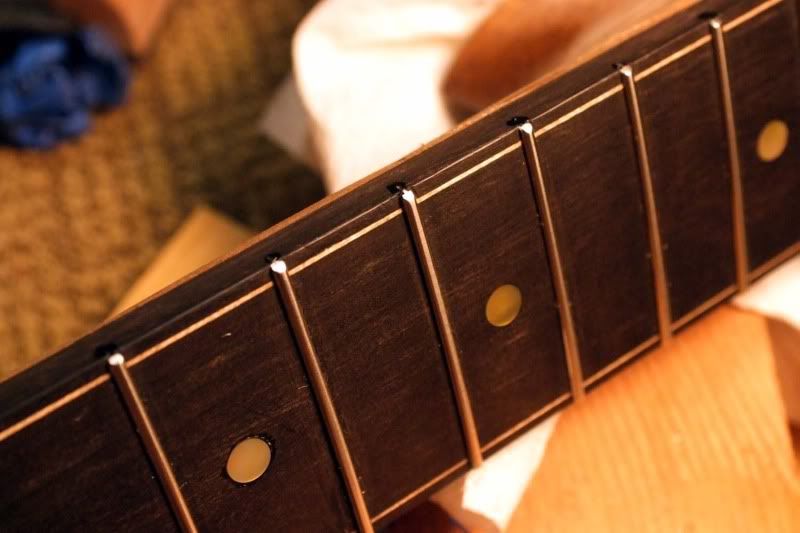 Then a spot glue of superglue on the ends of the fret board. Before wrapping up for the evening I sanded down the rough cut of the Pyramid bridge to a pretty good polish. It looked good at Midnight. Lets see what it looks like this morning after coffee! Today will be gluing in the bridge and making a nut and saddle. Tomorrow strings? I gotta find some light lights. Man I have my intonation fingers crossed!
|
|
#38
06-02-2009, 06:22 AM
|
|||
|
|||
|
Looking real good, YJ? Are you taking bookings for a tour of your new shop?

__________________
(2006) Larrivee OM-03R, (2009) Martin D-16GT, (1998) Fender Am Std Ash Stratocaster, (2013) McKnight McUke, (1989) Kramer Striker ST600, a couple of DIY builds (2013, 2023)
|
|
#39
06-02-2009, 07:40 AM
|
|||
|
|||
|
YJ that is really coming along nicely and is fun to read as you go along with the work, can't wait to see what is coming next.Ship
|
|
#40
06-02-2009, 08:11 AM
|
|||
|
|||
|
YJunkie....we are all living vicariously through you on this thread! It has been so much fun reading and following.
Buying a luthier's shop in Uhaul - $10000000  Playing your restored Braz guit with said equipment - Priceless 
|
|
#41
06-02-2009, 02:25 PM
|
||||
|
||||
|
The Bridge is on
. Lotsa pix!I have to work (snap pix) for an hour then Nut and saddle time!
|
|
#44
06-04-2009, 08:16 AM
|
||||
|
||||
|
Well I played her! Am I done? Noooooooooo. Many problems but I played her!
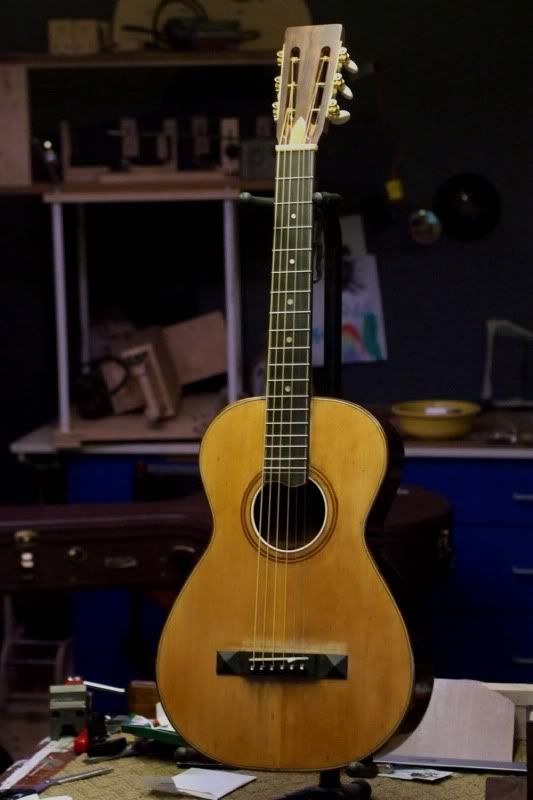 At first I was bummed. I had that hope in the back of my pea brain that Id string up after my hard labor. The clouds would part, angels would cry from the tone CLANG! Lol But darn it I played her. The first wrap up; First was find the bridge location. 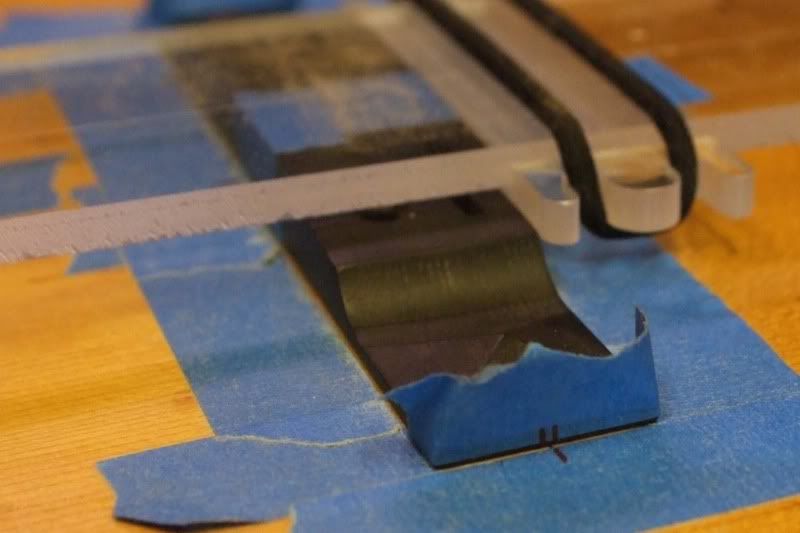 Center of 1st fret to center of 12th fret + 1/16" was the best answer I came up with out of 4 books. Best I can tell that is the standard. None differentiated a tiny guitar to a jumbo. What is straight? Right or wrong I used the center seam of the top as my point of reference. That means my Rosette is way off from my neck line. But about 1/5 of the Rosette is missing (under the fret board) so it is not a point of reference. Once I had the distance I used the fancy neck straight thingy 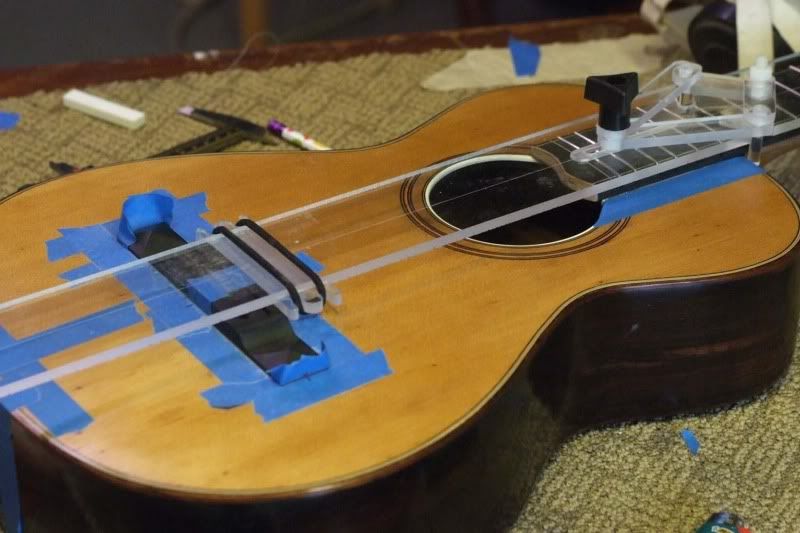 to find straight on the bridge. I verified and re verified left was even with right, bottom distance even left to right, distance from shoulder left to right....... I blue taped off the area, the holes from the old bridge did not line up (I should have paid attention to that) so I made little spruce plugs. 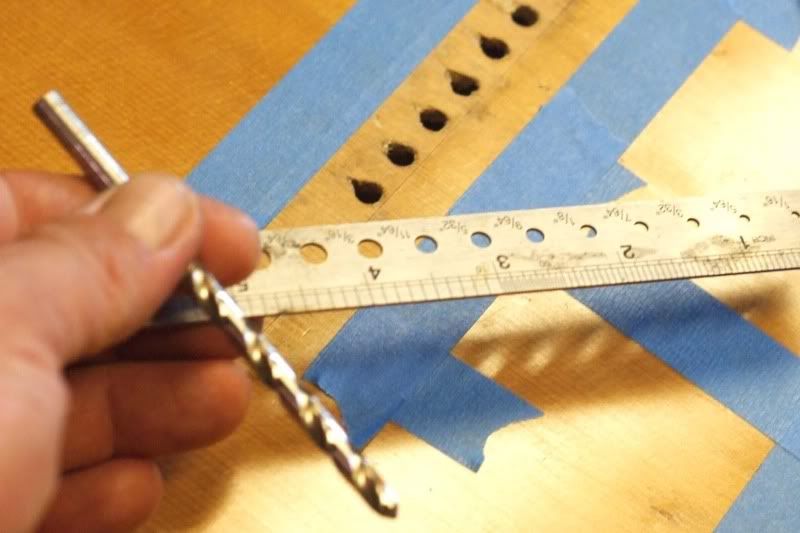 They took about 5 minutes each to size them. 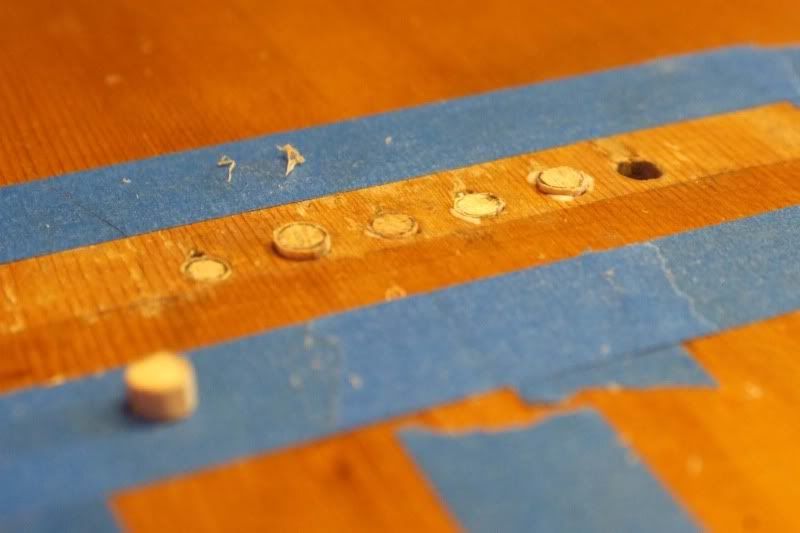 I glued them in and a while later I sanded them to flush with my 220 sanding block cut to width. Now I had a clean flat surface to glue my bridge plate to. This clamp is the cats meow of bridge clamps. 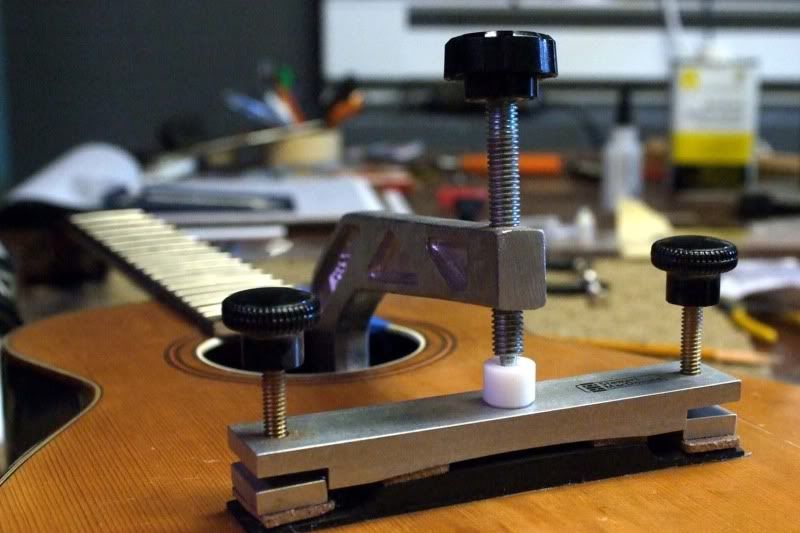 After clamping down I checked to make sure nothing slid. Wait a minimum of 24 hrs for the bridge glue to air out. Stuff to do; I spent about an hour finding little high spots on the fret board and leveling and polishing and leveling and polishing and leveling and polishing Onto the nut. I had no original nut to base my nut on. So, I went to the McKnight with the same 1 3/4" nut width and copied the locations. Tim puts some angled cuts in the nut. I attempted to emulate. I then started to make a Truss rod cover or in this case I guess Id call it the neck brace wood. (?) Anyway, it need a cover. I thought Id be clever and use Ebony from the original fret board. The guitars gods did not like the idea. After 20 minutes of cutting and shaping the cover went sailing off the sander at such great speed I can only theorize it got sucked into another dimension. Never to be seen again . So I went Mahogany. I like how it turned out. 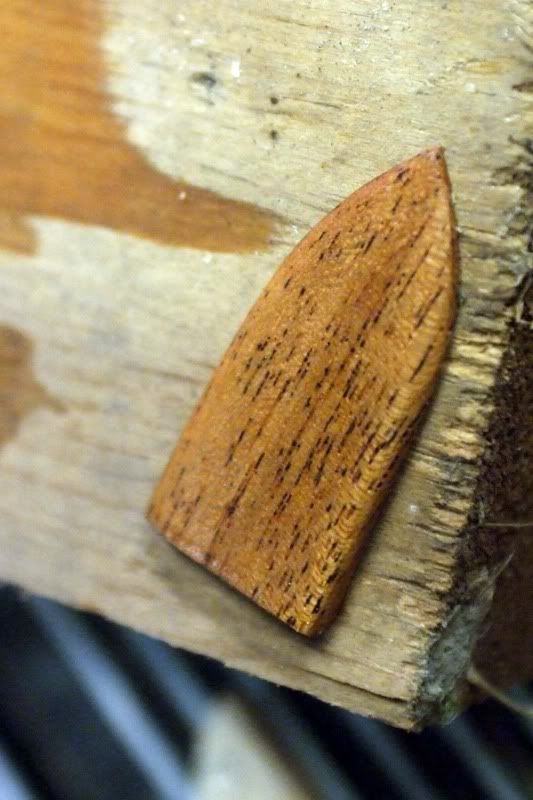 In the mean time I had more to do; I had to drill a small cup into each of the holes for the tuners. I used the drill on reverse and kinda ground my way in. If I had gone foward it could have dug in and gone too deep or worse split the head. The tuners look beautiful on the guitar. 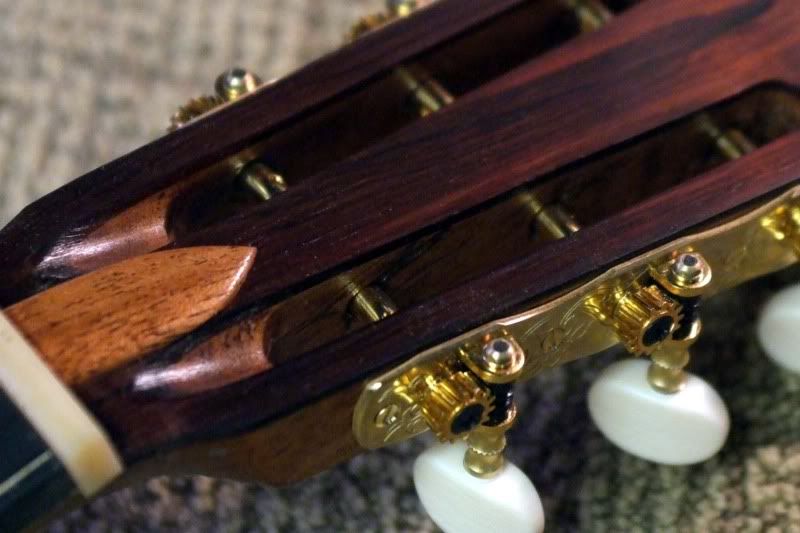 End of the day.
|
|
#45
06-04-2009, 08:17 AM
|
||||
|
||||
|
June 3;
I waited 25 hours and 14 minutes. Bridge clamps off. I carefully drilled out the rest of the bridge pin holes, down through the body. The bit really wanted to tear in (and up) so I held back as I drilled. The holes end up being too big for the smaller bridge pins but perfect for oversize. I only had white cheap oversizes but they would do for now. I could now make a saddle. The vintage bone saddle I had gotten from StewMac was slightly warped. I pencil marked it and flat sanded it for about 20 minutes. I used the Yamaha Saddle I had lying around for a stencil. I screwed up. I should have made it taller. Time to string up! No light strings in the pile! I went to my local shop. Martin extra light was the best I could do. I grabbed a few sets. And he had a set of ebony over sized pins. Perfect for the project and cool because I got them from the guy that sold me my first guitar. I strung up. The guitar was unplayable. Immediately I saw problems. I learned a pile of things right then. 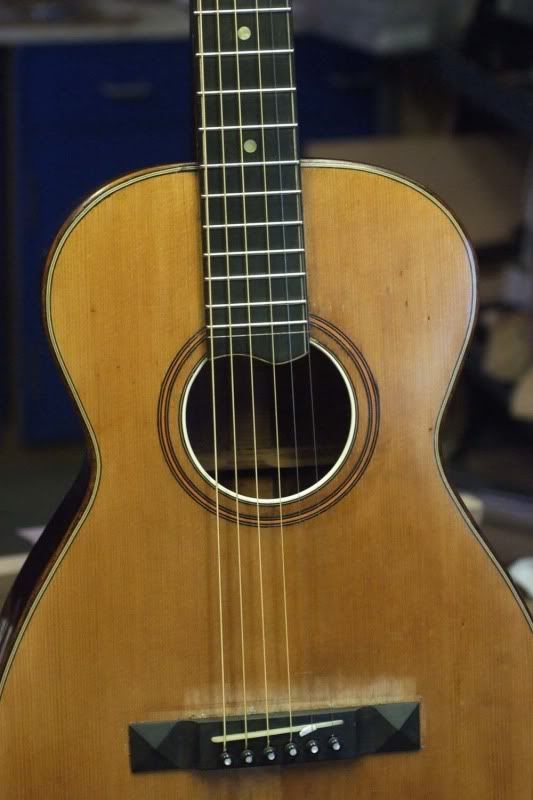 The bridge is too wide. I used a bridge for a full sized guitar. My pin spacing is way off. Look at the fret board line. The string just scoots right off the side. 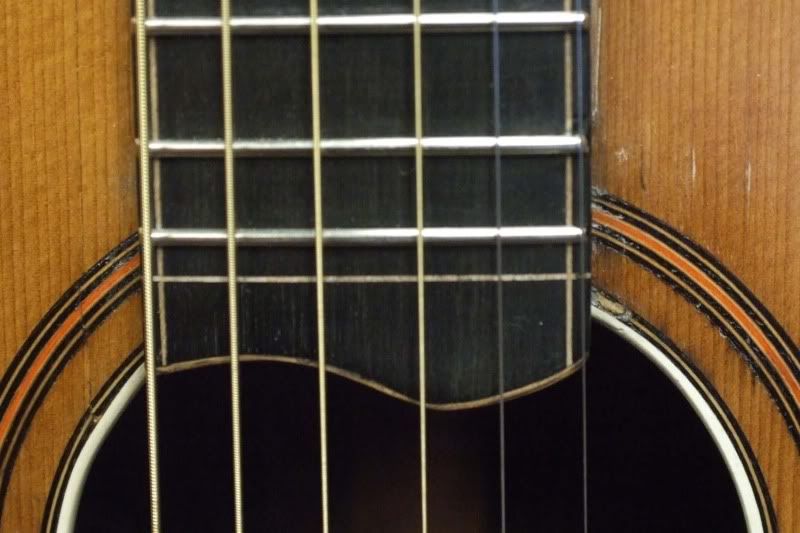 Also, my fret marker locations are um artsy. 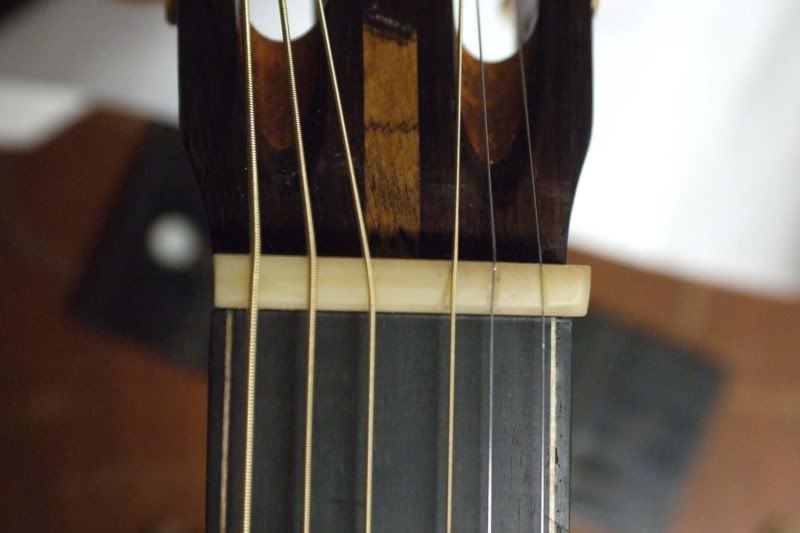 All of the nut slots were way too high (good), as said before the saddle was way too low. The B string was dragging by the 8th fret. CLANG. No angels! I went and had a cup of coffee. Pout pout think think. OK, I have had to do everything else 3 to 30 times. Why not the final setup. Get it done (insert Rocky theme music) First I adjusted the nut. I moved the string lay out considerably. I guess there is quite a layout difference between a paddle head and a slot head. The McKnight has the bottom of the strings adjusted to .012 from the nut. When I did a nut change on my Yamaha LS6 I went with .014 So, I went with .016 Theorizing I can always cut deeper later. Because of the saddle height the 1st, 2nd and 3rd strings are still way to low. If I barely press them and barely pluck the strings I get a glimpse of what they will be tone wise. 4,5 and 6 got clear! Intonation sounds ok, no buzz, height at the saddle still needs to come up but quite playable. The tone was not deep, Sustain but with a pretty quick fall off then some linger. Surprisingly loud. I played for about 20 minutes. Had my wife come up to the shop and listen to a tune I could play on the upper strings. She smiled, I smiled. Then I got back to biz. I took the strings off and spent the next 1.5 hours making ebony bridge plugs. 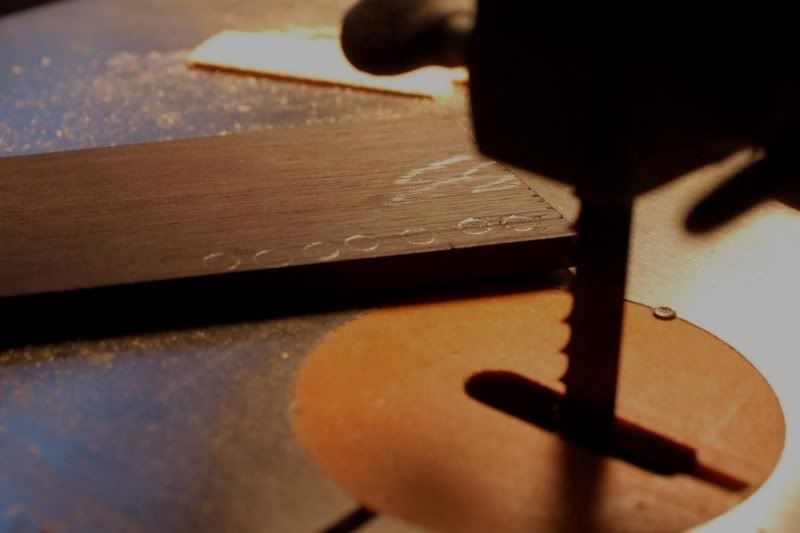 Final fitting on Ebony plugs was a major PIA. 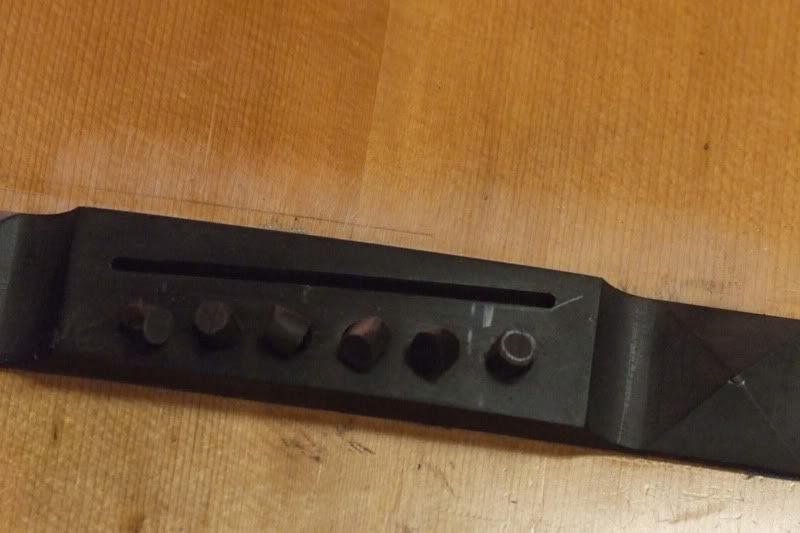 I ended up holding them with tweezers and using a belt sander. If it looks good filled in I will keep the bridge. Otherwise I will just use it to find my pin placement. Then I will remove it and put on a proper size. That will be today. If it works I will play the Guitar at McKnight Jam!!!!!!! The neck is straight. The neck angle to bridge is about 1/16 high. Thats an acceptable angle. Currently I have 6 layers of blue tape stuffed in the dovetail making that happen. I am sure after McKnight Jam (Tomorrow!) and A.S.I.A (next week) I will have fresh ideas how to wrap up. 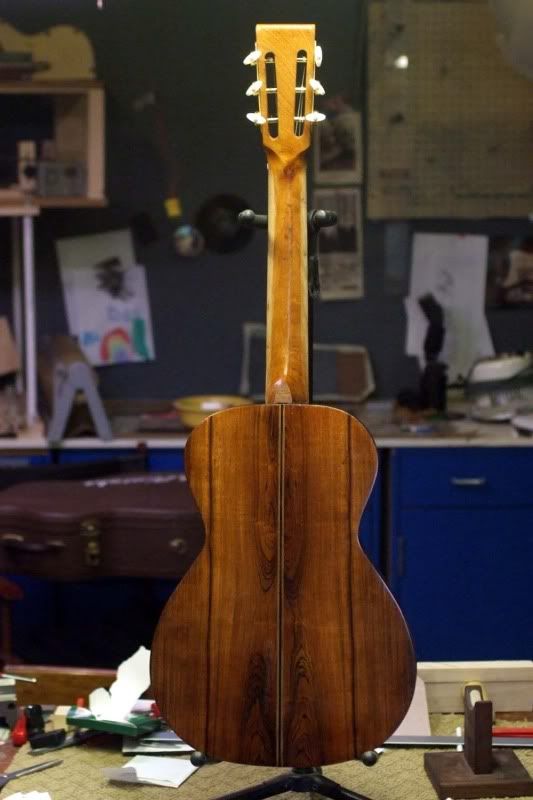
|


