
|
|
#31
 07-04-2009, 06:56 AM
|
|||
|
|||
|
Quote:
_____ _____ _____ on the the end grain. Not good. What you have done is you have put the flat sawn face at the top weakening the brace. You need to be using wood that is quartersawn AND, at the same time, wood that has little runout. You may need to get thicker material so it can be split properly. Does that make sense? Jim McCarthy 
|
|
#32
07-05-2009, 06:38 AM
|
||||
|
||||
|
Quote:
|
|
#33
07-05-2009, 07:09 AM
|
||||
|
||||
|
Well, the cut off the braces and start on them again…….
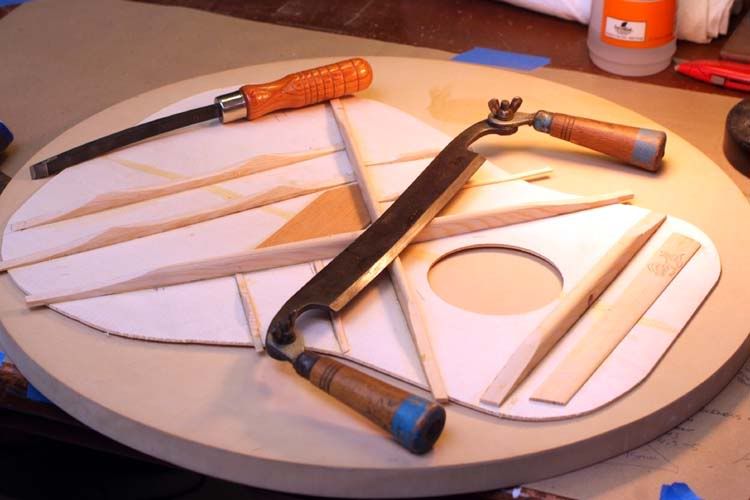 This might do the job. Nah, The idea didn’t seem like the top had much of a chance of survival. So I figure I will continue to do my best on this one and follow through with it to the end. I have already gotten irreversible CA glue onto the top, installed the braces on the way wrong radius dish and I radiused all of my braces, I should have only radiused the X brace. The others are supposed to be flat. Furthermore, my bracewood was cut on the wrong angle on grain. Other than that is perfect so far lol So, I have started Guitar #2, this one an OM. I will build the Dred in steps and as I figure out if my step worked or needs/needed corrections I will implement a clearer step on the second guitar. I have kept pretty good notes on the first one and hope to do better on this one. The top is shelac'd to keep the wood clean and from Ca glow! 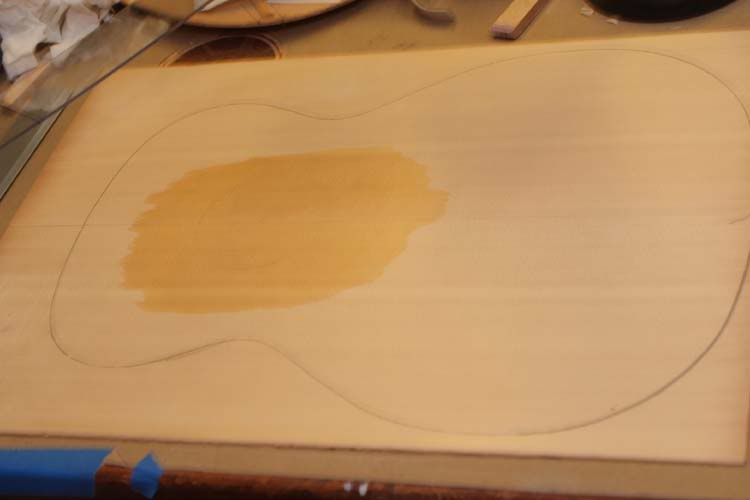 Here is the rosette; 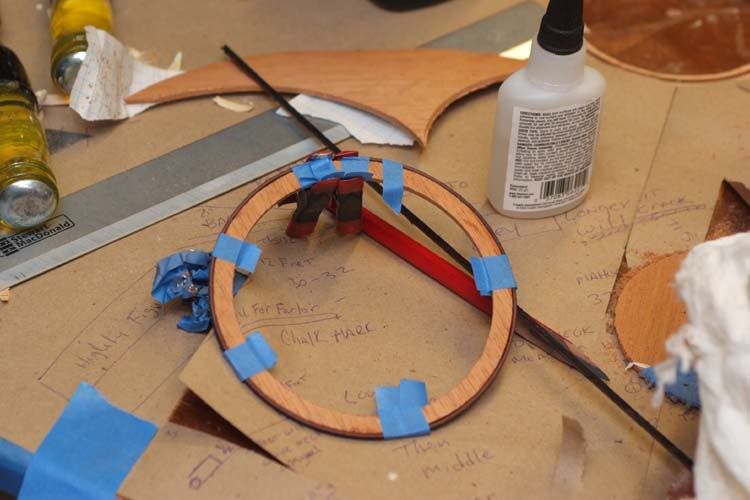 I assembled the rosette before installing this time. 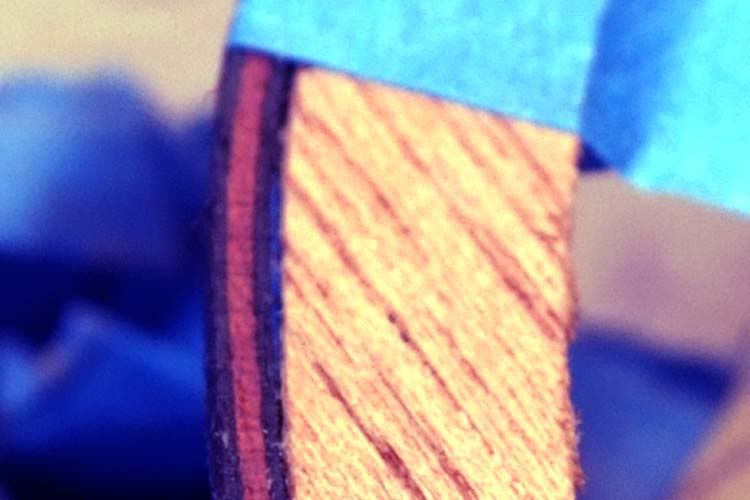 Theres not much left of this scrap Mahogany top! 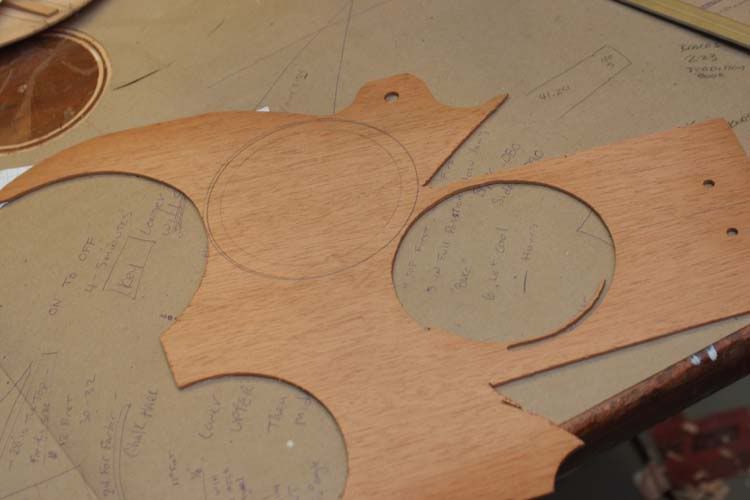 Some of my sanding blocks I have made, 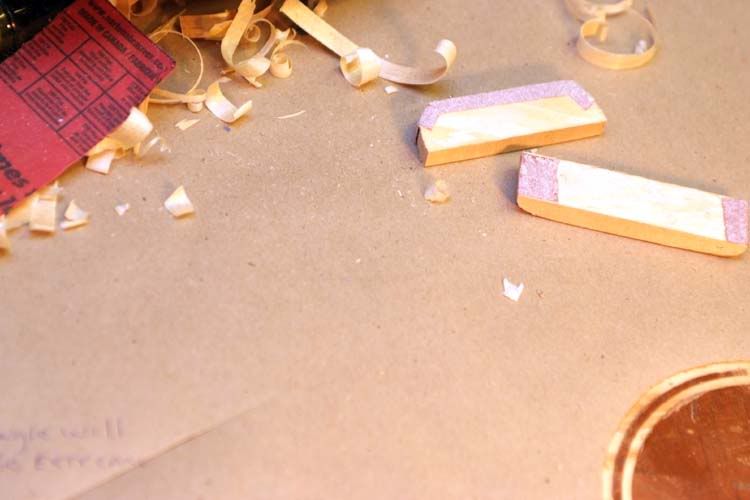 Some of my first work with a chisel; 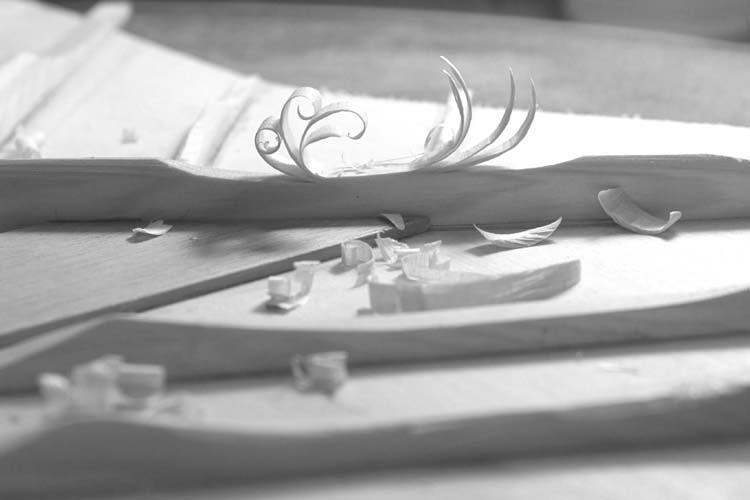 How my Scalloped bracing on #1 turned out; 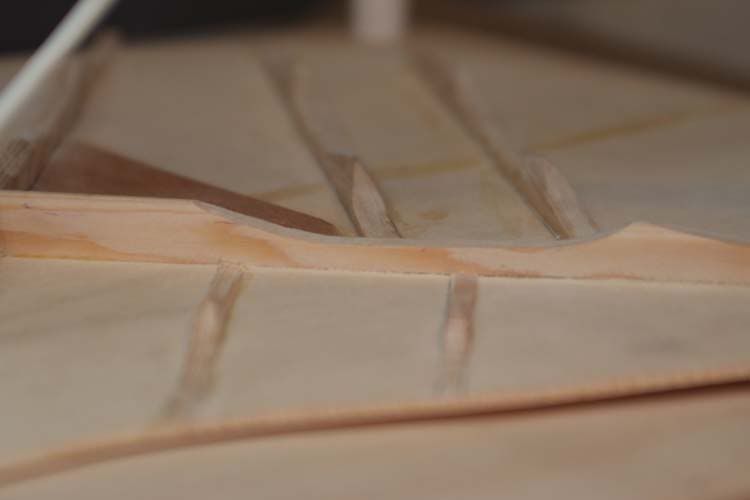 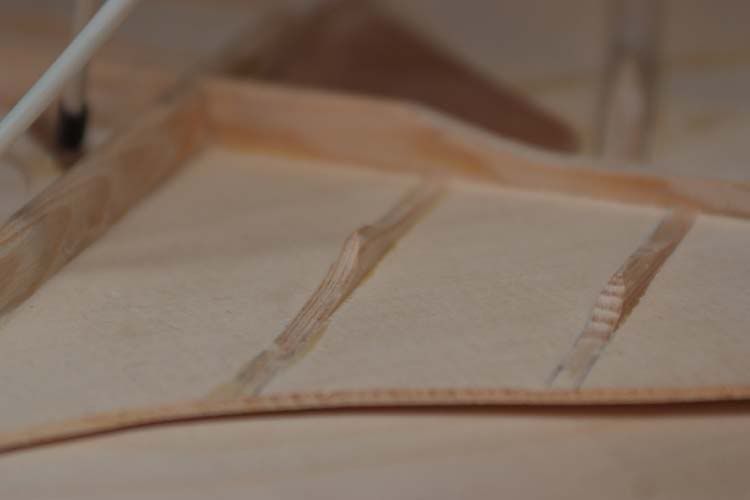  Not sure what I am doing today. Yesterday I cleaned up the shop. Man can it get messy fast!
|
|
#34
07-05-2009, 08:07 AM
|
|||
|
|||
|
This is a fun read. What a lot of work! Which I'm sure is a blast.
I wish I had the patience for this kind of thing. Thanks for sharing your learning process. Fun read indeed. Brent
|
|
#35
07-06-2009, 02:22 PM
|
|||
|
|||
|
I gotta bump this back up to the top of page 1. How's it coming, YJ?
__________________
(2006) Larrivee OM-03R, (2009) Martin D-16GT, (1998) Fender Am Std Ash Stratocaster, (2013) McKnight McUke, (1989) Kramer Striker ST600, a couple of DIY builds (2013, 2023)
|
|
#36
07-06-2009, 04:40 PM
|
|||
|
|||
|
Yams, can we get a soundclip of that Parlor? That would really top it off!
Be careful with the tap tuning, its really a balance thing, but some people take too much off the first one (me) and some don't take enough. I will just be doing tops because I am so slow with builds, if they are too tight or too loose, tile I get it right. No need to reinvent a broken wheel.
|
|
#37
07-06-2009, 08:05 PM
|
||||
|
||||
|
Quote:
The Parlor sounds like a great Ukle right now lol. I have to move the neck left a bit. Involving redoing the dove tail. I also have to learn how to make a proper sized Bridge, fix a crack. I will dig the thread up as I get things done I promise.
|
|
#38
07-06-2009, 08:12 PM
|
||||
|
||||
|
Quote:
I look foward to locking myself up in the shop for a few hours tomorrow.
|
|
#39
07-06-2009, 08:55 PM
|
|||
|
|||
|
So are the sanding blocks to touch up the braces after the chisels?
I have been looking at some kind of Taylor, its pretty small. I LOVE the sound and messing with it at GC, and I can't imagine its much different from your Parlor. (One is good, the others not so hot, same model) BUT your parlor is BRAZ and an old tight top, so I would think yours sounds pretty good. Like an Uber Uke? Yea, they are not dreadnoughts. Interesting, I have also been playing a Taylor dred, with a laminate no brace back, and it sounds the best of alot of the underagrand guitars. So I am thinking of that type of back now.
|
|
#40
07-06-2009, 10:12 PM
|
|||
|
|||
|
I'm way late to the party...but when you were thinking about using spalted wood for the rosette....take a look at Mike Doolin's spalted maple rosettes. They are quite beautiful. http://www.doolinguitars.com/
|
|
#41
07-07-2009, 03:31 AM
|
||||
|
||||
|
Quote:
I will used Spalted, I have loved that look for years. I had a Spalted LP (Korean) that was beautiful. But, a Spalted Rosette to me is more than just a nod to the McKnights (a tour of Tim and Marys shop is one of the big sparks that started this madness  ), my spalted log was swiped (with permission) off thier burn pile! lol. My McKnight OMD is Redwood with Spalted, it will take work to look at one of those pretty Rust colored tops and think of any other kind of Rosette. ), my spalted log was swiped (with permission) off thier burn pile! lol. My McKnight OMD is Redwood with Spalted, it will take work to look at one of those pretty Rust colored tops and think of any other kind of Rosette.
|
|
#42
07-10-2009, 06:21 PM
|
||||
|
||||
|
Great day! I started off with finishing up the Rosette on #2. No CA glue in the trench! Shelacd or not! I glued the rosette ring layers together before installing. I liked it better than piecing together in the soundboard but it was difficult to hold all in place. I did have to fill in a few spots I could see light through.
After installing the Rosette it was close to a perfect fit. 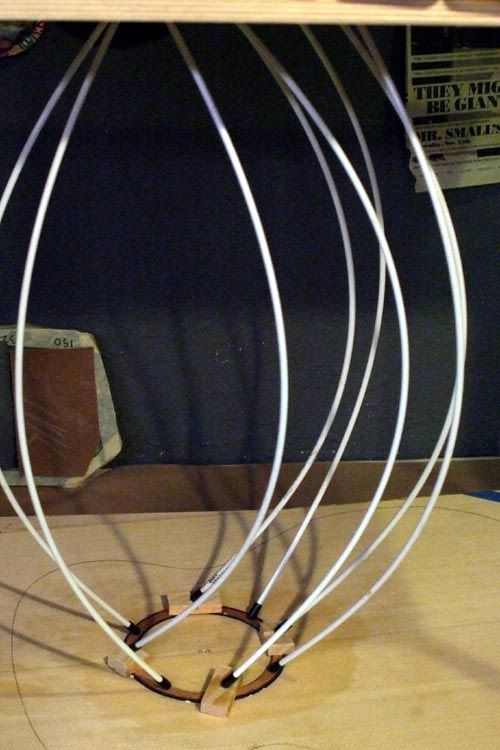 But there was a slight hair of a gap on the outside ring. So, I got out a 1/32 upturn bit and dug a tiny trench around the installed Rosette and did one more thin wood strip of black to fill the void. 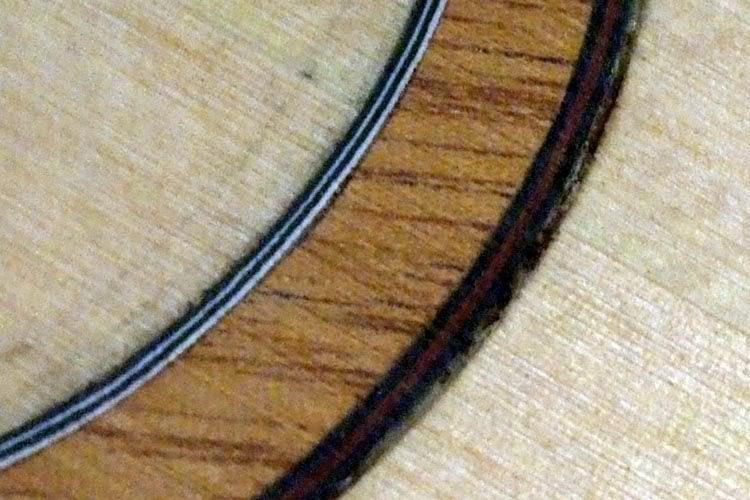 Onto #2s bracing. I used Adi Spruce from my good stuff stash to help me not have run off. I cut all of the bracing to the sizes on the blueprint, 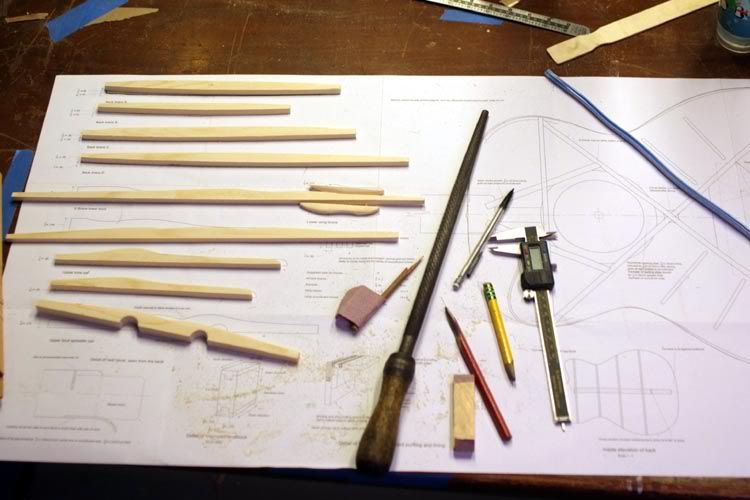 notched the x Brace and it went together perfect. In fitting I found that Id made the brace to short. I played around for a while trying to salvage it. No way, Ill save it for a Parlor. 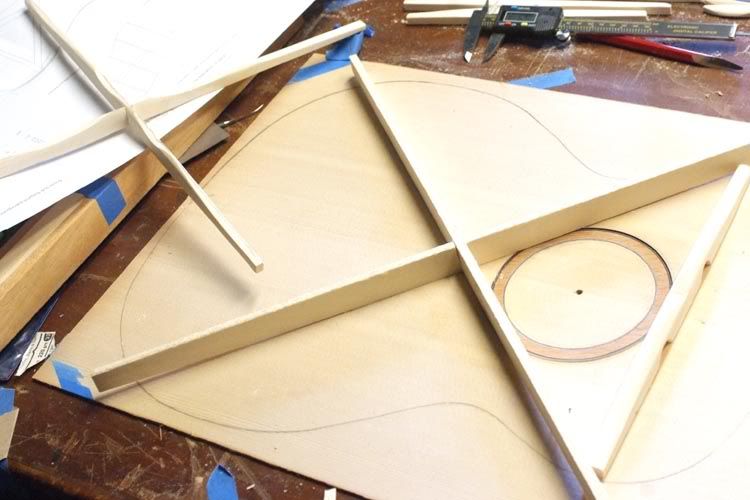 So, I made a new x brace. 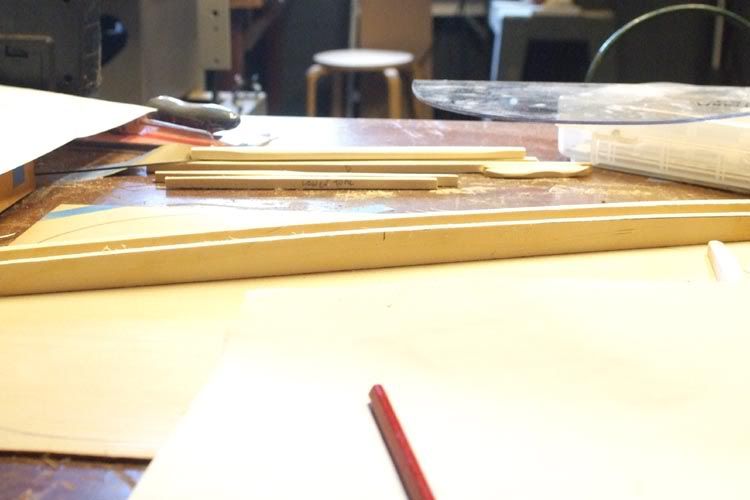 I discovered the way to accurately get the radius for the bottom of the X brace! By following the radius with this pricey little dodad; 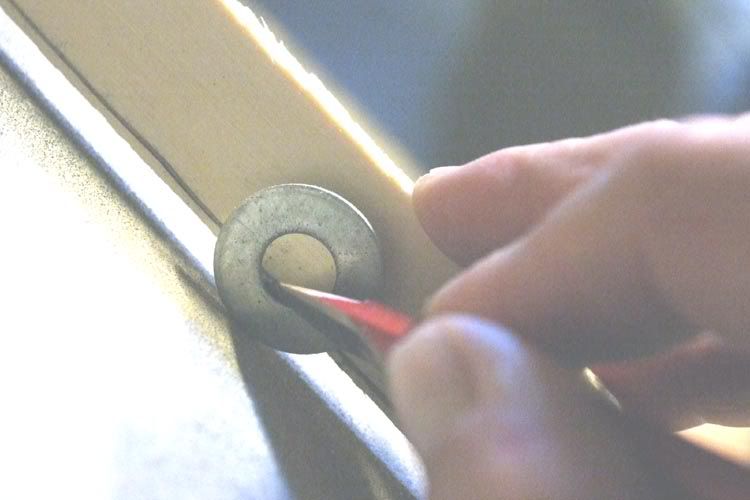 Anyway, 3rd time is a charm! This brace still needs trimmed but the radius is perfect and the arms reach further than needed. 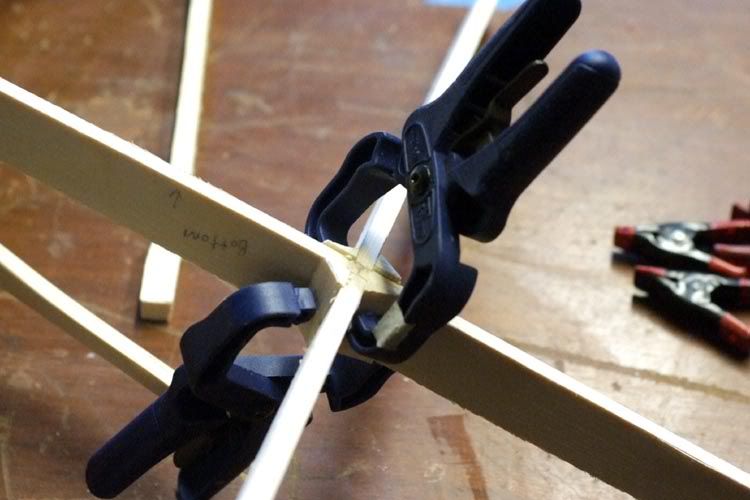
Last edited by Kitchen Guitars; 07-10-2009 at 07:44 PM.
|
|
#43
07-10-2009, 07:45 PM
|
||||
|
||||
|
OK. Confession time; I have been avoiding using the Bender.
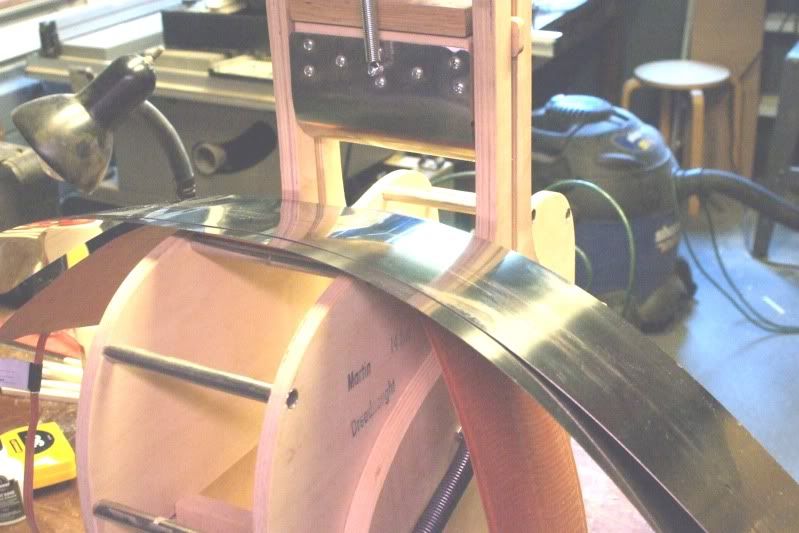 The heat blanket goes 0 400 degrees in 2 -3 minutes. The things you have to do in that short time frame is scary the first time. John Hall (builder of the Blues creek) talked me through the process a few times. But, new and spooky! So, I cleaned the shop, mowed the lawn . But darn it it didnt bend on its own! So, I did a couple dry runs. Made sure the fire extinguisher was very handy. I hooked up the timer and heat control through a surge protected extension cord. I spritzed the Mahogany for the Dred with distilled water front and back. If anything I used too much spray. I put the dampened Mahogany between the 2 metal sheets, then the thermometer, then the heat blanket. I put it in the bending machine having left a mark at the halfway point so while positioning I was also making sure I had enough top and bottom to mess with after it was bent. It is ideal to have overlap both directions top to bottom. That way you can cut them sandwiched to get an even cut on both sides (theory to me so far!) How many of you have bent sides? How many have seen sides bent? Me? I have watched the process a half of a dozen times. It still isnt doing it. The play by play given to me was; 1)stencil and cut right and left sides, mark your board top back, top front Mark 12 -121/2 from top. That is your middle. 2) dampen wood slightly. Do not drench. 3) sandwich the layers and put into the bender. Set up middle line under center press, snug it. 4) Plug in on full, set timer for 15 minutes. 5) @240 degrees start to bend the bout end, then the front kinda at the same time. By the time it gets up to temp (375) start to press the middle down to position. 6) Cook out the moisture for one minute at 375 Degrees. 7) down to variable temp 180 200 degrees for 15 minutes 8) let cool 30 minutes 9) Press into mold to hold shape. Just dont go to long of a time to short of a time to high of a temp to long or to short or to low to long or to short UGH!  So, I stenciled and cut, marked, dampened wood, thanked the stars in Heaven that I marked front and back top . Talked to myself like Sybil for 10 minutes on top is up left top goes to the right if facing the top of the unit ahhhhhhhh! So, I looked at it 4 times before trusting the mes! 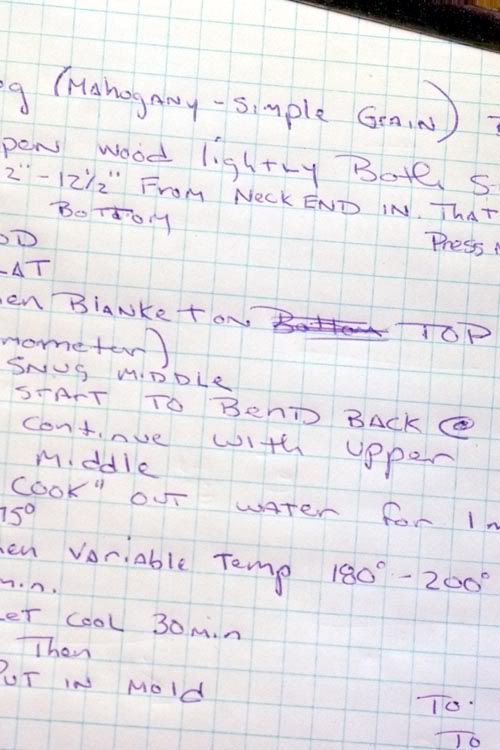 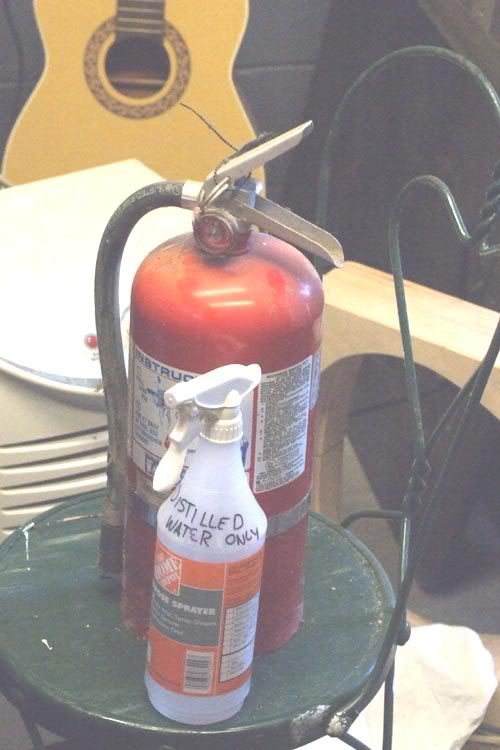 Moved the Fire extinguisher closer, further .. plugged it in, set the timer, hit the extension switch and I am off!!!! Hey, I should clip the ends I grab a handful of mini clips. Rip the rubber tips off and clip the sandwich ends together. MANNN that temp climbs fast NOTE TO SELF, attach the bender to the TABLE NEXT TIME! Too late to do it now ..240 blurrrrrrs to 300, BEND but not to fast, but not to slow what the heck does that mean? Use the force????? So, I start to work the heavy duty spring loaded blocks and not move the bender! Pull pull pull and pull.  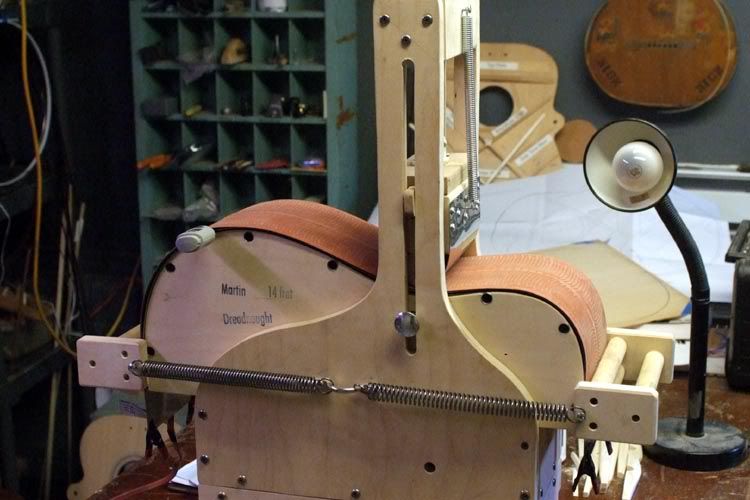 The temp is at 350 by now, the thermometer falls out and goes under the table! So, I worked the center press down. Too fast maybe. But I figure the way it was climbing I have got to be to 375 by now and I am now guessing the temp. I get the center down snug. Quick final fit of ends. I start counting Mississippis (briefly not remembering I have it on a timer duh) I climb under the table, get the thermometer. Snug it under the blanket. 59, 60 .. I switch to variable ( Insert Mission impossible theme music here). 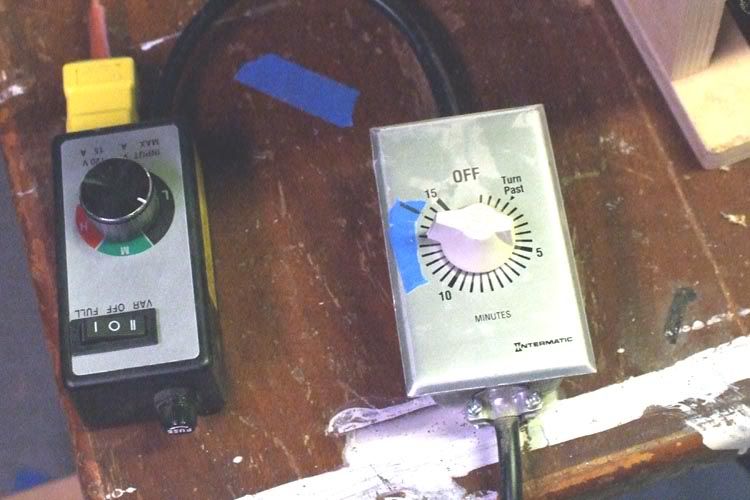 I have no idea WHERE on variable I am supposed to be. So, I moved the dial to the middle. When the temp quit falling at about 280 I turned it down. And again. Till I got to the lowest setting. Its now 10 minutes into the low bake. The temp never falls below 238. So, I figure take 2-3 minutes off the bake time? I turn off the switch and stare at it. Did I put it in right side up? Oh no hey I did this chat with myself already! Then I heard CLICK. I figured it was a cracking noise .it was the timer cutting off! 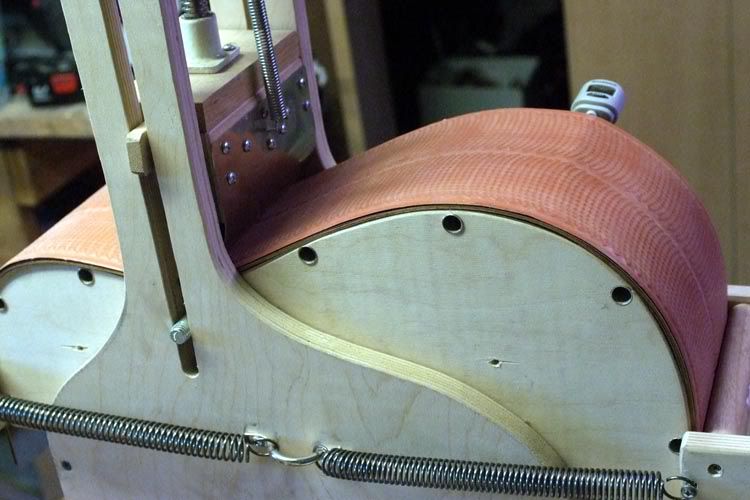 So, I let it sit 2 hours. I slowly undid the mold. I removed the center block to make room, pull the stuff out and . I DID IT. (Rocky Music please) Upon examination while putting it in the form I either see a small edge crack or just a wet weird spot. I will look at it after I bend the other side. I hope I get the top right oh ya its marked lol. 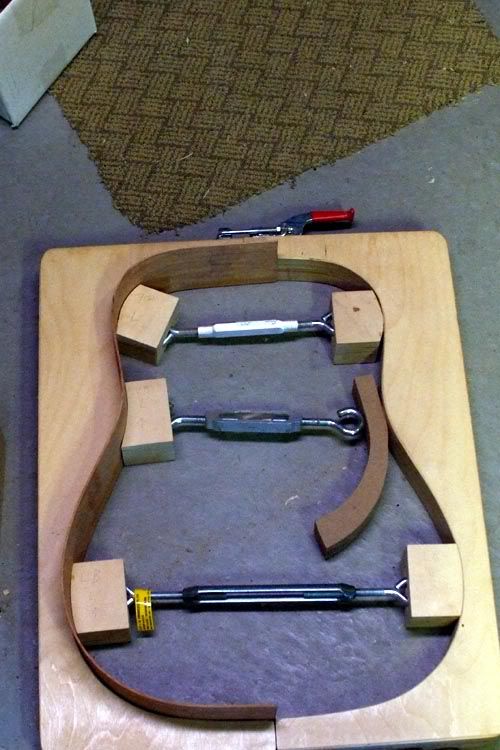
|
|
#44
07-10-2009, 08:03 PM
|
|||
|
|||
|
I have the same setup, and with the router switch, it won't go to 300, but with mahogany you don't need to. Your sandwitch is wrong though, should be wood/foil, stainless, blanket, stainless. Spritz the wood with water, paper , see toddstocks video at the OLF. Bending is pretty easy using this method, but the heat doesn't go so high, thats all.
Looks like you got one dem nice curved chisel blades, is that really nice or what?
|
|
#45
07-11-2009, 05:32 AM
|
||||
|
||||
|
I am pretty sure I used the order that Blues Creek gave me. Your way could be right or a different way. I was told by one "use soaked Paper to wrap the wood every time", another said the paper is only for woods with lots of figure.
I'm going to watch some Mayes video's today and see how he does it. Seems the only definitive answer to any technique is there is no definitive answer. Chisels are a whole new world to me. I did make a "scary sharp" Sharpening pad for about 50 cents. Beats 200 -300 for a sharpening set up!
|


