|
|
#76
 12-23-2020, 07:17 PM
|
|||
|
|||
|
Yup; looks good!
Mark and I use the same general methods, and get together when we can to bounce ideas off each other. Not nearly as often as I'd like, though. 
|
|
#77
12-25-2020, 08:12 PM
|
||||
|
||||
|
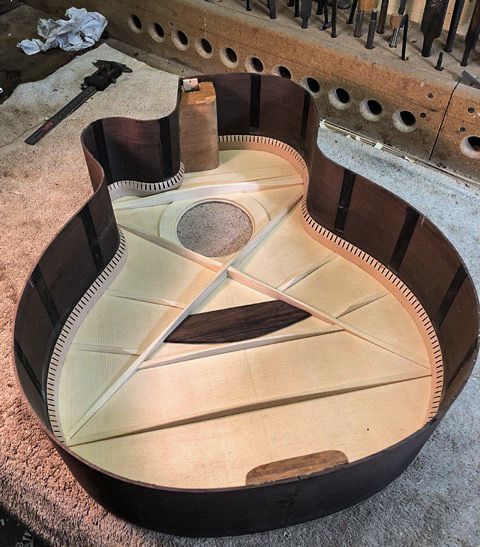
Mark glued the braced Italian Spruce top to the reverse kerfed lined Brazilian Rosewood rims. The rims have a 47 radius while the braced top has a 30 radius to the bracing. The rims are still oversized and will be cut down to incorporate a 1 Manzer wedge before being lined and having the back glued on.
__________________
A bunch of nice archtops, flattops, a gypsy & nylon strings
|
|
#78
12-27-2020, 03:09 PM
|
||||
|
||||
|
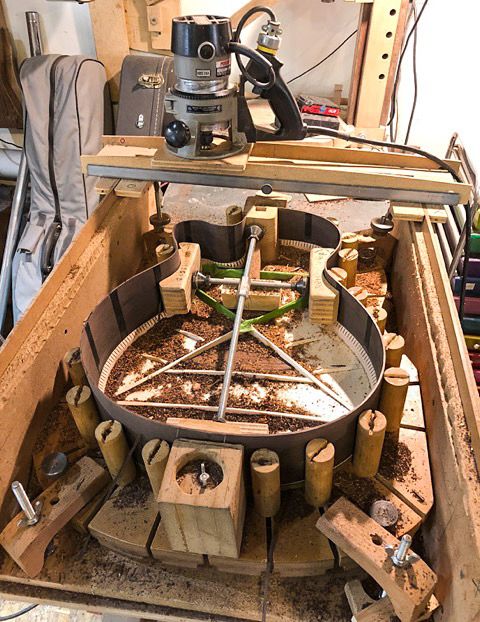
This is Marks rim trimming set up. Note the X and Y axis arched guides used to establish a dish with his router. Like on his top/side junction where he uses a 47 radius on the rims with a 30 dish radius on the top; he uses larger 18 radius on his rims than what he dishes his back to (12 radius). My Bristlecone is getting a 1 Manzer wedge for enhanced playing comfort; so the low E string side of the lower bout is only 3-1/2 deep and the high E string side is 4-1/2 deep. He marks target depths on the rims for the wedge and elevates the guitar from beneath on his work-board to establish the angle relative to the router to create the wedge.
__________________
A bunch of nice archtops, flattops, a gypsy & nylon strings
|
|
#79
12-28-2020, 06:55 PM
|
||||
|
||||
|
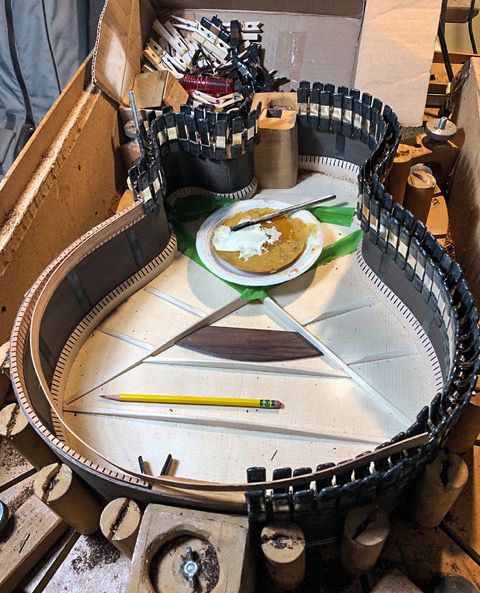
Now that the Brazilian Rosewood rims have been cut to size and radiused, Mark is now is installing some Spanish Cedar reverse kerfed linings. You can see how this is done in two steps. First the kerfed portion of the linings are glued to the rims followed by separate step of gluing on a thin cap.
__________________
A bunch of nice archtops, flattops, a gypsy & nylon strings
|
|
#80
12-29-2020, 09:00 PM
|
||||
|
||||
|
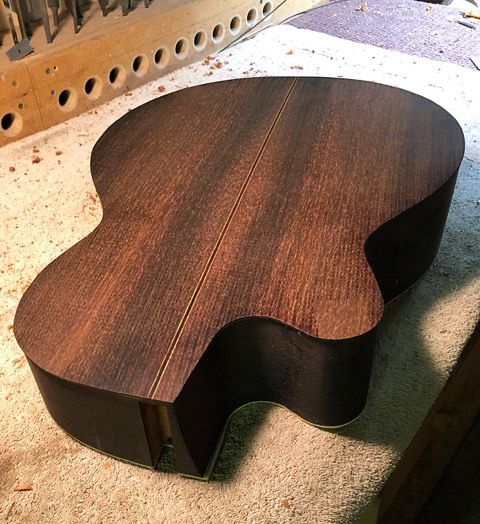
Today Mark trimmed off the Spanish Cedar reverse kerfed linings and drilled the holes for the neck bolt and a truss rod access port through the upper transverse brace.
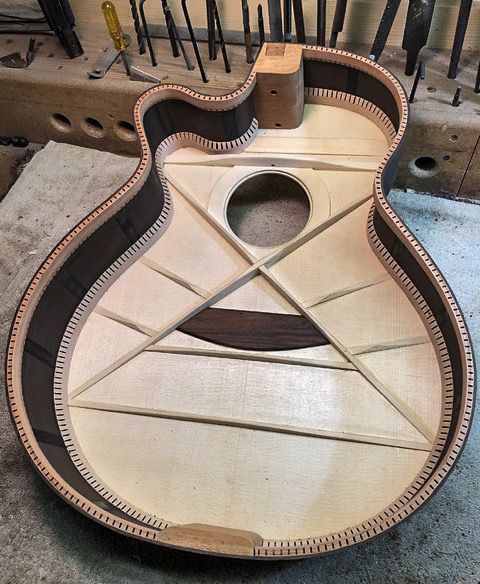 He also made some clamping molds for both the bridge and fingerboard extension. 
__________________
A bunch of nice archtops, flattops, a gypsy & nylon strings
|
|
#81
12-30-2020, 11:36 AM
|
||||
|
||||
|
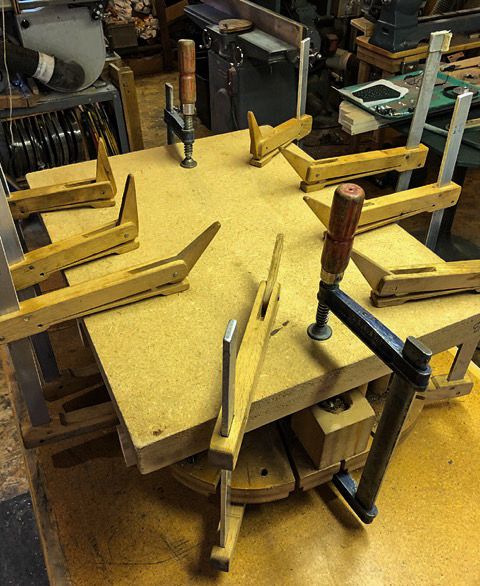
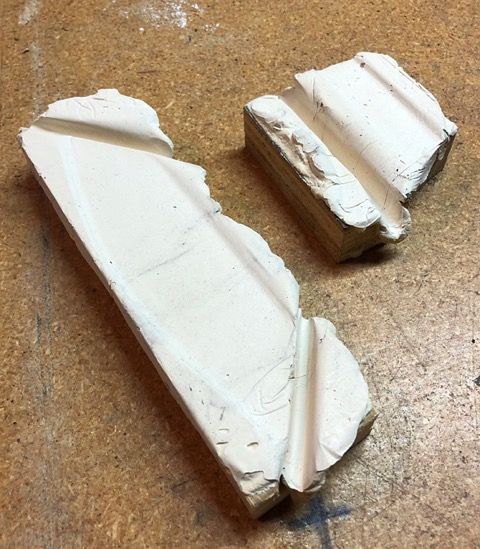
Marks clamping molds conform to the irregular shape on the inside of the guitar and result in him being able to apply much more even clamping pressure when he glues on the bridge and fretboard extension. Both the bridge and the fretboard extension have large surface areas. With these molded cauls on the underside he can apply a lot of clamping pressure without damaging anything. Heres a photo of the two molds. You can see the impressions of the bridge plate, popsicle brace, X braces, and upper transverse brace. The molding compound is a thick layer of a pasty consistency plaster (Fix-it-all) and backing blocks are 1 plywood.
__________________
A bunch of nice archtops, flattops, a gypsy & nylon strings
|
|
#82
01-01-2021, 03:13 PM
|
||||
|
||||
|
Mark typically roughs out neck blanks in batches of 8 or 10 at a time. Currently, he is all out of 14-fret length neck blanks, so he started making some more.
The first photo shows 20-year old 3 X 4 X 30 Honduran Mahogany neck blanks and a 12-fret version of the final result. 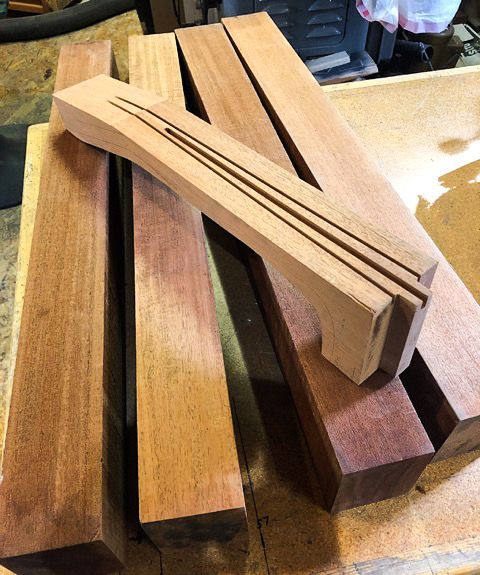 After cleaning them up and milling the blanks square, neck profile patterns is drawn on to them. Next step is off to the band saw....  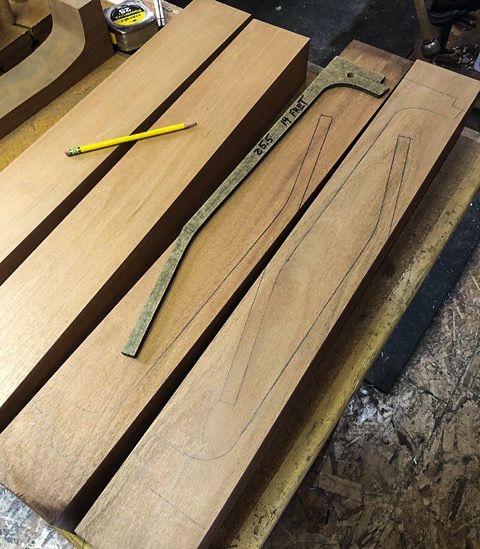 Eight 14-fret Honduran Mahogany neck blanks are now completed. The two outbound slots to either side of the truss rod slot are to accommodate 1/8 x 3/8 x 18 carbon fiber reinforcement rods. 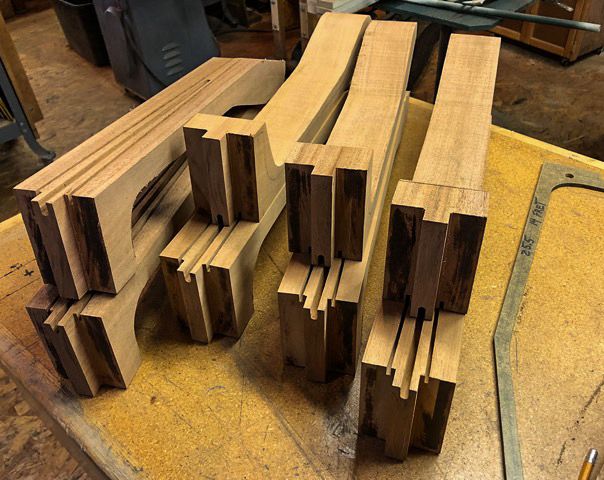
Last edited by iim7V7IM7; 01-01-2021 at 07:02 PM.
|
|
#83
01-02-2021, 07:42 PM
|
||||
|
||||
|
Mark installed one of his patented (US7507887B1) double action truss rods into the Honduran Mahogany neck blank today.
https://patents.google.com/patent/US7507887B1/en Marks truss rods are unique in they have two axial threaded sections with differing pitches. When you turn the adjustment nut, it causes the threaded sections to advance at differing rates changing the length of the rod creating a controlled bend. The mechanism provides extremely fine, controlled adjustment. Mark manufactures and sells them to many luthiers. My guitar from Michael Bashkin has one for example. The truss rod was capped by an Honduran Mahogany insert. He also epoxied in two supportive 3/8 x 1/8 x 18 carbon fiber bars as well. 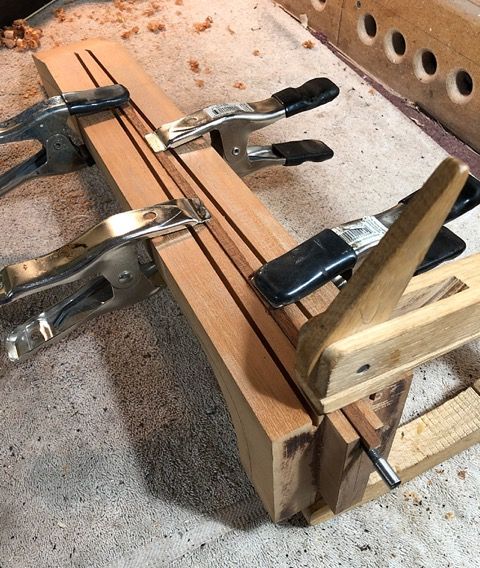 
|
|
#84
01-03-2021, 02:49 PM
|
||||
|
||||
|
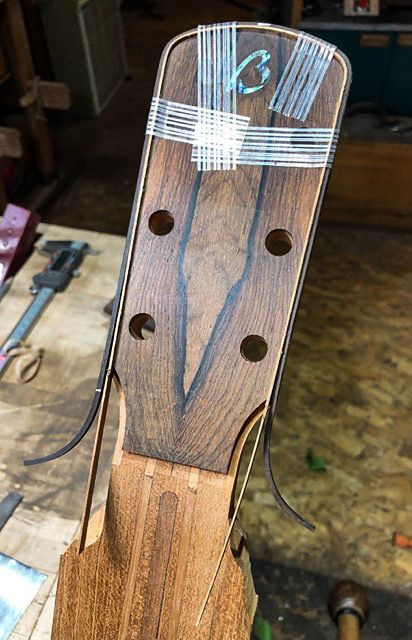
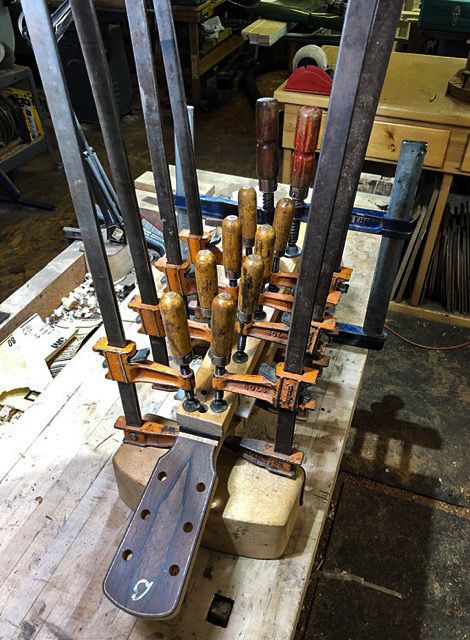
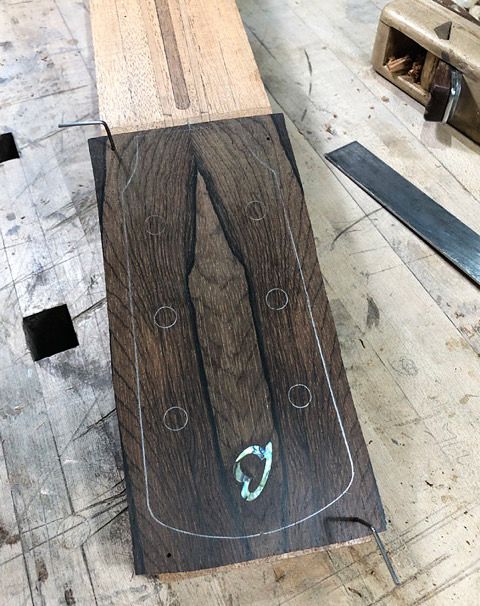
Mark has inlayed a Paua Abalone B into a book a matched Brazilian Rosewood headstock veneer. He uses alignment pins outside the profile to locate it on the Honduran Mahogany neck blank when gluing it.
|
|
#90
01-10-2021, 01:36 PM
|
||||
|
||||
|
Heres Marks sanding setup for truing up his rims. The horizontal drum sander that you see in the image is actually an attachment for his wood lathe. He is using an aluminum drum has no compliant cushioning, so it does a good job of eliminating irregularities in the sides and it is incapable of reaching into low spots. Care must be taken when using this method to avoid creating washboard on the sides.
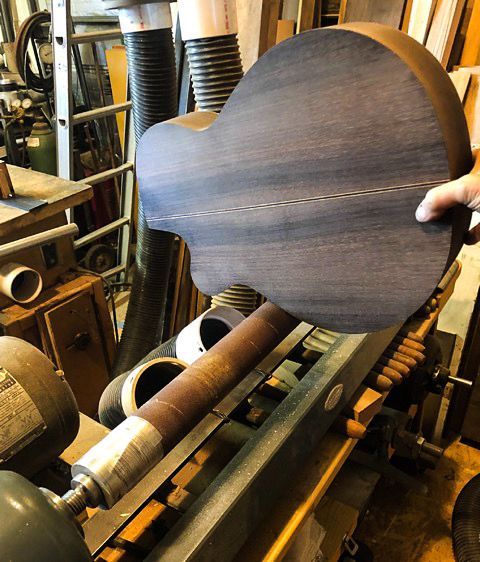 After the horizontal drum sanding to true up the sides is completed, Mark hard blocks the sides by hand with 80 and 120 grit sand paper to eliminate any minor washboard. 
|