
|
|
#48
 04-27-2023, 04:32 PM
|
|||
|
|||
|
Is yours the same model Lindsay is playing in the video? I love the tone of her guitar. I hope to play a Wilborn some day.
https://www.youtube.com/watch?v=qu1I1HNqchM 
|
|
#49
04-28-2023, 05:31 PM
|
||||
|
||||
|
Quote:
Ben sent me a couple of updates. He's getting ever-so-close to the finish line. Here is the neck getting carved down using a rasp...   And just like that, he's in high gear heading to the finish line. All that is left is installing frets, final clean up sanding and then off to the spray booth it goes. More than likely, between spray coats, cure time and letting it get used to strings, we are still a month or so out. However, I am amazed at how awesome the product is with such a relative short amount of build-time. Ben: Did you ever know that you're my hero? (Wind Beneath My Wings - Sorry to all that will have that song swimming in your heads!)   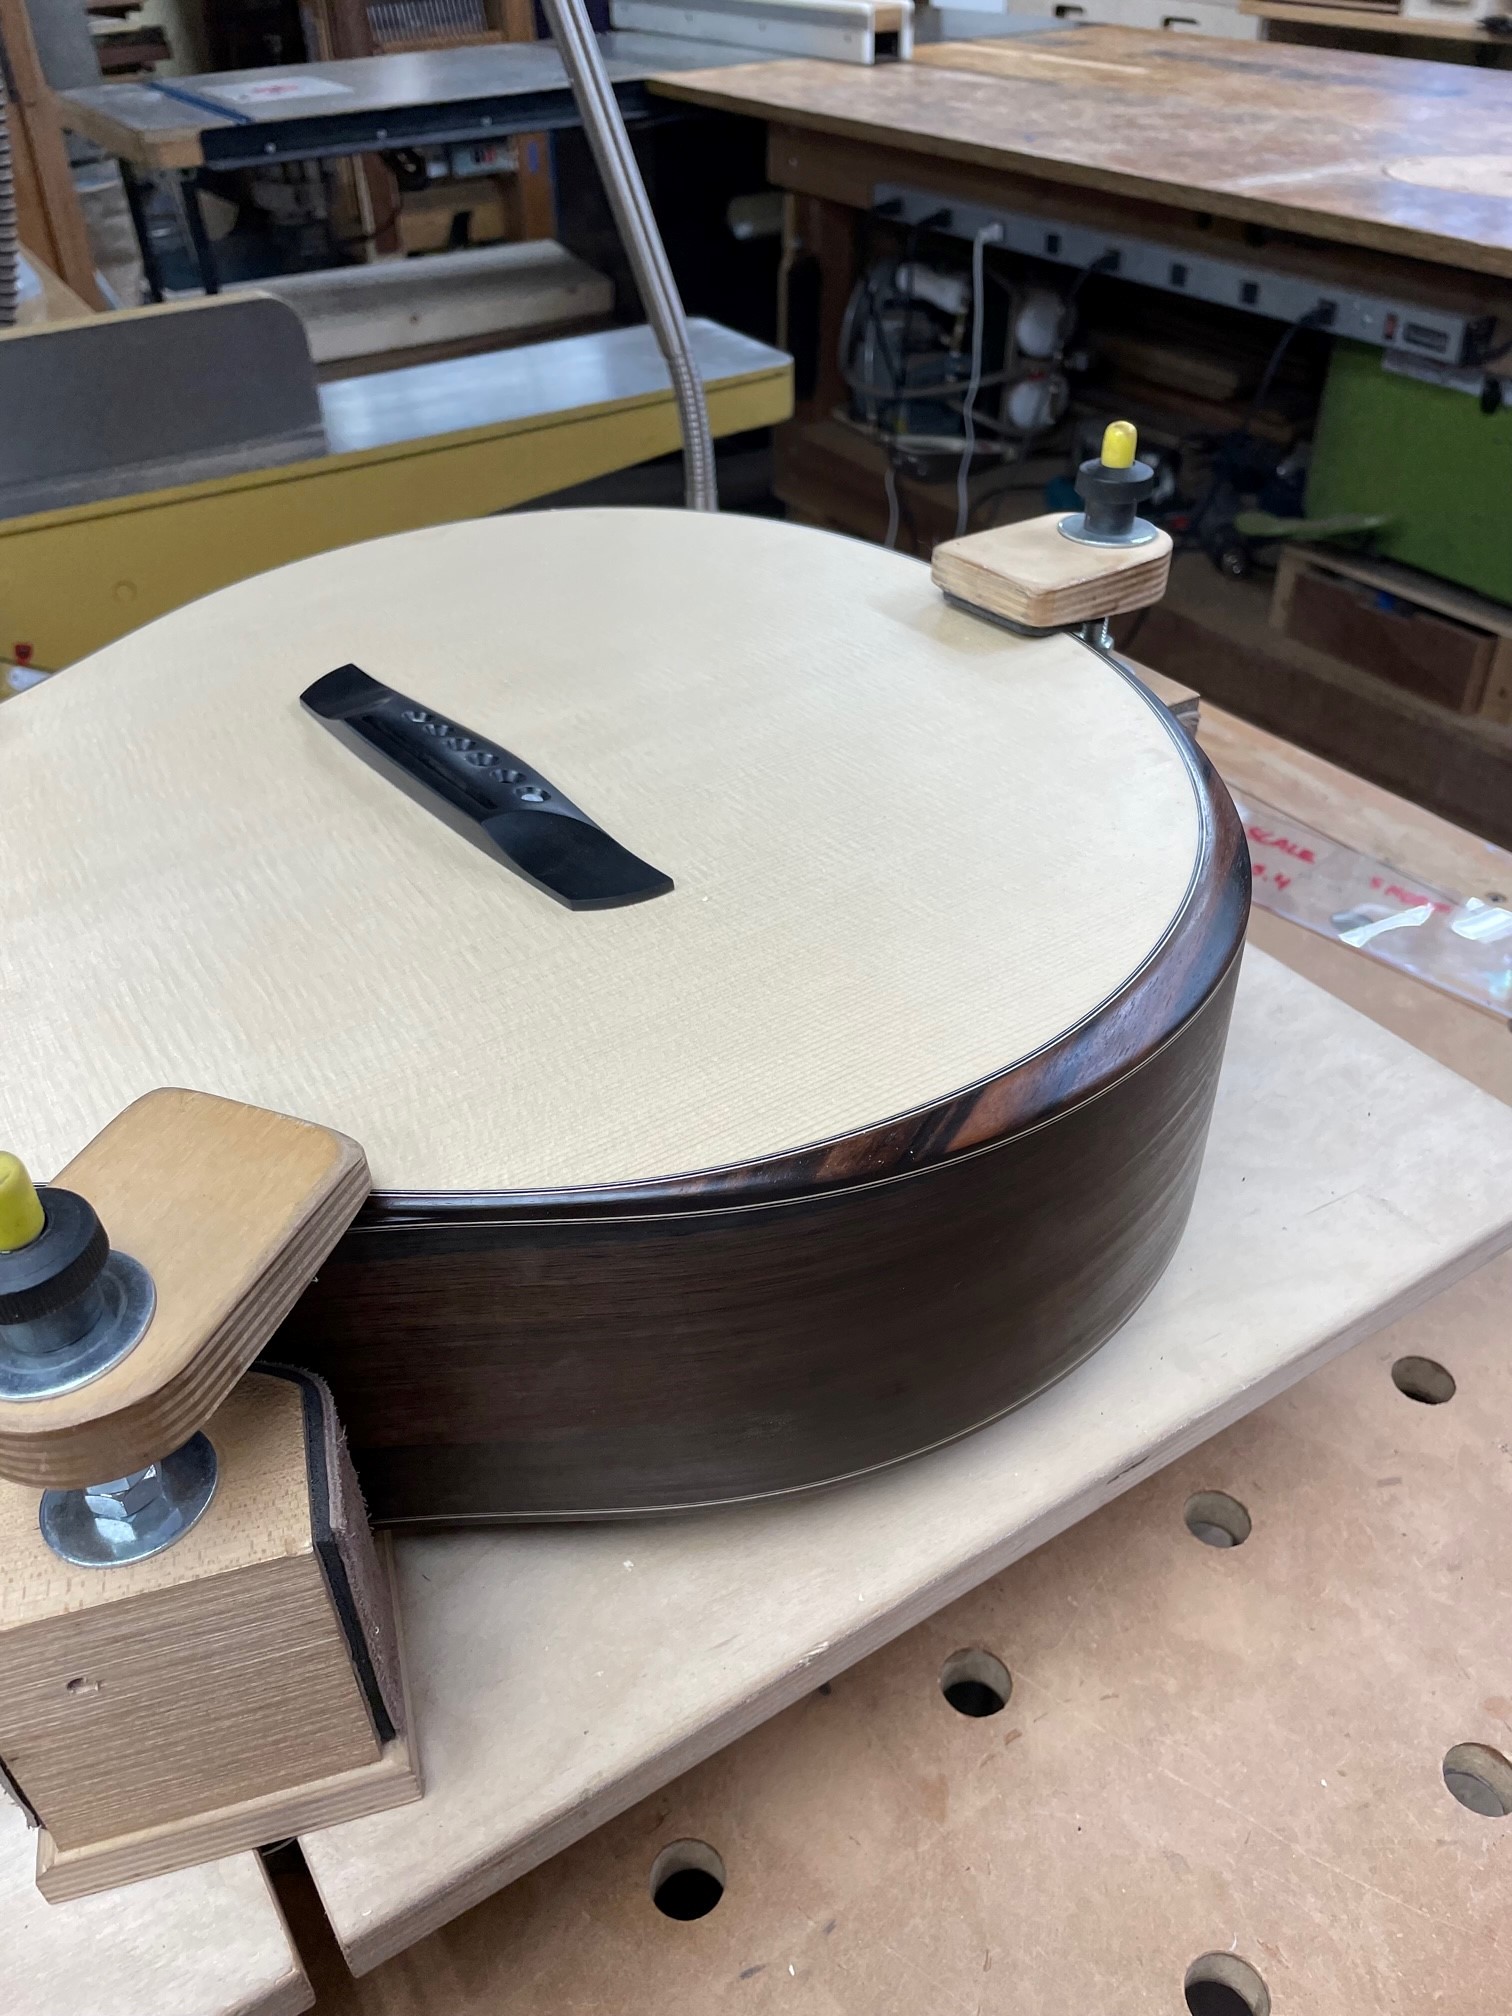 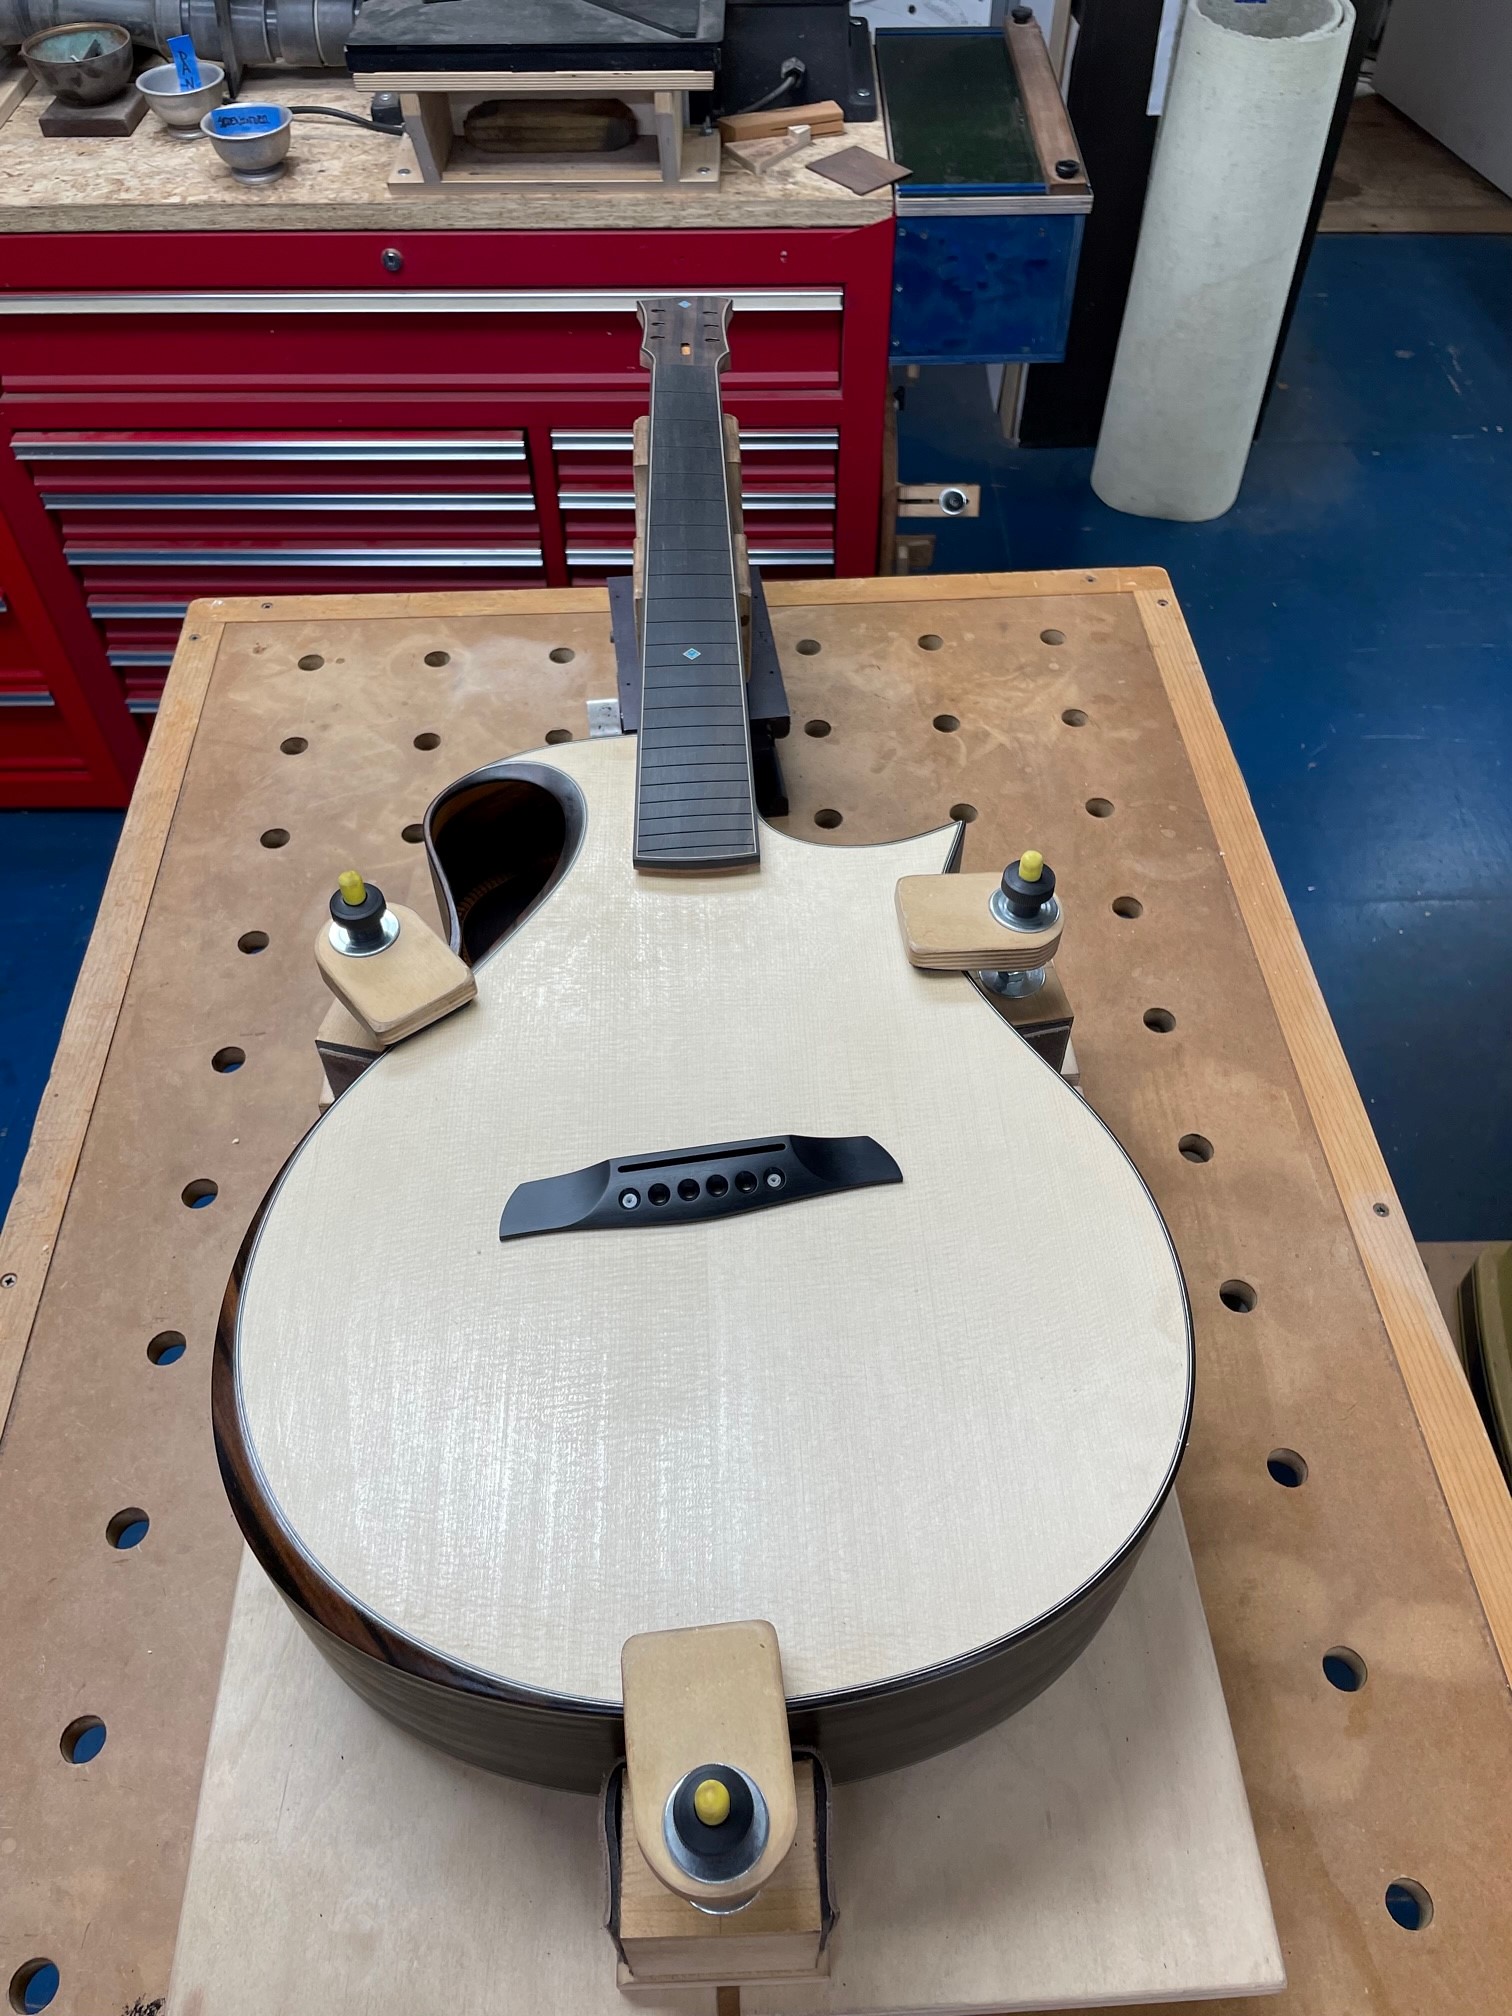
|
|
#50
04-28-2023, 06:57 PM
|
||||
|
||||
|
I schedule 10 weeks for a build. I figure it takes me about 3-4 weeks to build the instrument, and another month for spray and cure. I build in a bit of time for inefficiency/ fixing mistakes, and for working on other guitars a bit here and there. I generally start my next build as soon as the guitar goes into the finishing booth. I do think that the finish/ set-up is about 1/3 of the total labor of the process, so at this point, Dan's guitar is by no means done, but it is now what it will be, woodworking wise. This pace allows me to make about 10 to 12 guitars a year. I'm really lousy at keeping track of how long each guitar actually takes, but I know if I work 40-50 hours a week and take one month off, at the end of the year there will be a heap of 10-12 guitars completed. I think when you are doing a build thread like this, it makes it look like things are going faster than they really are because big chunks of work appear to suddenly be done with each post. But in between those posts, there is a lot of sawing and gluing, sanding, scraping and occasional cussing. What am I saying here? Well, I don't really think I'm very fast at all- it's just all I do with my days, so cumulatively, things end up getting completed. I just trudge along (see earlier posts...) and lo and behold, there is now a guitar where no guitar was before!
|
|
#51
04-28-2023, 07:07 PM
|
||||
|
||||
|
Quote:
|
|
#52
04-28-2023, 07:10 PM
|
||||
|
||||
|
Quote:
|
|
#53
05-01-2023, 08:25 AM
|
||||
|
||||
|
Blaping is a highly technical skill!
This is beautiful Congratulations to all involved Paul
__________________
4 John Kinnaird SS 12c CUSTOMS: Big Maple/WRC Dread(ish) Jumbo Spanish Cedar/WRC Jumbo OLD Brazilian RW/WRC Big Tunnel 14 RW/Bubinga Dread(ish) R.T 2 12c sinker RW/Claro 96 422ce bought new! 96 LKSM 12 552ce 12x12 J. Stepick Bari Weissy WRC/Walnut More
|
|
#54
05-01-2023, 11:49 AM
|
||||
|
||||
|
Thanks for checking in Paul.
I need to apologize to all of you and of course Ben... This morning I was cleaning out my junk folder and for some reason, a couple of updates that Ben had sent a couple of weeks ago were stuck in there. I did think it was odd that we went from bracing to a closed box in a blink of an eye, but we all know there was some time spent "under the hood" if you will. So with that said, let's time travel once again, but this time backwards. Here are the rims getting glued to the back along with some nice photos showing how clean and precise everything was prior to closing the box...     The quality of this build and Ben's work in particular are simply mind boggling.  There's still one more update that I missed to show, but I need to get to work. For now, enjoy. 
Last edited by nootis; 05-01-2023 at 05:15 PM.
|
|
#55
05-01-2023, 04:38 PM
|
||||
|
||||
|
No surprise, thats elegant work there. Bens work always inspires.
Steve
|
|
#56
05-01-2023, 05:50 PM
|
|||
|
|||
|
Nootis,
Let Ben know I have some extra clamps if he needs any. 😂
|
|
#57
05-01-2023, 05:57 PM
|
||||
|
||||
|
Thanks for checking in Steve. I too am inspired, but I'm also amazed!
Thank you too for reading along Jimmy. I look forward to meeting you and playing one of your instruments... hopefully at B.i.G. if everything works out. Ben tells me that the next set of pictures is the most technically difficult part of the Nautilus. He says that the trick to the long curved purfling miter is to perform the feat "off the instrument". That's right folks, you too can try this at home and you don't even need an instrument! The problem though, is if you can pull off making the purfling, you'll need an instrument to glue the assembly back on in order to continue. Since Ben does have the instrument handy, he then makes a template made of Baltic Birch in the shape of the Comma sound hole. Each guitar has it's own variation, so this is a necessary step for every guitar that Ben is making these days. He uses the template to shape a piece of Macassar Ebony (in this instrument's case), and rabbet it to sit on the little shelf that protrudes beyond the purfling. Ben cuts and pre-shapes the Comma as much as possible before gluing it in with the goal of using zero filler so that he ends up with just very tightly cut wood joints. Check out the tiny little tapered void in the Comma where the purfling fits that seamlessly tucks the point of the purfling into this piece. The result makes for a clean channel that the rest of the binding will fill in. And that there folks is the luthier equivalent to drag racing!   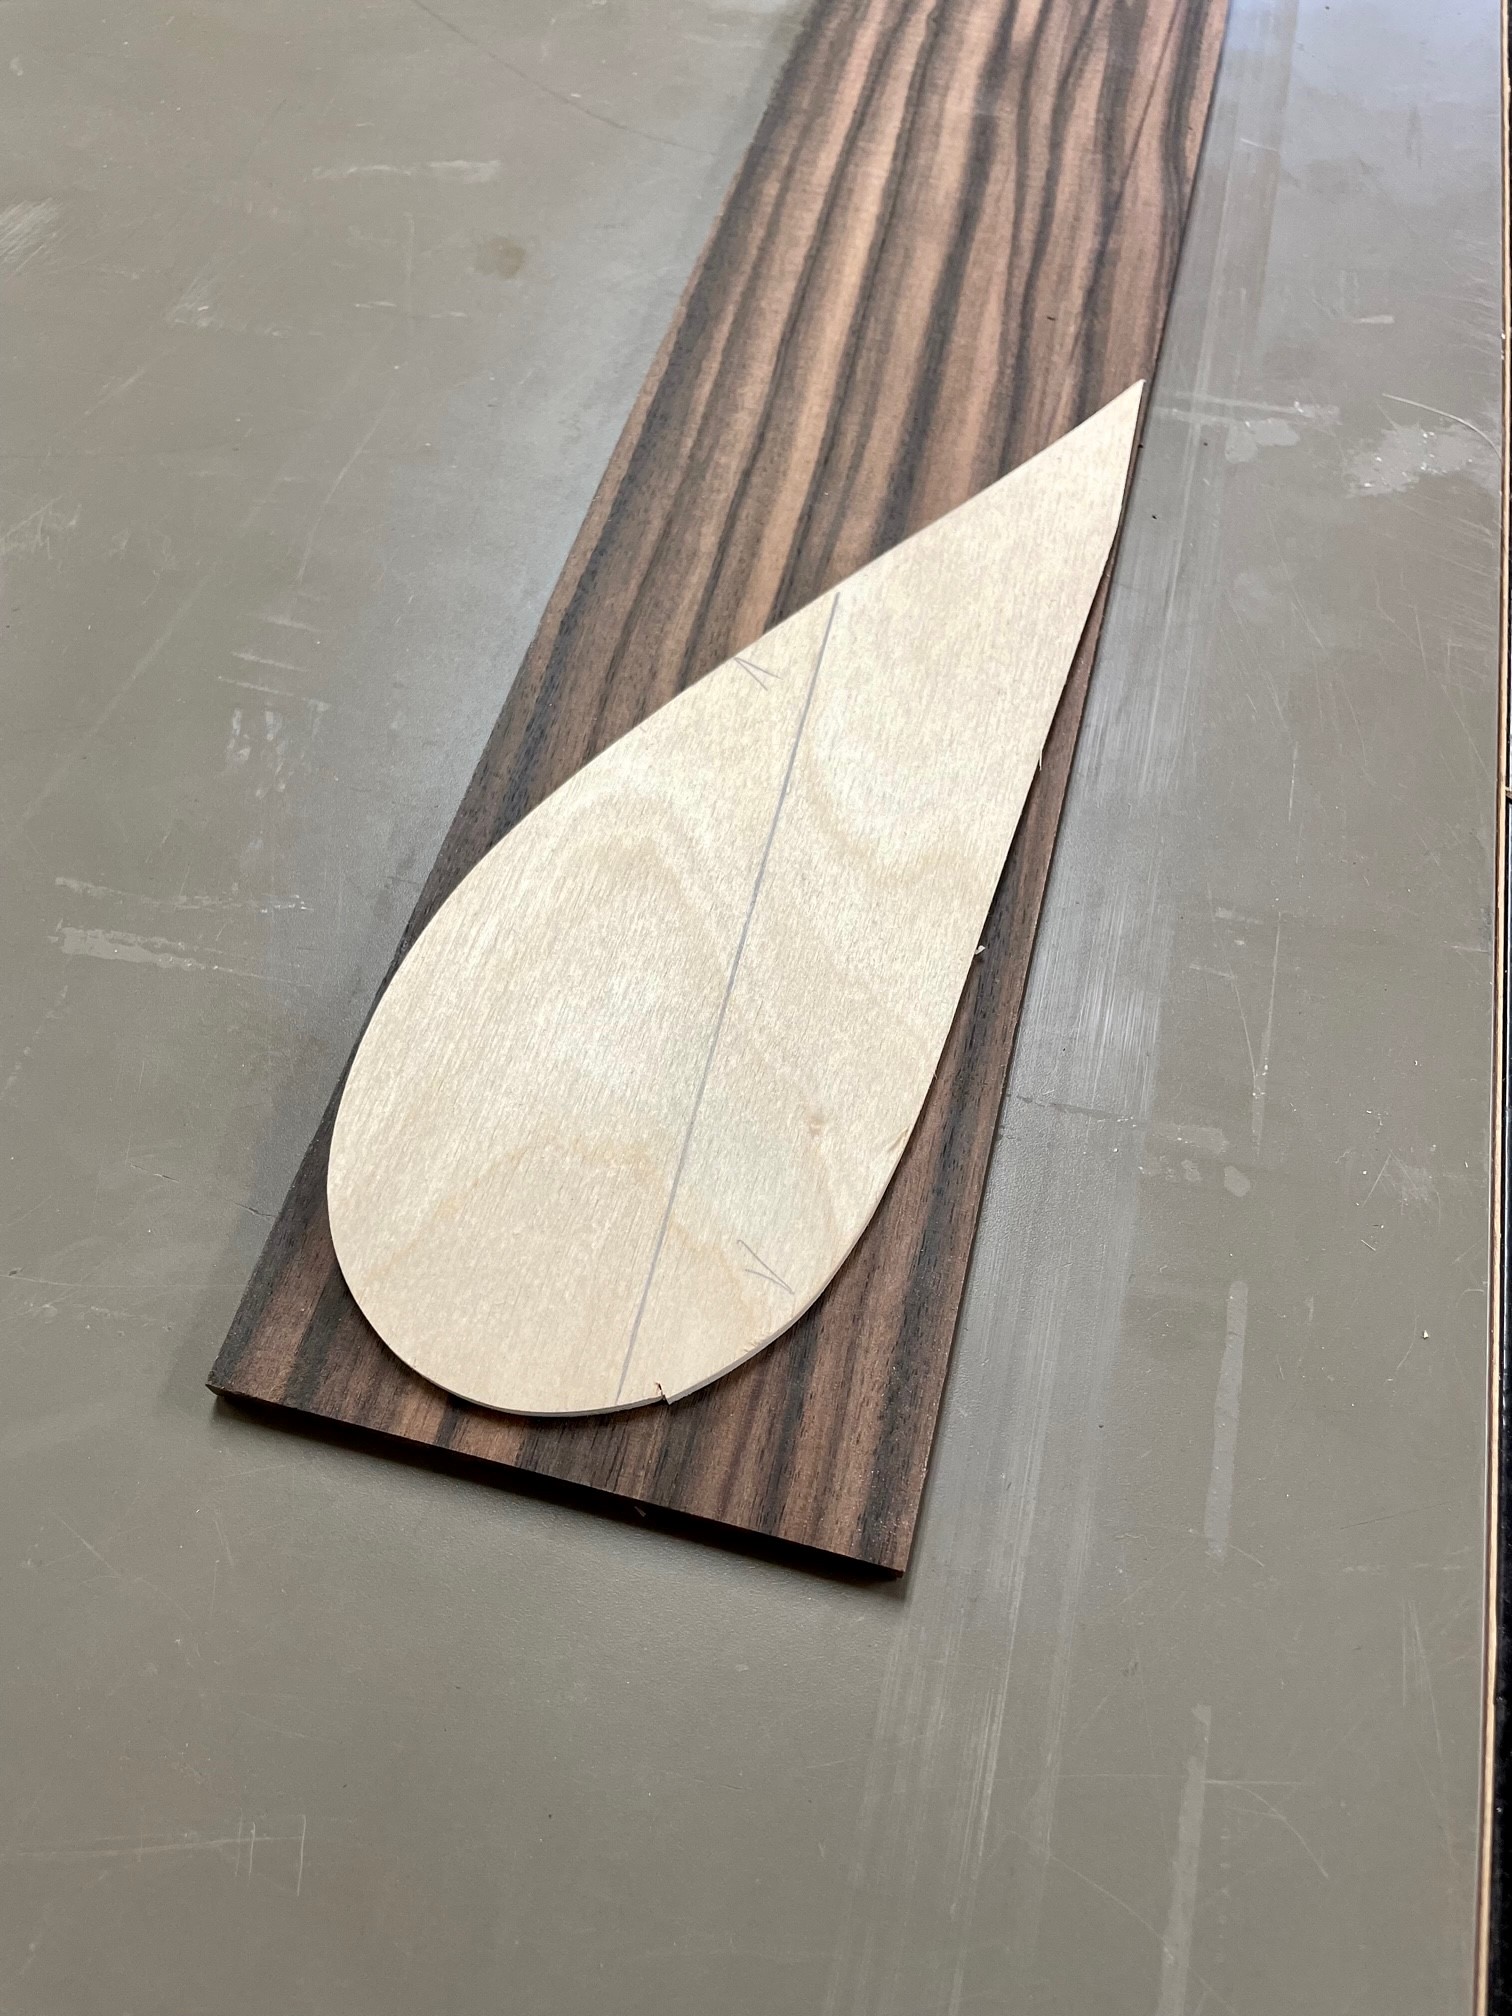  
|
|
#58
05-01-2023, 06:26 PM
|
|||
|
|||
|
Reminds me of the bee sting violin purfling. Exquisite!
|
|
#60
05-03-2023, 10:09 AM
|
||||
|
||||
|
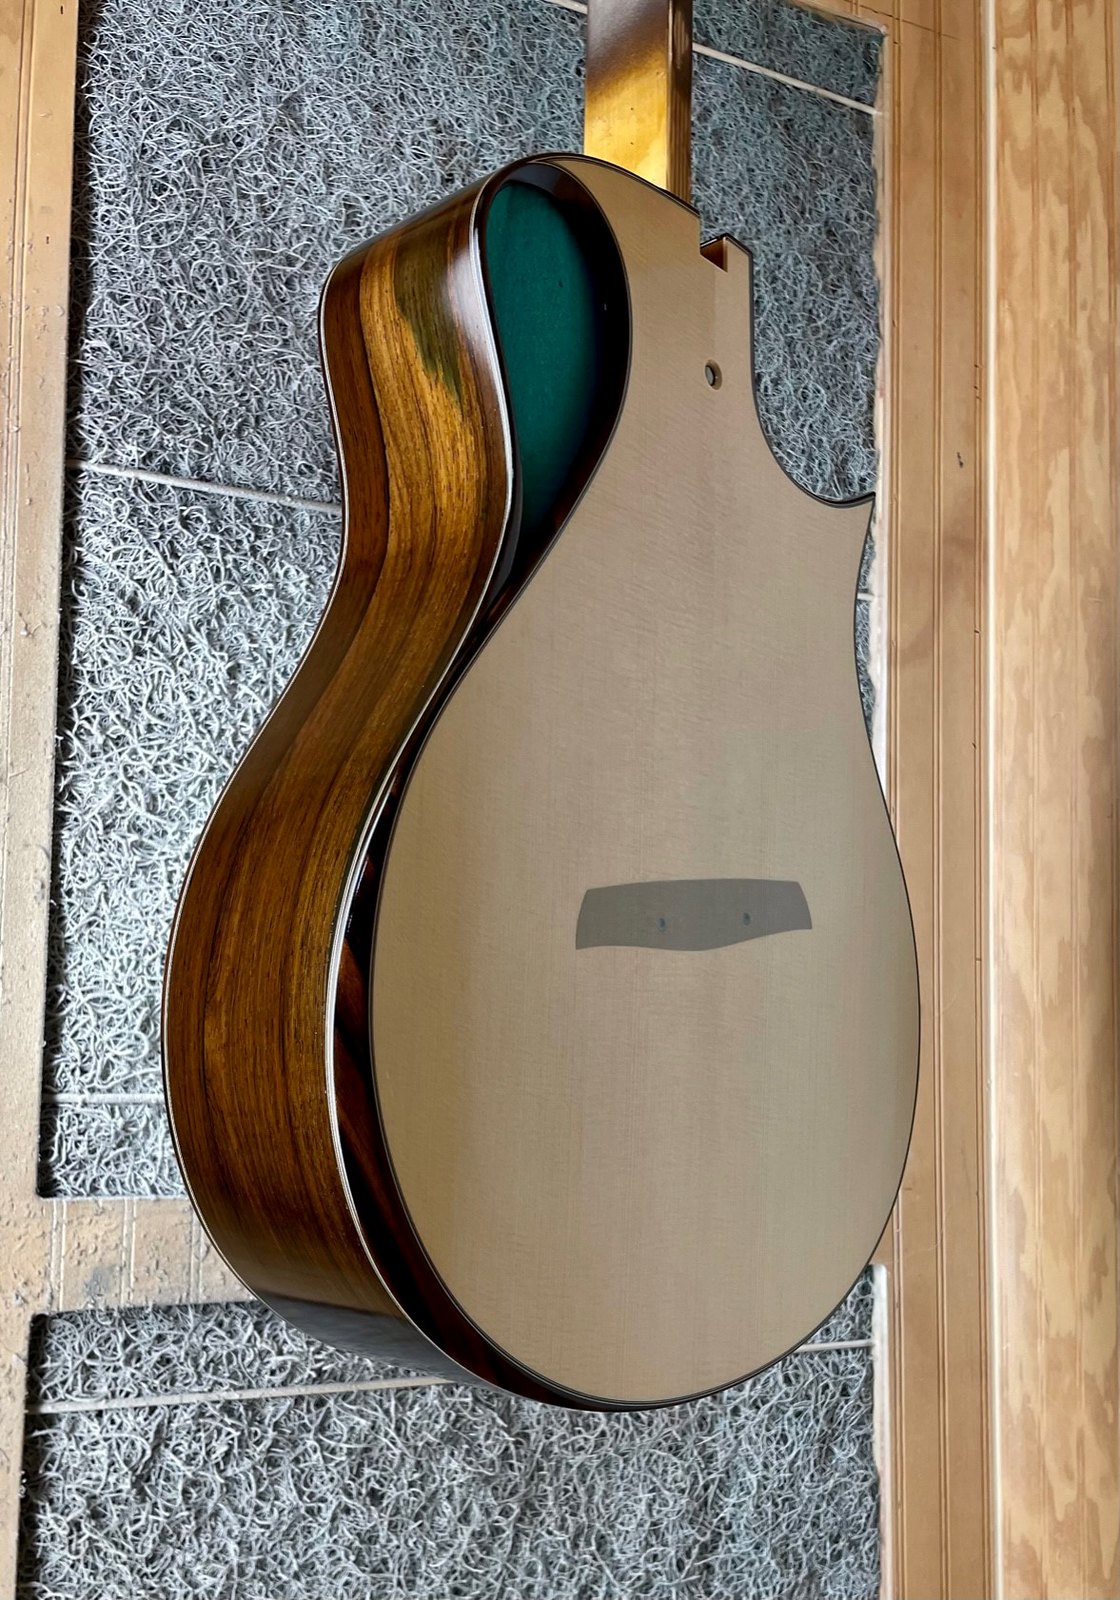
Thanks for checking in John, I couldn't agree more. The first coat of lacquer has been sprayed, and I love the slight bit of green coming from the BRZ near the Comma. The anticipation is amplifying.
|


