
|
|
#181
 11-02-2016, 06:37 PM
|
|||
|
|||
|
I use an end nipper that I ground the cutting edge flush to the surface , for trimming fret ends. I found I can use them to nip the tangs as well, by nipping flush against the bottom of the fret, then turning the fret and removing the waste tang. I do touch up the tangs a little with a file, in a jig I built similar to Frank Ford's, down to the ball bearings (though I use 2 bearings to give my file more surface to ride against.) I have a picture of this jig in the jigs and fixtures thread I started a while ago.

|
|
#182
11-03-2016, 12:39 AM
|
|||
|
|||
|
The stewmac nipper works very well but still leaves a tiny ridge ( maybe 3-4 thousandths of an inch) where the tang was. It takes me about 30 seconds of filing per fret to remove these ridges.
__________________
Larry Nair
|
|
#183
11-08-2016, 11:14 AM
|
|||
|
|||
|
Haven't had a chance to post in a while, and i haven't done much, but the small steps I have done are starting to really make forward progress.
I rough carved the heel properly, and then got it 98% of the way there, but I forgot to take a picture of the end result I got the headstock to the correct thickness and carved in the volute. The volute will be adjusted to a final shape when I carve the neck so I can blend it in properly, the neck carving and volute finalising I won't do until I glue the fretboard on, but hopefully that won't be too far away. I FINALLY managed to get to the point where I glued the neck in. So the neck got glued and then pinned in place. this makes the guitar really feel like a guitar. Unfortunately I ran out of time in the workshop today to be able to rout the channels to install the graphite rods in the neck and the truss rod. If all goes to plan I may be able to do that tomorrow, and if that goes right, I should hopefully be able to glue the fretboard on after that. Rough carved heel 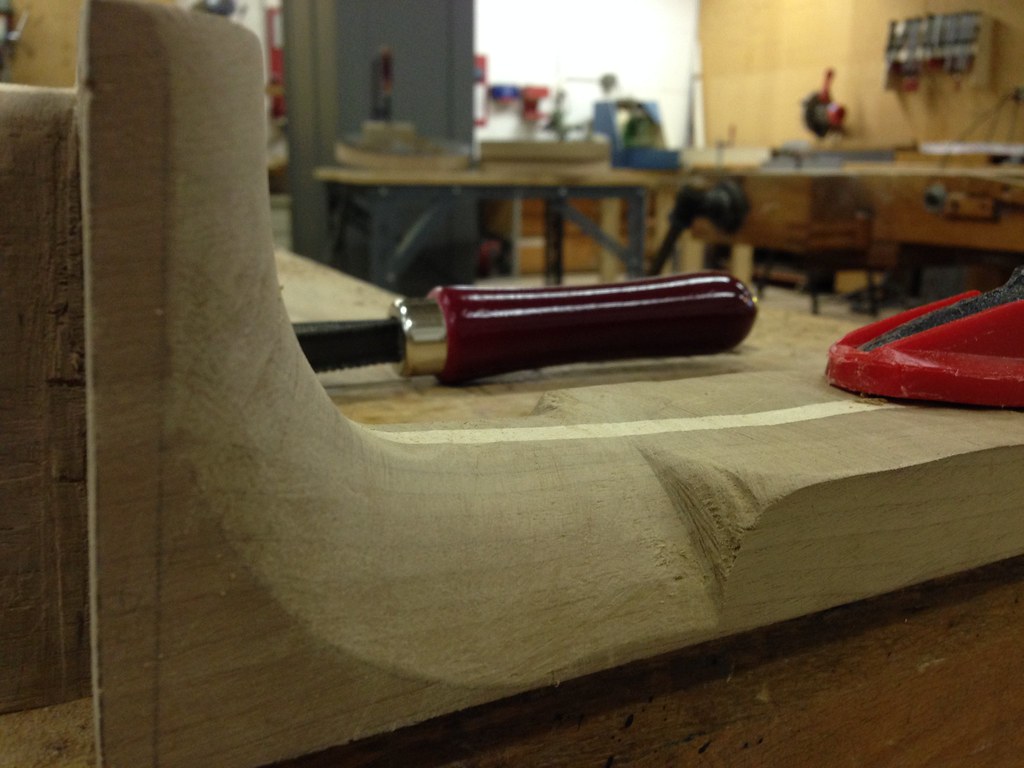 Untitled by David Emm, on Flickr Untitled by David Emm, on Flickrheadstock thicknessed and volute intially shaped 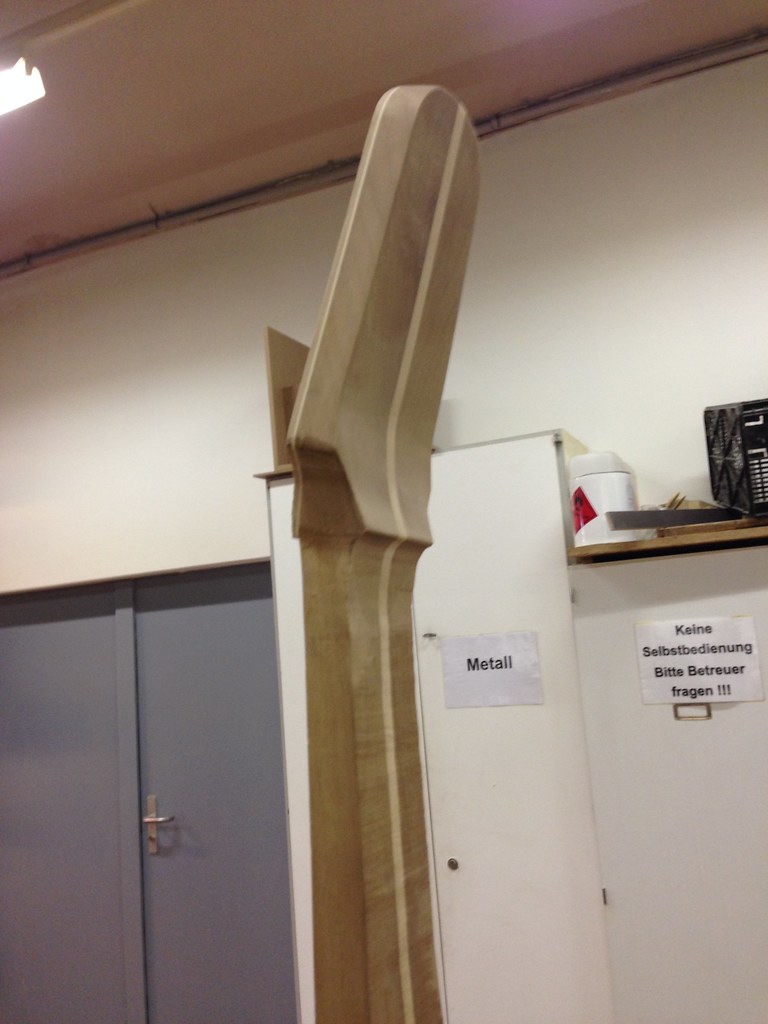 Untitled by David Emm, on Flickr Untitled by David Emm, on Flickrheadstock corrected and initial volute shaping 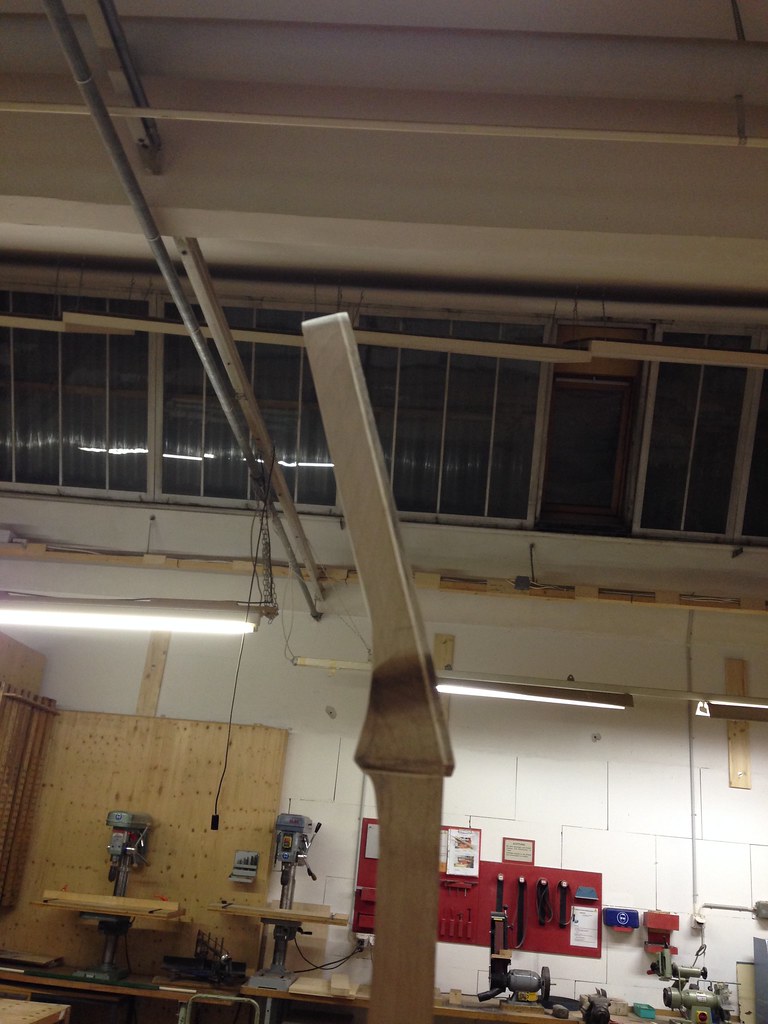 Untitled by David Emm, on Flickr Untitled by David Emm, on FlickrNeck being glued in. Held down into the joint with the tape and then kept flush with the board and clamps 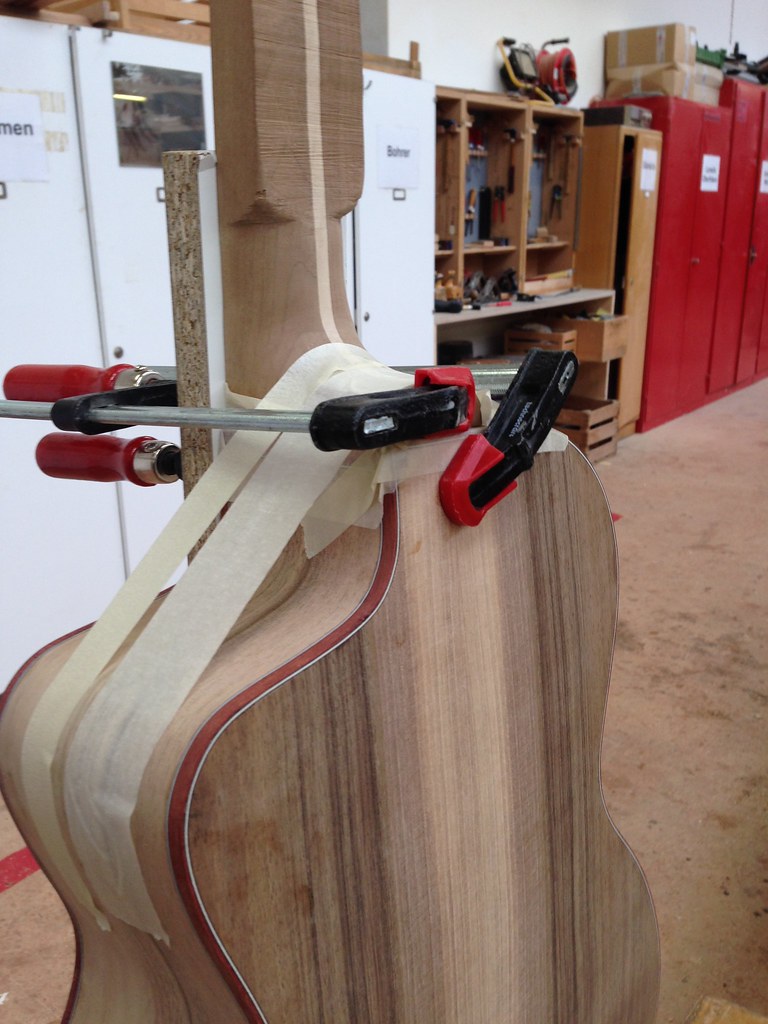 Untitled by David Emm, on Flickr Untitled by David Emm, on FlickrNeck gluing!! 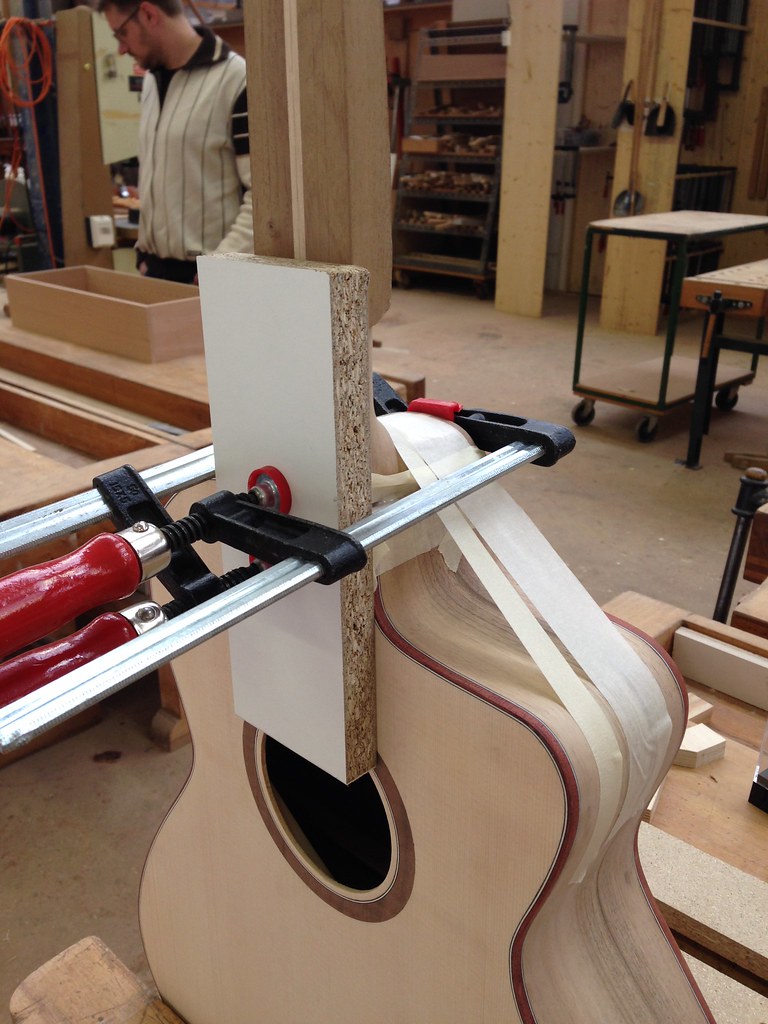 Untitled by David Emm, on Flickr Untitled by David Emm, on FlickrNeck joint pinning 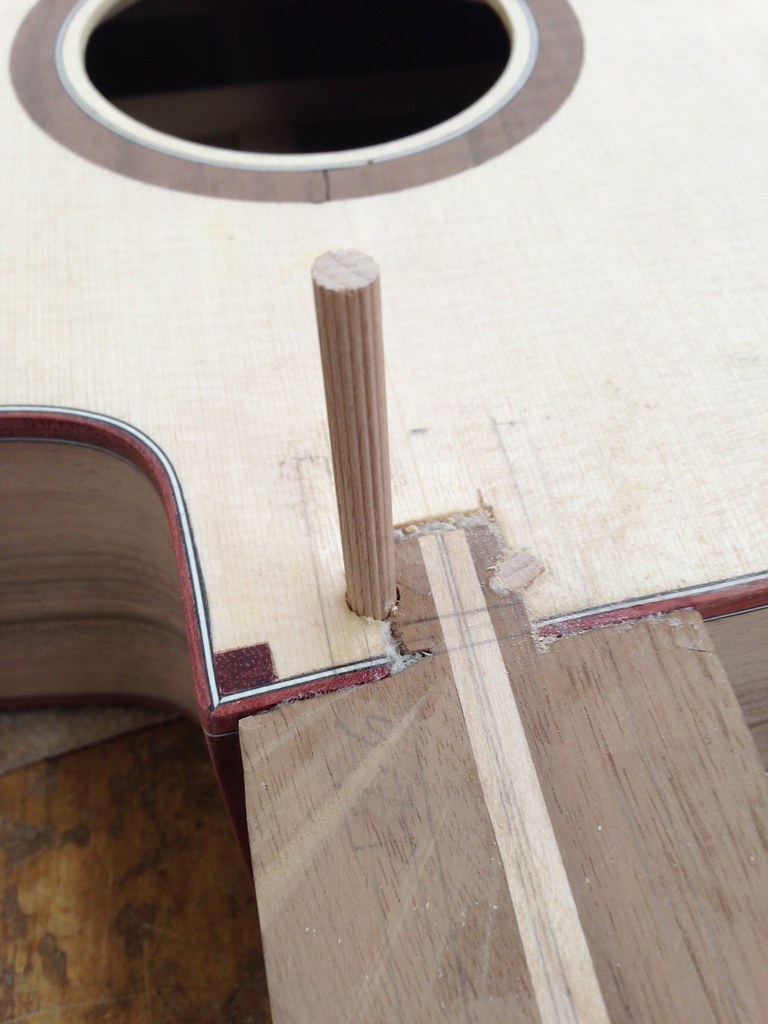 Untitled by David Emm, on Flickr Untitled by David Emm, on FlickrNeck joint pinned and glue in the joint covered in sawdust. It looks completely terrible here, but its a much closer joint than I expected it to be. 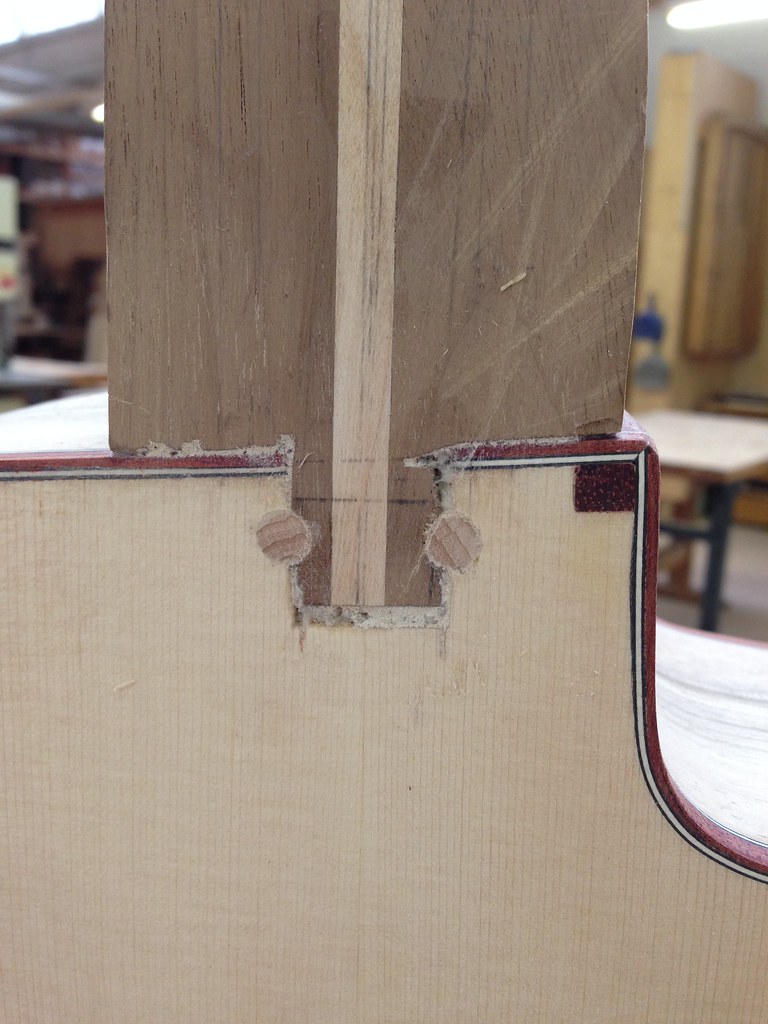 Untitled by David Emm, on Flickr Untitled by David Emm, on Flickr
|
|
#184
11-08-2016, 01:31 PM
|
|||
|
|||
|
Nice progress, do you feel like you are beginning to see the light at the end of the tunnel? Nice looking work.
Clifford
__________________
Recording King RD-318 Bedell TBAC-28-SB Jeff "Skunk" Baxter
|
|
#186
11-09-2016, 03:56 PM
|
|||
|
|||
|
Congrats on the progress.
I couldn't help but notice the job you did hiding that bad miter near the cutaway. The blood wood bindings look awesome although after following this thread, I'd never try it!
|
|
#187
11-10-2016, 10:37 AM
|
|||
|
|||
|
Quote:
So todays work didn't go as fast as planned, I had already built a "sled" to run the router in, but during my test cut, it didnt run right, it seemed the wood I picked didn't have a straight enough edge nor did it run smoothly despite significant sanding. So I rebuilt one with heavier duty wood and it worked much better. I was using an automatic on/off dust extractor connected to the router and because of this and its noise, at one point I lifted the router out before it had stopped spinning and took a nice chunk out of the side of one of the graphite rod channels. I thought about leaving it there as an experimental "tone chamber" in the neck, but when gluing the graphite rods in, I just filled it up with glue. I had hoped if I had finished the routing and graphite rod gluing quick enough, I could have glued the fretboard on, but as it happens, its probably better I haven't done that yet as my mother of pearl headstock logo is smaller and will be trickier to cut the shape of than I originally thought, so it will be handy to be able to clamp it all down on the neck without having to worry about damaging my pre-fretted board. New router sled that works with a 30mm guide bushing 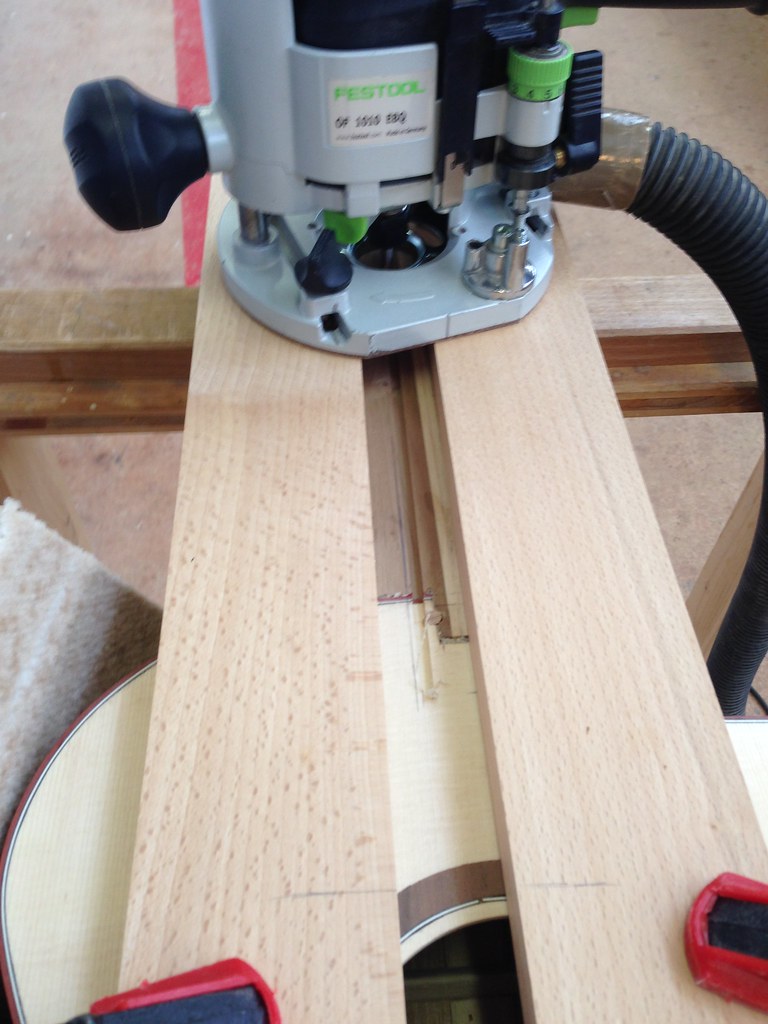 Untitled by David Emm, on Flickr Untitled by David Emm, on FlickrStrengthening rod channels and truss rod channel routed 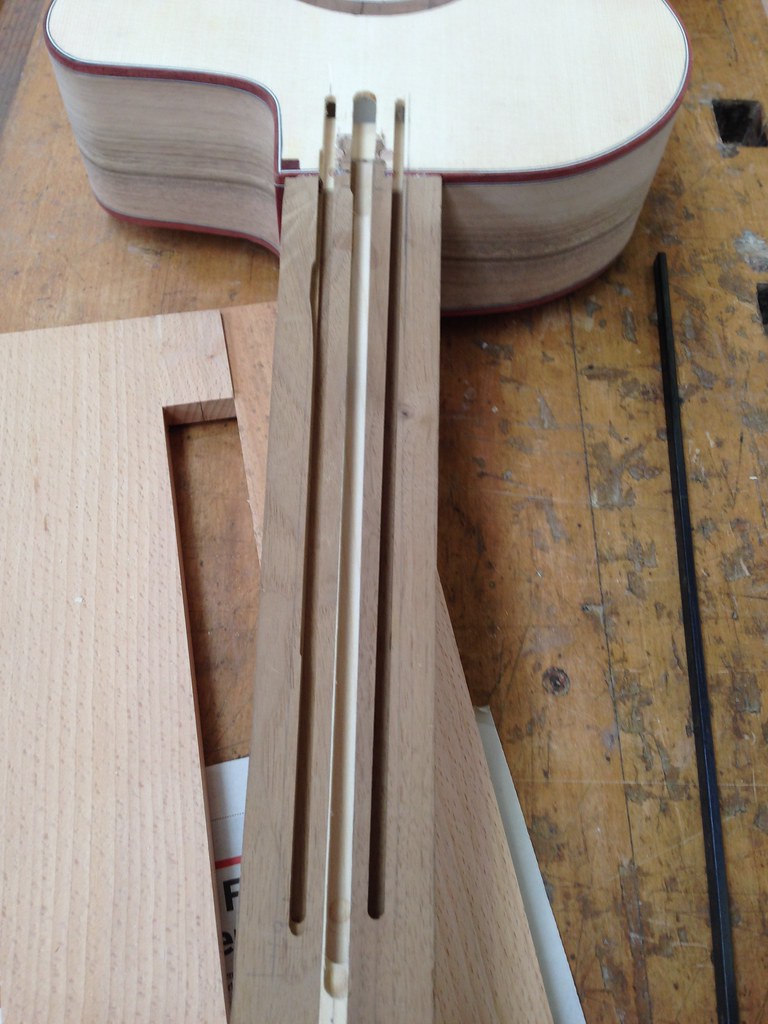 Untitled by David Emm, on Flickr Untitled by David Emm, on Flickrright side view of the 95% finished neck heel 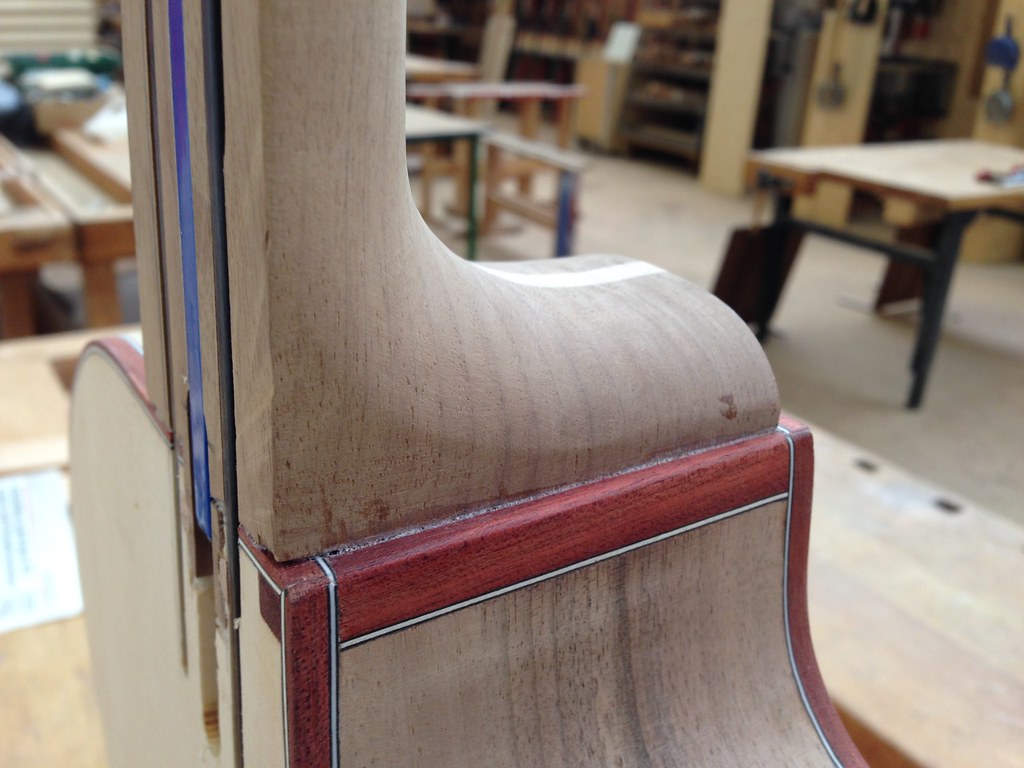 Untitled by David Emm, on Flickr Untitled by David Emm, on Flickrleft side view of the pretty much finished neck heel  Untitled by David Emm, on Flickr Untitled by David Emm, on Flickrafter the graphite rods are glued in and truss rod sitting in position 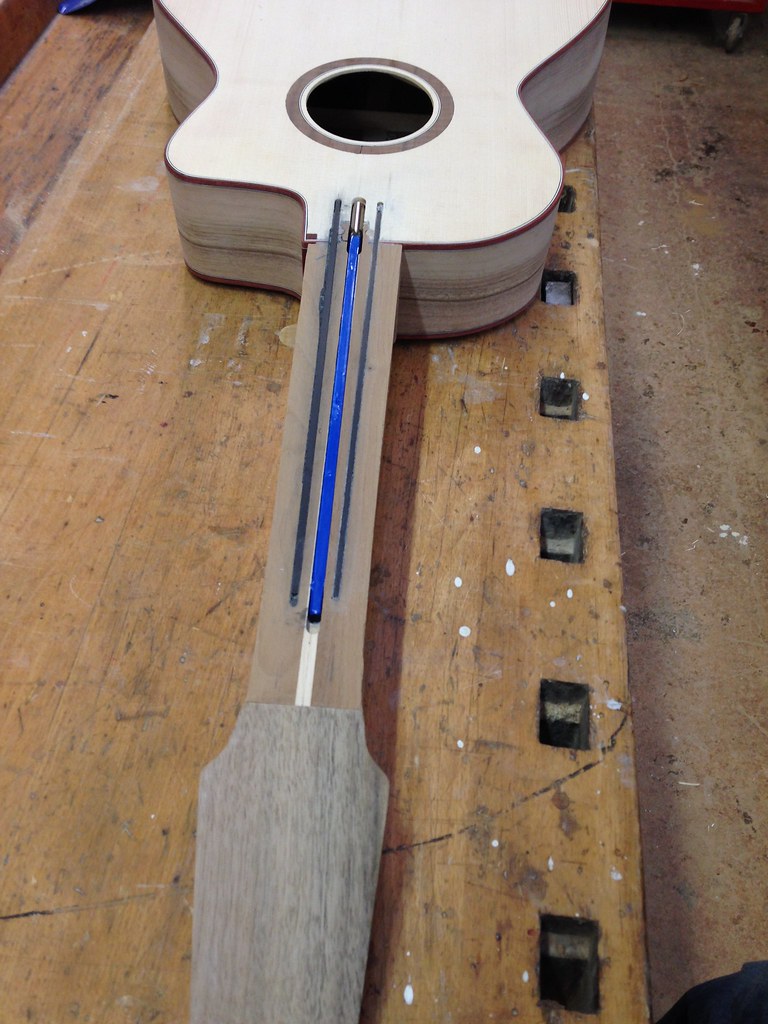 Untitled by David Emm, on Flickr Untitled by David Emm, on Flickr
|
|
#188
11-11-2016, 10:27 AM
|
|||
|
|||
|
Woohoo! the fretboard got glued on today! makes such a difference. It feels weirdly WAY heavier now the fretboard is glued on, although that could also be due to the truss rod too, but still its a surprising difference.
I also managed to inlay my logo in the headstock, not as tricky as I thought it would be, just time consuming, but it would be much easier if I had a smaller chisel. I was using a 4mm wide one however a 2mm one would have been the way forward. I'll remember that for the next one. After where i've got to, next stop is carving the neck and sorting the bridge. I really don't know how tall the bridge is supposed to be. Right now when I put a straight edge on the frets and the bridge in its approximate position, the top of the bridge is about 2mm higher than that line. My saddle is 12mm tall and because I don't know how tall the bridge is supposed to be, that means I don't know how deep i'm supposed to rout the saddle slot. Any suggestions? Everything i'm finding is all related to the saddle, nowhere can I find how tall the bridge is supposed to be before you calculate saddle sizings etc. I did the inlay first Heres the start of the inlay, I traced the outline of the logo with a sharp point scribe and then used a brand new stanley knife blade to cut that line. I then used this line as the boundary to chisel up to and remove material. Because of how narrow the logo is, I could only go so deep before I had to remove material by using the chisel vertically as a scraper and basically hacking away the bottom with the stanley blade. 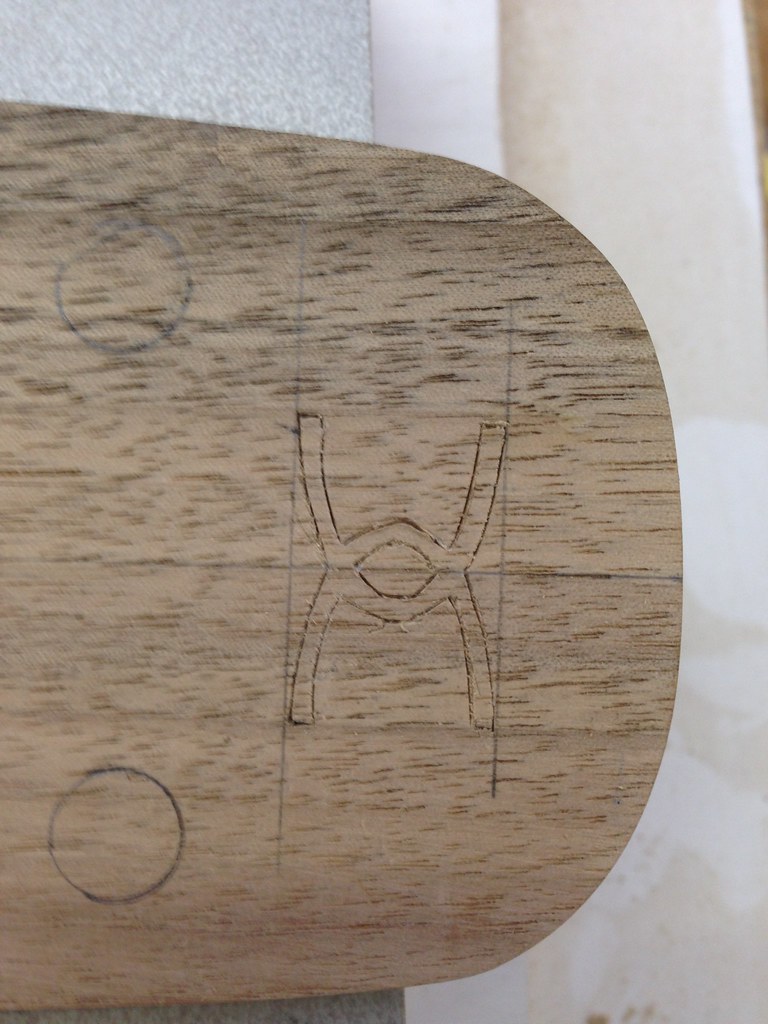 Untitled by David Emm, on Flickr Untitled by David Emm, on FlickrAfter I added the other 2 small bits to create the D and the E I superglued it all in place 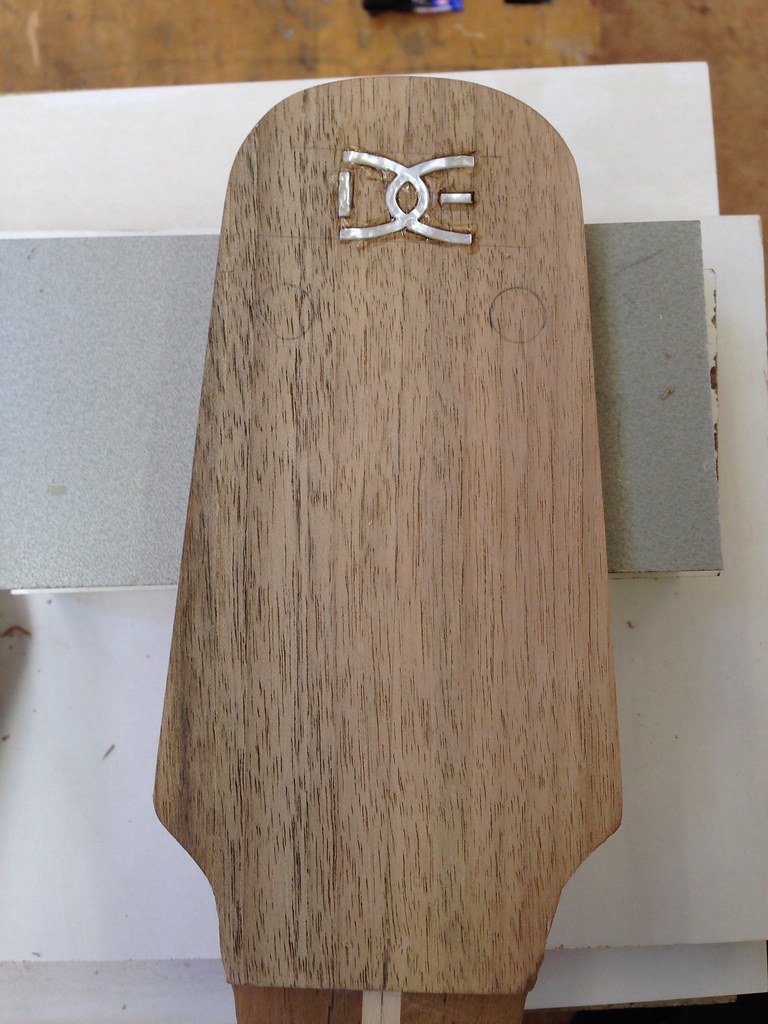 Untitled by David Emm, on Flickr Untitled by David Emm, on FlickrI then sanded it all flush. I still need to re-fill some of the smaller gaps still around the edges. The superglue settled and gaps that were not there suddenly appeared. I'll also sand it a bit better once the gaps are filled. 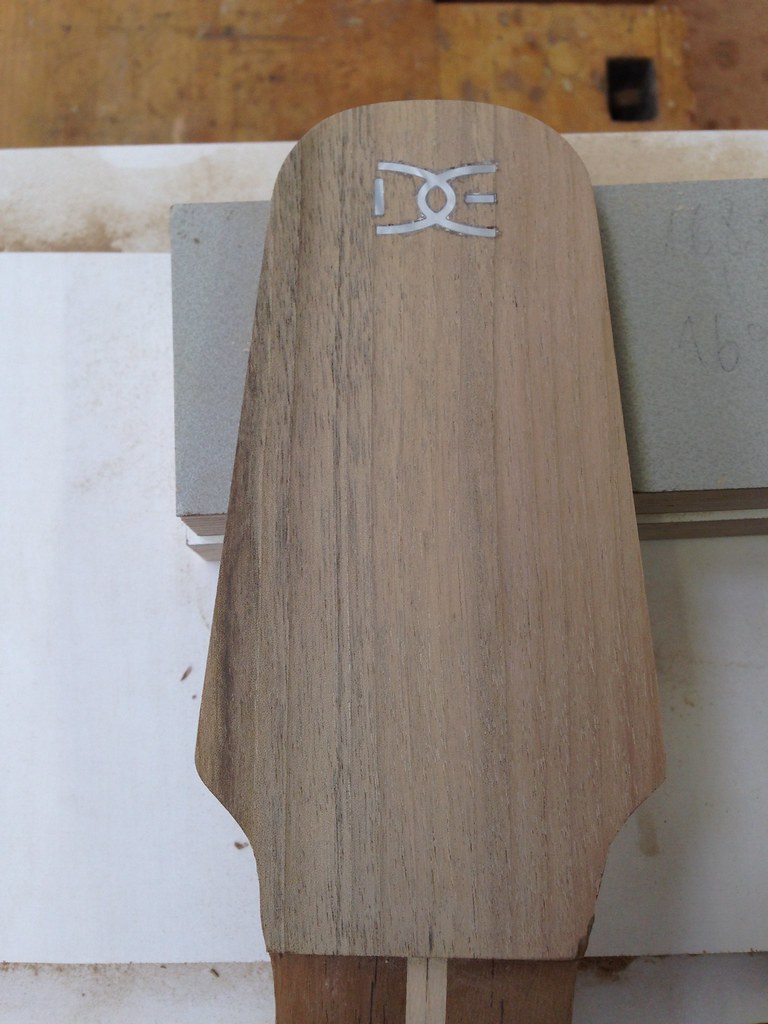 Untitled by David Emm, on Flickr Untitled by David Emm, on FlickrUsed 2 small brass tacks, one by the headstock and one by the neck joint with the tops cut off as locating pins with corresponding small holes drilled in the underside of the fretboard to make sure the fretboard didn't move under clamping 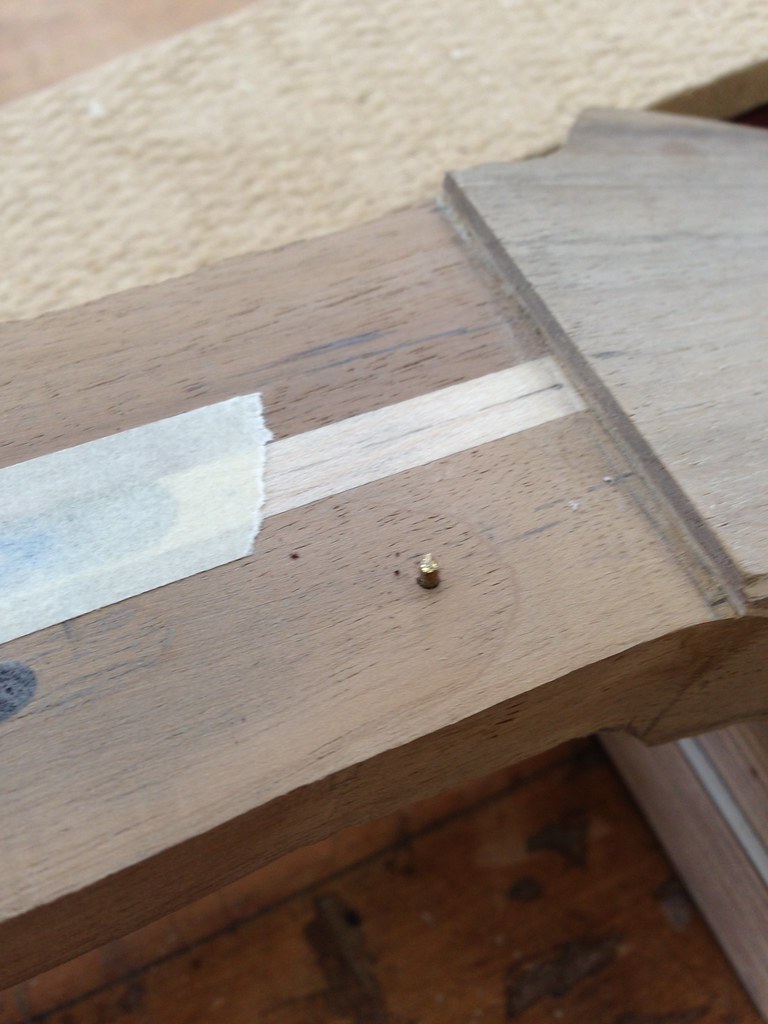 Untitled by David Emm, on Flickr Untitled by David Emm, on Flickrafter gluing clamped the fretboard on. borrowed some exploded wood soft pads to clamp the board on without damaging it, especially as its already fretted.  Untitled by David Emm, on Flickr Untitled by David Emm, on Flickrnot sure how, but did end up with this small gap between the neck and the fretboard right by the joint to the body, but only in this area and only on the one side of the neck 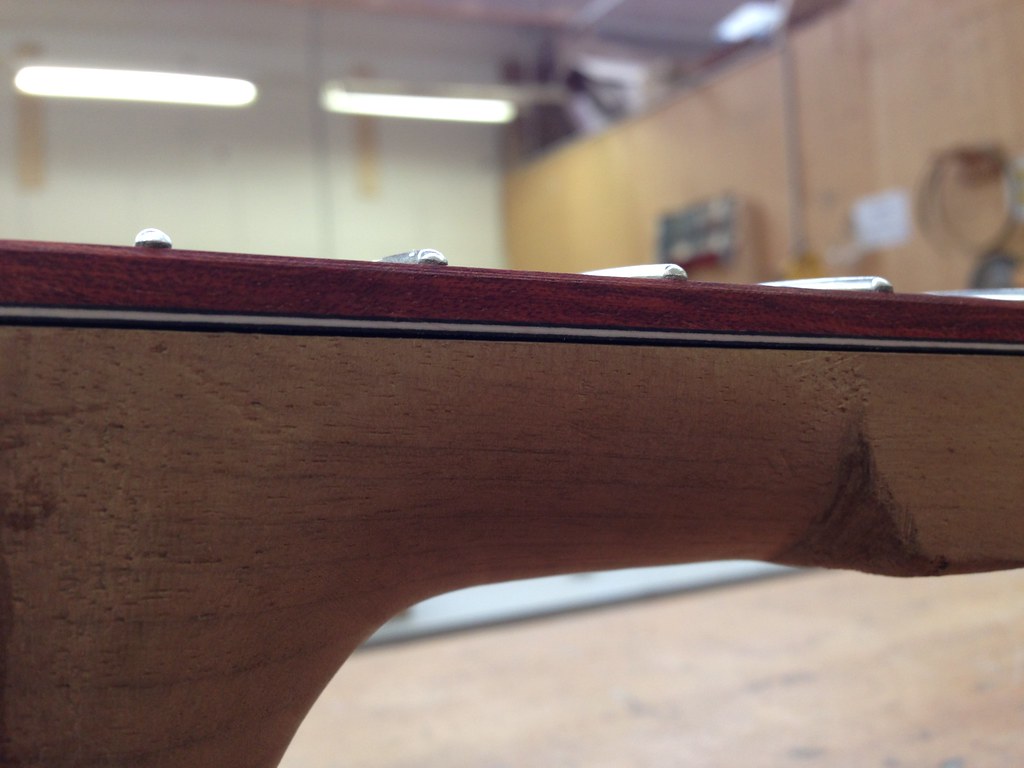 Untitled by David Emm, on Flickr Untitled by David Emm, on FlickrView of the guitar after todays work. 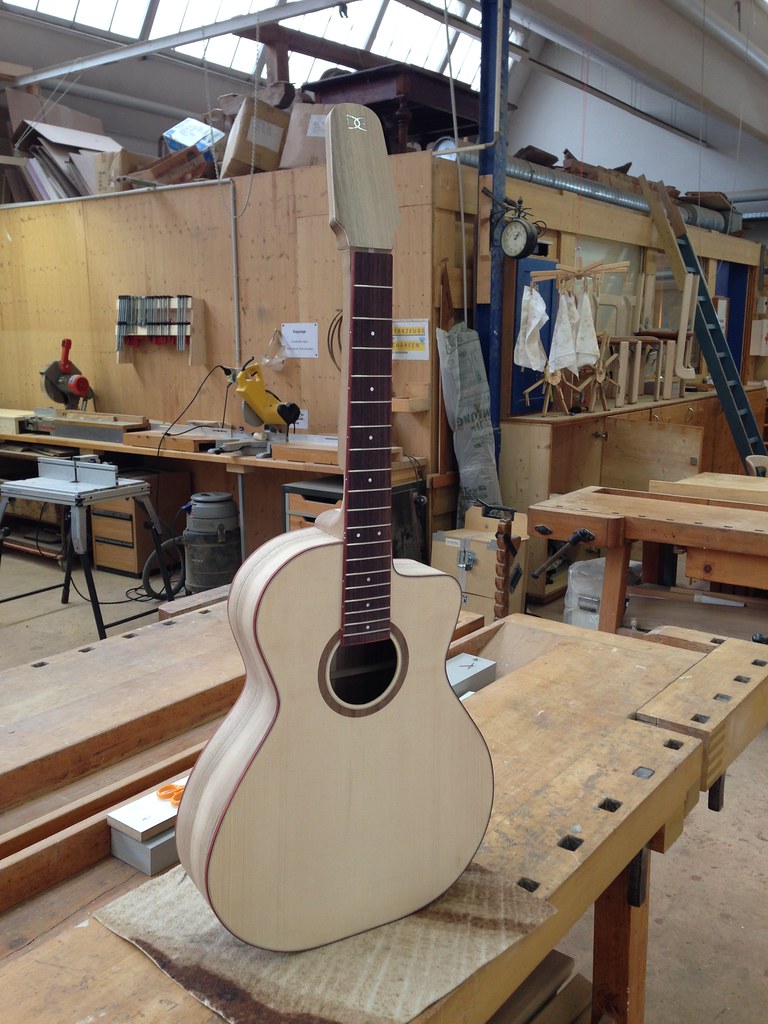 Untitled by David Emm, on Flickr Untitled by David Emm, on Flickr
|
|
#190
11-11-2016, 02:14 PM
|
|||
|
|||
|
Quote:
|
|
#191
11-14-2016, 03:45 PM
|
|||
|
|||
|
Definite progress today and think I can now see the finish line.
Got the neck carved, it now feels like a guitar. Carved the volute, came out as exactly as planned which is a bit of a surprise Routed the saddle slot in the bridge, required step, looks better too Shaped the bridge, makes it look even more like the final result Drilled the bridge position into the top so it can be placed in the correct position after finishing, also grabbed some golf tees to fit as pins to hold the bridge in place while gluing that on Only annoying thing about the bridge is that after taking advice from the other thread I posted, I calculated I needed a bridge height of about 9mm, I got over agressive with my shaping and ended up closer to 8mm, that left me with only about 4mm of saddle slot depth and I need approximately just over 4mm of saddle above the bridge, so its a bit borderline tight on height. Basically i'm down to sanding the thing ready for finish, drilling the tuner holes (i'm pretty sure the Gotoh 510's I ordered use 10mm holes, but i'm not 100% sure so I haven't drilled them yet), the actual finishing process, i'm having it lacquered with 2 part PU high gloss lacquer as thats what the only spray guy nearby uses (he mostly does cabinetry but i've instructed him to go thin this time), and then final assembly and setup. Carving the neck with this fantastic shinto saw rasp and razor files, so much easier than my last attempt when I used a ancient, probably 1950's rasp from the depths of the garage (actually better than a brand new DIY store style one) and sandpaper 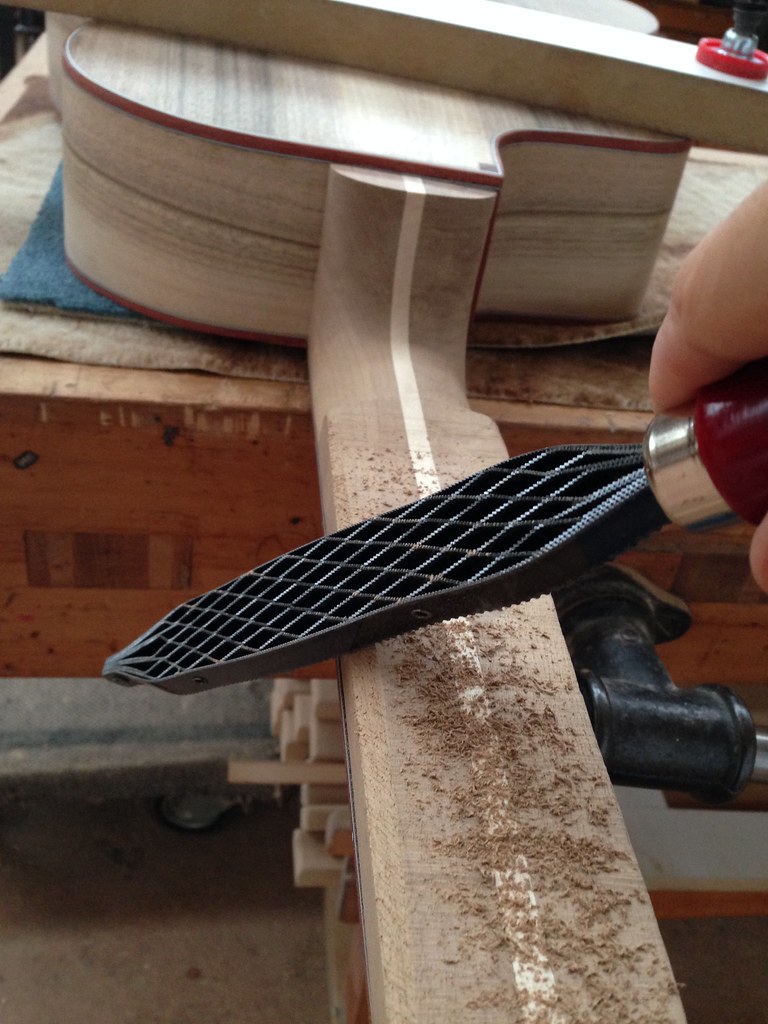 Untitled by David Emm, on Flickr Untitled by David Emm, on FlickrHand carved neck 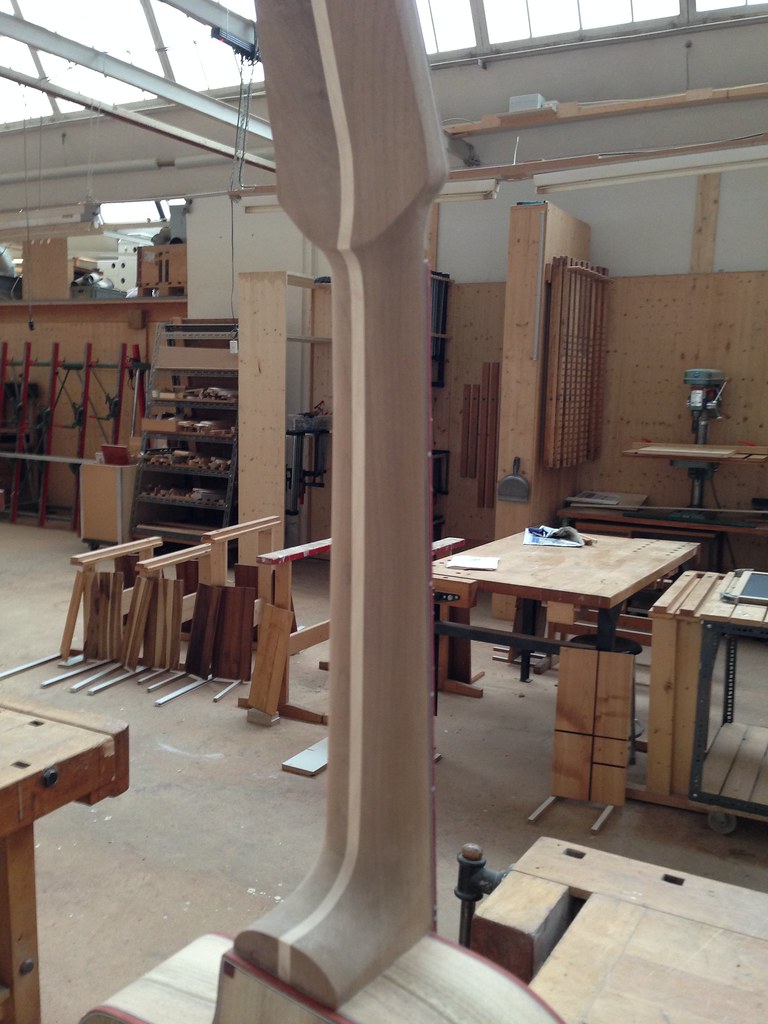 Untitled by David Emm, on Flickr Untitled by David Emm, on FlickrHand carved neck pt 2 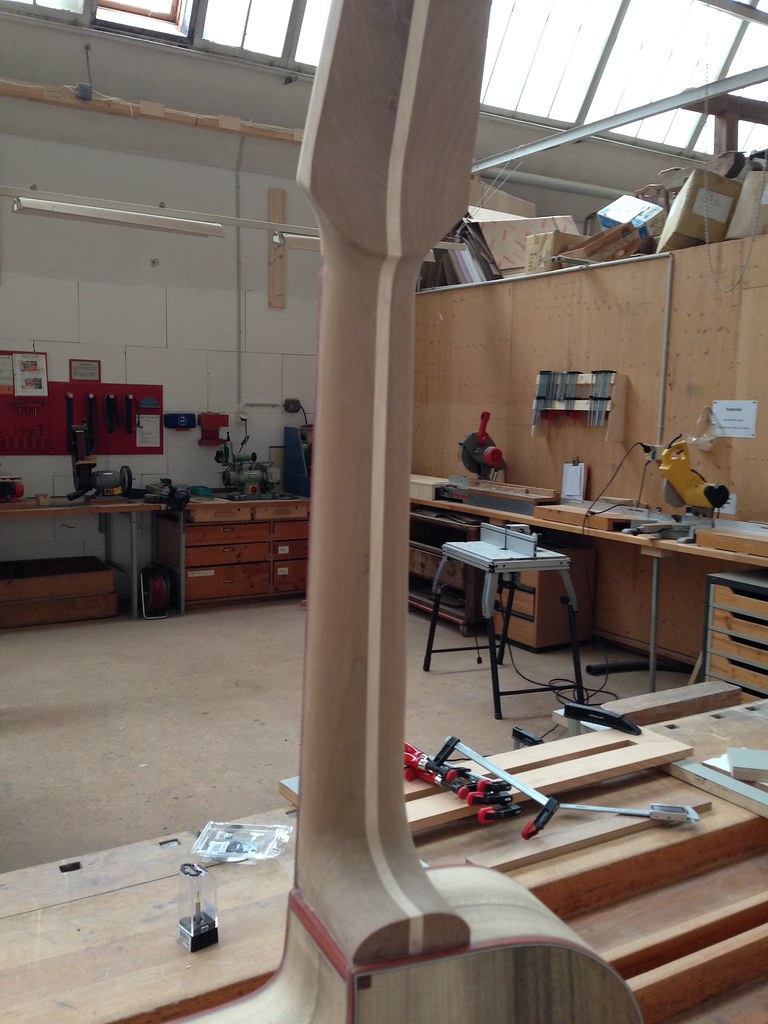 Untitled by David Emm, on Flickr Untitled by David Emm, on Flickrvolute, pretty happy with this actually 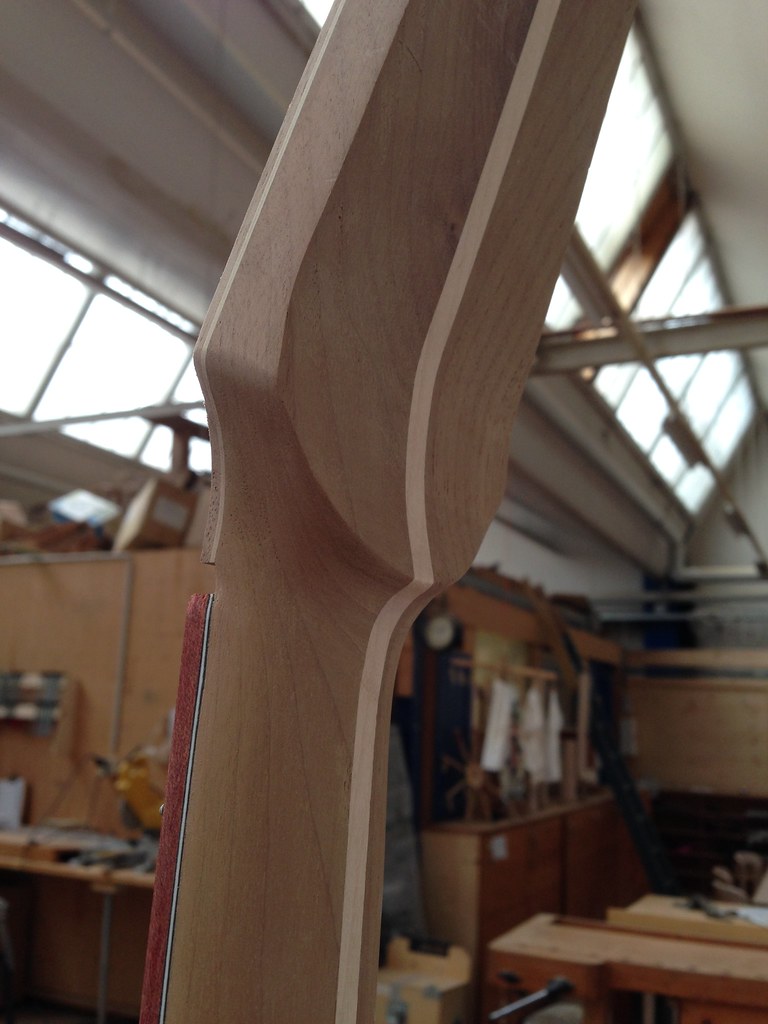 Untitled by David Emm, on Flickr Untitled by David Emm, on FlickrBridge, looks a bit distorted in this picture though 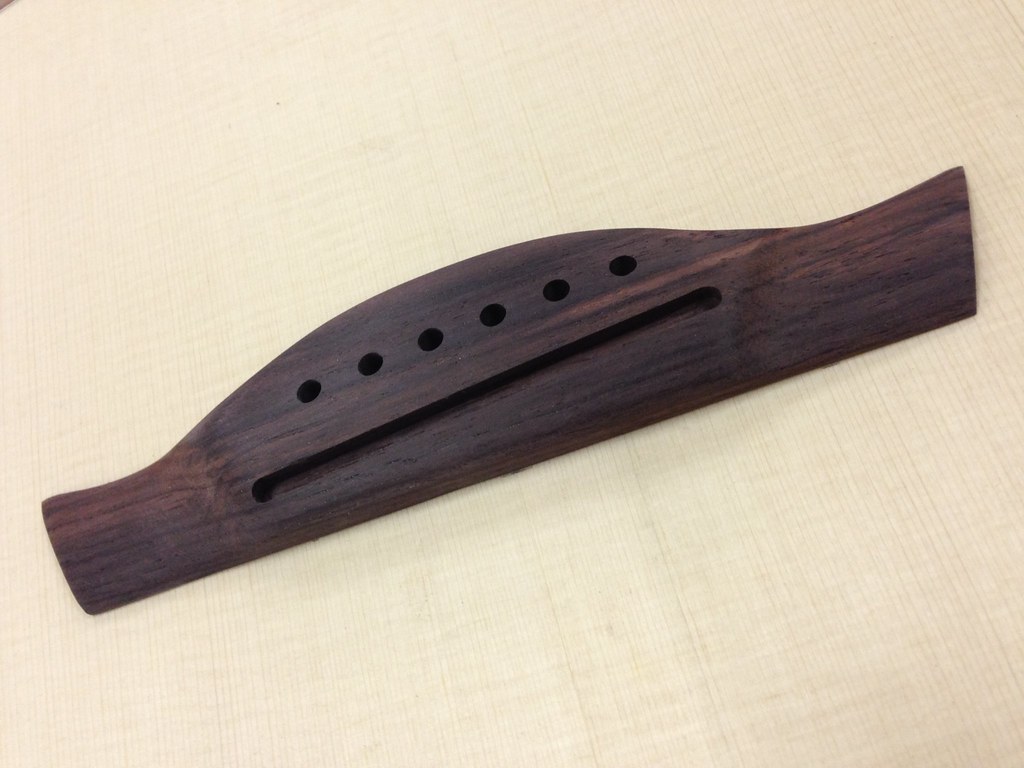 Untitled by David Emm, on Flickr Untitled by David Emm, on FlickrBridge 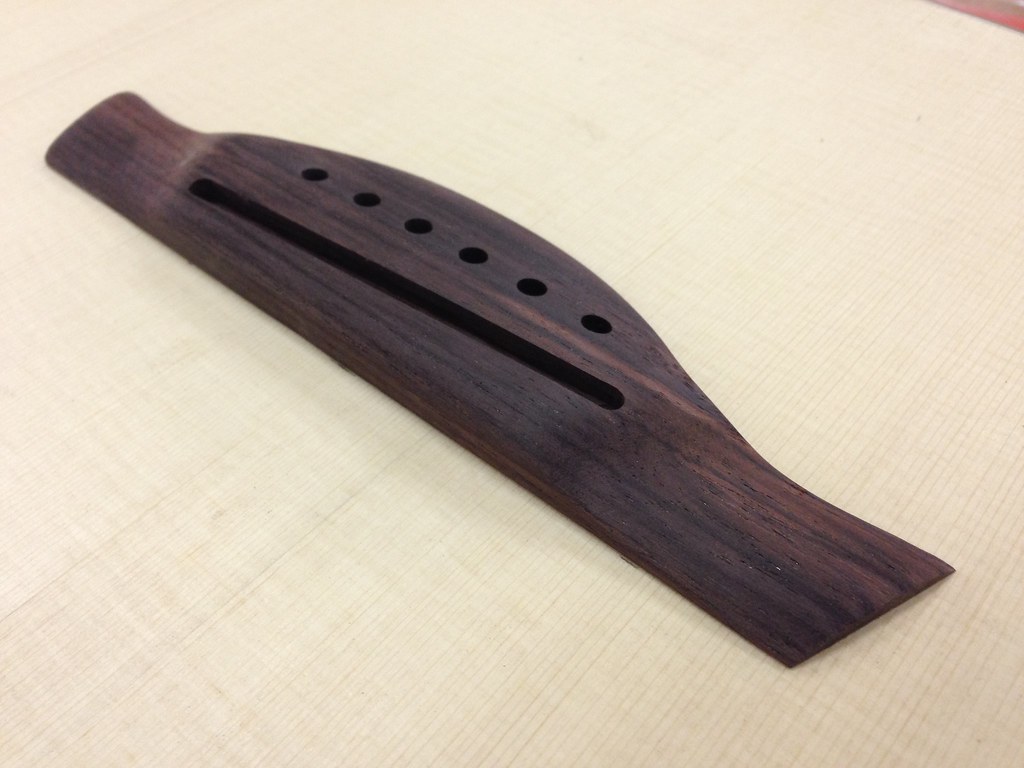 Untitled by David Emm, on Flickr Untitled by David Emm, on Flickr
|
|
#192
11-14-2016, 09:49 PM
|
|||
|
|||
|
This has been a fun project to follow. I'm almost sorry to see it coming to completion.
I've probably said this four times by now, but I just can't get over how cool that binding looks. The contrast between the walnut and the blood wood is really going to pop once finished. The neck looks a little thick to me. Are you happy with how it feels in your hand? I'm guessing the place you are doing the work doesn't allow spraying. Is that why you're not doing the finish yourself? Be sure to clean up any excess glue like around the neck to body joint because it will reallly show up after finishing. Can't wait to see the finished product.
|
|
#193
11-15-2016, 10:50 AM
|
|||
|
|||
|
Quote:
That maybe so, but i'll be VERY happy to have it finished! Yea, the walnut/bloodwood is a great looking combo, i'm looking forward to see how it comes out but i'm definitely going to go for an alternative red wood next time (if i stick with red) The neck is not thin, but it sure isn't huge. I quite like how it feels, but without strings you can't really tell. In the pictures the short scale length does make it look chunkier than it really is. Actually one of the guys who supervises at the workshop is going to do the spraying, I could do it myself if I used spray cans, but i'm 100% sure thats not the right way to go here. The guy has real spray equipment and although there are things i'm happy to try myself, with zero experience, I don't really have confidence in my ability to do a decent spray job. Yep, i'm pretty much sanding and cleaning and sanding and scraping and sanding until it gets sprayed, possibly at the end of this week, but much more likely to be early next week. on a separate note I've been recommended to sand only to 180 grit before spraying, this doesn't seem very high, is this normal or would other people go to a higher grit, perhaps 240 before lacquering?
|
|
#194
11-15-2016, 11:31 AM
|
|||
|
|||
|
Quote:
As an aside, walnut is an open pored wood and will need to have its pores filled if you want a smooth/mirror finish. If that is the look/feel you want, is the guy spraying also doing the pore filling, or do you do that?
|
|
#195
11-15-2016, 11:58 AM
|
|||
|
|||
|
Quote:
Thats good to know. Yes I was aiming for a mirror/high polish high gloss finish The pore filling is where i come to a problem. A) i'm really struggling to find real pore filler here in Switzerland (all i've found is DIY wood filler) And when i've looked online there are more than a bazillion options and just about all of them have split opinions. I have thought about the epoxy option though. B) the guy who's spraying it has said he wouldn't and doesn't use filler because "its always obvious and looks terrible" C) I wasn't thinking about filling the neck anyway, even though thats also walnut it seems to have much less open pores, i'm wondering if this might make the lacquered neck a bit less sticky, but thats just a random guess. Basically pore filling has been a headache since I first thought about earlier on in the project and unfortunately never managed to find a solution and until you mentioned it now, I wouldn't have thought about it again. If all else fails, I could oil it, but thats not really the finish I wanted
|


