|
|
#62
 07-02-2015, 01:21 PM
|
|||
|
|||
|
I cut the binding channels today, everything went smoothly, I always cringe at this stage due to possible tearing/chipping of the top wood....a sharp bit and some other precautions worked out great....whew. I've only had one top tear and it was redwood with an older/dull bit, still stresses me out though. I will be cutting the tail wedge slot tomorrow, and then bending and installing the binding, she is coming together and it wont be too long now.
__________________
Greg Gwaltney 
|
|
#63
07-04-2015, 10:04 AM
|
|||
|
|||
|
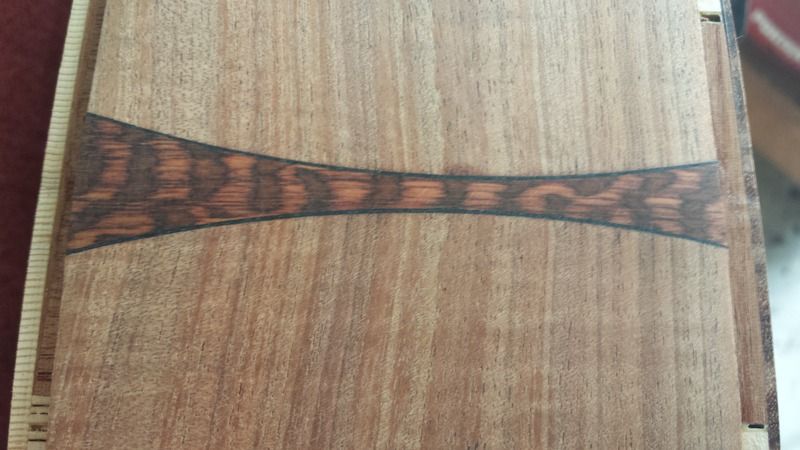
I thought it might be interesting to show some of the steps involved in making my curved tail piece, it seems like it would be simple enough, but it does take some thought to make it as precise as it needs to be. I built a jig years ago for this process that has 4 independently adjustable screws that enable me to micro align the jig opening on the guitar body when cutting the tail piece slot. This tail piece is snakewood with ebony purfling.
Here is the jig showing the adjustable screws....2 front & 2 back....There is a padded/shaped pressure bar that fits inside this jig(front & back)that is attached to the ends of the screws that allows for the independent adjustability. 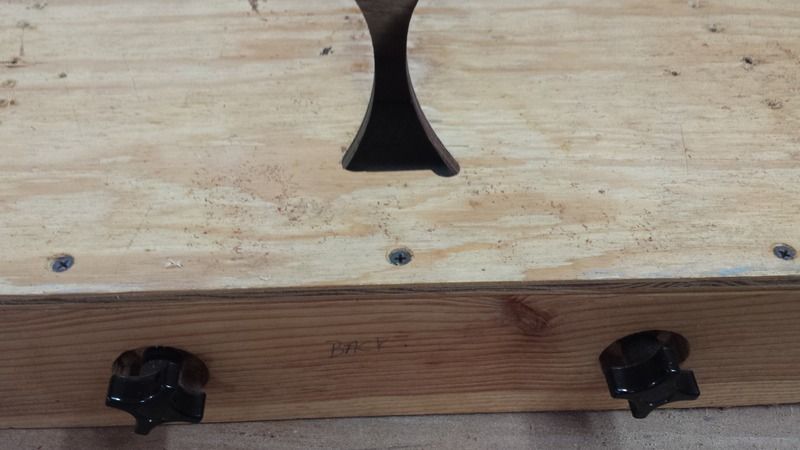 This is the tail piece fastened to the backer block with the cutting jig positioned on top. 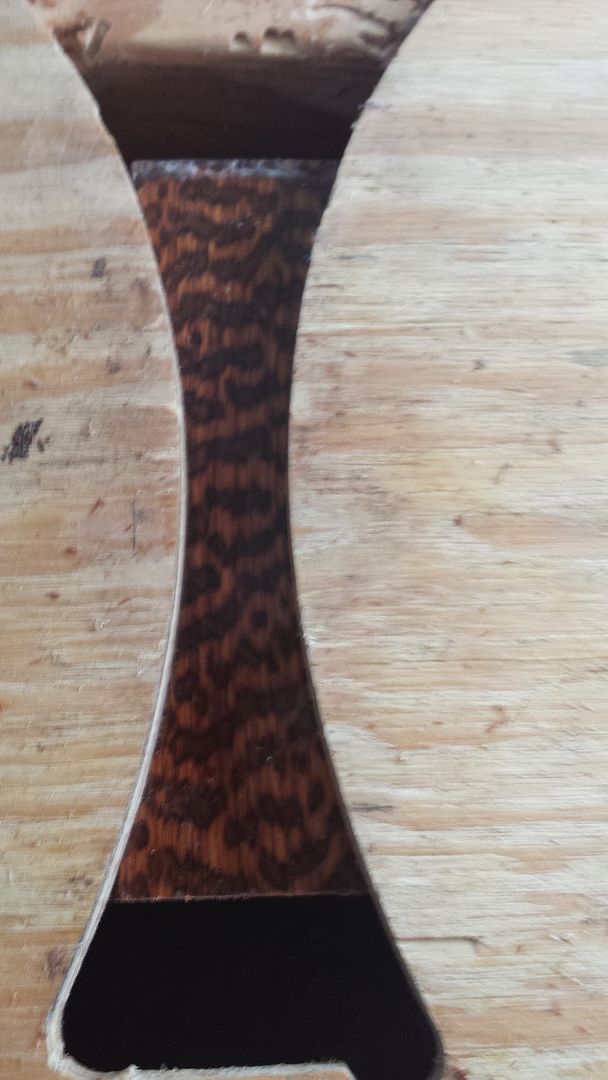 Here is the jig with router, you can see the cuts/pattern already made. 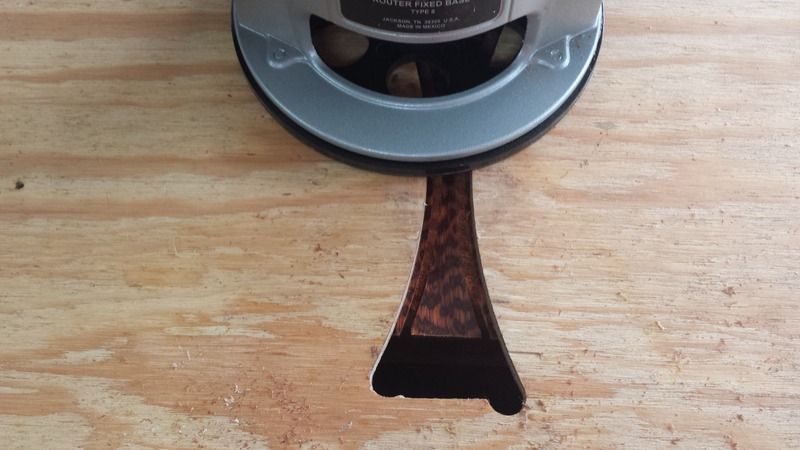 The jig was then placed on top of the guitar tail here, this is where the adjustable screws were tightened to secure and align the jig....and the resulting slot. 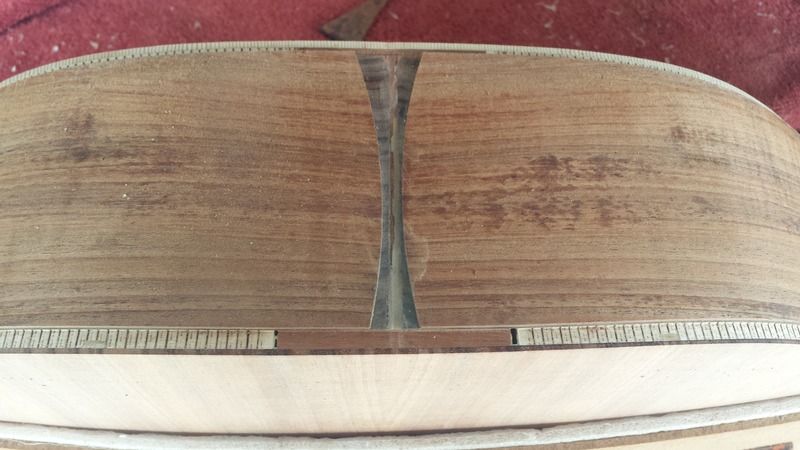 And finally the piece of snakewood with ebony purfling glued into place, I will sand it flat/even, and then cut it parallel to the binding slots to complete the process 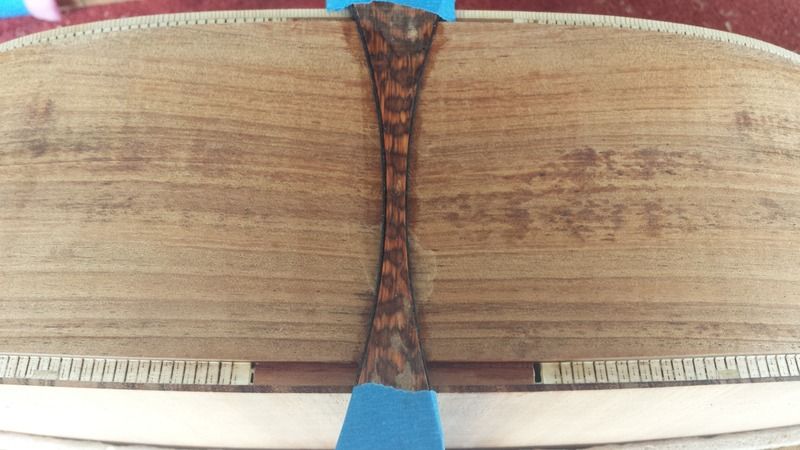
__________________
Greg Gwaltney
|
|
#65
07-08-2015, 07:18 PM
|
|||
|
|||
|
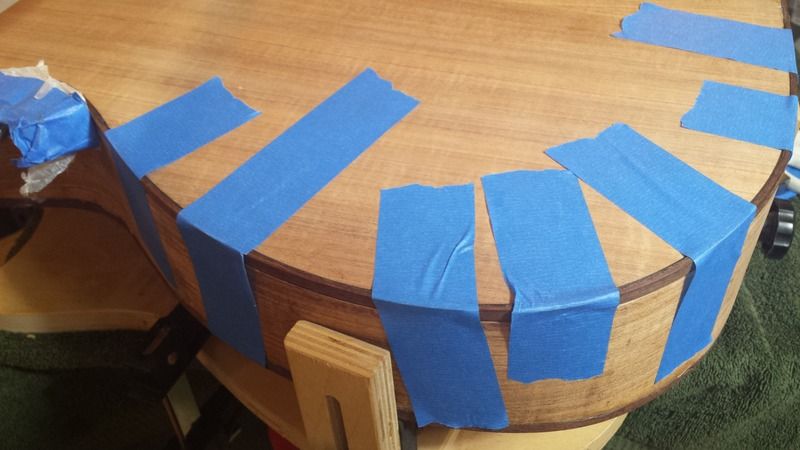
Just a pic showing the last piece of snakewood binding being fitted on the back of the guitar, this is the most critical piece as it has to be a perfect fit to look good on the back/bottom as there is nowhere to hide a short piece like on the top under the neck/heel. I actually push/pull everything as tight as possible before making the final fitting cuts or it is likely one will find the binding too long once it is wrapped up tight during the gluing process.....not a fun place to find yourself. I get to sand/scrape all of the binding level soon, one of my favorite things to do as it really brings the body to life
__________________
Greg Gwaltney
|
|
#66
07-25-2015, 04:59 PM
|
|||
|
|||
|
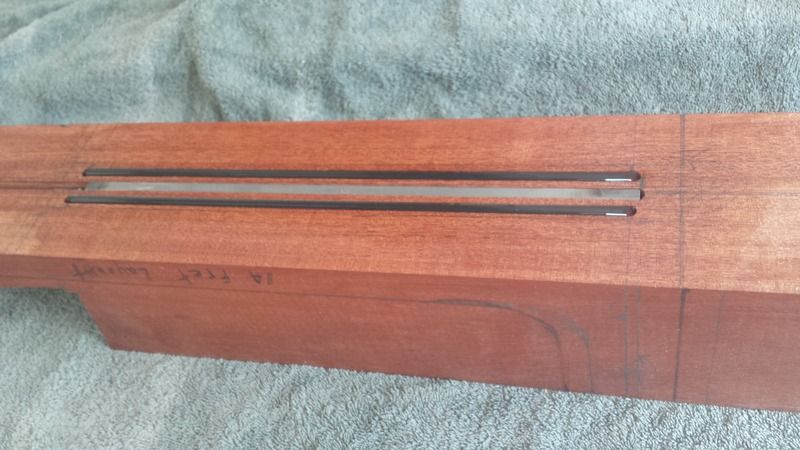
Back and forth to the router table as I'm fitting the truss rod and CF neck reinforcements, all of these marks/lines were for another 14 fret guitar, but decided to use this piece of mahogany on this one which will be a 13 fretter. This is a rather large, 1 piece, beautiful chunk of neck wood, thankfully I can use all of the cutoffs for a myriad of other guitar parts.
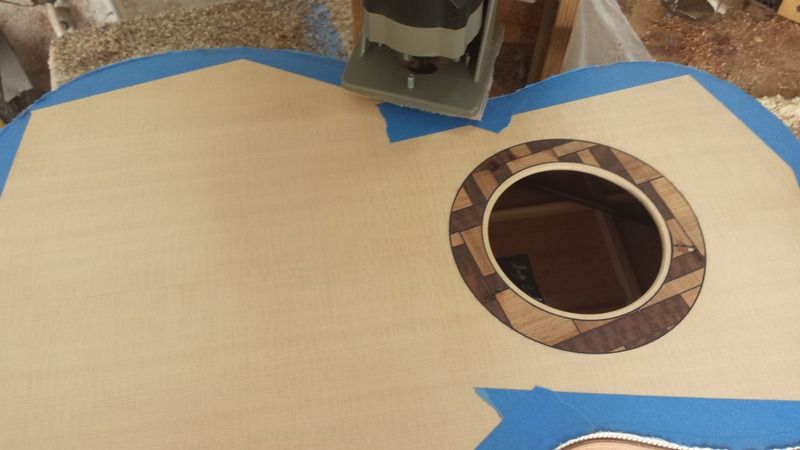
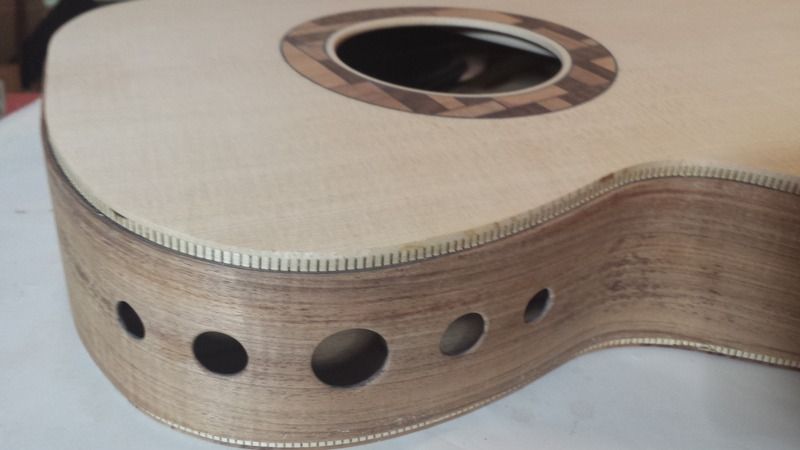
 Just having some fun with snakewood "rounds".... decided that soundports alone were boring me so I added a little something interesting to do. These rounds are obviously not glued in yet, but just sitting in the holes to see what I thought.....might look cool when all is said and done. Oh yeah, the fretboard is in this pic too, just glued on the binding so it is not even sanded/leveled/shaped yet. The body is 90% completed now, just some detail work left to do. This guitar is one of my new models, it has an unusually high arch on both the back and top plates, very unique, different, and something I have wanted to do for 10 years. Definitely don't need an arm bevel or wedge for this guitar as the strong arching creates comparatively thin edges on the widest part of the lower bout. I will take some pictures of the body in the near future. Having a blast with this one 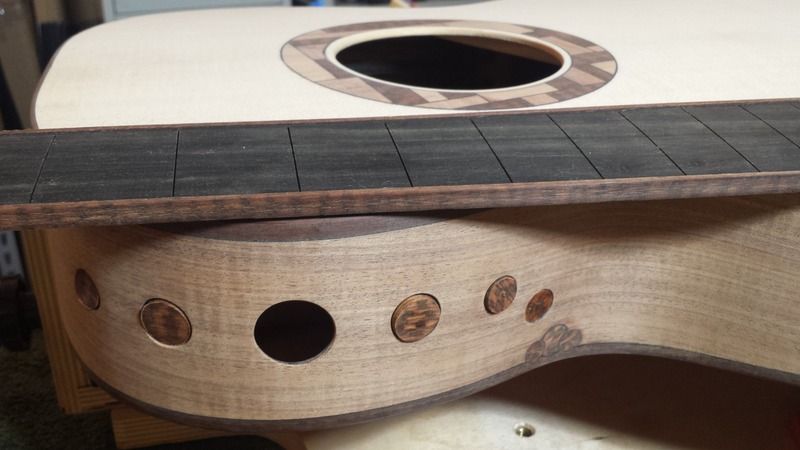
__________________
Greg Gwaltney
|
|
#67
11-08-2015, 04:33 PM
|
|||
|
|||
|
I haven't posted anything in a while on this guitar, but thought I would show this bridge as it was a fun little project. It is a 3-piece bridge, Snakewood/African Blackwood/Snakewood....wanted to do something like this for a while as well, thought it turned out pretty neat(bridge is just taped into place and not quite finished). You can also see the snakewood dots I put in the fretboard. Actually this build is almost finished, I am going to French Polish the guitar myself and it will be my personal instrument for a whille
. I'm very excited to string'r up as this one has some unique features that I have wanted to use for many years. My plan is to eventually make some recordings and share them here to see what everyone thinks about this design. I will post some more pictures when the guitar is finished.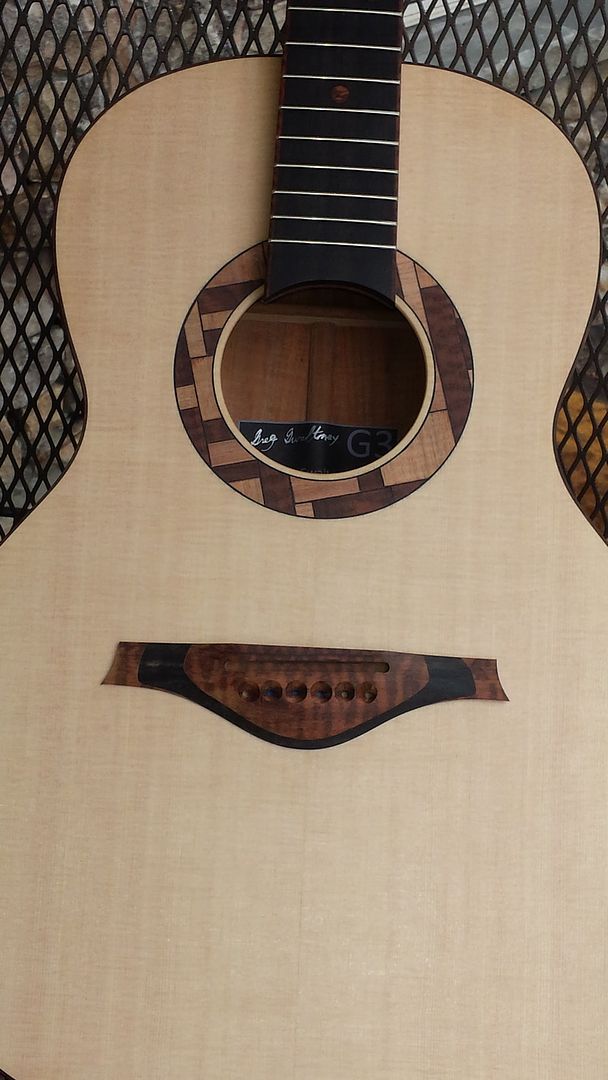  
__________________
Greg Gwaltney
|
|
#70
11-09-2015, 07:50 PM
|
|||
|
|||
|
Quote:
I'm curious, is there a reason why some necks protrude into the sound hole? Some finish flush, others finish before the hole, while this, and many others protrude into the sound hole. Is it just aesthetics, or is there another factor involved?
__________________
1995 Maton EM725C - Solid 'A' Spruce Top, QLD Walnut B&S, AP5 Pickup 2018 Custom Built OM - Silver Quandong Top, Aussie Blackwood B&S, Fishman Matrix Infinity Mic Blend Pickup 2021 Faith Neptune Baritone - Solid Englemann Spruce Top, Solid Indonesian Rosewood B&S, Fishman INK3 Pickup 2022 Yamaha SLG200S Silent Guitar
|
|
#71
11-09-2015, 08:13 PM
|
|||
|
|||
|
Quote:
__________________
Greg Gwaltney
|
|
#72
11-10-2015, 06:50 AM
|
|||
|
|||
|
Quote:
__________________
Greg Gwaltney
|
|
#73
11-10-2015, 07:21 AM
|
||||
|
||||
|
Love the look of the guitar and the explanation of your processes. It'll be nice to see this one all together, especially with the higher arches.
By the way, your website link doesn't seem to work.
__________________
--------------------------------------- 2013 Joel Stehr Dreadnought - Carpathian/Malaysian BW 2014 RainSong H-OM1000N2 2017 Rainsong BI-WS1000N2 2013 Chris Ensor Concert - Port Orford Cedar/Wenge 1980ish Takamine EF363 complete with irreplaceable memories A bunch of electrics (too many!!) Last edited by mikealpine; 11-10-2015 at 07:28 AM.
|
|
#74
11-10-2015, 04:12 PM
|
|||
|
|||
|
Quote:
Quote:
__________________
1995 Maton EM725C - Solid 'A' Spruce Top, QLD Walnut B&S, AP5 Pickup 2018 Custom Built OM - Silver Quandong Top, Aussie Blackwood B&S, Fishman Matrix Infinity Mic Blend Pickup 2021 Faith Neptune Baritone - Solid Englemann Spruce Top, Solid Indonesian Rosewood B&S, Fishman INK3 Pickup 2022 Yamaha SLG200S Silent Guitar
|
|
#75
11-10-2015, 05:43 PM
|
|||
|
|||
|
Quote:
__________________
Greg Gwaltney
|