
|
|
#1
 11-10-2018, 04:19 PM
|
|||
|
|||
|
As the name implies, here I go with my first acoustic build.
I've picked up a few books (Cumpiano and Siminoff) and jigs. This is going to be 90% hand tools and most of my jigs will be home made. Lots to learn so here we go.  Bought the wood. Sitka top, sapele back, sides, and neck. 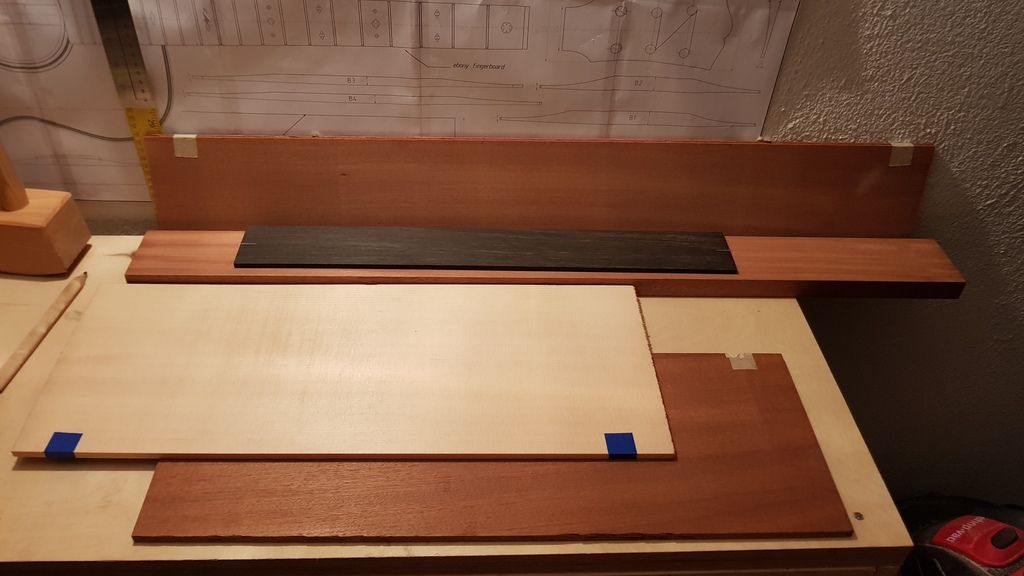 Decided to start with the neck for no good reason. Scarf joint was more difficult but also more satisfying than i thought.  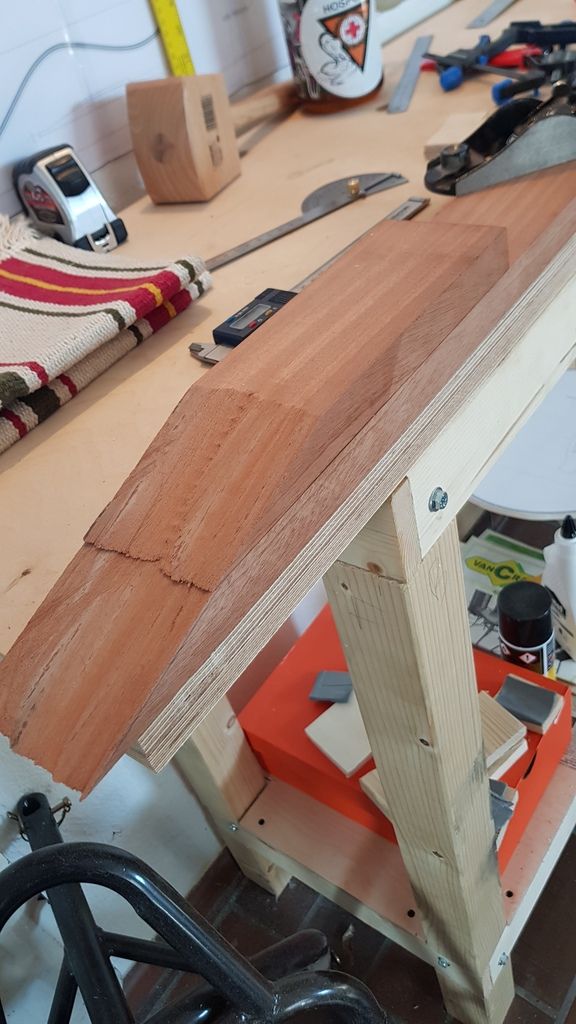 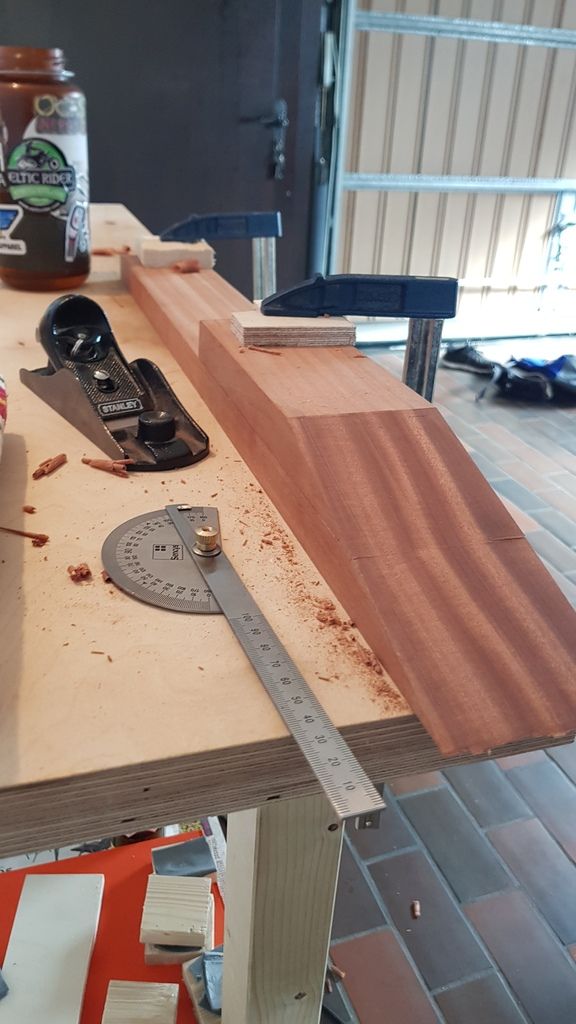 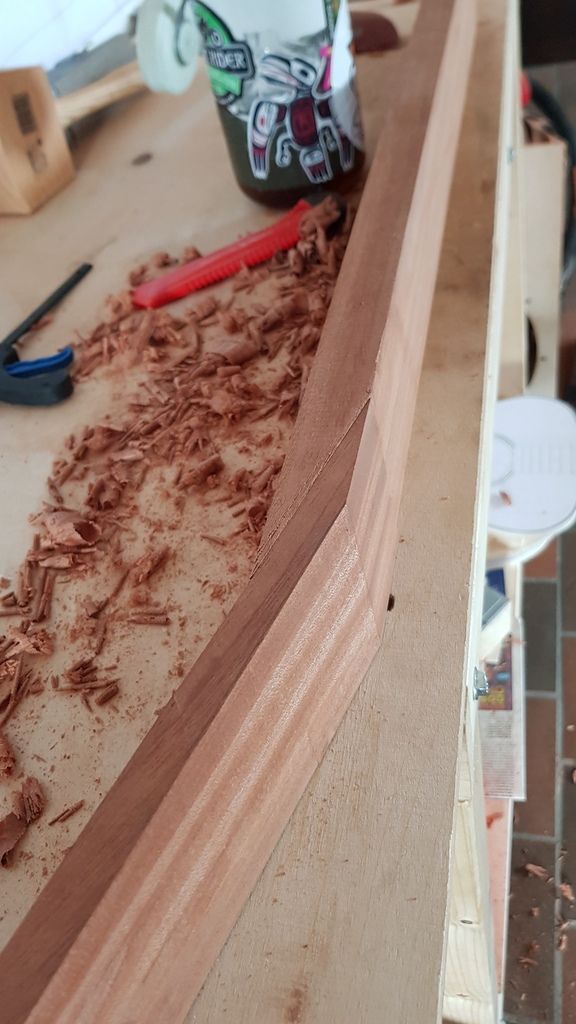 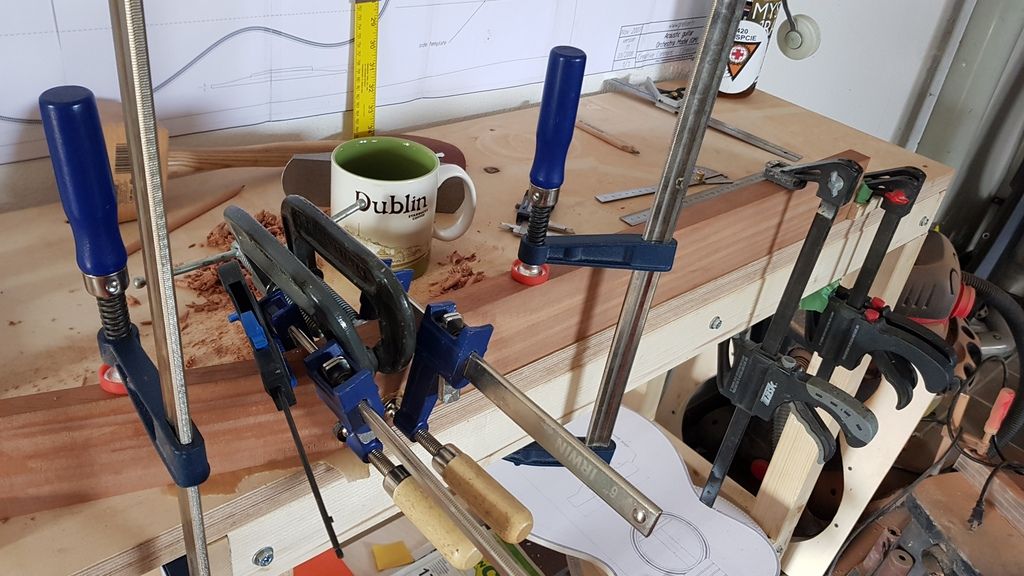 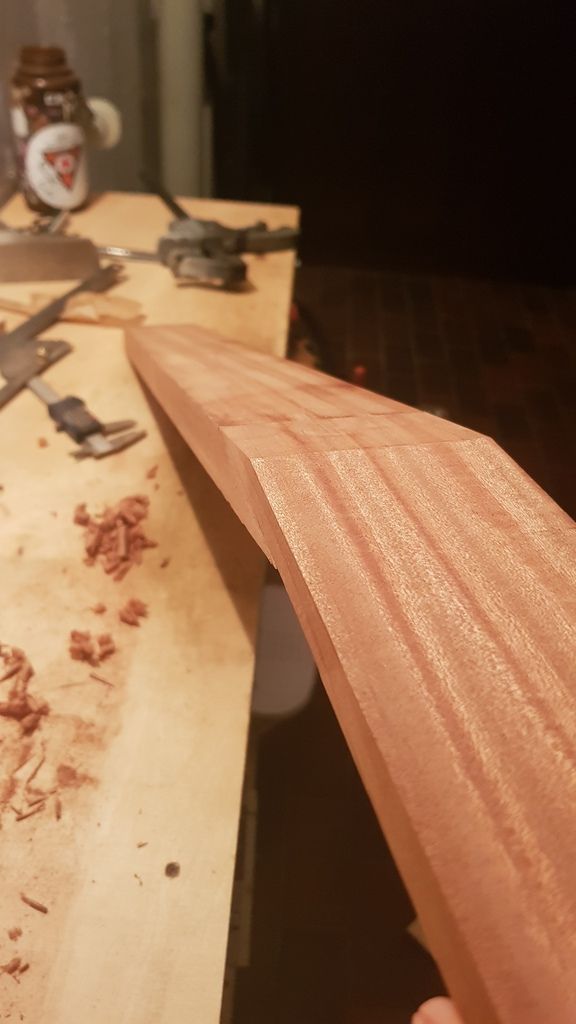

|
|
#3
11-10-2018, 05:15 PM
|
|||
|
|||
|
Quote:
Just curious, but what about the scarf joint was more difficult than you thought it would be? The end result looks good. I often cut mine on a bandsaw and then clean-up/finalize with a hand plane. I used to use a backsaw and cut it by hand. I don't find much difference in either accuracy or speed. It appears you changed sawing direction half-way through: that makes for more planing.
|
|
#4
11-11-2018, 12:10 AM
|
|||
|
|||
|
Quote:
But here it is with the truss channel routed and a rough tenon shape cut and ready for final shaping once the body is ready and the mortise has been cut. 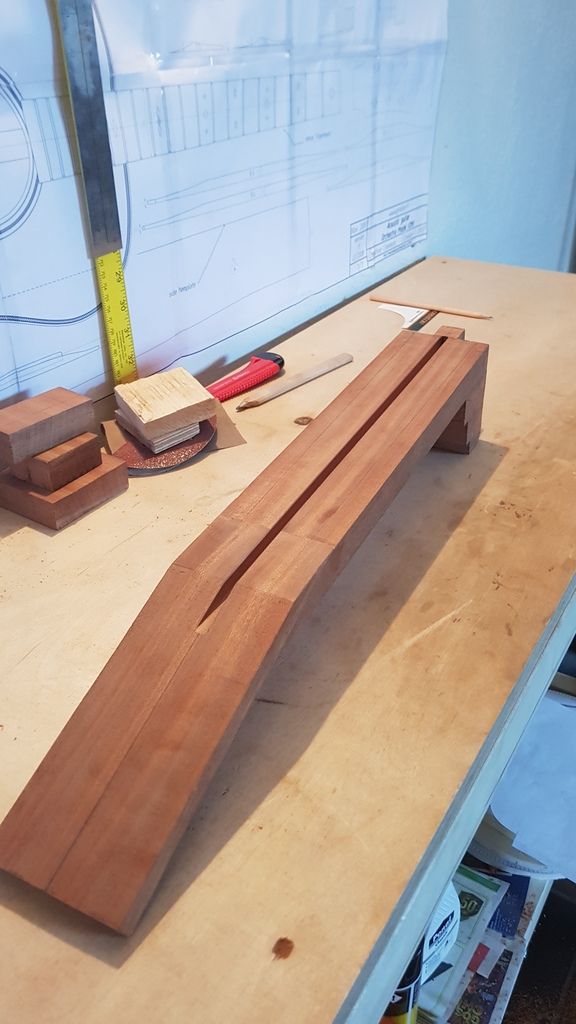
|
|
#5
11-11-2018, 12:54 AM
|
|||
|
|||
|
Did you cut the cheeks of the heel at a slight angle?
Typically I cut the tenon after the box is made, then I use my built box as point of reference for cutting the cheek angle on my heel Looking good so far, clean work Steve
__________________
Cole Clark Fat Lady Gretsch Electromatic Martin CEO7 Maton Messiah Taylor 814CE
|
|
#6
11-11-2018, 09:26 AM
|
|||
|
|||
|
[QUOTE=GrimesGrimes;5886801]As the name implies, here I go with my first acoustic build.
I've picked up a few books (Cumpiano and Siminoff) and jigs. This is going to be 90% hand tools and most of my jigs will be home made. Lots to learn so here we go. Bought the wood. Sitka top, sapele back, sides, and neck. Decided to start with the neck for no good reason. Scarf joint was more difficult but also more satisfying than i thought. Good luck man. I hope you stick around with this thread. I will follow it. I am to the shopping and buying stage.
|
|
#7
11-11-2018, 10:05 AM
|
|||
|
|||
|
Quote:
And thanks!
|
|
#8
11-11-2018, 11:16 AM
|
|||
|
|||
|
Out of curiosity, I checked Cumpiano & Natelson's book. In the book, they glue the spliced head to the back of the neck shaft, rather than as you have done it, to the top (i.e. the back of the head to the top of neck shaft).
Some makers do as you have done. It probably doesn't make all that much difference and I wouldn't recommend that you change it. However, for future builds, you might consider doing the opposite. The advantages to gluing the head to the back of the neck shaft are that it moves the transition into what becomes the head, rather than the shaft of the neck. Visually this might be more appealing "concealing" the joint in the head and moving it out of the back of the neck. It also eliminates gluing the nut-end of the fingerboard to "end grain" in the first few frets. It also makes the neck shaft shorter and the head longer - if you plan for it, you don't waste a few inches of wood in excess head length. Practically, it probably makes less difference than it does theoretically. Just a thought for your consideration. Last edited by charles Tauber; 11-11-2018 at 11:22 AM.
|
|
#9
11-13-2018, 02:07 AM
|
|||
|
|||
|
Quote:
 Those are good points though. In the future I'll flip it and glue it the other way. Thanks 
|
|
#10
11-13-2018, 02:36 AM
|
|||
|
|||
|
This might be a bit of a tangent from the guitar for a second, but I decided that I wanted to upgrade my bench slightly from the plywood top and post legs to something a little nicer and sturdier.
Started with laminating a bunch of 2x3's. Planed them down. Finished up by adding some extra shelves, paint, drawers, etc. Edge was cleaned up, top laquered, and small bench vice added post-picture. 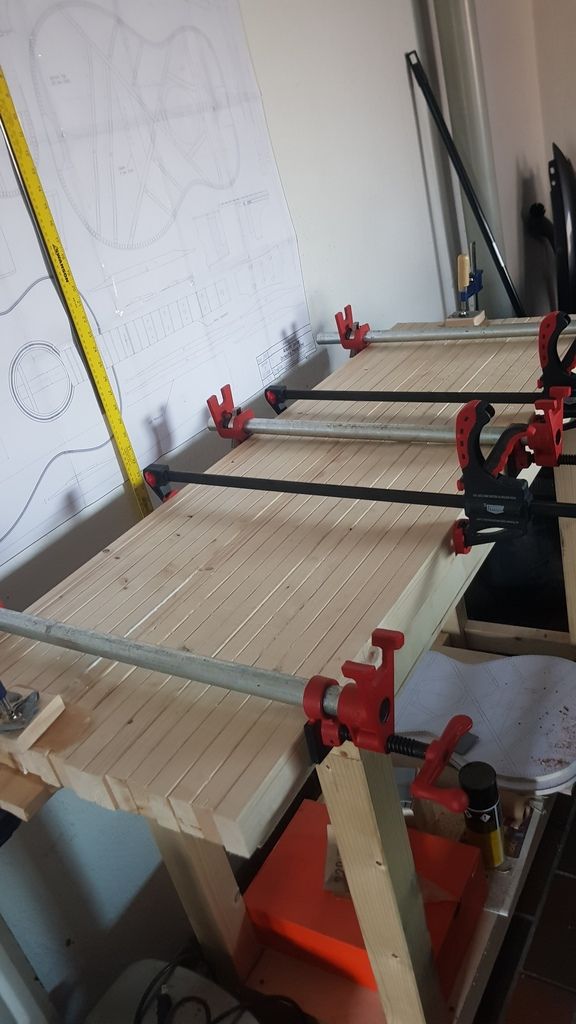 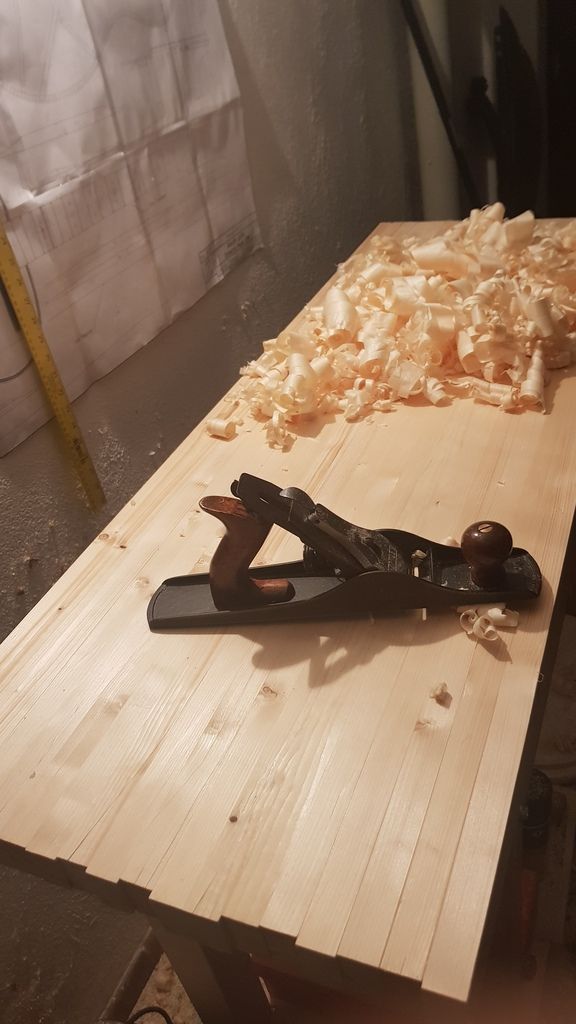 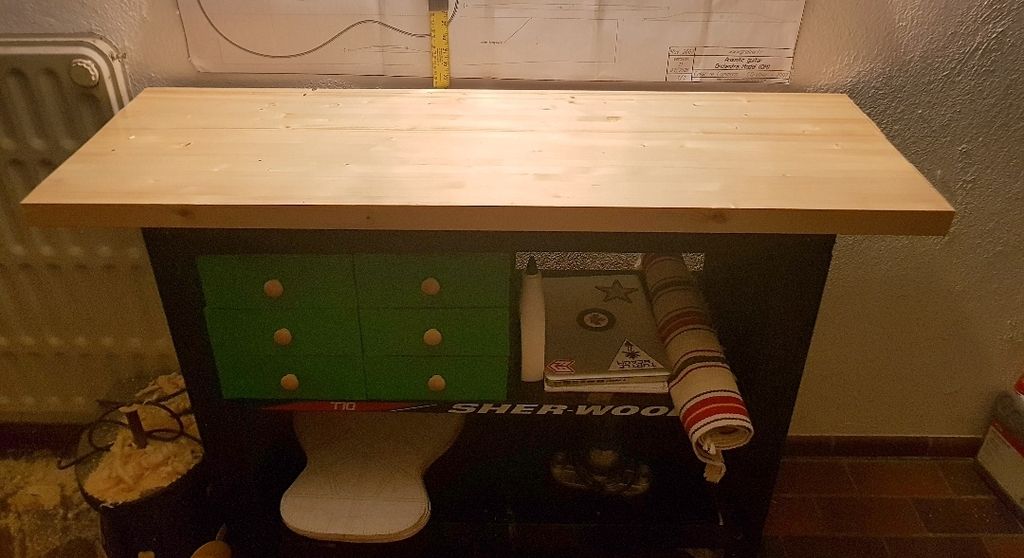
|
|
#11
11-13-2018, 02:46 AM
|
|||
|
|||
|
I used my new little bench top to make a fox style bender to use with the silicone heating blanket I picked up.
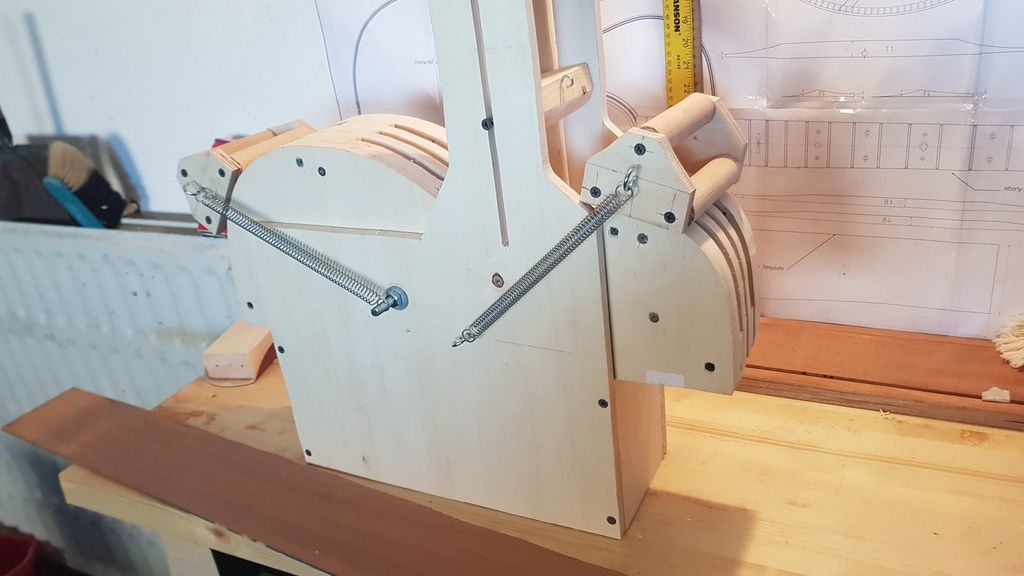 Sanded the sides down to 2.8mm(give or take .1mm). Quick spray with water, wrapped in some tin foil, and sandwiched (steel slat, wood, blanket, slat). 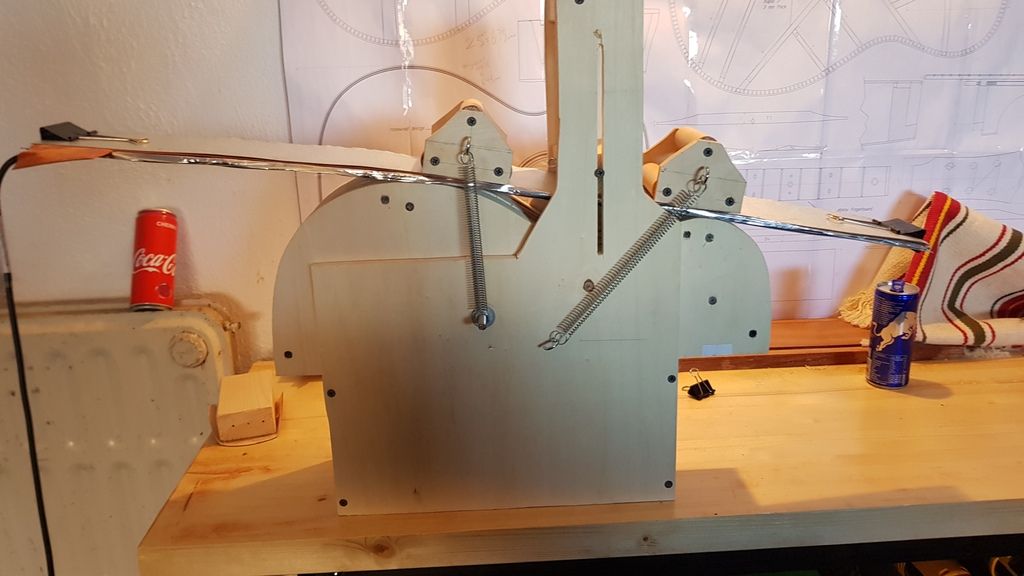 Success! It actually worked. I was genuinely surprised that I didn't crack, warp or burn the sides but hey I'm not complaining. 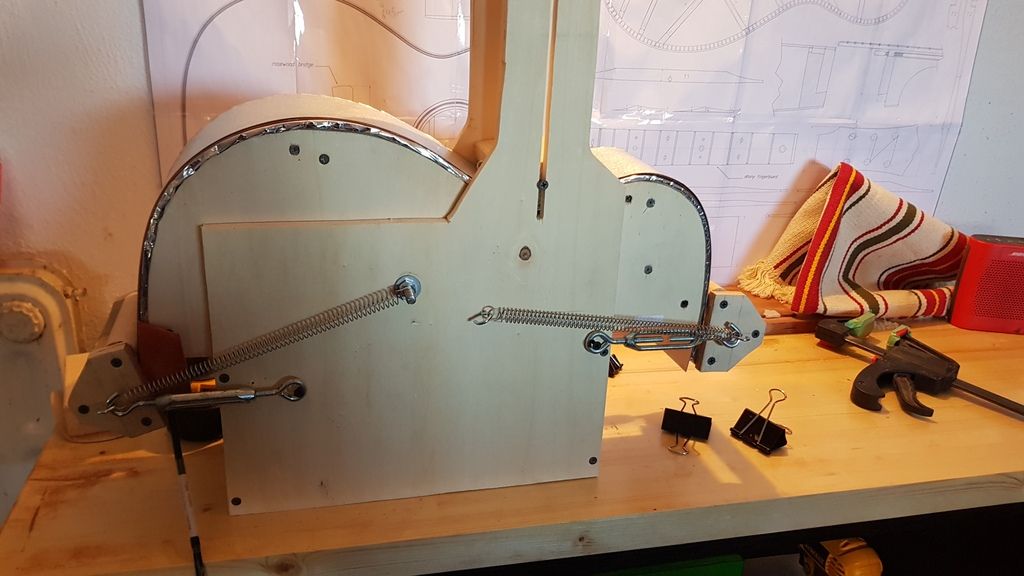 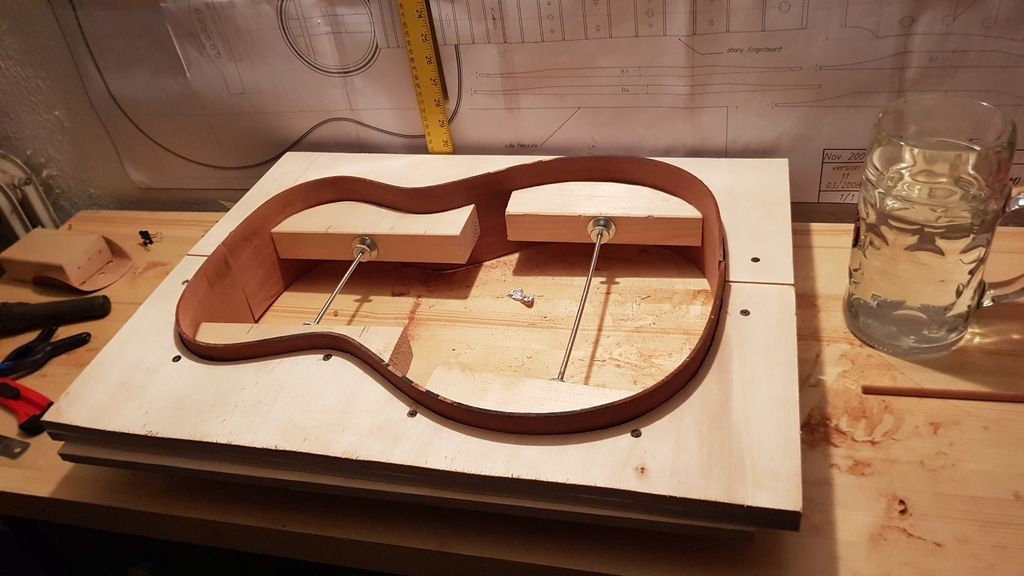
|
|
#13
11-13-2018, 05:56 AM
|
|||
|
|||
|
Quote:
|
|
#14
11-14-2018, 03:02 AM
|
|||
|
|||
|
Others may differ, it’s about finding what’s right for you.
I find if I use a fox style (I have LMII version) bender, if I am building with a mold (which I mainly do), I have to hand bend the sides afterwards to get a neat fit into the mold. Extra time spent now tweaking the fit will save having a side split out from excess stress later on in its working life. Steve This example I have bent the side in my lmii unit and then hand bent it on a hot pipe to match my mold 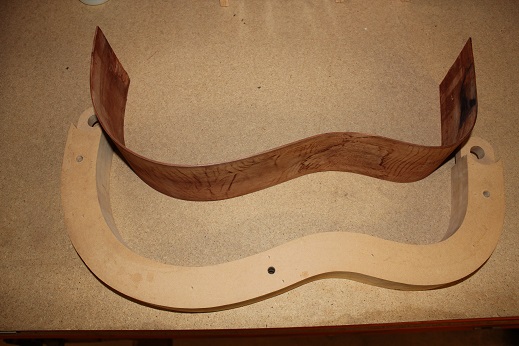 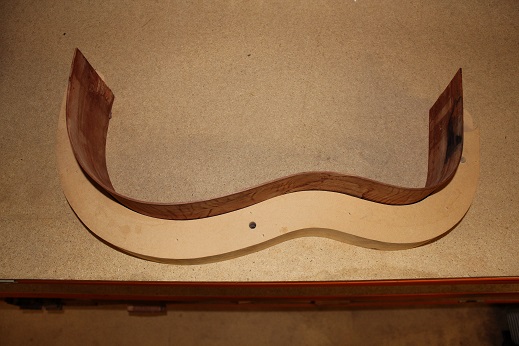
__________________
Cole Clark Fat Lady Gretsch Electromatic Martin CEO7 Maton Messiah Taylor 814CE
|
|
#15
11-14-2018, 03:21 AM
|
|||
|
|||
|
Its probably just out of shot, but are you using a controller for your heat blanket or just powering it straight out the mains? I was going to try use mine with a simple potentiometer to control it but i was too nervous about that solution so i've had an electrician friend of mine build me a real heat controller. Saved me a bunch of money over the pre-manufactured controllers. I just have to wait for it to arrive in the post before I can attempt to bend my sides....
Your bench looks great and the build looks good so far
__________________
David
|


