Quote:
Originally Posted by TomB'sox

|

Yeah, and I think it's going to look extra nice with the cedar top -- should be a really nice color palette all around!
After gluing up the rim in several stages, it was satisfying to finally get it all together...

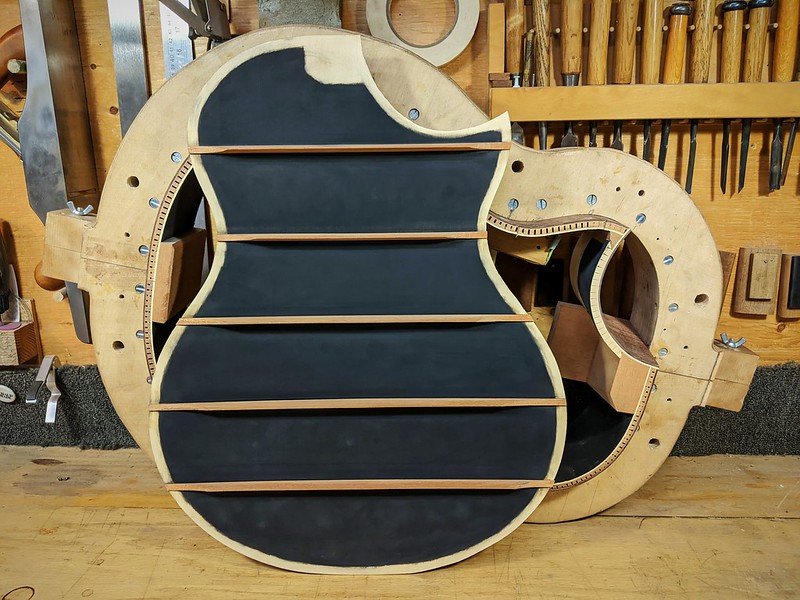
Once the rim was joined it's time to finish up work on the back. I've been having fun ebonizing and/or staining the interior of my guitars recently and am still experimenting with the most efficient method to get there. This time I decided to tape off for all the braces and liners ahead of time instead of ebonizing after gluing...

Before starting in on this build I took a couple of days to build some jigs I've been putting off for years and years (and years!). One of those was updating my brace arching jig which I am sooooo glad I finally got around to! I had been using the same jig for probably 12 years and it worked fine but definitely had it's quirks and required a bit of messing around with every time. My updated version is much more streamlined, compact, and holds tighter. There is a concave 15' arch sandwiched between two sheets of 3/4" plywood that a brace gets pressed up against forming a concave arch in the brace. This arch in the brace is sanded flat, run over the jointer, then one or two swipes with a hand-plane. When unclamped from the jig, that just-made-flat side is now the convex side of a 15' arch. Making the jig smaller allows me to get most of the work done on power tools before hitting it with the hand plane -- probably takes about a minute per brace from start to finish. In the picture below the jig would be rotated 90 degrees so that the arched mahogany is run over the sander/blades...

Back braced and ready to be glued to the rim...
One extra twist of trickiness with this build is that it has an elevated neck. That requires some extra careful planning to make sure all of my angles will hit their intended marks with everything on center by the time I get around to carving the neck. So far things are looking good!

Lots of challenges coming up this week working with stone to hopefully get a rosette installed!