The quote is from the character Jack Aubrey, Captain of the square-rigged 20-gun sixth rate warship HMS
Surprise in the movie,
Master and Commander, the Far Side of the World.
Sunday afternoon my wife and I were out for a drive in her Ford Escort. Because of its precious cargo, I try to keep my wifes car in excellent shape. Anyway, we decided to roll down all the windows. While sitting in the passengers seat, I heard a clunk from behind me. We tried to roll the rear right window back up and nothing happened. We pulled over and I lifted the window by hand. It came up easily and wouldnt stay up. Uh-huh. Window regulator. Knowing that there was rain later in the forecast I had my brain working in the background on a solution to temporarily close in the car window. Just before the rain began I came up with the fix: Every Christmas we hang these lighted wreaths on our windows. Each wreath came with a hanging bracket containing two, three-inch suction cups to be stuck to the house windows. I pulled up the car window to the top seal and stuck the four suction cups to the inside bottom of the window so that they wedged against the gasket, blocking the window from dropping. Et Voile! The window was closed and going nowhere.
Next it was off to the Internet where I located a motor and regulator (might as well start new). But here is the modern kicker: I found a fifteen-minute video that demonstrated the process of replacing the motor and regulator on this car. Wow! Being mechanically inclined, I like to do a repair If possible. In the old days repairs were like embarking on a solo backpacking expedition into an unknown wilderness. You stood on the gulf of this impressive adventure wondering what you faced. These days the good videos remove all that. They show you what it will look like, tell you what tools youll need, give you an idea how long it will take, show you the pitfalls to avoid, and give you tips to make it go quickly. In this case I invested $60 in a regulator and motor and $12 in a set of trim removal tools.
From
"1A Auto: How to Replace Rear Window Regulator 08-12 Ford Escape" HERE .
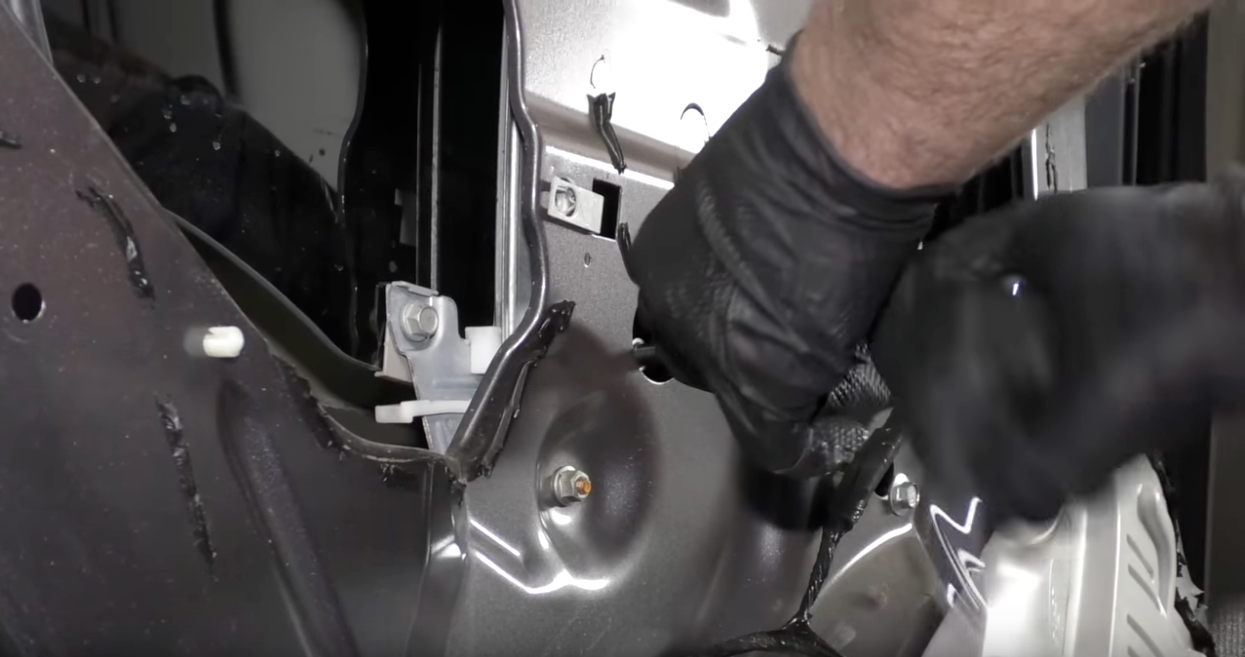
Yesterday afternoon my oldest son and I dived in. Now, my son started as a machinist and mechanic at a shipyard and has worked his way up to being the director of drydocks. As director he is no longer allowed to
touch a tool by union rules. However, he LOVES this stuff so much that he buys cars to repair and soup up just for fun. Between his daily driver, his project car, and mine, this was going to be his THIRD window regulator in a week. He has a three-foot fan to cool us. Lovely.
So, off we went, armed with the proper knowledge, right down to the number of inch-pounds of torque needed to tighten down the window into the new regulator. What I havent told you is that I am on a blood thinner so those little knuckle busters that crop up in most jobs develop into a half-hour or hour long stop-down to apply pressure and stop me from bleeding all over the work. After initiating one of these micro-emergencies while simply checking my wifes oil, I decided to invest in a set of mechanics gloves. I havent suffered a cut since. This job went off
really smoothly, just like the video showed it. A couple of little trim pieces popped out, allowing access to screws. The arm rest and window control poped out. With five screws removed you just pop the interior trim panel off with the trim tool and lift it out. Disconnect the cable for the door lock. Carefully pry off the plastic vapor barrier and fold it down. The glue will stick it back on later. Tape the window into position with painters tape, remove five nuts and bolts, and loosen two. Pull the window up to the top and retape. Out comes the regulator. Reverse the process and you are done. Okay, on the videos they stage each of those jobs to make everything go extremely smoothly. We had a little glitch on the very last screw when a clip nut, one of those little nuts that clips onto sheet metal with a spring, sagged out of position behind the interior panel we had just remounted. We had to remove the interior panel again, re-tensioned the clip, and reposition it. Then BAM! It all came together. Tested.
Success.
Forty-five minutes after we started we cleaned up and went out for Greek food. No busted knuckles, no bleeding. No Gojo to clean the hands.
I checked the pricing on this job and it averages around $250 dollars, so I saved the family somewhere in the neighborhood of $190 dollars. Do check out these videos on YouTube. If you can, watch one from a professional. Quite often they are put out by a parts store. These guys have the incentive to show you the proper way to thing so that it can be a slick, easy experience. Why? Because it encourages you to buy the right parts and tools
from them to do it yourself rather than spend much more to have a mechanic do it for you.
Happy wrenching.
Bob
PS. I went out to move my wifes car from the driveway and go to work this morning. Ironically, while getting into my wifes car I barked my forearm on the doorframe and started one of those bleeds.