Hello all.
due to a number of issues, and things like recent lack of workshop access due to COVID-19, i've only got round to posting this latest update now.
So, here we go.
Pretty much right after my last post, only a few days actually, i received a message from my finisher that there was a crack in the top. Naturally this was a bit of a shock to the system, I was unaware of anything of the like before I had sent it off (the guitar wasn't shipped there, it was hand transported by my father who came over and then flew it from Switzerland back to England). Fortunately I was back in England for christmas so I picked up the guitar, took it home, investigated the crack and dealt with it. It wasn't a difficult thing to fix, it was just annoying and set the schedule way back as it couldn't be worked on again in the spray booth until the end of January.
Once it was sprayed my brother visited me in early march and brought the guitar with him. I am VERY happy with the spray job, it looks epic. It really brings out the almost copper like colour of the Tasmanian blackwood and just makes all the maple just pop and go extra 3d.
Once I had the guitar back I could then glue the bridge on. Something I had been thinking of but was going back and forth on, was the option of adding the extra holes to turn it into a 12 hole bridge. Quickstep192's comment had reminded me about that (thanks!) and before I had the guitar back in my hands I had drilled the extra 6 holes required.
The next task was what to do with the fretboard. I had already decided I did not want the fretboard to be glossy, i thought it would be a bit strange despite all the other gloss maple on the guitar. Several tests of numerous different types of oil had all darkened the fretboard way beyond what was aesthetically pleasing and it completely lost its match with the rest of the light wood on the guitar, if I was going to go with those options I might as well have painted the fretboard orange. Anyway, thanks to a very helpful conversation with Dion from Dion guitars (who i had seen had also done some maple fretboard guitars recently) I asked him what he had done and the answer was to do a hand rubbed epoxy finish. The test results were very pleasing so this is what I have done. The maple is still darker now, but WAY less than with any of the oil finishes, it actually makes the grain patterns in the fretboard jump out more than it did with the oil on the offcuts.
Once that was dealt with it the next tasks were to make and install a black TUSQ nut, which i have used because it frames the fretboard along with the black binding and looked "right" compared to the white bone nut, then I had to make a bone saddle and then the simple job of installing the tuners and stringing it up.
I have a few things still to do, because I have a radius'd fretboard I need to slot the back edge of my saddle to stop the 2 outside strings slipping down the radius'd saddle and leaving them too close to the edge of the fretboard, it's not so bad on the wound low E but its really noticeable on the nylon high e. I will also install a clear pickguard at some point.
Those tasks will have to follow my fretwork though. I have 1 low fret, fret 12 and this is going to cause some major headaches for several reasons.
1) the reason this fret is low is because it actually is seated much better than the rest of the frets on the fretboard. I wonder if this is due to a possibly wider fret slot due to the Rocklite inlay, or possibly due to the Rocklite itself.
2) most of the rest of the frets are all very slightly raised in the centre. Normally this a simple fix. you go in with superglue and press the fret down, then you can sand or scrape away any excess superglue and you're good to go. But as I already have a finished fretboard because of the epoxy, the superglue sits on the top and doesn't wick under the fret like it would on a non-finished fretboard. It also cures to the epoxy surface very quickly and then needs to be scraped off, this scraping does not only scrape the super glue layer off, it takes the epoxy with it.
As i see it I have 2 solutions
a) remove all the frets, sand the whole fretboard down to bare wood, reinstall and glue all the frets in, then re-epoxy the fretboard.
b) leave the frets as they are but do a full sanding job and re-crowning to get them down to the level of the single low fret and hope that the frets stay where they are due to the epoxy.
solution a) is a LOT of work, it's 80% of the way to rebuilding a new neck.
solution b) is a normal job, but I don't know if the frets will move during the sanding causing more high and low frets all over the neck. I can see from the tests that the epoxy did absorb quite a lot into the neck and may now be holding the frets in place. (the frets were not previously glued in, just bashed with a hammer and then pressed with a fret press into place)
See the picture right at the end below to see how the frets are typically currently seated
Any suggestions as to what option to take here are much appreciated!!
Once the fretwork has been dealt with I can actually get out my studio lighting and do my proper photos of the guitar. I'm actually looking forward to that.
I would say the guitar sounds good, its definitely not dead, its not as magical as i had hoped though, its a pretty dry sound and much more in a flamenco-y direction. It is loud, and when I first strung it up I was really impressed with how much low end it threw out. Once I actually put some strings that haven't been on and off 37 times i'll see how it really sounds....
The cracked top before fixing
 Untitled
 by
David Emm, on Flickr
Guitar at the finishers - look at that colour!
 Untitled
 by
David Emm, on Flickr
the top after finishing
 Untitled
 by
David Emm, on Flickr
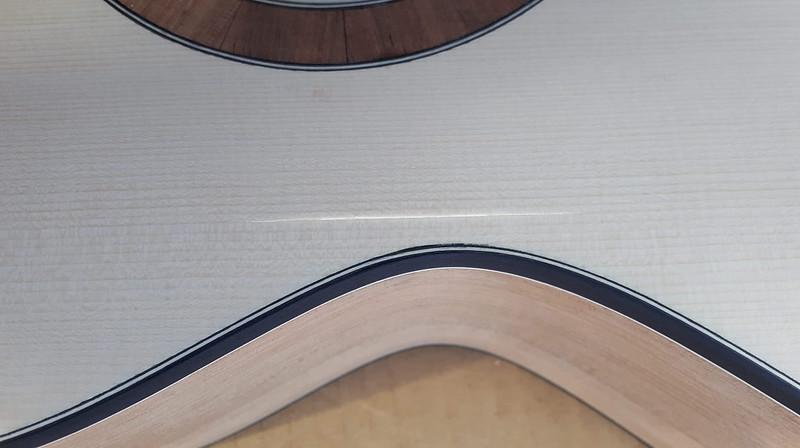
the back after finishing
 Untitled
 by
David Emm, on Flickr
the end graft
 Untitled
 by
David Emm, on Flickr
the bridge being glued on
 Untitled
 by
David Emm, on Flickr
the bridge with 12 holes and with strings on, it's the only picture i have while i'm writing this
 Untitled
 by
David Emm, on Flickr
the headstock with gold Schertler tuners. This set of strings still has to come on and off a few times hence the untrimmed ends and untidiness
 Untitled
 by
David Emm, on Flickr
fretboard after hand rubbed epoxy finish - you can see from the line on the end how deep the epoxy absorbed into the fretboard.
 Untitled
 by
David Emm, on Flickr
frets as a lot of them are currently seated. For reference (as this is a close up photo) its just about enough gap to barely squeeze a piece of paper into
 Untitled
 by
David Emm, on Flickr