Quote:
Originally Posted by Joel Teel

Hi David,
It's all looking great. I wanted to let you know what we use here at the shop, to thickness our peg heads. Although we us a saf T planer to rough thickness the back of our necks, we use a spindle sander with an adjustable fence for the back of the headstock. It's much cleaner than the stp.
|
Thanks Joel, thats something i've thought about, but there is no spindle sander in our workshop and i haven't found one that mounts in a drill press with sleeves that don't fall off. If i find one that holds the sandpaper on properly, it is something i would probably use.
More updates.
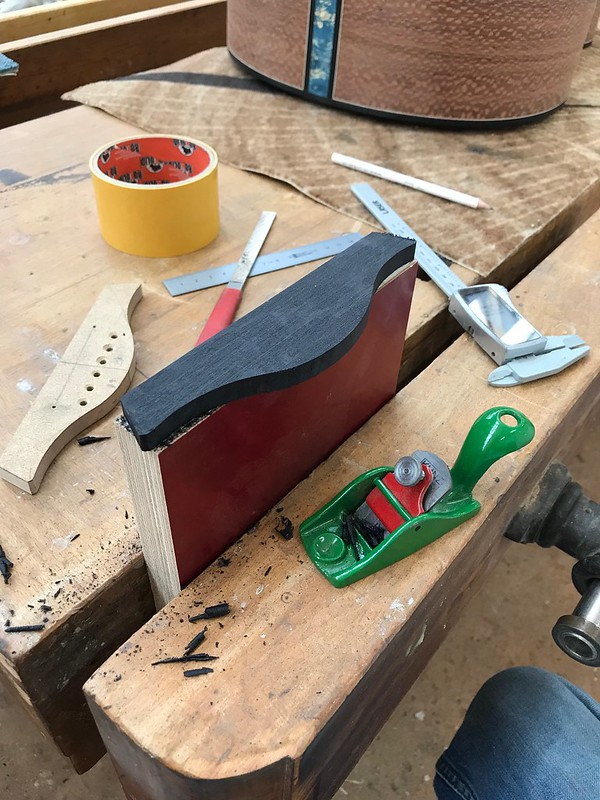
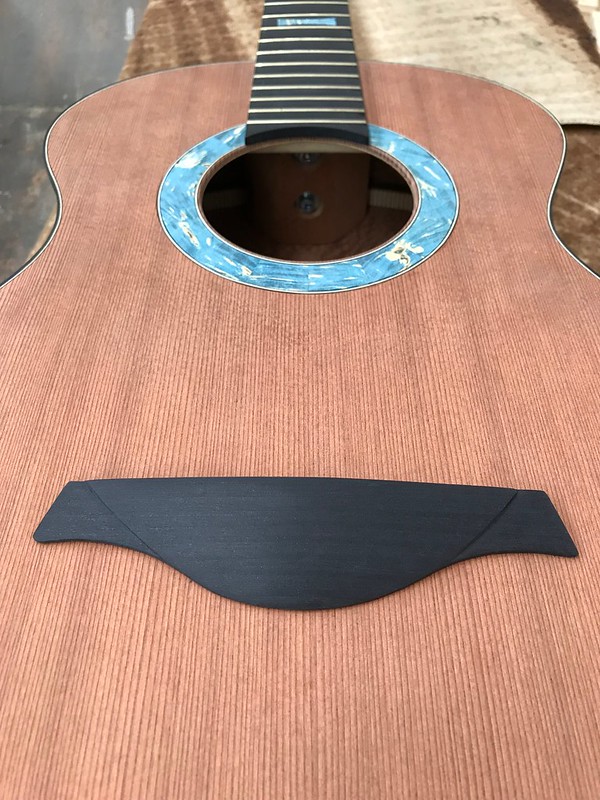
I shaped the bridge today. No idea how i came up with the shape i did, it was one of those things that just happened as I was carving, so I just went with it (actually I had the outline already) it was just the 'carve' that was new. I was liking how it was looking up until I drilled the pin holes.
The low E pin hole is far too close to the edge for my liking. I doubt its a structural problem it just looks worse than terrible
I don't know how i'm supposed to solve this issue though, it isn't aesthetically pleasing AT ALL, but without going for a fully compensated nut and saddle to allow me to go for a non-angled slot (something I was thinking about doing but i don't think my nut slot was left thick enough to make a compensated nut) nor do I have the setup to do such a thing at the moment) this was probably the way forward.
Having thought about it now, ie while typing, I could have gone for the semi-circular pin hole pattern but i've heard that those aren't the best for string angle over the saddle. No idea if thats true or not.
The issue came because the pencil dots on the bridge didn't seem as close to the edge as 4.5mm diameter holes actually are. A truly shocking error of judgement.
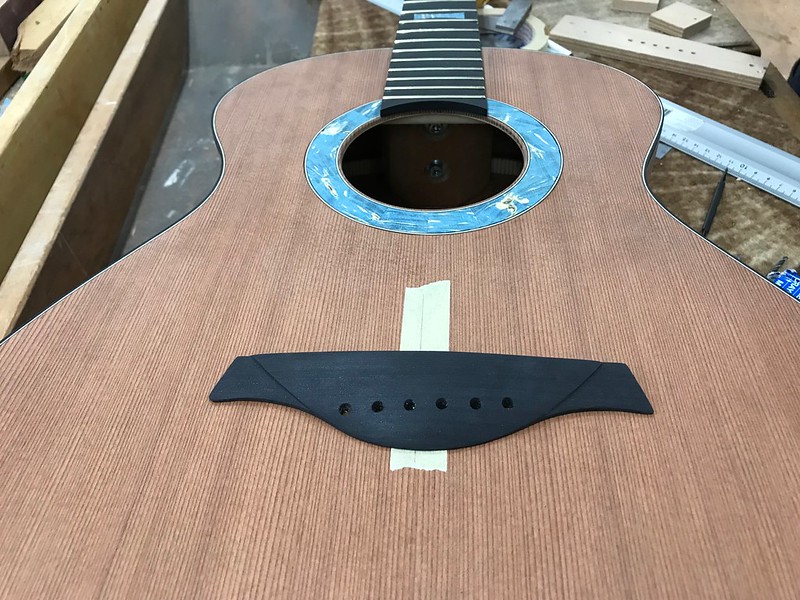
Interestingly enough, the bridge shape template you can see in the pictures below isn't nearly so bad because the string spacing is set to be 54.5mm instead of 57.5mm.
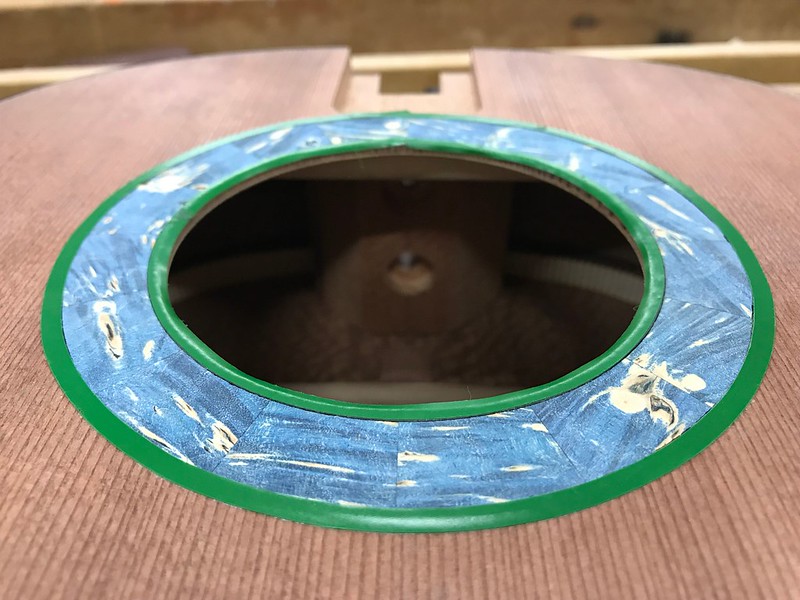
I then decided to fill some gaps around the edge of my rosette. There were absolutely no gaps when i installed it, I think its because the soundboard gets bent to fit the 25ft top radius and that probably stretches the wood around the rosette and opens up a few small gaps around the edges between the maple and the purfling or between the purfling and the soundboard. I used the super cool and ultra narrow and green GluBoost vinyl tape to mask it off. I'll do the reverse tomorrow to allow me to fill the gaps between the redwood and the purfling. I'm using a german (that i don't know the name of) resin like type product that all the carpenters in the workshop use for small gap filling. You add the sawdust from the wood you are filling to the resin, mix it and fill it. It comes out quite decently, i've seen it used, and briefly used it myself.
high tech bridge carving setup
 Untitled
 by
David Emm, on Flickr
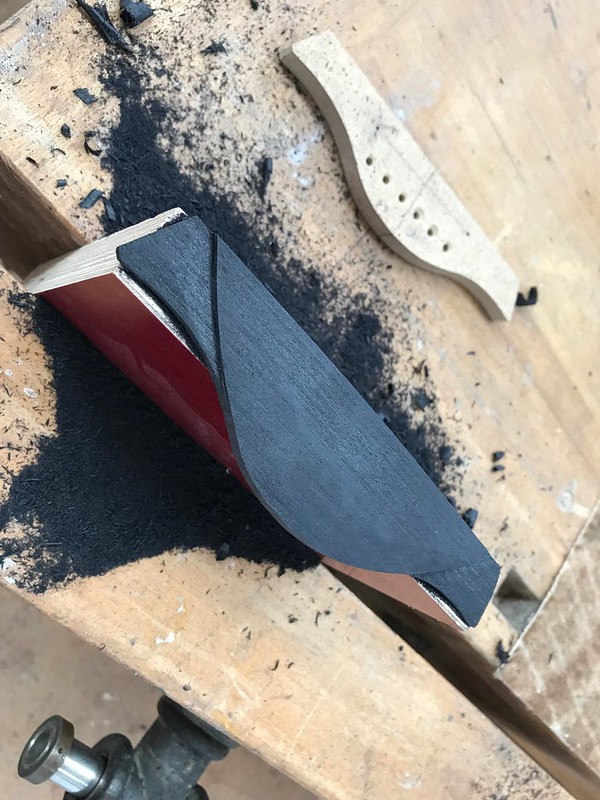
bridge carving underway
 Untitled
 by
David Emm, on Flickr
bridge carved and looking nice on the soundboard
 Untitled
 by
David Emm, on Flickr
bridge carve finished but then completely ruined by the horrendous pin holes.
 Untitled
 by
David Emm, on Flickr
Rosette taped off to fill the holes around the maple before the filling was done. Kinda like the green, maybe I need to do a green rosette next time.
 Untitled
 by
David Emm, on Flickr