
|
|
#76
 07-11-2017, 03:43 PM
|
|||
|
|||
|
Thanks, cutting it out, or some of it out is something I've already been considering but without having come to an acceptable solution.
The reason here is that bwb strip is pretty thin, I haven't worked out how I'll cut it out and how much, I do have some small chisels these days but even so it's pretty narrow even for those. I could probably remove a section with those chisels but then getting the resulting hole 'clean' enough to insert a new piece of purfling is going to be an almighty challenge. I'd also though about sawing it out but my Japanese saw is way too long to use here, it would cut too much out. 
|
|
#77
07-21-2017, 08:39 AM
|
|||
|
|||
|
Did a bit more work on the headstock today. Its getting there. The slots are slotted. The tuner holes are drilled and the tuners fit. i've started to sort out the areas at each end of the slots. The tapers along the centre still need to be carved properly to allow better string access to the tuners, lots of sanding is required and the volute needs to be carved too.
Also tried to fix my purfling issue. I hacked out the damaged section with a scalpel and dropped the new one in. I couldn't get a decent horizontal scarf joint so I vertically scarf jointed it. It looked almost invisible until I sanded it and the black dust went in the small gap. now its obvious again. It definitely looks even worse in close up, but here you go. Not sure if I can bring myself to hack this one out again. Hence why I was doing more work on the headstock again today. My next idea is to make an indent to the right of the centreline the same distance away as this mark, and sand black rocklite sawdust into that so as to make this one look deliberate. 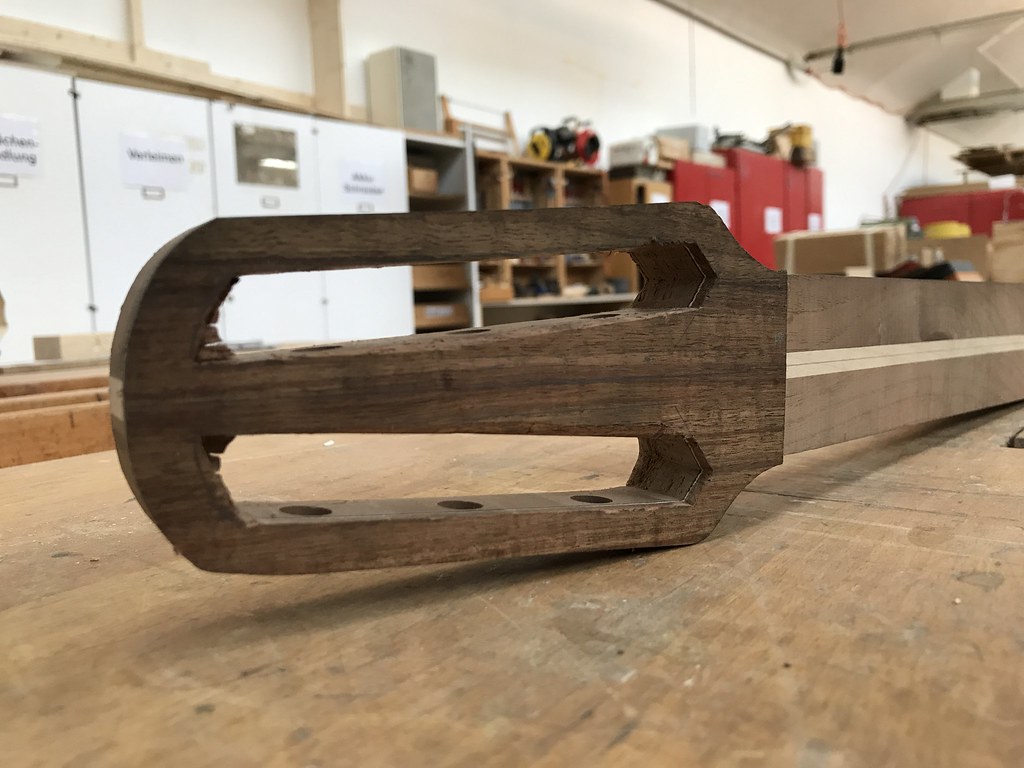 Untitled by David Emm, on Flickr Untitled by David Emm, on Flickr Untitled by David Emm, on Flickr Untitled by David Emm, on Flickr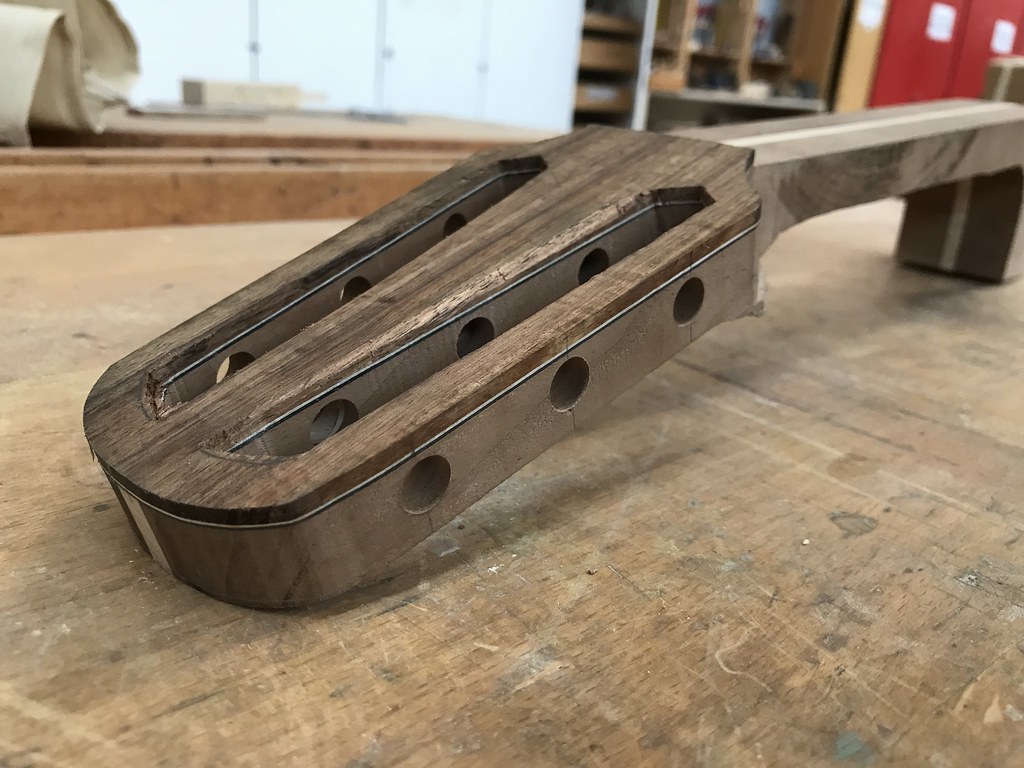 Untitled by David Emm, on Flickr Untitled by David Emm, on Flickr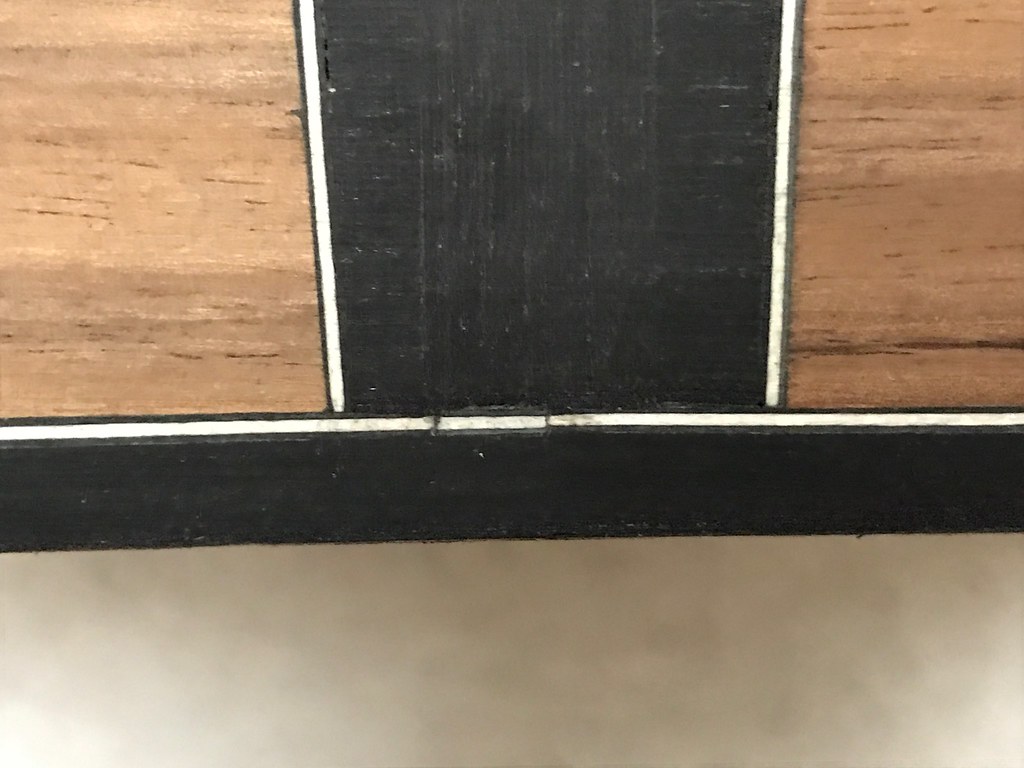 Untitled by David Emm, on Flickr Untitled by David Emm, on Flickr
|
|
#78
07-29-2017, 02:28 PM
|
|||
|
|||
|
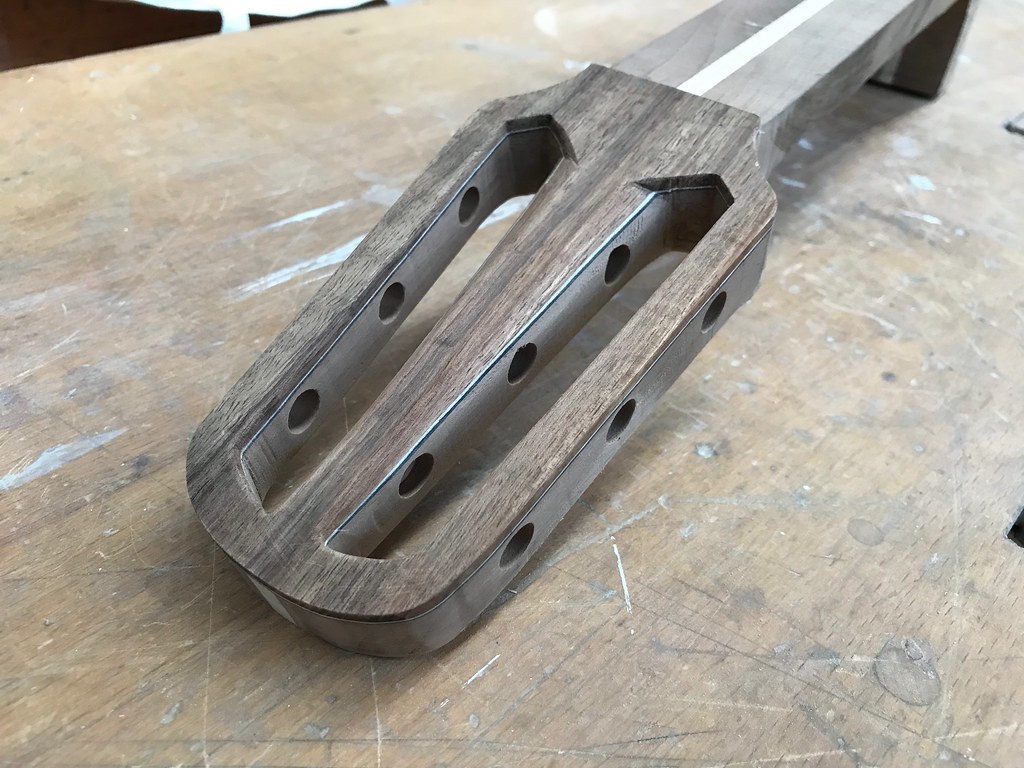
I've managed to get the main shaping of the headstock done now. It just needs some very minor tweaks to keep the lines straight, a bit more in the corners to get them cleaner and some real sanding, I didn't really have time to do a real sanding job while I was in the workshop yesterday. But here's some pictures
 Untitled by David Emm, on Flickr Untitled by David Emm, on Flickr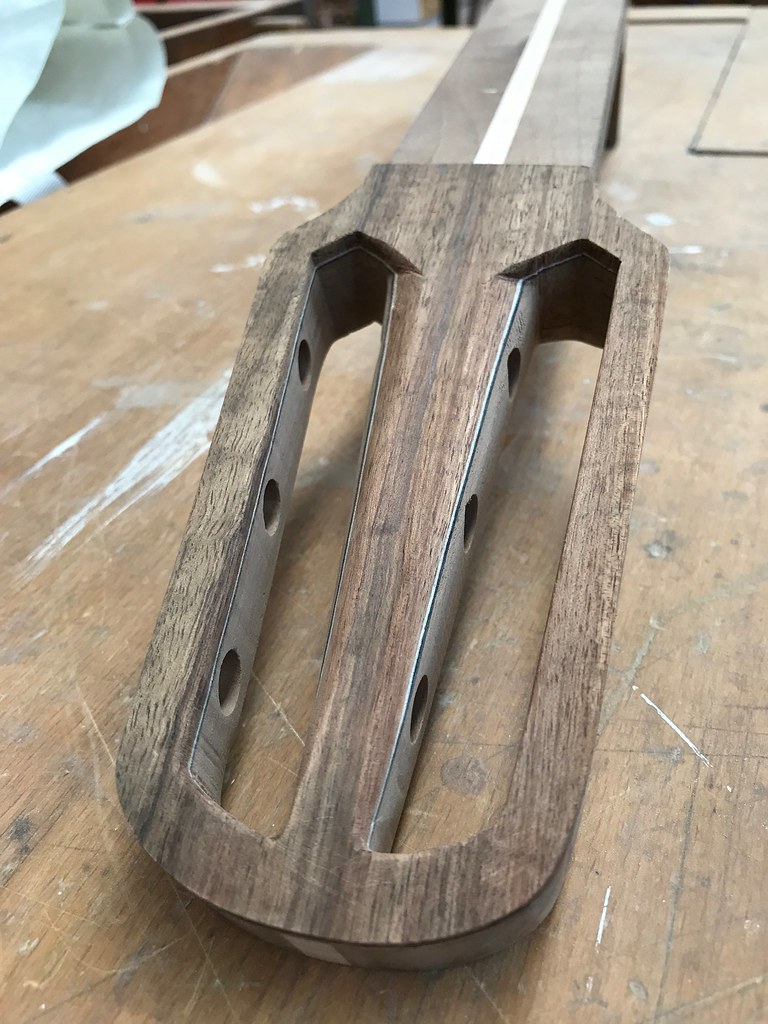 Untitled by David Emm, on Flickr Untitled by David Emm, on Flickr
|
|
#79
08-23-2017, 06:12 AM
|
|||
|
|||
|
Its been a while since my last update as i've had no access to the workshop recently due to a summer break, but as its open again, i'm back to the building
Yesterdays work consisted of assembling a small jig to rout the neck tenon slot. And once that was done, actually rout that slot and then fit the neck. The neck fits pretty well but using the sandpaper flossing method is taking ages to get clean edges between the neck and the body without ruining my neck straightness and neck angle. I also cut my fretboard to shape and decided to bind it. I still have to cut the end to match the soundhole, but I ran out of time yesterday. Neck tenon slot cutting jig with custom infinitely adjustable depth stop. 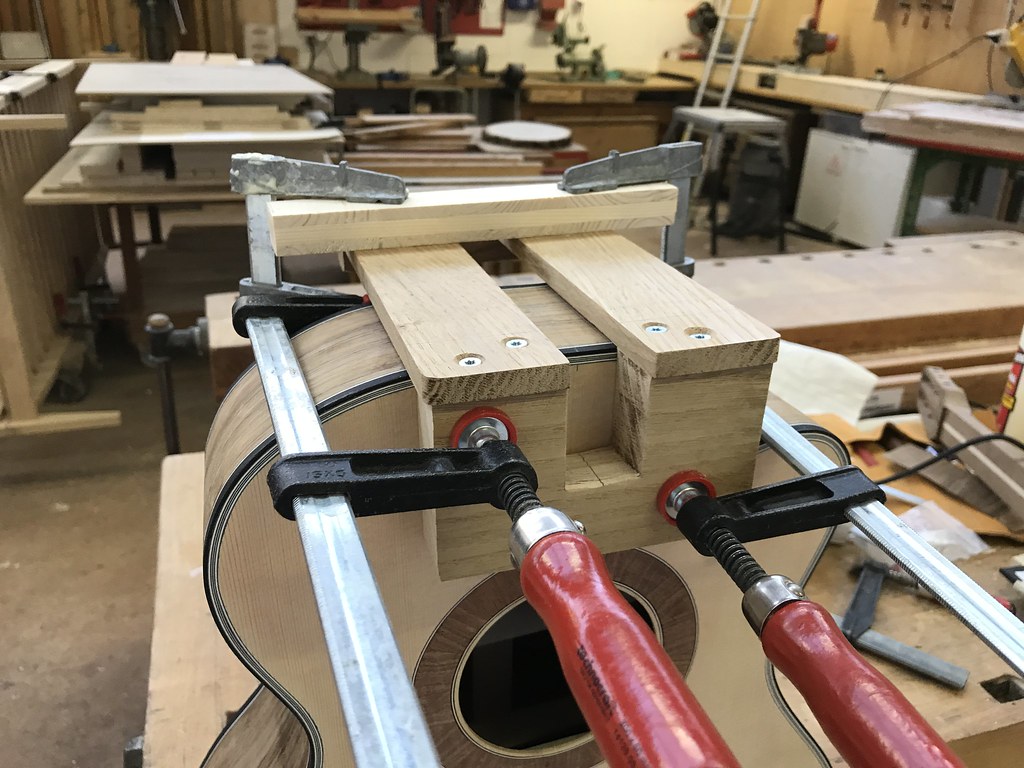 Untitled by David Emm, on Flickr Untitled by David Emm, on FlickrNeck tenon slot jig 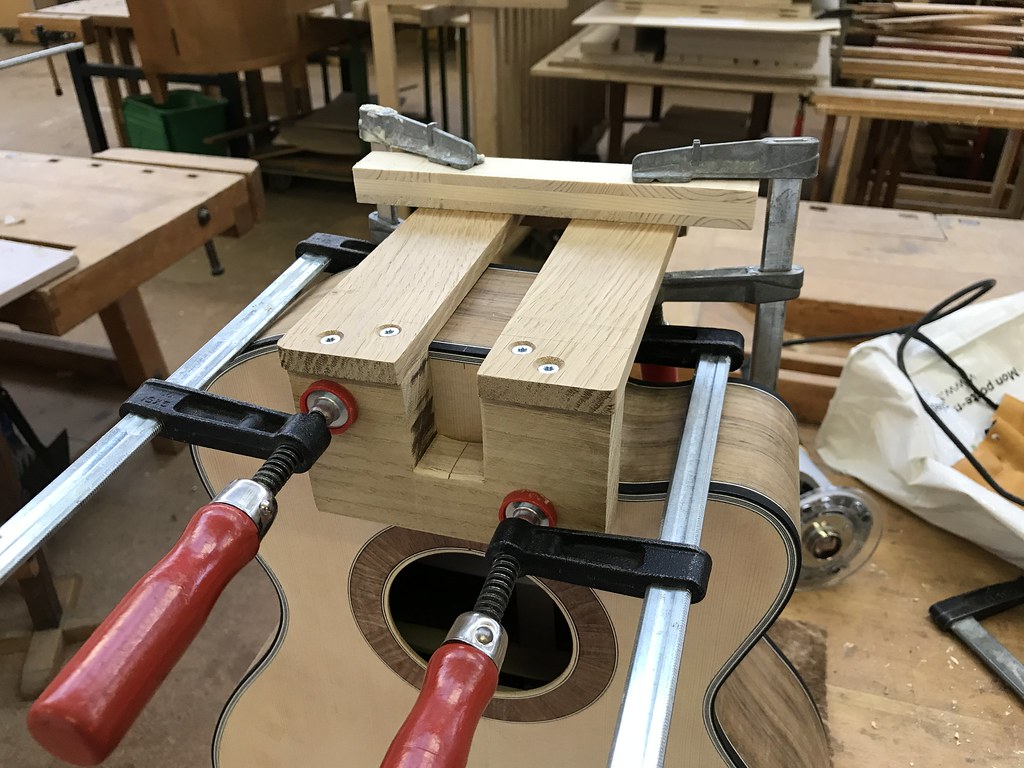 Untitled by David Emm, on Flickr Untitled by David Emm, on FlickrNeck tenon slot jig with router sat on top ready to go 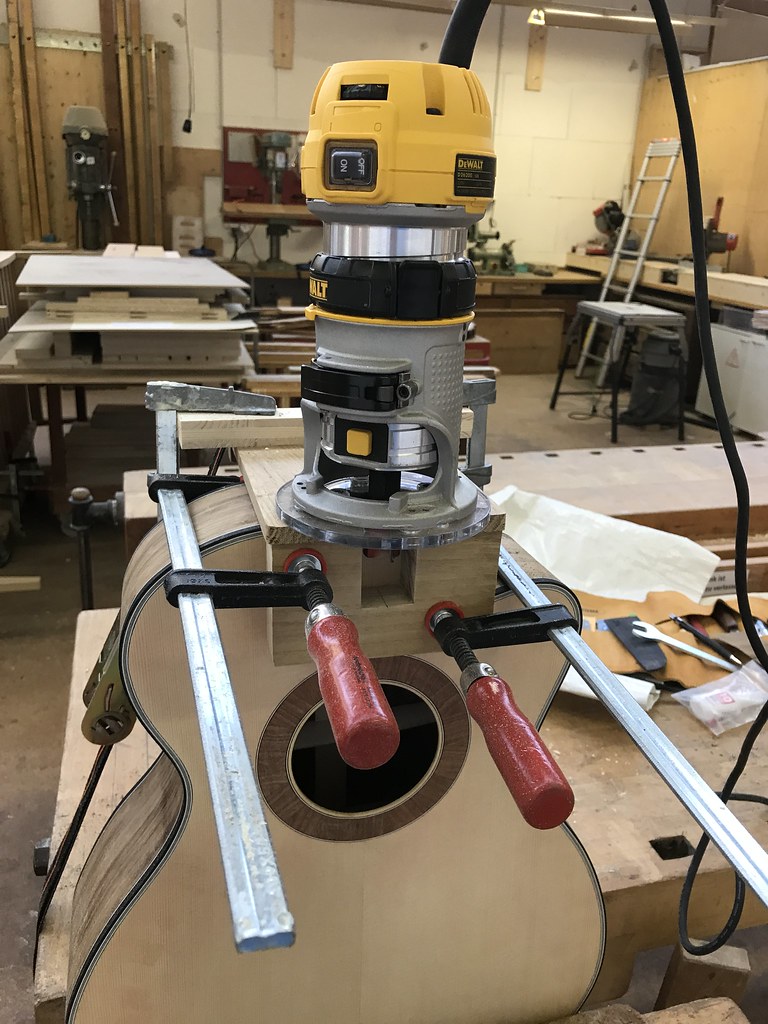 Untitled by David Emm, on Flickr Untitled by David Emm, on FlickrNeck tenon slot cut, but before i cleaned up the edges 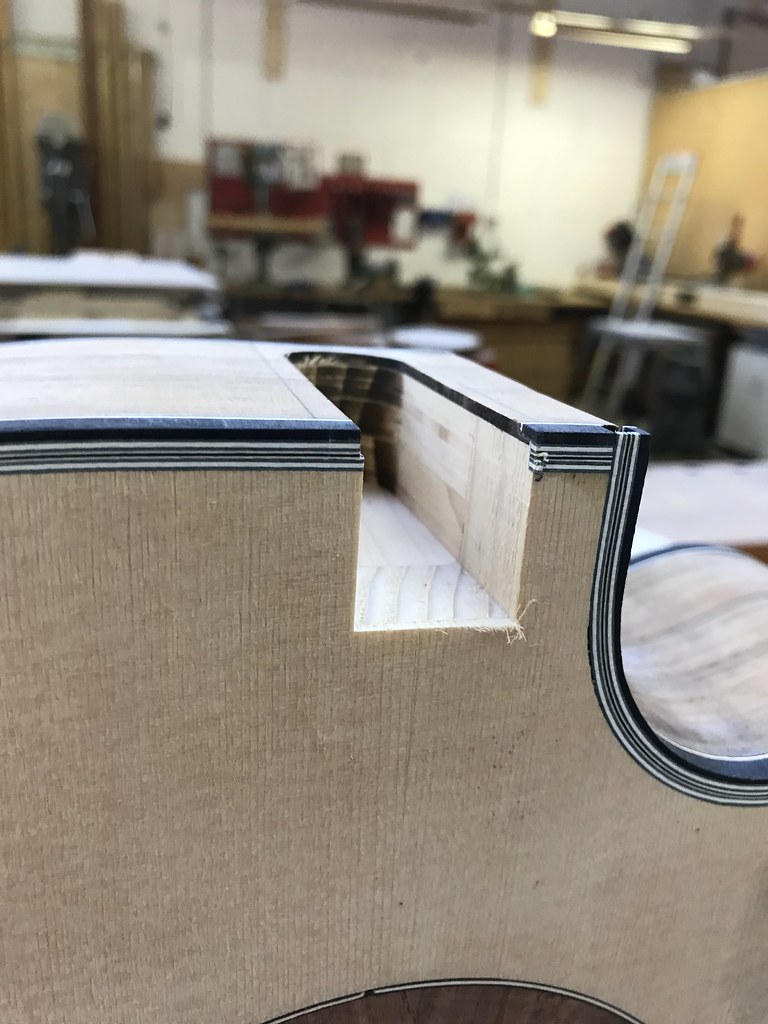 Untitled by David Emm, on Flickr Untitled by David Emm, on FlickrNeck test fit  Untitled by David Emm, on Flickr Untitled by David Emm, on FlickrNeck test fit much further along in the procedure  Untitled by David Emm, on Flickr Untitled by David Emm, on Flickrbinding the fretboard 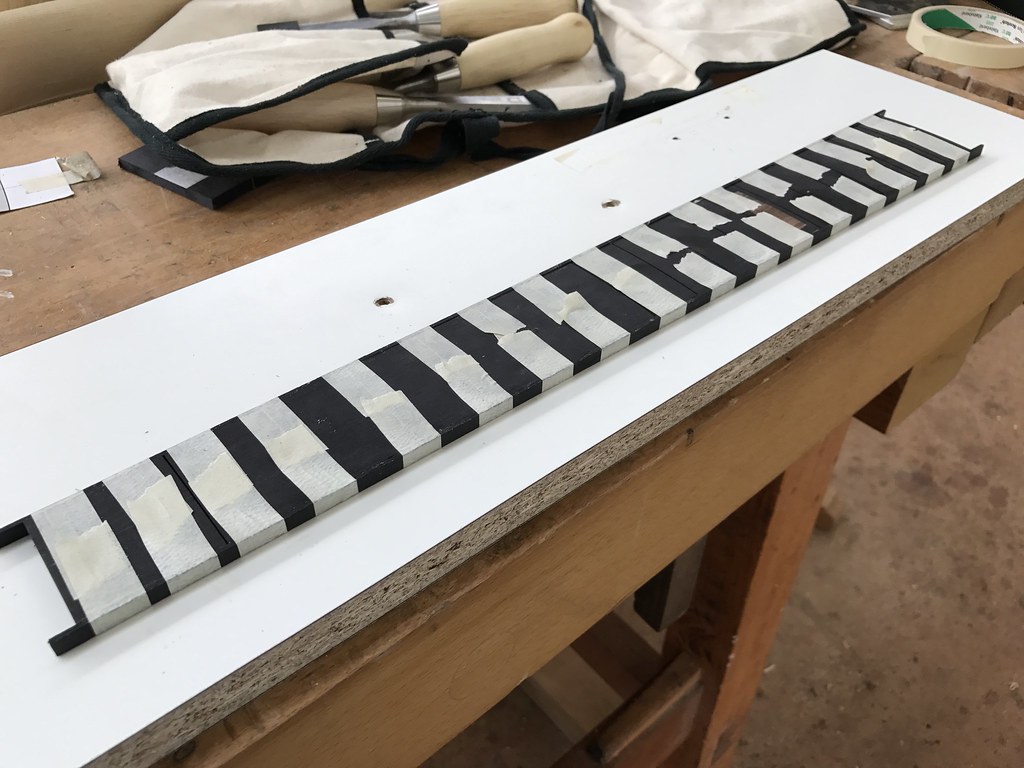 Untitled by David Emm, on Flickr Untitled by David Emm, on FlickrSome serious forced perspective going on here, but here's the guitar sitting on the bench, looking like a guitar!!! 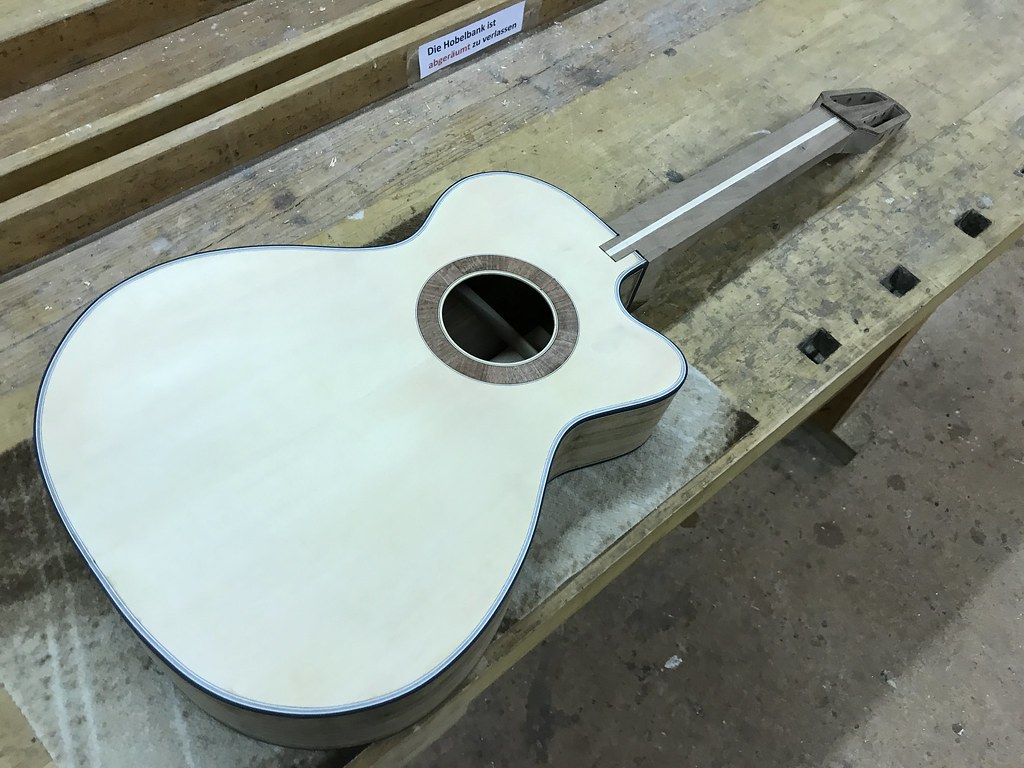 Untitled by David Emm, on Flickr Untitled by David Emm, on Flickr
|
|
#80
08-25-2017, 03:40 PM
|
|||
|
|||
|
Were you able to fix that section of purfling that was bothering you?
|
|
#81
08-27-2017, 01:57 PM
|
|||
|
|||
|
Quote:
 Untitled by David Emm, on Flickr Untitled by David Emm, on Flickr
|
|
#82
09-08-2017, 09:03 AM
|
|||
|
|||
|
Apologies for the lack of updates, but actually i've been making some decent progress recently as the pictures below will show (with less horror show mistakes!)
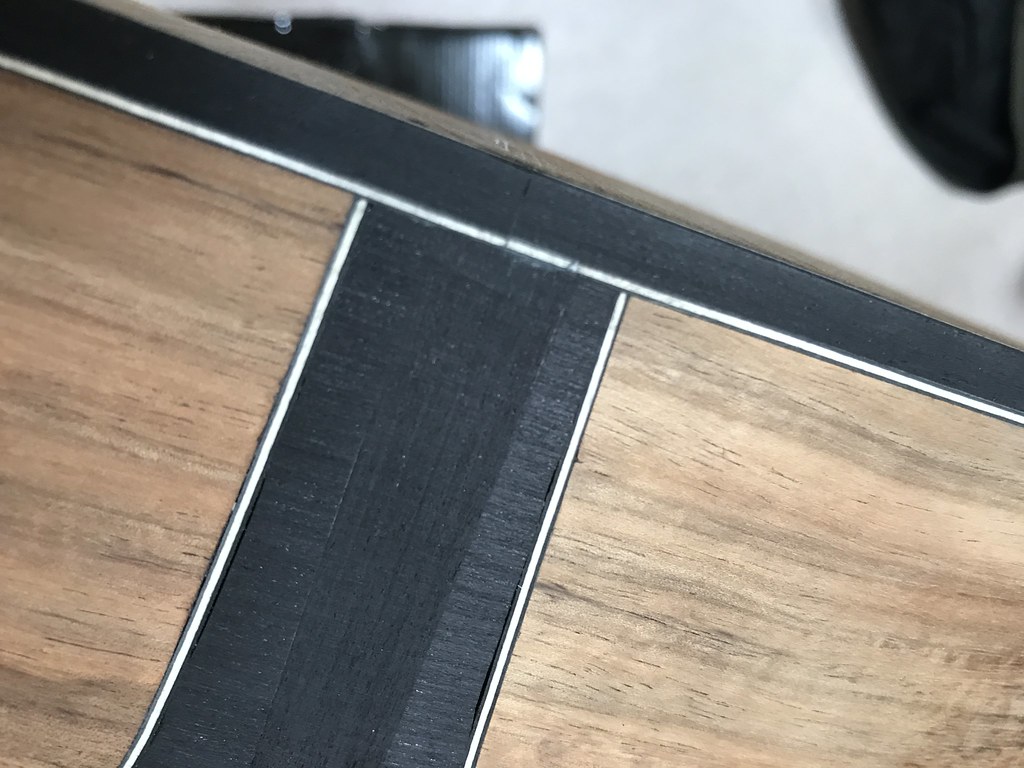
as I had a joint I was happy with and after adjusting the joint until it was straight, square and at the correct angle, I couldn't find a big enough clamp to the clamp neck on, so i went with binding tape that i pulled as tight as i could. worked out nicely. 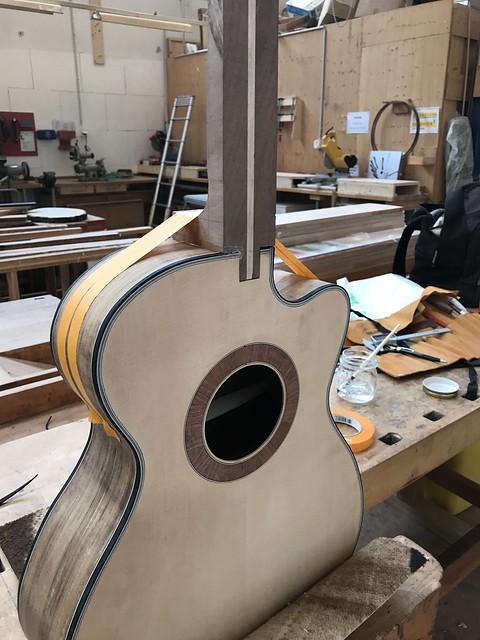 Untitled by David Emm, on Flickr Untitled by David Emm, on Flickrsecond angle of the tape clamping method  Untitled by David Emm, on Flickr Untitled by David Emm, on Flickrafter that the fretboard got glued on  Untitled by David Emm, on Flickr Untitled by David Emm, on Flickrview with fretboard attached 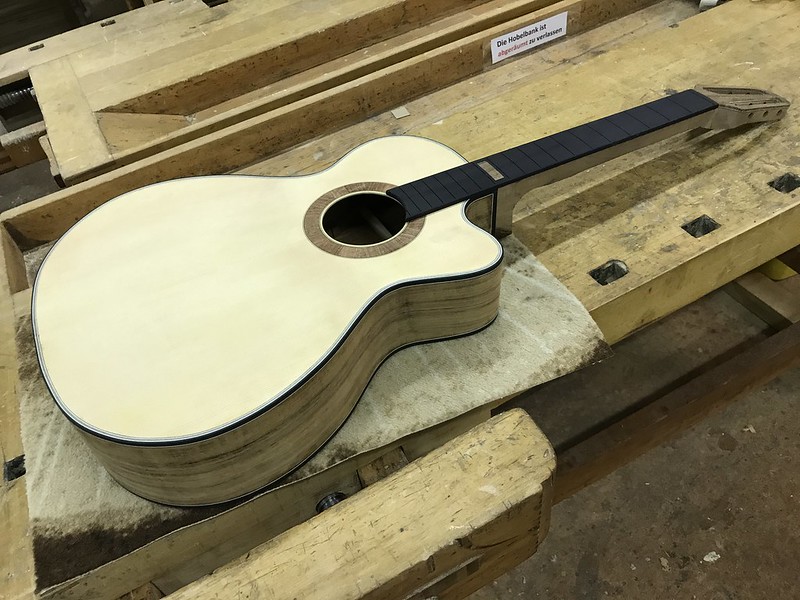 Untitled by David Emm, on Flickr Untitled by David Emm, on FlickrI then carved the neck and the volute (not finished in this picture) 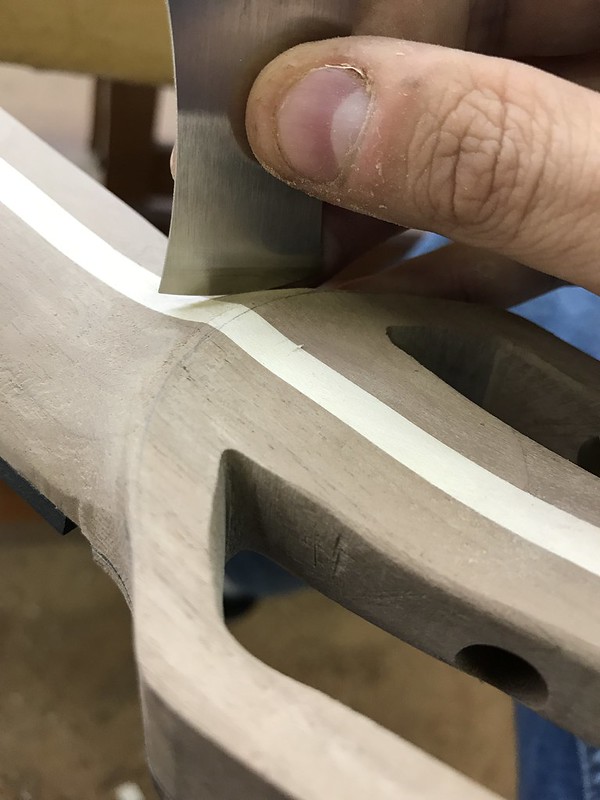 Untitled by David Emm, on Flickr Untitled by David Emm, on Flickrfinished carving the string access on the headstock  Untitled by David Emm, on Flickr Untitled by David Emm, on Flickrcarved the heel with thumb access cutaway 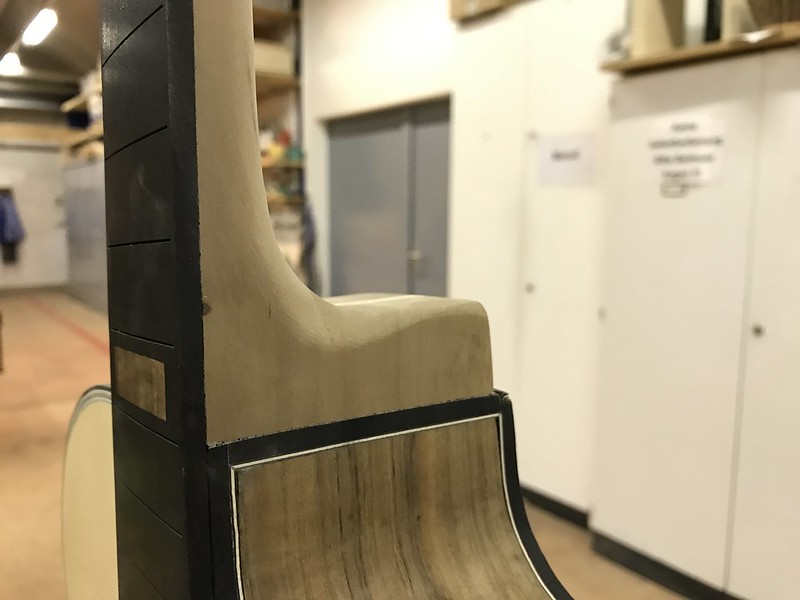 Untitled by David Emm, on Flickr Untitled by David Emm, on Flickrattached the heelcap 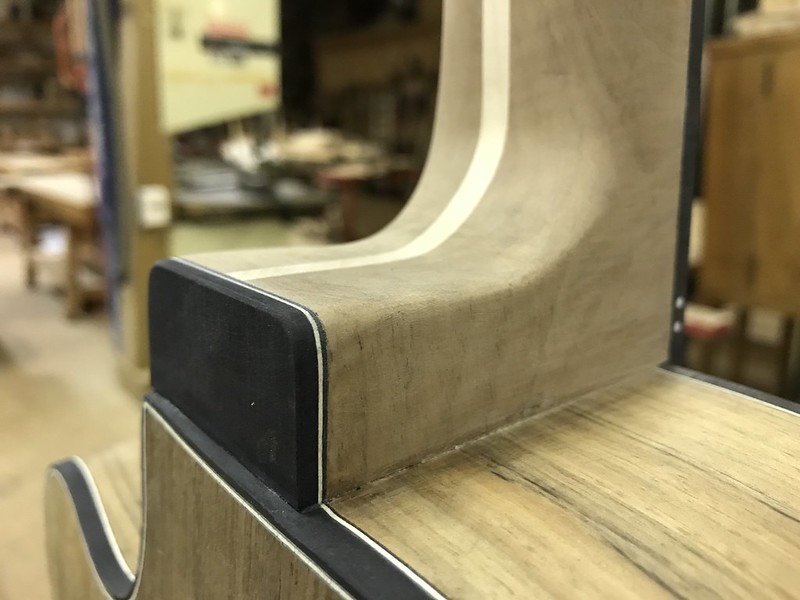 Untitled by David Emm, on Flickr Untitled by David Emm, on Flickrnext up, gap filling, sanding, shaping the bridge, fretting, more sanding, and then a even more sanding. Thanks for following along David
|
|
#83
09-27-2017, 11:49 AM
|
|||
|
|||
|
For all the remaining few of you still reading the updates on this thread, you will be unsurprised to hear the following update.
Yesterday was due to be the day the guitar got lacquered and thus the guitar would have been completed by this coming weekend. It what is probably no surprise to anyone who has been following this build, that won't be the case. The final sanding in the finish sanding process caused irreparable damage to the top and rosette, and as such the top needs to be and will be replaced. Its been several days and i'm still very very angry about this. I have already acquired a new top, although this one is Swiss spruce, not German, but i do like it, possibly even more than my previous top. I have 'started' the process of the top replacement. I say started, i haven't got far, I spent almost 2 hours staring at it on monday working out how exactly i'm going to do the process. For those interested in just how exactly i'm going to replace the top, i'm basing my method on an article in the spring 2016 'guitarmaker magazine'. The article described replacing the top of a 1972 0-16 Martin yet keeping the original binding. This was of great interest to me as by keeping my current binding, I don't need to completely redo that end graft/entire bottom of my guitar that took me so long to actually sort out. I will be documenting my method of top replacement, both here, and likely in a separate thread. I'm sure it will be of use to others to know pretty much how not to do it. I will be mostly following the magazine's method, but with some deviations such as the one due to the fact my neck is glued on and isn't removable and others that i'll no doubt encounter due to more mistakes. Just because i did take pictures, here are pictures from just before the final sanding and thus before the damage occurred. 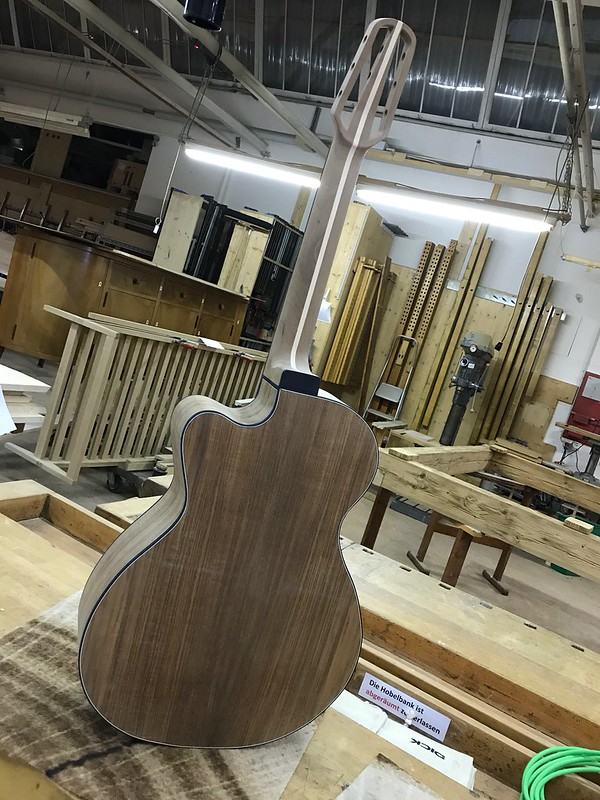 Untitled by David Emm, on Flickr Untitled by David Emm, on Flickr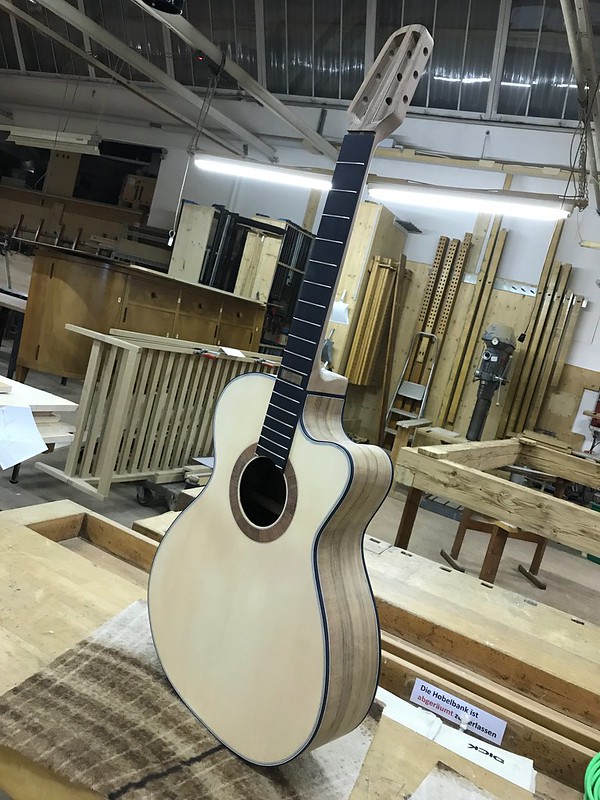 Untitled by David Emm, on Flickr Untitled by David Emm, on Flickr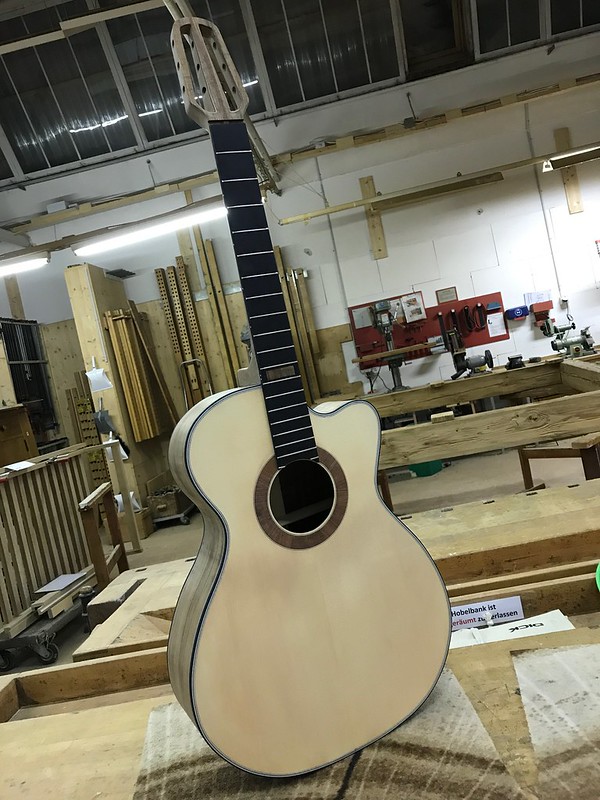 Untitled by David Emm, on Flickr Untitled by David Emm, on Flickr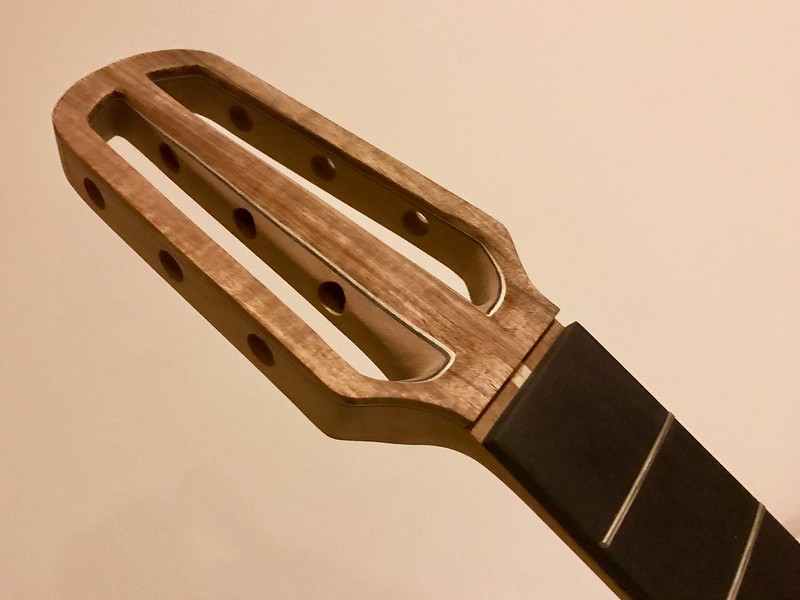 Untitled by David Emm, on Flickr Untitled by David Emm, on Flickr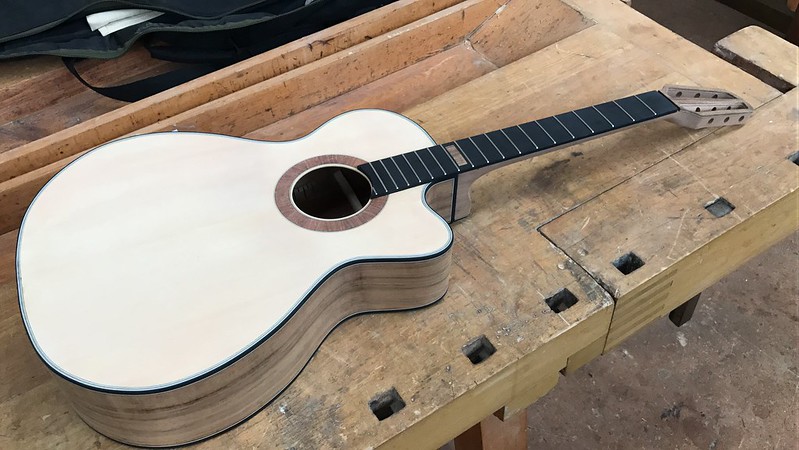 Untitled by David Emm, on Flickr Untitled by David Emm, on Flickr
|
|
#84
09-27-2017, 12:34 PM
|
|||
|
|||
|
That is heartbreaking! Wow! You made it past all the router and inlay work - only to be done in by a sander of all things..
That was a beautiful build with a really pretty top and rosette. Your work is very clean. I am interested in your retopping process. Please post some pix.
|
|
#85
09-27-2017, 01:59 PM
|
|||
|
|||
|
So sorry to read about your tribulations ... hopefully you will overcome these problems and still end up with the beautiful instrument which this build always promised.
|
|
#87
09-28-2017, 03:18 PM
|
|||
|
|||
|
So the top replacement by keeping the original binding starts like this.
if possible, remove the fretboard and the neck. I have discovered that removing a Rocklite fretboard glued on with Titebond is tricky, so tricky it looks like i won't be removing mine. its hard to get the heat to get through to the glued side as the Rocklite is a pretty good insulator. Also due to the way my neck is attached and glued, its almost impossible to get that off in one piece. The replacement top needs to be sized correctly, the correct size in this case is the exact outline of the INSIDE of the top purfling. The idea being the original top will be hacked out leaving the top purfling and binding in place and standing proud. After cleaning up the inside edge of the purfling and the top edge of the kerfed linings to allow gluing again, the top should just drop straight in to the gap and onto the ledge created (hopefully) To get the top correctly sized to these dimensions first you find the router cutter with the bearing used to cut the channel for the top purfling. Its also very handy if you have something like the stew mac vertical sliding binding cutting system i have here. Although the fact it slides its not ideal here. I've secured the sliding system in place using a strategically placed and custom shaped block of wood. This means the bearing follows the binding, but because of the way it has to cut, the router cutter can't sit on the new top, nor sit on the old top otherwise damage would occur. Hence i blocked the router at a set height. Next, you need to place some spacers on the soundboard onto which the replacement top will sit. These are here to keep the router bit off the original top so it only cuts the new top. I had planned to hold these spacers in place using superglue, but it turned out I left my superglue at home so I used double sided tape, something i loathe to do as it never seems to be trustworthy enough. In this case, it did work and worked successfully. They are placed near the edge with a small 5mm(ish) gap between the edge of the spacer and the inside edge of the purfling 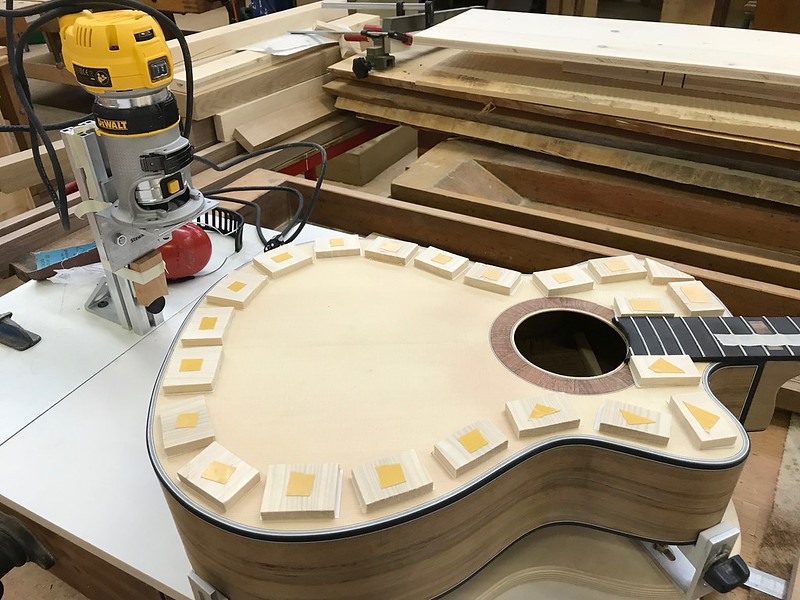 Untitled by David Emm, on Flickr Untitled by David Emm, on Flickrmy first attempt used a test piece of plywood to verify my method would work, it seemed to do exactly as expected. Its actually very good but the angle of the camera makes it look a bit inaccurate. (top view of test piece) 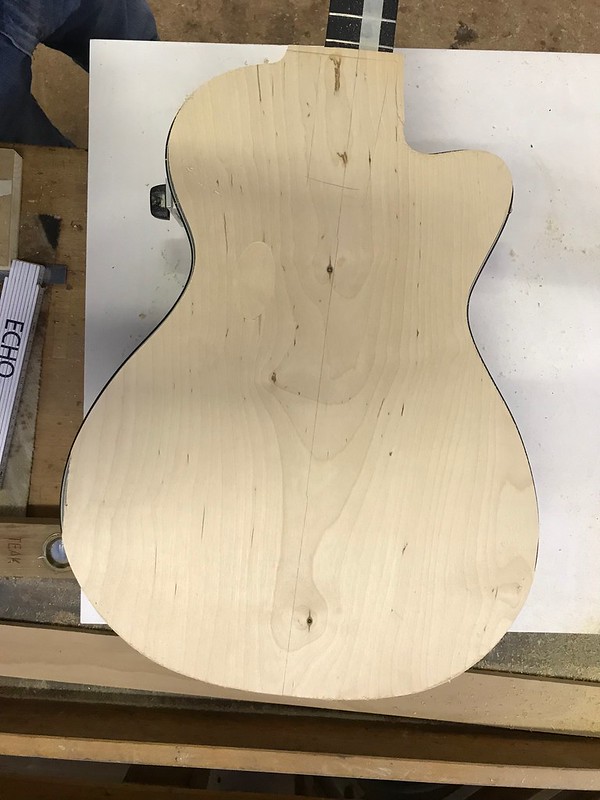 Untitled by David Emm, on Flickr Untitled by David Emm, on FlickrAfter replacing the test plywood with the new swiss spruce top and trimming that, you get an exact copy of the shape of the inside of the purfling. close up view of the new top lining up exactly with the inside of the purfling 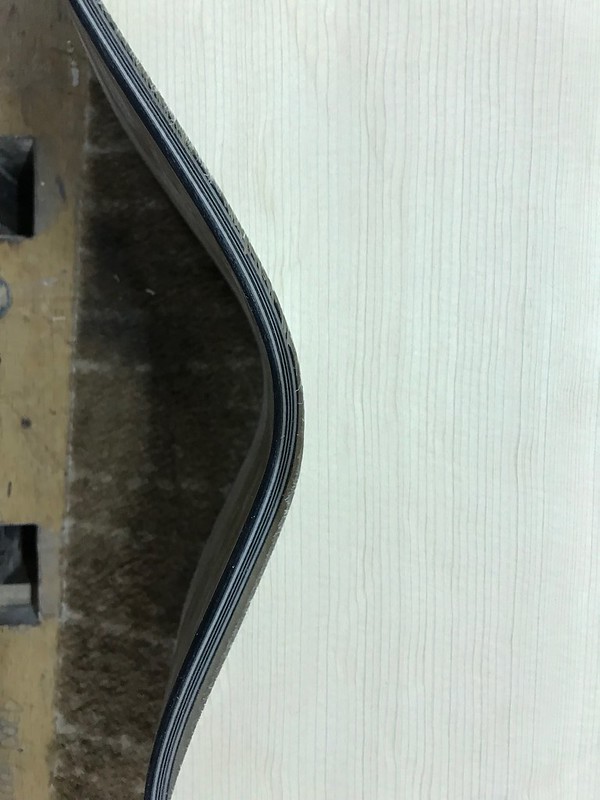 Untitled by David Emm, on Flickr Untitled by David Emm, on FlickrIts harder to tell from this view, but the new top lines up perfectly with the purfling 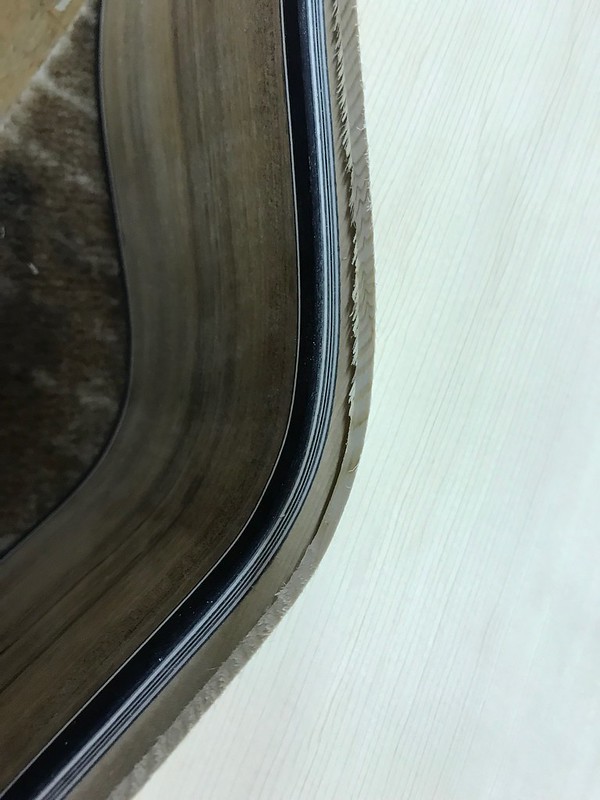 Untitled by David Emm, on Flickr Untitled by David Emm, on FlickrHeres the new top, its hard to tell from this but its got some really nice bearclaw in it. 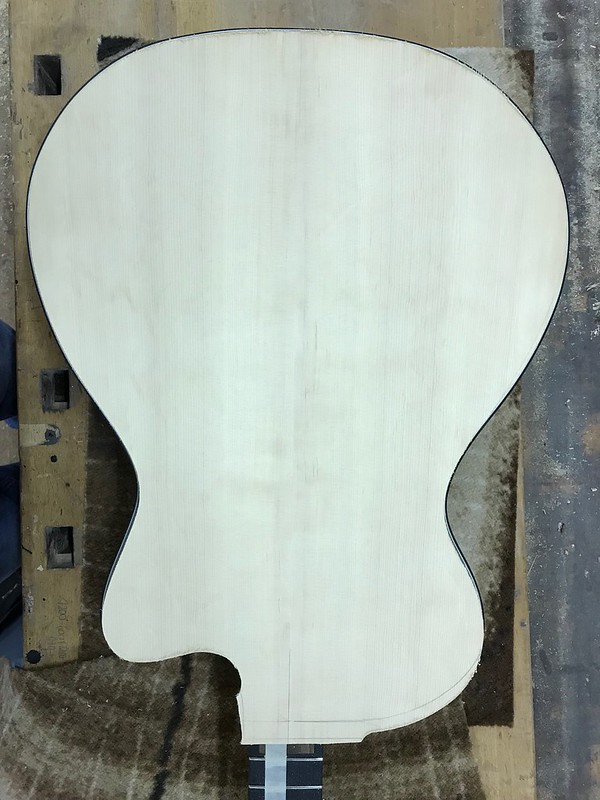 Untitled by David Emm, on Flickr Untitled by David Emm, on FlickrHeres the new top after being trimmed to size, you might be able to make out some of the bearclaw here 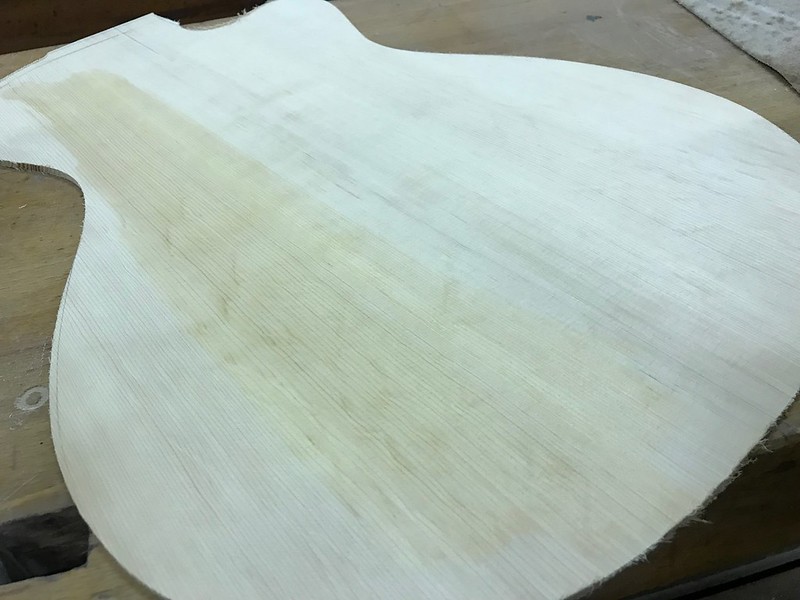 Untitled by David Emm, on Flickr Untitled by David Emm, on FlickrThe next step is to hack out the original soundboard, but i'm first going to do another rosette and install it, cut a new soundhole, thickness and brace the top before I get to doing that. That process should start tomorrow.
|
|
#88
10-08-2017, 02:56 PM
|
|||
|
|||
|
The new rosette on the new soundboard is now installed, next step will be bracing it before I hack the old top out and install this new one
Time permitting, I'm hoping to get the bracing glued on and start the voicing tomorrow... i'd like to have this soundboard installed (or at least work out if my process is accurate enough to see if the install is possible) by the end of the week, but this build hasn't gone to any time plans i've made so far, so lets see..... radial rosette building, as I still haven't come across somewhere I can buy wax paper, or anything else that is completely superglue resistant I'm using brown tape. The superglue sticks to it well enough to hold the pieces in place, but not so well thus it peels off fairly easily leaving a reasonably clean surface that just needs a small amount of sanding before being glued into the soundboard. 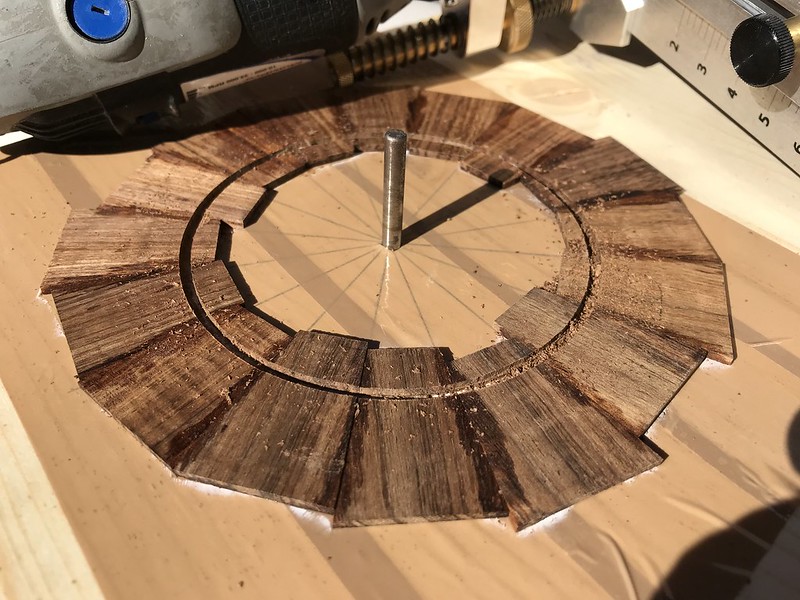 Untitled by David Emm, on Flickr Untitled by David Emm, on Flickrrosette cut out, this is actually the underside that was stuck down to the brown tape, this got sanded cleaner after the picture 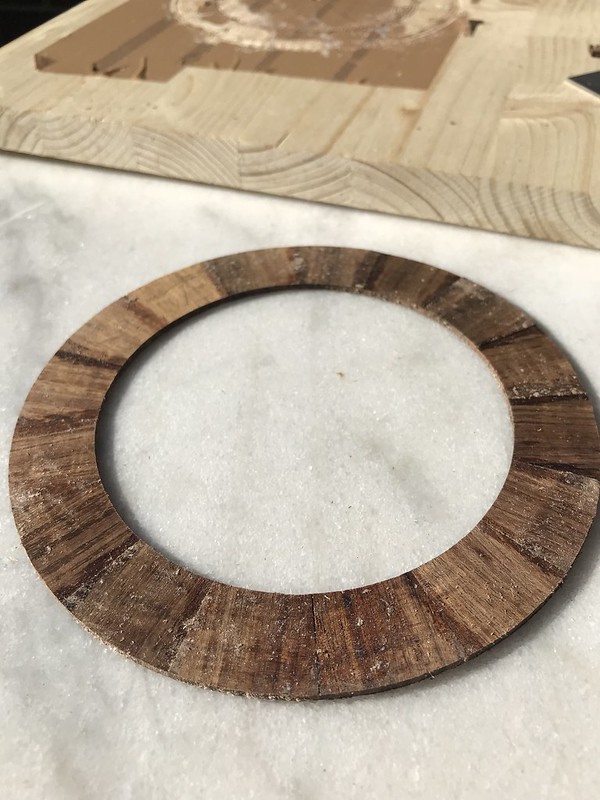 Untitled by David Emm, on Flickr Untitled by David Emm, on Flickrfirst stages of the rosette channel routing 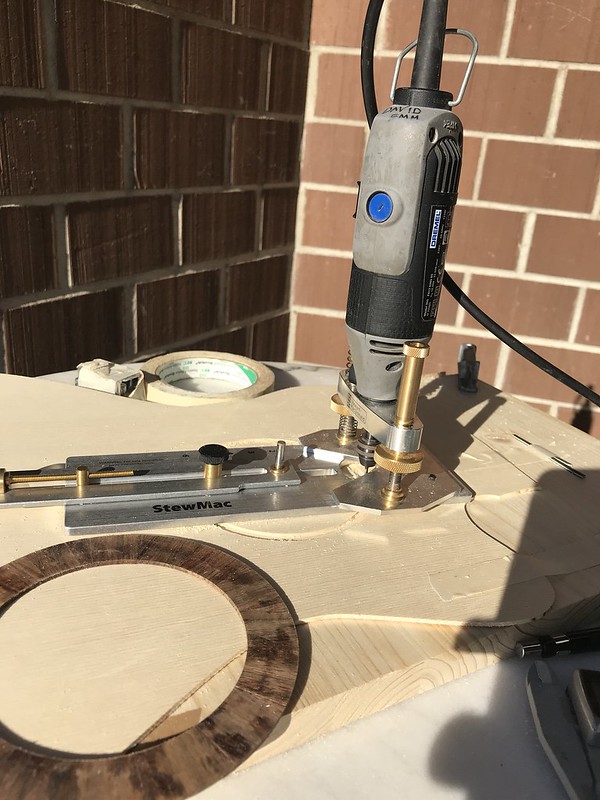 Untitled by David Emm, on Flickr Untitled by David Emm, on Flickrrosette installed and scraped flush, its actually pretty flame-y but its not showing in any of the pictures 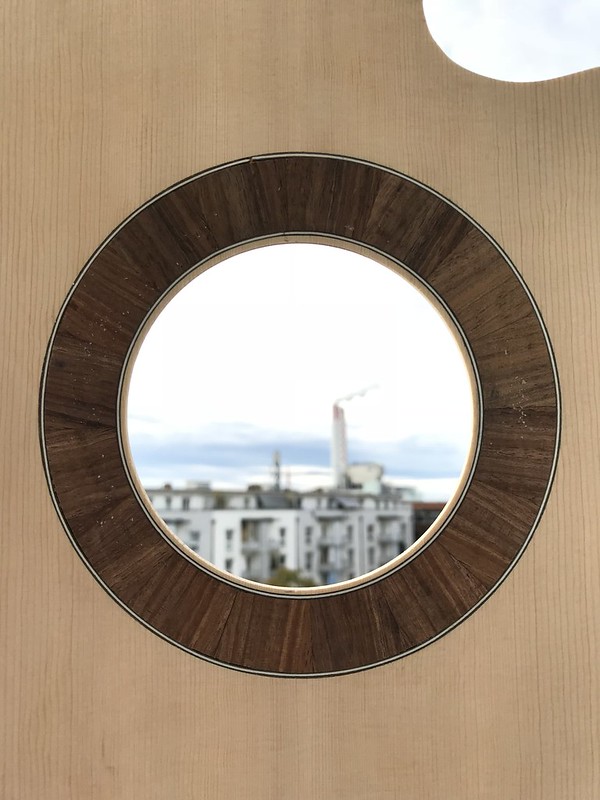 Untitled by David Emm, on Flickr Untitled by David Emm, on Flickr
|
|
#89
10-19-2017, 03:37 PM
|
|||
|
|||
|
We have a new top on!!!
I couldn't be more pleased, well I could, but i'm more than happy with the results. I still need to sand the top down to be level with the bindings. Its not an absolutely perfect fit, but its 95% spot on and the few almost perfect sections are still a better fit than what I had previously when I fitted the bindings and they didn't quite perfectly fit. Here was my prototype design for an expanded soundhole with integrated independant vibrational upper bout plate and a design which would have incorporated a true floating bridge 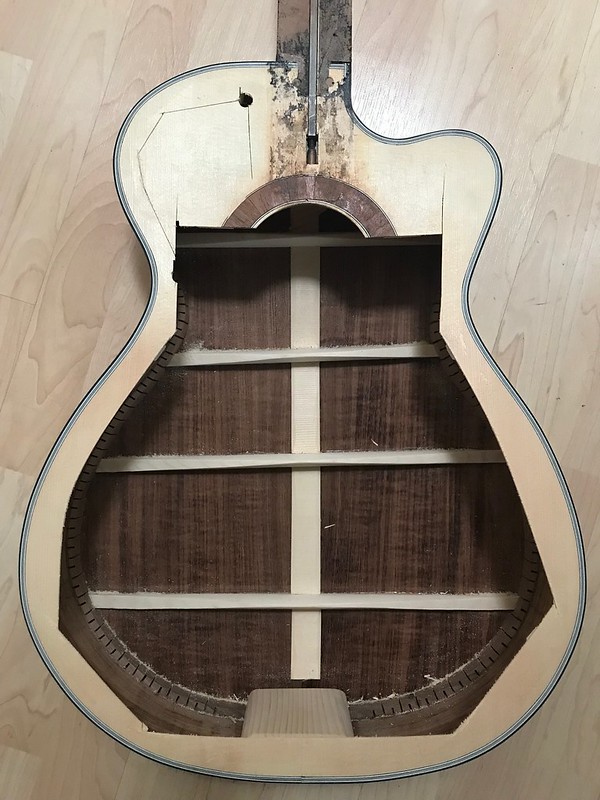 Untitled by David Emm, on Flickr Untitled by David Emm, on FlickrThis was my first bracing with my sparkly new chisels and Veritas micro block plane. That block plane is amazing! I did the bracing of this top WAY quicker than the last one and i'd put that down to a few percent experience, quite a good percent much sharper tools and a lot of percent down to that micro plane. 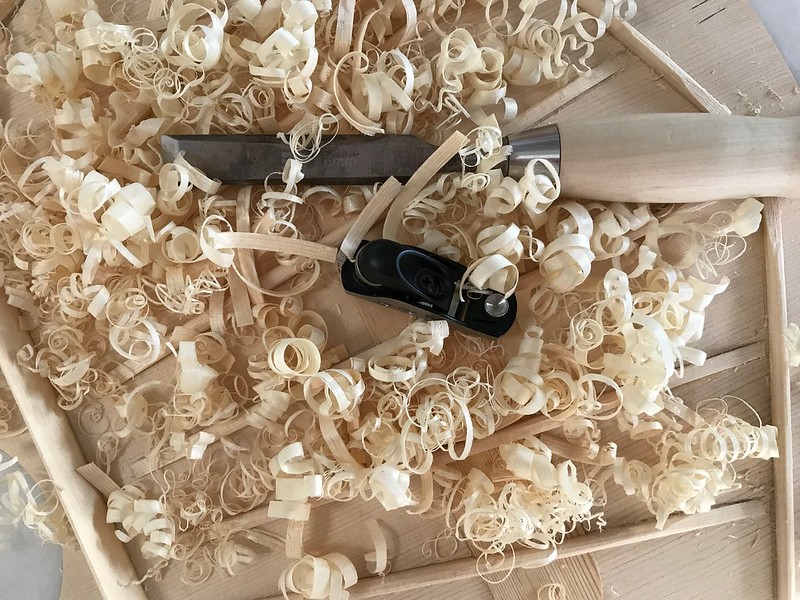 Untitled by David Emm, on Flickr Untitled by David Emm, on Flickrnot the best picture as i'm only about 85-90% done here but this is the bracing of the new top 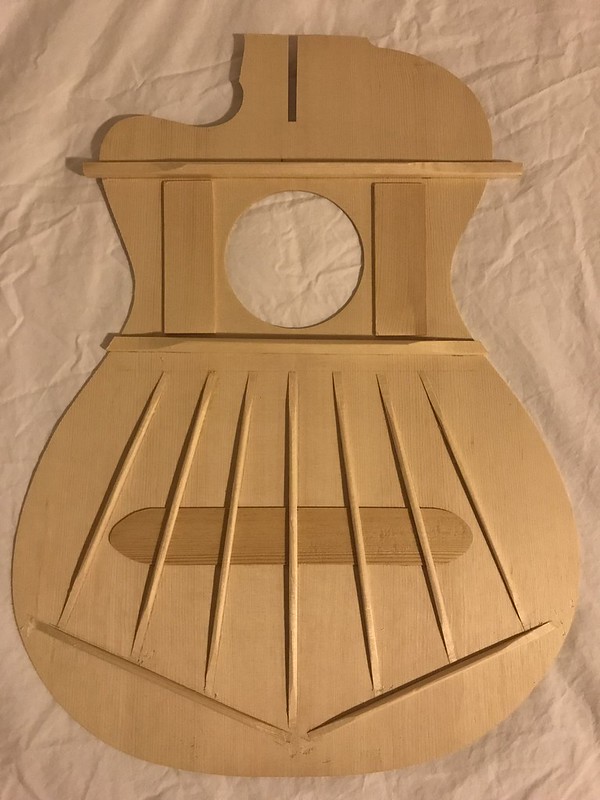 Untitled by David Emm, on Flickr Untitled by David Emm, on Flickrguitar body and bindings cleaned out ready for the new top  Untitled by David Emm, on Flickr Untitled by David Emm, on Flickrbinding and top purfling remain in place. but all remnants of the old top have been removed ready for the new top. i've still got over 3mm of lining to glue to, its not the biggest amount, but i think its enough as long as no-one uses the top as a table. 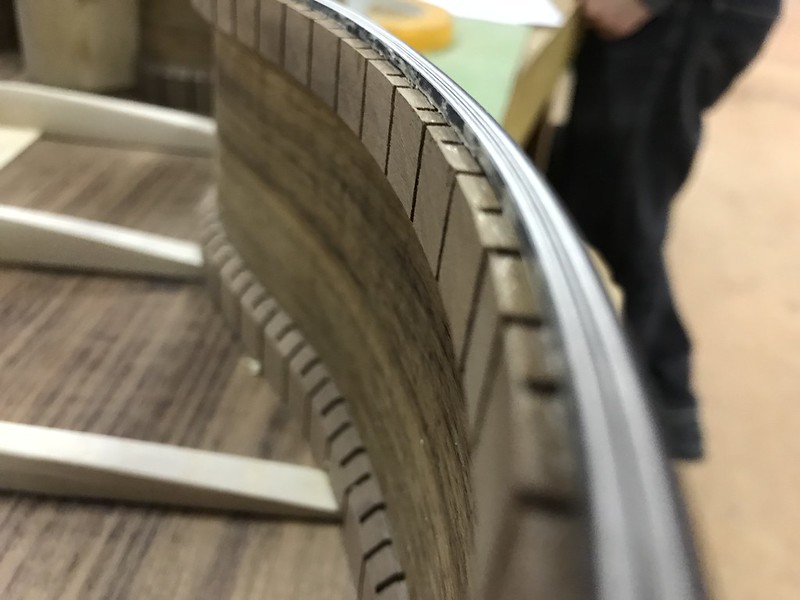 Untitled by David Emm, on Flickr Untitled by David Emm, on Flickrtop being glued on, i used a paper cover to prevent the binding tape ripping the spruce grain out. The weights are used to hold the very end down onto the neck block in an area it was hard to hold down with just tape. 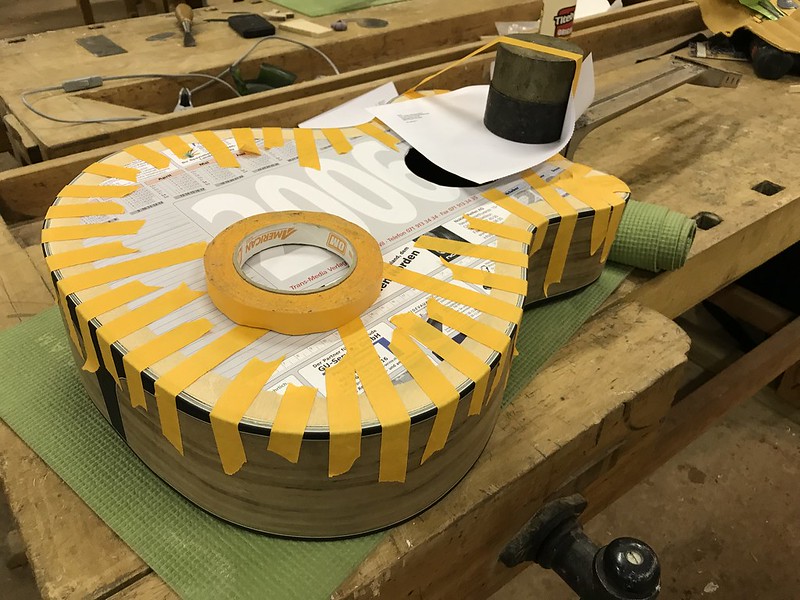 Untitled by David Emm, on Flickr Untitled by David Emm, on FlickrThe top is glued on! 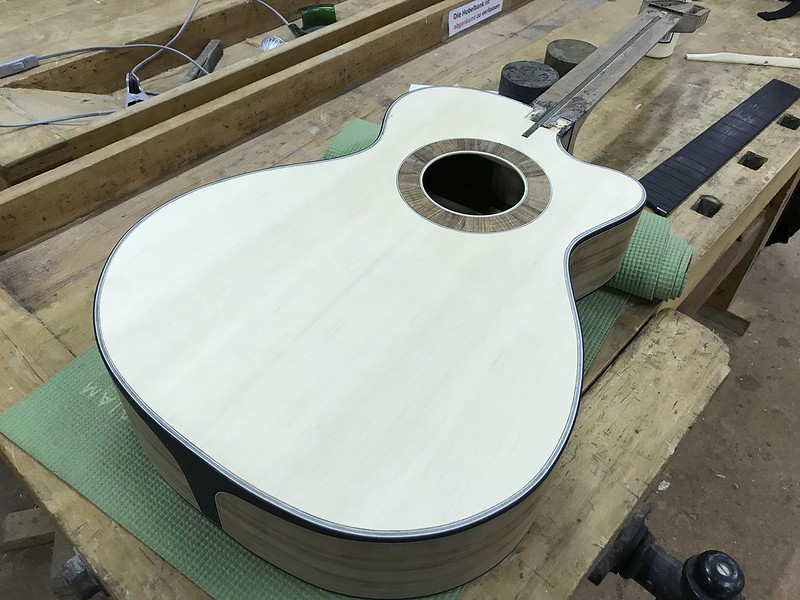 Untitled by David Emm, on Flickr Untitled by David Emm, on FlickrThis is what most of the fit looks like. Can't really argue with that. The top is still slightly higher than the purfling, that may distort the picture 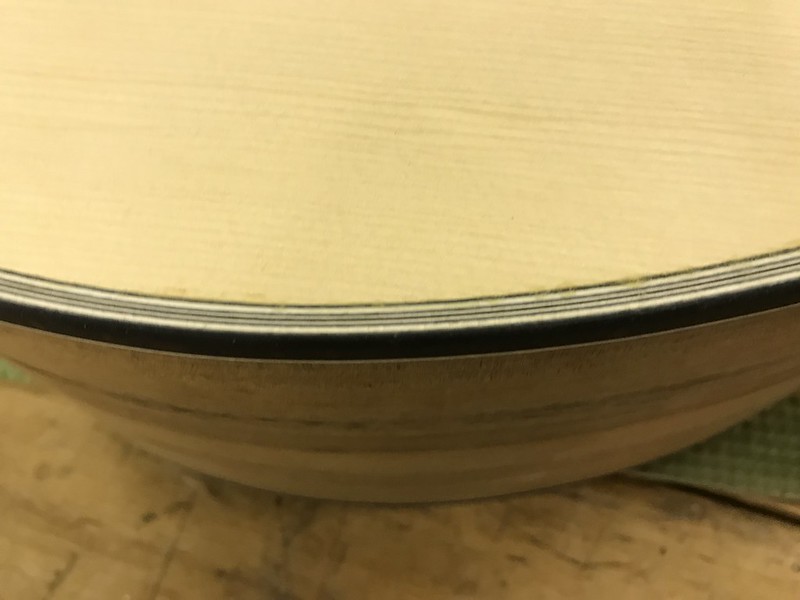 Untitled by David Emm, on Flickr Untitled by David Emm, on FlickrOnce i actually sand the top down, i think you'd almost barely know the top was replaced.  Untitled by David Emm, on Flickr Untitled by David Emm, on Flickr
|
|
#90
10-19-2017, 03:49 PM
|
|||
|
|||
|
That's impressive! Congratulations on making this work out.
|


