
|
|
#17
 04-02-2017, 03:51 AM
|
|||
|
|||
|
Quote:

|
|
#18
04-03-2017, 01:47 PM
|
|||
|
|||
|
Right, so I need some advice.
I went to check on the sides having let them sit for a few days. They were nicely holding in shape, but there are a few issues and this is what I need the advice on before I start gluing neck and end blocks in, it would be good to know how bad the state of the wood is and how badly a mess I've made and if I need to replace the sides? A) Both sides seem to have significant scorching, this is a bit surprising to me as I was thinking during my last corrective bends that they were almost too wet. Attempts to sand burns out of wood before has taken a lot of effort, and with 2.0mm thin sides, how much can sanding I get away with? B) I have several large grain splits. I attempted to close these with glue and clamps this evening but they haven't closed completely. I have no idea how bad the grain split can be and it still be useable? C) around and in the cutaway some obvious 'creases' have appeared. These look far from ideal and I have no idea if these can be hidden/sanded out/fixed/etc? As mentioned the sides are only 2.0mm thick so I don't have huge amounts to play with. top side with scorching 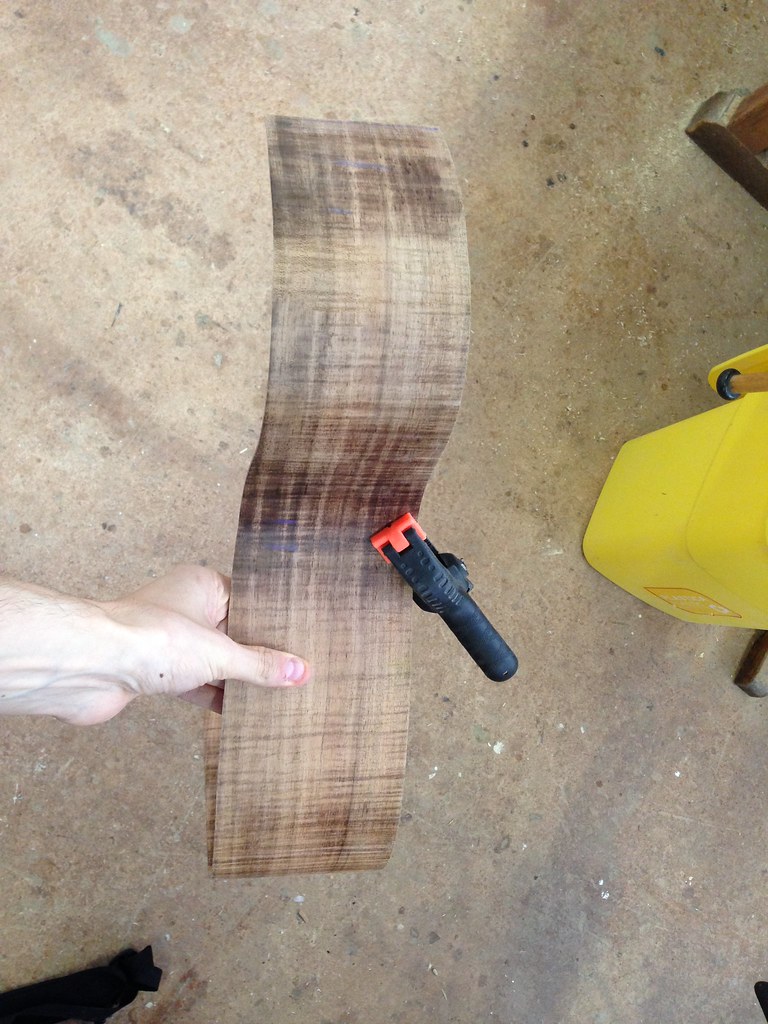 Untitled by David Emm, on Flickr Untitled by David Emm, on Flickrcutaway side with possibly worse scorching 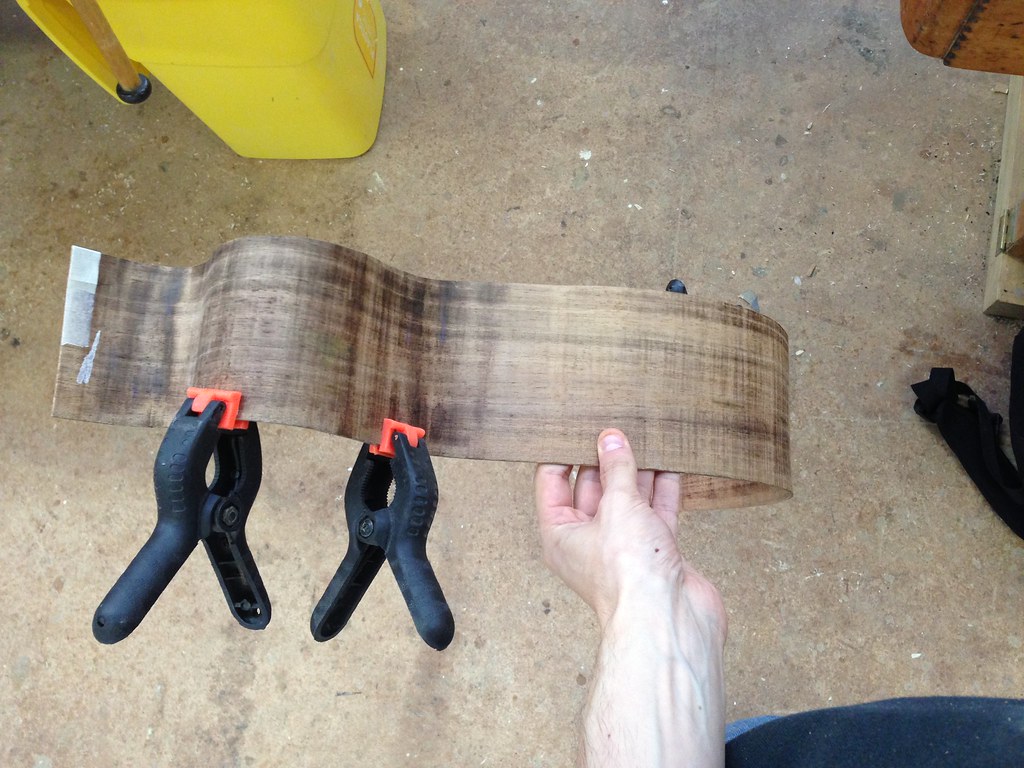 Untitled by David Emm, on Flickr Untitled by David Emm, on Flickrturns out I missed the focus, but here is one of the cracks 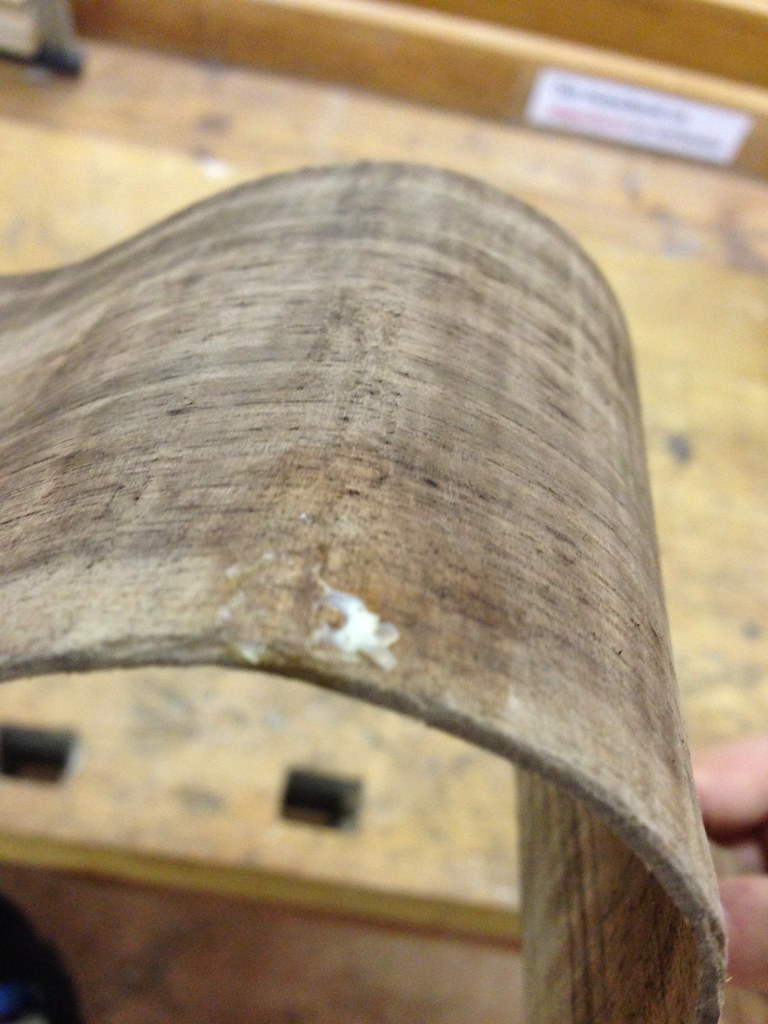 Untitled by David Emm, on Flickr Untitled by David Emm, on Flickrcreasing in the cutaway 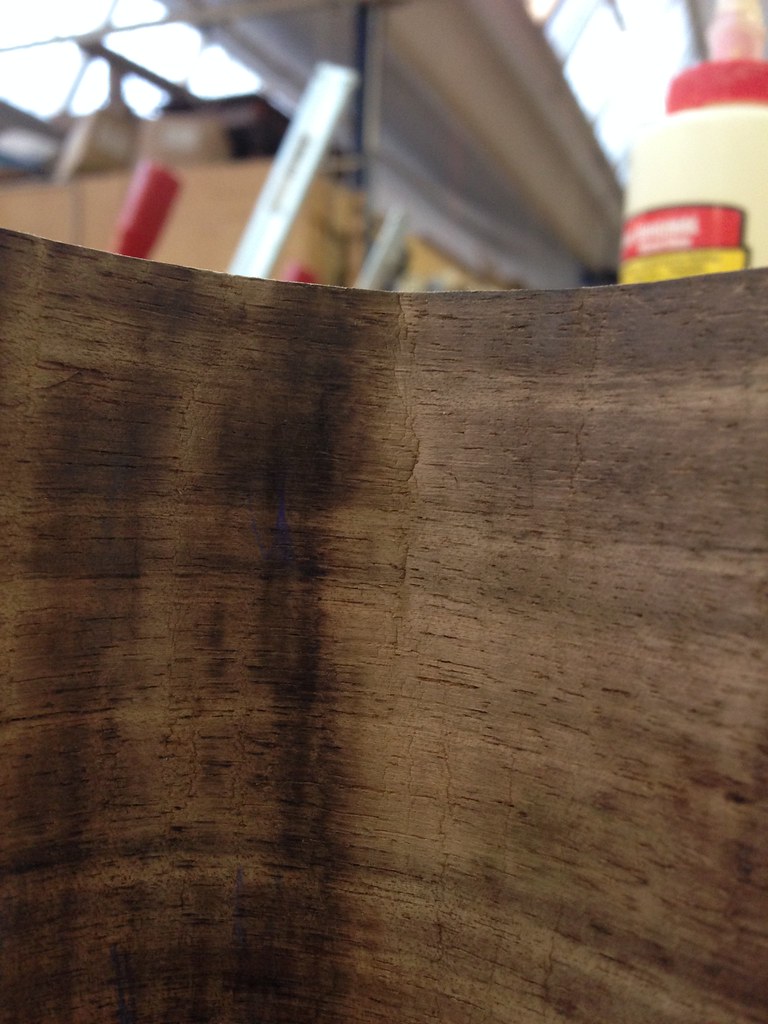 Untitled by David Emm, on Flickr Untitled by David Emm, on Flickrcreasing and scorching in the cutaway 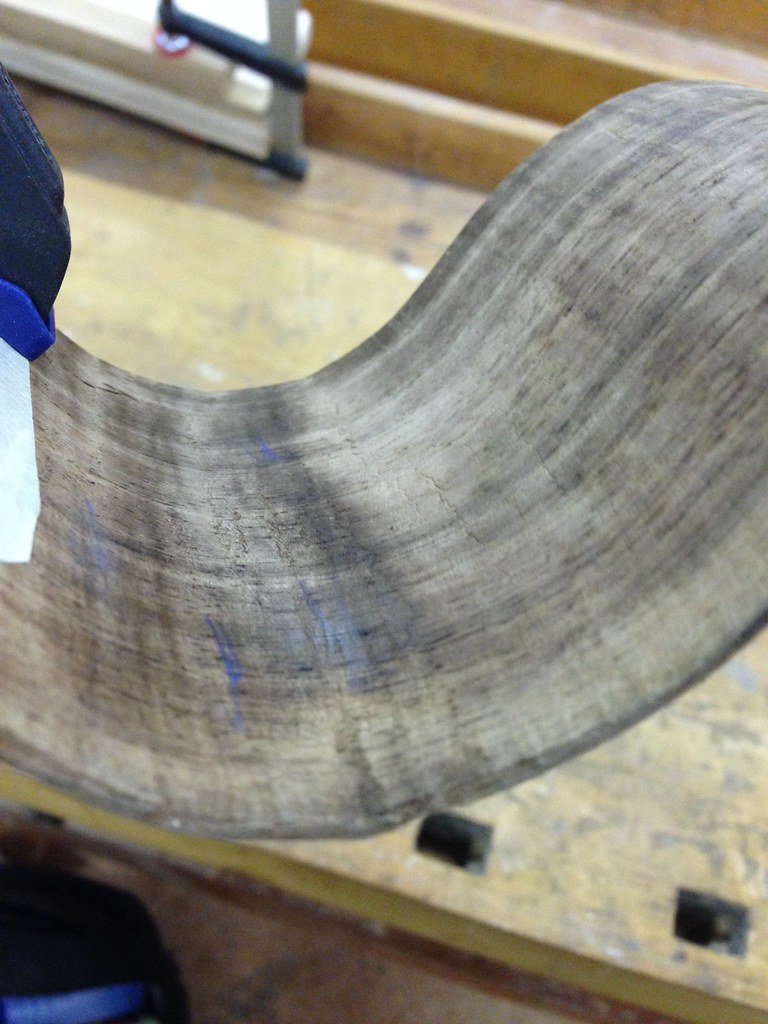 Untitled by David Emm, on Flickr Untitled by David Emm, on Flickr
|
|
#19
04-04-2017, 08:16 AM
|
|||
|
|||
|
Unfortunately David, I think those sides are cactus. Bending a cutaway in figured wood is quite a big ask of the wood in the first place. Reversing a cutaway in figured wood is next to impossible whilst leaving the sides in good condition.
I've bent a lot of cutaways in figured blackwood - a couple here and here. A few things for next time: 1) Thin the cutaway side to 1.8mm "north" of the waist and keep that constant right up to the end of the side 2) Don't profile the sides before bending. If you get cracks beginning to form, they nearly always start from the edges. If you profile the sides after bending, you have a good chance of cutting out any cracks. 3) Only dampen the inside of the curve when bending. You'll have a lower propensity for fibre starts on the outside of the curve if you keep that side pretty dry. 4) Set the temperature of the bending iron so that you don't get scorching. You'll need to allow more time for the heat to penetrate the wood, but you'll save that time in not having to sand out burn marks. Wood bends a lot more easily than charcoal. You may be able to rescue parts of your "old" sides for bindings or for laminated linings or even for figured wood purfling. Remember that all the linings, bindings and purfling have to go around the cutaway, too. So have a think about what species of wood to choose for the bindings, if you don't rescue some of the blackwood. You can't thin the bindings in the cutaway area. A final use of the blackwood if all else fails is to use it for headstock facings. On other subjects, I'd recommend going with the truss rod. I put truss rods in all my classicals, which improves playability significantly. As it's a cross-over, you'll likely be playing with a lower action anyway, so a truss rod will be a big help with the set up rather than having to guess any pre-relief based on no data. Also (as I think you've already discovered) the sequence of operations for the rosette inlay is to join the top, level the joint, inlay the rosette, level the rosette, then reduce to final thickness by removing wood from the underside of the soundboard. Then cut to outline and finally cut the sound hole. Good luck!
|
|
#20
04-05-2017, 06:34 AM
|
|||
|
|||
|
Thanks Trevor.
Good to have a second opinion on that. I'm actually not surprised they aren't really useable any more but it is highly annoying though. I now have to somehow find a new set of sides. The local guy here in Switzerland I bought these from had several sets, but these were the only ones with any flame in, the others were all pretty boring. And also having seen these sides with flame in, i'd really like another set with flame. In the meantime I'm definitely looking into making an actual bender with a heat blanket. My first bends with the iron went ok (other than being bent incorrectly), but if I decide I can make something more repeatable, something less likely to end up with damaged wood and modifiable to different outline shapes and able to incorporate a cutaway, and all for an un-ridiculous price, i'll be tempted to do that. It also kinda depends on the availability of replacement tasmanian blackwood sides and that cost involved. David
|
|
#21
04-05-2017, 07:28 AM
|
|||
|
|||
|
Quote:
Quote:
If you go to my website, http://charlestauber.com/luthier/Resources.html, you'll find some dimensioned sketches of Charles Fox's bending machine - he and George Morris invented it - as it was in the 1970's. Dimensions are in inches, but can easily be converted to suitable metric sizes. That will give you some specifics of bending machine design and sizes. I've used the same bender for the last 30+ years, only last year switching from light bulbs to a heating blanket. Since then, there are a variety of modifications to the design that have been made by various people. These include substituting the heat source - light bulbs - for heating blankets, modifying the shape of the frame of the bender to accommodate cutaways, using rods on the sliders, rather than springs, cantelevering the press to allow sides to be slid in from one side so that you don't have to remove the press from the body of the bender to install the sides, and a variety of other improvements and variations. It is a fair bit of work to source all the bits and pieces, make the forms and assemble it all. Buying the controller, probes and blanket won't be inexpensive: it is an investment like any other guitar-making tool.
|
|
#22
04-05-2017, 01:55 PM
|
|||
|
|||
|
Thanks Charles
Quote:
Quote:
Having spent the afternoon investigating, (and thanks access to the plans by the way) the cost of a side bending machine is looking to be higher than I initially thought, mostly because of the temperature controllers. Those things are easily double my guesstimated costs. At this point, due to the fact that I'm going to have to buy more sides, i'm not sure I can spring for a side bender too, that money could/should/probably will go straight towards some decent sharpening stones instead.
|
|
#23
04-05-2017, 03:23 PM
|
|||
|
|||
|
Quote:
A good set of water stones, here, will run close to $200. Oil stones, less. If you use a honing guide with them, another $20 to $200, depending on the one you chose. Sandpaper and a glass or marble plate, about $20 or so to get started.
|
|
#25
04-05-2017, 05:17 PM
|
|||
|
|||
|
No need to bother with a bending machine, David. I think your skills on a bending iron are fine if your can reverse a cutaway bend and still have a single piece of wood. There's probably more potential to bend sides wrong in a machine, because you aren't looking at the wood as you're doing it. It's a good building system and a good system of work that prevents you from making mistakes like that.
Investing in sharpening is a good idea. Having tried just about everything, if you want no fuss sharp, diamond plates are the way to go. I use DMT's blue and green coded stones with a Veritas honing guide and nothing else (no strops etc.). Not the cheapest, but no maintenance (like waterstones), fast and you'll only ever have to buy them once.
|
|
#26
04-06-2017, 01:23 PM
|
|||
|
|||
|
Quote:
http://www.luthiersforum.com/forum/v...37283&start=25 By the way, that's bloodwood, which is very difficult to bend.
__________________
Rodger Knox, PE 1917 Martin 0-28 1956 Gibson J-50 et al
|
|
#27
04-06-2017, 08:12 PM
|
|||
|
|||
|
Rodger,
The pictures on that site are only available to members, but I'd very much like to see your bender. Would you be kind enough to post them here?
|
|
#28
04-07-2017, 10:52 AM
|
|||
|
|||
|
Sure...
 Wiring:  With a bending form (this one is an L-00 shape)  Bending the upper bout:  Right after bending: 
__________________
Rodger Knox, PE 1917 Martin 0-28 1956 Gibson J-50 et al
|
|
#29
04-07-2017, 04:11 PM
|
|||
|
|||
|
Rodger, Thank you very much.
Simple and effective. What's not to like!
|
|
#30
04-11-2017, 01:00 PM
|
|||
|
|||
|
Rodger, thanks for those bender pics. Budget dictates that I can't even bodge one together at the moment so its out at least for this build.
Hopefully i'll find out in the next day or so about the options/availability of replacement tasmanian sides but in the meanwhile i've been keeping myself somewhat occupied with the rosette. Last time round I just bought a pre-cut walnut rosette from LMI, this time I wanted a Tasmanian blackwood one to go match the back and sides so I got hold of some flamey pieces and assembled one myself. As previously mentioned, I should perhaps have installed the rosette before thicknessing the top as doing it this way round doesn't give you much leeway. Its a long way from impossible though and i've managed to do it, but you have to be very careful. I have to say, shelling out for the Stew Mac dremel router base and circle cutter made this job WAY easier then using the stupid, all plastic, wobbly, decidedly unaccurate router base actually made by Dremel. Although it was expensive, it was clearly money well spent. Here's the process in picture form First step of the rosette, cutting pieces to a 22.5 degree angle to give me 16 pieces that would go together to make a complete circle. I did this by clamping a 22.5 degree wedge onto a small piece of tasmanian and then using this as a straight edge for the japanese saw to cut the pieces to correct size, shape and angle. 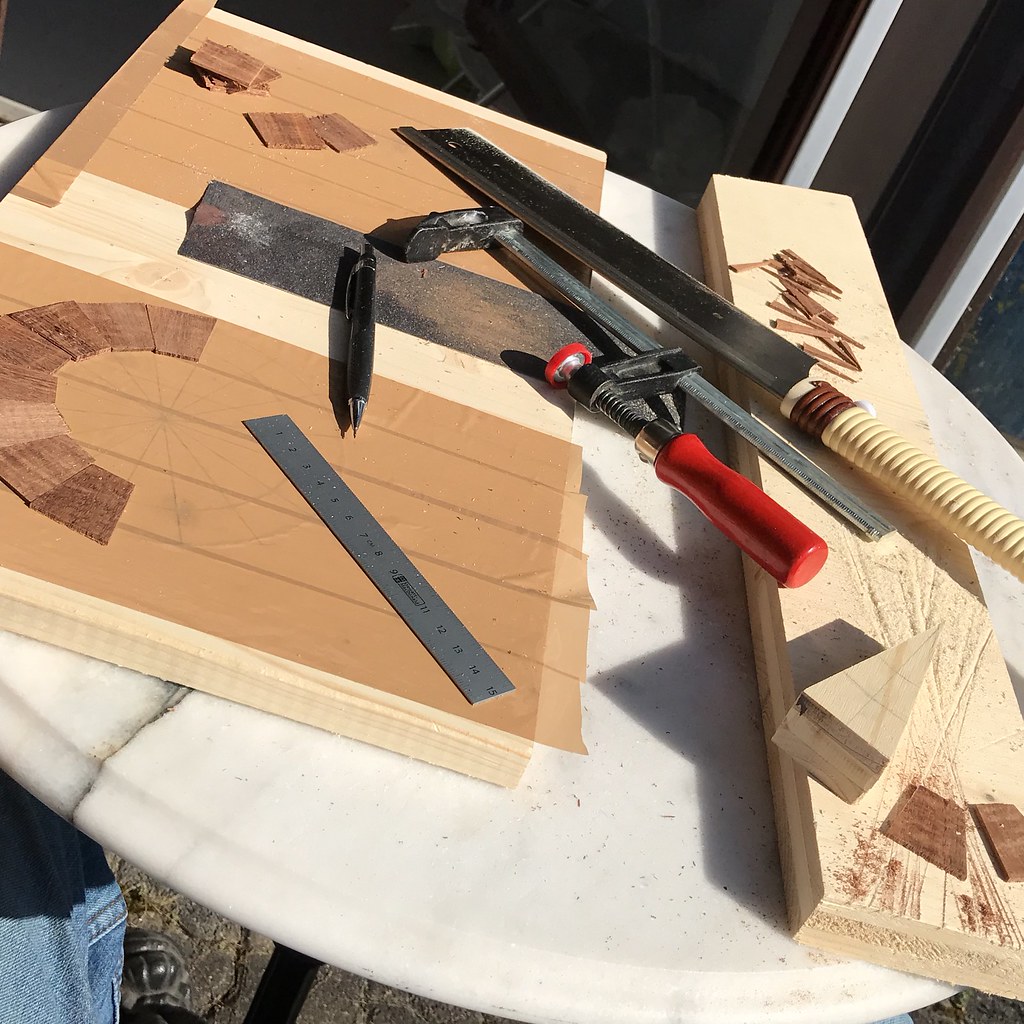 Untitled by David Emm, on Flickr Untitled by David Emm, on Flickr Second step was gluing these pieces together. I put brown parcel tape across the board hoping that superglue wouldn't stick to it so well. Well it did stick, but it was possible to peel it all off eventually without leaving any stuck to the bottom of the rosette.  Untitled by David Emm, on Flickr Untitled by David Emm, on FlickrRouted the rosette to the dimensions I wanted. 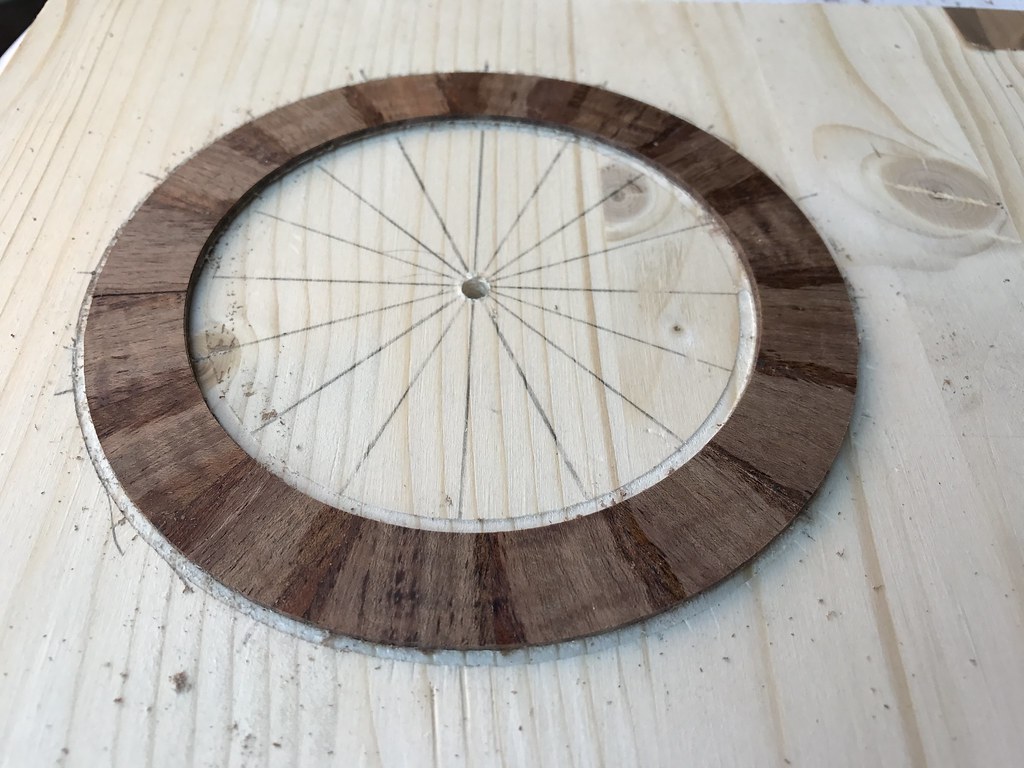 Untitled by David Emm, on Flickr Untitled by David Emm, on FlickrRouted the channel in the soundboard for the rosette, I left this shallower then normal, barely 1mm deep and did extra scraping to level it afterwards.  Untitled by David Emm, on Flickr Untitled by David Emm, on FlickrRosette glued in place. 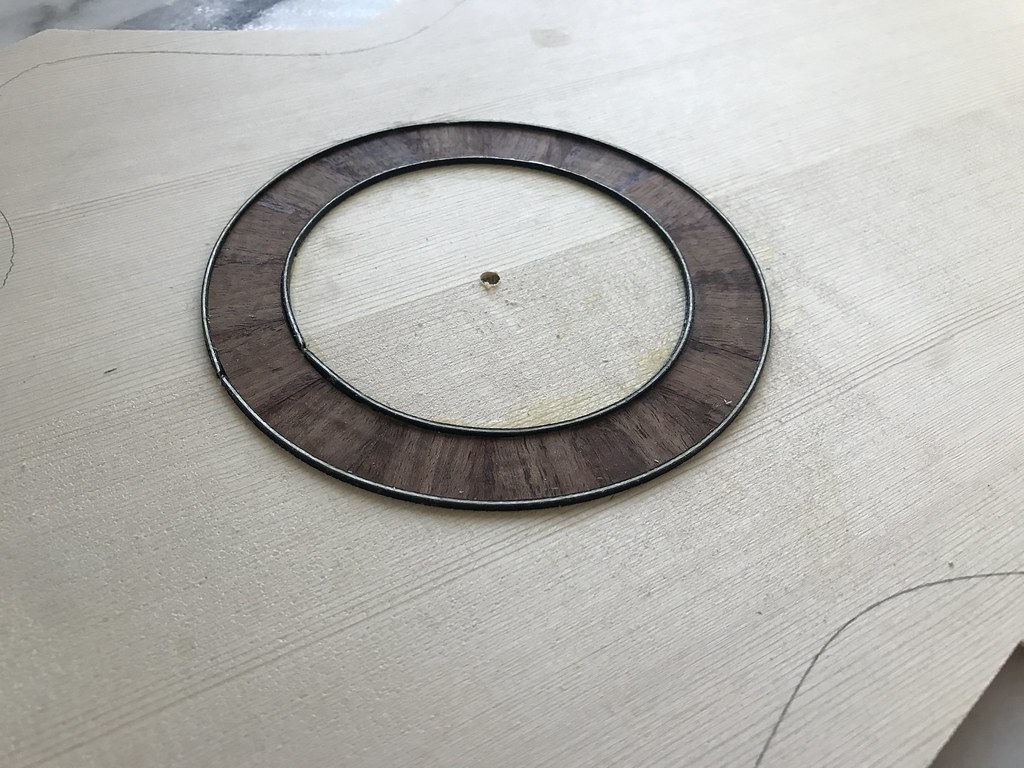 Untitled by David Emm, on Flickr Untitled by David Emm, on FlickrRosette being scraped to be level with soundboard 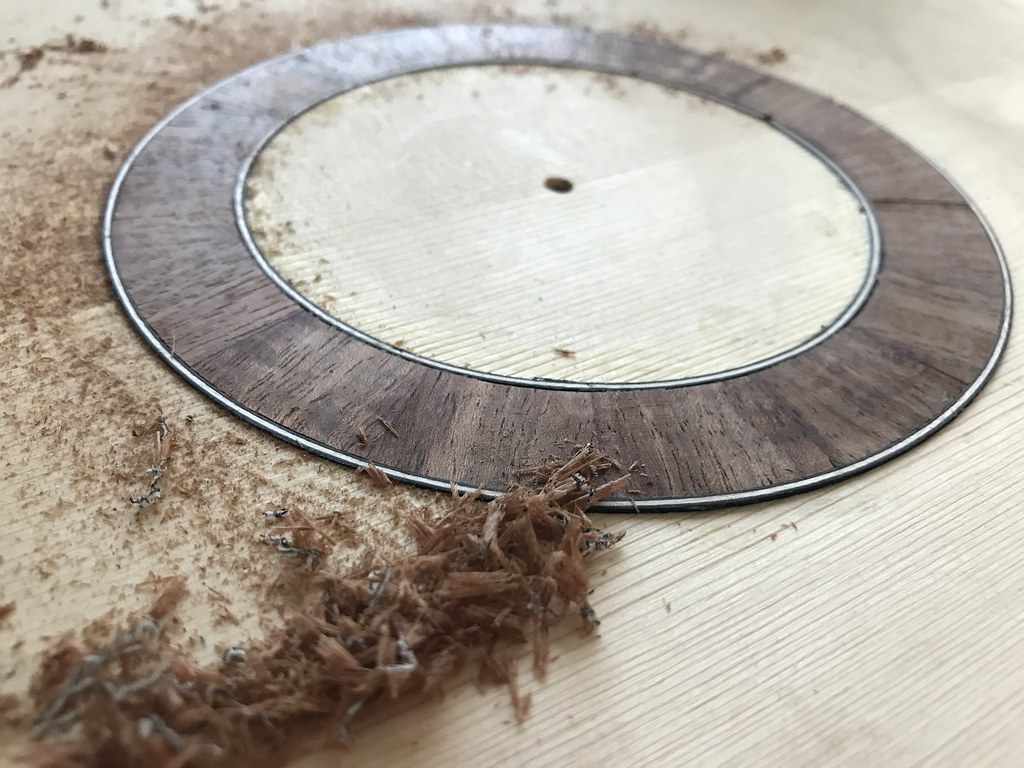 Untitled by David Emm, on Flickr Untitled by David Emm, on FlickrRosette scraped level with the soundboard 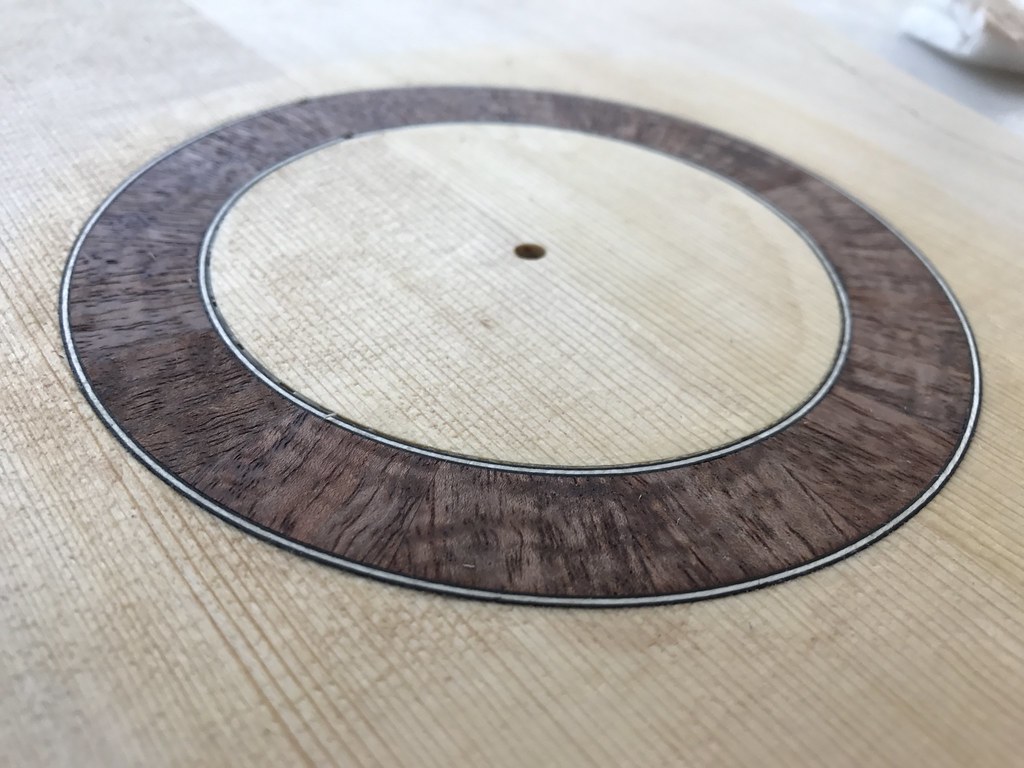 Untitled by David Emm, on Flickr Untitled by David Emm, on FlickrRosette installed and soundhole cut 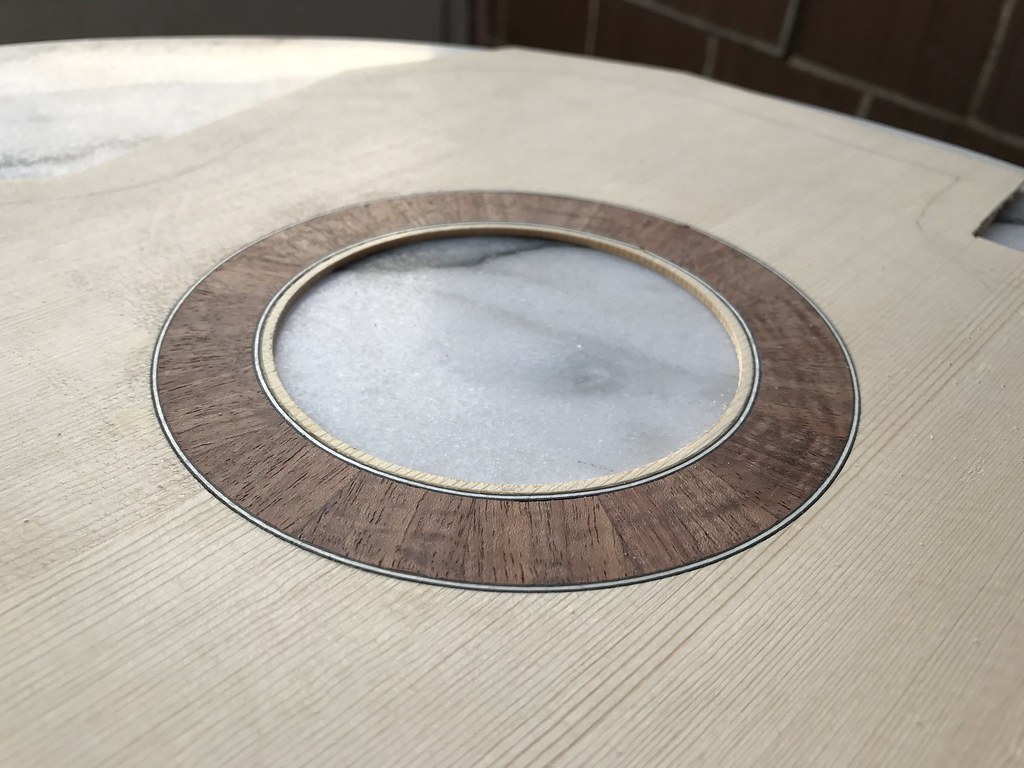 Untitled by David Emm, on Flickr Untitled by David Emm, on Flickrsoundhole cut and rosette installed in the soundboard  Untitled by David Emm, on Flickr Untitled by David Emm, on Flickr
|


