
|
|
#61
 05-26-2014, 09:41 PM
|
|||
|
|||
|
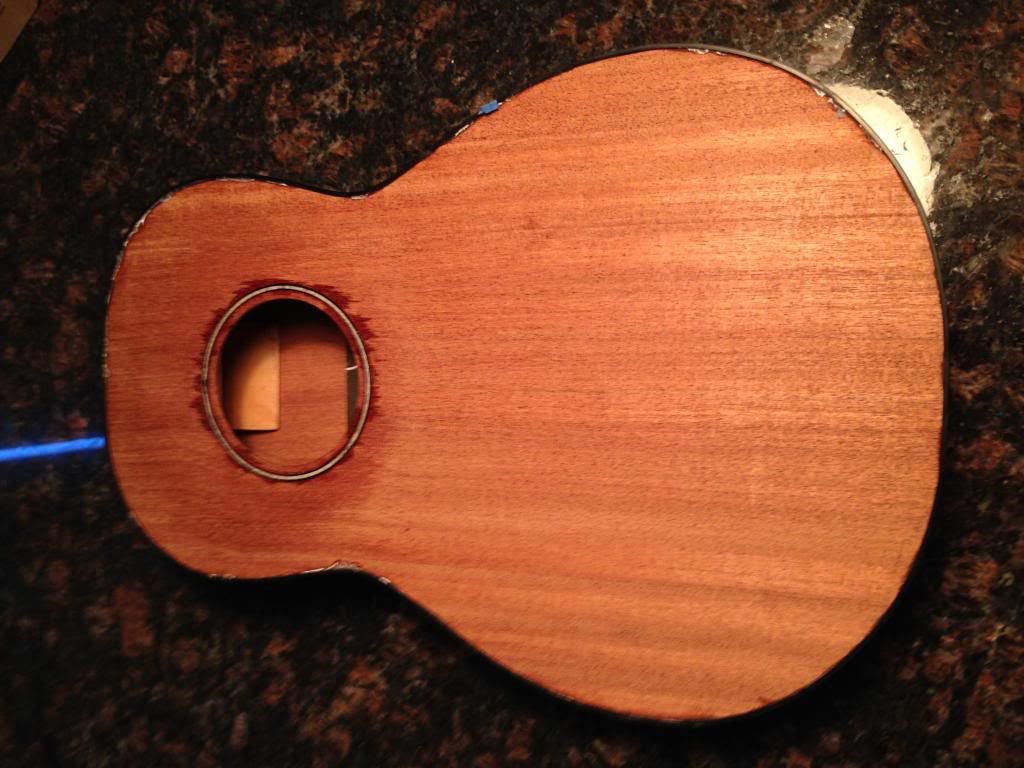
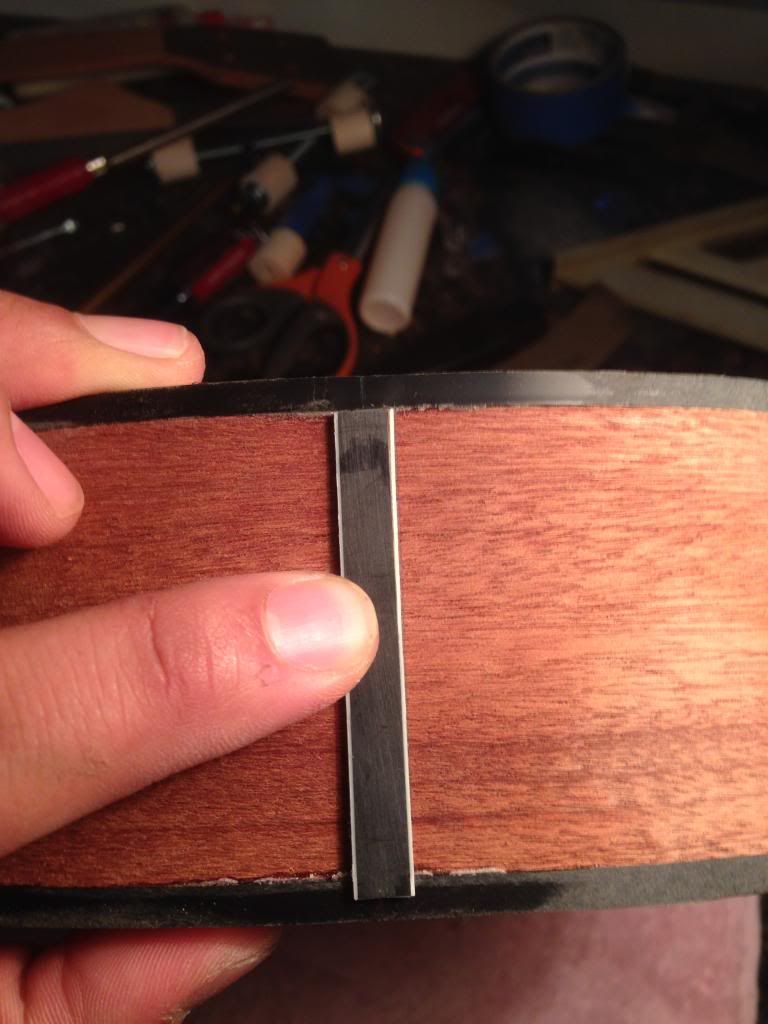
While I had the router all setup, I decided to just go ahead and route the top and back for the binding. I want to make sure that the binding sits proud of the top/back and also proud of the sides. I forked out the bit of money to buy this specialized bit and bearing from StewMac. I adjusted the depth of the bit so that it's just short of the height of the plastic binding...also from StewMac.
 Here's the test cut: 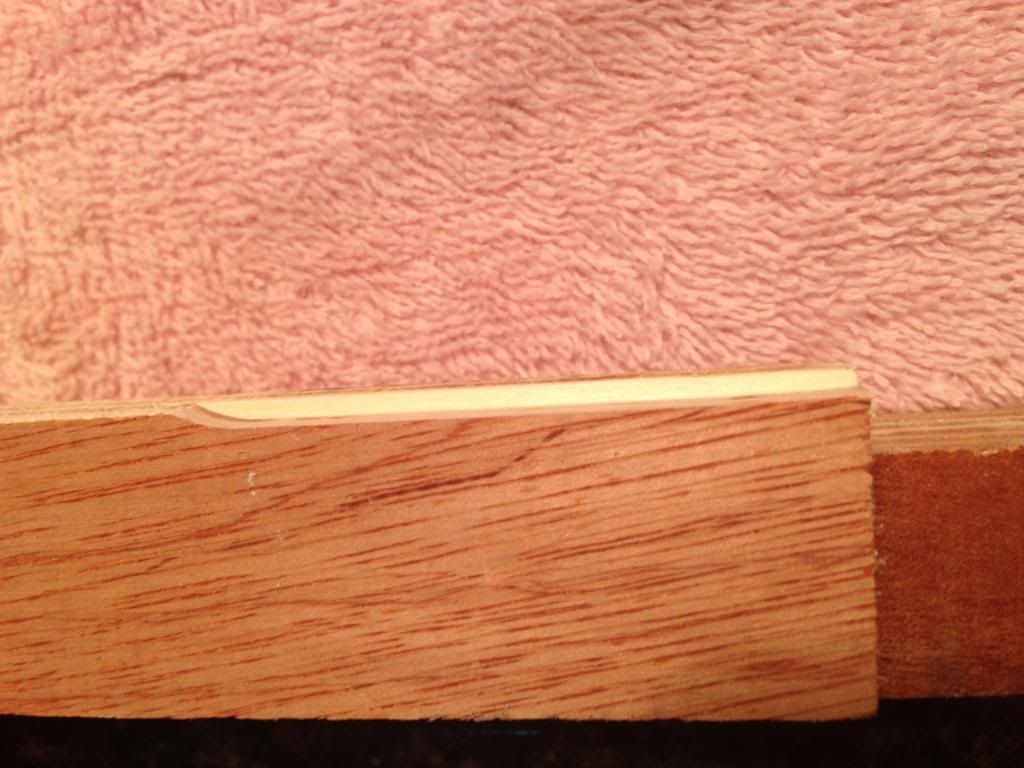 Binding fit perfectly: 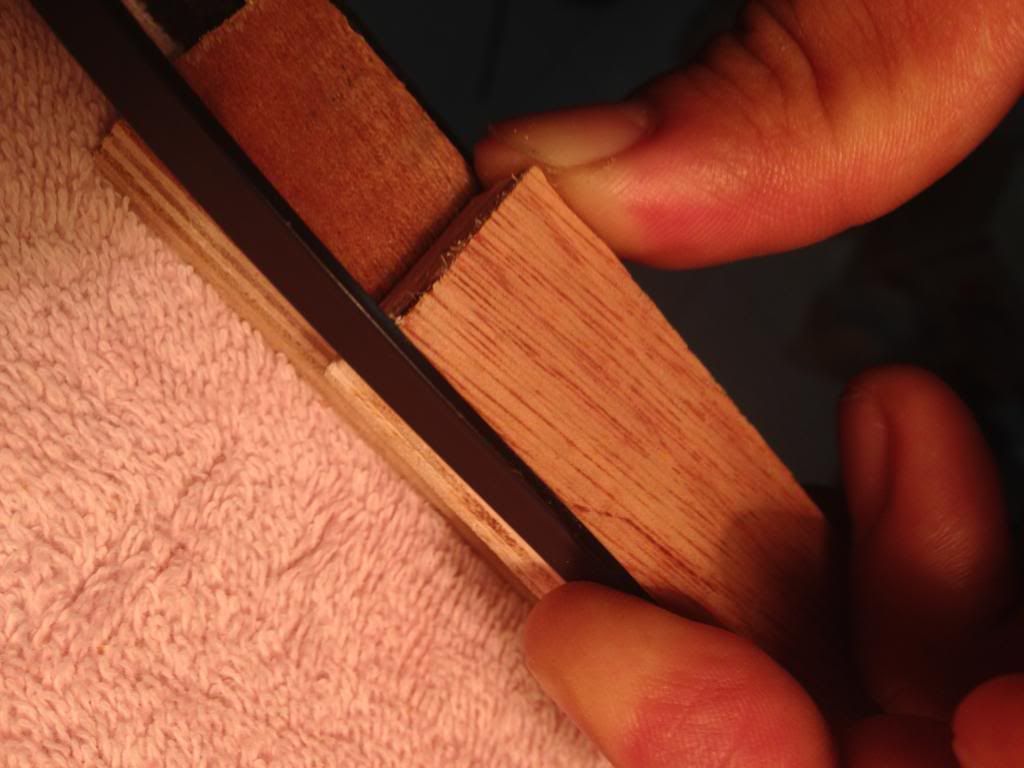 Here's the completed routing, it went pretty smoothly with my Rigid minirouter. Have to say thanks again to the MyaMoe team! 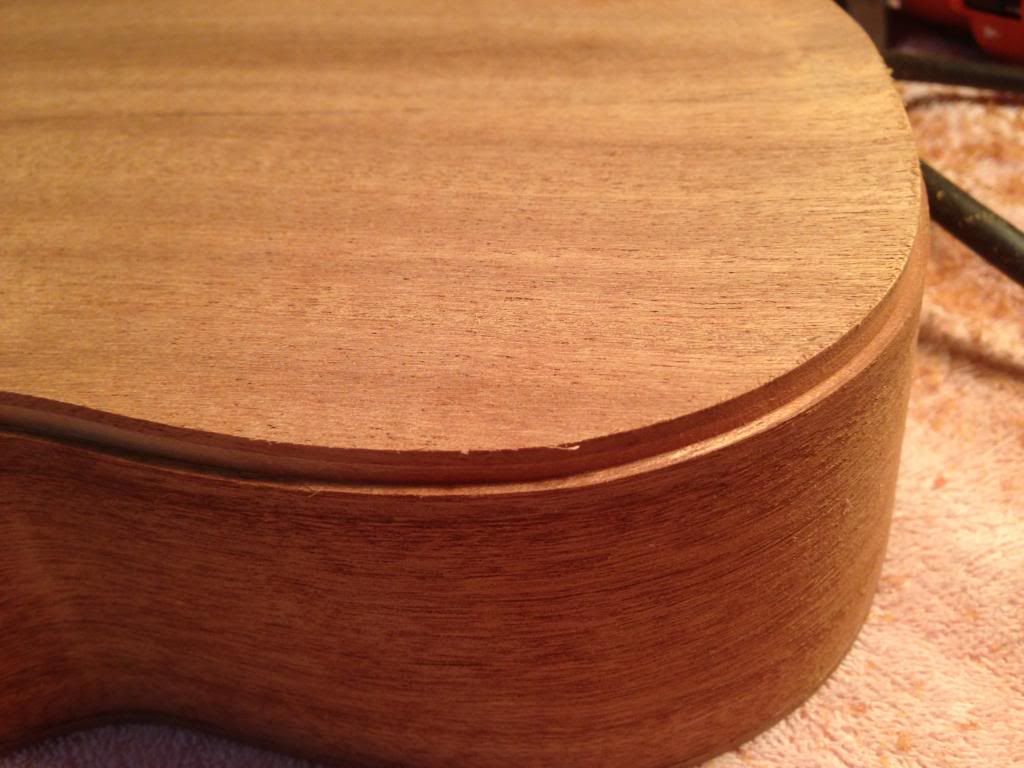

|
|
#62
05-26-2014, 09:46 PM
|
|||
|
|||
|
Here is how we glued in the plastic bindings. We had to use CA glue because we didn't have weld-on. Jackie helped me with this task and we worked in short segments to ensure we had enough work time with the CA.
 This is the top all done: 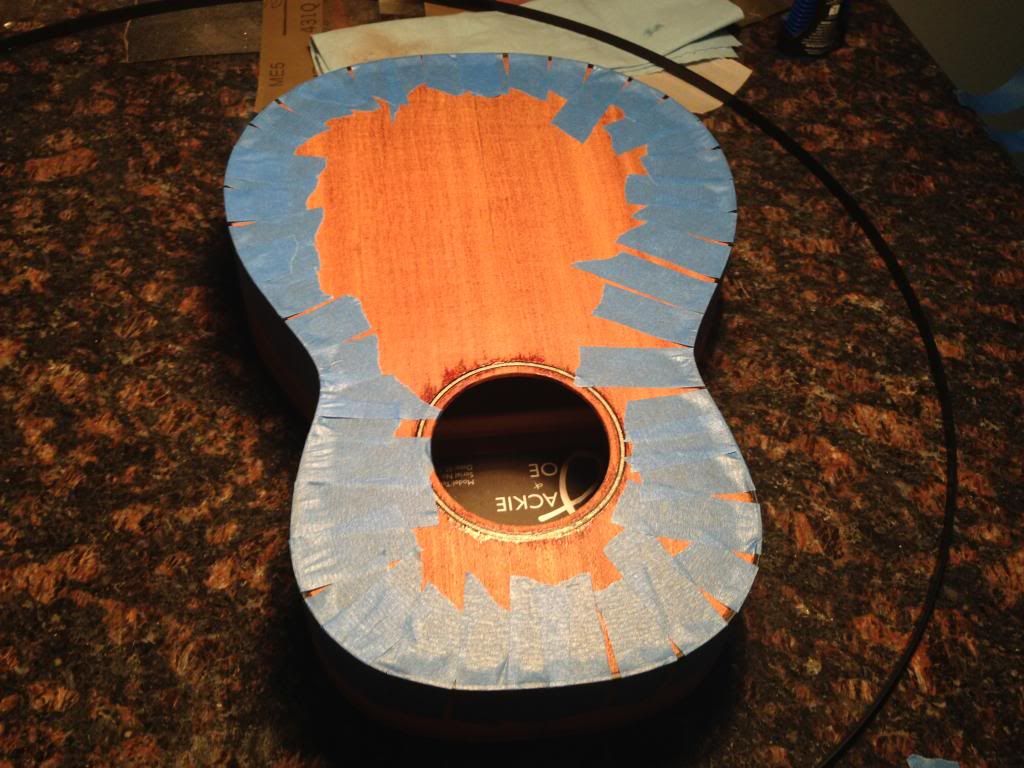 This is both the top and back done: 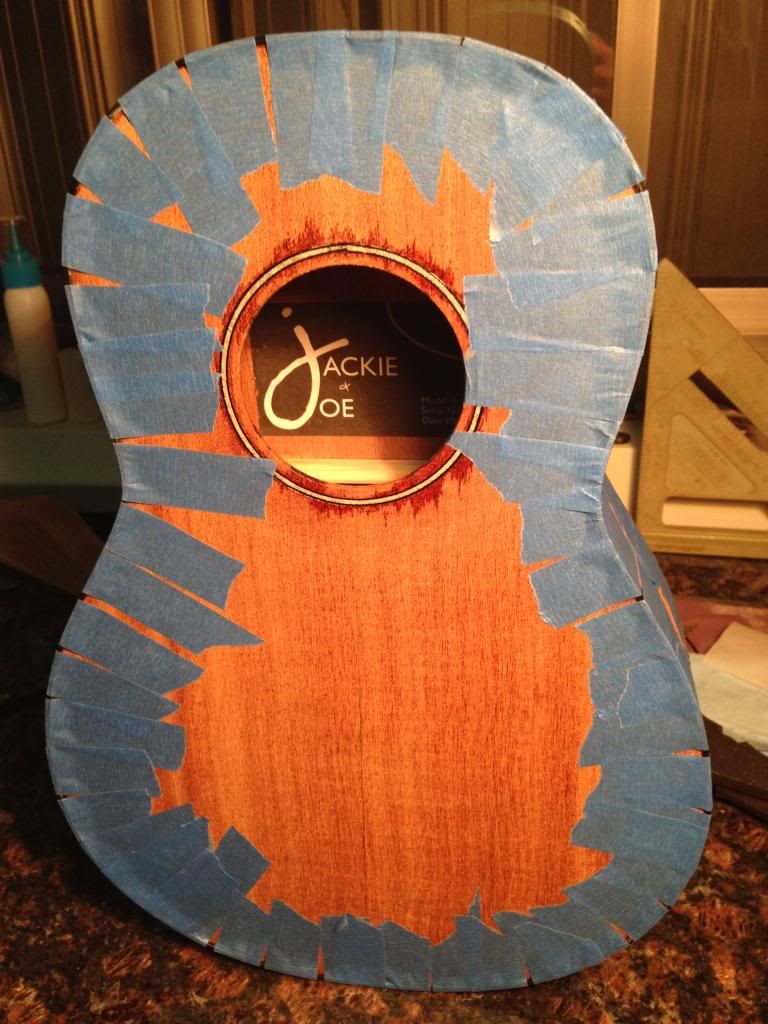 I let it dry overnight and couldn't wait to take off the tape: 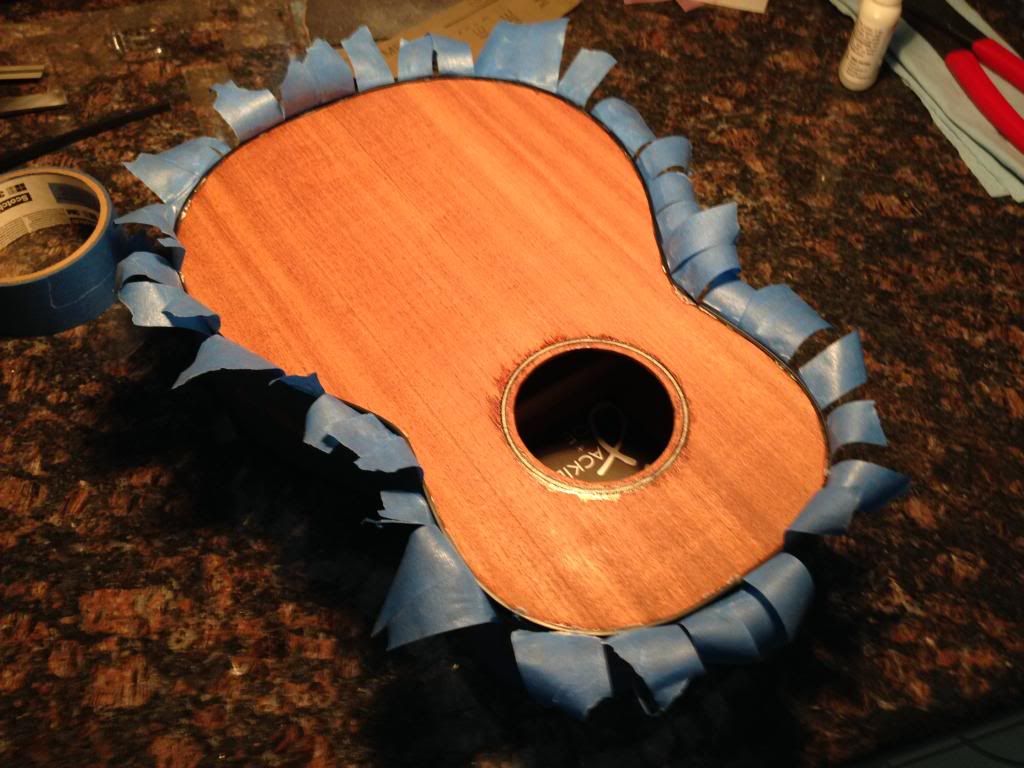
|
|
#63
05-26-2014, 09:51 PM
|
|||
|
|||
|
Here are the bindings newly installed and tape just removed:
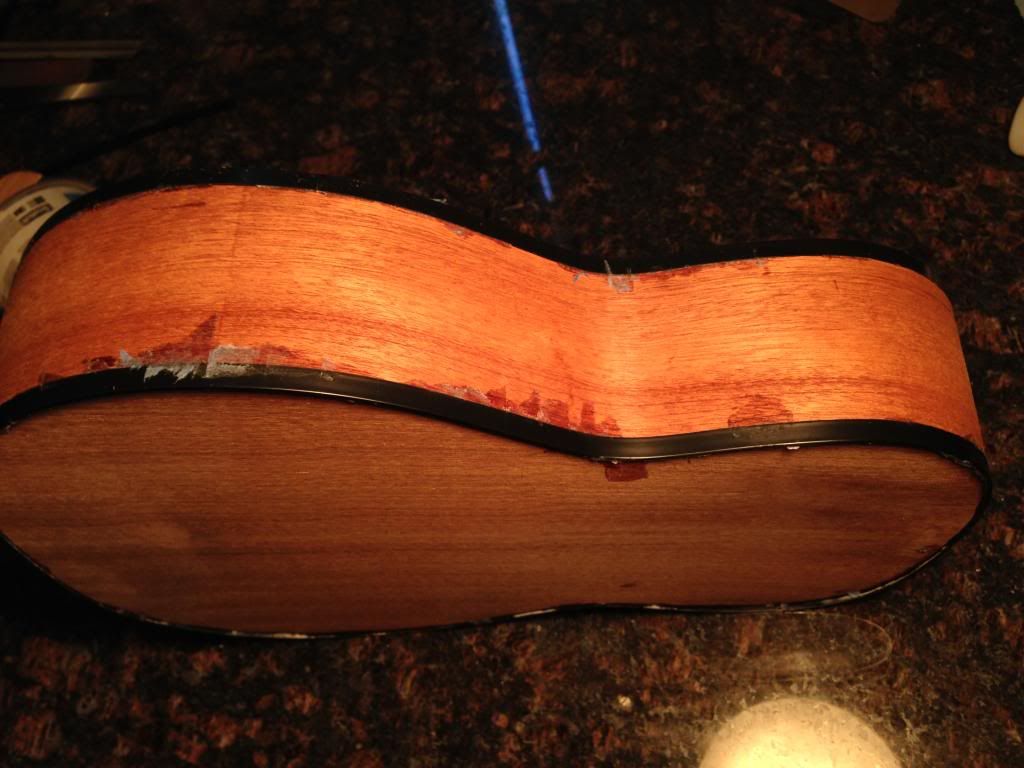  I only had time to sand down the back binding flush, here's a shot of the back wood rubbed with naptha. I think the final color is going to look pretty nice. The black plastic binding will be final sanded up to 400-grit along with the body. 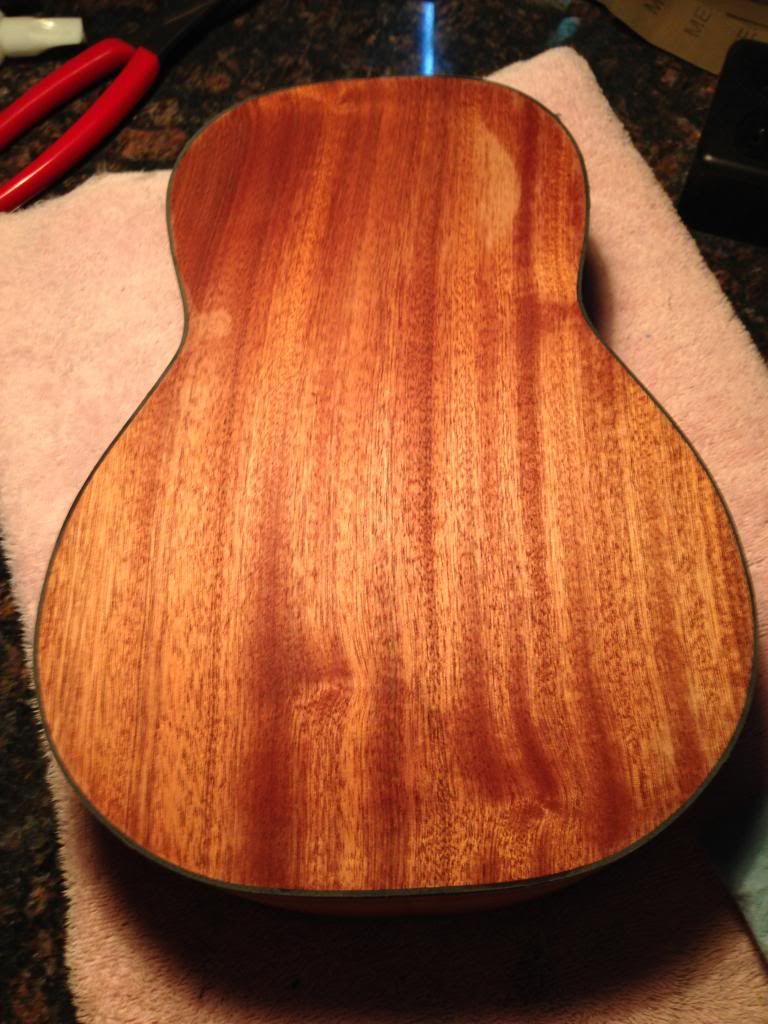 A shot of the side with bindings before sanding: 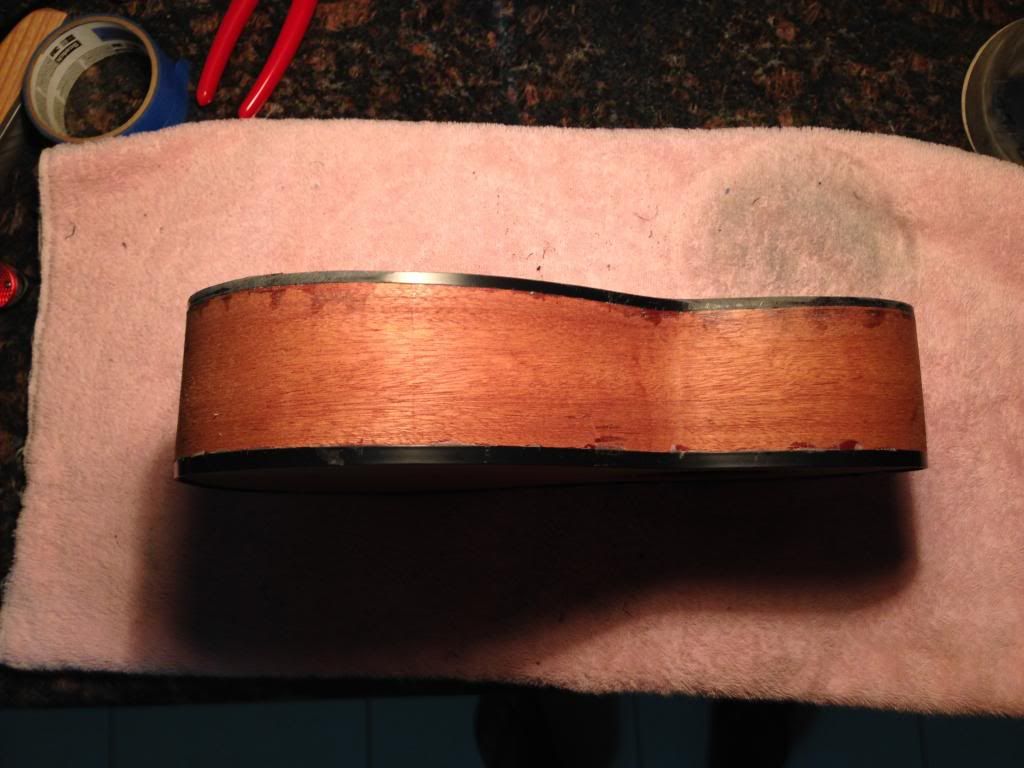
|
|
#64
05-26-2014, 09:53 PM
|
|||
|
|||
|
That's all the updates for now, I hope to get body final sanded, pore-filled and masked for finishing by the next update. I have my weekly back-to-back gigs so won't have much time to work on this build maybe until the weekend.
Thanks for reading along!
|
|
#65
05-27-2014, 03:54 AM
|
|||
|
|||
|
Looking awesome Joe.
What an incredible project 
|
|
#69
05-28-2014, 12:05 AM
|
|||
|
|||
 I'd like to talk a little about this photo and the fact that the neck isn't seating at all with the radius of the body. A special thanks again to Bruce Sexauer and Sven (from UU) for their recommendation to refit the neck to the body better. They suggested to hollow out the center of the neck heel so that only the sides are touching the body. Then, I could sand the "rails" of the neck heel accordingly to get the right neck angle straight with the centerline of the top. I did some research and found some great info from Kathy Matsu****a on her website called The Amateur Luthier. I must say, she does some real inspiring work for people starting out. Here are some photos from her site to illustrate what I will attempt: 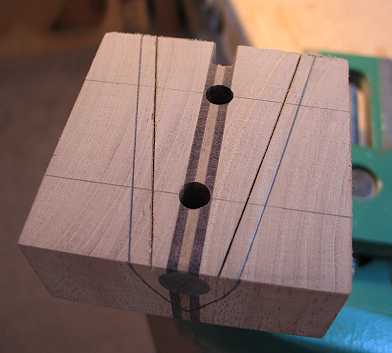 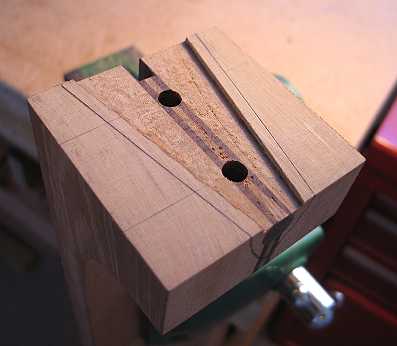 Thinking this through: - Mark lines for 3/16" rails on the edge of the heel - Route out material within the lines to create a cove 1/16" deep - Use the center lines on the top to sand either the bass or treble side to get a straight/good fit If anyone has some additional tips or advice, I'd appreciate it. Thanks again!
|
|
#70
05-31-2014, 08:26 PM
|
|||
|
|||
|
Taking some advice from Bruce Sexauer, I decided to try and use a sharp tool - in this case a small planer - to level the binding instead of sand paper.
 I have to say, it was much easier, quicker and more efficient. Thanks again Bruce! 
|
|
#71
05-31-2014, 08:34 PM
|
|||
|
|||
|
So you taking orders yet? Looking good fella
__________________
Martin HD28E Retro Seagull Maritime Mahogany Alvarez Rd8c Dean EABC5 Gretsch 9121 Lag TN100 Nylon Recording King RO-10 Recording King RP-06 https://soundcloud.com/search?q=Smokerblacker
|
|
#72
05-31-2014, 08:48 PM
|
|||
|
|||
|
So now it was time to try and re-fit the neck to the body. I did considerable research to try and learn the science behind this method and I have to say thank you again to Kathy M., the Amateur Luthier.
The first is to mark to route the side rails 3/16" from the edge. 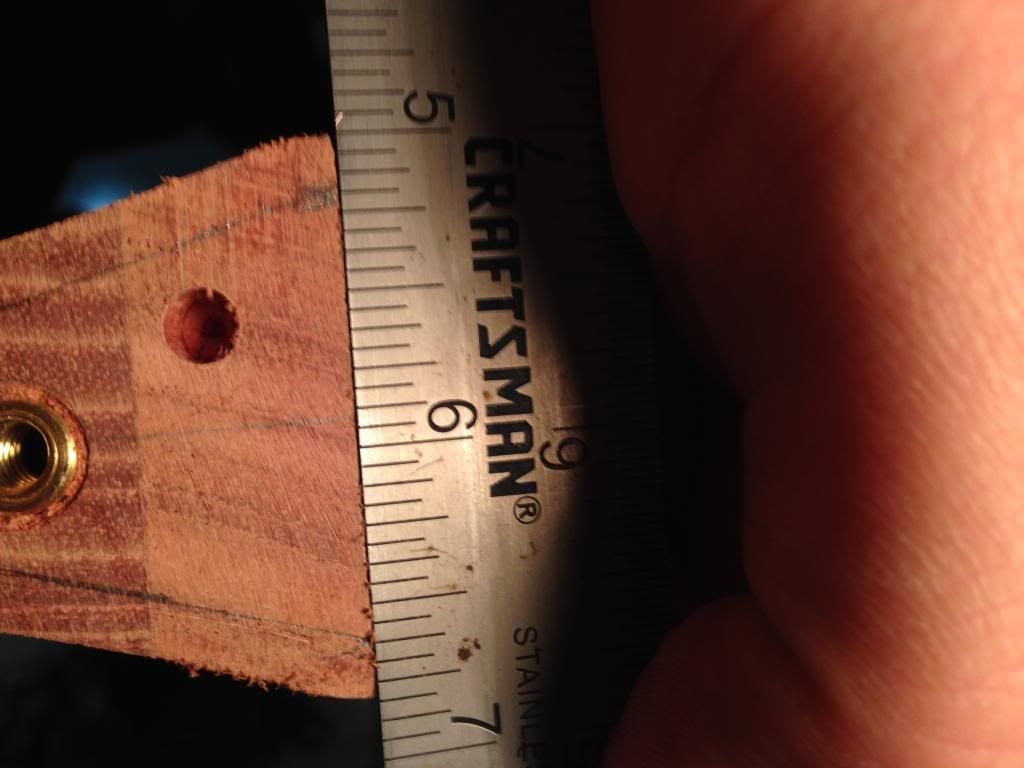 I marked the line down the side of the heel. 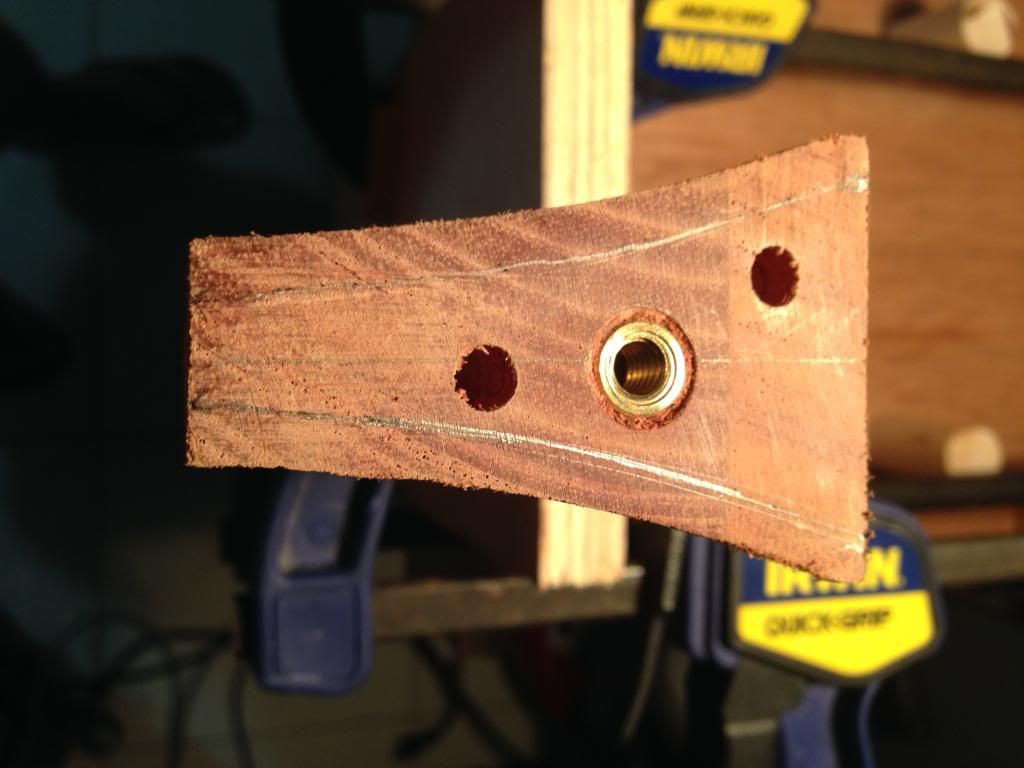 Its unfortunate, but the chuck in my vise broke, so I used the body jig and some clamps to get the neck clamped upright. Using the same method as before, I removed the threaded insert. 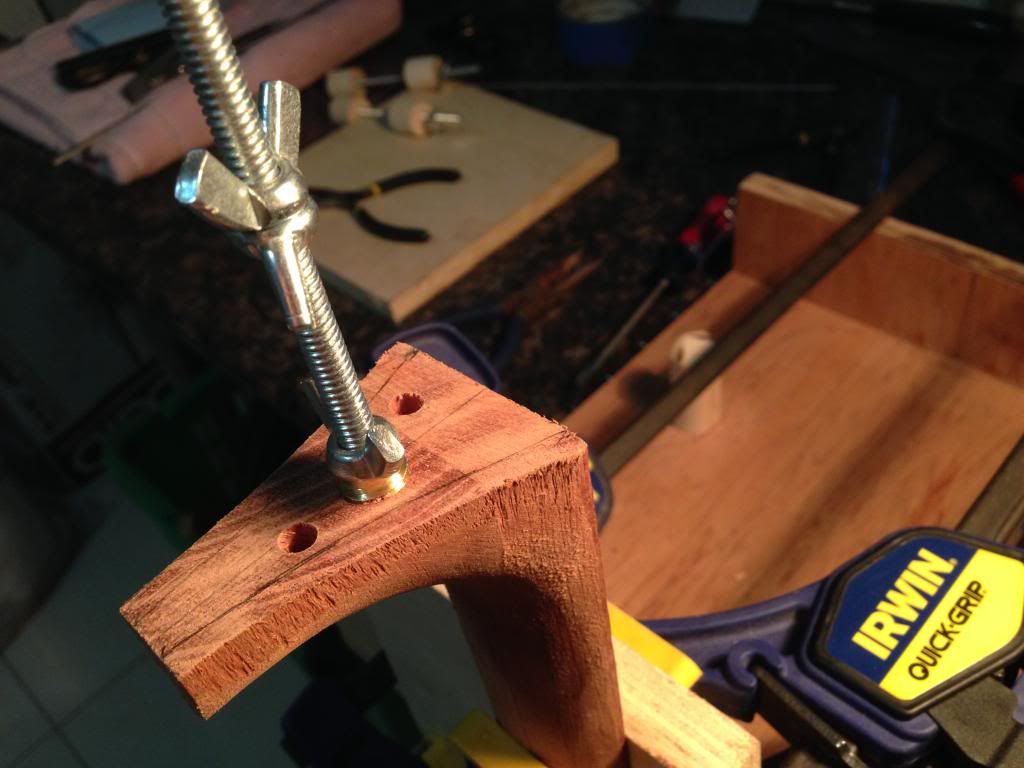 It was kind of tough on such a small surface, but I managed to route out the center cavity 1/32" deep. 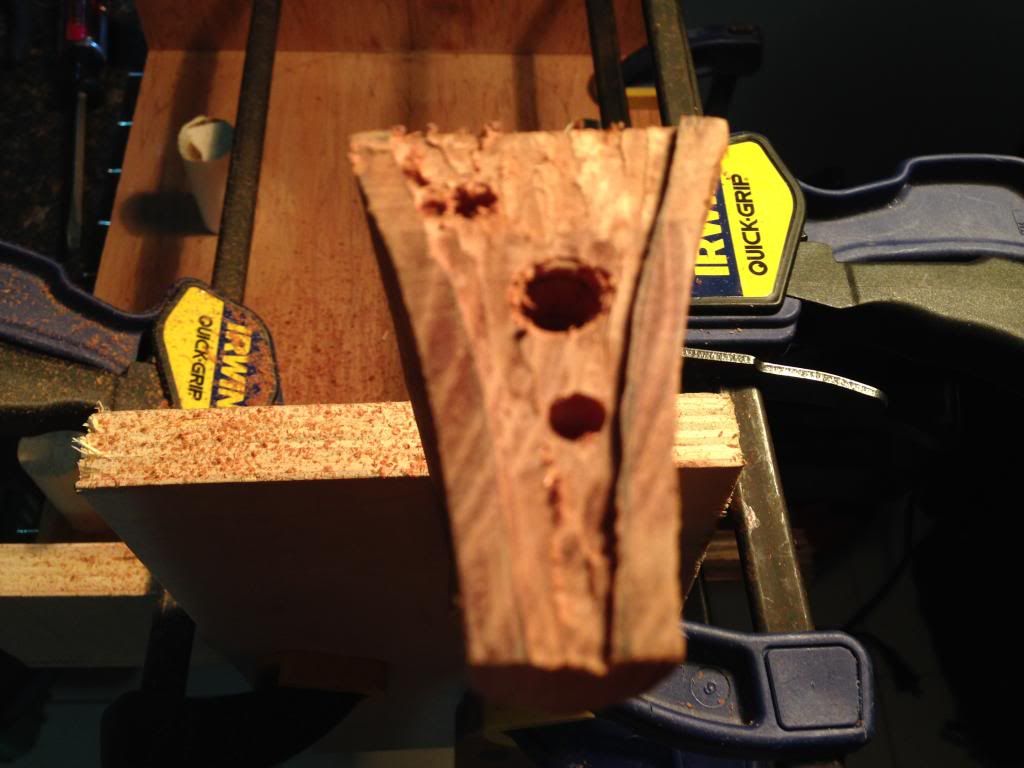 I cleaned up the heel as best I could with a chisel, then re-threaded the insert, this time adding some epoxy. 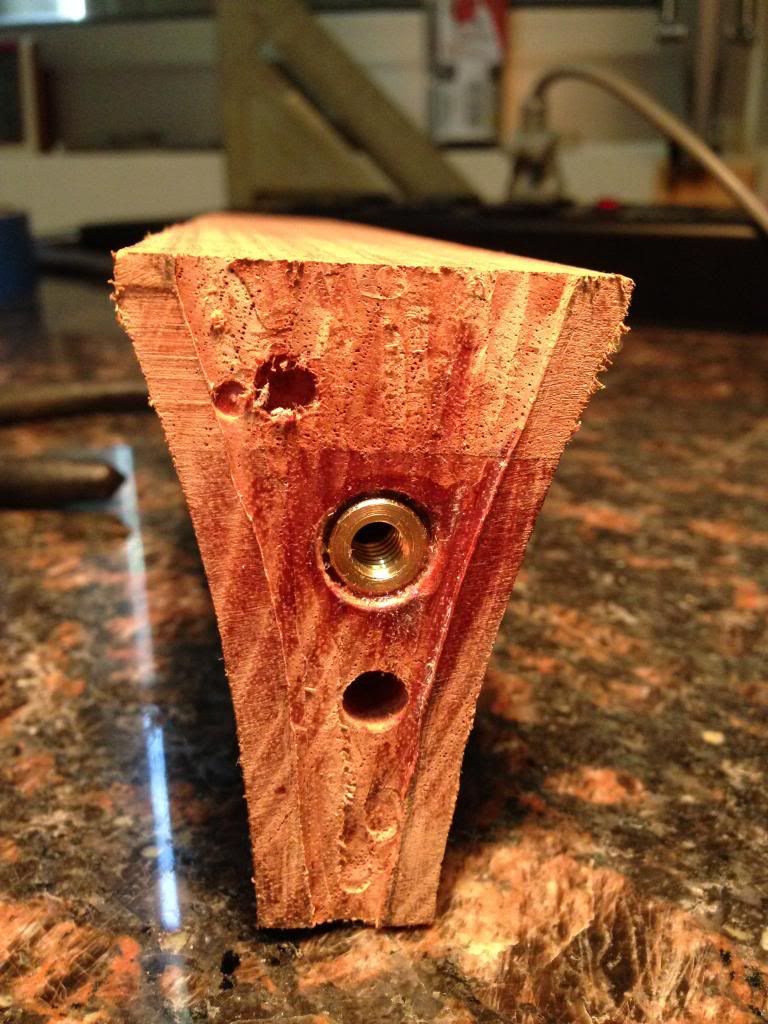
|
|
#73
05-31-2014, 09:17 PM
|
|||
|
|||
|
I have to confess, I made a rookie mistake here. The neck heel shipped two holes drilled, I decided to try and use one of these holes for the dowel. To make a long story short, I used carbon paper, traced the hole positioning on the heel and then tried to transfer it to the body. Unfortunately, I forgot to flip the carbon paper to a mirror-image and accidentally marked the body on the opposite side of the centerline. Yeah, rookie mistake.
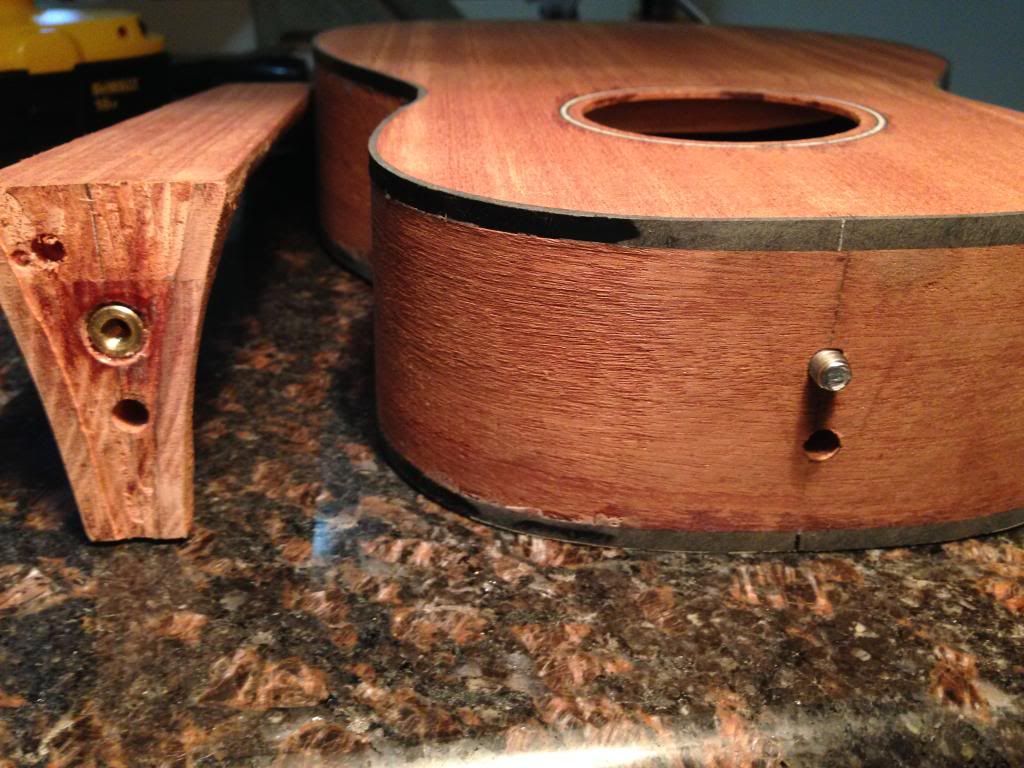 To fix the situation, I needed to first fill the holes in the heel. 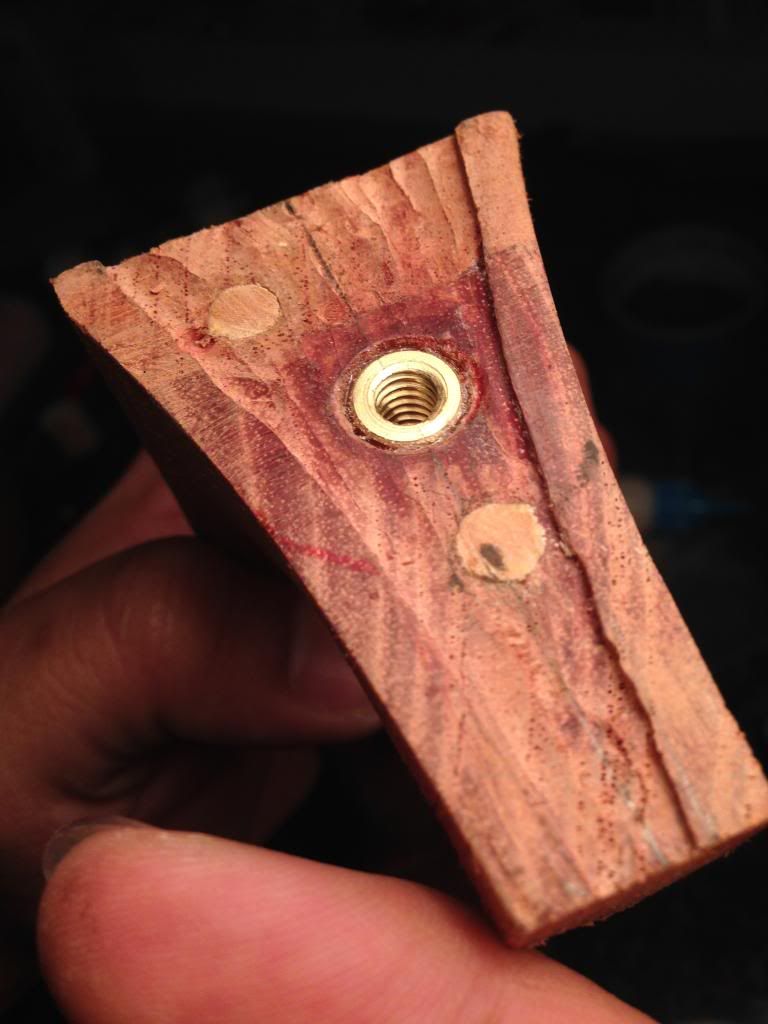 Then, to transfer the location of the hole from the body to the heel, I didn't feel confident using the carbon paper again. I used the dowel and a small pin inserted in the center of the hole. 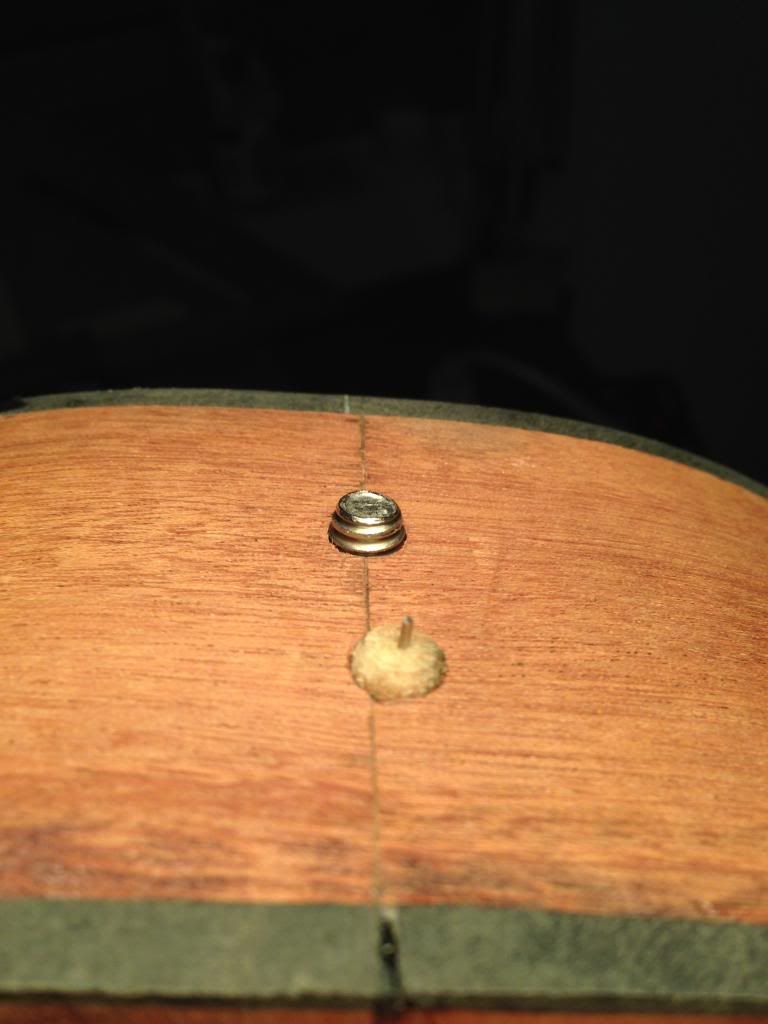 I then bolted on the neck to the body, the pin imprinted the location of the new hole into the heel. You can see it in this picture indicated by the "X" pencil mark. 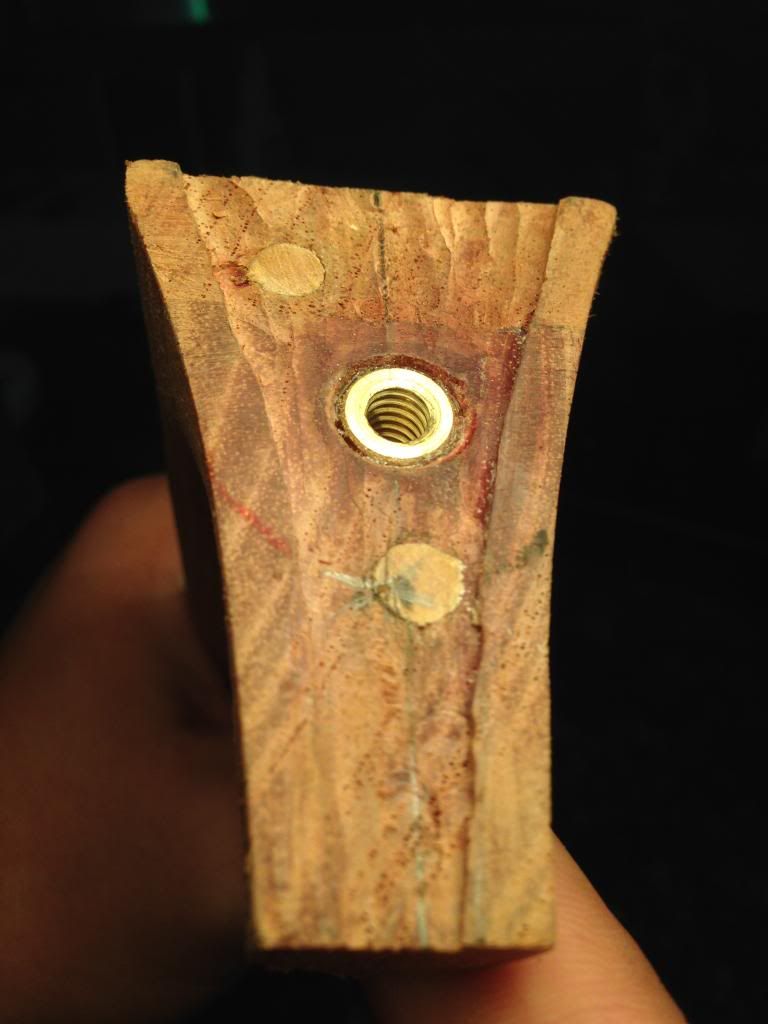 So I drilled the hole and the dowel lined up absolutely perfect! Another disaster averted! 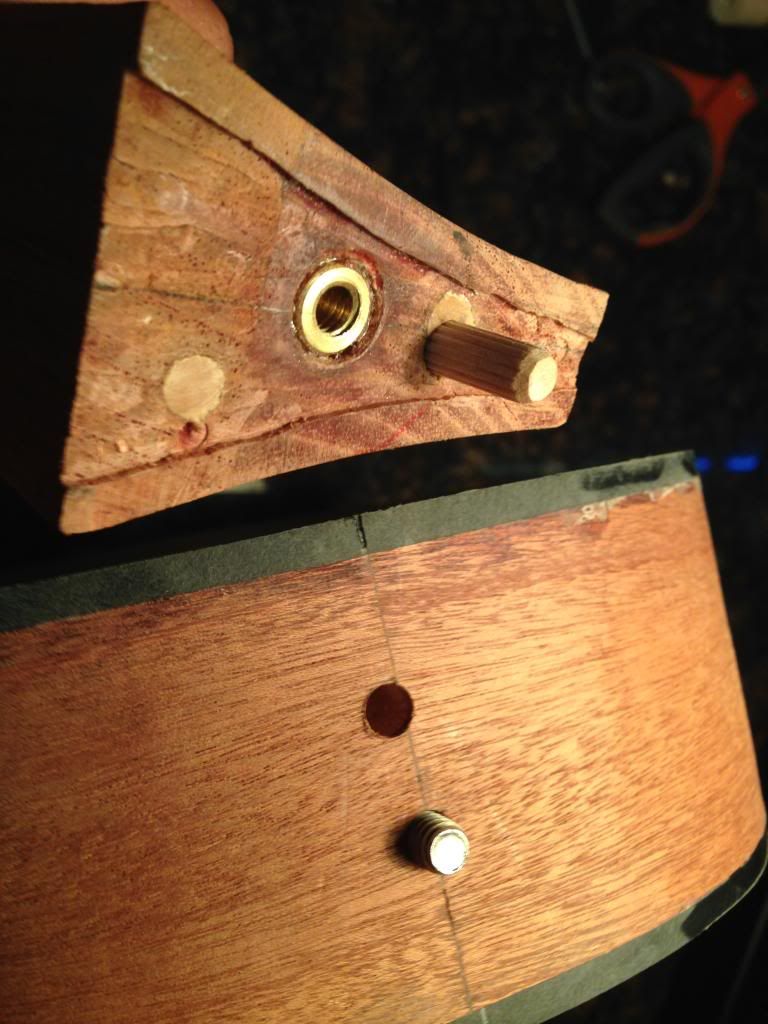
|
|
#74
05-31-2014, 09:34 PM
|
|||
|
|||
|
Taking a concept I learned from the MyaMoe YT series, I decided to get the heel fitted to the body as best I could and set the angle by placement of the fretboard. I chose to use this method because the geometry of the body isn't too regular.
Recall from this photo that there is a "wedge created from the top down to the back. Maybe I'll call this the "JoeGuam Wedge" taking after Manzer, haha! Although I don't think his was unintentional. So to fit the heel, I once again followed Bruce Sexauer's great advice and used sharp tool instead of sandpaper to remove material as needed. 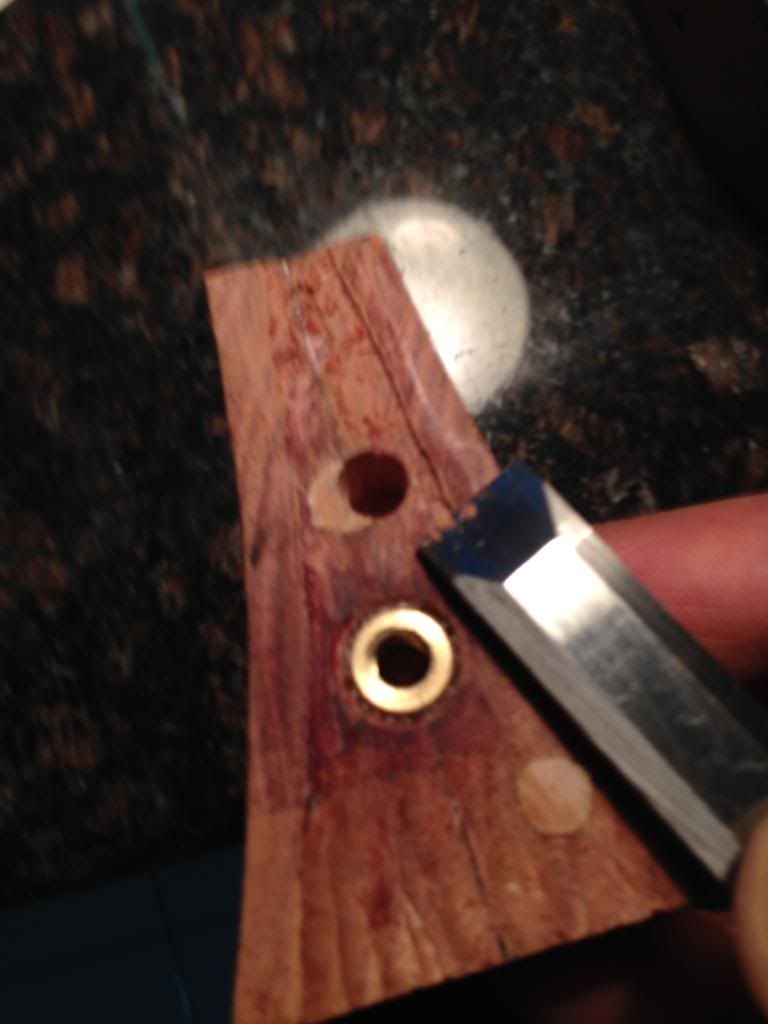 Fit-chisel-sand-repeat...multiple times...made the heel fit much, much better. Thanks again to Bruce and Sven for recommending that I do this! 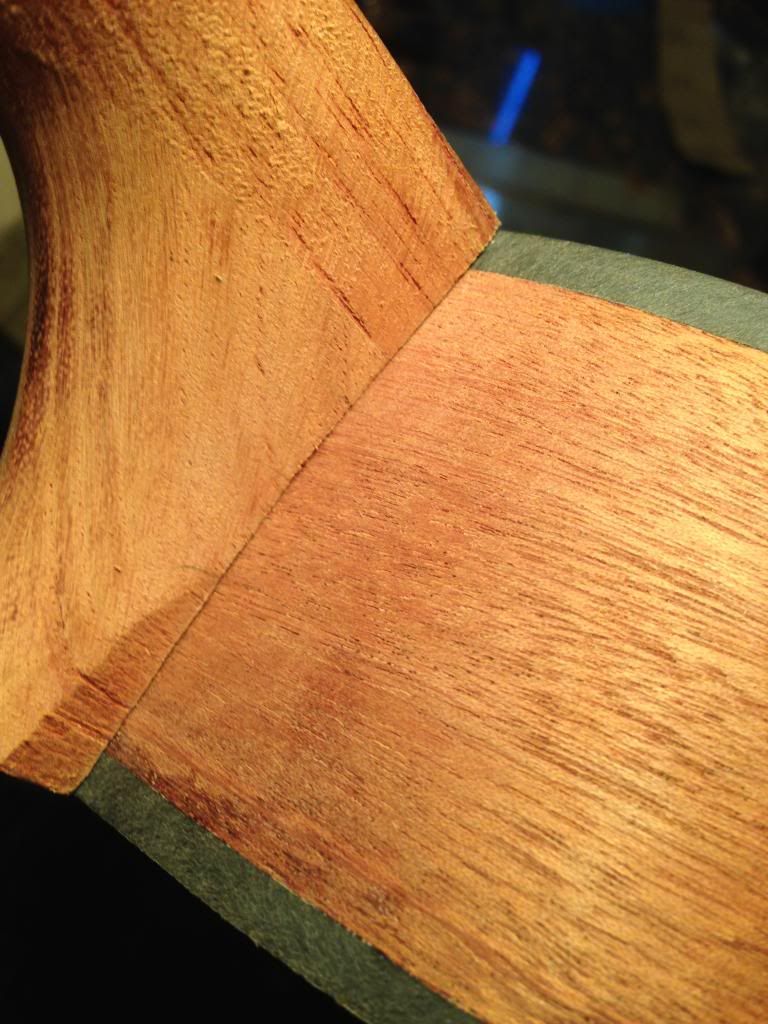 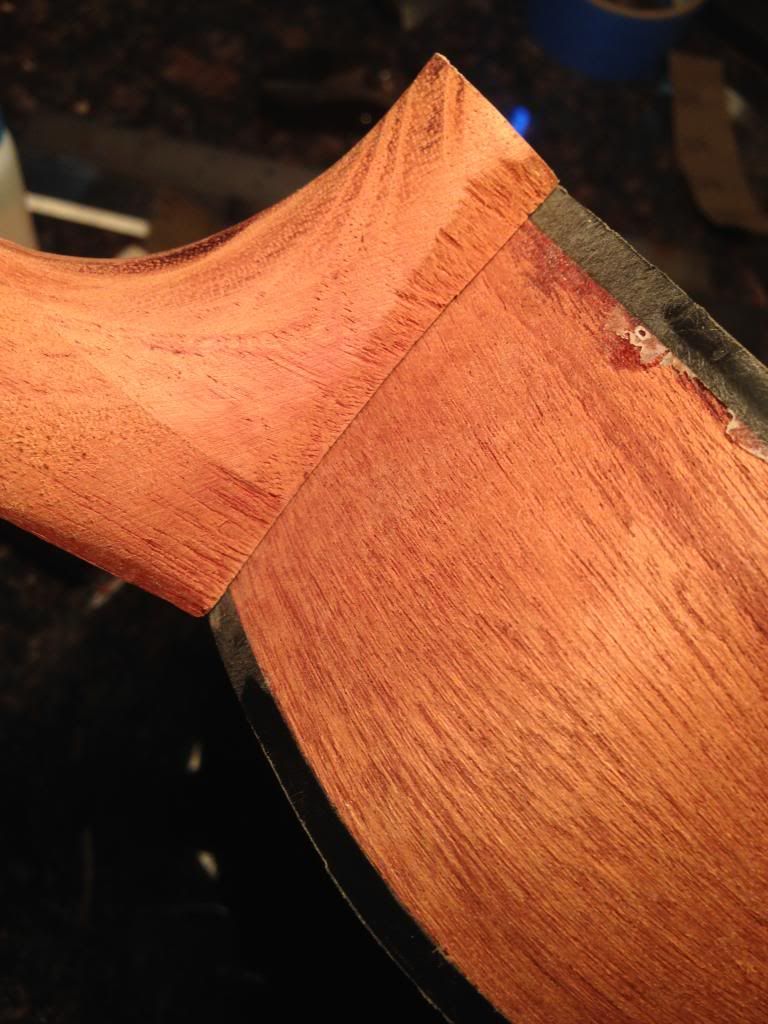
|
|
#75
05-31-2014, 09:49 PM
|
|||
|
|||
|
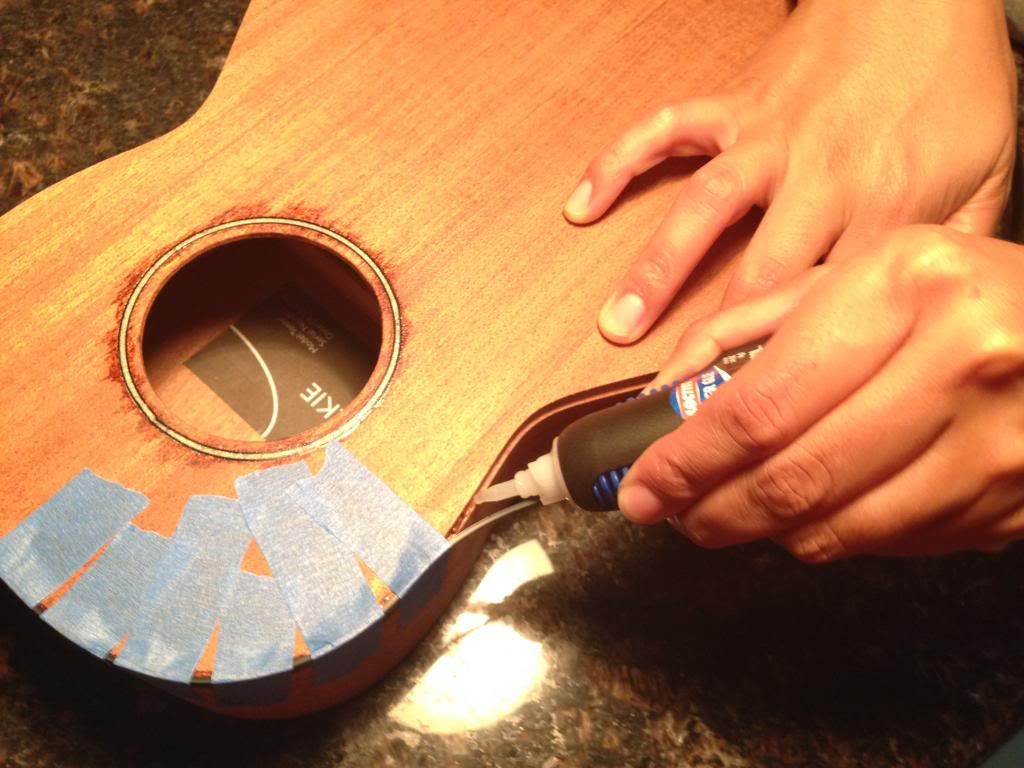
The neck heel fitting was a bit exhausting, it took a lot of concentration and patience! Once that was done, I decided to do something a little more straight-forward...the end graft.
Quote:
 So I lined it up with the centerlines and marked its position. 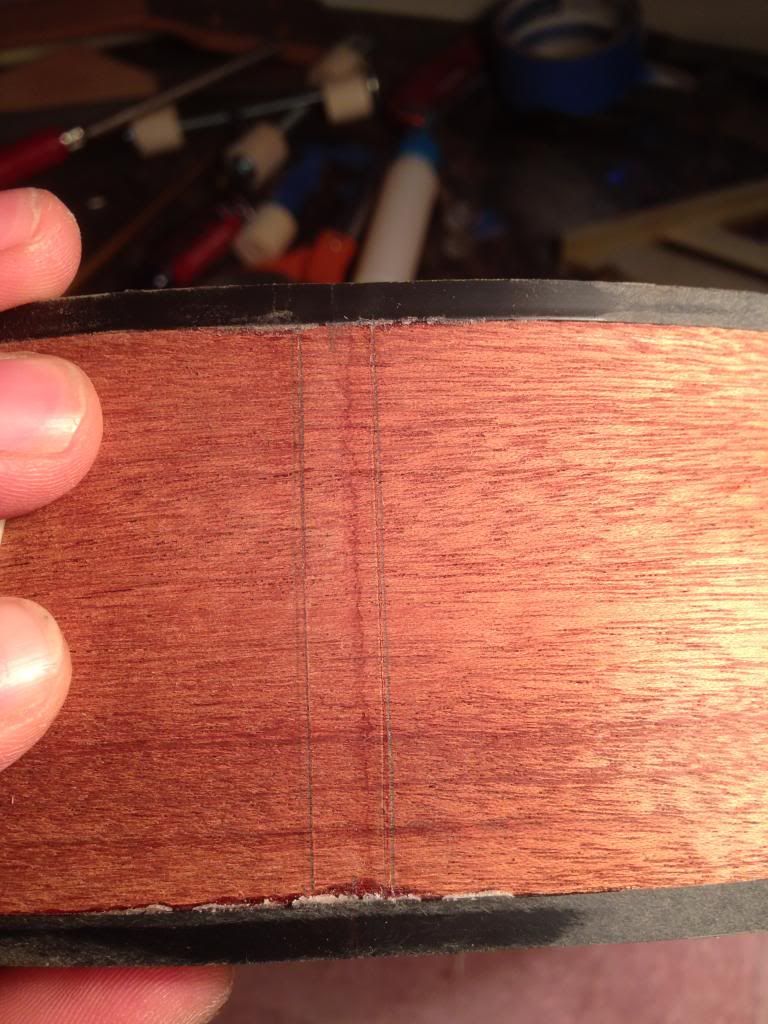 I clamped the body in my make-shift "jig vise" and went to work slowly routing the cavity and test fitting to ensure I didn't make it too big. 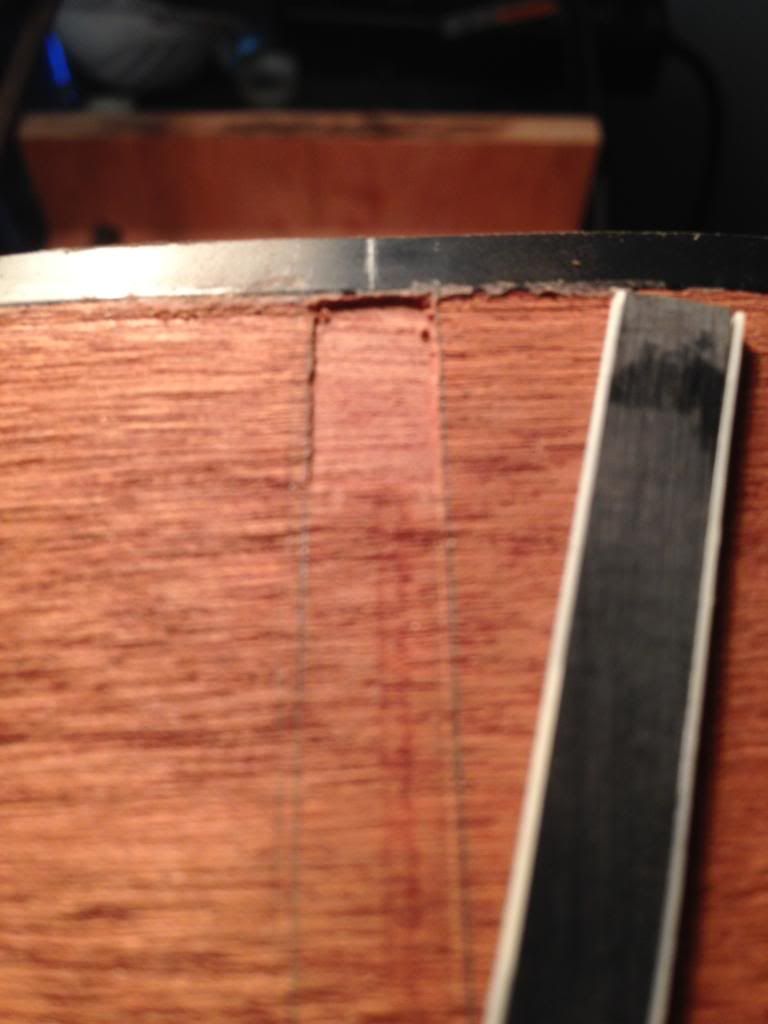 So far so good... 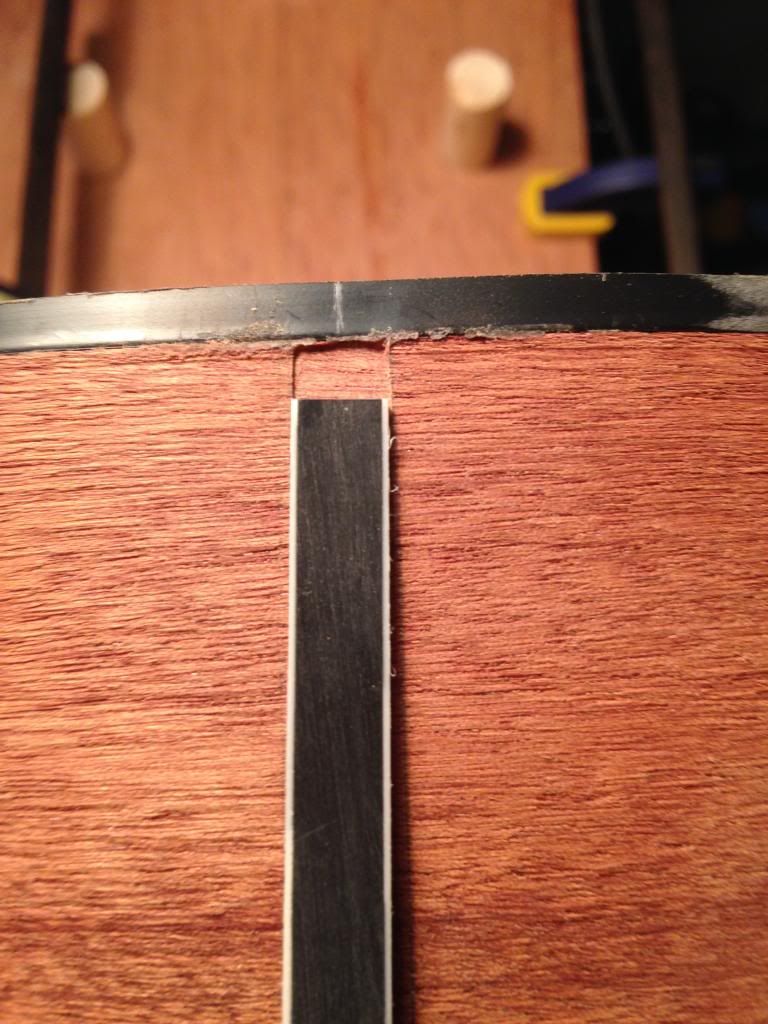 It actually fit very nicely, I was quite proud of myself as this was my very first "solid-shape" inlay (previous inlays were done with sand only). 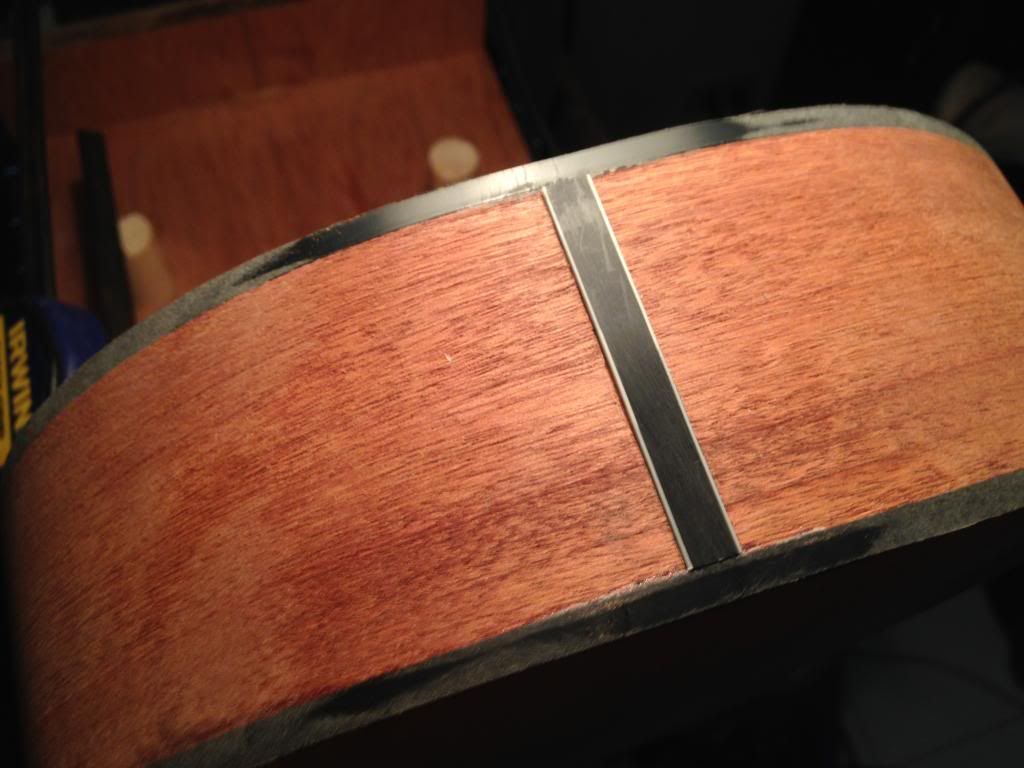 Because all looked good, I filled the cavity with CA glue and clamped it in with a caul. Of course I did this pretty effectively because I did a dry fit before I added the glue. 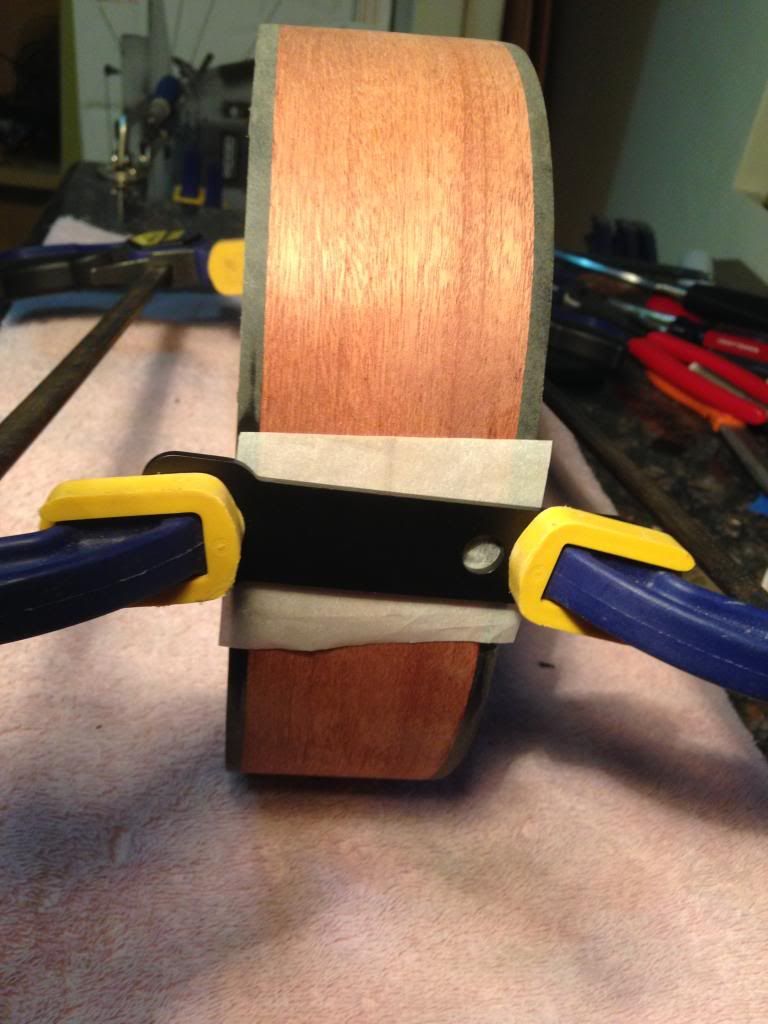 I let it dry for 5 hours while Jackie and I went to the movies, then came home and sanded everything level. 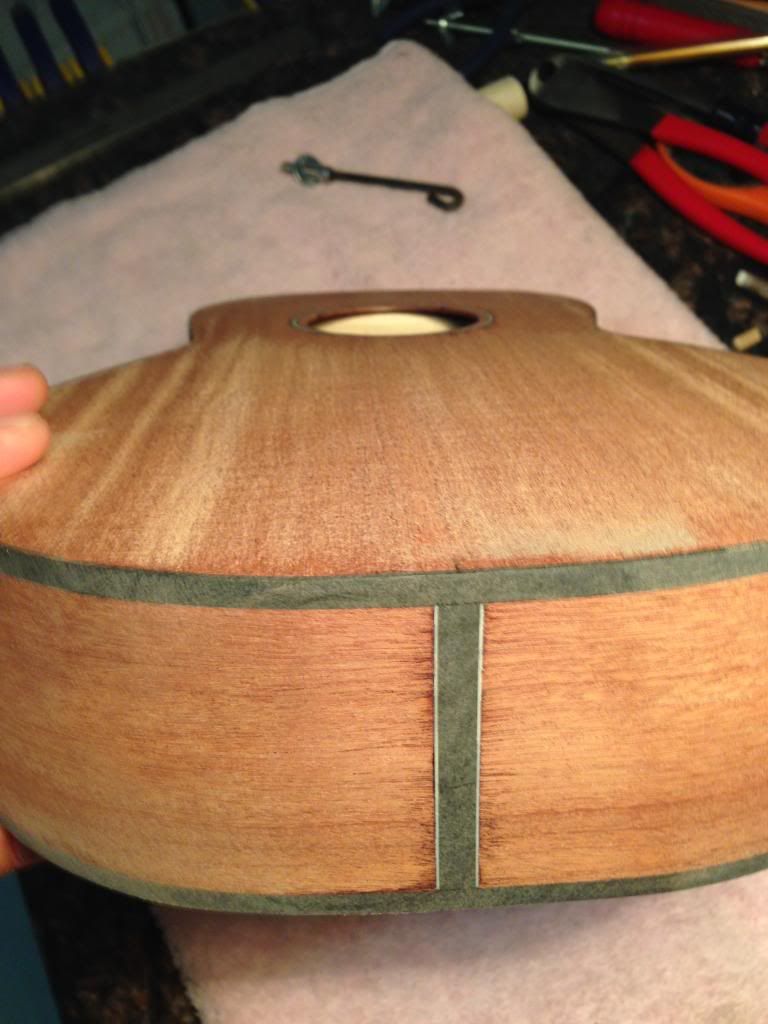
|
 |
|
| Tags |
| first build, stewmac tenor kit |
|
|


