
|
|
#31
 05-18-2014, 09:46 PM
|
|||
|
|||
|
Here's the back all trimmed up. You can see how close I sanded the neck-edge of the back to the template line.
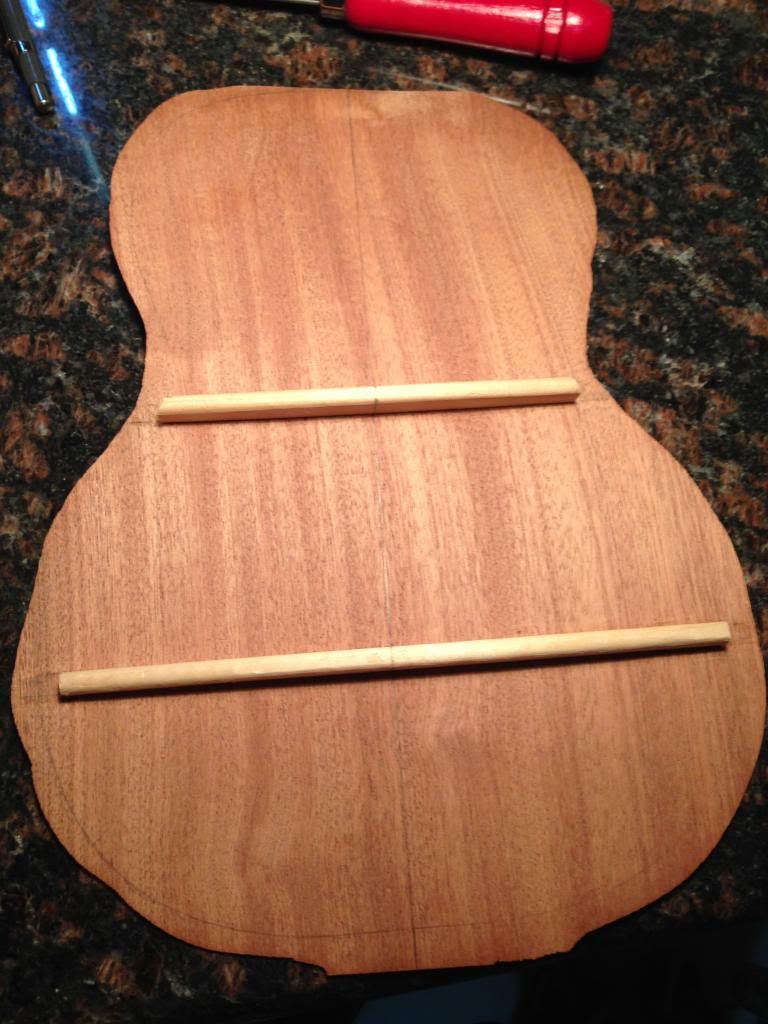 ..and here's dry fit, all ready to be glued up later in the build process. 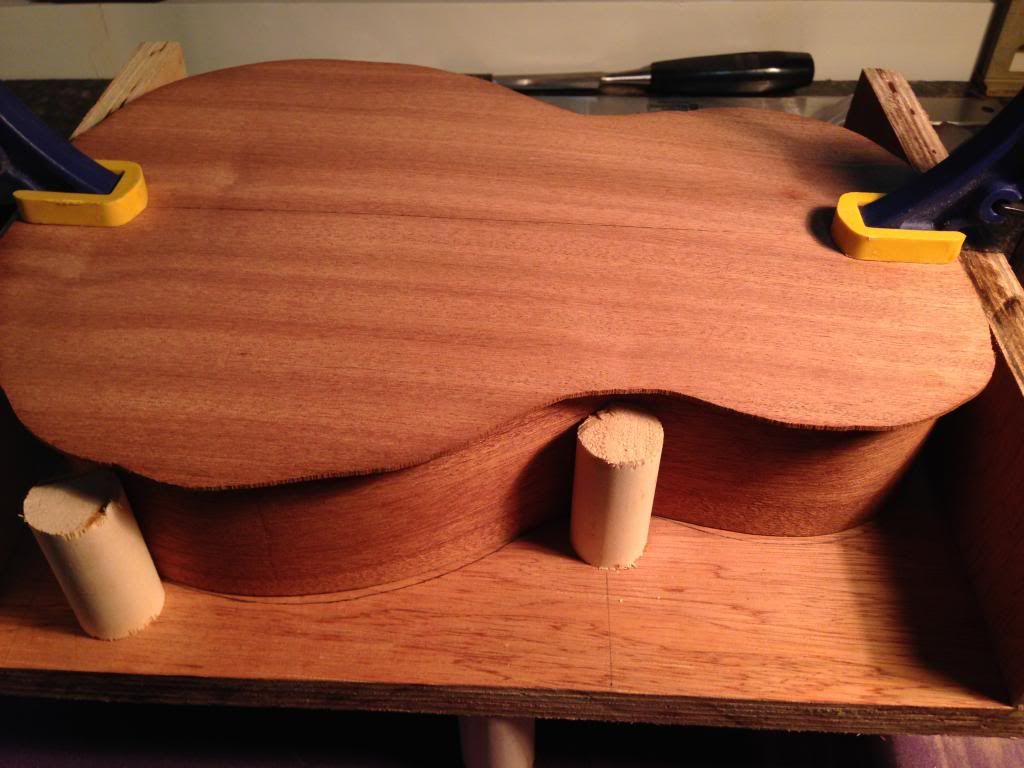 I did the same thing to the other end of the sides, to prep for gluing the top. 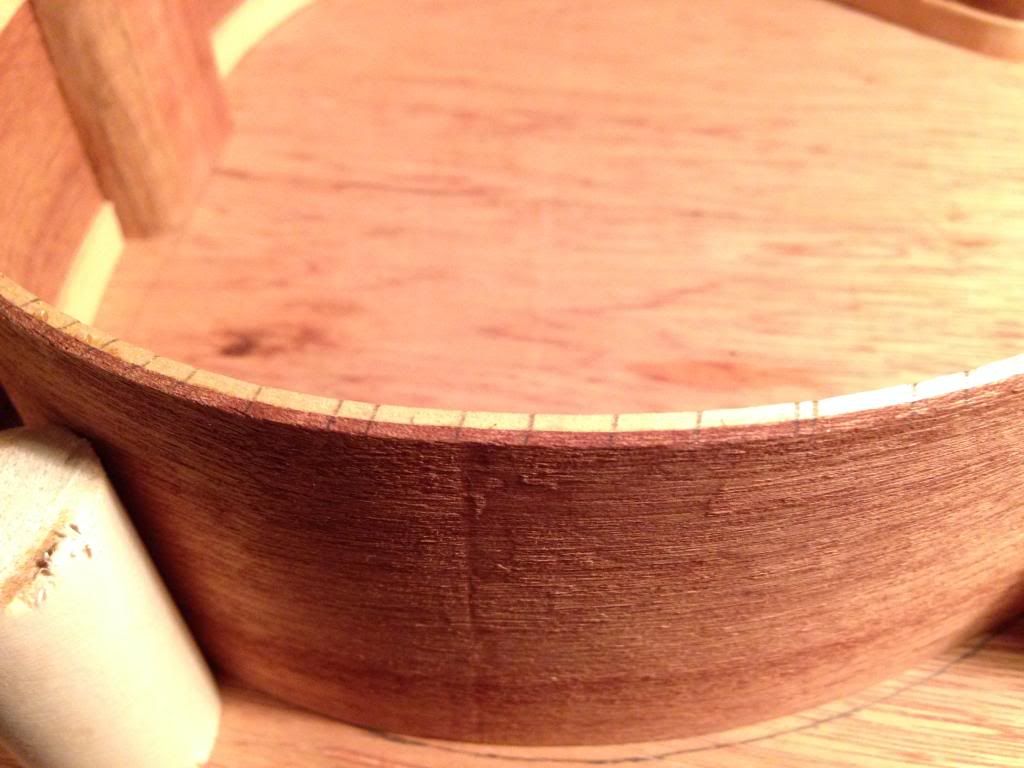 Just for looks, here's the top dry fitted (but no braces yet). 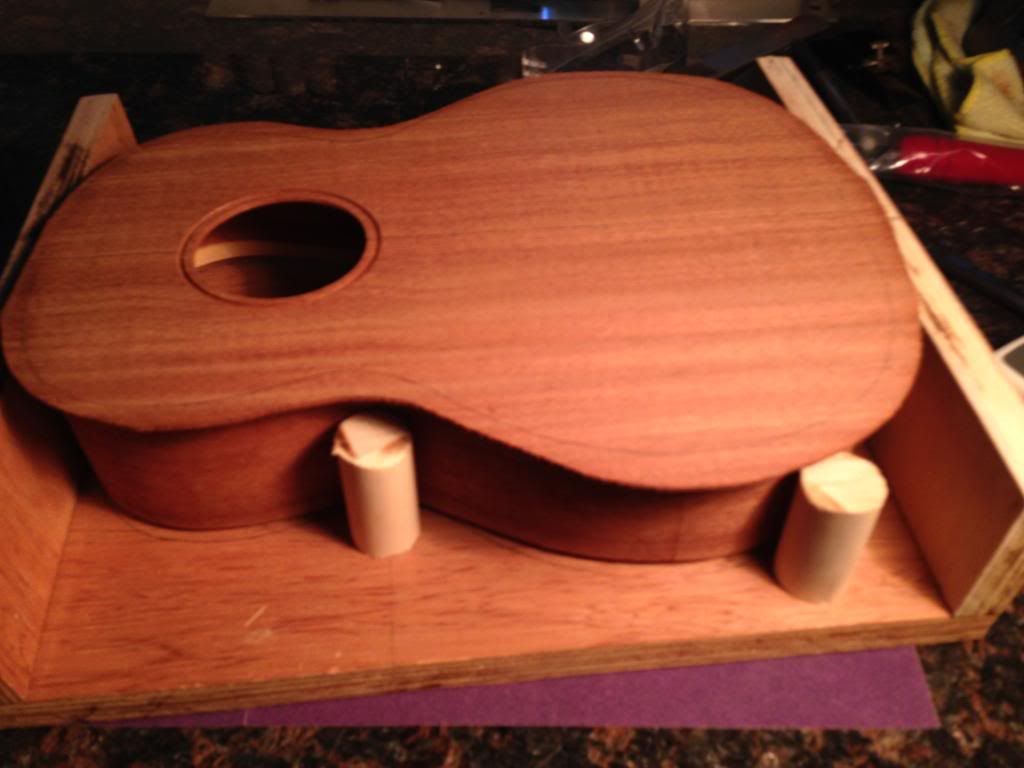

|
|
#32
05-18-2014, 09:55 PM
|
|||
|
|||
|
The next step was to work on the fretboard, here's the practice run inlaying the sand in a scrap piece of mahogany.
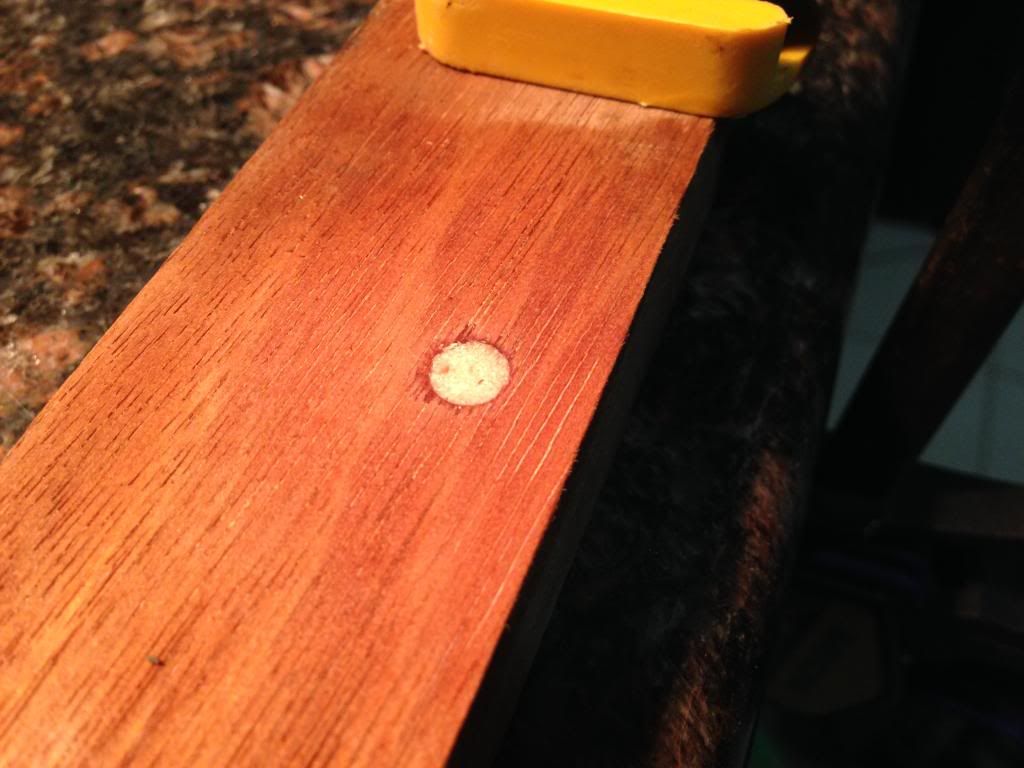 You lay the sand in the cavity, then fill it with thin viscosity super glue until it's proud of the surface. 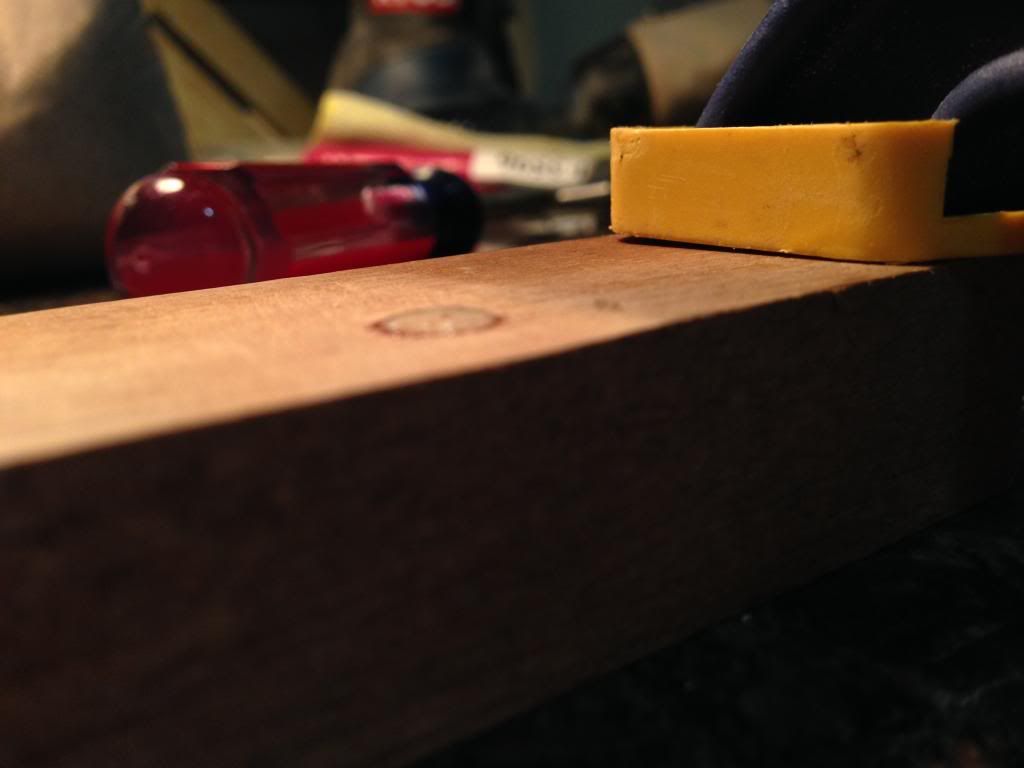 Then I used 100/220/24/400 grit to level it smooth.  Considering this is my very first time every inlaying anything, I was very happy with the results. I was having so much fun with my StewMac 1/32" downcut router bit, that I decided to do another test with a prototype logo. I think it came out pretty nice. 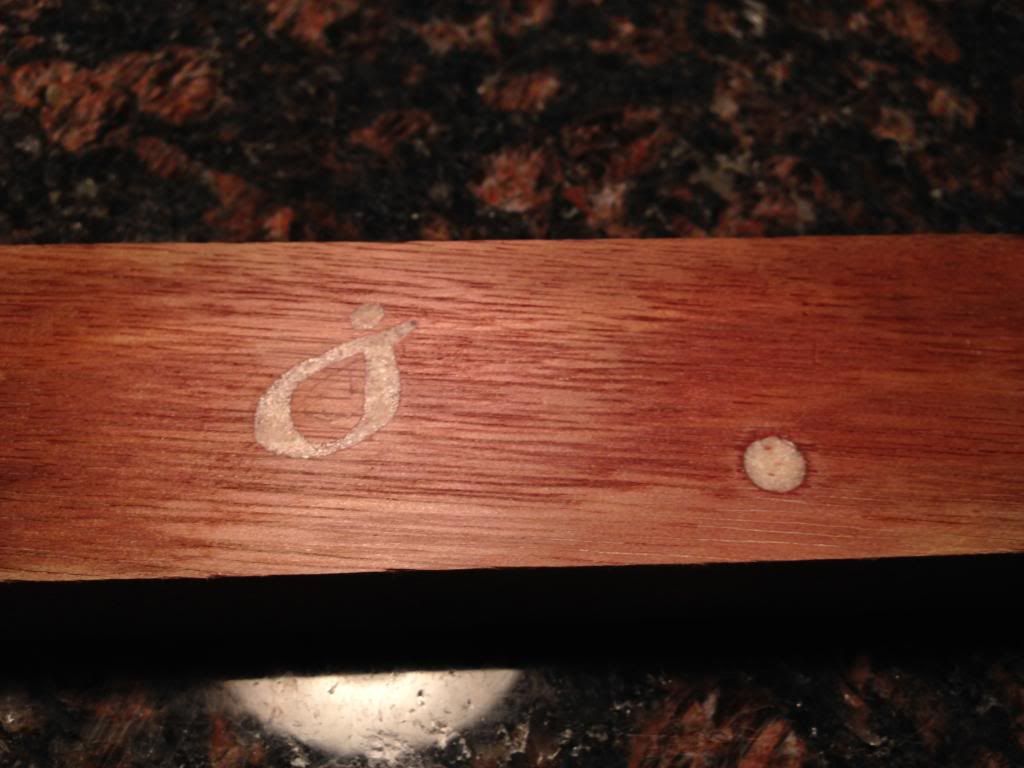
|
|
#33
05-18-2014, 10:07 PM
|
|||
|
|||
|
So now that I've practiced, time to move onto the fretboard. First step is to lightly sand the cavity surfaces.
 Then I masked off the fret slots just to be sure I don't get CA glue in there by accident. Made sure to have all the materials I needed because you gotta work quickly when using CA glue. 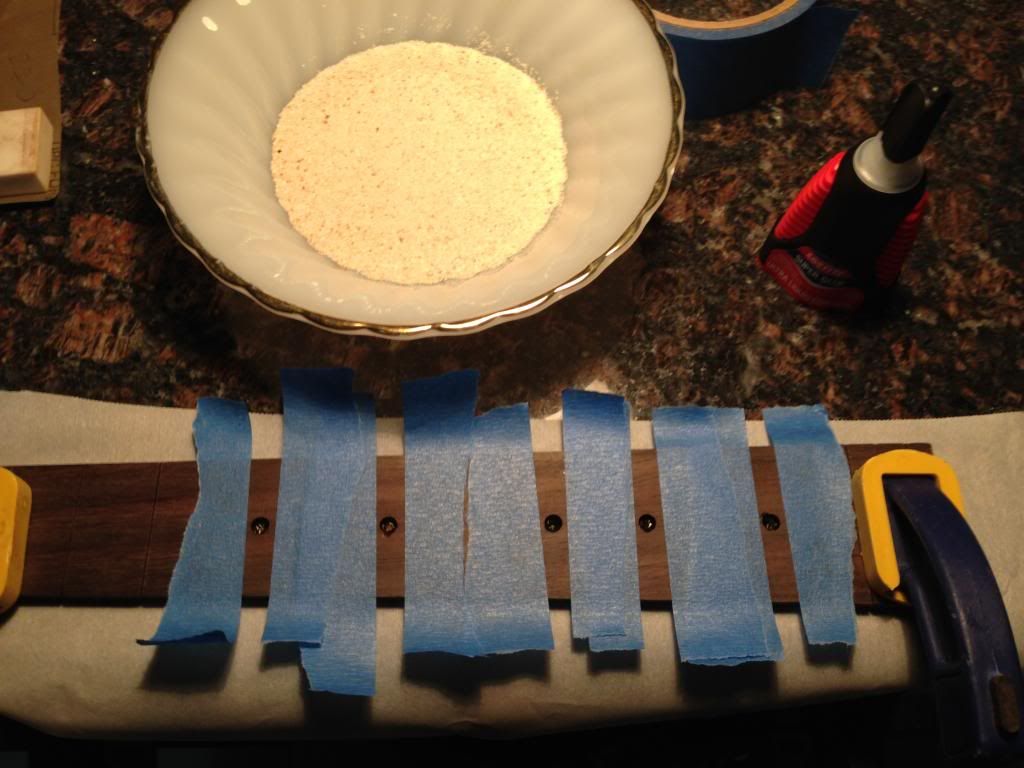 I didn't have time to take a picture of the previous step, but I just filled each cavity with CA glue almost to the rim of the cavity. Then, I gently laid sand in and used a chisel to lightly press it down flat. 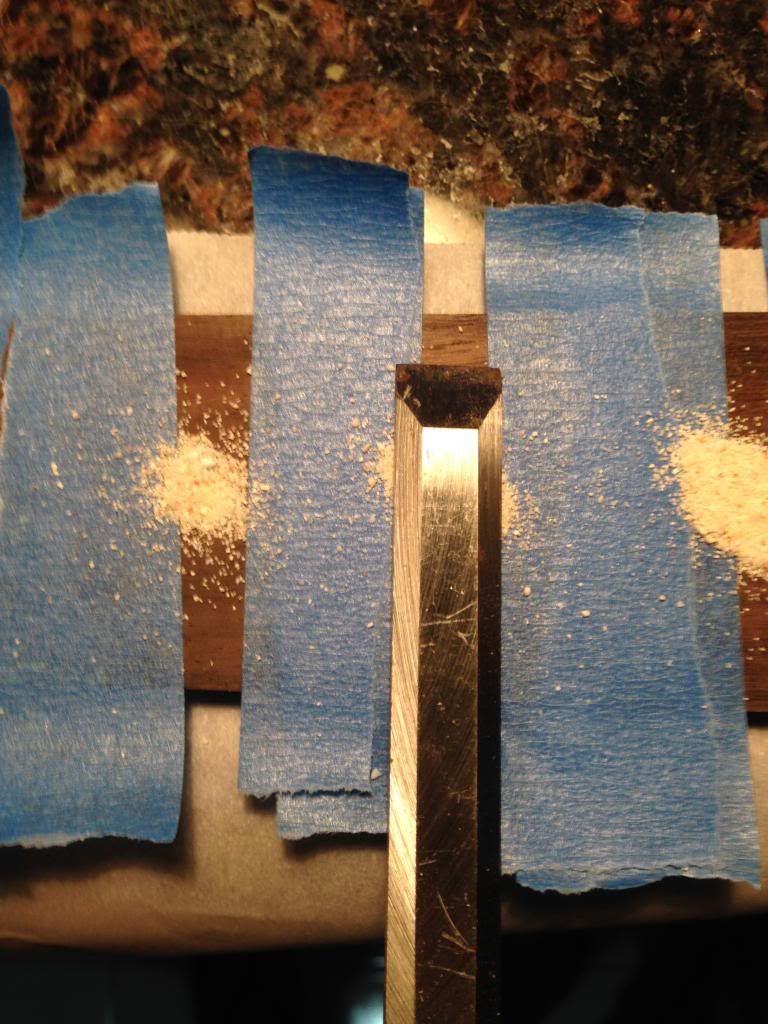 Dusted off the excess, then used 100/220/24/400 grit to level it smooth. You can see in this picture the consequences of lesson learned #1 where the sand inlay isn't perfectly circular because I damaged the rim of the cavity. Oh well, this will be part of the story to tell for my first build. 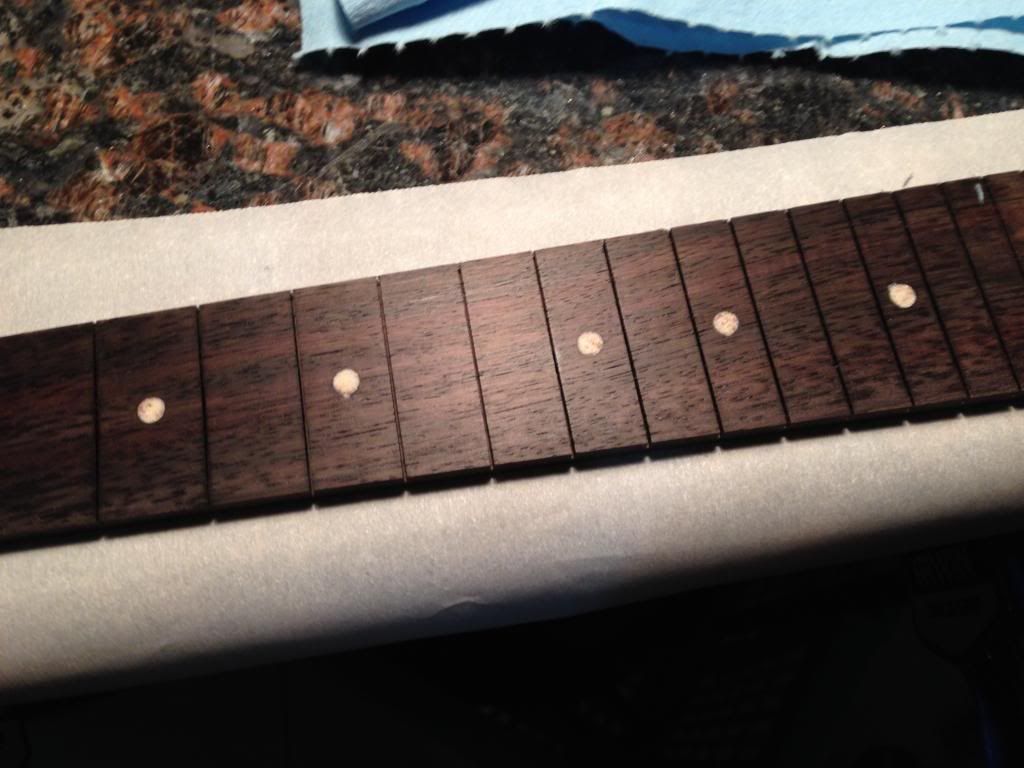
|
|
#34
05-18-2014, 10:17 PM
|
|||
|
|||
|
While I had the tools and materials out, I decided to do the inlay of the rosette. I changed the design from the original black/white alternating rings, to black/sand/black.
Here's a shot of me gluing the inner black ring to the inner wall of the rosette channel. I had to glue the two inner/outer black strips in place first before laying down the sand. 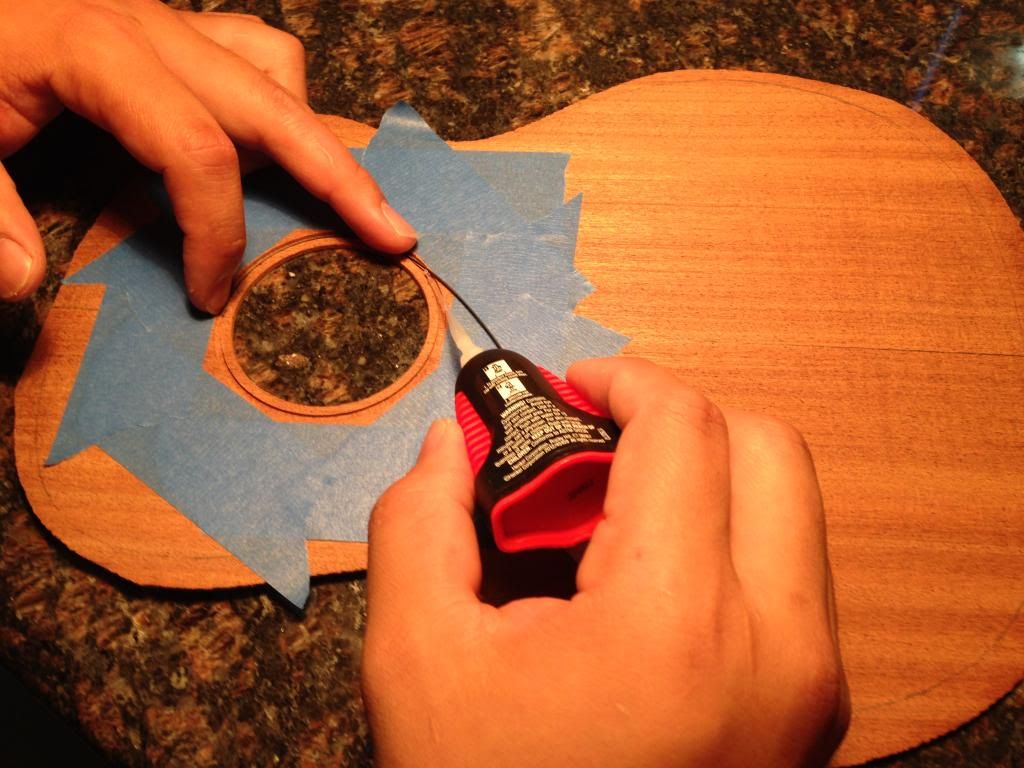 Once I had both black strips glued, I followed the same process as the fretboard to inlay the sand proud of the surface. 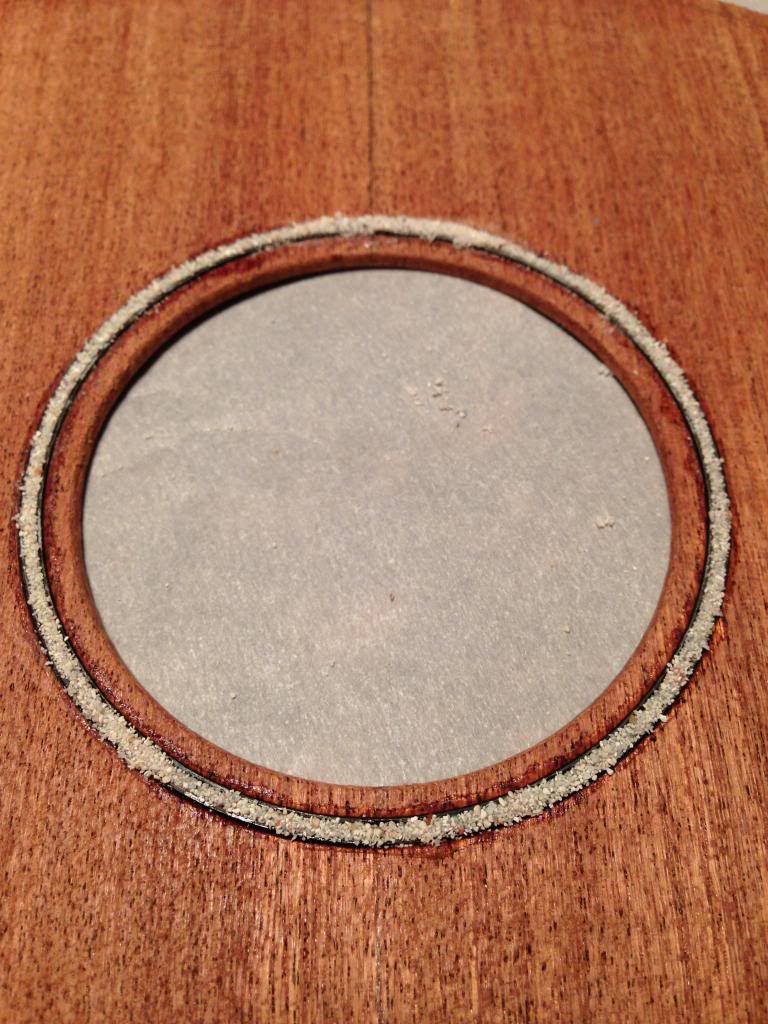 Then I used 100/120 grit to level the rosette flush with the top. I have to admit, I got a little impatient and used 120-grit with my orbital sander to speed up this process. I only felt comfortable doing this because I saw a YouTube video of a luthier do this successfully. I was sure to be careful. 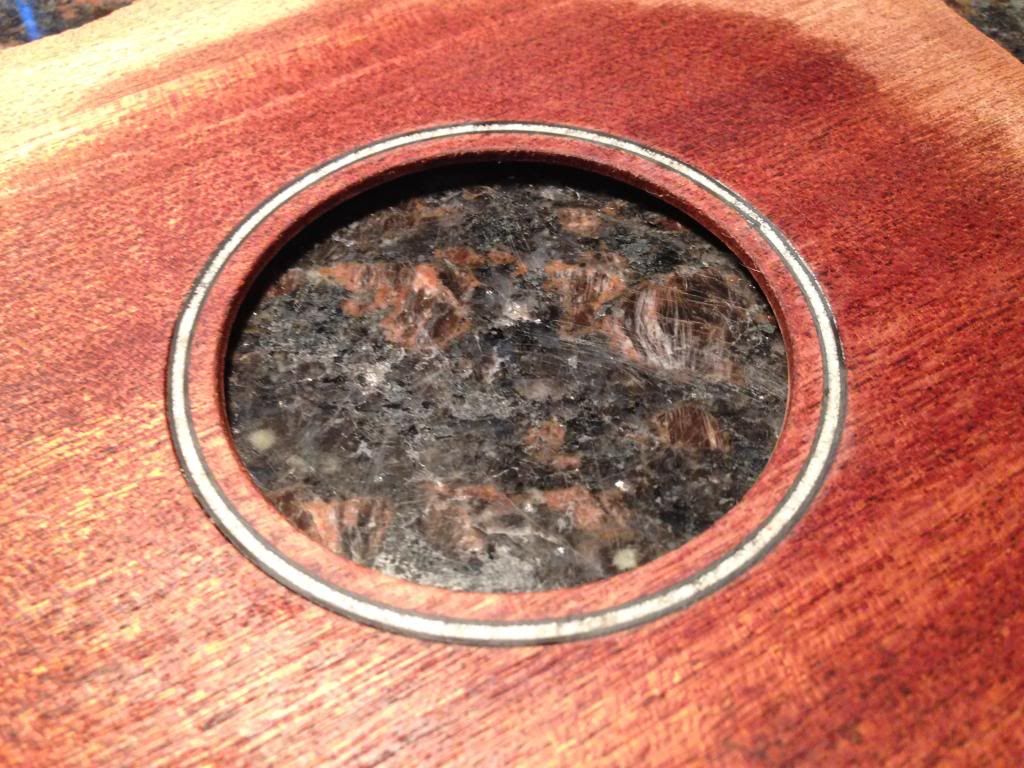 I did a final leveling with a small sanding block and 220 grit. Once I had it all leveled, I vacuumed the dust, wiped it with naptha, then covered the entire channel with very thin viscosity CA glue as a final sealant. I'll use 220/320 grit to level the CA glue one last time. 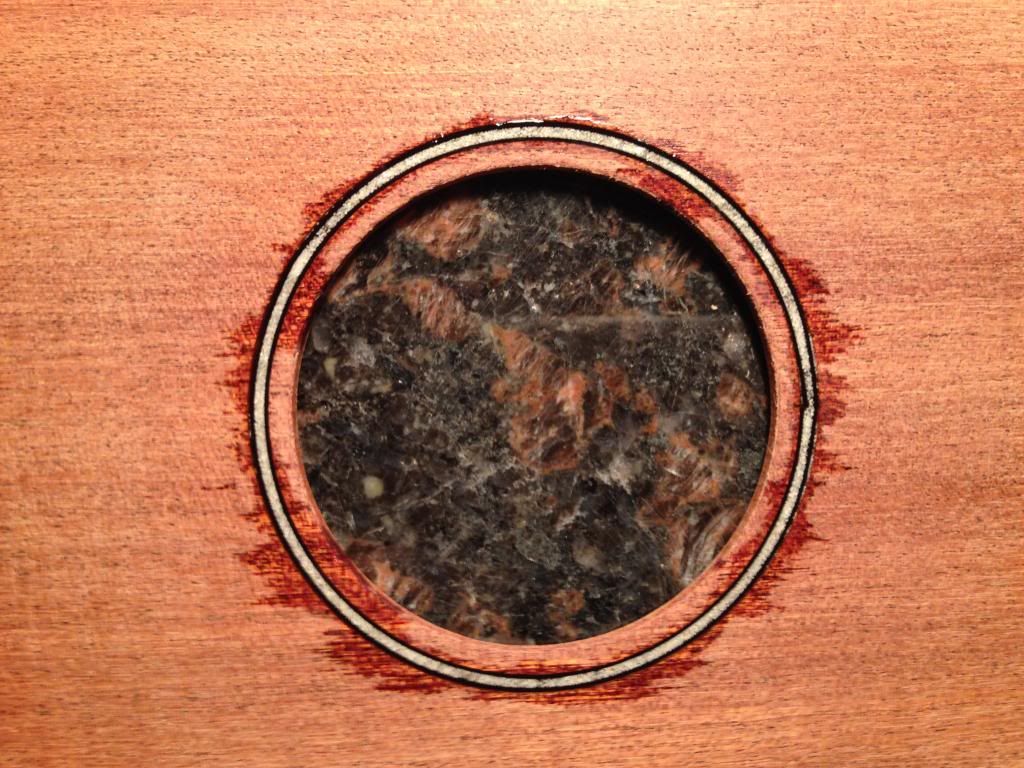
|
|
#35
05-18-2014, 10:30 PM
|
|||
|
|||
|
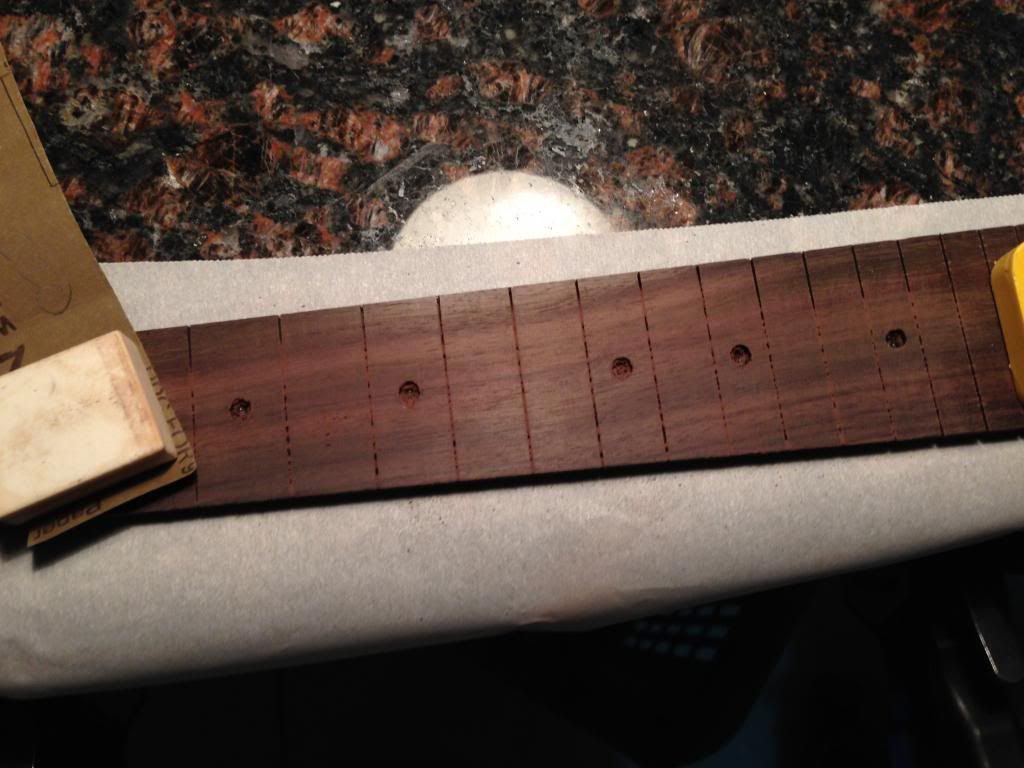
While the rosette was drying, Jackie started installing the frets.
Quote:
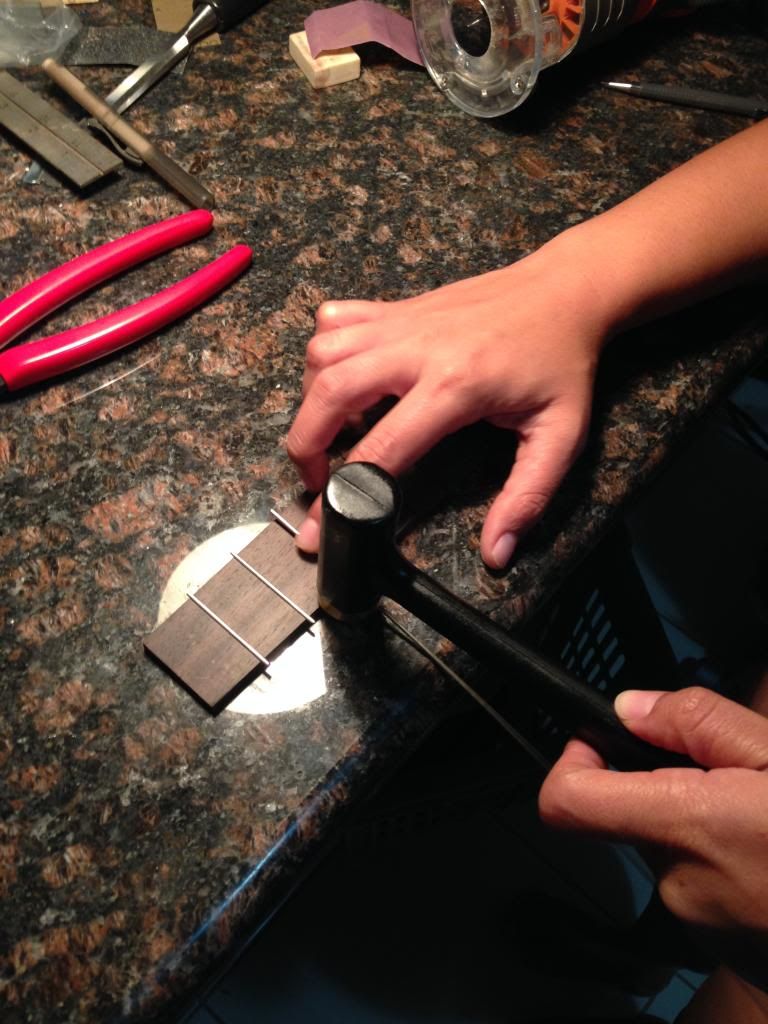 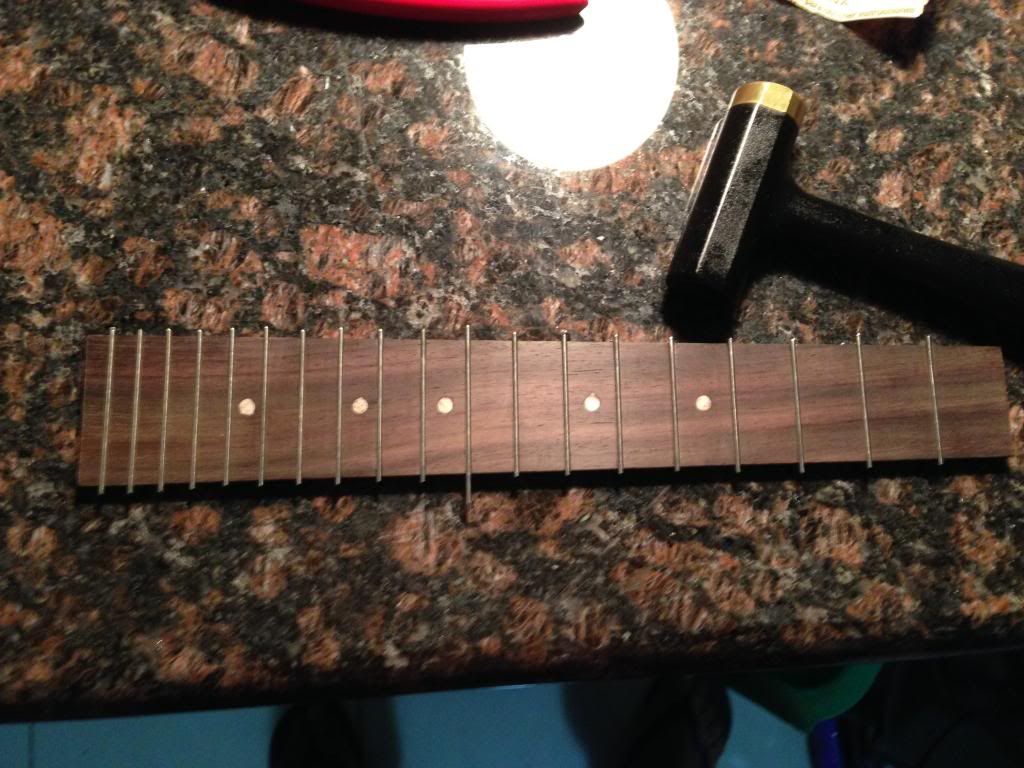 Then we used the StewMac cutters to trim the fretwire flush. 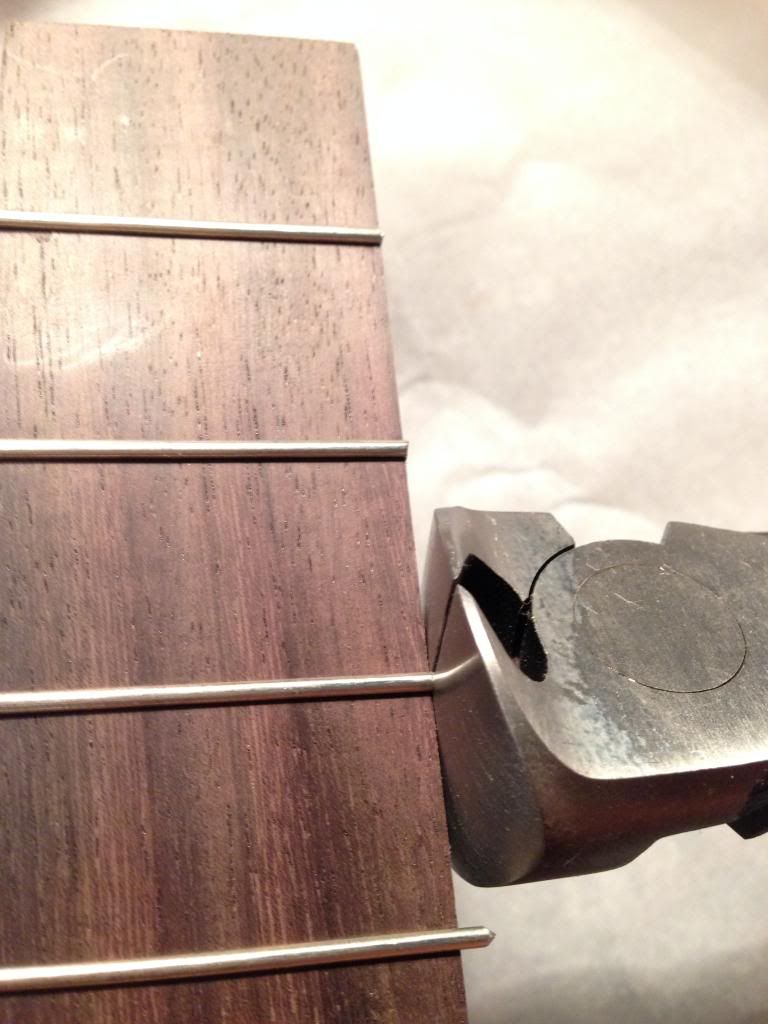 Taking another tip from the Mya-Moe series on YouTube, I clamped the fretboard upside down to my granite top overnight to help reverse the bow from installing the frets. 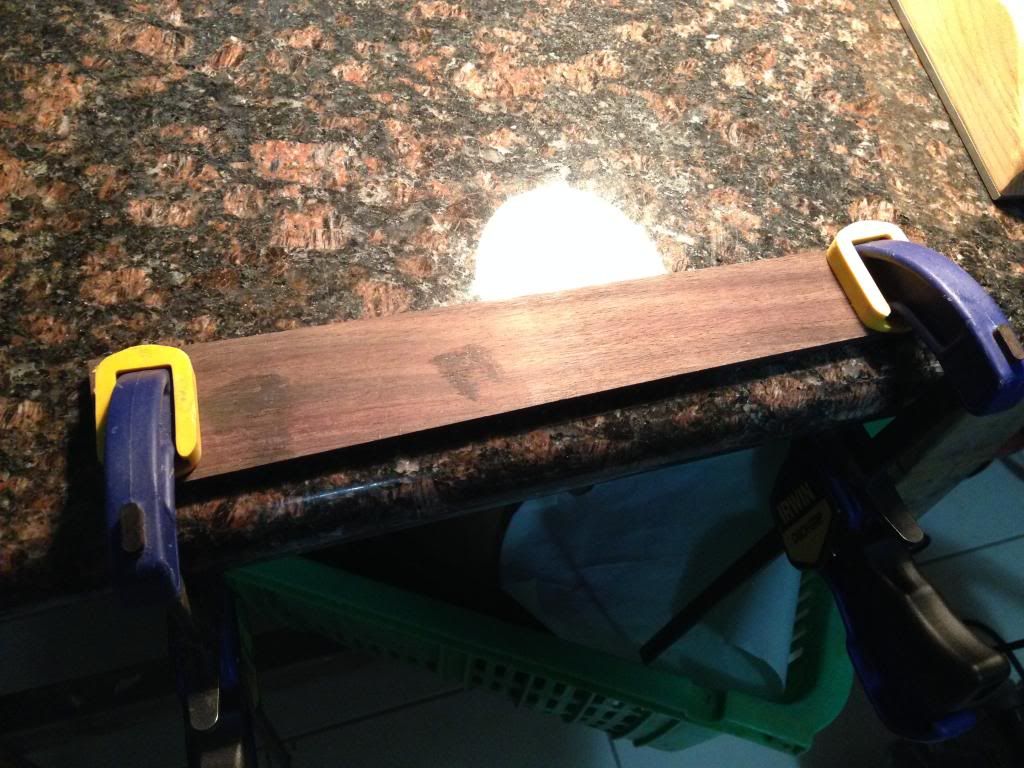
|
|
#36
05-18-2014, 10:34 PM
|
|||
|
|||
|
That's all the updates for the weekend, I also added the completion dates to the respective tasks in the build plan in the first post of this thread.
The next step will be to glue the braces to the top, scallop the back bracing, then finish leveling/dressing/crowing the frets.
|
|
#39
05-19-2014, 05:45 AM
|
|||
|
|||
|
Quote:
__________________
Martin HD28E Retro Seagull Maritime Mahogany Alvarez Rd8c Dean EABC5 Gretsch 9121 Lag TN100 Nylon Recording King RO-10 Recording King RP-06 https://soundcloud.com/search?q=Smokerblacker
|
|
#41
05-19-2014, 06:47 PM
|
|||
|
|||
|
Very interesting. Nice how you can recover from seeming disasters. Early on in this thread, you indicated (and proved) that you are indeed a PM. Oh no! As a software engineer, I deal with you guys every day. When is it going to be done? We have a schedule....
I always wondered about players who build their own instruments. ...didn't I have TEN fingers when I started?!?!?!? Tony
__________________
The guitar is a wonderful thing which is understood by few. Franz Schubert "Alexa, where's my stuff?" - Anxiously waiting...
|
|
#42
05-19-2014, 07:06 PM
|
|||
|
|||
|
Haha Tony, that's funny!
I have a systems engineering degree, and worked as a software engineer for a couple of years before making the switch to project manager. I like to think I'm the PM that has a bit more understanding for both the hardware and software team members, and defends them a bit more.  Although I laid out the plan for this build, I definitely did not put down any deadlines...I wanted this to be stress free and enjoyable...which it has been very much!
|
|
#44
05-23-2014, 09:44 AM
|
|||
|
|||
|
Hi to both of you,
You two are doing a good job with the build, and I am sure you are learning with each phase of the project. That is what makes projects like this so much fun. Years down the road when you play or look at the Uk, memories from your early days together will come back to you to be enjoyed again! Carry on and enjoy the process, oh and by the way I really like the granite topped bench, keeping the project flat and square becomes much easier with that.
__________________
Jim
|
|
#45
05-23-2014, 10:42 AM
|
|||
|
|||
|
This is a very interesting process. Anybody who decides to follow in your footsteps will benefit greatly from all that you're sharing here.
And I really love your sand inlays! Pacific Island music (and musicians!) should always be connected to the land and the sea, and using sand that comes from your family's own beach makes the connection even more powerful. Well done! - Pili
|
 |
|
| Tags |
| first build, stewmac tenor kit |
|
|


