
|
|
#31
 10-18-2013, 03:18 AM
|
||||
|
||||
|
Such cool wood, the grain on the top is incredibly tight, and some very cool bearclaw-ish figure to it. One thing you Aussies don't want for is different wood!
__________________
1930 Martin OM-28 2017 LeGeyt Parlor 2021 LeGeyt CLM Red/Tree 2021 Kostal MDW German/Pernambuco 
|
|
#32
10-18-2013, 09:29 AM
|
|||
|
|||
|
keep it comin', Devan. one rarely gets to see the start to finish process. very interesting stuff. also shows how tedious some of the work is. i'm sure many folks view guitar building as being very romantic in all aspects. truth is, its very exacting work which can be extremely difficult for many to bear. of course, much of it is romantic as well.
thanks for sharing. i look forward to following thru to the end.
__________________
Bill Gennaro "Accept your lot, whatever it may be, in ultimate humbleness. Accept in humbleness what you are, not as grounds for regret but as a living challenge."
|
|
#33
10-20-2013, 05:30 AM
|
|||
|
|||
|
Day 6
----- Word for today is: AAAAAAAAAAAAARGH ! Ok, today didn;t go to well at all. At all. As you noticed yesterday, I had cut out the rosette circle to be inserted into the top. All good so far. The cutting went well. Now it was time to measure out the routing groove on the top in order to fit the rosette circle in there. This is where I made the absolutely stupid rookie mistake of measuring the diameter wrongly when setting the router. Well, actually I measured the diameter correctly, but made a stupid divide error when working out the RADIUS setting for the router. A mistake that even a grade two student would not make. That will teach me for rushing in excitement and trying to do maths in my head and not double checking using the actual cut pieces to ascertain whether the starting groove was correct. As it turned out, I routed the groove about 3mm under sized. Nothing I could do to correct this. I had already cout out the circle for a particular radius, but cut the groove in the top at a totally different radius. At this point I just wanted to crawl under the table and book my ticket home. Chris the master luthier came and had a look and after some tut-tutting, he suggested that I use some paua shell lining to fill in the gap inside and outside the groove I had cut. This meant I had to cut the groove even wider still to allow for the outer ring of paua shells. This time I was absolutely meticulous with my measuring and calculations and got it right. I had originally wanted the rosette with no purfling or surrounding decoration, but I ended up having double paua shell lining around it instead. Not what I wanted, but it solved the problem. Because te paua shells were about 2mm thick, it still meant that the circle segments were not a perfect circle when fitted around it due to the radius difference, so I had to individually hand shape each segment to make the joins butt up against each other. I had to do the same with the paua shell segments to make them line up nicely. All in all, it took the whole day to correct and make amends for my mistake. A whole day to do perhaps a 2 hour task. I have fallen behind schedule BIG TIME. Thankfully, some friends of mine rang in the afternoon and invited me out to a BBQ tonight, which will make up for things somewhat... Only a couple of photos today, because I was too angry/upset to take any when I realised my mistake. Before and after. The gap at the top will be covered by the fingerboard when it eventually goes on. 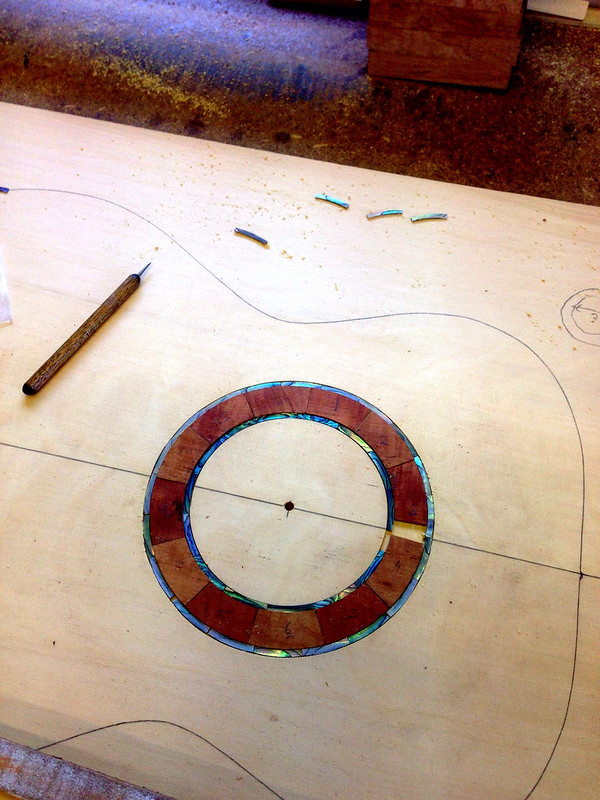 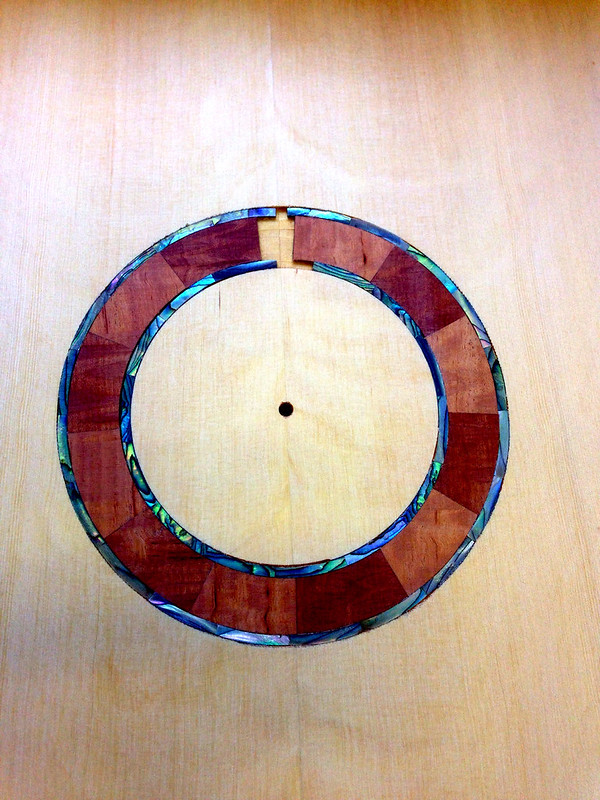 Right at the end of the day, I just got time to mark out the bracing positions on the back of my guitar in readiness for tomorrow. 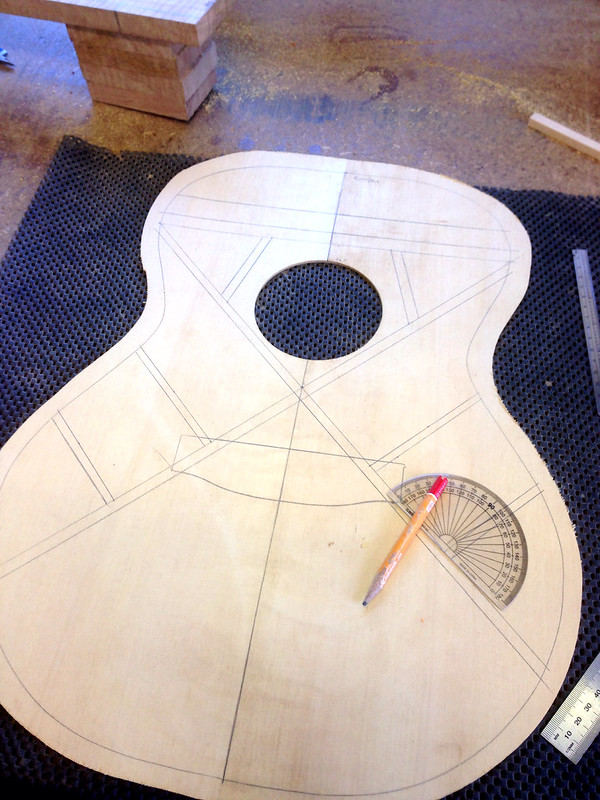 I also got to cut out the sound hole, which had to be 100mm in diameter. This time I set the router and calibrated everything so that when I finished, the calipers ACTUALLY measured the hole at 100.00 mm wide. Chris said it was only the second time in the history of his workshop that someone had hit the 'perfect' 100 using the digital calipers.
__________________
······························ ·▄▄▀▀▀▄▄··▄▄·················· ▐·······▀▀··▀▌··········ΦΦΦ··· ▌····║··(░)▒▒▒▒▒▒▒▒▒▒▒▒█████·· ▐·······▄▄··▄▌··········ΦΦΦ··· ·▀▀▄▄▄▀▀··▀▀·················· ······························ » My name is Devan » Guitar and Personal Blog. » Guitar and Gear Review Site.
|
|
#34
10-20-2013, 05:41 AM
|
|||
|
|||
|
Day 7
----- Word for today is: SEEDY ! Here is a tip: Facing a whole day of fitting and carving top bracing after a heavy night drinking wine and beer is NOT a good idea!  Thankfully I wasn't too seedy. But I was aware that I had to concentrate just that but harder, as I would be handling a sharp chisel around the top a LOT today. Nothing really exciting to report today, except that I had to fir the bracing to the top, and then carve it down to shape it and to form the 'peaks' that you see here. It meant a lot of sanding, planing and chiselling to get the desired results, so that is basically how I spent the entire day today. 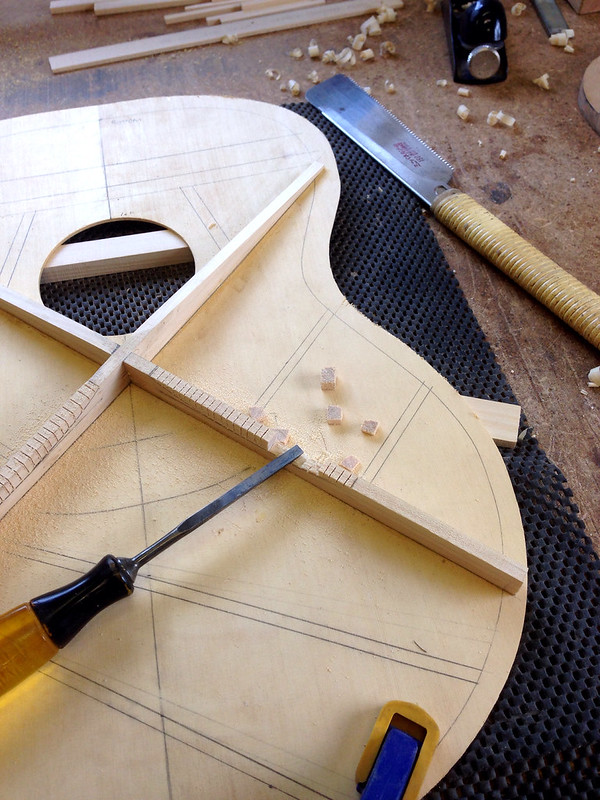 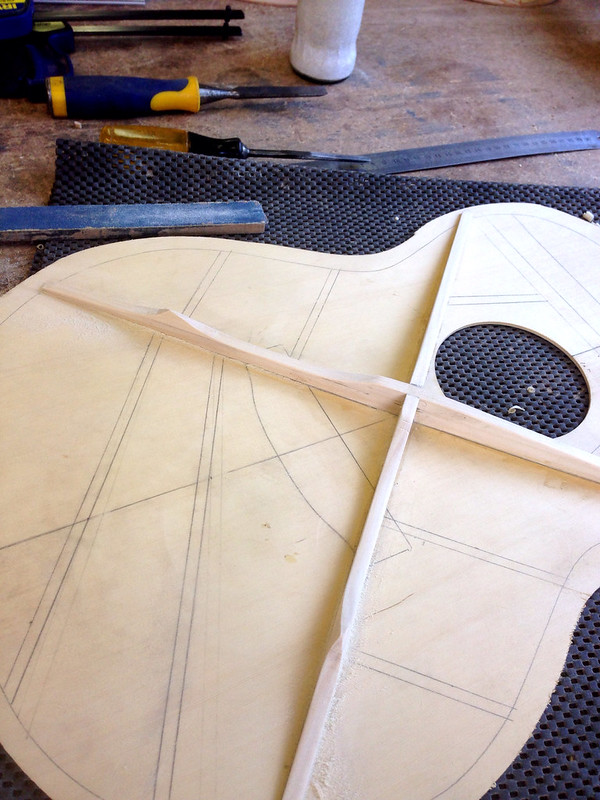 Once again, I decided to err on the side of caution when using the chisel, so I made smaller cuts, increasing the time taken to complete the shaping, but I got there in the end. 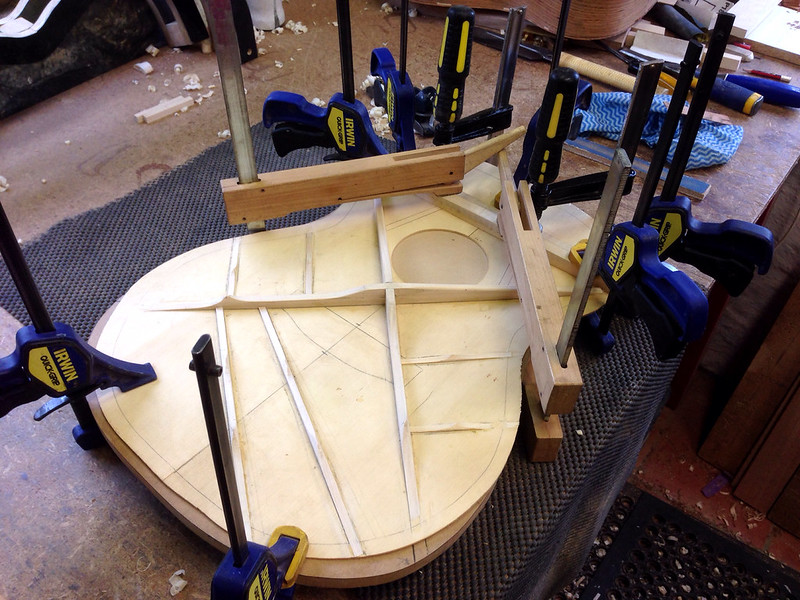 Isn't this the cutest little hand plane - it is only about 40mm long... 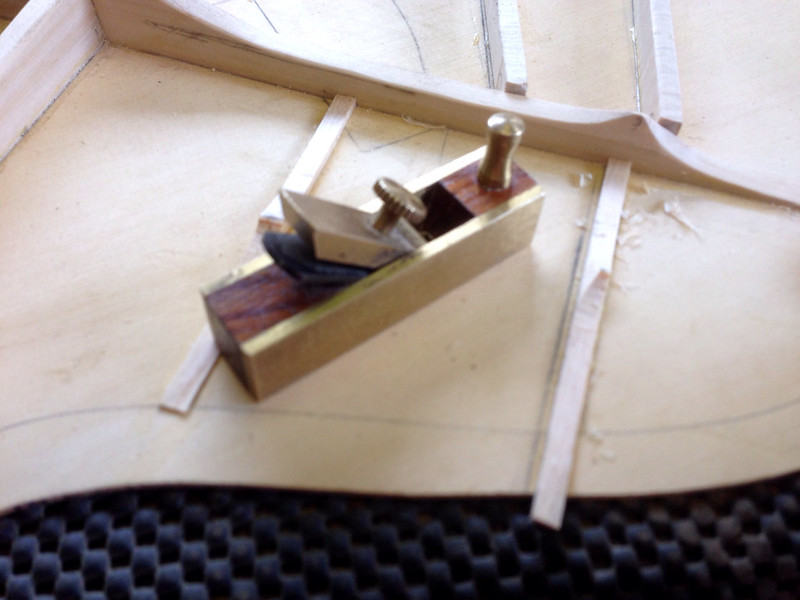 End of the day, I still had two little soundhole braces to install, but that should be a quick job tomorrow. I suspect we will be working on joining the top to the bottom tomorrow, which will give me a whole body and prety much mark the halfway point of the build. Oh, at the end of the day, we found out that the intensive chiselling had cause a couple of cracks at the top of the body, on either side of the upper bout. The body join had also cracked a little bit at the bottom of the guitar, so we applied thin glue to the cracks and will inspect them tomorrow to see how they hold up. 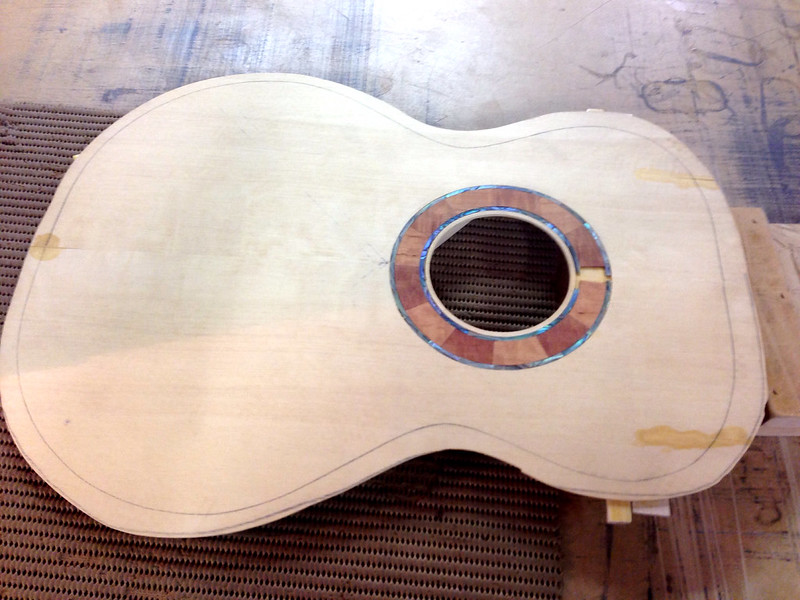
__________________
······························ ·▄▄▀▀▀▄▄··▄▄·················· ▐·······▀▀··▀▌··········ΦΦΦ··· ▌····║··(░)▒▒▒▒▒▒▒▒▒▒▒▒█████·· ▐·······▄▄··▄▌··········ΦΦΦ··· ·▀▀▄▄▄▀▀··▀▀·················· ······························ » My name is Devan » Guitar and Personal Blog. » Guitar and Gear Review Site.
|
|
#35
10-20-2013, 07:37 AM
|
|||
|
|||
|
Devan,
It may have started as an error, but I like the look of the rosette!
|
|
#36
10-20-2013, 09:37 PM
|
|||
|
|||
|
Devan,
I just saw your thread a short while ago and I've been totally captivated from the beginning and all the way through your Day 7 post. Talk about living vicariously through someone else's experience. Thanks for the extremely interesting and thorough posts. Unless I miss my bet, you've got a bunch of guitar geeks (me included) who are all rooting for you and your guitar. All the Best, Ernie
|
|
#37
10-21-2013, 02:32 AM
|
|||
|
|||
|
Day 8
----- Word for today is: PROGRESS ! Well, after the last two days where it seemed I got bogged down on one or two tasks, today felt like the stage 2 rockets had fired! First thing this morning I shaped and glued the bridge plate to the top of the guitar. It was important to get the shape exactly correct to that it butted up solidly against the X bracing. This was trickier than expected, and I ended up throwing out the first plate as the angles were just not accurate enough. 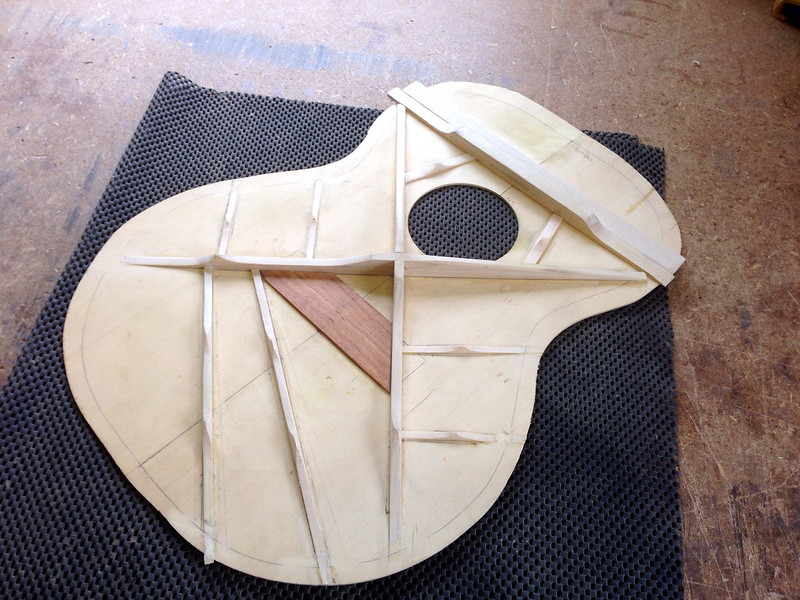 I found another cute little hand plane...  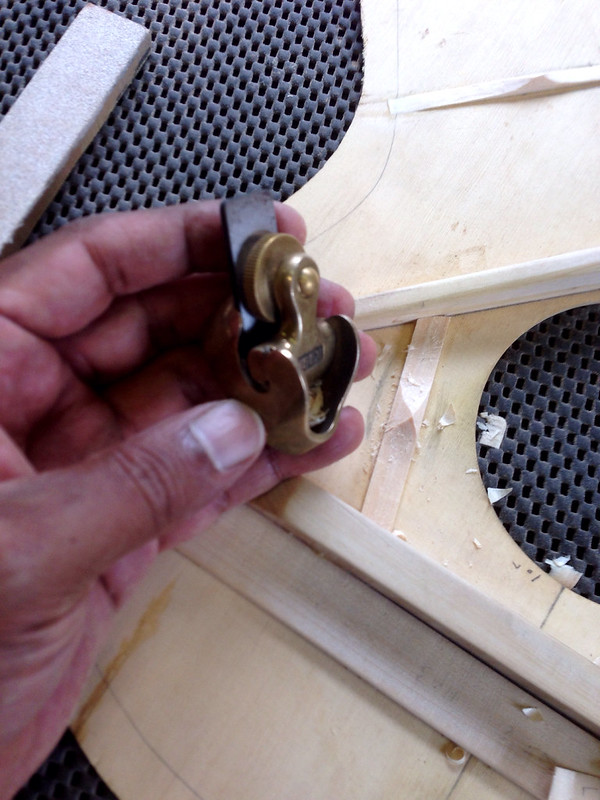 Then, TA DA, it was time to prepare to put the top on the back. I thought that this would have been easier than putting the back plate onto the side frames, but no, I was wrong. I had to spend a LOT of time measuring and test fitting the top to ensure that there were no untoward gaps or bends. As it turned out, my side frames were a little twisted, so I needed a lot of temporary bracing inserted into the body to move the sides out a few millimetres. After the lessons learned in the past few days when I tried keeping all the numbers in my head, I got out my notebook and made copious sketches and measurements as I went along. 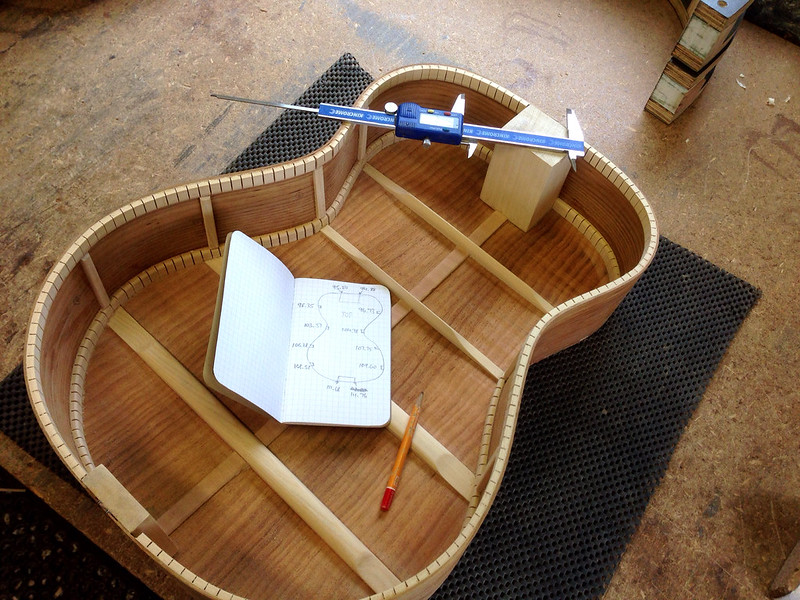 I had to do a final cleanup of the inside of the back shell, especialy in the areas that would be visible through the sound hole. I also took this opportunity to glue in two inserts that I brought across the country with me. The first one was made by my wife, and the butterfly and Koi carp are symbols for her mother and my father, whom we lost in 2009 within months of each other. It is mainly due to the life efforts of these two extraordinary people that my wife and I have the opportunities, the passion and the courage for accomplishing things such as me doing this build. This guitar is a tribute to both of them. The second insert was made by my 9 year old son. He gave it to me proudly the day I left to come to the course, and there is no way that I will NOT put it on. I am thinking that when it is MY turn to leave this mortal coil, I will leave this guitar to him. Which of course means that I will HAVE to build another one for my older son so I can do the same.  I initially thought that I could get the top glued on by lunchtime, but alas, several corrective measures had to be taken, such as sanding down the top spars that I carved too thick, and doing some reshaping of the sides and the neck block, but finally, at around 3:30pm we were ready to glue the top on. Note the 'locking blocks' glued at either end to help align and lock the top lid position. Note also the temporary braces inside the back shell. These were sawed half way through so that we can snap them and remove them later through the sound hole. 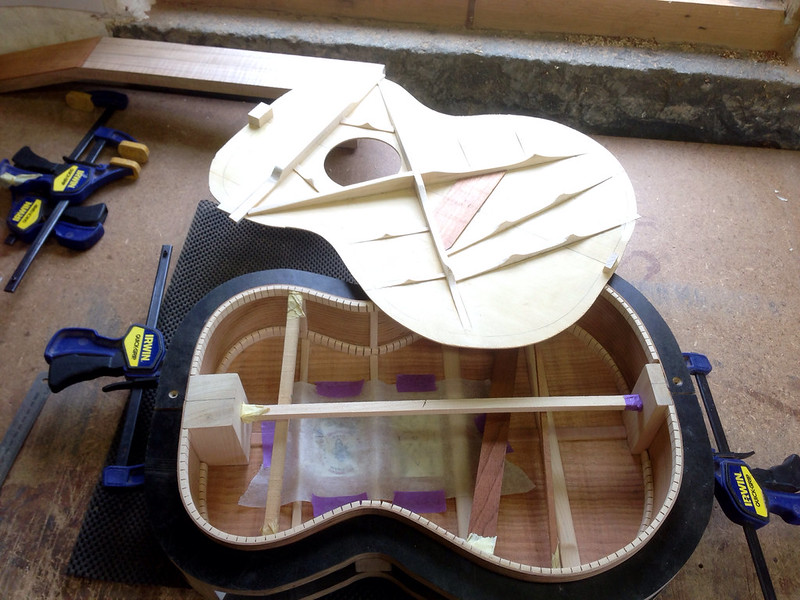 Ta Da !!! 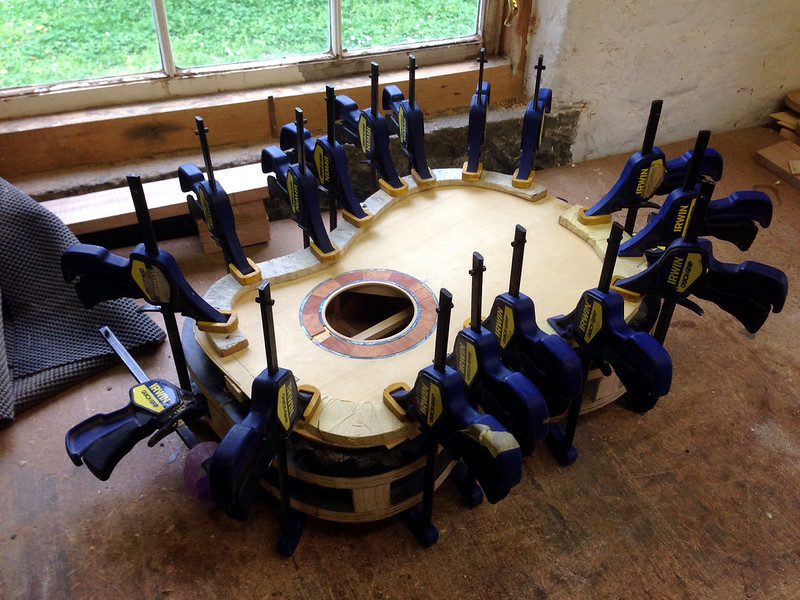
__________________
······························ ·▄▄▀▀▀▄▄··▄▄·················· ▐·······▀▀··▀▌··········ΦΦΦ··· ▌····║··(░)▒▒▒▒▒▒▒▒▒▒▒▒█████·· ▐·······▄▄··▄▌··········ΦΦΦ··· ·▀▀▄▄▄▀▀··▀▀·················· ······························ » My name is Devan » Guitar and Personal Blog. » Guitar and Gear Review Site.
|
|
#38
10-21-2013, 02:33 AM
|
|||
|
|||
|
(Day 8 cont'd)
This was once again another mental shift for me. It felt like the halfway point was hit. No rest for the wicked though - next step was choosing the binding. I elected to go for the darker Australian Gidgee wood. We used the band saw to slice off some strips which I then belt sanded down to 2mm thick. We then wet the binding strips and used the side bending rig to bend them to shape.  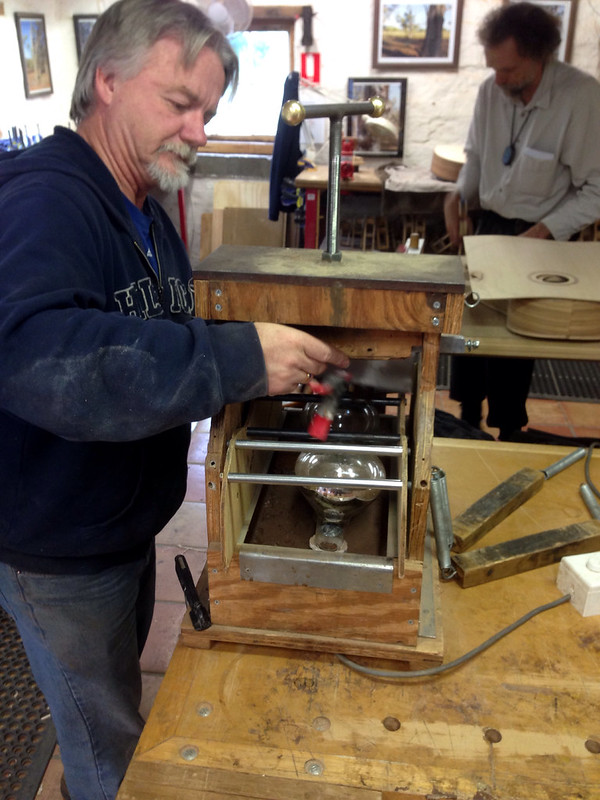 Pic above is master luthier Chris setting up the bending rig. Another student, John, is in the background working on his two baritone guitars. After the bending was done, we left the binding strips in the rig and went over to the neck blank which has been sitting idle on my desk for a few days now. We marked out the channel for the truss rod and routed that. 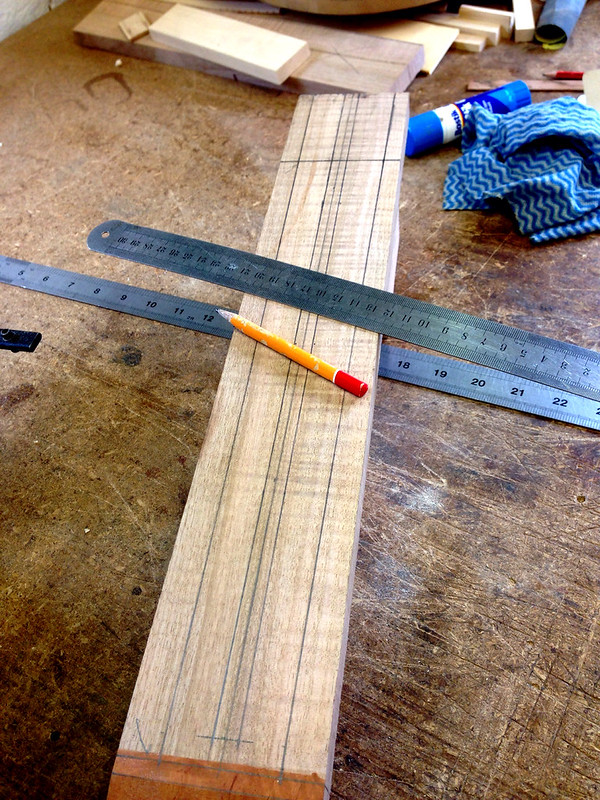 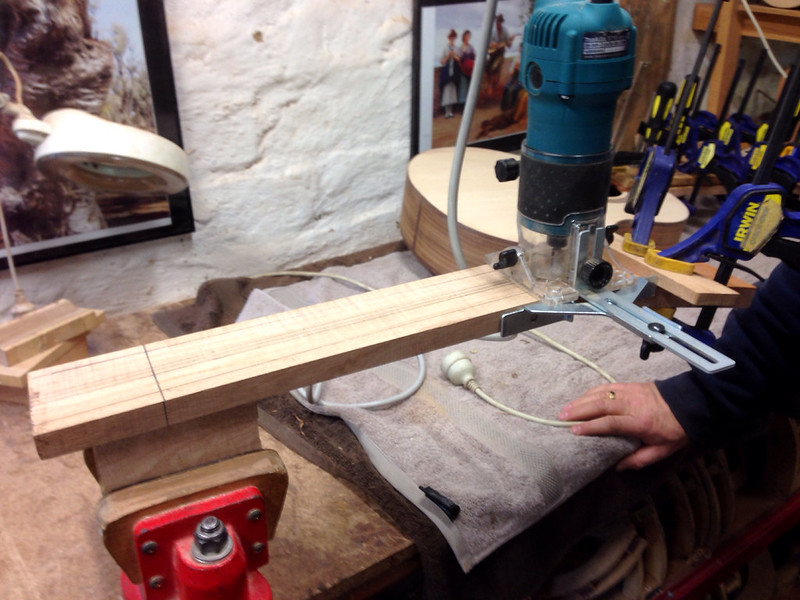 Then we trimmed the neck down to size a litle more, and marked and drilled the tuning peg holes before thinning down the headstock on the band saw. I am a litle miffed that one of the tuning peg holes is 1mm off line. I marked and checked the drill points, so I think I just aligned that hole wrongly. It was the last hole I drilled too! 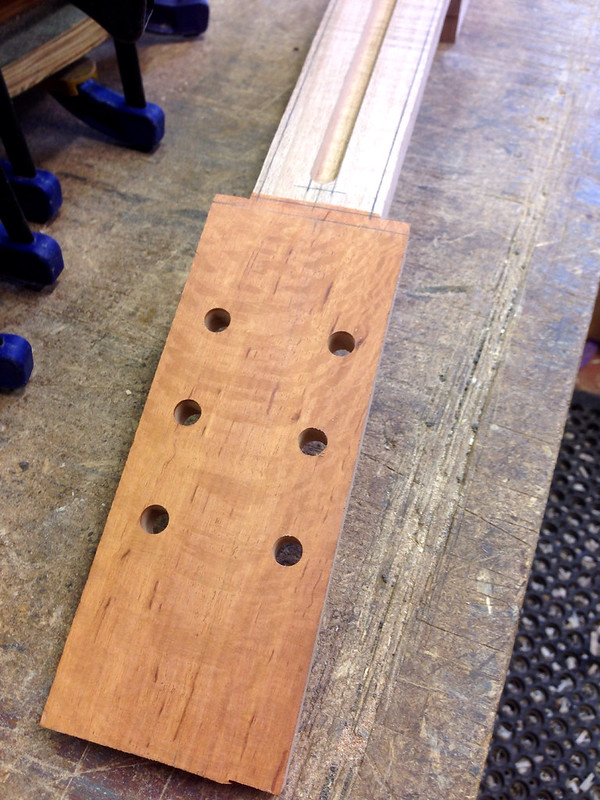 Overall, a very satisfying day. I went about an hour overtime in the workshop today, but didn't realise the time had flown as I was really 'in the flow' today. Can't wait to get stuck into more neck work tomorrow...
__________________
······························ ·▄▄▀▀▀▄▄··▄▄·················· ▐·······▀▀··▀▌··········ΦΦΦ··· ▌····║··(░)▒▒▒▒▒▒▒▒▒▒▒▒█████·· ▐·······▄▄··▄▌··········ΦΦΦ··· ·▀▀▄▄▄▀▀··▀▀·················· ······························ » My name is Devan » Guitar and Personal Blog. » Guitar and Gear Review Site.
|
|
#39
10-21-2013, 04:05 AM
|
|||
|
|||
|
Been watching this thread for awhile.
Great progress Devan. It's looking good. How long in Melbourne? Will you be there long enough to catch the guitar/luthiers festival this weekend (or perhaps you'll still be working on your build)?
__________________
Mick  Martin D-28 Maton EA808 Australian Maton EBG808 Performer Cole Clark FL2-12 Suzuki Kiso J200
|
|
#40
10-22-2013, 03:43 AM
|
|||
|
|||
|
Day 9
----- Word for today is: SPLITTING (wood) Well, I bounded excitedly into the workshop this morning and removed the body clamps from yesterday. Everything looked great. I then got the router and trimmed off the excess top overlap. 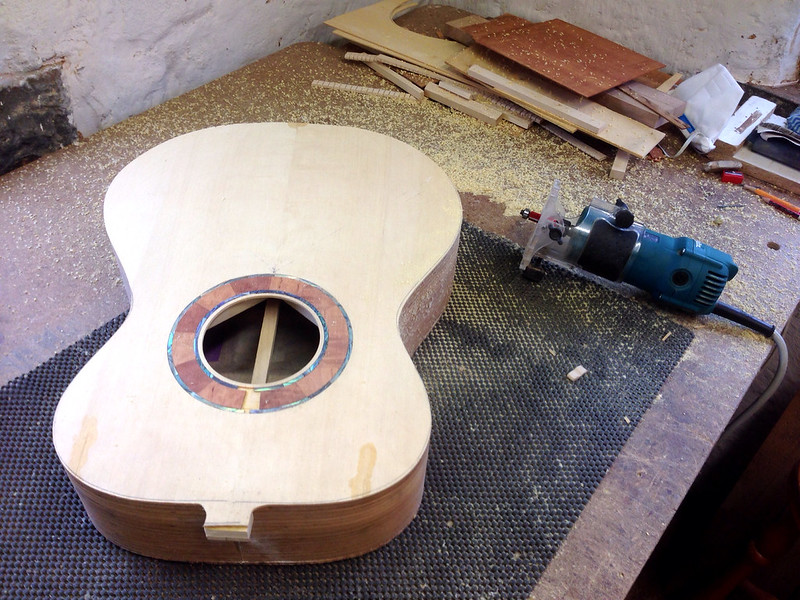 Nearly there - once I was sure that the top was securely put on, I changed the router bit and cut the groove on the top and bottom for the binding. 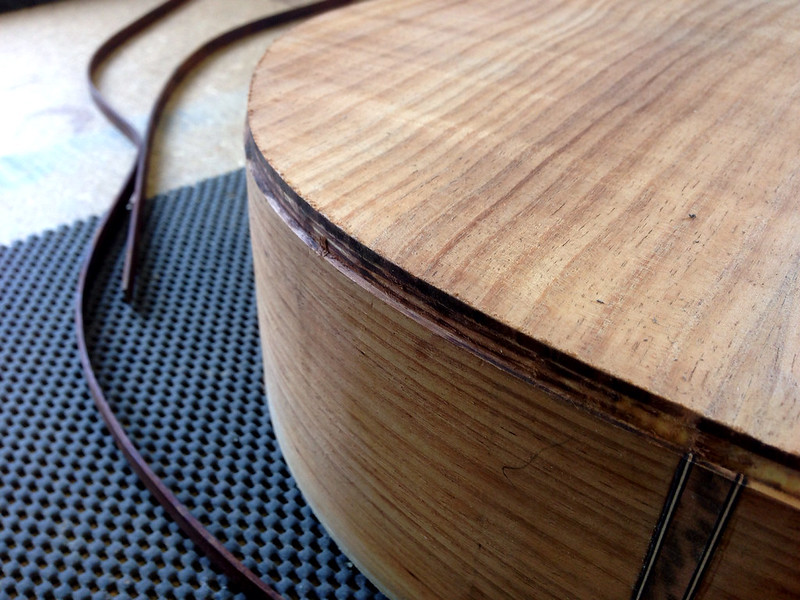 After measuring out the correct lengths on the four pieces, I glued them on straight away. This was where the complacency set in. Because the binding gluing is quite a simple, straightforward task, I let me concentration wander a little, and as a result, I didn't notice that the masking tape had let go a little bit on some sections and the binding was not 100% flush with the body. Also, on a couple of sections, I didn't get down and check that the bottom of the binding was flush with the bottom of the groove I cut, therefore the binding height around the top especially was not level, and there were a couple of gaps on the lower bout. 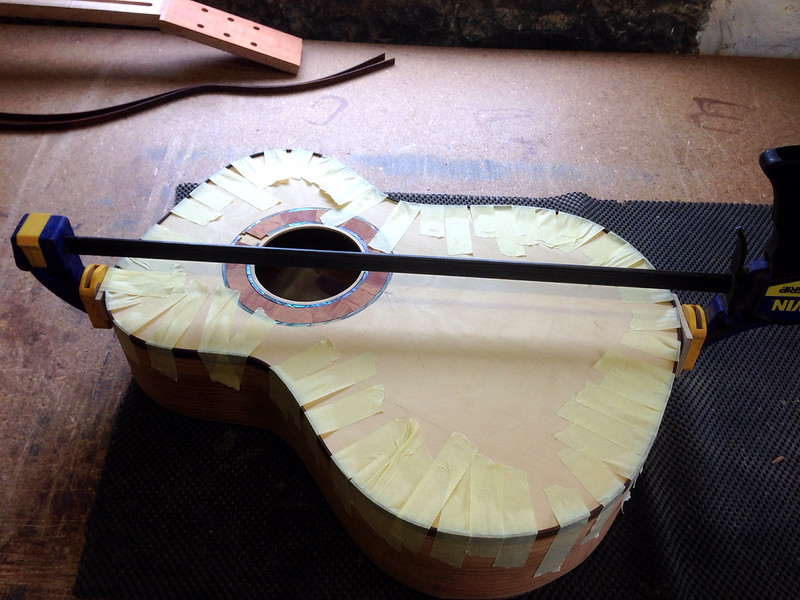 Motto is to check the progress of your work while you go, and to also do a final check once each section is glued. Oh, and you see that large clamp across the body there? That is because a section of the top binding on the upper bout cracked when bending it around that tight curve. Drat! The piece was an angular crack that threatened to split the entire binding at that point. We actually attempted to fix it 4 times today, but it refused to hold, which was really irritating. While the binding was drying, we got to choose the fretboard and bridge material. I wanted to stick with the darker colouring, so had a look at a few more Gidgee boards.  I settled on the darker one with the black streaks on it on the left. Another student who was more advanced had finished a guitar with this same material and it looked great. It was straight to cutting the fret slots on a special jig. All was going well until I was cutting the 4th fret and a large triangular piece broke off. There was a fault in the wood, and angular crack on the side which resulted in weakened wood at that point. I showed Chris and he seemed to think that when we trimmed the board down, it might bypass that missing chunk. Fingers crossed. 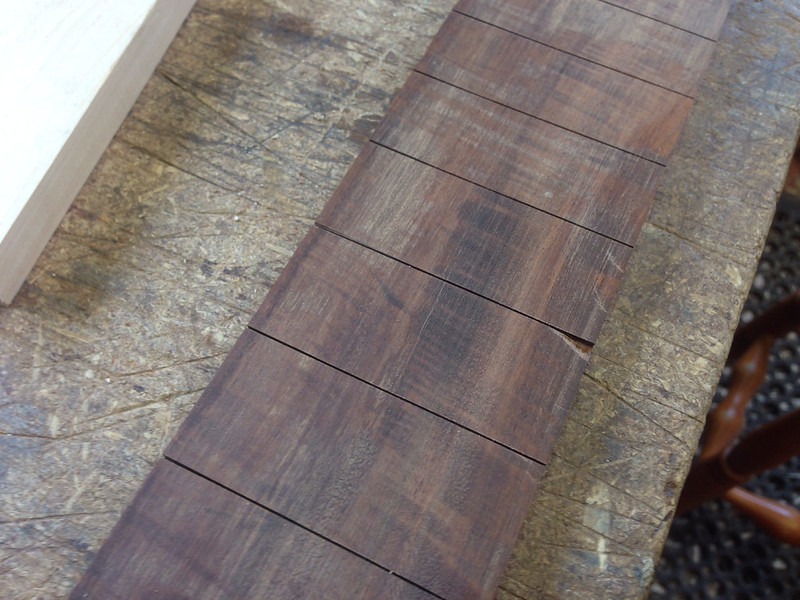 Well, I bandsawed out the fretboard taper, and luckily it DID bypass the weakened section of the fretboard, and we couldn't see the same angular fault on the side of the 4th and 5th frets any more. A sigh of relief, as cutting the fret slots on this extremely hard wood was a painful process. I then smoothed the edges of the fretboard on the marble flat sanding block. 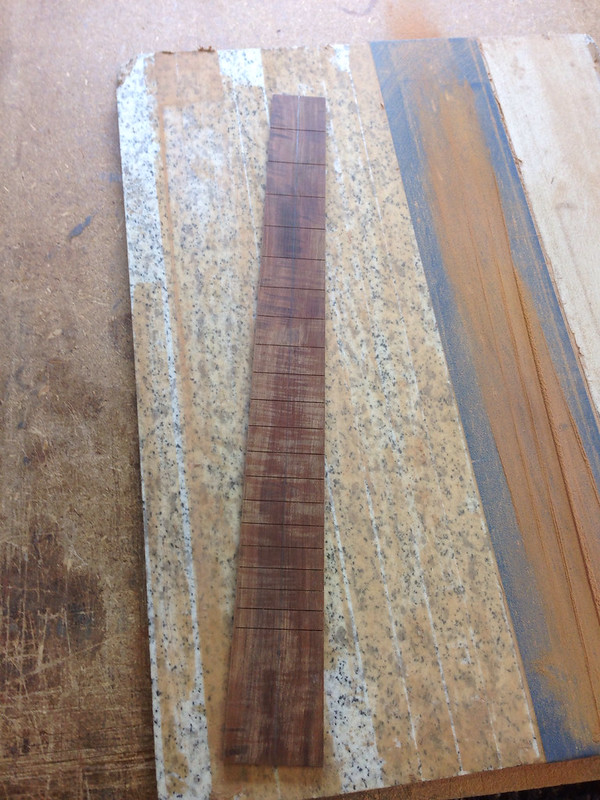 I spent the rest of the afternoon sanding down the binding to be flush with the body. Very back breaking work and resulted in my breathing in a lot of fine Gidgee wood dust! Also, I couldn't do the sections where the clamp was. Every time I removed the clamp, the split popped open again. In frustration, we reglued and reclamped it and decided to leave the body overnight as it was the end of the day. Fingers crossed (again) for tomorrow. 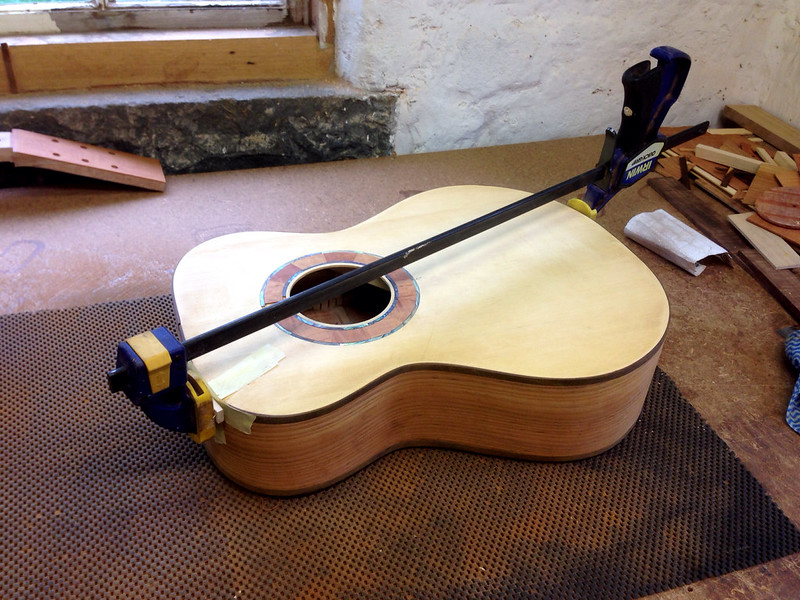 With only about 3 full working days left before I have to leave, I am starting to panic that we will not be able to complete the build in time, or complete it fully. I am starting to feel the time pressure a little. We got a litle treat at the end of the day. This is Shannon, one of the other students who started the course earlier and is who just finished his guitar today. It is a Jumbo sized model, but essentially the same woods as my guitar. He is a sound engineer for a couple of vey high profile Aussie artists, and is a killer guitar player in his own right.  It was the first time stringing up his guitar, and it was really interesting to hear it 'open up' within the first 15 minutes that he played it. The high end was initially a little dead and the bottom overly punchy, but as the woods settled in with the playing vibrations, the high end became a lot clearer, and the low end a lot warmer.
__________________
······························ ·▄▄▀▀▀▄▄··▄▄·················· ▐·······▀▀··▀▌··········ΦΦΦ··· ▌····║··(░)▒▒▒▒▒▒▒▒▒▒▒▒█████·· ▐·······▄▄··▄▌··········ΦΦΦ··· ·▀▀▄▄▄▀▀··▀▀·················· ······························ » My name is Devan » Guitar and Personal Blog. » Guitar and Gear Review Site.
|
|
#41
10-23-2013, 02:38 AM
|
|||
|
|||
|
Day 10
------ Word for today is: SWEAT ! Thank you for the positive comments and fantastic support so far everyone. I promise I will respond to questions and comment when I get back and have full time internet connectivity again. Well, today went better than expected, because, well - I cheated (a little)... I'll explain later, but first task of the day was to sand a 12" radius on the fretboard. Normally a bit of a task in itself, but in this case it was a total sweat fest. I didn't realise that Gidgee wood is one of the hardest woods around. To give you some perspective - If we were talking a hardness scale of 1 to 20, the soundboard woods would be 2 to 4, then back and sides 5 to 8. Rosewood fingerboards would be 9 or 10, Ebony fingerboards would be 12 or 13. Gidgee would be 19 !! Honestly, it was like sanding steel. Lots of arm work. Lots of sweat. Lots of muttered cursing. 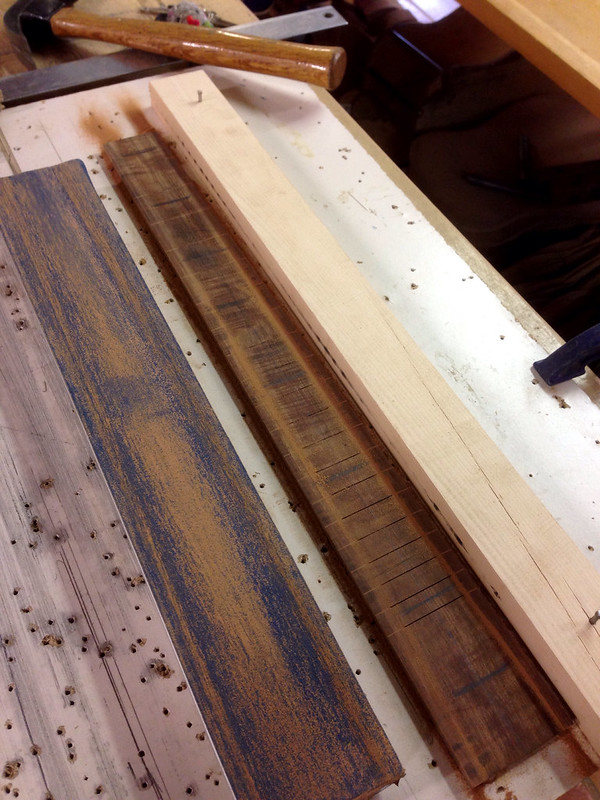 It was taking so long that we had to pause this task to move onto the BIG one for the day - routing the neck and body for the dovetail joint. This is where the cheating comes in, because master luthier Chris did all the work here. Given the time pressure on me to get the build finished, this task is normally done by the student - but if not done absolutely perfectly (and I am talking about just 1 degree difference or 0.25mm cut difference), it can take several hours to correct and realign the neck/body join. Possibly even all day. Seeing as we haven't got all day, Chris did all the cutting process - which was a godsend because lo and behold, when we checked the alignment, it was pretty much perfect 'out of the box'. Hooray! That means time that I can spend on other important tasks. 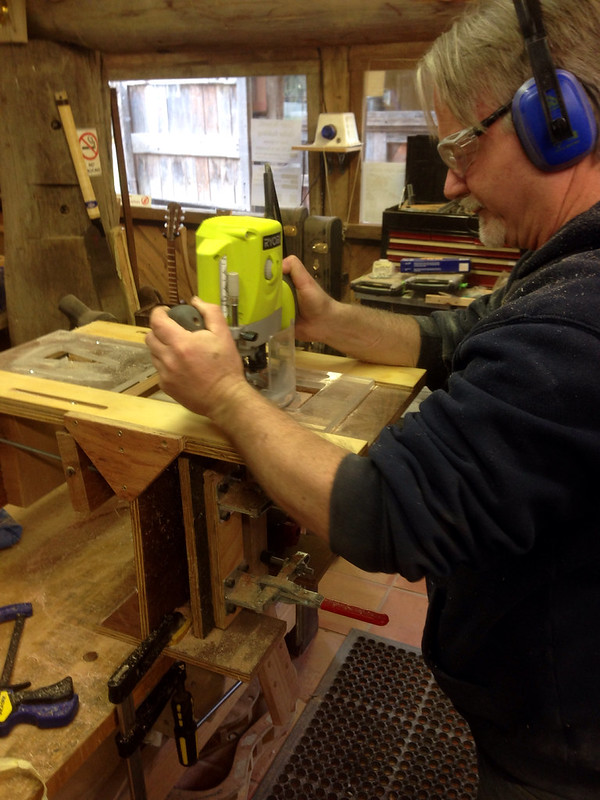 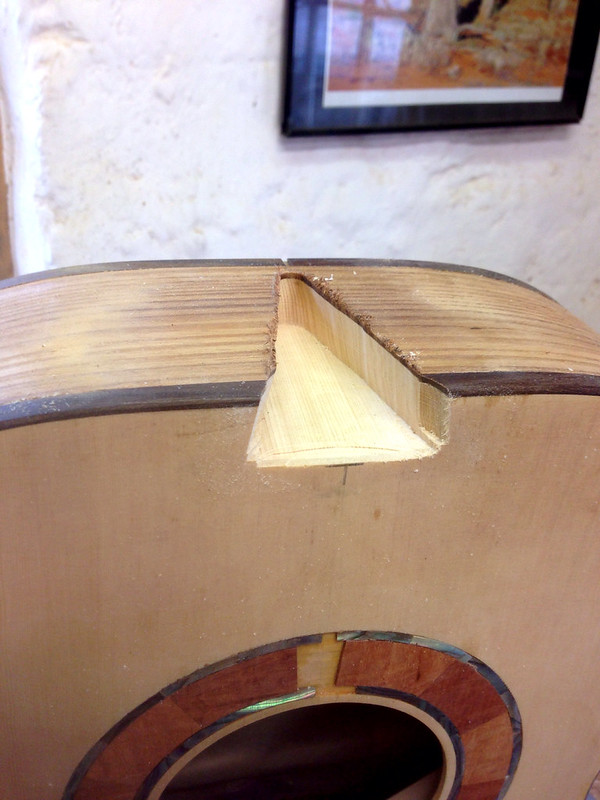 First was shaping the heel of the guitar, which I did on the Linisher (belt sander). At one stage my hand slipped and I took a chunk of skin off my knuckle. But even worse, I took the corner off the top of the neck where it joins the body. This could be critical if we have to realign the fingerboard tomorrow.  Then, it was onto further refining the heel shape using files and sanding paper. 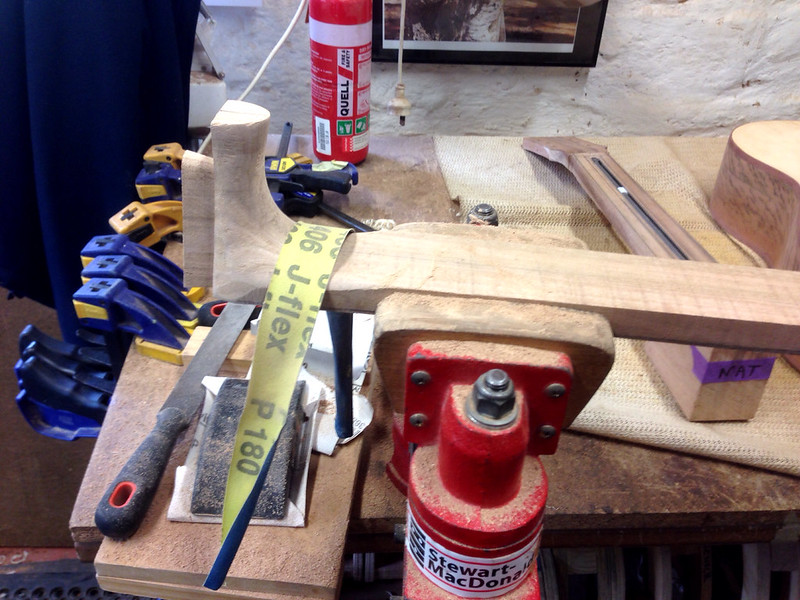 We then cut a basic curve on the back of the neck using a spokeshave. Tomorrow we will be doing more shaving of the neck to get the final profile, so today was a good practice session with this nifty tool. Look at all that lovely flame pattern coming out!  Then, Chris told us we had about an hour of time to spare as he wanted to leave the gluing of the neck till task thing of the day so we could leave it to dry overnight. I took this oportunity to cut the top of the headstock to a shape I liked. I also decided to try and glue a bit of lacewood I had leftover onto the headstock as a laminate to see how it would look. I am going to sand it a bit thinner and take away most of that 'hard' edge and see how it turns out. 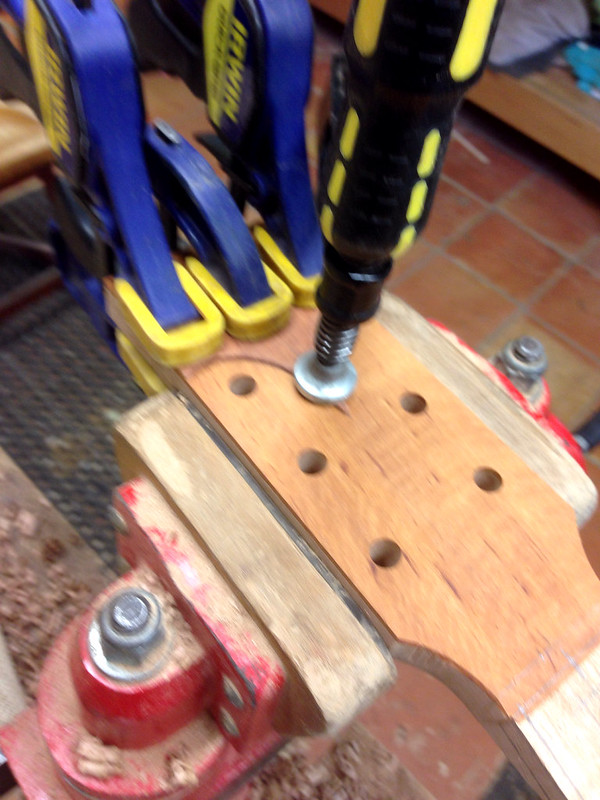 I also had to recut the fret slots, as the sanding process had taken off a lot of the wood on the sides, and it turns out that I hadn't cut the slots deep enough. 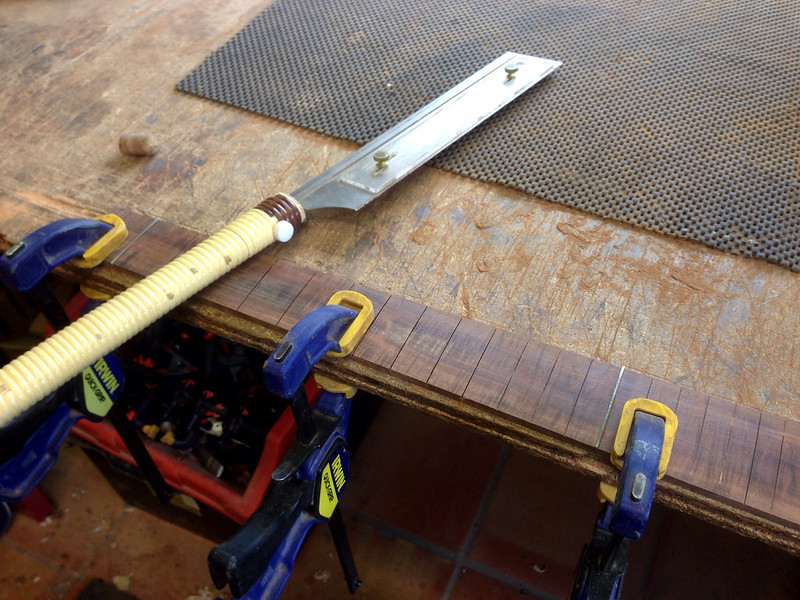 Then it was the moment of truth - the neck/body gluing. It was a quick process, but when I stepped back to look at the (nearly) completed guitar, I nearly had tears appear as I finally saw the total package as it would look when completed. When we checked the left/right alignment, it looked perfect. We won't check the forward/backward alignment until tomorrow when the joint is dry. 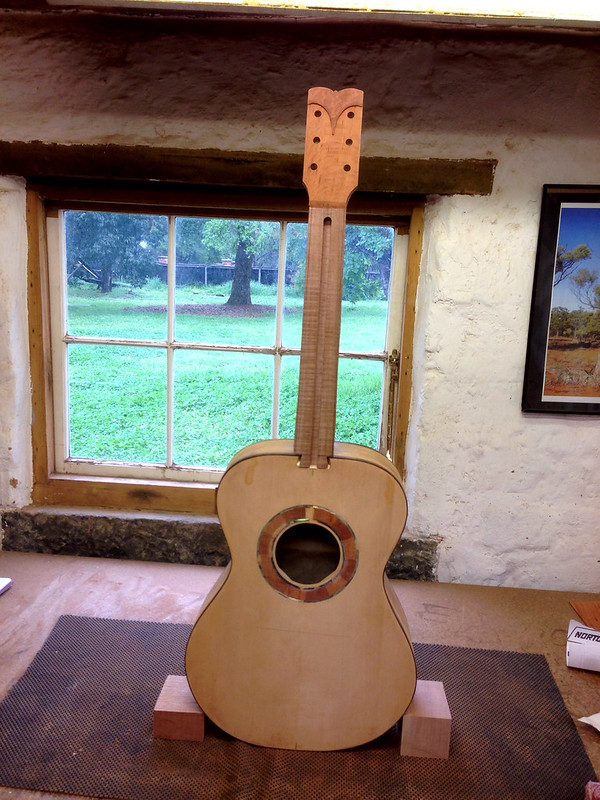 I walked home tonight a happy man, with better perspective over my ability to complete the build in time.
__________________
······························ ·▄▄▀▀▀▄▄··▄▄·················· ▐·······▀▀··▀▌··········ΦΦΦ··· ▌····║··(░)▒▒▒▒▒▒▒▒▒▒▒▒█████·· ▐·······▄▄··▄▌··········ΦΦΦ··· ·▀▀▄▄▄▀▀··▀▀·················· ······························ » My name is Devan » Guitar and Personal Blog. » Guitar and Gear Review Site.
|
|
#43
10-24-2013, 05:04 AM
|
|||
|
|||
|
Day 11
------ Word for today is: ODD JOBS Well, it's the home stretch folks. A strange sort of day. We had a lot to do, but did it at a leisurely pace. First thing to do today was to get the fretoard onto the guitar. But before we did that, we had to get the dot markers on. I opted for only the side dot markers and nothing on the face of the fretboard because I didn't want anything to cover the great flame pattern on the board.  Then we had to do some more routing on the neck through to the body and fitted the truss rod in the cavity. 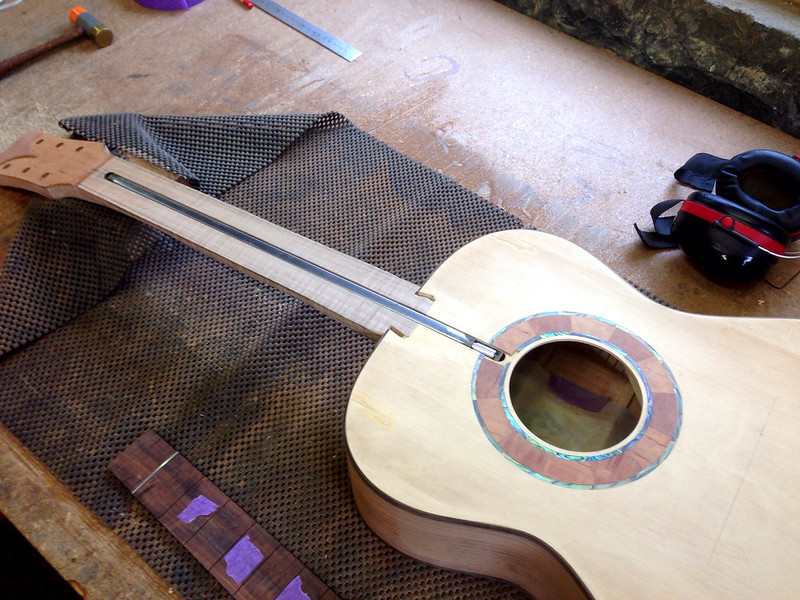 Only then was it time to glue the fretboard onto the neck. Oh, I had to trim and shape the bottom of the fingerboard before that too, but it is hard to see in the pic. 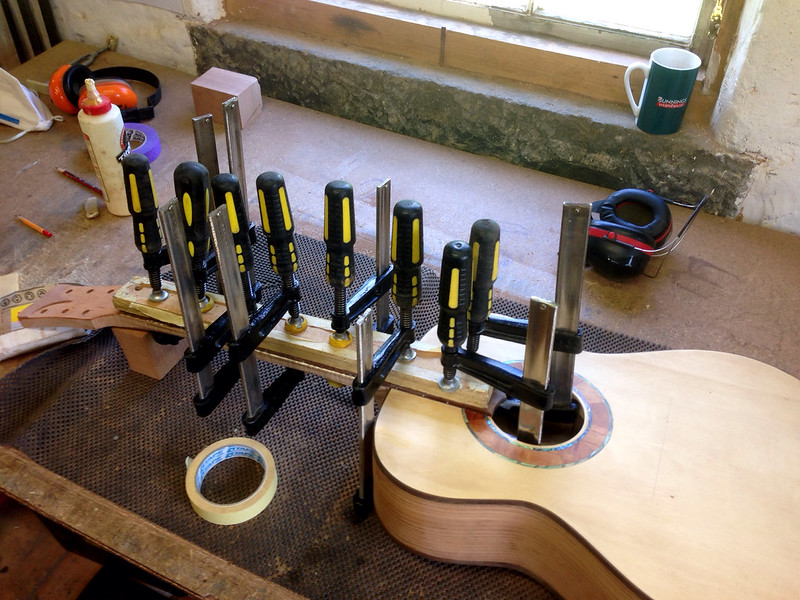 We then left the entire guitar to dry properly. I took this chance to get some head space and to walk around the grounds of this beautiful area that I am staying in. We had a leisurely lunch, then it was back to nclamp the guitars and begin shaving the neck. This is the picture I had in my mind when I decided to build a guitar - the picture of the guitar held between my knees as I ran the spokeshave along the neck to remove all the bits that didn't look like a guitar... It is the ultime romantic image of a guitar builder at work... 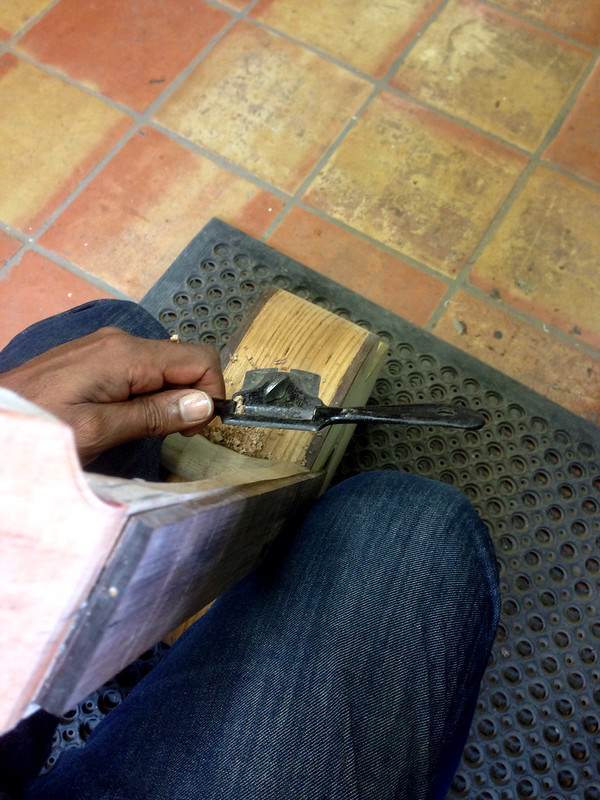 It took a while, but eventually I got a neck profile that I liked. (You can see the side dot markers on this pic too). 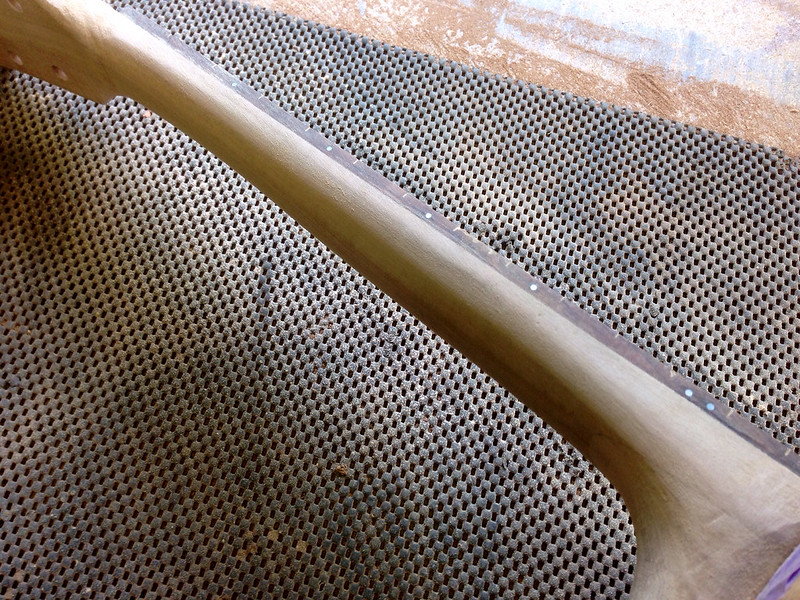 Then it was back to the body and filling in gaps in the binding etc. Chris showed me this cabinet makers wax which was magic stuff to use to fill in the gaps in the dark gidgee binding. 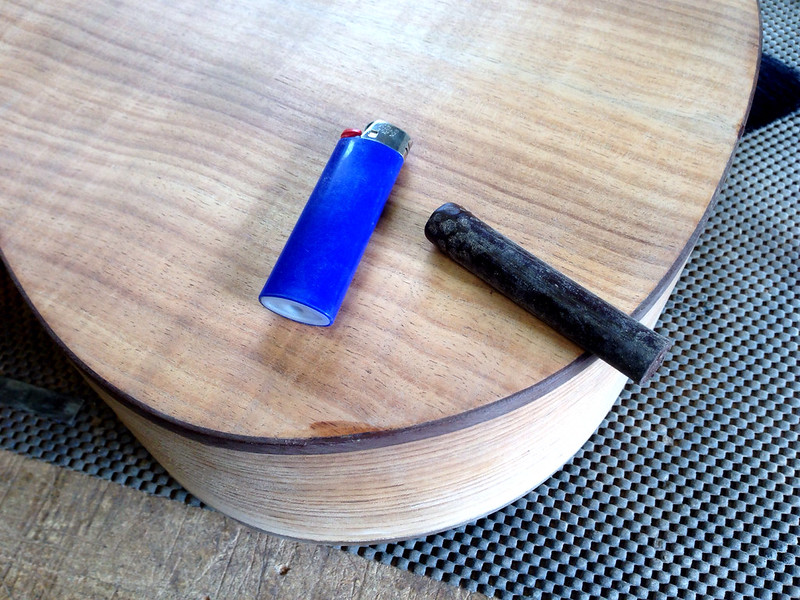 Then Chris set up the routing jig so we could cut the slot in the bridge, which was just a block of wood at this stage. 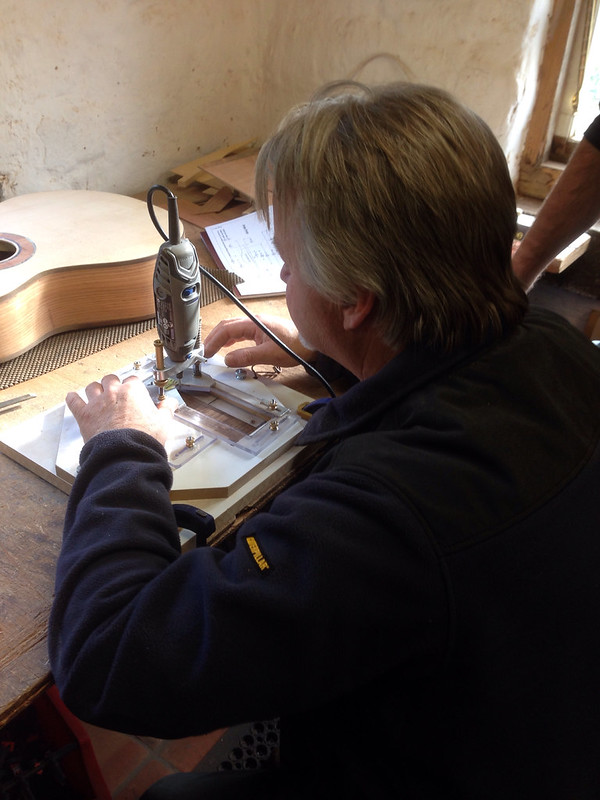 Once the slot was cut, I drilled the six holes in the bridge before running through the band saw then the Linisher to shape it into a 'Baterang' type shape. Well, it ISN'T a Baterang, but looks close. I just wanted the rounded point shape so that it matched the headstock and bottom of the fretboard. 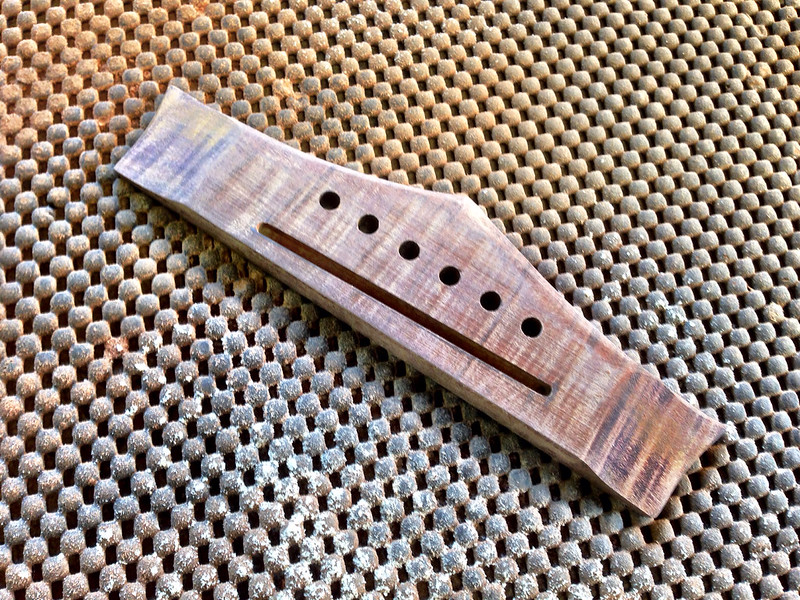 Last task of the day was to glue the bridge on. This means that nearly everything that needs to be glued to the guitar body is now glued on !! 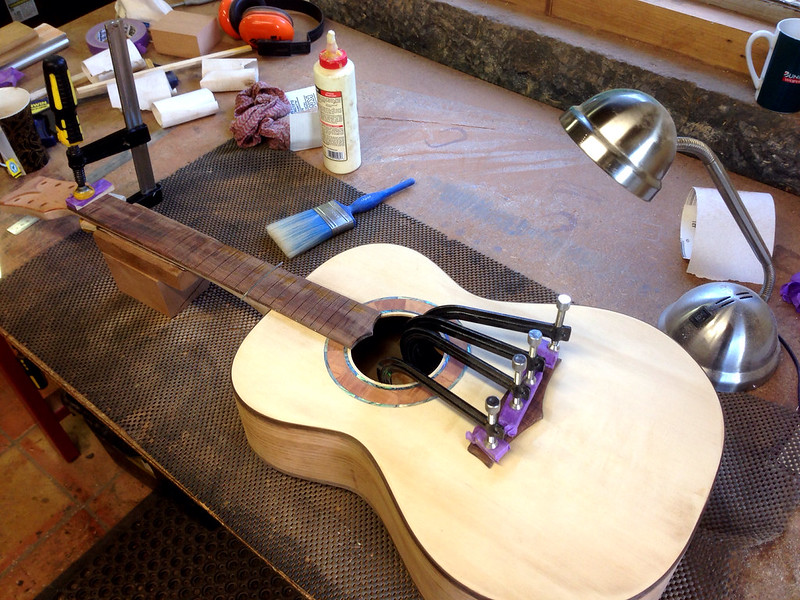 (Oh, there was a slight gap in the fretboard join at the first fret, which is why there is another clamp on the neck overnight). Tomorrow begineth the final preparation for finishing, including the fret work...
__________________
······························ ·▄▄▀▀▀▄▄··▄▄·················· ▐·······▀▀··▀▌··········ΦΦΦ··· ▌····║··(░)▒▒▒▒▒▒▒▒▒▒▒▒█████·· ▐·······▄▄··▄▌··········ΦΦΦ··· ·▀▀▄▄▄▀▀··▀▀·················· ······························ » My name is Devan » Guitar and Personal Blog. » Guitar and Gear Review Site.
|
|
#44
10-24-2013, 06:22 AM
|
|||
|
|||
|
This is looking amazing...can only imagine how it felt gluing all the parts together to actually have a guitar in your hands. Very, very cool
|
|
#45
10-24-2013, 07:05 AM
|
|||
|
|||
|
you have provided a very intent and comprehensive commentary, one of the best I have followed. Really appreciated the personal insights and problems and their resolutions. A fantastic build. Its like waiting for my favorite author to publish his next book, looking forward to see the end results. Thank you
tom
|


