
|
|
#151
 02-28-2014, 10:48 AM
|
|||
|
|||
|
Quote:
Mr. Gore's latest books suggest reducing the radius on the transverse brace, to less than the curvature of the dish. This reduces the amount, he suggests, that the top needs to be thinned to be flat in the area of the fingerboard extension, if using a radiused transverse brace. To turn the question around, who advised you to radius the transverse brace? (Most likely, it became popular when people started using radiused dishes/forms.) 
|
|
#152
02-28-2014, 03:44 PM
|
|||
|
|||
|
I was told by Tim McKnight. He told me that's how Ervin Somogyi does it too. BTW, I was also told not to taper the ends of the UTB and instead have the ends butt up against the interior of the sides to reinforce the upper bout.
__________________
(2006) Larrivee OM-03R, (2009) Martin D-16GT, (1998) Fender Am Std Ash Stratocaster, (2013) McKnight McUke, (1989) Kramer Striker ST600, a couple of DIY builds (2013, 2023)
|
|
#153
02-28-2014, 04:07 PM
|
|||
|
|||
|
Ervin Somogyi does it that way because he builds the tops on a solera, which has a domed lower bout. But if you look at the picture of the soloera in his book, his solera is domed at the area of the upper transverse brace.
Really, I think it's much ado about nothing, unless you must have a zero neck set angle. You're talking about a strip of flat spot 2-1/4" or so in width in the upper bout; if you sand it [the area below the fretboard] flat, and used a 25' radius dish you are removing .002"(!) on what is largely considered and inactive part of the soundboard (unless you are in the cantilevered neck boat, in which case that area wouldn't be sanded flat anyway.) Plus, if you build in a neck block extension like Somogyi this difference becomes even more moot. I believe Taylor uses a 50' or 60' radius for their tops. I build my tops on a dead flat workboard. I am working on a "hybrid" top of sorts, but won't comment more on it untill I have a working prototype...
|
|
#154
02-28-2014, 08:13 PM
|
|||
|
|||
|
Goodness, all kinds of thoughts on this subject.
Quote:
Quote:
__________________
-- Nick
|
|
#155
02-28-2014, 09:13 PM
|
|||
|
|||
|
Quote:
Quote:
In my observations, the back plays just as much a role; as the "dome" of the back flattens, the neck pulls up. Spanish guitars have a "foot" at the bottom of the neck block which supports the neck. Guys like Traugott have a longitudal brace tying the back braces together in an attempt to retain the "dome" shape. I found laminating my back reinforcement strip, which is cross-grained, with a strip of the same back wood, in the same direction as the back wood, helps retain the dome nicely. I also moved the upper bout brace in the back more toward the neck block in order to reinforce the dome shape there.
|
|
#156
05-27-2015, 10:17 PM
|
|||
|
|||
|
Life and some serious health problems conspired against me. But I am determined to finish at least 1 guitar! lol
So. Onward. I still have all the stuff, and the components I already built. So I'm just picking up where I left off. I've been working for the last couple weeks, getting ready to brace the top. Thicknessing the x braces.  Cutting the lap joint. This wasn't too hard. 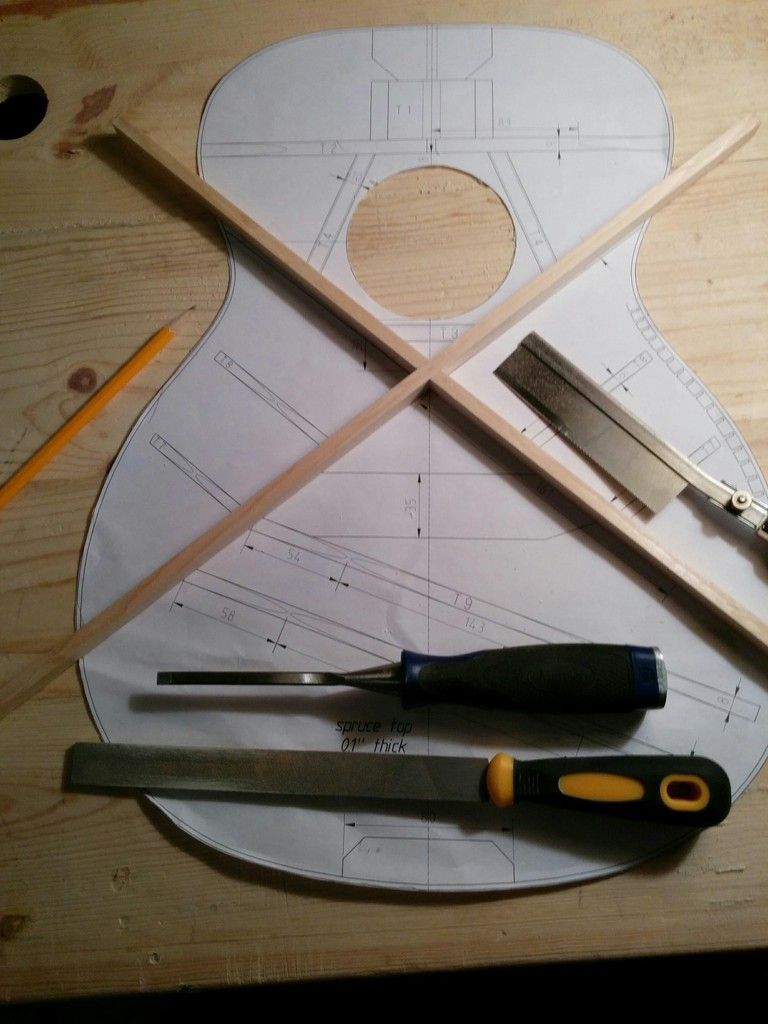 Thicknessing the bridge plate.  Gluing the bridge plate. 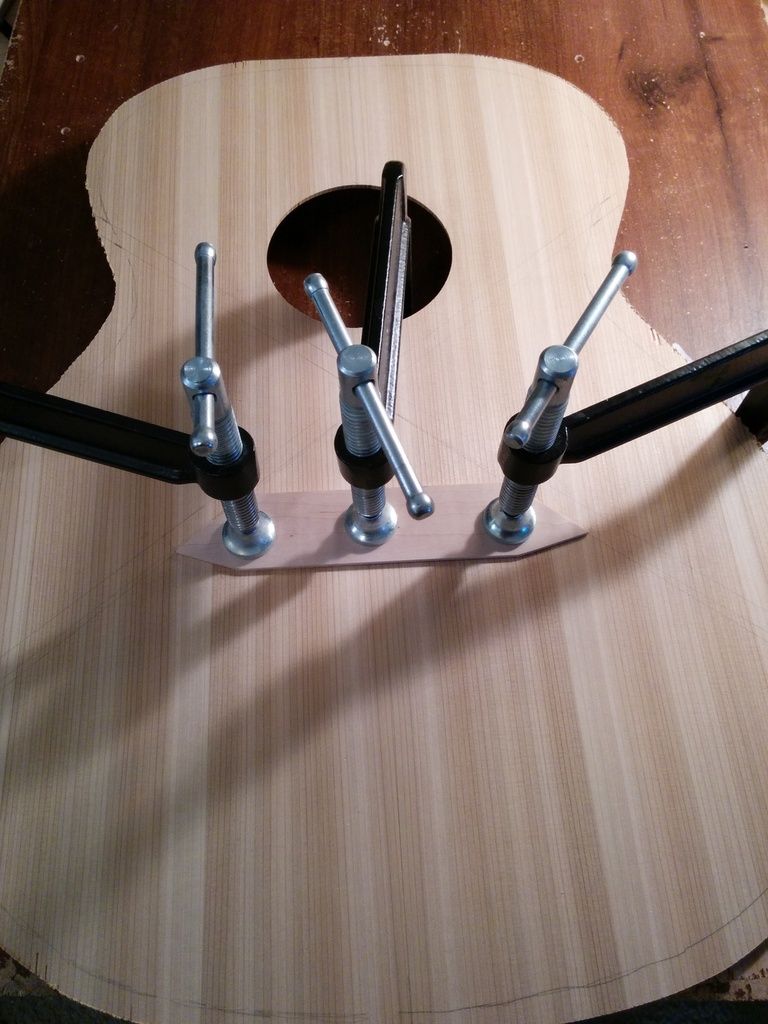 I used my jointing plane to cut the radius into the braces. I used cumpiano's wooden dowel method to draw the initial radiused line into a piece of cardboard. Then I used the cardboard to draw the line onto the thicknessed brace. Then I used the plane below to plane down to the line. It's a bit tricky, but I think it worked fine. I'd be interested in hearing other ways of doing this, as this seems a bit hazardous to my fingers. Wouldn't be that hard to cut a finger tip off doing it this way. 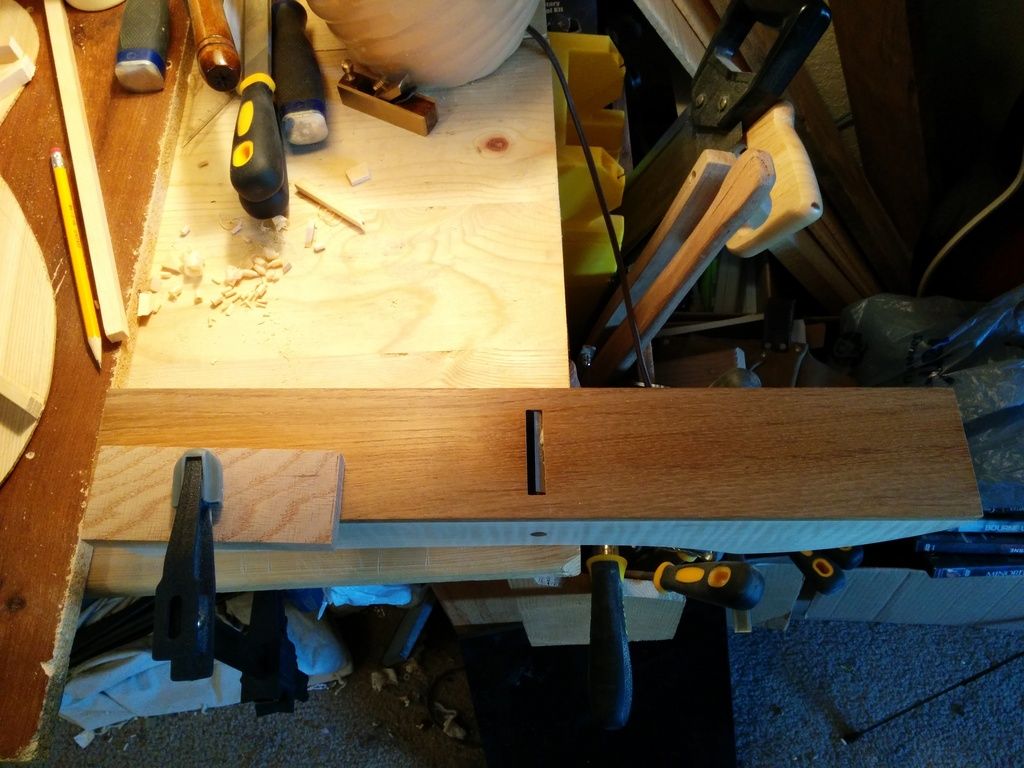 Gluing the first x brace. 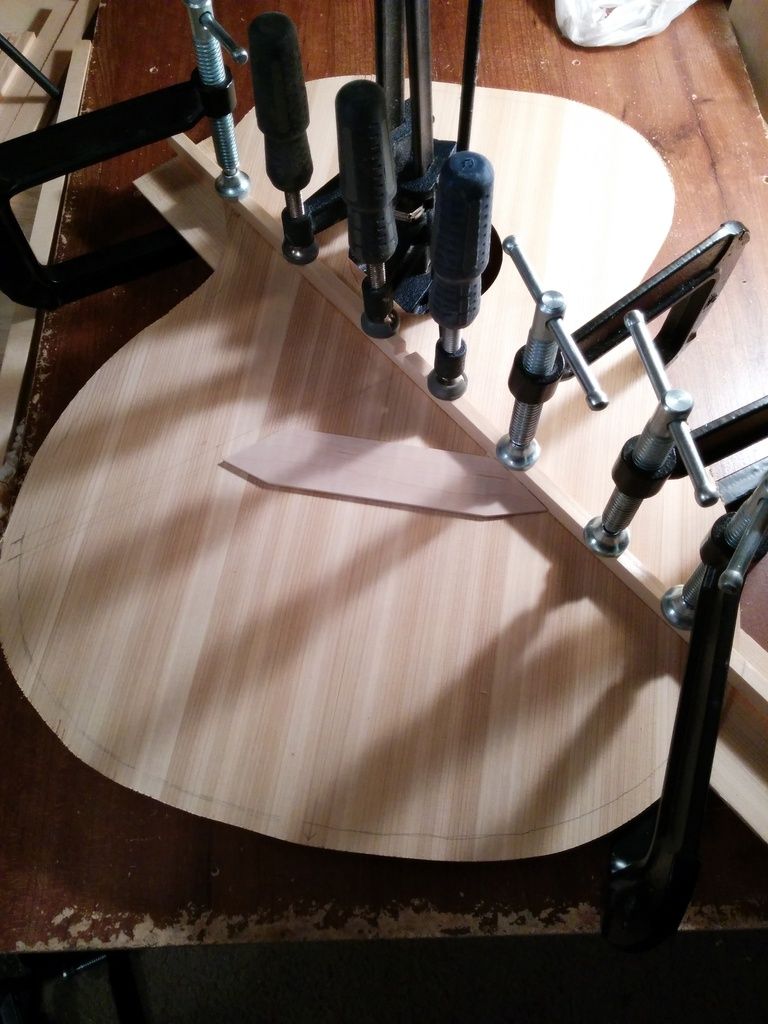 Gluing the other x brace. 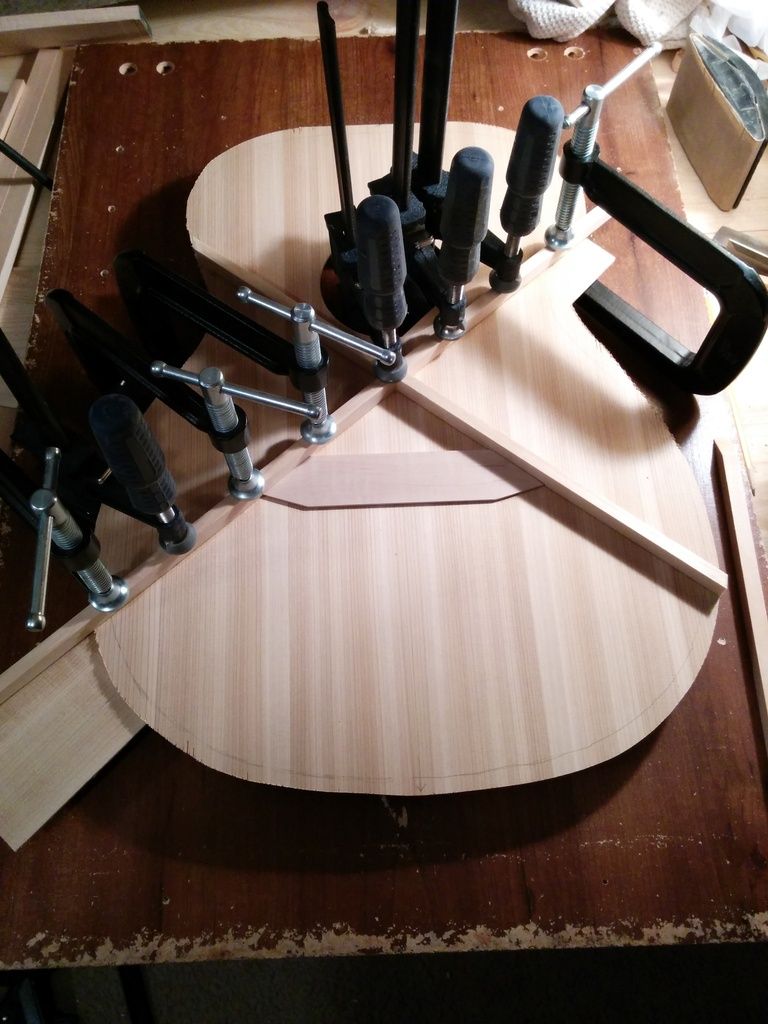 Gluing the upper transverse brace. 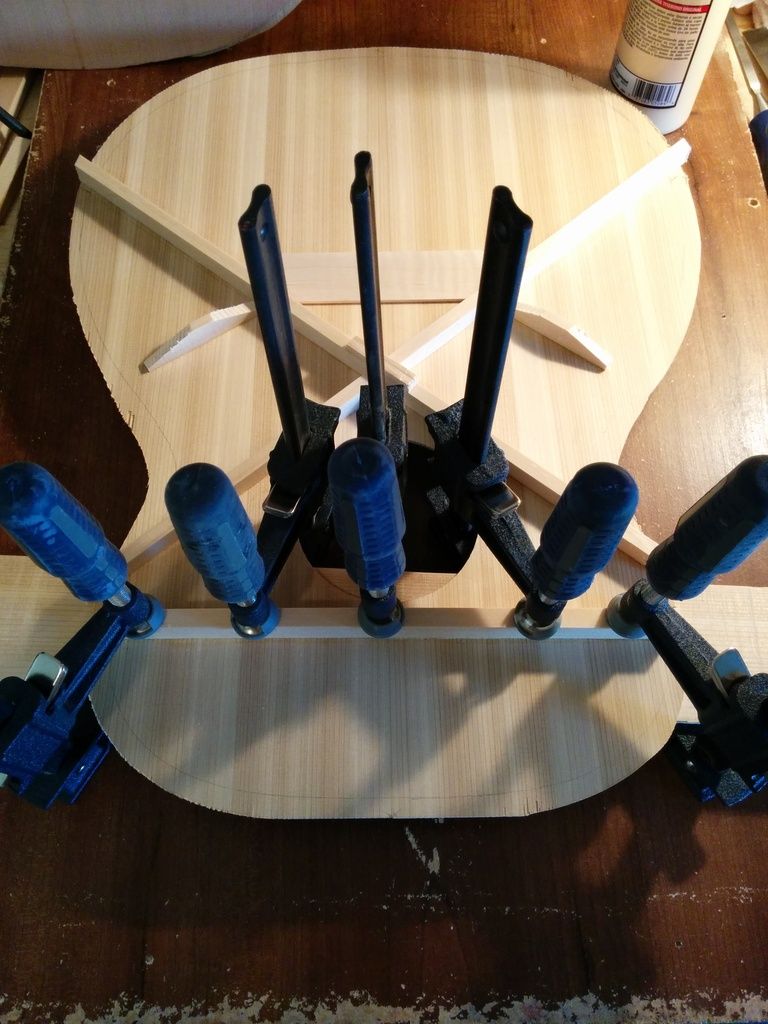 Fashioning the lower "tone bars". I'm not going with the old Martin way of doing things, making the tone bars cross the lower face of the sound board. 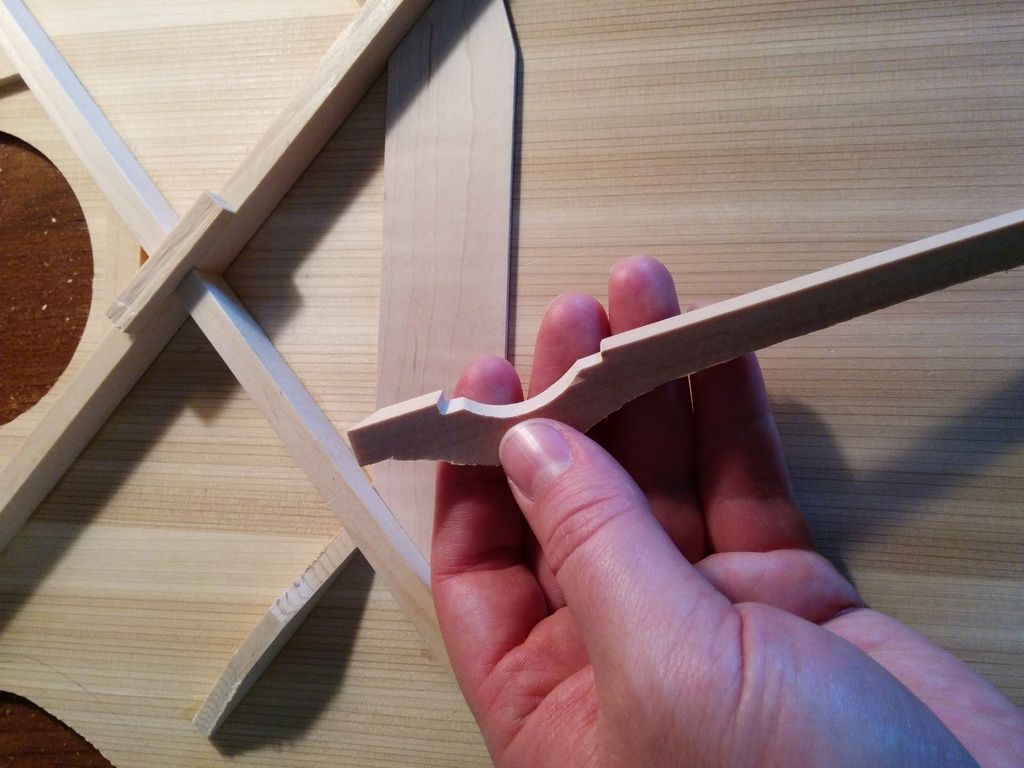 The tone bar fit into place. 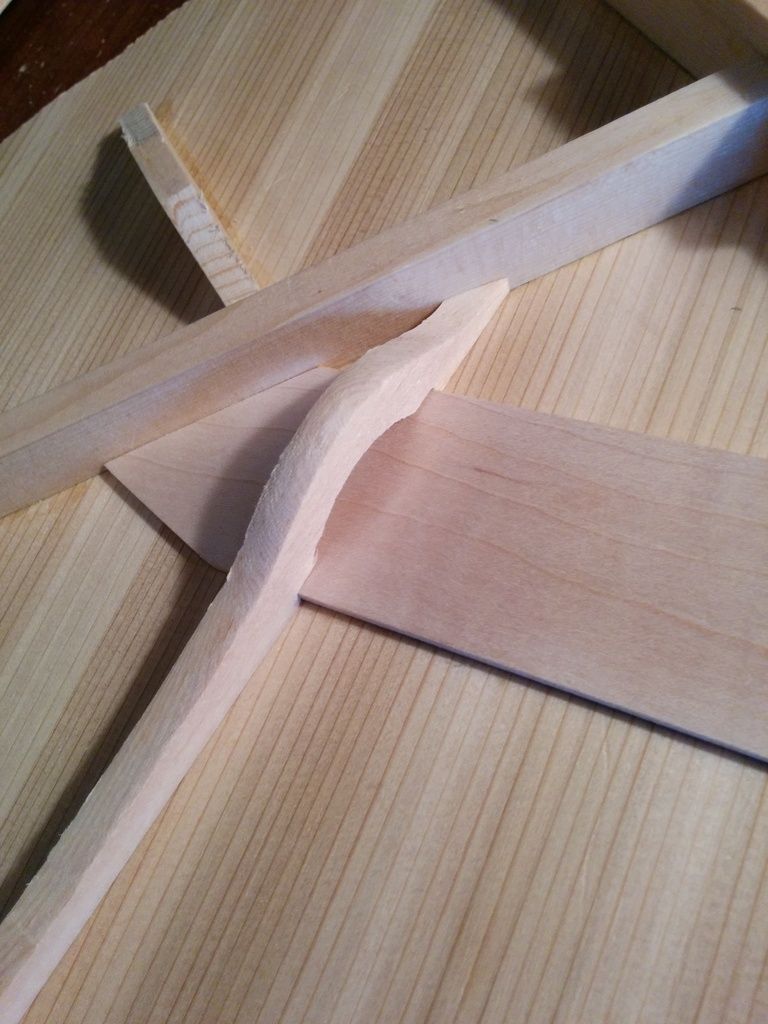 Another shot of the tone bar. On larger sized guitars, I'll do 3 of these (possibly). For this OO size, just 2. They are a quarter inch tall and a quarter inch wide. They will be shaped to a triangular shape. 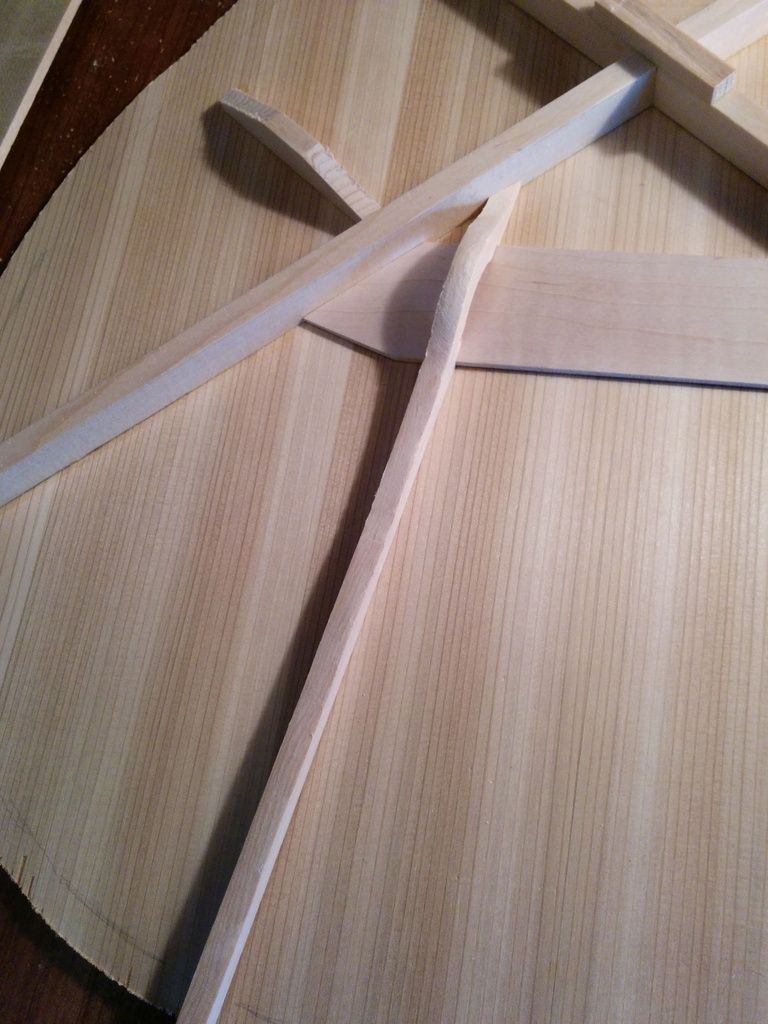 Shaping the braces with my hock chisel. I love that chisel. Thing of beauty. 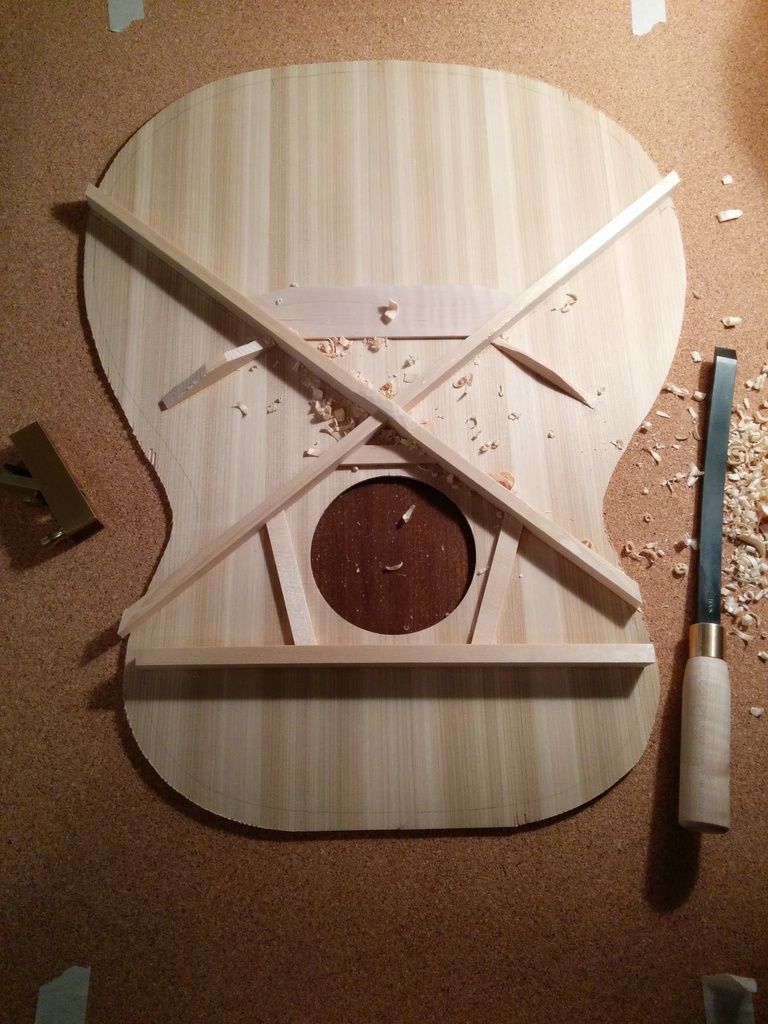 Closeup of one of the fan braces. Not the prettiest thing, but then, I've never done this before. I'm just glad I haven't yet put the chisel through the sound board. lol. Or my hand. 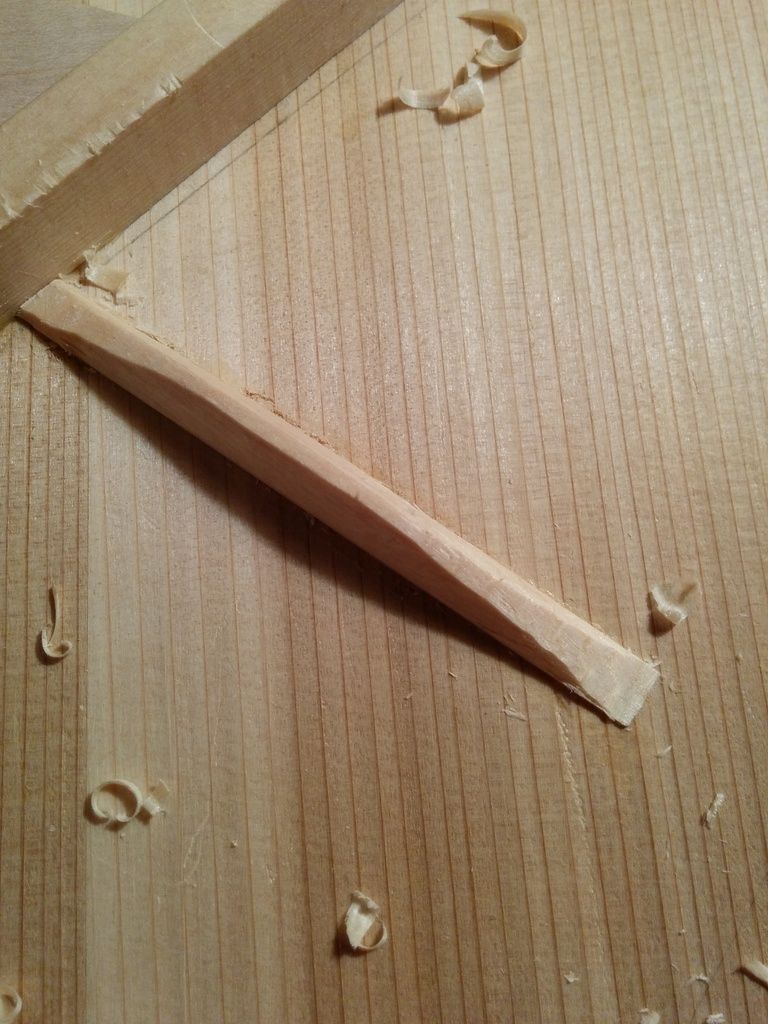 Here is the top with half the shaping done on the braces. Cutting the triangular shape is next. That'll be the hardest part. And after I'm done there, I'll glue the tone bars into place and shape them. The x braces are cut to 1/8 inch at the sides on the lower side, and 3/16 inch on the upper side. Should I go lower than that? Any thoughts there? 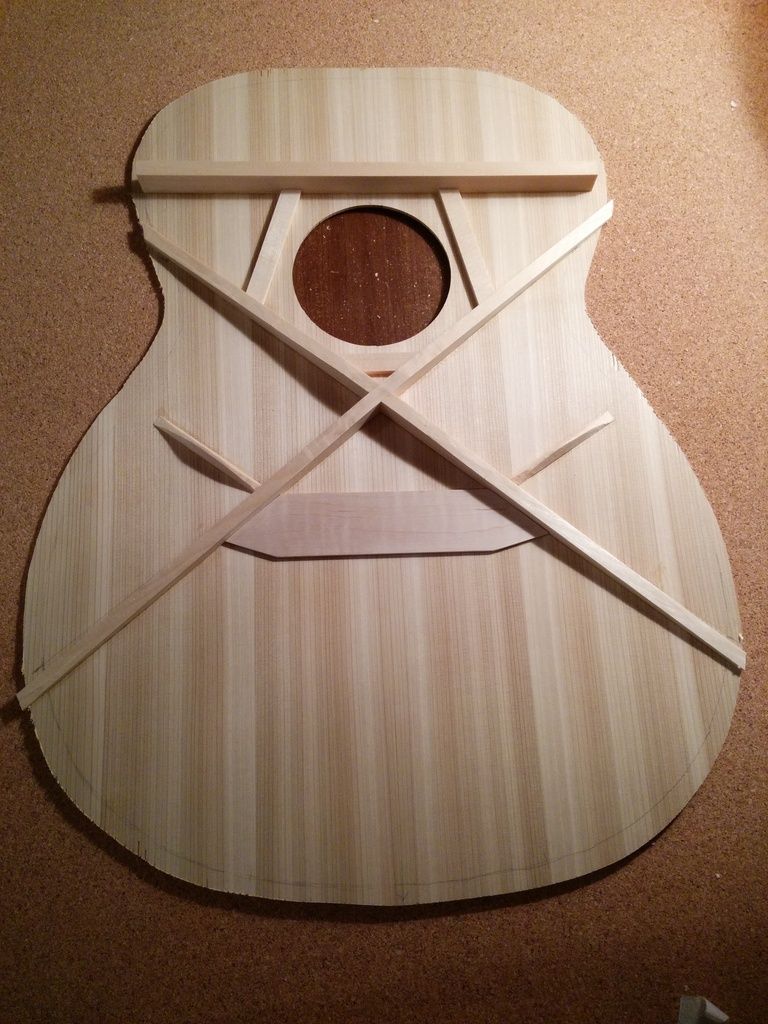 For the upper transverse brace, I'm going to leave the majority of the material alone, and cut a steep angle where the brace meets the side/kerfing. I'll then fashion a rib with a complimentary angle to provide a strong, load bearing anchor point to glue the transverse brace to. I also had already put the x brace patch in place, a small piece of sitka. But I realized after that I probably shouldn't have put it there yet, it gets in the way while shaping the braces. So I planed it off. I'll put it back on when I'm done. 
__________________
-- Nick Last edited by Viking; 05-27-2015 at 10:23 PM.
|
|
#157
05-27-2015, 10:22 PM
|
|||
|
|||
|
Prior to cutting away all this material, the soundboard didn't have much in the way of a tap tone. But now, goodness. I can hear several different notes in there. And that's saying something given that I'm half deaf. Hearing that many notes is good, right?
__________________
-- Nick
|
|
#158
05-28-2015, 04:24 AM
|
|||
|
|||
|
Quote:
One way is to make up a jig for use with either a disk or belt sander. Clamp the stack of braces to the jig, which has the desired curvature profile on the front of it, and present the curved profile to a long stop in front of the disk or belt. The braces overhand the stop to touch the sanding disk/belt. Then just sand until no more sands off and you have the perfect curvature. Works well, takes 2 minutes. Another way is to create a jig to use with a router and template bit. Downside is that it can tear the wood, or go at it from the center outwards. Another way is for those that use arched dishes, just run the brace back and forth on the sandpaper-covered surface of the dish. Another way is to arch the braces one at a time, placing them in a vice and using a block plane to get the curvature close to a drawn line, then finish off on sandpaper. Another way that I use these days is to make a fixture that clamps several braces at once. It is exactly sized to fit the width of my block plane. The edges of the bottom of the block plane, to the sides of the blade, ride on a curved surface that is the exact curvature I want. Run the block plane back and forth. When it stops cutting, the braces are ready to glue. Takes about 2 minutes, perfect every time. One I haven't tried, but would probably work, is to setup a shooting board that has the desired curvature in it for the plane to follow. That would be quick and easy, once the setup is created. Of course, these days, there is also the possibility of using a CNC machine. Unless I'm doing a lot of them, I can probably do it faster with my block plane fixture. I'm sure there are other methods, limited only by one's ingenuity.
|
|
#159
05-28-2015, 06:41 AM
|
|||
|
|||
|
Looking good, Viking!
I am curious... Are you using a different bracing pattern than the plans you have? Why do you have a "hollow" cut out above where one brace will fit to the bridgeplate? I am not at all against "bridges" or hollows in bracing, in fact I use the concept myself, but I can't understand the function from your photos.
__________________
---- Ned Milburn NSDCC Master Artisan Dartmouth, Nova Scotia
|
|
#160
05-28-2015, 11:15 AM
|
|||
|
|||
|
Quote:
Quote:
http://www.edwinsonguitar.com/Design...nd_Tuning.html My intent is to limit the amount of wood and mass the bracing has, while providing sufficient structure to resist the upward pull of the strings on the back of the bridge/bridge plate. Having the lower face braces contact the bridge plate seems to me to be the way to do that. But I should have measured the string spacing on the bridge plate more carefully. The flying part of the brace was intended to give sufficient clearance for the bridge pins, but the way the spacing worked out here, they aren't needed. There is plenty of space on the bridge plate for the bridge pins even if the lower face braces hadn't arched over the bulk of the bridge plate. So in the future, I would make these smaller size guitars without the arch, larger guitars with an arch on the middle brace.
__________________
-- Nick Last edited by Viking; 05-28-2015 at 11:25 AM.
|
|
#161
05-28-2015, 11:25 AM
|
|||
|
|||
|
Quote:
__________________
---- Ned Milburn NSDCC Master Artisan Dartmouth, Nova Scotia
|
|
#162
05-28-2015, 11:36 AM
|
|||
|
|||
|
Quote:

__________________
-- Nick
|
|
#163
05-28-2015, 12:51 PM
|
|||
|
|||
|
Quote:
__________________
---- Ned Milburn NSDCC Master Artisan Dartmouth, Nova Scotia
|
|
#164
05-28-2015, 12:58 PM
|
|||
|
|||
|
Quote:
__________________
-- Nick
|
|
#165
05-28-2015, 03:48 PM
|
|||
|
|||
|
Hey Viking,
Good to see you are back at work on your guitar! I say brace the top however you see fit and learn from there. You are headed for one of the coolest times in a build, closing the box. Enjoying following along. Travis
|


