
|
|
#1
 08-02-2015, 12:52 PM
|
|||
|
|||
|
Section 1:
This comes up a lot - "Can I install a K&K myself?" It is not that hard, especially if you read the instructions and visualize each step prior to doing it. In this case, the guitar - a Martin D-18V - already had the endpin hole drilled out. This part intimidates more people than anything else usually. But with the proper tool it is a breeze. StewMac reamer expressly for this purpose is great! 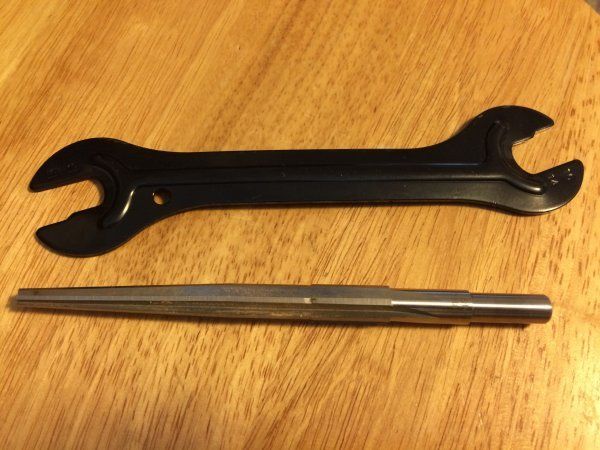 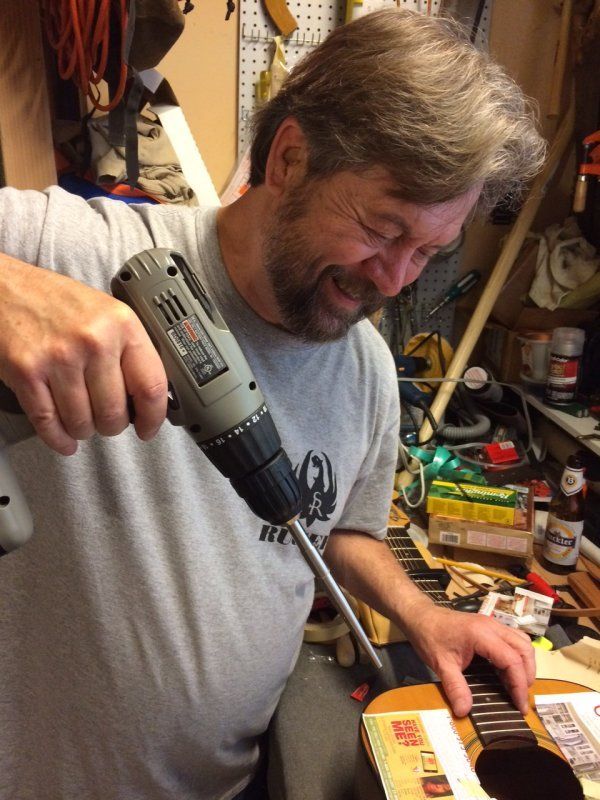 Drilling it out using several progressively larger bits is what I used prior to buying this tool. Anyway, with that out of the way, or before, loosen strings and use a clothespin capo for the one use I find appropriate - keeping the loose strings in place! 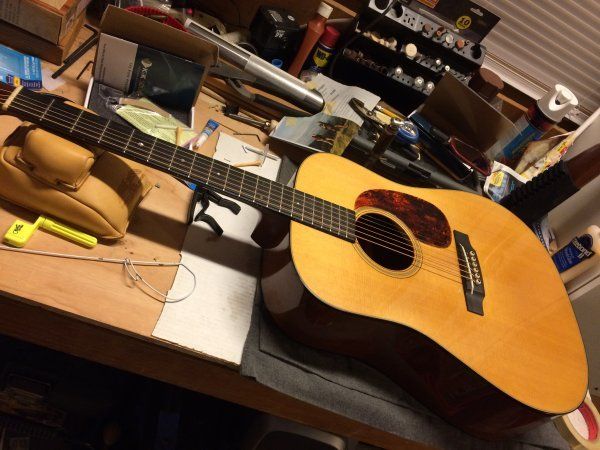 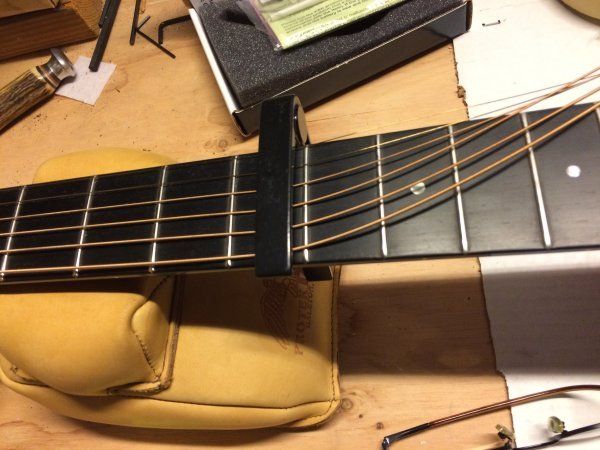 P.S. A good working surface is handy. I have a piece of flannel under the body and the neck in a good rest. You can buy these rests through a music supply house, but they're cheaper through a shooting supply house. They're rifle rests. Last edited by kydave; 08-02-2015 at 01:56 PM. 
|
|
#3
08-02-2015, 01:09 PM
|
|||
|
|||
|
Have your mirror and lighting handy. I've found one of my camping LED headband lights works great! As big a mirror as fits through the sound hole is handy.
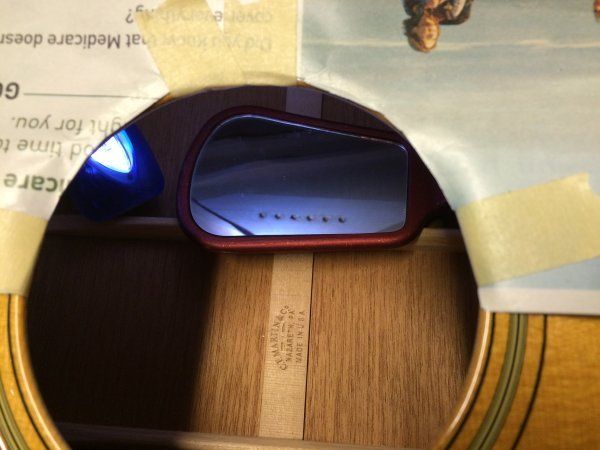 OK, the most time consuming part is setting the barrel of the endpin slot to the correct depth. Too much or too little and the 1/4" cable jack will not seat correctly. 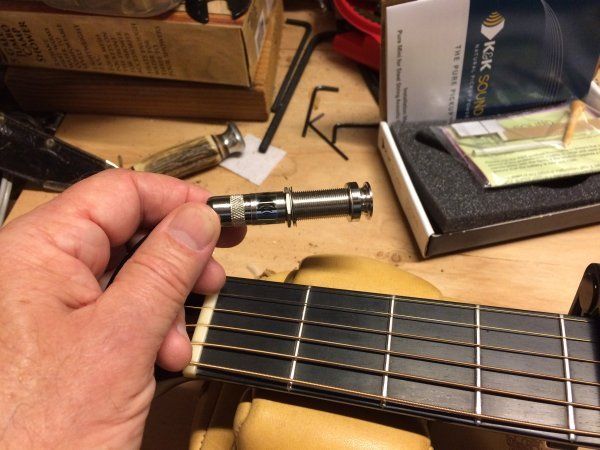 At this point, you may as well start thinking about protecting the top from dropped items, or later - glue drops. 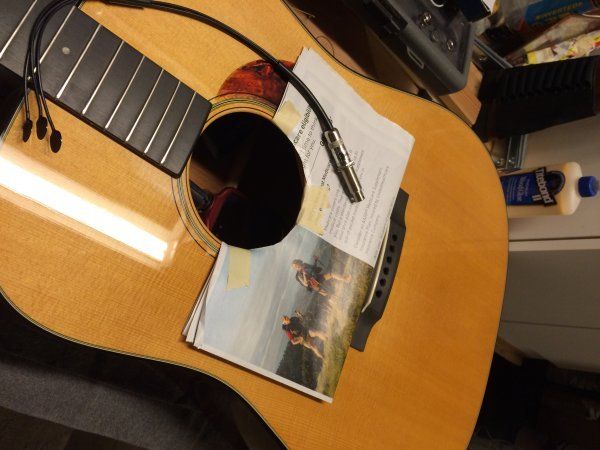 This item, while not up to Frank Ford's standards, is invaluable! Coat hanger bent with handle on end, cut to proper length, with tiny right angle hook in end to catch the hole in end of endpin jack: 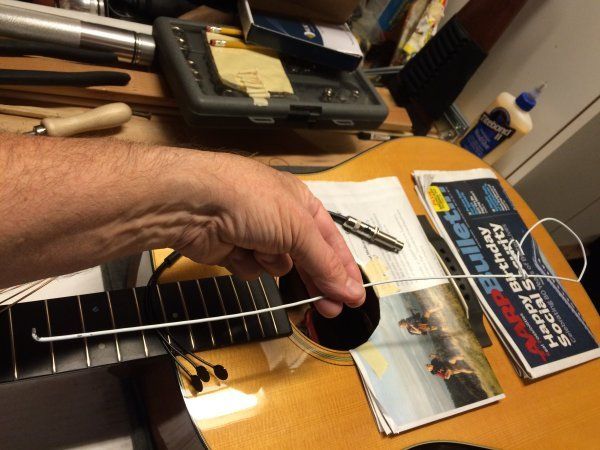 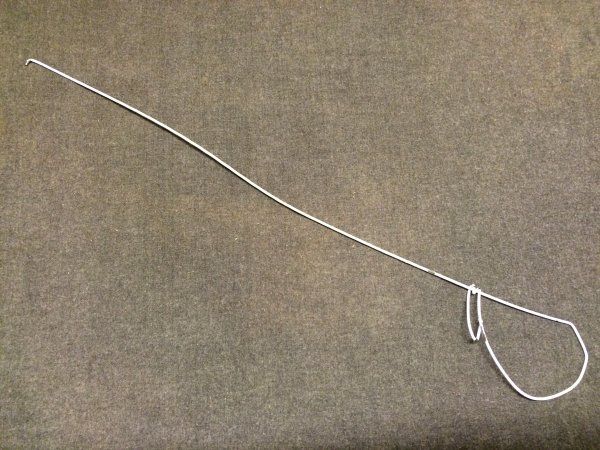 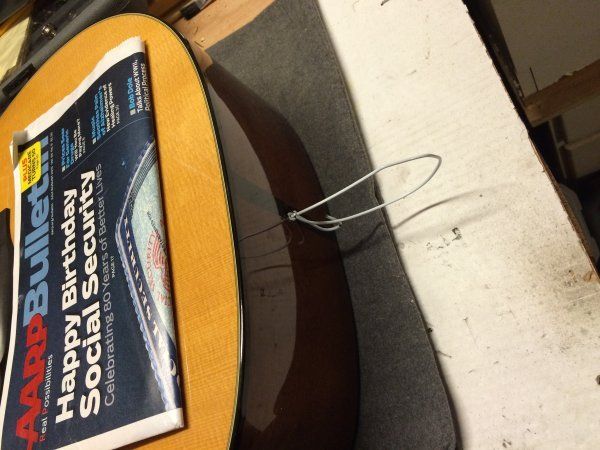 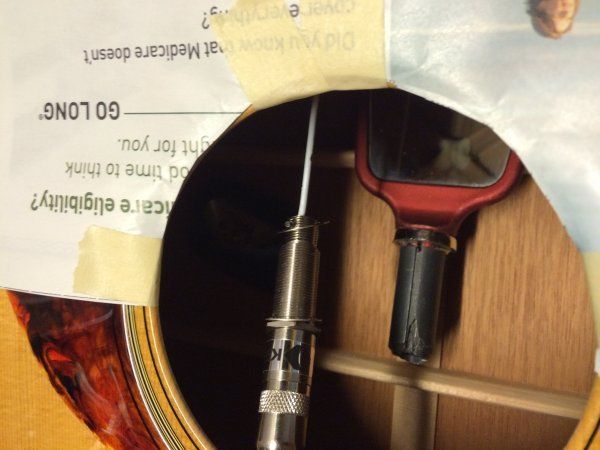 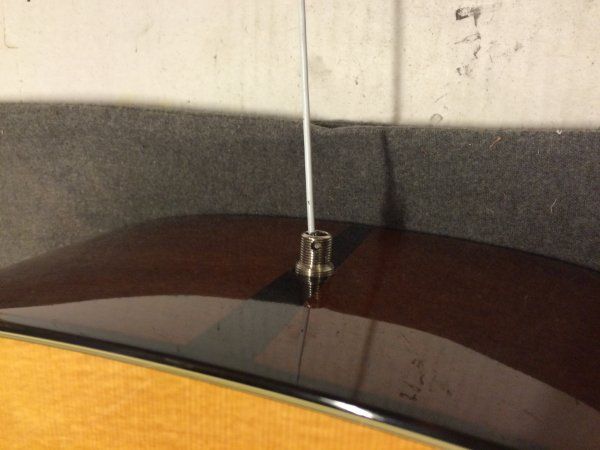 Trial and error gets you to the correct depth. At that point, carefully take the unit out, keeping the back barrel and lock nut from changing position, put a drop of locktite or white glue on them to keep them in place. The benefits of the hanger tool are to ease in pulling through the endpin hole multiple times AND to do so without dropping the interior washers into your guitar (They are a PITA to pick up sometimes!).
|
|
#4
08-02-2015, 01:22 PM
|
|||
|
|||
|
OK, so you've got your interior barrel and lock nut positioned so you can pull it through and have it at the correct depth when you put on the exterior nut and strap holder screw on piece.
Time to look at the spiffy new plastic jig included with the K&K Pure Mini. They used to instruct you to cut one out of the cardboard box. 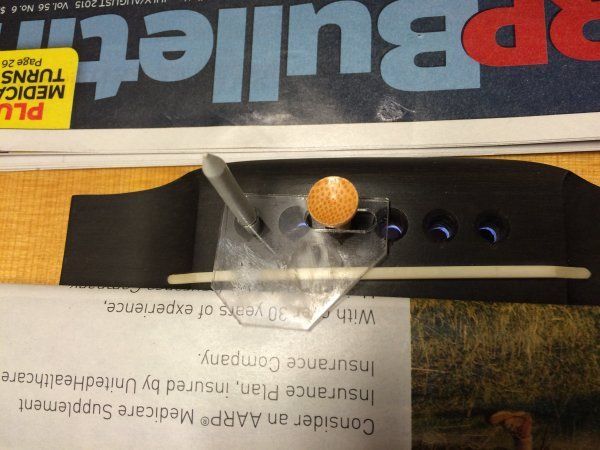 As you can see, once you've put the white pointed rod in place with a touch of glue (the pointy end up helps you push it through from underneath later) and you sit it through the first (high E) hole, positioning it with the included golf tee, you can see the saddle underneath. EASY to position a little blob of the putty (cut on tiny piece, then make a ball) over exactly where you want that contact to be. In the case of the one between the E & B strings, slightly closer to the E, directly over (and will be under) the line of the saddle. 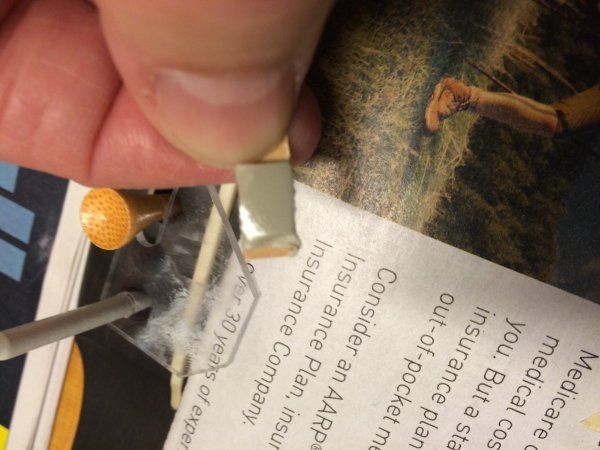 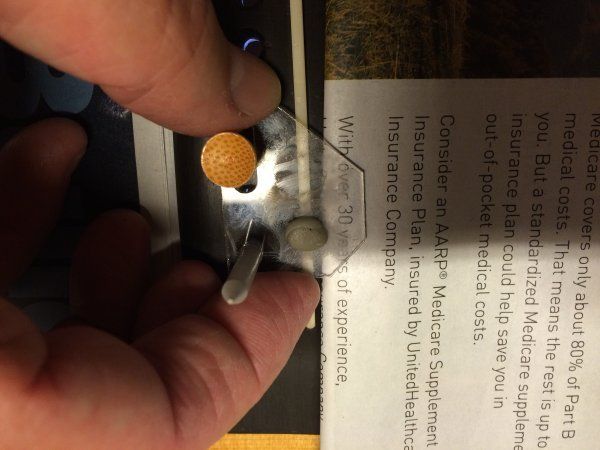 You will then put the contact on the blob with cable running in the opposite direction from the pin holes. Practice taking this unit into the guitar, running the pointy white rod up through the E pin hole, then pushing the golf tee down into the slot to position things. Do this without glue a few times to get the feel! This is what it will look like inside, with my hand out of the way. 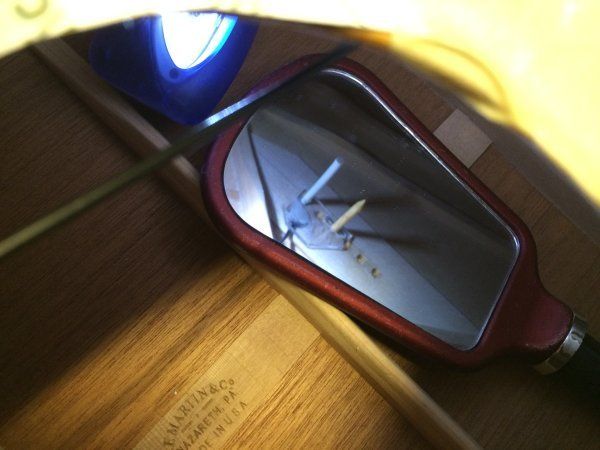
|
|
#5
08-02-2015, 01:53 PM
|
|||
|
|||
|
Now you are ready for the final step.
NOTE!! K&K NO LONGER INCLUDES GLUE WITH THE PICKUP PACKAGE!! Prior to starting this project, buy some GEL superglue. Prior to starting this project, make sure that the GEL you bought is actually gel and not running. It WILL ruin your day to have runny superglue dripping off your contact and all over your fingers and guitar!!! By the way, I forgot to take this type shot, so I dug up an old install photo using the old cardboard jig. But this is how the contact will look in position prior to installing the glue and going into the guitar. 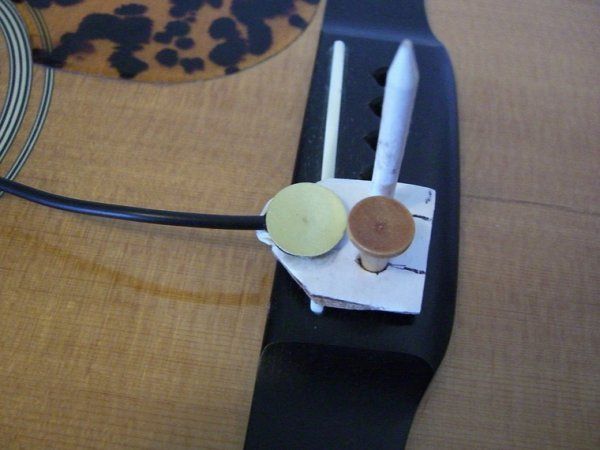 You'll put a thin coat of gel superglue on the contact, a tiny bit squeezing out is OK, too much is not. Too little and the contact and sound won't be optimal. So you put your glue on, position the jig inside - USE THE GOLF TEE TO POSITION PRIOR TO PUSHING UP AND HAVING THE CONTACT WITH GLUE MAKE THE JOINT WITH THE BRIDGE PLATE! Once you have in in position, THEN push it solidly against the bridge plate and hold for 30 seconds. THEN let the contact sit for 5 or 10 minutes prior to pulling the jig and putty away for the next contact install. Repeat this three times and you should have something looking like this. 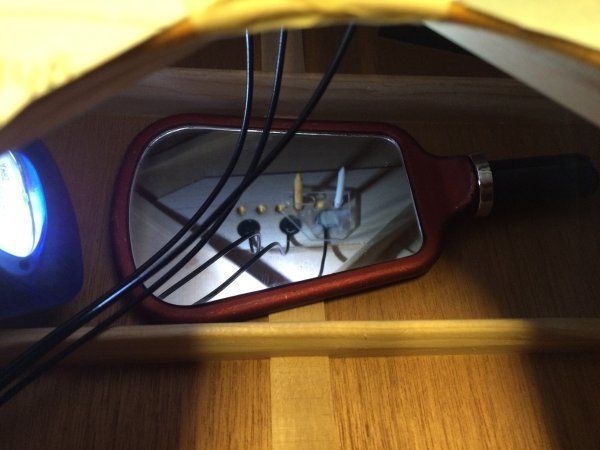 Let everything sit and dry for an hour or so before bending the cables with the barrel and endpin assembly back out the endpin hole. By this time you should have put some protective masking tape around the end pin hole to protect the finish when tightening the exterior nuts. 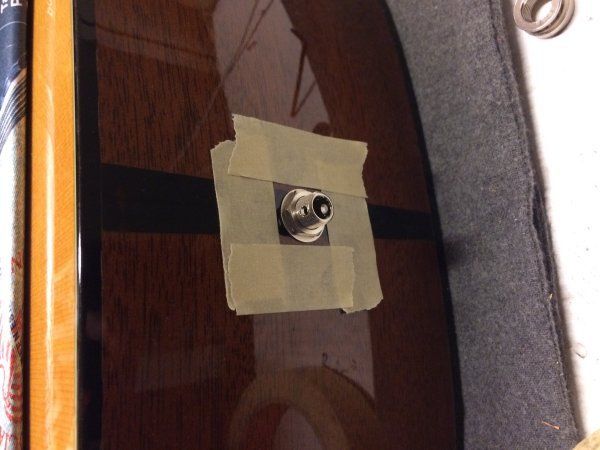 I use a flat bike wrench tool to tighten the nut. I keep a small Allen wrench though that hole in the end of the jack so it doesn't twist OR you can use Frank Ford's specialty cam tool made for the job! 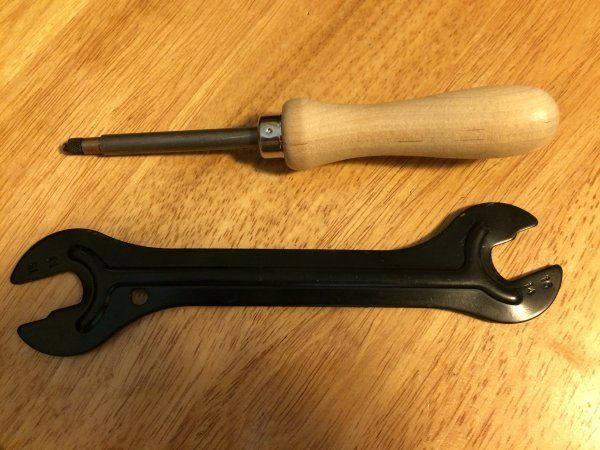 Do that, put on washer, screw on the nut. Then screw on the strap pin portion of the job. I use so pliers with a piece of leather padding the jaws so as not to mar the metal on the strap button. 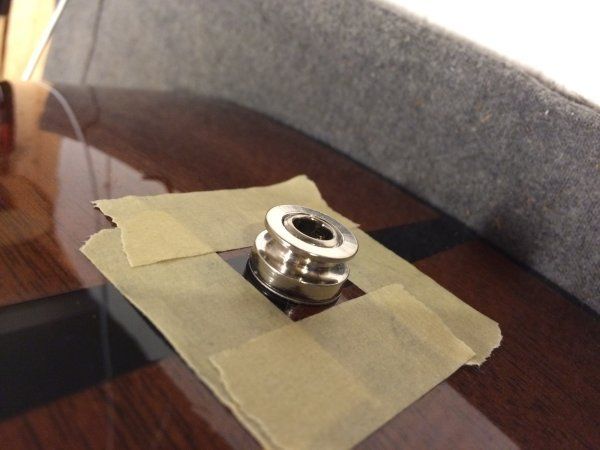 Remove the masking tape. Plug in and test and you're done!! 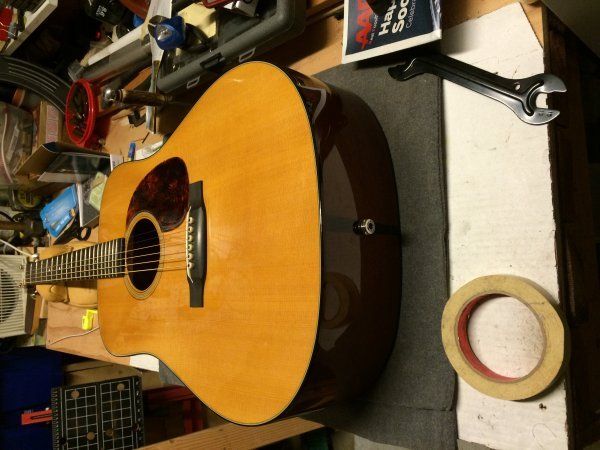
|
|
#7
08-02-2015, 06:44 PM
|
|||
|
|||
|
Great post kydave.
 I always apply the three transducers at the same time. I fix them to a thin strip of card (with the adhesive putty supplied) at the correct spacing on the outside of the guitar using the strings as my guide. After a couple of "dry runs" sighting through the bridge pin holes as a guide and then moving slightly towards the headstock to the correct postion, I apply the glue and postion the card/transducers assembly and hold for 5 minutes. The first time I did this I removed the card, but haven't bothered to do so on the subsequent dozen or so installs I have done. I wear a rubber glove when doing the final sticking, and cover the entire top of the guitar with cling-film (UK - does that translate to US?). Also done some pinless bridge installs this way - drill a small hole in the base of the saddle slot at each end; insert a short length of wire (or guitar string!) through each, and it gives feelable reference points for the saddle position. Keith
__________________
http://www.youtube.com/user/keithche...n?feature=mhum http://keithchesterton.bandcamp.com/
|
|
#8
08-02-2015, 08:56 PM
|
|||
|
|||
|
Last time I looked at K&K's instructions they wanted the head for the high-E string not centered between the E & B but directly in front of the E.
EDIT: I just checked on-line and found their picture in the latest instructions shows it centered, but the words say: With the included putty, form a small ball and stick it on top the jig, above the point where saddle and high E string intersect.
__________________
jf45ir Free DIY Acoustic Guitar IR Generator .wav file, 30 seconds, pickup left, mic right, open position strumming best...send to direct email below I'll send you 100/0, 75/25, 50/50 & 0/100 IR/Bypass IRs IR Demo, read the description too: https://youtu.be/SELEE4yugjE My duo's website and my email... [email protected] Jon Fields
|
|
#9
08-02-2015, 09:18 PM
|
|||
|
|||
|
I have noticed the revised recommendation of the contact under the high E string instead of between E & B, but closer to the B (and the original recommendation simply had it the same as the others - in between).
I don't know & should probably email Dieter, but my guess is some folks using very light strings could have more of a drop off than people using traditional gauges. My early installs were centered, my later installs all have been closer to the E than B, but definitely not directly under the E. I've never had an issue with uneven, lower output from the E. But on all my guitars and the friends for whom I've installed, we use medium gauge strings.
|
|
#10
08-03-2015, 05:57 AM
|
|||
|
|||
|
I've installed a bunch of them too, old and new way, on quite a few guitars for friends. I am fairly certain it does not matter, but all sorts of minutia get debated on the AGF. Those are great pictures for someone to use as a reference and someone might follow your guide and then read the instructions.
__________________
jf45ir Free DIY Acoustic Guitar IR Generator .wav file, 30 seconds, pickup left, mic right, open position strumming best...send to direct email below I'll send you 100/0, 75/25, 50/50 & 0/100 IR/Bypass IRs IR Demo, read the description too: https://youtu.be/SELEE4yugjE My duo's website and my email... [email protected] Jon Fields
|
|
#11
08-03-2015, 07:04 PM
|
|||
|
|||
|
Nice pics and will I am sure prove useful to new K&K peoples. I know I looked up a couple before I did mine. And yes I wimped on the drilling, had the guy what built it do that. The rest is pretty straightforward as you show.
I did vary from you in doing the all three at once thing though. To me it made sense. Cardboard template, saddle and strings marked, two golf tees and folded masking tape to hold the elements. I did the slightly out to the high E too, not sure how much difference that might make. Nice job. Kris
__________________
Keep it Simple
|
|
#12
08-03-2015, 08:16 PM
|
||||
|
||||
|
It was great of you to do this, Dave! Thanks
__________________
Baby #1.1 Baby #1.2 Baby #02 Baby #03 Baby #04 Baby #05 Larry's songs... Just because you've argued someone into silence doesn't mean you have convinced them
|
|
#13
08-03-2015, 09:22 PM
|
|||
|
|||
|
Quote:
Thank you. It's something I've been thinking about for a while and I had a friend's D-18V to play around with, so... 
|
|
#14
08-04-2015, 01:44 AM
|
|||
|
|||
|
What a great tutorial!
I've done four installs myself, two of which were already end-pin jack ready (we were replacing existing pickups), one of which was my wife's Furch maple OM (took it to a repair man to get it done) and one of which was a friend's Furch laminated dread (he insisted I did it with he Forstner bit and it went perfectly!). The new plastic jig is a great addition to the package, isn't it! Great pics - I'll be bookmarking this one for the future.
__________________
Gibson ES-335 Studio 2016; Furch OM34sr 2015; Fender MiJ Geddy Lee Jazz bass, 2009; Taylor 414CE 2005; Guild D35 NT 1976; Fender MIM Classic 60s Tele 2008; Fender US Standard Strat 1992; G&L ASAT classic hollowbody 2005; Ibanez RG350MDX 2010(?); Ibanez Musician fretless, 1980s; Seymour Duncan Tube 84-40; Vox AC4TV; Ex-pat Brit in Sweden
|
|
#15
08-04-2015, 06:22 AM
|
|||
|
|||
|
Thanks for the post, I did one in my Taylor Baby-m and it works great. I found your instructions clearer than the Youtube one I eventually followed. Pretty similar, but I really like your coat hanger, very clever idea :-)
__________________
"Music makes pictures and often tells stories, all of it magic and all of it true" John Denver Taylor 514ce (1999) Taylor Baby-m (1999) Taylor 814ce (2014 - Finally!)
|


