
|
|
#1
 09-19-2010, 10:29 AM
|
|||
|
|||
|
Hi all,
This thread is created to share the memorable moments of my guitar building experiences with Jeff. Along with me, there are two other students. A friend of mine and the other is an Australian I met today. Firstly, let me stress by going through the guitar building course doesn't make me a Luthier. However, the amount insights shared during the hand-ons and discussion moments with Jeff was indeed invaluable. He is a guy who questions the traditions and fixations and if you are more curious than prudence, you will enjoy learning from him. In fact, one of the student is a Luthier who owns his brand, Valleys Guitars (http://valleysguitars.com/), based in Australia. His name is David. This guy is really interesting, was a Qantas pilot, a Queen's Counselor and now a Luthier. While he has guitar making experiences, he is very open minded to learn. A pleasant gentleman to be with. Jeff was managing three students of differing paces. Especially for David, equipped with guitar making experiences, he was ahead of me and my friend certainly. Also, David brought his own set of woods for this course. For topwood, a beauty set of European Spruce and B/S is Australia's Tiger Mrytle. I could tell that the eventual guitar is going to be a head-turner. Due to our difference in pace, Jeff could not guide us through a fixed sequence of guitar building but base on the principle of efficiency. Doing what is suitable in accordance to the situation. As such, the pictures below are not meant to be sequential. It is Jeff's nature to adapt and innovate, therefore he seldom get pinned down by traditions and assumptions. I must say we enjoyed such fluid nature as you will not know what will come next instead of keeping to a time-table. By saying this, it doesn't also imply that he is disorganized. I would say that he is wise and adaptable when comes to building guitars. As a mentor, he invokes you in thinking about the most efficient way in doing things, not necessary "the way", or sent a message to us that there are no other ways but his. In day one, I reckon we have made great progress ... in summary we did all these, 1. Selected top and B/S woods 2. Glued the Topwood 3. Cut Top and B/S wood to rough sizes 4. Sand the Topwood to desired thickness 5. Bent the Side woods 6. Cut and glue the Rosettes 7. Made and Glues Back braces Well, here're the pictures! Jeff explained his method in gluing the Topwood 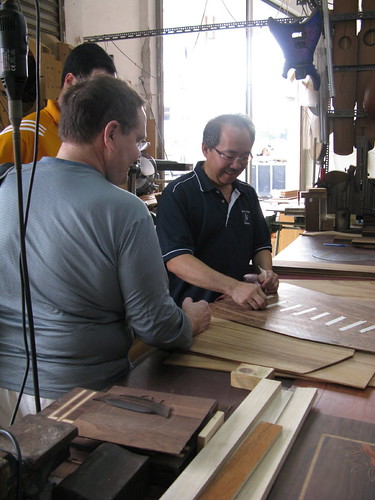 Below is the piece I have selected as Back, it is called Saman, Rain Tree or Monkey Pod. It is abundance in Equator regions but not every such tree is suitable for making guitars. Jeff has such discernment and ability to visualize, those selected by him turn out to be fantastic sounding guitars. I hope this piece will be too ... B-) 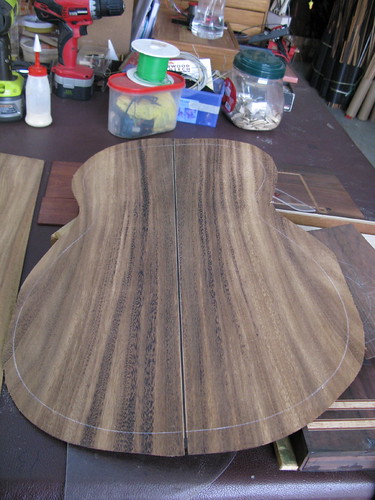 The infamous Tiger Mrytle wood. I think it will turn out to be a head-turner. The chalk marks help in ensuring sanding is applied to the entire surface.  Straight Back brace glued on David and my Back wood. 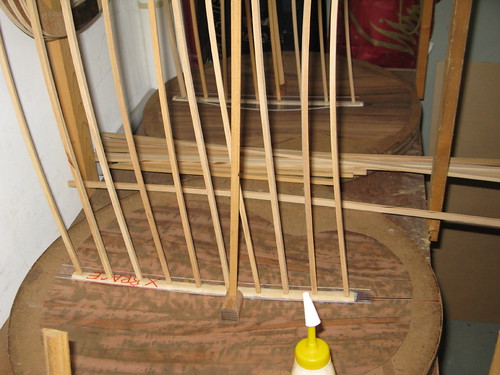 I was guided in bending my Side woods by Jeff's brother. A very patience and nurturing man. 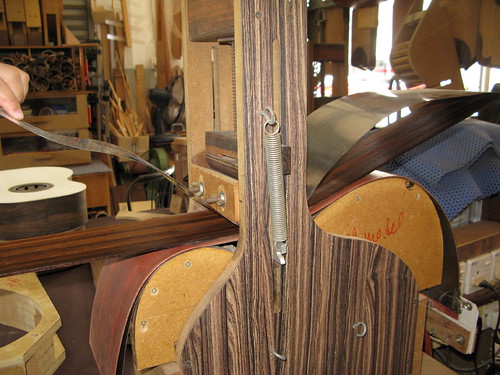 After gluing the straight Back brace, there are touch-ups to be done. We now understand why genuinely well hand-made guitars are expensive. It is the attention to details to differential the mass-produced and one that is skillfully made. 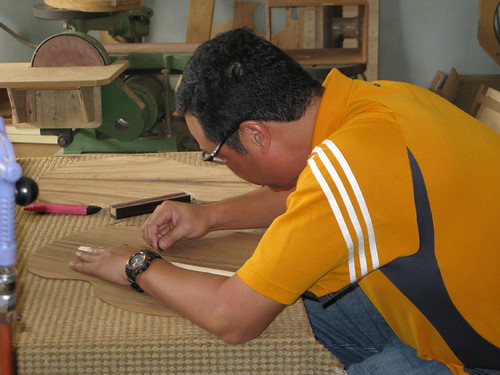 The routed cavity to fit a Rosette. 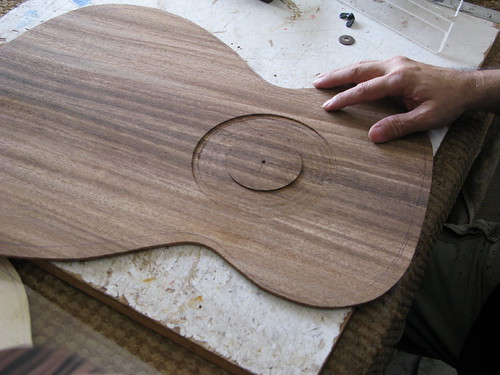 Gluing of binding stripes to Rosette cavity. 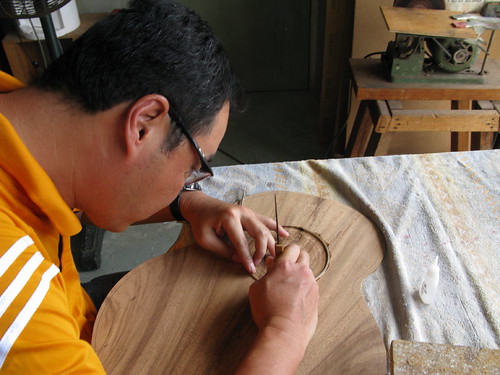 A fitted Rosette and binding strips topwood waiting for the glue to dry.  The day ended when I set my Back wood braces in place, just waiting for the glue to dry. 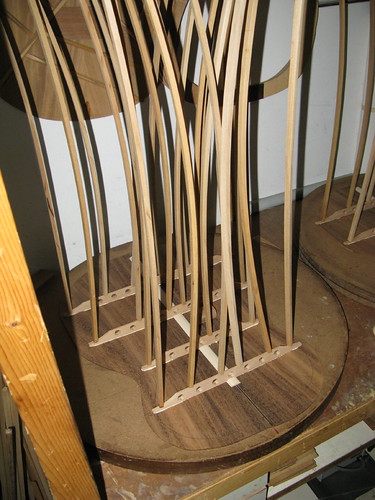 It was indeed rewarding. It is hard to describe it vividly as the entire package of experience needs to be felt.
__________________
Regards aDAM 
|
|
#2
09-19-2010, 10:40 AM
|
|||
|
|||
|
It is Day 2. Another long but rewarding day. We have covered the followings.
1. Back braces completed. 2. Gluing the neck and end blocks for the Side wood. 3. Sanding the Side wood to its rough thickness profile. 4. Routed the cavity for Abalone Inlay Rosette. 5. Added Maple and Ebony veneer to the rosette cavity. 6. Selected and fitted the required abalone pieces into the rosette cavity. 7. Sanded the rosette to flush with the topwood. 8. Glued Back kerfing. 9. Reinforced the rosette 10. Cut and sanded the fingerboard to rough size. 11. Cut the soundhole. Let the pictures talk ... End block glued and secured with clamps. 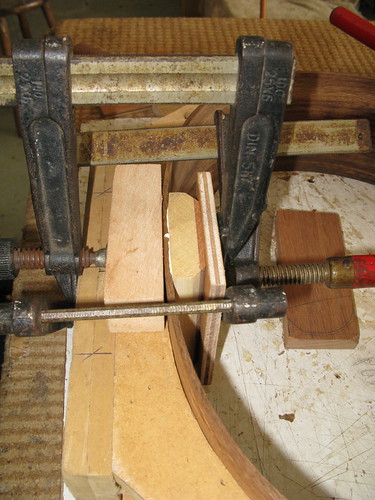 Routing the abalone inlay rosette cavity. 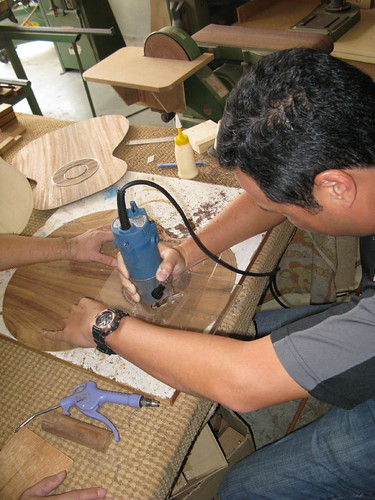 I was gluing the ebony and maple veneer as part of the rosette. 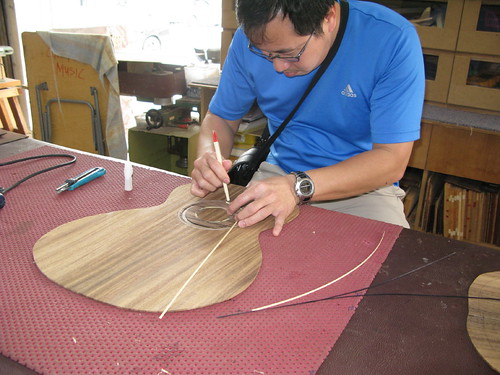 The exciting part ... fitting the abalone pieces into the cavity. 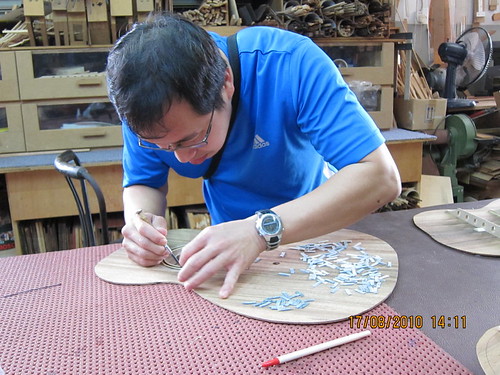 Sanding the topwood to flush the rosette. 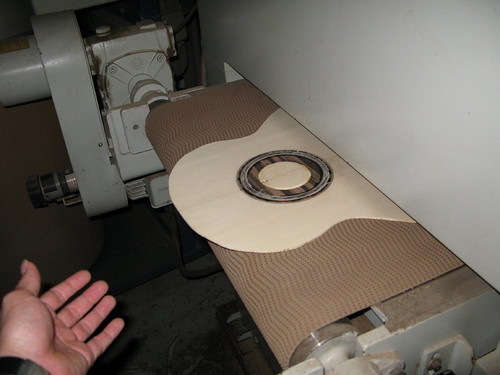 The most interesting part of the day. Jeff was sharing his wisdom in understanding topwood bracings. There were lots of stuffs he has told us but in summary. He highlighted the essence of bracing the topwood. Fluently he chained these elements up and they made a lot of sense; they are the position of the braces, angle of the braces in relation to each other, peak height of the scalloped braces, position of the peak along the length of the braces, the angle of the X-braces, the number of peaks on each brace, the total number of braces and their intended positions, speaker cone concepts in relation to topwood, etc. Sorry for the mouthful ... 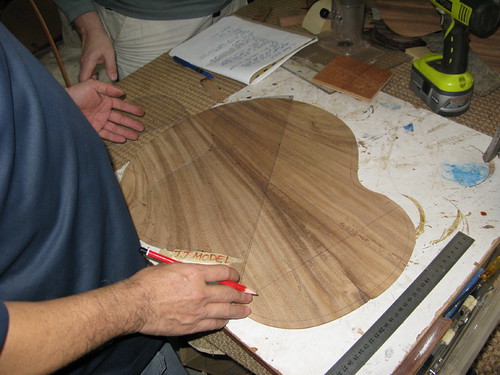 Gluing the Back kerfing. 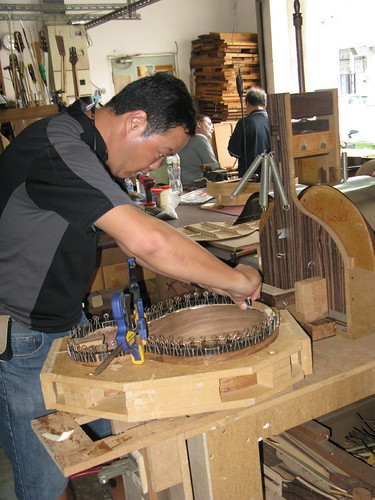 Right after sanding the fingerboard, the tough part came ... to sand the fingerboard profile. Jeff has made a sanding jig to speed up the process. Very innovative indeed. 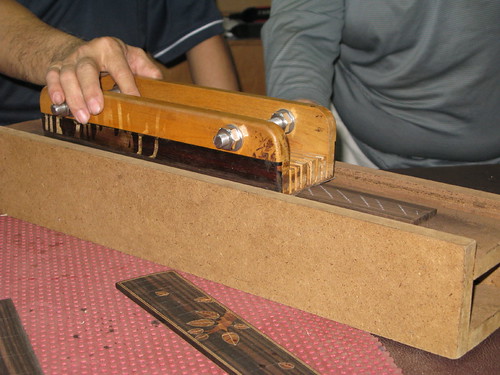 Finally, completing day with three lovely hand-made rosettes with their inlays.  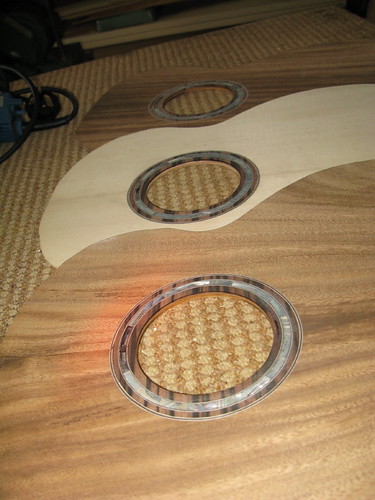 Will update again!
__________________
Regards aDAM
|
|
#3
09-19-2010, 11:45 AM
|
|||
|
|||
|
Yes! Adam, I love threads like this. Thanks so much for sharing such a wonderful opportunity with us. Hopefully I'll get to return the favor some day

|
|
#4
09-19-2010, 09:58 PM
|
|||
|
|||
|
Thank you for sharing this wonderful experience! I'm amazed at how quickly the process is coming together.
|
|
#5
09-20-2010, 07:46 AM
|
|||
|
|||
|
The postings are actually back posts. The guitars are already built. More pictures are coming ... appreciate the encouragement.
__________________
Regards aDAM Last edited by cadam5150; 09-20-2010 at 08:03 AM.
|
|
#6
09-20-2010, 08:01 AM
|
|||
|
|||
|
It is day three ... getting really excited as the guitars began to take shape :laugh: and also witnessed some slipshod workmanships of our own surfacing as later errors ...
 Nevertheless Jeff has constantly assured our ability. We were not discouraged in anyway instead we will be more diligent and focused moving forward. Nevertheless Jeff has constantly assured our ability. We were not discouraged in anyway instead we will be more diligent and focused moving forward.In fact, we conversed so much about guitars ... Cutting the chase; we have done these. 1. Flushed the Back kerfing with the Side wood 2. Routed cavities for concluding bindings for the rosettes. 3. Glue 5 veneer layers as bindings onto the prepared cavity. 4. Cut ebony stripes to be used as binding for the inner edge of the soundhole. 5. Heat-bent the Ebony stripes. 6. Glued the ebony stripes. 7. Prepared and glued Back to Side wood. 8. Fabricated and glued cross braces. 9. Fabricated and glued shaped kerfings 10. Completed the fingerboard preparation. 11. Glued the top kerfings. Again, let the pictures talk. Routing the final cavity to facilitate the final stage of making the rosettes. 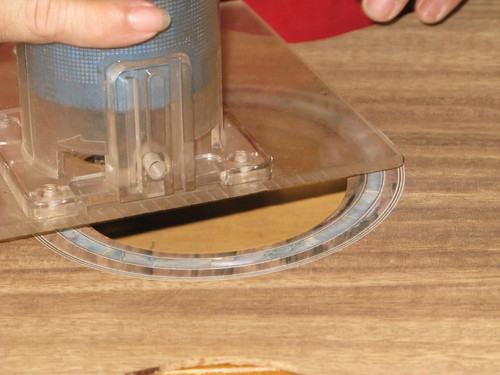 Gluing 5 veneer layers onto the prepared cavity. It did look kinda of straight-forward until we sand & flushed the rosette later ... 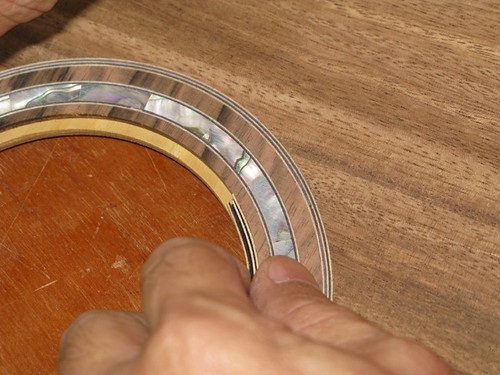 Heat bending the ebony stripes ... looks doable right? But it was far from being easy. 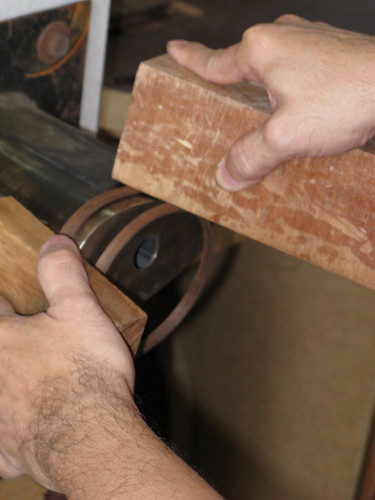 Glue was applied to secure the ebony stripe. 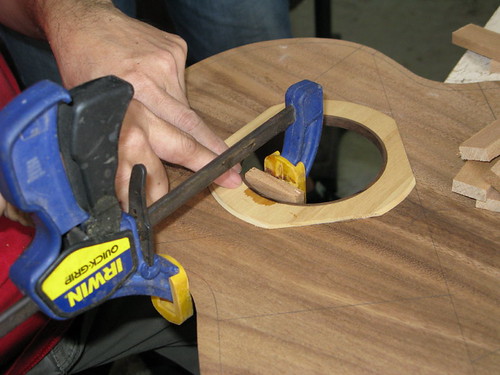 After we have made the rosette, it was indeed humbling because our best efforts to make sure it was a good built weren't adequate. We have detected certain imperfections and after a moment of reflection, we realized it was caused by what we have done or have not done during the early steps of making the rosettes. Henceforth we will look at well-made rosettes with respect. Completed gluing and trimming the back wood. 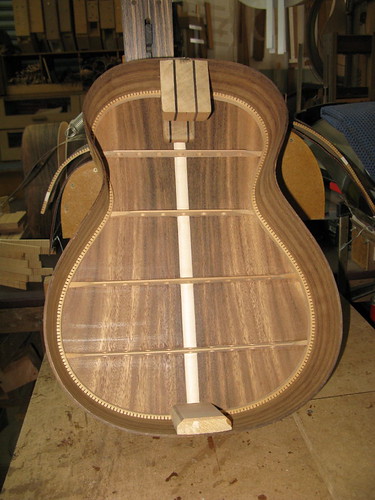 Making the wood kerfings for both the bevel edge and mini-cut-away.  This piece of leaf-liked wood kerfing allows the mini-cut-away to be made. You will be able understand the purpose of this unique piece later. By no mean making this piece of kerfing was easy.  Both the mini-cut-away and bevel kerfing were glued and positioned. 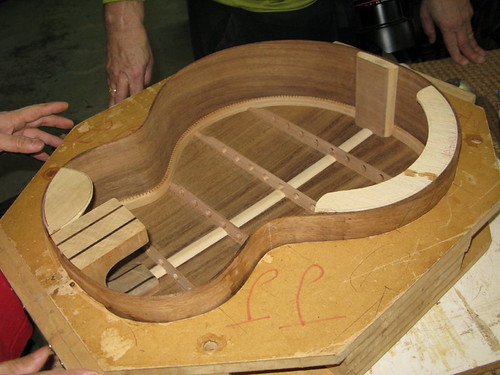 It was tiring ... it is hard to appreciate and understand what luthiers go through on daily basis. They placed their heart and soul into making good guitars but only few would understand both the pain and joy. There were more useful workshop practices and tips shared by Jeff that were not mentioned because these stuffs are difficult to comprehend through writings. Regardless you are a guitar making or guitar lover, assuredly the advises from Jeff were useful, practical and innovative. Of course one needs to be open-minded to try them. Day three has ended, we were delighted, looking forward to the next. Cheers!
__________________
Regards aDAM
|
|
#7
09-20-2010, 08:14 AM
|
|||
|
|||
|
Day Four.
Each day, we stretched into longer hours of building. Indeed it was tiring even we were building guitars, something we adore. Personally, I greatly respect Jeff's passion, and his unending stamina towards innovating both his building processes and guitars design after going through the past 4 days. Indeed, a good guitar goes with a good building process. It is hard to imagine a fine guitar is conceived by a disorganized construction process. With each step being demonstrated and explained, it is now comprehensible to me that a well thought through construction process, great attention to details to attain quality, the ability to adapt when things go wrong, and most importantly the discernment in appreciating the essence of this God sent instrument over the mere superficial aesthetic aspects ensure a good guitar. We have done these in day four, 1. Glued the side braces 2. Glued and set the other top braces 3. Made and glued ebony and maple veneer for the soundport lamination. 4. Applied sealant and oil to the interior of the soundbox. 5. Trimmed the top braces in preparation for gluing the top wood to the partially completed soundbox. 6. Glued and set the topwood 7. Trimmed headstock 8. Trimmed the neck 9. Prepared and cut the bevel and mini-cut-away. 10. Trimmed the mortise joint of the necks. 11. Completed the major jobs of making the soundbox. Here're the pictures. Gluing the side braces 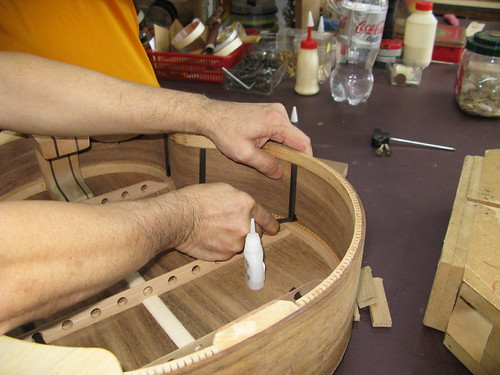 Heavily clamped veneer. 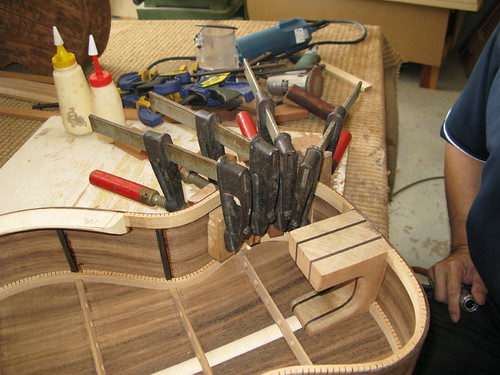 Applying sealant and oil to coat the soundbox's interior. 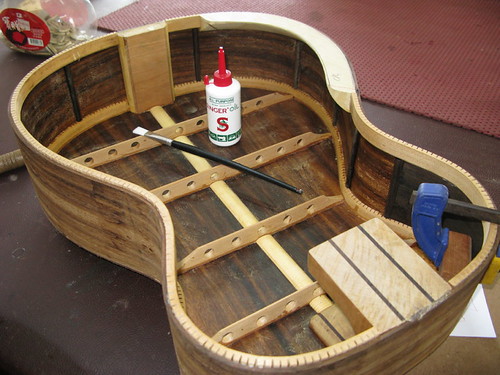 Top braces glued and dried of an OM model 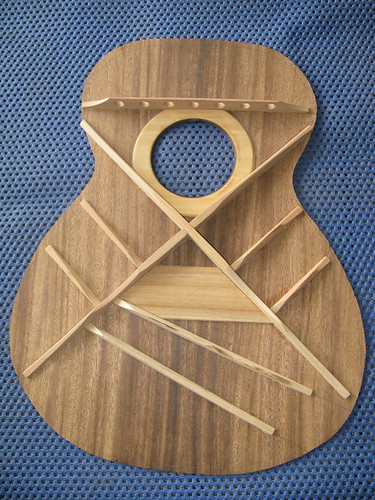 Top braces glued and dried of a JJ model. 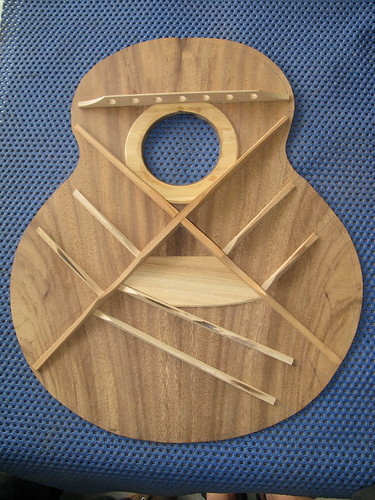 Topwood glued and set for drying. 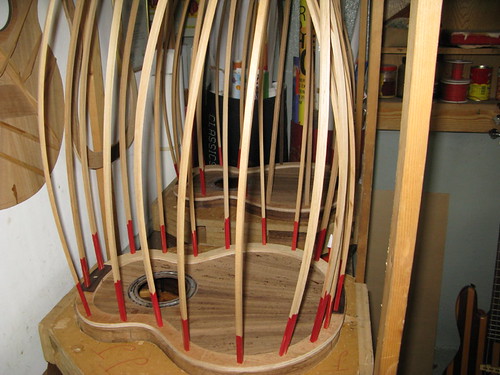 The major works on the soundboxes are completed. 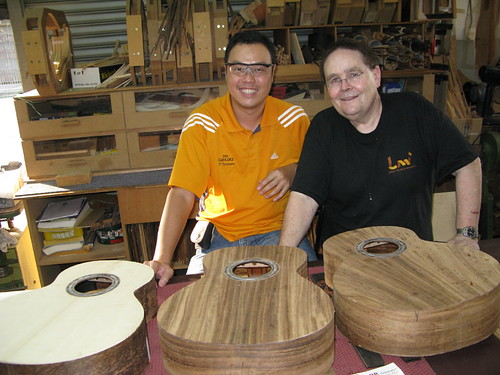 A routed bevel edge.  A routed mini-cut-away. 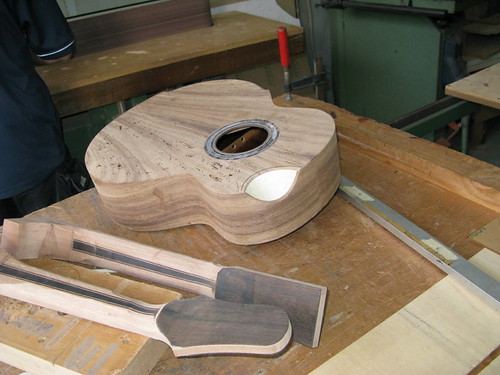 We left the workshop after 8pm ... tired but worthwhile ...
__________________
Regards aDAM
|
|
#8
09-20-2010, 08:21 AM
|
|||
|
|||
|
It is day five ...
We ended the day at 2030hrs, later than all the first few days. We spent a lot time constructing the bindings. Layers after layers, building them up until they became the aesthetic ornaments on the guitars. I will remember the amount of focus and effort expended to construct these "aesthetic stuffs" when I see them on any guitars. Not to mention when I finally commission someone to build a guitar for me, I will understand the attention and work involved. It was another humbling day we have underwent. We have done these, 1. Routed the cavity for the tail veneer. 2. Cut and sand the tail veneers to size. 3. Glued one layer of maple veneer onto the cavity. 4. Glued and touch-up the tail veneer. 5. Routed the step for back purfling. 6. Glued the back purfling 7. Construct and glued both bevel and mini-cut-away bindings. 8. Routed the step for top purfling. Here're the pictures. The eventual look of the tail veneer. A feature unique in Jeff's guitars. It also takes a lot of work to get it constructed. 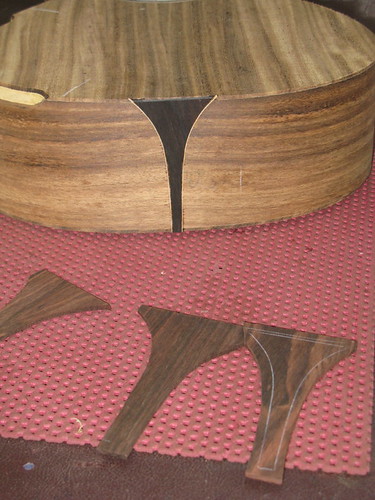 Life isn't perfect; we tried with our might to get the tail veneer to fit like a glove into the routed cavity but ... touch up is inevitable ... 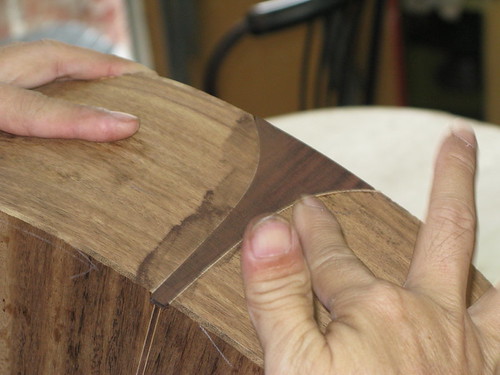 The demanding task began; gluing the back purfling ... many things can go wrong ... and it did ... :O 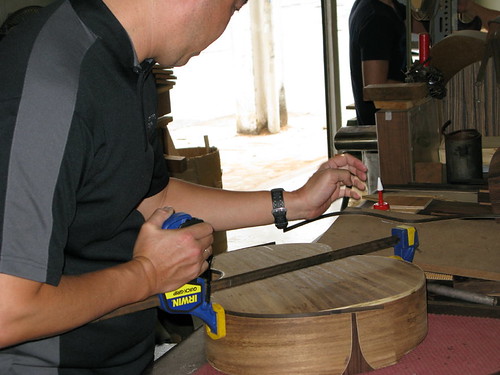 Gluing the cut and bent ebony onto the prepared bevel surface ... not easy at all ... 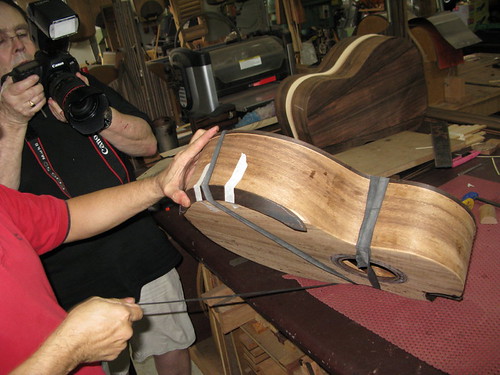 I was given a chance to perform the routing operation. 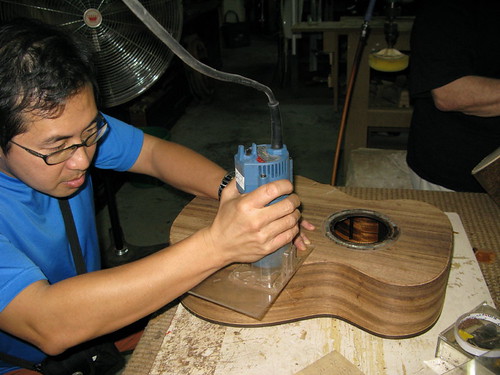 Finally, cavities for the top purfling were routed and we decided to call for the day. Three happy campers ... even the guitars were barely done ... :laugh: 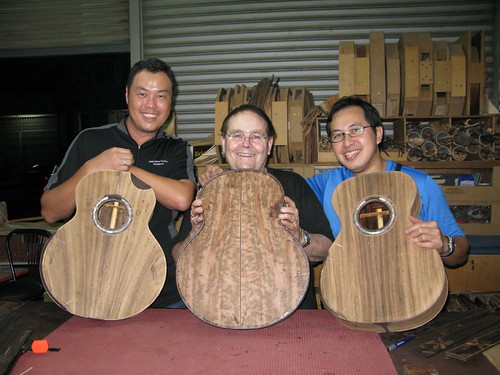 We will be visiting a durian farm the following day to study about trees ... hee hee ... is this convincing? )
__________________
Regards aDAM
|
|
#9
09-20-2010, 08:24 AM
|
|||
|
|||
|
It is day six ...
We pretty much spent the whole morning studying durian trees at a plantation populated with it. Indeed it was a splendid outing and it was much enjoyable as building guitars. However, we managed to get to the workshop, gluing the top purlfings, made up of 5 layers of veneers, in white and black combination. The maple is white and the ebony is black. It was pretty straightforward ... it seem ... but it turned out to be another humbling task. We will continue to work on the guitars ... With persistence, it was done ... 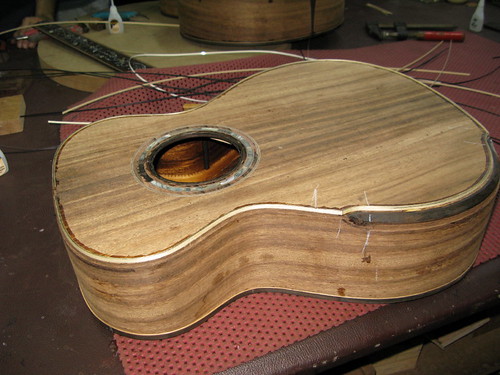
__________________
Regards aDAM
|
|
#10
09-23-2010, 05:41 AM
|
|||
|
|||
|
It is day seven, a Sunday ...
Jeff is a man of God, he spent the morning at church with his family. I think he deserved these moments even this is a two weeks course with no breaks ... the short break was nevertheless a timely one ... We covered these, 1. Heat-bent the ebony bevel binding. 2. Cut the bent binding to fit snuggly onto the beveled surface. 3. Glued the cut bevel binding. 4. Cut and prepared the mini-cut-away binding 5. Glued the mini-cut-away binding. 6. Removed excessive materials from the rough finished necks. 7. Glued the top ebony binding. Here're the pictures. Heat bending the ebony bevel binding. 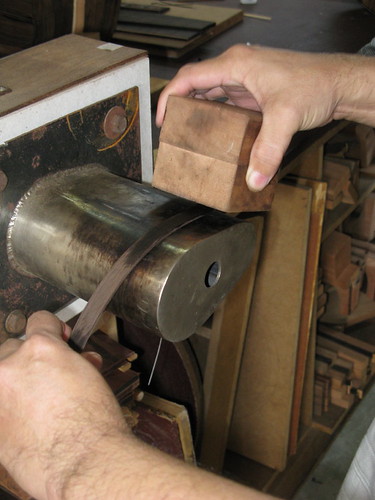 An uncut ebony bevel binding. 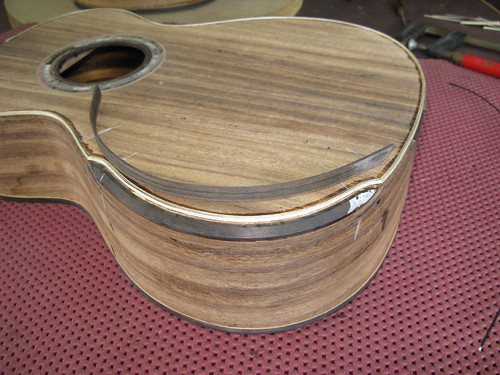 Cut to fit ebony bevel binding. 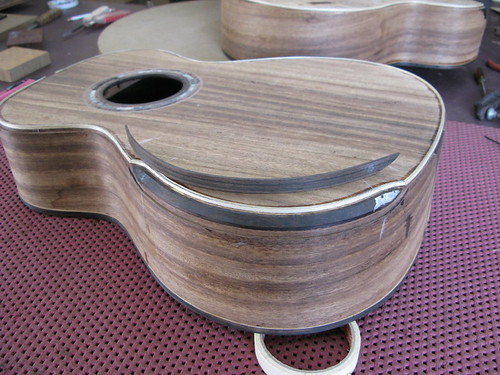 Gluing the ebony bevel binding.  Secure the binding by clamps. 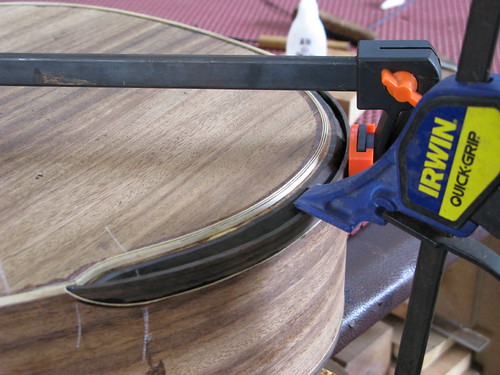 Removing excessive materials of the rough finished neck by filing. 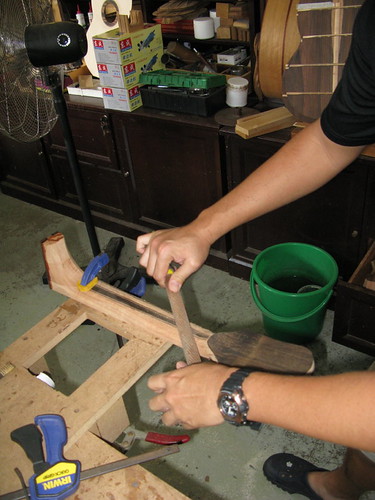 Using the belt sander to obtain the heel. 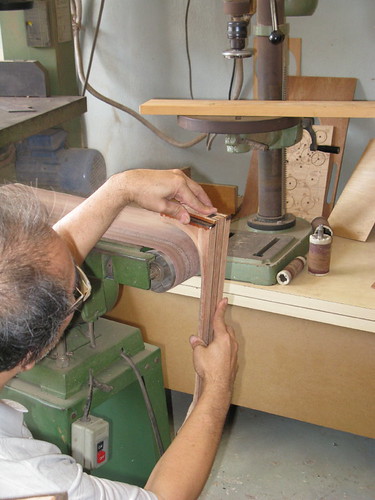 Gluing the mini-cut-away ebony binding. 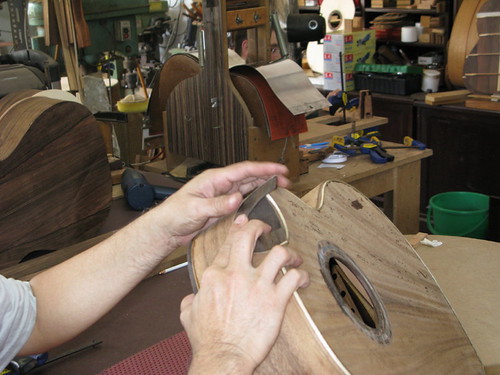 Partially completed top ebony binding. More to achieve the following day ... 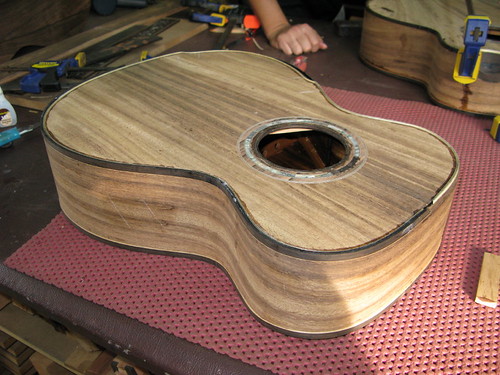 It ended early today because Jeff deserved to spend time with his family too.
__________________
Regards aDAM
|
|
#11
09-23-2010, 05:48 AM
|
|||
|
|||
|
Day Eight ...
We are backed into full swing and the coverage for today was extensive. Indeed, it was exhausting but rewarding. These things we have done ... in fact kudos to Jeff for his undivided attention in guiding us. 1. Completed the topwood ebony binding. 2. Routed headstock's step, glued maple veneer and ebony binding on the headstock. 3. Completed an overall initial finished sanding on the soundbox. 4. Cut and fitted the top bevel ebony binding. 5. Patched up all the micro holes and imperfections with the appropriate saw dust. 6. Routed the mortise joint on the necks. 7. Aligned, drilled, fastened, the necks to the soundboxes. 8. Marked the soundport and routed the soundport hole 9. Marked the position of the bridge. 10. Binded the fingerboards 11. Glued maple veneer to the underside of the fingerboards. 12. Applied sealant on both the monkey pod guitars. Here're the pictures. Enjoy! A routed headstock. 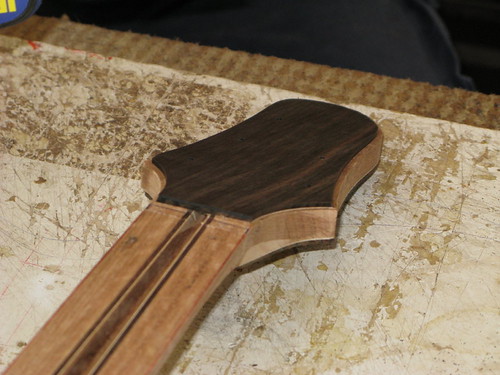 Two bounded headstocks.  Planing the excess binding materials. 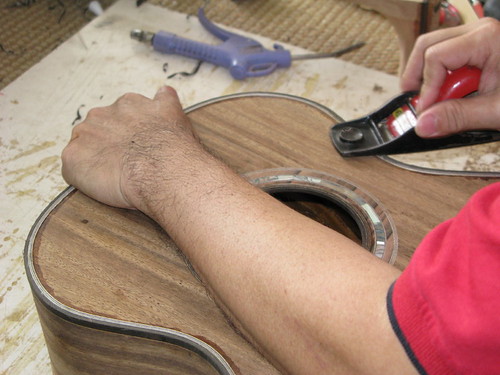 Aligning the neck to the soundbox.  The required holes and fasteners were fitted onto both the neck and mortise joint. 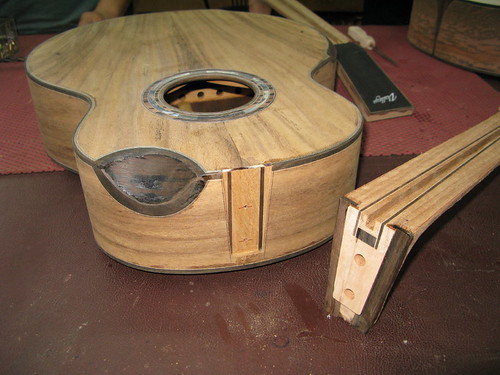 The required holes were drilled. 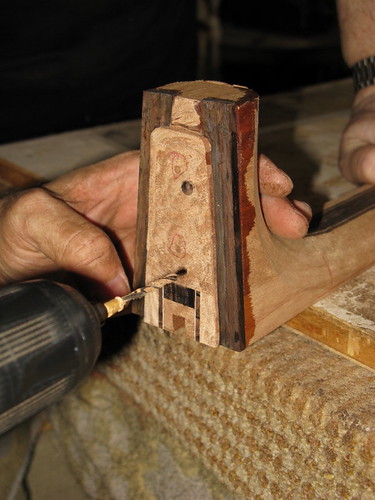 Routing the soundport. 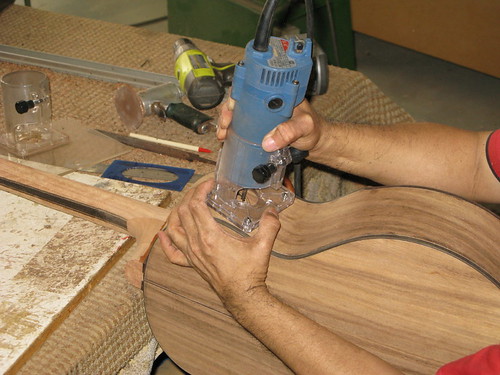 Using a jig to mark out the position of the bridge. 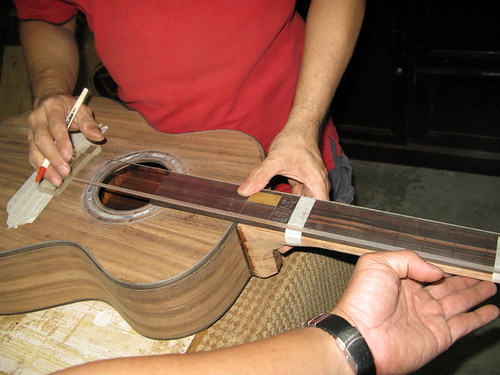 Lots of clips ... actually they are holding the maple veneers that were glued to the underside of the fingerboard.  After sealant is applied. 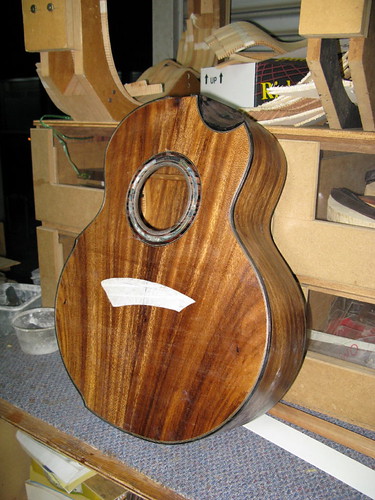 More things to be done next day!
__________________
Regards aDAM
|
|
#12
09-23-2010, 05:54 AM
|
|||
|
|||
|
It is day nine,
Lots to do and we have worked hard to get to this point ... We have covered these, 1. Drill the truss rod holes. 2. Routed the cavity for the neck joint timber. 3. Glued the neck joint timber. 4. Dilled holes for tee nuts. 5. Fitted the truss rods 6. Glued fingerboard. 7. Sprayed the initial coat. 8. Sand neck to finished dimensions. 9. Sand the neck radius 10. Routed and fitted the headstock inlays. 11. Cut and buffed the bridge. Here're the pictures. The three soundboxes. 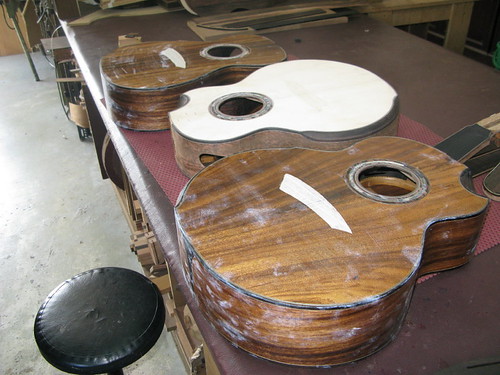 Glued the neck joint timber. 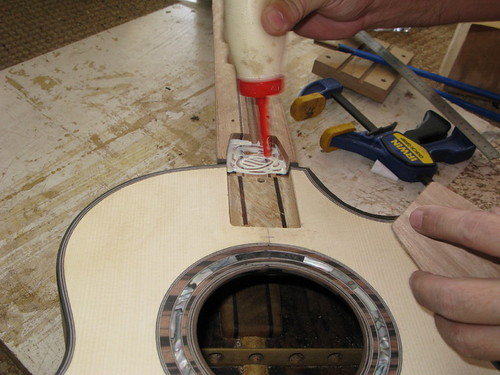 Press fitting the tee nut.  Fitting the truss rod. 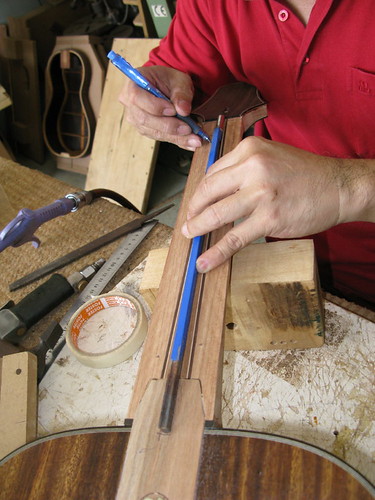 More clips were added to firmly secure the glued fingerboard to the prepared neck. 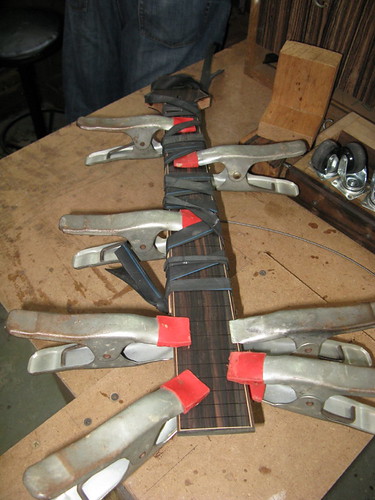 Rounding the neck. It is tiring ... 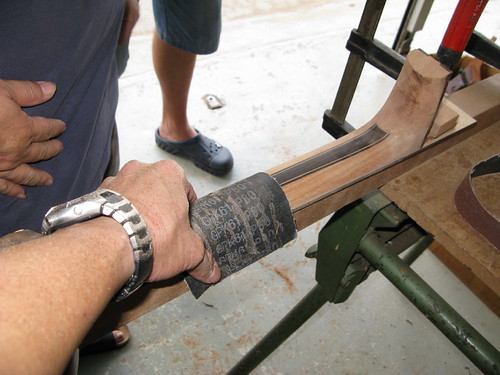 One of the done headstock inlays. 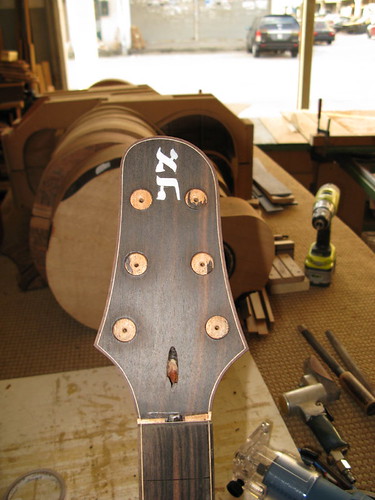 Hanging out to dry ... the Tiger Mrytle is looking alive by the day. 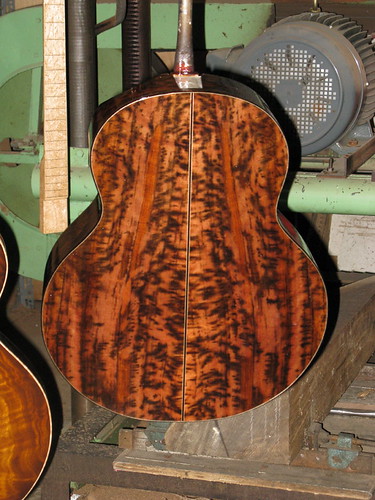 Drying the JJ, 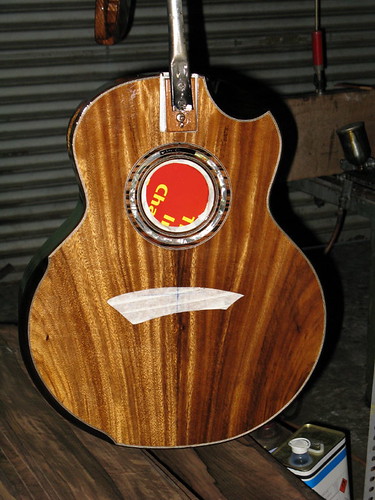 Drying the OM, 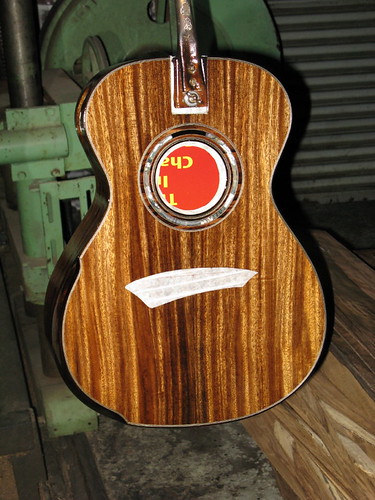 We are looking forward to the finish product. Hopefully we are able to produce a standard that would make Jeff proud. Thanks for reading.
__________________
Regards aDAM
|
|
#13
09-23-2010, 05:55 AM
|
|||
|
|||
|
It is day number ten ...
We spent most of the time spraying PU coat on the guitars. Layers after layers ... While waiting for the coats to dry sufficiently for another, we catch up with learning and doing other stuffs. Nevertheless, we have covered the following, 1. Final adjustment and alignment of the neck to the soundbox. 2. Made and glued the neck heel cap. 3. Water sanding the guitars, in preparation for spraying. 4. Masking taped all bare woods in preparation to spraying. 5. Learned and drawn the topwood blueprints. 6. Made truss rod covers. Here're the pictures. Water sanding ...  Clamping the neck heel.  Aligning the neck. 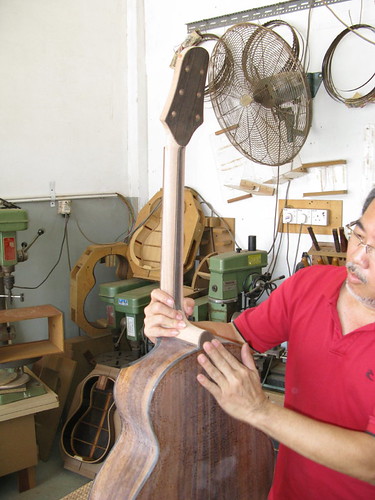 A sanded guitar before spraying. 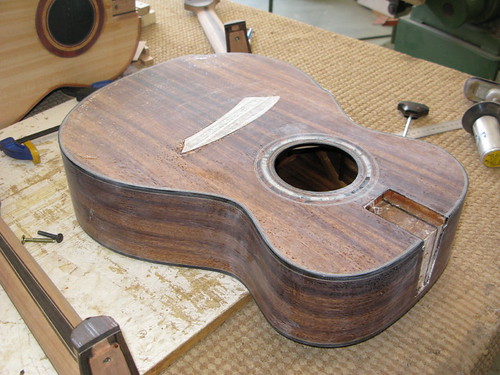 Neck sprayed with initial coat. 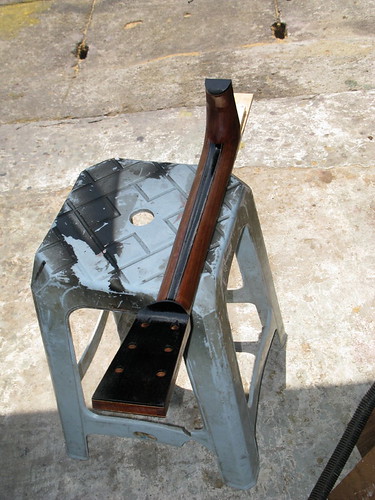 After several coats. 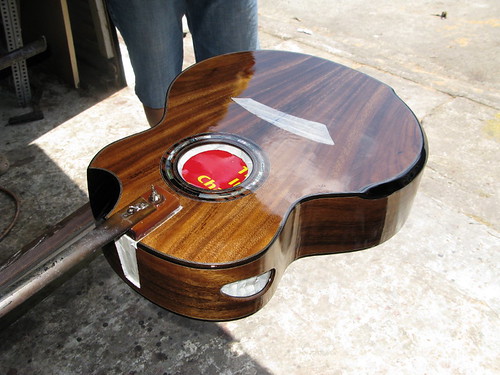 Jeff explaining the topwood bracing positions and their relationships to tuning the topwood. 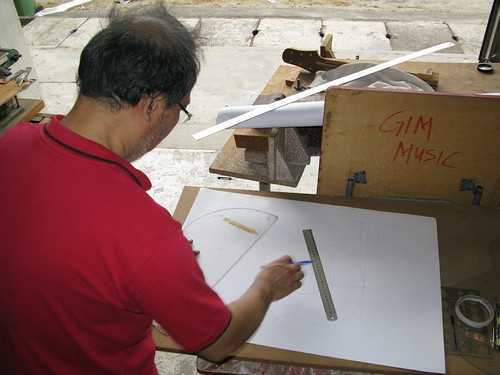 A truss rod cover. 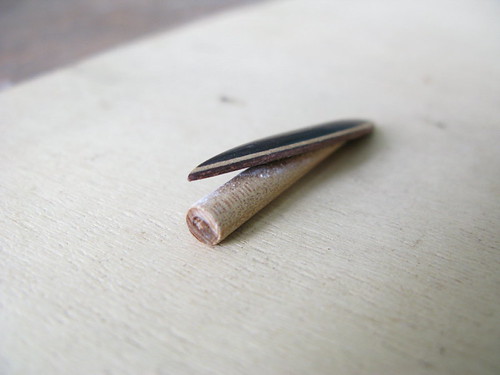 We tried to custom made our own truss rod covers .... 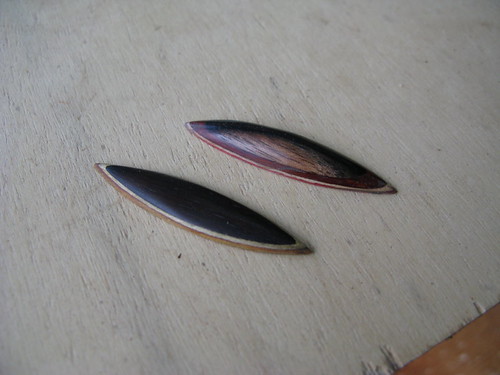 We will be going for more spraying the next day.
__________________
Regards aDAM
|
|
#14
09-23-2010, 05:58 AM
|
|||
|
|||
|
It is day eleven.
Majority of the day was spent spraying coats after coats on both the necks and soundboxes. While waiting for the coats to dry, we experimented various truss rod covers' designs and some wood picks too. Today we covered, 1. Water sanded the guitars to obtain better flatness throughout the soundboxes. 2. More spraying on the necks and soundboxes. 3. Made more truss rod covers. 4. Made some wood picks. Here're the pictures. Water sanding the guitars. 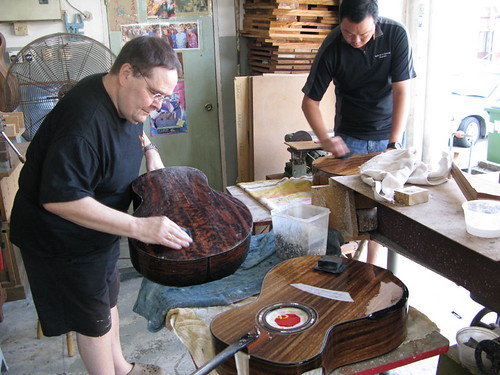 Looks like car polish, isn't it? 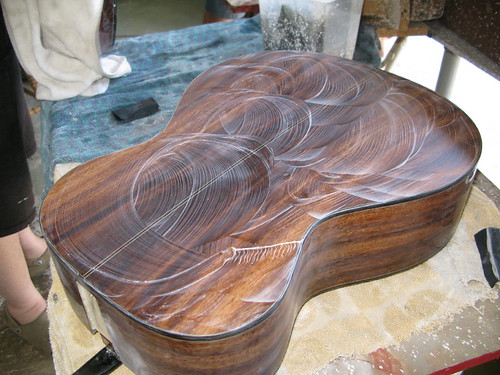 Using a powered sander to achieve better consistency. 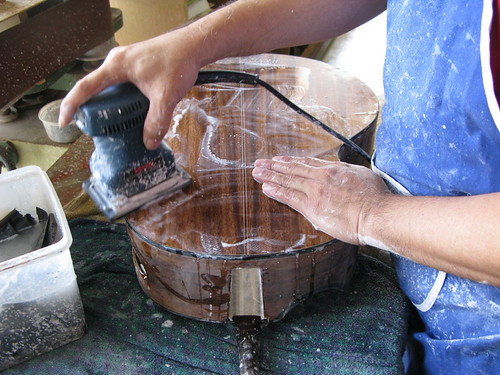 Sanding one of the truss rod covers. It is easy to over sand it ... 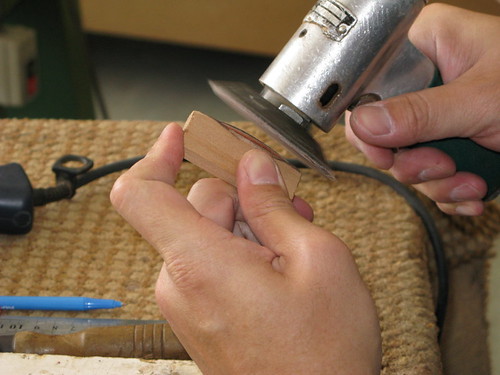 The three bodies ... 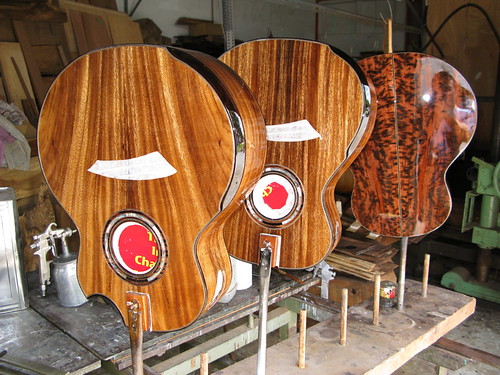 The three necks ... 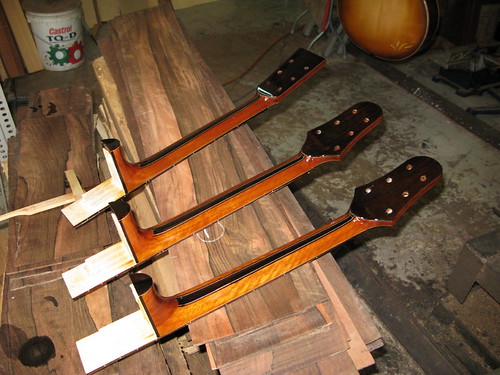 Check out the new designs of truss rod covers! Purely students' made ...  I stole some time and made myself an ebony pick. Might make a few more tomorrow. 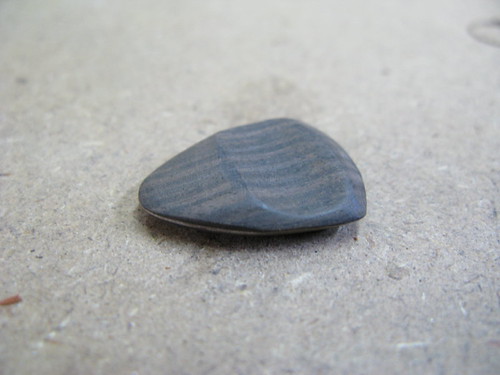 We are going to fine sand the soundboxes tomorrow and hopefully buffing them. Thanks for reading!
__________________
Regards aDAM
|
|
#15
09-23-2010, 05:59 AM
|
|||
|
|||
|
Day 12 ... the guitars are near completion ...
Precisely it is near completion that makes its more important to exercise care and attention with every step henceforth. We have done these, 1. Sanded the guitars using 800, 1200, 1500, 2000 grade sand paper in preparation from buffing. 2. Placed and glued the bridge. Here're the pictures. Water sanding the guitars. 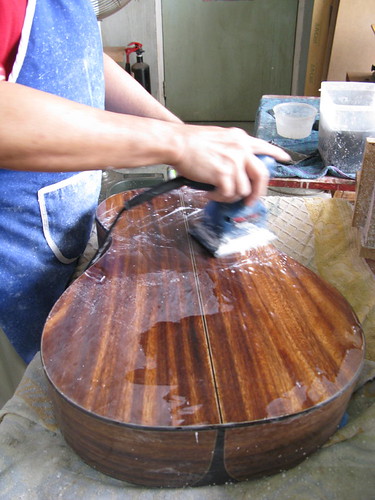 Buffing the guitars. 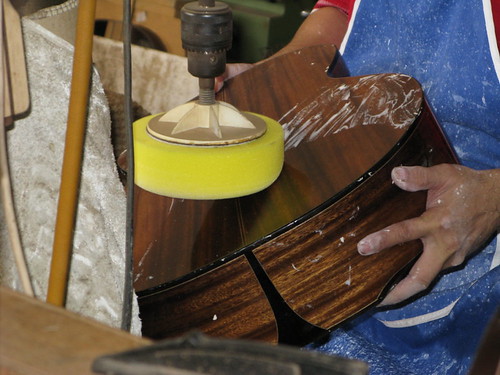 Drilling pin bridge holes. 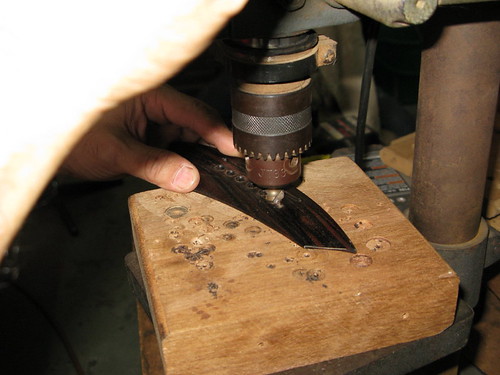 Cutting the masking tape along the edges of the bridge. 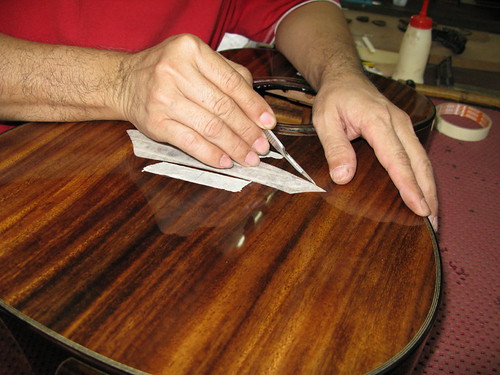 Removing the masking tape. 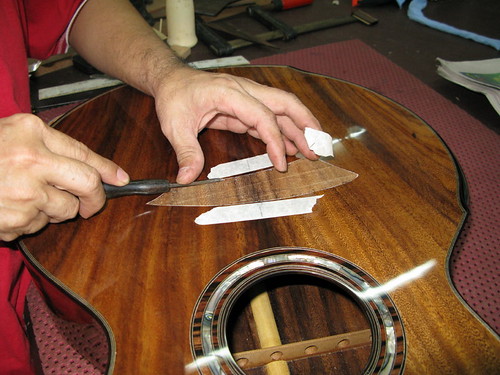 Marking the bridge position with the help of masking tape. 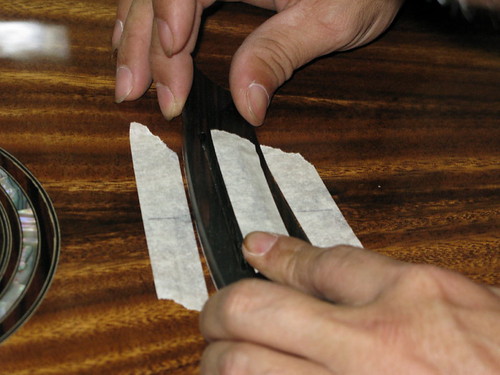 Applying glue to the bridge area. 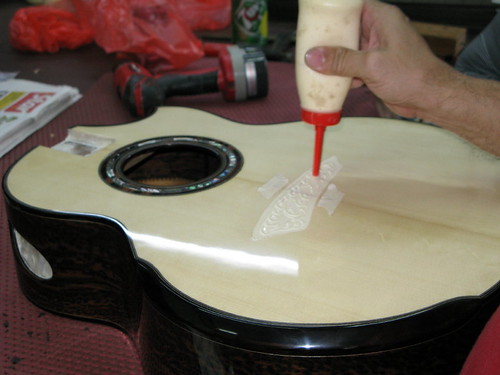 Bridge clamped for drying. 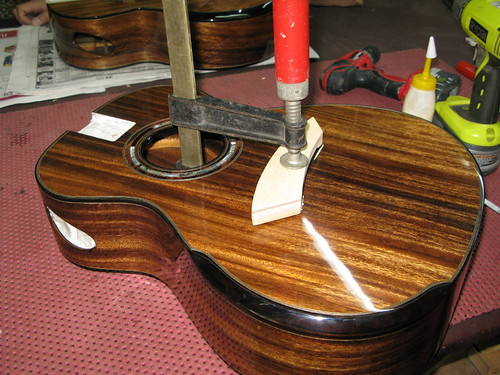 We will be working on the guitar neck tomorrow and that should complete the guitar.
__________________
Regards aDAM
|


